Home Blog Page 347

Install Android 6.0 Marshmallow on T-Mobile Galaxy Note 5 and Root it

Install Android 6.0 Marshmallow on T-Mobile Galaxy Note 5 and Root it

Android 6.0 Marshmallow followed its way towards a lucky Galaxy Note 5 user under the tag of T-Mobile. The firmware has been transformed into an Odin-flashable file and is now available for all the T-Mobile users. In order to install Android 6.0 Marshmallow on your T-Mobile Galaxy Note 5 SM-N920T, follow the step-by-step instructions in the succeeding guide. After installing Android 6.0 Marshmallow on your T-Mobile Note 5, you can also root it using the method explained in the end.

The title may have got you surprised, if so, then you’re not alone. We were surprised to after seeing the Android 6.0 Marshmallow coming out for the T-Mobile Galaxy Note 5. Samsung is all set to roll out the official Marshmallow update for Galaxy Note 5 somewhere around December, 2015. The update making its way to a lone T-Mobile note 5 user isn’t less then a surprise at all. Now that the update is out, it doesn’t make a sense to wait for the update anymore if you’re an Android power user. You can flash the leaked update on your Note 5 and use Android Marshmallow in a full swing. The new update brings all the core enhancements that Google made in this firmware. Android 6.0 Marshmallow for Samsung Galaxy Note 5 brings a handful of goodies. Let’s have a look into the new features.

Android 6.0 Marshmallow brings some minor cosmetical changes in the TouchWiz UI. Samsung changed the stock colour palette of the TouchWiz UI. It’s white now instead of green. Clock, file manager, calendar and music applications have a slightly new UI now. Settings applications is also seeing a revamped UI. Samsung has bundled up some handy settings under a new tab named as “useful settings” in the settings app. Samsung has also revamped the phone application, the power menu also comes with a new look. Android 6.0 Marshmallow brings enhanced battery stats and better battery management. You will also find the new app permissions feature in this update. Apart from these enhancements, Android 6.0 Marshmallow comes with latest security enhancements making Android a more intact OS. The Marshmallow build comes with a lot of other enhancements, you may want to check those out after installing this firmware on your T-Mobile Note 5.

Let’s go ahead now and flash this latest Android 6.0 Marshmallow test firmware on our beloved T-Mobile Galaxy Note 5 and root it.

Precautions and preparations

  • This guide is intended for T-Mobile Galaxy Note 5 SM-N920T only. Do not try this on any other Android device. Flashing a file on an incompatible device will result in bricking it.
  • Charge your phone up to 50% to avoid power issues during flashing process.
  • Backup your important contacts, call logs, sms messages and media content before proceeding.
  • Don’t forget to create a Nandroid backup and also backup its EFS partition.
  • If there’s OEM Unlock option in your phone, then enable it first. Enable OEM Unlock on your phone. To do so on your phone, go to settings > about device > tap the build number for 7 times to enable developer options. Get back to the settings and open developer options. Under developer options turn on “OEM unlock.
  • Turn off Windows Firewall before connecting your device to your PC.
  • Uninstall Samsung Kies if you have already installed it.
  • Make sure that you’re using original data cable to establish connection between your phone and your computer.
  • Follow this guide carefully to avoid any mishaps and get the process done successfully.

Required downloads and installations

Install Android 6.0 Marshmallow on T-Mobile Galaxy Note 5

  • Make sure that you’ve installed and downloaded the stuff linked above.
  1. Open Odin3 V3.10.6.exe that you extracted on your PC.
  2. Put your Galaxy Note 5  in download mode now. To do so, turn it off completely. Now turn it on by pressing and holding Volume Down + Home + Power Key. Once your phone boots up, press the Volume Up key to continue.
  3. Connect your phone to your PC now. The ID:COM box in the top-left corner of Odin3 should  turn blue. This indicates that your phone is connected properly.
  4. Now load the files in Odin one by one as follows.
    • Click on the PIT tab and load the PIT file that you got after extracting the firmware.zip file.
    • Click the BL tab and select the BL_N920TUVU2DOK5_CL6256935.tar.md5 file.
    • Click the AP tab and select the AP_N920TUVU2DOK5_CL6256935.tar.md5 file.
    • Click the CP tab and select the CP_N920TUVU2DOK5_CL6256935.tar.md5 file.
  5. Make sure that your Odin3 looks like this. The only option ticked should be F. Reset Time.
    • Odin 3.10.6 Explained_Techbeasts
  6. Now you’re all set to flash the test firmware. Just click the start button in Odin3 and sit back.
  7. Once the process box above ID:COM box shows green light and flashing process is finished, disconnect your device.
  8. Now reboot your device. To do so, press and hold Volume Up + Volume Down + Power Key. It will reboot in a few seconds.
  9. As it boots up, checkout the all new Android 6.0 Marshmallow running on your T-Mobile Galaxy Note 5 SM-N920T.


Screenshot at Nov 29 02-26-35 Screenshot at Nov 29 02-26-25 Screenshot at Nov 29 02-26-16

Image Courtesy: XDA Developers

How To Root Galaxy Note 5 SM-N920T Running Android 6.0 Marshmallow

  1. Download SuperSu.zip file and copy it to your T-Mobile Note 5’s internal storage.
  2. Download this custom kernel.tar file and place it on your desktop.
  3. Put your Galaxy Note 5 in download mode using the method explained in step 2 above.
  4. Open Odin3.exe now and click on the AP tab. Select the kernel.tar file in the AP tab now.
  5. Connect your Galaxy Note 5 to your PC now.
  6. As soon as Odin detects your device, click on start.
  7.  This will flash custom kernel on your device.
  8. Now you need to flash a custom recovery on your Galaxy Note 5. To do so, download this philz_advanced_cwm_recovery.tar.md5 file.
  9. Flash the recovery on your Galaxy Note 5 using step 2 – 5.
  10. Once you’ve flashed the file, boot your Galaxy Note 5 into recovery mode. To do so, turn off your device, now turn it on by pressing and holding Volume Up + Home + Power Key.
  11. Once your’e in recovery mode, tap “Install Zip > Choose Zip from SD card > locate SuperSu.zip and flash it.”.
  12. Now reboot your device. Your Note 5 will be rooted on Android 6.0 Marshmallow. That’s all.

Thanks to Danon.brown and Manh_It  for their great efforts on this firmware and its root. If you liked their work, we recommend a donation to the developers.
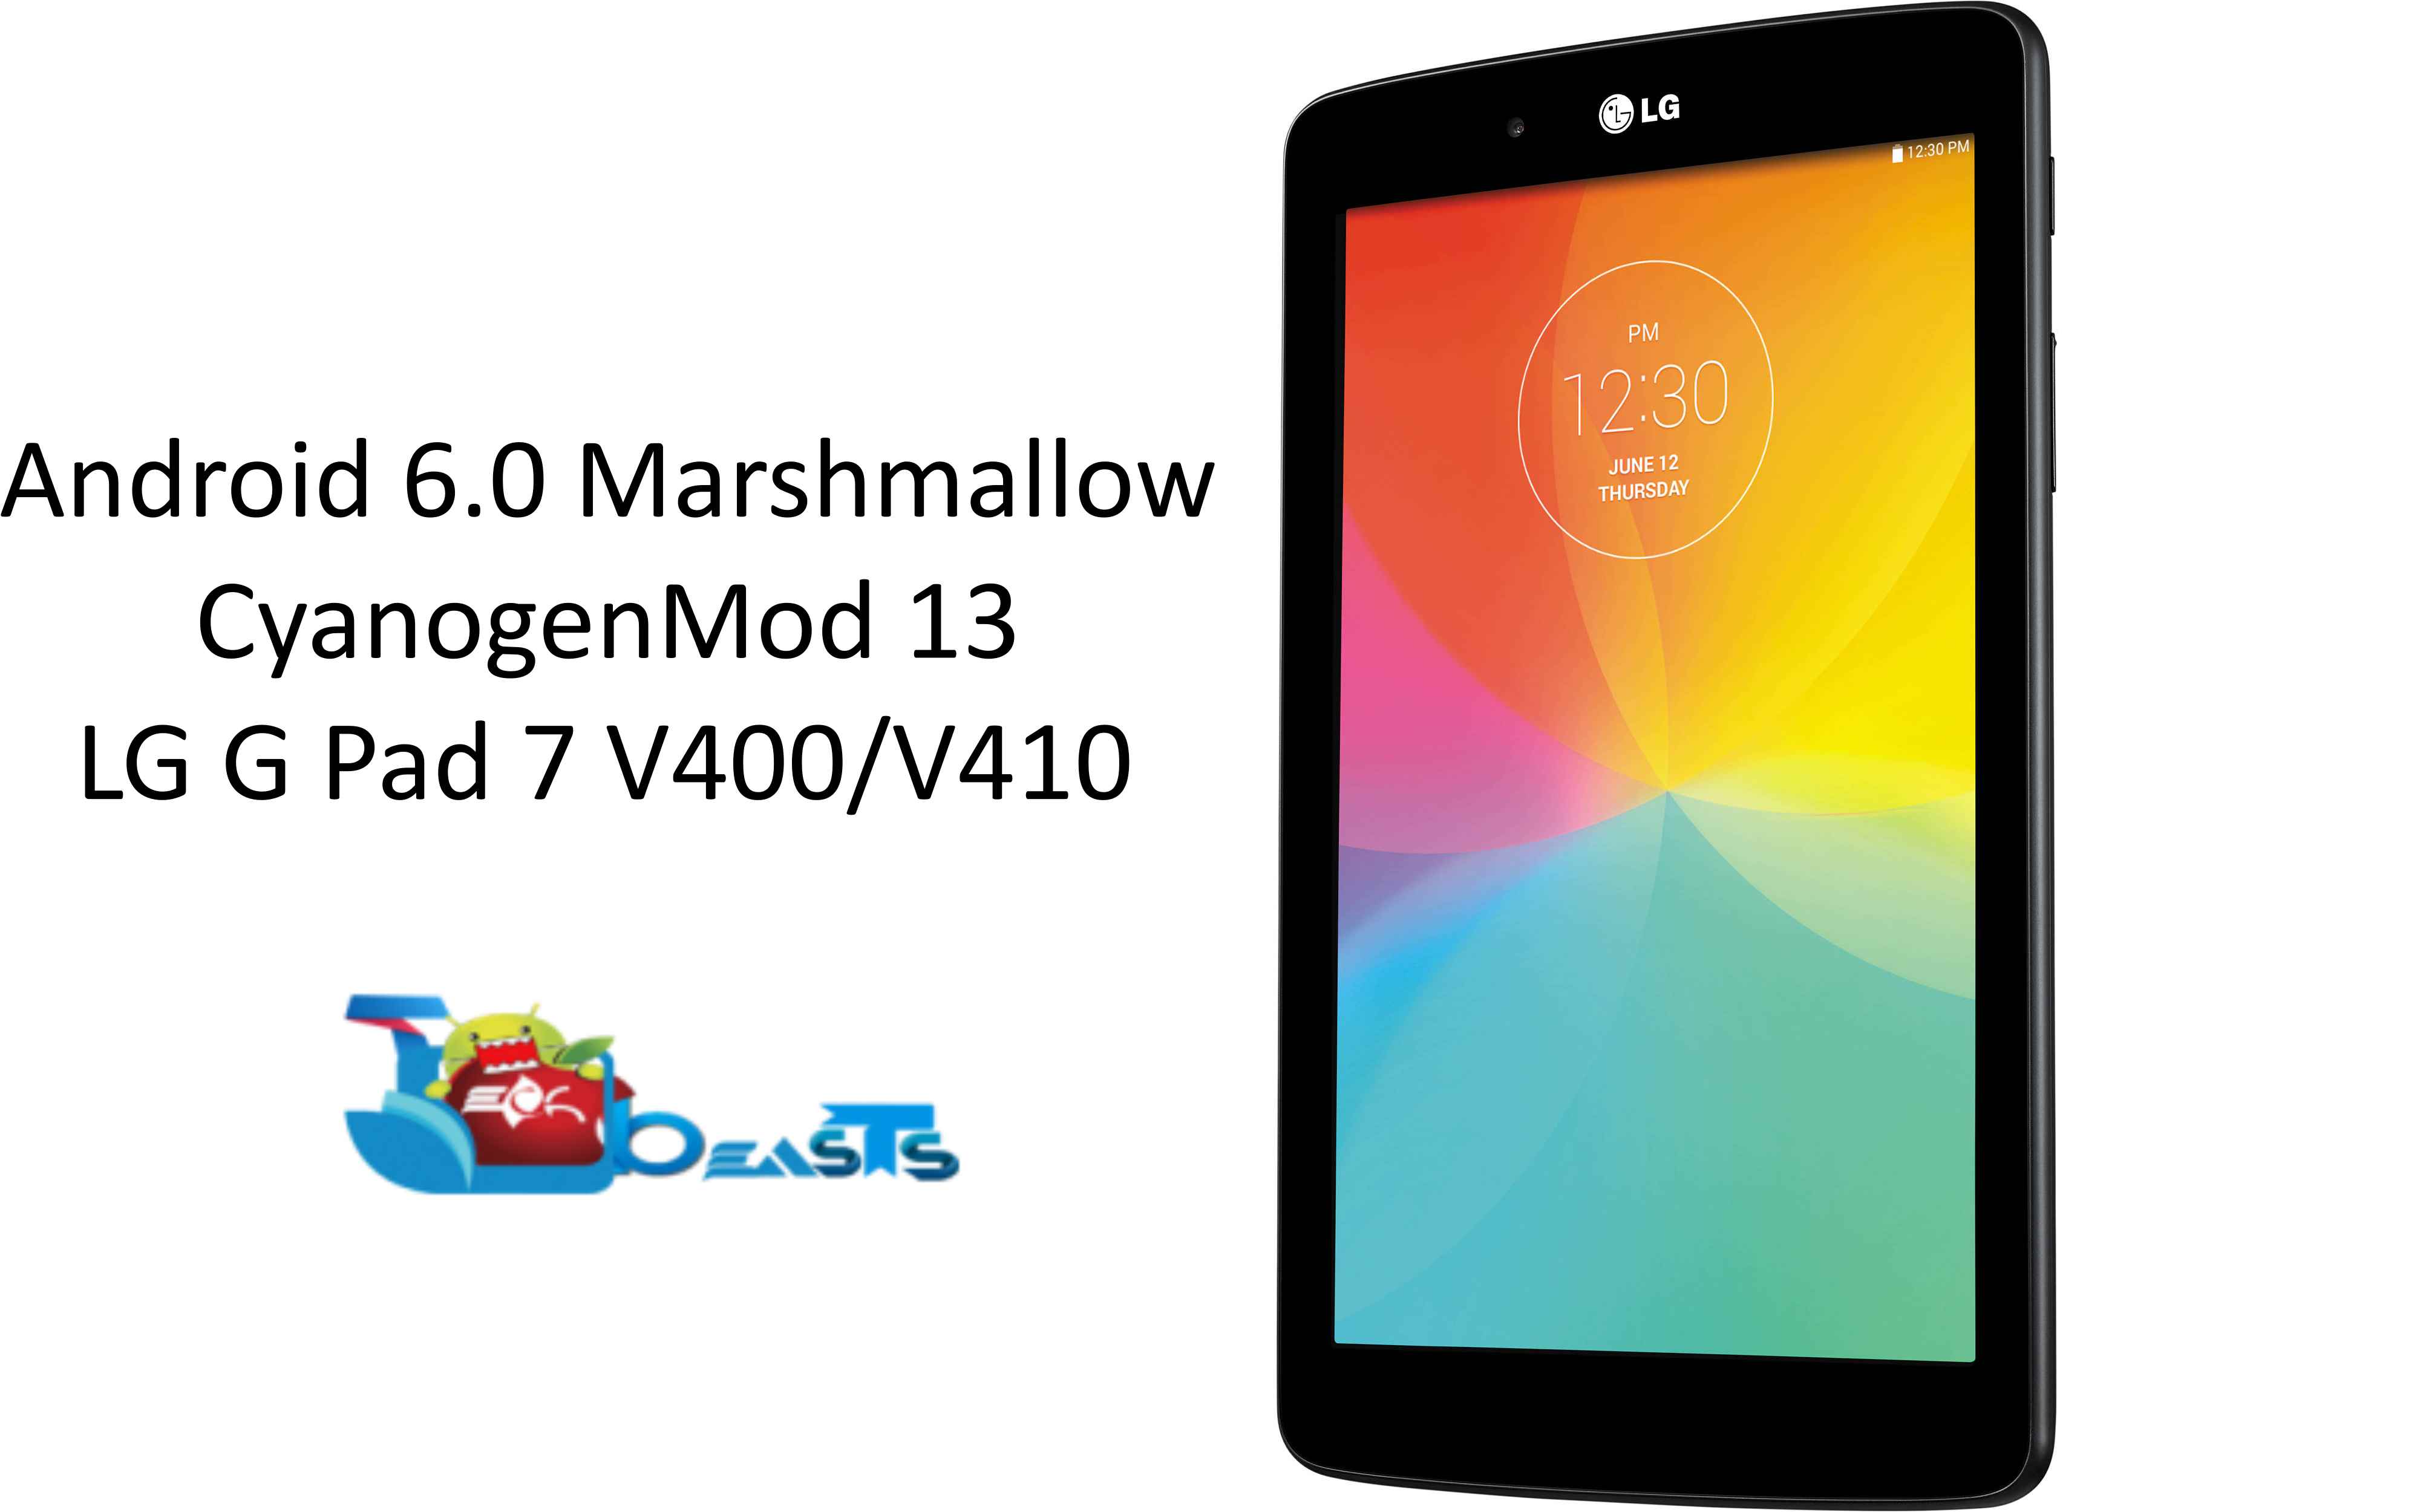
Install Android 6.0 Marshmallow on LG G Pad 7 via CM 13

0
Install Android 6.0 Marshmallow on LG G Pad 7 via CM 13

Official nightly builds of CyanogenMod 13 (CM 13) have landed in for the LG G Pad 7.0 V400 and V410. You can now easily flash Android 6.0 Marshmallow on your LG G Pad 7.0 V400 (WiFi) and V410 (LTE) via CyanogenMod 13 using the set of instructions attached in the on-going guide.lg_lgv400_ausabk_g_pad_7_snapdragon_1060248

LG released the G Pad 7.0 back in May 2014. G Pad 7 flaunts a beautiful 7.0-inch display with 800 x 1280 pixels resolution. LG equipped this tablet with Qualcomm’s Snapdragon 400 CPU clocked at 1.2 GHz accompanied by Adreno 305 GPU and 1 GB RAM. The device has an internal storage of 8 GB and also supports a microSD card. You can find a 3.15 MP camera fixed at the back of LG G Pad 7 and a 1.3 MP shooter fixed on the front. G Pad 7 ran on Android 4.4.2 KitKat out of the box, the device was updated to Android 5.0 Lollipop afterwards. It’s been quite a while since the G Pad 7 is stuck on Android 5.0 Lollipop. LG hasn’t pointed towards any traces of any further version of Android for this device. Chances are, LG G Pad will be sticking to Android Lollipop for the rest of its life. If you’re looking for a way to update your LG G Pad 7 to a higher version of Android, flashing a custom ROM maybe the only choice. Google is already done rolling out Android 6.0 Marshmallow, now the aftermarket version of Marshmallow is also out. CyanogenMod 13’s official builds based on Android 6.0 Marshmallow have finally made their way and the G Pad 7 happens to be on of the luckiest devices to make its way to this list. G Pad 7’s has got the Marshmallow nightly builds via CM 13 ROM for both of its variants V400 (WiFi) and V410 (LTE).

While these are the official nightly builds of CM 13, you can expect the firmware to get better in future. We will be seeing a stable version of this build pretty soon. While the stable ROM is on its way, you can flash this nightly build to fulfil your Marshmallow appetite. Just for the sake of having a look and feel of Marshmallow on your LG G Pad 7, you can checkout this CM 13 ROM. Android 6.0 Marshmallow brings a number of new features and enhancements that make it a firmware worth running on your device. Let’s go through the instructions now and flash the firmware on our desired variant of LG G Pad 7.

Here are some precautions

  • This ROM has been found working fine on LG G Pad  7 V400 and V410. Do not use this rom on any other Android device as using an invalid file may result in bricking it.
  • Charge your G Pad 7 up to 50% to avoid power issues during flashing process.
  • Flash TWRP Recovery on your LG G Pad 7.
  • Backup your important contacts, call logs, sms messages and media content before proceeding.
  • Don’t forget to create a Nandroid backup.
  • Follow this guide carefully to avoid any mishaps and get the process done successfully.

Disclaimer: Flashing custom recoveries, custom ROMs and rooting the Android smartphones at first involves going through a complex process and it includes potential risks. Although the methods listed on our site are pretty much safe to follow, but we do not guarantee a safe result in the end. Just in case you end up bricking your device or getting something wrong done, TechBeasts or the device manufacturer may not be held responsible in that case. Make sure that you’ve read each and everything carefully and you’re proceeding at your own risk.

Update LG G Pad 7.0 To Android 6.0 Marshmallow CyanogenMod 13

  1. Download CyanogenMod 13.zip file according to your device
  2. Download Gapps.zip file for Android Marshmallow.
  3. Connect your G Pad 7 to your PC now.
  4. Copy all .zip files to the storage of your G Pad 7.
  5. Now disconnect your G Pad 7 and turn it off complete.
  6. Boot into TWRP recovery now, in order to do so, turn it on by pressing and holding Volume Down + Power Key. You should see the recovery mode in a while.
  7. Now in TWRP  recovery, wipe cache, factory data reset and advanced options > dalvik cache.
  8. After wiping all these three, select “Install” option.
  9. Now select “Install > Choose Zip from SD card > Select cm13.0…….zip file > Yes”.
  10. This will flash the ROM in your G Pad 7, once done get back to the main menu in recovery.
  11. Now once again select “Install > Choose Zip from SD card > Select Gapps.zip file > Yes”
  12. This will flash the Gapps in your G Pad 7.
  13. Reboot your device.
  14. You should see the Android 6.0 Marshmallow running on your device in a while.
  15. That’s all!

Got any queries? Reach us out through the comment box below.

Install TWRP Recovery and Root Nvidia Shield Tablet

16
Install TWRP Recovery and Root Nvidia Shield Tablet

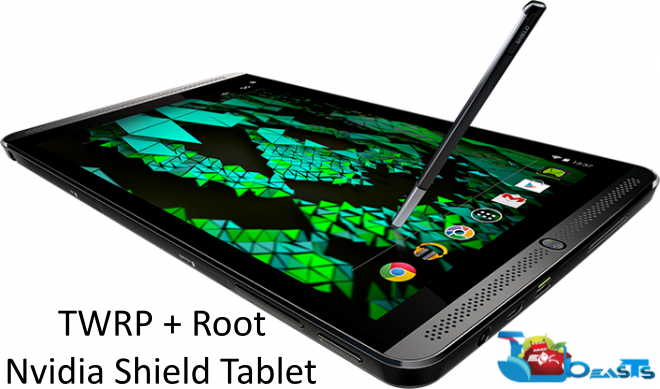
TWRP Recovery now officially supports Nvidia Shield Tablet. You can easily install TWRP 2.8.x.x recovery on your Nvidia Shield Tablet and also gain root access on this device. You will find a detailed guide to perform the aforementioned tasks on your Nvidia Shield tablet in the proceeding guide. We will go through a brief over-view of this device before flashing the custom recovery.NVIDIA-SHIELD-Tablet-stylus-660x389

Nvidia Shield Tablet carries an 8-inch display with a resolution of 1920 x 1200 pixels. Nvidia equipped this device with Nvidia Tegra K1 Quad-core CPU clocked at 2.2 GHz accompanied by a RAM of 2 GB. Nvidia Shield Tablet sports a 5 MP camera at the back. This device has an internal storage of 16 GB and also supports external SD card slot. The device was found running on Android KitKat out of the box, but later on it received Android 5.0.1 Lollipop update as well. If you’re willing to modify your Nvidia Shield Tablet by means of some MODs, tweaks, custom ROMs or by means of some root-specific applications, you will need a custom recovery and root access on your Nvidia Shield Tablet.

If you do not have an idea about a custom recovery and root access previously, you may want to know a little bit about both these things. A custom recovery is your way towards the open-source world of customisation on Android. Once you’ve a custom recovery installed on your Nvidia Shield Tablet, you will be able to flash custom ROMs on your tablet to give it a whole new life. You can add new features to your Shield Tablet by means of some MODs or by applying some custom tweaks. You can also backup Nandroid. Another option is to wipe cache and dalvik cache using a custom recovery. Root access serves a little different purpose. Once your Nvidia Shield Tablet is rooted, you will be able to install root-specific applications like Root Explorer, Greenify, System Tuner. Such applications allow you to access root directory of your tablet, enhance the performance and battery life of your device and a lot more. To be able to have such freedom on your Nvidia Shield Tablet, follow the succeeding guide to install custom recovery i.e. TWRP Recovery and root your Nvidia Shield Tablet.

Here are some precautions

  • This guide is intended for Nvidia Shield Tablet only. Do not try to use this guide on any other device as you may result in bricking it by flashing an invalid file.
  • Charge your tablet up to 50% to avoid power issues during flashing process.
  • Backup your important contacts, call logs, sms messages and media content before proceeding.
  • Turn off Windows Firewall before connecting your device to your PC.
  • Make sure that you’re using original data cable to establish connection between your tablet and your computer.
  • Download and setup Minimal ADB & Fastboot drivers.  Mac users can use this guide to install ADB & Fastboot drivers.
  • Enable USB debugging mode on your Nvidia Shield Tablet. To do so, go to settings > about device > tap build number for 7 times. You will have developer options enabled in settings. Open developer options > Enable USB debugging mode.
  • Follow this guide carefully to avoid any mishaps and get the process done successfully.

Disclaimer: Unlocking bootloader, flashing custom recoveries and rooting the Android smartphones at first involves going through a complex process and it includes potential risks. Although the methods listed on our site are pretty much safe to follow, but we do not guarantee a safe result in the end. Just in case you end up bricking your device or getting something wrong done, TechBeasts or the device manufacturer may not be held responsible in that case. Make sure that you’ve read each and everything carefully and you’re proceeding at your own risk.

Unlock Nvidia Shield Tablet Bootloader

Unlocking bootloader will wipe your device. Make sure that you’ve backed up everything before going ahead.

  1. Make sure that you’ve downloaded and installed Minimal ADB & Fastboot drivers on your Windows PC or installed Mac ADB & Fastboot for Mac.
  2. Connect your tablet to your PC now.
  3. Now open Minimal ADB & Fastboot.exe from your desktop. If you do not have this file on your desktop, then go to your Windows installation drive i.e. C drive > Program Files > Minimal ADB & Fastboot > Open py_cmd.exe file in order to open the command window. Mac users can see in the Mac guide for the file they will be opening.
  4. Now in the command window enter the following commands one by one.
    • adb reboot-bootloader

      This will reboot your Nvidia Shield in bootloader. Once booted up, issue the following command.

      fastboot devices

      This command will verify the connection of your device with your PC in fastboot mode.

    • fastboot oem unlock

      This command will unlock the bootloader. As soon as you press the enter key after typing this command, you will get a message in your tablet asking for the confirmation of bootloader unlocking. Use volume up & down keys to navigate through options and confirm unlocking.

    • fastboot reboot

      This command will reboot your tablet. That’s all, disconnect your tablet.

How To Flash TWRP Recovery On Your Nvidia Shield Tablet

  1. Download twrp-2.8.7.0-shieldtablet.img file. Rename the file to only “recovery.img”.
  2. Copy recovery.img file to Minimal ADB & Fastboot folder which is located in program files in your windows installation drive.
  3. Now boot your Nvidia Shield Tablet into fastboot mode as suggested in the step 4 above.
  4. Connect your Nvidia Shield Tablet to your PC now.
  5. Open Minimal ADB & Fastboot.exe or Py_cmd.exe as explained in step 3 above.
  6. Now in the command window enter following commands:
  • fastboot devices

    fastboot flash boot boot.img

  • fastboot flash recovery recovery.img

  • fastboot reboot

This will flash TWRP recovery on your Nvidia Shield Tablet.

How To Root Nvidia Shield Tablet

  1. Download SuperSu v2.52.zip file and copy it to your tablet’s SD card.
  2. Boot into TWRP recovery on your tablet. You can issue the following command in ADB window: adb reboot recovery
  3. This will boot your device in TWRP recovery mode, once you’re in TWRP recovery mode, go ahead.
  4. Tap Install > Scroll all the way down > Select SuperSu.zip file > Confirm flashing.
  5. Once flashed, reboot your tablet.
  6. Locate SuperSu in application drawer. Verify root access using Root Checker.

Now that you’ve rooted your Galaxy A5, don’t forget to create a Nandroid backup. Also checkout our best root applications list.

That’s all. Need help with something? Reach us out through the comment box below.

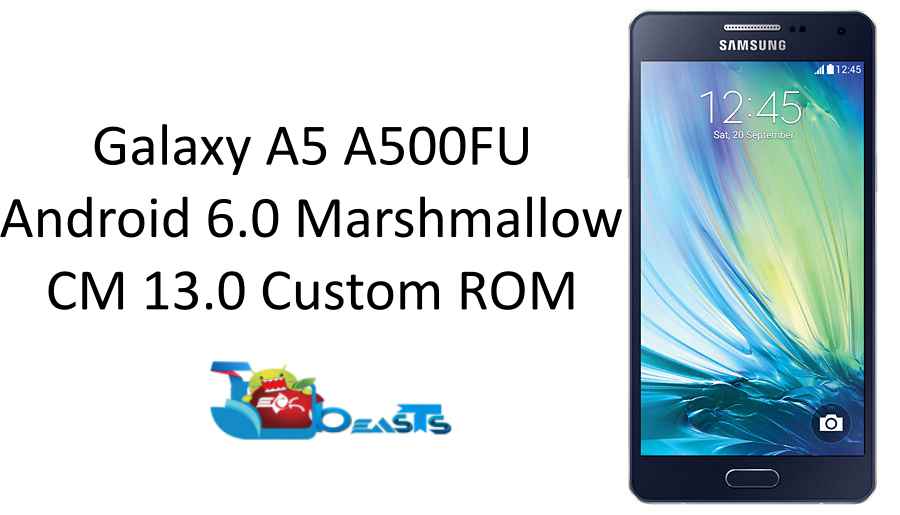
Update Samsung Galaxy A5 A500FU To Android 6.0 Marshmallow CyanogenMod 13 ROM

0
Update Samsung Galaxy A5 A500FU To Android 6.0 Marshmallow CyanogenMod 13 ROM

It’s easily possible to update your Galaxy A5 to all new Android 6.0 Marshmallow by means of CyanogenMod 13 custom ROM. While this device is going to wait in the queue to get the Marshmallow firmware officially after ages, using a custom ROM maybe a chance for Android geeks to have a look and feel of Marshmallow on their Galaxy A5 sooner then the time. In the succeeding guide you will find the step-by-step instructions to flash Android 6.0 Marshmallow on your Galaxy A5 using CyanogenMod 13 unofficial custom ROM.  Before we proceed with the guide, let’s go through a recap of the Galaxy A5 and some reasons to flash this custom ROM on your device right now.

When Galaxy A5 was released back in 2014, the device was caught running Android 4.4.4 KitKat out of the box. Galaxy A5, being a mid-ranger carried some specifications that was worth the money. The device was later updated to Android 5.0.2 Lollipop. Samsung has the plans to update the Galaxy A series to Android 6.0 Marshmallow. Since these devices are not the flagship devices, it’s not going to be a priority for Samsung to release the updates for these devices anytime soon. Samsung will be covering up its flagship devices in the first phase. Its gonna take quite a while for Samsung to cook up the official Marshmallow update for the Galaxy A series. If you’re an Android enthusiasts who just can’t sit back and wait for this update to come out, you may want to taste the Marshmallow firmware on your device right now through some other means. The best option that has been there for power users is the installation of a custom ROMs. Custom firmware have always been a great source to give the devices a new life. Now that CyanogenMod 13, which is based on Android 6.0 Marshmallow, has already made its way for the Galaxy A5, you can easily flash it to fulfil your appetite or Marshmallows right now. The Android 6.0 Marshmallow carries some major system enhancements which are going to give you a whole new experience.

As far as the stability of this custom ROM is concerned, it’s still in the early development stages. This ROM is definitely not a daily driver at the moment. If you’re a newbie or you’re not a pro-user, we highly recommend you to stay away from this ROM as it may get you caught in a mess. You may proceed with the flashing process if you know how to handle a custom ROM or if you’re confident enough to follow the guidelines carefully. As off now, FM Radio and Android Beam are reported to be unstable. Other features like Camera, RIL are working fine. You can flash this ROM to experience Marshmallowed Galaxy A5 for now. Let’s go ahead and learn the steps to flash Android 6.0 Marshmallow CyanogenMod 13 custom ROM.

Here are some precautions

  • This ROM has been found working fine on Galaxy A5 A500FU. Do not use this rom on any other Android device as using an invalid file may result in bricking it.
  • Charge your phone up to 50% to avoid power issues during flashing process.
  • Flash TWRP Recovery on your Galaxy A5 A500FU.
  • Backup your important contacts, call logs, sms messages and media content before proceeding.
  • Don’t forget to create a Nandroid backup and also backup its EFS partition.
  • Follow this guide carefully to avoid any mishaps and get the process done successfully.

Disclaimer: Flashing custom recoveries, custom ROMs and rooting the Android smartphones at first involves going through a complex process and it includes potential risks. Although the methods listed on our site are pretty much safe to follow, but we do not guarantee a safe result in the end. Just in case you end up bricking your device or getting something wrong done, TechBeasts or the device manufacturer may not be held responsible in that case. Make sure that you’ve read each and everything carefully and you’re proceeding at your own risk.

Update Samsung Galaxy A5 A500FU To Android 6.0 Marshmallow CyanogenMod 13 ROM

  1. Download CyanogenMod 13.zip file according to your device
  2. Download Gapps.zip file for Android Marshmallow.
  3. Connect your phone to your PC now.
  4. Copy all .zip files to the storage of your phone.
  5. Now disconnect your phone and turn it off complete.
  6. Boot into TWRP recovery now, in order to do so, turn it on by pressing and holding Volume Up + Home Button + Power Key. You should see the recovery mode in a while.
  7. Now in TWRP  recovery, wipe cache, factory data reset and advanced options > dalvik cache.
  8. After wiping all these three, select “Install” option.
  9. Now select “Install > Choose Zip from SD card > Select cm13.0…….zip file > Yes”.
  10. This will flash the ROM in your phone, once done get back to the main menu in recovery.
  11. Now once again select “Install > Choose Zip from SD card > Select Gapps.zip file > Yes”
  12. This will flash the Gapps in your phone.
  13. Reboot your device.
  14. You should see the Android 6.0 Marshmallow running on your device in a while.
  15. That’s all!

Galaxy A5 Marshmallow 1-side

First boot may take up to 10 minutes, you may not worry if it’s taking that much long. In case it’s taking too long, you may boot into TWRP recovery and wipe cache and dalvik cache and reboot your device as it may fix the issue. In case your device is having issues, you may return to your old system using the Nandroid backup or follow our guide here to install stock firmware.

Got any queries? Reach us out through the comment box below.


Source and Credits

Install TWRP Recovery and Root Galaxy A5 on Lollipop

Install TWRP Recovery and Root Galaxy A5 on Lollipop

You can now install TWRP Recovery and Root your Samsung Galaxy A5 running Android Lollipop. You will learn the method in the following guide. As you scroll down, you will come across a step-by-step method to be able to do this. Before we jump up to the method, we will have a flashback at the Samsung Galaxy A5 and also learn a little bit about a custom recovery and root access.uk_SM-A500FZKUBTU_000266157_front(SS)_black

Samsung released the Galaxy A5 back in December, 2014. Samsung equipped the Galaxy A5 with a 5.0-inch 720p display. We witnessed a 5 MP shooter for selfies and a 13 MP shooter at the back. In the spec-shed we also found a Snapdragon 410 Quad-Core CPU accompanied by an Adreno 306 GPU and a RAM of 2 GB. On the software end we found this device running on Android 4.4.4 KitKat out of the box, but Samsung didn’t take long to update it to Android 5.0.2 Lollipop. The device might get Android 5.1.1 Lollipop as well anytime soon.

Galaxy A5 was easily root-able on Android 4.4.4 KitKat. Since the day Samsung updated this device to Lollipop, it has become tough to achieve root access on this device. A custom kernel is required to root Lollipop as its not directly root-able. You can flash a custom kernel equipped with a custom recovery and then flash SuperSu.zip file to root the device. A working TWRP recovery has landed for our beloved Galaxy A5. You can flash this recovery on a Galaxy A5 running Android Lollipop and you can also root the phone using this recovery. Furthermore, you can also flash a custom ROM on your A5 using this custom recovery. In case you don’t have an idea about custom recoveries and rooting stuff and this is your first time, you may want to know a little bit about both these terms. Let’s learn a little bit about custom recovery and root access and then head towards the installation method.

A custom recovery helps you to create and restore Nandroid Backup, EFS Backup, IMEI Backup, Modem Backup etc. Using a custom recovery you can also flash MODs, .zip files or other custom packages on your phone. You can also wipe cache and dalvik cache of your phone using a custom recovery. In case your device is bricked, you can use a custom recovery to easily recover your data or fix your device by means of flashing particular files. Root access a little different purpose, but is as handy as a custom recovery. Root access allows you to install root-specific applications like Titanium Backup, Greenify, System Tuner and many others to modify or enhance the performance of your Android device and do the things that you ordinarily can’t do. You can also modify the UI of your system and add a lot of cool applications using an application like Xposed Module which requires root access to work on an Android smartphone. That’s all you need to know to have a basic idea about root access and custom recovery. Now that you’ve a very good idea about these terms, we can head to the recovery installation and root processes.

Here are some precautions

  • This recovery has been found working fine on Galaxy A5 A500FU, A500G and A500M. It should work on other variants of Galaxy A5 as well running Android 5.0.2 Lollipop. Do not use this recovery on any other Android device as using an invalid file may result in bricking it.
  • Charge your phone up to 50% to avoid power issues during flashing process.
  • Backup your important contacts, call logs, sms messages and media content before proceeding.
  • Turn off Windows Firewall before connecting your device to your PC.
  • Uninstall Samsung Kies if you have already installed it.
  • Make sure that you’re using original data cable to establish connection between your phone and your computer.
  • Follow this guide carefully to avoid any mishaps and get the process done successfully.

Disclaimer: Flashing custom recoveries and rooting the Android smartphones at first involves going through a complex process and it includes potential risks. Although the methods listed on our site are pretty much safe to follow, but we do not guarantee a safe result in the end. Just in case you end up bricking your device or getting something wrong done, TechBeasts or the device manufacturer may not be held responsible in that case. Make sure that you’ve read each and everything carefully and you’re proceeding at your own risk.

Required downloads and installations

Install TWRP Recovery and Root Galaxy A5 running Lollipop

  1. Make sure that you’ve installed and downloaded the stuff linked above.
  2. Open Odin3 V3.10.6.exe that you extracted on your PC.
  3. If there’s OEM Unlock option in your phone, then enable it first. Enable OEM Unlock on your phone. To do so on your phone, go to settings > about device > tap the build number for 7 times to enable developer options. Get back to the settings and open developer options. Under developer options turn on “OEM unlock.
  4. Put your Galaxy A5  in download mode now. To do so, turn it off completely. Now turn it on by pressing and holding Volume Down + Home + Power Key. Once your phone boots up, press the Volume Up key to continue.
  5. Connect your phone to your PC now. The ID:COM box in the top-left corner of Odin3 should  turn blue. This indicates that your phone is connected properly.
  6. Now click the “AP” tab in Odin and select the twrp-2.8.7.0-a5ultexx-11112015.tar.md5 file that you downloaded. It will take a second or two for Odin3 to load this file.
  7. Make sure that your Odin3 looks like this. The only option ticked should be F. Reset Time.
    • Odin 3.10.6 Explained_Techbeasts
  8. Now you’re all set to flash the recovery. Just click the start button in Odin3 and sit back.
  9. Once the process box above ID:COM box shows green light and flashing process is finished, disconnect your device.
  10. Now turn off your device properly as we are going to boot into recovery mode. You can turn it off by keeping the power key pressed for a while. 
  11. Now turn it on by pressing and holding Volume Up + Home + Power Key. This will boot your device in recovery mode. It should be TWRP recovery that you just installed.
  12. Now in CWM recovery, select Install > locate SuperSu.zip file and swipe finger on the screen from left to right to flash it.
  13. Once done, reboot your device into system using the reboot option in TWRP recovery.
  14. As it boots up, checkout the SuperSu in application drawer. Also install BusyBox from Play Store.
  15. Verify root access using Root Checker.
  16. That’s all. You’re now set to unleash the open source nature of Android.

Now that you’ve rooted your Galaxy A5, don’t forget to create a Nandroid backup and also backup its EFS partition. Also checkout our best root applications list.

Source and Credits

The most common OnePlus X issues and their fixes

0
The most common OnePlus X issues and their fixes

The OnePlus X isn’t perfect in anyway, and none is any other Android device. Every device comes with its boons and liabilities, and we’ve listed the most common OnePlus X issues which users have reported all around the web, and we’ve provided the most suitable solution for it. Please refer down below to get an idea of what we’re talking about.

GULlOe1448714708

MicroSD Card Issues:

Many users have reported that their OnePlus X doesn’t simply recognize the SDCard that they put into it. This might be a big software bug that might prevent many users from enjoying their OnePlus X’s to the fullest, and we recommend you not to medal with the device itself. The only thing you can do right now is try and format your SD Card to the NTFS format. This fixes many bugs, resulting you in using your OnePlus X more merrily.

Fixing Blurry Images:

One of the biggest issues with the latest budget smartphone cameras has been the fact that they haven’t been good at focusing, and the OnePlus X isn’t a surprise. It doesn’t take sharp images, and many a times the user is dissatisfied with the blurred images.One such solution is the fact that you can download a third-party photo editing application like Google Snapseed, or VSCOCam, and sharpen up the images manually. And the next time you take a shot, just make sure your hands are stabilized.

Problems With LTE Bands:

The OnePlus X sadly doesn’t support LTE Bands 12 and 17, which sucks for AT&T and Verizon users residing in the US, as they will be forced to use just the HSPA speeds, which as we all know, really very much sucks. The only way is to simply try to use a WiFi network more than your cellular data, as it might be very helpful.

If you think our guide in solving the most common OnePlus X problems is up to the mark, why not share the love using one of the buttons below?

Install Incompatible\region-restricted Apps On Android [ How To ]

0
Install Incompatible\region-restricted Apps On Android [ How To ]

Android is probably the best choice when it comes to installing an enormous library of applications which are available on the Google Play Store nowadays. However, some applications like Music Streaming services such as Spotify or Hulu are only region-specific applications, meaning that you won’t be able to use them in your native place by default.

Here is a workaround on how to install incompatible or region-restricted apps on Android. We have gathered two of the best applications which can enable you to download region-specific applications or incompatible applications from your Google Play Store.

Install Incompatible\region-restricted Apps On Android

Install Region-Specific Apps:

Here, we are going to use a VPN service called TunnelBear, which is a great application available on the Google Play Store for free. Download that, are refer to our guide below.

1. Launch the application, and create an account for your use.

2. Just use the switch to turn on the service, and tap anywhere on the globe or map you see on the

screen and the bear will hop into that tunnel, enabling you to overpower your smartphone.

3. If you get a confirmation request, accept it.

4. Connecting to a VPN service might take a little bit of time, and we insist you do not press back at any cost. Once done, you can easily use the Google Play Store to download the applications which were once unavailable in your region.

Install Incompatible Apps:

Market Helper is a great application which practically helps you install an application which is incompatible for you Android device.

1. Download Market Helper, and launch it.

2. Now you will be able to see four main menus, each having a lot of options to choose from. The menus respectively are ‘Device Type’, ‘Device Model’, ‘Location’, and ‘Carrier’. These will be auto-filled to match your actual device’s readings. What you are going to do is simply change these settings to result in the Google Play Store to think your device as some other one.

3. Select a Device type, a device model, a suitable region, and at last a carrier.

4. Tap activate at the bottom, and if the root window pops up, tap to access it. This might take some time, but it is worth the wait.

5. You can now launch Google Play Store, to see that your device is now supported with a ton of different apps now.

Thank us later in the comments section below! You can now enjoy any application you want from the Google Play Store!

Download Star Wars™: Galaxy of Heroes for PC – Windows and Mac

0
Download Star Wars™: Galaxy of Heroes for PC – Windows and Mac

Following are the instruction on how to download and install Star Wars Galaxy of Heroes for PC running Windows and Mac OS. Star Wars Galaxy of Heroes is the latest top free role playing game designed by ELECTRONIC ARTS. Star Wars Galaxy of Heroes gives you option to choose from your favorite Star Wars characters to conquer your opponent in epic combat. Basically this game is designed for Android and iOS smartphones, but we can install Star Wars Galaxy of Heroes for PC using third-party emulators.

In the following guide I’ll tell you how you can download Star Wars Galaxy of Heroes for PC using BlueStacks and Andy. There are other emulators which allow you to run Android apps on PC, but BlueStacks and Andy are the best.

Star Wars Galaxy of Heroes for PC

How To Install Star Wars Galaxy of Heroes For PC or MAC Using BlackStacks

Method 1:

  1. Install Bluestacks on your PC or MAC.
  2. Download Star Wars Galaxy of Heroes Apk on your PC.
  3. Make sure that you have installed Bluestacks. Double-click the downloaded Star Wars Galaxy of Heroes Apk to install it.
  4. The APK will be installed through Bluestacks, once the notification pop-ups determining the installation completion, open Bluestacks.
  5. Now click on My Apps and then click on Star Wars Galaxy of Heroes.
  6. The application will open up. Now follow on-screen instructions to Star Wars Galaxy of Heroes.

Method 2:

  1. Install Bluestacks on your PC or MAC.
  2. Open Bluestacks and setup your Google Play Store account.
  3. Now open Google Play Store and search for “Star Wars Galaxy of Heroes“.
  4. Once found, install Star Wars Galaxy of Heroes.
  5. Now click on My Apps and then click on Star Wars Galaxy of Heroes.
  6. The game will open up. Now follow on-screen instructions to Play Star Wars Galaxy of Heroes.

How To Install Star Wars Galaxy of Heroes For PC or MAC Using Andy OS

  1. Download and install Andy OS on your Windows PC or MAC.
  2. Once downloaded, open Andy OS.
  3. Setup Google Play Account on it.
  4. Now open Apps > Google Play Store and search for “Star Wars Galaxy of Heroes“.
  5. Install Star Wars Galaxy of Heroes and wait for it to finish the installation.
  6. Once done, open “Uncategorized” portion in Andy and click on Star Wars Galaxy of Heroes to play it.
  7. That’s all.

Update Xperia Z2 to Android Marshmallow 6.0 AOSP ROM

0
Update Xperia Z2 to Android Marshmallow 6.0 AOSP ROM

AOSP Android 6.0 Marshmallow custom ROM has made its way to the Xperia Z2 finally. You can now flash the AOSP custom ROM on your Xperia Z2 and update it to all new Android 6.0 Marshmallow. You can learn to flash Android 6.0 Marshmallow AOSP custom ROM on your Xperia Z2 as you scroll down in the succeeding post.Sony-Xperia-Z2

Xperia Z2 was recently updated to Android 5.1.1 Lollipop. Sony has also announced its plans to update some of its devices to Android 6.0 Marshmallow. Fortunately, Xperia Z2 is one of those lucky devices which are in the queue to get the sweetness of Marshmallows. In case you’ve no idea about what’s the big deal in Marshmallow and why its going to be a major update, you may be interesting in knowing that Android 6.0 Marshmallow brings the core enhancements in the Android OS. It includes new and enhanced security features, enhanced app permissions, doze mode for better battery consumption and a lot of other enhancements to improve the over-all Android experience. Sony will be rolling out this update for all of its Xperia Z flagships from Xperia Z2 onwards. We will be seeing the update coming out in next few months. While Sony is cooking up the official Marshmallow firmware for our beloved Xperia Z2, some of you may be pretty much impatient to wait and may want to check out a look and feel of Marshmallow on their device. In order to get your Xperia Z2 Marshmallowed right now, you can flash the AOSP Marshmallow custom ROM that we just mentioned above.

Let’s go through some pre-installation instructions and then head towards the method to install Android Marshmallow AOSP custom ROM on the Xperia Z2.

Pre-installation instructions

  1. This custom ROM is compatible with Xperia Z2 only. Do not try flashing it on any other device.
  2. Charger your Xperia Z2 up to 50% to make sure that it doesn’t die during the flashing process.
  3. Flash a custom recovery like TWRP or CWM on your Xperia Z2.
  4. Create a Nandroid backup of your phone before flashing the custom ROM.
  5. Backup your important call logs, contacts, sms messages and media content as well.
  6. To know about what’s working and what’s not working on this ROM, checkout its official thread.
  7. Follow this guide carefully to flash the Android 6.0 Marshmallow custom ROM successfully on your phone.

Disclaimer: The methods involved in flashing custom recoveries and rooting the device are highly custom. Rooting the device and flashing a custom recover is never recommended by a device manufacturer. In case something goes wrong, TechBeasts or the device manufacturers may not be held responsible. Make sure that you’re doing everything at your own risk.

How To Update Xperia Z2 to Android Marshmallow 6.0 AOSP ROM

Make sure that you’ve installed Minimal ADB and Fastboot drivers.

  1. Now go to your Windows drive (i.e. C drive) > Program files > Minimal ADB & Fastboot folder.
  2. Copy all the Sirius image boot.img file, ROM files (boot.img, system.img etc) to this Minimal ADB & Fastboot folder.
  3. Now connect your phone to your PC in fastboot mode. To do so, turn off your Xperia Z2 completely. Now press and hold Volume Up and plug the data cable in. Your phone will be connected to your PC in fastboot mode.
  4. Now open the Minimal ADB & Fastboot folder from Program files and open “Py_cmd.exe” file.
  5. Now in the command window, issue the following commands one by one.

fastboot device

This will verify the connection of your device in fastboot mode.

fastboot flash [sirius]boot.img 

(Replace sirius boot.img with the exact name of the sirius image file)
This will flash the boot into your device in order to make the Marshmallow firmware boot up.

  1. Now boot into recovery on your phone. To do so, turn off your phone completely. Now turn it on and see the purple LED, as soon as it blinks press the volume up or down key to boot into recovery.
  2. Now in recovery, perform a factory data reset. If you’re coming form Android Lollipop, you need to wipe system using the advanced wipe options in the recovery.
  3. Once you’re done wiping, its turn off your phone, and connect it to your computer in fastboot mode using the method explained in step 3.
  4. Once you’ve connected your phone in fastboot mode, issue the following commands one by one now.fastboot flash boot boot.img 

    (replace boot.img with the name of the boot.img that you found in ROM folder)
    This will flash the boot into your device in order to make the Marshmallow firmware boot up.

    fastboot flash system system.img
    This will flash the AOSP Android Marshmallow system.

    fastboot flash [sirius]boot.img   

    (Replace sirius boot.img with the exact name of the sirius image file)

  5. Once all of the above steps are done, reboot your phone.

How To Install Google GApps

  1. Download Google GApps for Android 6.0 Marshmallow.
  2. Copy the downlaoded GApps.zip file to your Xperia Z2.
  3. Now boot into TWRP or CWM recovery on your Xperia Z2. To do so, turn off your phone completely. Now turn it on and as soon as you see the boot screen press Volume Up or Down key to boot into TWRP or CWM.
  4. Now depending on your recovery, select the install zip option  and locate the GApps.zip file. Flash the file and reboot.
  5. You’re all done and you’ve installed GApps as well.

Source

Install Xperia Z5’s Camera on your Xperia Z3, Z2 and Z1

0
Install Xperia Z5’s Camera on your Xperia Z3, Z2 and Z1

Sony has always been a winner in the photography department. Sony always equips its devices with the best possible Camera shooters, and it also adds a cool Camera application to allow its users to make the best use of the shooter placed at the back. Recently Sony released its all new Xperia Z5 family. Sony equipped Z5 with world’s best camera lens. Sony Xperia Z5’s is packed with Sony’s camera application v2.0. Camera application on the Z5 includes a number of features and enhancements alongside a new UI that you won’t find in the camera application of older smartphones such as Z1, Z2 and Z3. Xperia Z5’s camera has been ported to the Xperia Z1, Z2, and Z3 family by Team EXR and Team HS. Basically the camera has been made to work with all Xperia Z family devices carrying a 20.7 MP G Lens shooter. In case you’re willing to install it on your Z1, Z2 or Z3, you can give it a try as it’s found working perfectly well on these devices without any mainstream issues.

In order to install this Camera application on your older Xperia Z device, you need a custom recovery running on it. The MOD is available in the form of a flashable zip file. You can simply flash the zip and enjoy the Camera v2.0 application from Xperia Z5 with all new enhanced features and a new UI on your smartphone. Compatible devices with this MOD include Sony Xperia Z1, Z1 Compact, Z2, Z3 and Z3 Compact. Let’s go ahead and go through some quick pre-install instructions in order to be able to install the all new Camera application on our target device.

Pre-installation instructions

  1. This MOD is compatible with Xperia Z1, Z1 Compact, Z2, Z3 and Z3 Compact only. Do not try flashing this on any other device as it may result in bricking it.
  2. Make sure that your device is running on Android Lollipop. You can update your Xperia Z smartphone to Android Lollipop using guides available on our site.
  3. Charge your phone up to 50% to avoid power issues during the flashing process.
  4. You must have a custom recovery installed on your phone. Check out our custom recoveries section to find recovery for your Xperia handset.
  5. Just to be on a safe side, create a Nandroid backup of your existing system. It can become handy if your phone gets brick. You will be able to fix it easily without any hiccups here and there.
  6. Read the instructions carefully to get Camera 2.0 running fine on your device.

Disclaimer: Flashing custom recoveries, MODs and rooting the device voids its warranty. In case something goes wrong, TechBeasts or the MOD developers may not be held responsible. Make sure that you’re doing this at your own risk.

How To Install Xperia Z5’s Camera on your Xperia Z3, Z2 and Z1

  1. Download {EXRxTHS]Z5 Camera2.0 for 20.7MP Ver2.zip and copy it to your phone’s internal or external storage.
  2. Now boot into CWM or TWRP recovery on your phone.
  3. Depending on your recovery, select Install Zip or Install option.
  4. Now locate the .zip file from the location you copied it to.
  5. Select the .zip file and flash it.
  6. Once flashed, wipe cache and dalvik cache of your device.
  7. Reboot your device and find Camera 2.0 from Xperia Z5 installed in your app drawer.
  8. Use Camera 2.0 and enjoy the new photography experience on your Xperia Z1, Z2 or Z3.

Z5 Camera

Now checkout: Install Xperia Z5 Premium’s Walkman on your Android smartphone [how to]

Source

Download WordBrain for Pc Online – Windows and Mac

0
Download WordBrain for Pc Online – Windows and Mac

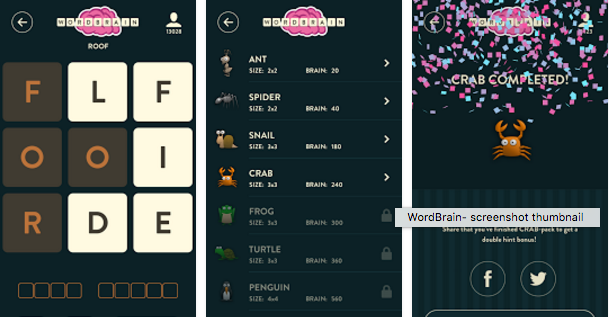
Following are the instruction on how to download WordBrain for PC running Windows and Mac OS. WordBrain is available on both iOS and Android app stores, it’s a simple game where you have find the hidden words in order to move to next level, but as the time goes on WordBrain becomes more and more difficult. The game features 15 languages and there are 580 levels per language, so put your mind to test and enjoy.

WordBrain is basically designed for smartphones, but it can be installed on PC using third-party emulators. In the follow guide I’ll tell you two methods on how to download and install WordBrain for PC. I’ll be using BlueStacks and Andy to install WordBrain on PC.

WordBrain for PC

How To Install WordBrain For PC or MAC Using BlackStacks

Method 1:

  1. Install Bluestacks on your PC or MAC.
  2. Download WordBrain Apk on your PC.
  3. Make sure that you have installed Bluestacks. Double-click the downloaded WordBrain Apk to install it.
  4. The APK will be installed through Bluestacks, once the notification pop-ups determining the installation completion, open Bluestacks.
  5. Now click on My Apps and then click on WordBrain.
  6. The application will open up. Now follow on-screen instructions to WordBrain.

Method 2:

  1. Install Bluestacks on your PC or MAC.
  2. Open Bluestacks and setup your Google Play Store account.
  3. Now open Google Play Store and search for “WordBrain“.
  4. Once found, install WordBrain.
  5. Now click on My Apps and then click on WordBrain.
  6. The game will open up. Now follow on-screen instructions to Play WordBrain.

How To Install WordBrain For PC or MAC Using Andy OS

  1. Download and install Andy OS on your Windows PC or MAC.
  2. Once downloaded, open Andy OS.
  3. Setup Google Play Account on it.
  4. Now open Apps > Google Play Store and search for “WordBrain“.
  5. Install WordBrain and wait for it to finish the installation.
  6. Once done, open “Uncategorized” portion in Andy and click on WordBrain to play it.
  7. That’s all.