Home Blog Page 346

Install CyangenMod 12.1 Android 5.1.1 Lollipop on Galaxy E5 E500H

0
Install CyangenMod 12.1 Android 5.1.1 Lollipop on Galaxy E5 E500H

CyanogenMod 12.1 based Android 5.1.1 Lollipop is now available for Galaxy E5 E500H. You can follow the method listed in the succeeding guide to install CyanogenMod 12.1 Android 5.1.1 Lollipop on your Galaxy E5 E500H. Before we head towards the CyanogenMod custom ROM installation guide, we will have a flashback at the Galaxy E5 and also learn a few reasons to install this CM 12.1 Android 5.1.1 Lollipop on your Galaxy E5.Samsung-Galaxy-E5

Galaxy E5, Samsung’s mid-ranger first popped up in February, 2015. Galaxy E5 carries a 5-inch 720P display. Samsung used A Quad Core CPU clocked at 1.2 GHz to power this phone up. A RAM of 1.5 GB and internal storage of 16 GB can be found inside. Galaxy E5 sported an 8 MP shooter at the back and 5 MP shooter on the front. The device ran on Android 4.4.4 KitKat out of the box. The device later on received Android 5.0.2 and Android 5.1.1 Lollipop updates.

Since this guide is about installing a custom Android 5.1.1 Lollipop firmware, some of you may wonder why should you flash this firmware while there’s an official Android 5.1.1 Lollipop available. The answer is simple, it’s all about getting rid of the bloatware that Samsung puts on its devices. TouchWiz UI has always remained under severe criticism because of being less responsible and heavily bloated. The new CyanogenMod 12.1 will not only give you the clean stock Android experience, but it will also help you to get rid of the bloatware. The ROM doesn’t contain any extra applications that you would hate having on your phone. You can choose the apps to install and make your phone work super-fast. The ROM is found to be working pretty fine, it doesn’t contain any major bugs. Current version is quite stable and can be kept as a daily driver. The instructions listed below will make it a lot easier for you to flash this ROM on your Galaxy E5, but we still do not recommend you to go ahead if you’re a newbie and you do not have an idea how these custom ROM works. We only recommend you to flash this custom ROM if you’re confident enough to handle the device in-case of a mishap. Let’s head towards the pre-installation instructions and then flash Custom Android 5.1.1 Lollipop CyanogenMod 12.1 ROM on your Galaxy E5 E500H.

Pre-installation instructions

Disclaimer: Flashing custom recoveries, custom ROMs and rooting the Android smartphones at first involves going through a complex process and it includes potential risks. Although the methods listed on our site are pretty much safe to follow, but we do not guarantee a safe result in the end. Just in case you end up bricking your device or getting something wrong done, TechBeasts or the device manufacturer may not be held responsible in that case. Make sure that you’ve read each and everything carefully and you’re proceeding at your own risk.

Install TWRP Recovery on your Galaxy E5 E500H / M

Required downloads

  1. Open Odin3 V3.10.6.exe that you extracted on your PC.
  2. If there’s OEM Unlock option in your phone, then enable it first. Enable OEM Unlock on your phone. To do so on your phone, go to settings > about device > tap the build number for 7 times to enable developer options. Get back to the settings and open developer options. Under developer options turn on “OEM unlock.
  3. Put your Galaxy E5  in download mode now. To do so, turn it off completely. Now turn it on by pressing and holding Volume Down + Home + Power Key. Once your phone boots up, press the Volume Up key to continue.
  4. Connect your phone to your PC now. The ID:COM box in the top-left corner of Odin3 should  turn blue. This indicates that your phone is connected properly.
  5. Now click the “AP” tab in Odin and select the twrp recovery.tar.md5 file that you downloaded. It will take a second or two for Odin3 to load this file.
  6. Make sure that your Odin3 looks like this. The only option ticked should be F. Reset Time.
    • Odin 3.10.6 Explained_Techbeasts
  7. Now you’re all set to flash the recovery. Just click the start button in Odin3 and sit back.
  8. Once the process box above ID:COM box shows green light and flashing process is finished, disconnect your device.
  9. Now turn off your device properly as we are going to boot into recovery mode. You can turn it off by keeping the power key pressed for a while. 
  10. Now turn it on by pressing and holding Volume Up + Home + Power Key. This will boot your device in recovery mode. It should be TWRP recovery that you just installed.
  11. Once done, reboot your device into system using the reboot option in TWRP recovery.

Install CyangenMod 12.1 Android 5.1.1 Lollipop on Galaxy E5 E500H

  1. Download CyanogenMod 13.zip file according to your device
    1. cm-12.1-20151203-UNOFFICIAL-e53g.zip
  2. Download Gapps.zip file for Android 5.1.1 Lollipop according to your device.
  3. Connect your phone to your PC now.
  4. Copy all .zip files to the storage of your phone.
  5. Now disconnect your phone and turn it off complete.
  6. Boot into TWRP recovery now, in order to do so, turn it on by pressing and holding Volume Up + Home Button + Power Key. You should see the recovery mode in a while.
  7. Now in TWRP  recovery, wipe cache, factory data reset and advanced options > dalvik cache.
  8. After wiping all these three, select “Install” option.
  9. Now select “Install > Choose Zip from SD card > Select cm-12.1…….zip file > Yes”.
  10. This will flash the ROM in your phone, once done get back to the main menu in recovery.
  11. Now once again select “Install > Choose Zip from SD card > Select Gapps.zip file > Yes”
  12. This will flash the Gapps in your phone.
  13. Reboot your device.
  14. You should see the Android 5.1.1 Lollipop CyanogenMod 12.1 running on your device in a while.
  15. That’s all!

First boot may take up to 10 minutes, you may not worry if it’s taking that much long. In case it’s taking too long, you may boot into TWRP recovery and wipe cache and dalvik cache and reboot your device as it may fix the issue. In case your device is having issues, you may return to your old system using the Nandroid backup or follow our guide here to install stock firmware.

Got any queries? Reach us out through the comment box below.

Source and Credits

Download Die in 100 Ways for Windows PC and Mac

0
Download Die in 100 Ways for Windows PC and Mac

Die in 100 Ways is just a few days old game, and its already rocking the top charts in the Google Play Store. The game comes from CanadaDroid, the guys behind games like Punch Boxing 3D, Real Skate 3D etc. Die in 100 Ways seems to be carrying a similar concept as that of Dumb Ways to Die. In the game you’ve to complete crazy tasks otherwise you’re going to die. There’s a limited time that you’re given to complete each task, and the time limit keeps on decreasing as you move on to further levels. The crazy tasks include tasks like picking up a glass that doesn’t have poison, or putting all Banana peels in the trash bin otherwise your character will slip on the floor and die, or you’ve to open the door of the Toilet before your avatar dies inside the toilet. In another task you’ve to connect a line to light up the trees. The game comes with hundreds of such crazy tasks that will make you fall in love with this game within no time. Die in 100 Ways has been downloaded for over half a million times already. The game first appeared on November 27, 2015. Die in 100 Ways is an absolutely free to play game. You can get this game on your Android smartphone or tablet from the Google Play Store.Die in 100 Ways

Just in case you’re looking for the desktop version of this game, that’s not directly available, but using a different method you can grab Die in 100 Ways for your computer. Its fairly possible to install and play Die in 100 Ways for PC on your Windows XP, 7, 8, 8.1, 10 powered Laptop / PC or Mac OS X Macbook, iMac. We will be taking you through a step-by-step guide to install and play Die in 100 Ways for PC. Let’s go ahead and get this game running on our desired computer now.

Download Die in 100 Ways For Windows PC & Mac

  1. Download Die in 100 Ways APK
  2. Download and install Bluestacks: Bluestacks Offline Installer | Rooted Bluestacks | Bluestacks App Player
  3. Once you’ve installed Bluestacks, double click the downloaded Die in 100 Ways APK.
  4. The APK will be installed using Bluestacks, once installed open Bluestacks and locate the recently installed Die in 100 Ways.
  5. Click the Die in 100 Ways icon to open it, follow the on-screen instructions to play it.

You can also use Andy OS to install Die in 100 Ways, here’s the tutorial:  How To Run Android Apps On Mac OS X With Andy

The Andy OS tutorial explains how to play a game on your Mac OSX, but the same guide will also work for a Windows PC.

That’s all. In case you’re stuck with anything, reach us out through the comment box below.

Temple Run 2 Frozen Shadows for PC – Windows and Mac

0
Temple Run 2 Frozen Shadows for PC – Windows and Mac

The all time famous runner game, Temple Run 2 has got a new update. Temple Run 2 has got winter makeover now. The new Temple Run 2 is now named as Temple Run 2 Frozen Shadows. Imangi Studios have brought the best possible changes in the game to make it attractive and revive it among the Android users. Temple Run 2 remained stable on the number one spot in the world of Android gaming, but the game lost its charm as other rivals like Subway Surfers came up. Imangi seems to be active to take its spot back now, so the new Temple Run 2 Frozen Shadows is all set to rock the Android gaming world.Temple Run 2 Frozen Shadows

Temple Run 2 Frozen Shadows brings a new Frozen theme in the game. Now your avatar is running in under Frozen Shadows. The new land brings a lot of new obstacles and challenges. You’re all set to surf and explore the ice luge across the Frozen land. Thew new update also brings a number of new updates. The Demon Monkeys running after you are now called Snowy Demon Monkeys. New Frozen-themed graphics of this game definitely look awesome and make the game-play much more lucrative. Temple Run 2 Frozen Shadows is now available in the Google Play Store. You can grab this game on your Android smartphone or tablet and play it right away.

However, if you’re looking for a way to play Temple Run 2 Frozen Shadows on your desktop PC / Laptop or on your Macbook, that’s possible too. We will be showing you a detailed method to install and play Temple Run 2 Frozen Shadows  for PC on your desktop PC / Laptop running Windows XP, Windows 7, Windows 8, Windows 8.1, Windows 10 and Mac OS X Macbook, iMac. Let’s go through the guidelines and start playing Temple Run 2 Frozen Shadows for PC.

Download Temple Run 2 Frozen Shadows For Windows PC & Mac

  1. Download Temple Run 2 Frozen Shadows APK
  2. Download and install Bluestacks: Bluestacks Offline Installer | Rooted Bluestacks | Bluestacks App Player
  3. Once you’ve installed Bluestacks, double click the downloaded Temple Run 2 Frozen Shadows APK.
  4. The APK will be installed using Bluestacks, once installed open Bluestacks and locate the recently installed Temple Run 2 Frozen Shadows.
  5. Click the Temple Run 2 Frozen Shadows icon to open it, follow the on-screen instructions to play it.

You can also use Andy OS to install Temple Run 2 Frozen Shadows, here’s the tutorial:  How To Run Android Apps On Mac OS X With Andy

The Andy OS tutorial explains how to play a game on your Mac OSX, but the same guide will also work for a Windows PC.

That’s all. In case you’re stuck with anything, reach us out through the comment box below.


Unlock Bootloader, Install TWRP Recovery and Root OnePlus X

0
Unlock Bootloader, Install TWRP Recovery and Root OnePlus X

An unofficial build of TWRP recovery is now available for the all new OnePlus X. You can flash this TWRP recovery on your OnePlus X. First of all you will need to unlock the bootloader of your OnePlus X. Instructions to unlock OnePlus X booltoader are attached below, after unlocking the bootloader you can flash TWRP recovery. Once you’ve flashed the TWRP recovery on your OnePlus X, you can flash SuperSu afterwards and easily gain root access on your device. Custom recovery will allow you load all the custom stuff on your phone as well. Before we learn about the proper use of custom recovery and root access, we will go through a brief over-view of OnePlus X and then head towards the method as well.oneplusxfrontback

Exactly a month ago, OnePlus launched a younger brother of its all time famous the original OnePlus named as OnePlus X. This new phone by OnePlus sported a 5.0-inch 1080p display carrying a ppi of 441. The device runs on Qualcomm Snapdragon 801 CPU clocked at 2.3 GHz accompanied by Adreno 330 GPU and a RAM of 3 GB. OnePlus X has an internal storage of 16 GB and also supports a microSD up to 128 GB. One the camera end, we have got a 13 MP shooter at the back and 8 MP shooter on the front. OnePlus X runs on Android 5.1.1 Lollipop themed with OxygenOS UI out of the box. Now that the device is out, it’s being caught up by some developers as well that means we will be having enough of stuff to unleash the real power of OnePlus X in the upcoming days.

In casey you’re new to custom recovery and root access, you may want to learn a little bit about both these terms. A custom recovery works in the boot-partition of your Android device. It allows you to perform various operations like flashing custom ROMs, custom MODs, Tweaks and other .zip files like SuperSu.zip. You can also wipe system, modem, cache, dalvik cache and other such partitions. Another useful function of a custom recovery is the complete Nandroid backup. As far as the root access is concerned, it allows you run root-specific applications on your device. You can install applications like Titanium Backup, Greenify, System Tuner etc to enhance the performance and battery life of your Android smartphone. Both these custom recovery and root terms have a lot of advantages, and have some downsides too, but since the advantages are greater, the downsides shouldn’t bother you. Let’s move ahead now and learn to install TWRP recovery and root your OnePlus X.

Precautions & Prep

  • This guide is intended for OnePlus X only. Do not try this method on any other device otherwise you may result in bricking it.
  • Make sure that your phone’s battery is charged up to 80% in order to avoid any power issues during the flashing process.
  • Backup all of your important contacts, call logs, sms messages and media content to stay on a safe end.
  • Enable USB debugging mode on your OnePlux X in developer options. To do so, go to settings > about device > tap build number for 7 times. You will have developer options in settings now. Open developer options > Enable USB debugging. If you have the “OEM Unlocking” option, enable it as well.
  • Use your original data cable to establish connection between your phone and your PC.
  • Follow this guide to the letter to avoid any mishap.

Disclaimer: The methods involved in flashing custom recoveries and rooting the device are highly custom. Rooting the device and flashing a custom recover is never recommended by a device manufacturer. In case something goes wrong, TechBeasts or the device manufacturers may not be held responsible. Make sure that you’re doing everything at your own risk.

Required downloads & installations

  1. Download and install OnePlus USB drivers.
  2. Download and install Minimal ADB & Fastboot drivers.
  3. Download SuperSu.zip file and copy it to your phone’s internal storage.

Unlock OnePlus X Bootloader

Unlocking bootloader will wipe your device. Make sure that you’ve backed up everything before going ahead.

  1. Make sure that you’ve downloaded and installed Minimal ADB & Fastboot drivers on your Windows PC or installed Mac ADB & Fastboot for Mac.
  2. Connect your phone to your PC now.
  3. Now open Minimal ADB & Fastboot.exe from your desktop. If you do not have this file on your desktop, then go to your Windows installation drive i.e. C drive > Program Files > Minimal ADB & Fastboot > Press and hold Shift Key + Right click on an empty area with the open folder > click “Open command window here”.
  4. Now in the command window enter the following commands one by one.
    • adb reboot-bootloader

      This will reboot your Nvidia Shield in bootloader. Once booted up, issue the following command.

      fastboot devices

      This command will verify the connection of your device with your PC in fastboot mode.

    • fastboot oem unlock

      This command will unlock the bootloader. As soon as you press the enter key after typing this command, you will get a message in your phone asking for the confirmation of bootloader unlocking. Use volume up & down keys to navigate through options and confirm unlocking.

    • fastboot reboot

      This command will reboot your phone. That’s all, disconnect your phone.


How To Install TWRP Recovery on OnePlus X

  1. Download recovery.img file for OnePlus X.
  2. Rename the download file as only recovery.img and then copy this file to Minimal ADB & Fastboot folder which is located in program files in your windows installation drive.
  3. Now boot your OnePlus X into fastboot mode as suggested in the step 4 above.
  4. Connect your OnePlus X to your PC now.
  5. Open Minimal ADB & Fastboot.exe or the command window as explained in step 3 above.
  6. Now in the command window enter following commands:
  • fastboot devices

    fastboot flash recovery recovery.img

  • fastboot boot recovery.img

    (this will boot your device in TWRP recovery mode)

    To boot manually in to TWRP recovery mode, unplug USB cable from your OnePlus X and turn off your device completely by keeping the power key pressed for a while. Now press and hold Volume Down + Power Key to turn on your OnePlus X. As soon as your phone’s screen turns on, leave the Power Key and keep the Volume Down Key pressed. Your device will now boot into TWRP recovery mode.

How To Root OnePlus X

  1. Make sure that you’ve copied SuperSu.zip file to your phone. In case you haven’t, do it now.
  2.  Now boot your phone in to TWRP recovery mode. To do so, turn it off completely first. Now turn it on by pressing and holding Volume Down + Power Key. If this doesn’t work for you then try Volume Up + Power or both, Volume Down + Up + Power to boot into recovery mode.
  3. As you see TWRP recovery, tap “Install > Locate the copied SuperSu.zip file (should be at bottom) > tap this file > Swipe the bar at the bottom of screen to confirm flash”.
  4. As soon as SuperSu.zip file is flashed, go back to main menu in TWRP and tap reboot > system.
  5. Your device will boot up now. Find SuperSu in app drawer. Install Root Checker app to verify root access.

Don’t forget to create a Nandroid Backup for your OnePlus X now. Also checkout how to use Titanium Backup since you’ve got your phone rooted. That’s all. Stuck with something? Don’t worry! Reach us out through the comment box below.

Download Best HD Merry Christmas Wallpapers

0
Download Best HD Merry Christmas Wallpapers

Merry-christmas-wishes-card-santa-claus-christmas-hd-wallpapers-for-greetings-fbIt is that time of the year when everyone is excited to welcome a new great year, and also to enjoy the greatest event of the year just before the new year heads up. We are talking about Christmas. The season of lights and delights has come up again, and its the chance for everyone to enjoy at their best. Kids are all set to get their gifts from the Santa Clause. Preparations for the celebrations of Merry Christmas 2015 and New Year 2016 are at peak. While you’re busy bringing in the Holiday Tree and decorating your houses, we decided to add a little charm to your Christmas celebrations by bringing some make over stuff for your computers and your handheld devices. We have collected a large collection of best HD Merry Christmas 2015 Wallpapers for your desktop PC, Laptop, Macbook and your iOS or Android powered smartphones. All the wallpapers are in high definition resolution. You can pick up your favourite one and use it freely anywhere you want. You can also use these wallpapers as Merry Christmas Cards, Merry Christmas Wishes etc.christmas-wallpapers-download

While you’re going to download the best HD Merry Christmas Wallpapers, we would like to make it clear that we do not own any of the images shown below. We have only picked up these images randomly from different sources to make a collection of best possible Merry Christmas 2015 wallpapers. All these images are a party of their rightful owners. To download your desired wallpaper, go ahead, click on your favourite wallpaper and the “right click > save image as” in order to save it to your computer or mobile phone. Time for us to go ahead and grab some cool wallpapers to light up Christmas celebrations.

Don’t forget to download Best HD Happy New Year 2016 Wallpapers For Your Desktop PC.

Happy New Year 2016 Wallpapers

Download HTC Sync Manager On Your PC

0
Download HTC Sync Manager On Your PC

HTC’s tool, the HTC Sync Manager is available to download for PC, and it sports some amazing features such as backing up everything, and automatic sync. HTC Sync Manager for PC allows you to control your HTC device totally using you PC, and we have elaborated some of its main functions down below. Once you start feeling cozy with the numerous features that it holds, follow the link download below to download HTC Sync Manager On Your PC and make the most out of it.

HTC_Sync_Manager_Options

Features Of HTC Sync Manager:

Backup Files (Media, Video, Music):

You can use this amazing tool to quickly snap some of your most important documents, or pictures of your cats, and store them safely on your PC, in case of something were to happen to your device. You can use this mini-tool to backup all types of media, including documents, videos, music, and many more content as such.

Real-Time Sync:

One of the most aspiring features of this tool is the fact that once you connect your HTC device to your PC, the tool automatically tries to sync contacts, and other important documents as such. You can disable this option in the settings, but for optimal performance, it is a must.

Transfer Content from an iPhone to HTC:

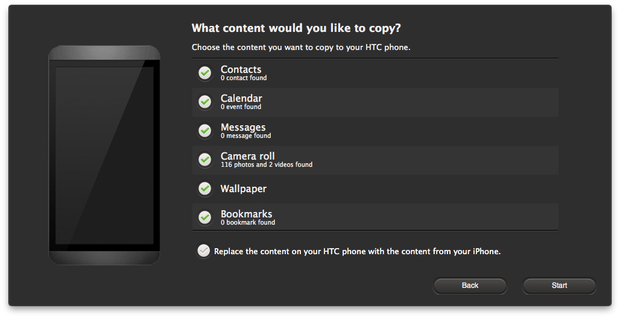
How witty! HTC’s tool can even allow an existing iPhone user to switch to a HTC device without a hunch of a problem. You can use this mini-tool to transfer stuff such as contacts, images and videos and more.

Updating Your Device:

Just like Samsung Kies, HTC Sync Manager also lets you easily find for the latest firmware update for your device, and install it safely. This way, you won’t need a WiFi connection, or even put in some efforts to taste the latest of Android.

Download For Windows.  (v3.1.61.0) -130 MB

Download For Mac. (v3.1.72) – 44 MB

How To Root Any Android Using Cydia Impactor

0
How To Root Any Android Using Cydia  Impactor

For iOS devices, there’s a one-click jailbreak tool, Cydia, which got a lot of reputation around the globe for its assistance in perfecting an iOS device. The developer, Saurik has been unbiased, and also made the Cydia tool for Android devices, called Cydia Impactor. In this guide, we are going to see how to root any Android using Cydia Impactor.

Cydia-Impactor-Copy-Right

How To Root Any Android Using Cydia Impactor:

1. First up, make sure you have USB Debugging enabled on your Android device. If not, head over to Settings>Developer Options, and then check the option which reads ‘USB Debugging’.

2. Once that is done, you need the Cydia Impactor tool on your PC to start with rooting your Android device. It is a simple ZIP file, which you can get by heading over here.

3. What you just downloaded is a ZIP file containing your most important files. All you need to do is unzip it using a software such as WinRAR or Unzip Pro. Once extracted, you will have a look at some files with weird extensions.

4. The one we are looking for is none other than an EXE file. Launch it up, and connect your Android device to your PC.

5. You now need to press on the ‘Start’ button you see on the application implemented. With this, you’ll start the process of rooting your Android device.

6. Once that is done, head over to the Google Play Store, and install the latest SuperSU application, to ensure full root support.

If you think our guide on how to root any Android using Cydia Impactor was helpful to you, just share it using one of our buttons below.

Best Chromecast Apps to turn your TV into a smart Tv.

0
Best Chromecast Apps to turn your TV into a smart Tv.

Chromecast is a great way to turn your TV into a smart Tv. You can simply plugin the handy device into the HDMI port. The device works similar to the Apple TV however, the device alone is of no use unless you have an internet connection or chromecast-compatible apps with which it can do wonders for you.

Here is a list of the most handy and best Chromecast app that you can use.

130730122817-google-chromecast-620xa

Allcast:

Developed by Koushik Dutta, this is considered the best streaming app that is capable of streaming anything from not only your chromecast but also from your Amazon Fire TV, Apple TV, Xbox 360, Roku and more. You can get the app for $4.99 whereas a free version is also available that lets you stream with 5 minutes viewing limit for each session.

Screen Shot 2015-12-01 at 02.13.58

VideoStream:

Screen Shot 2015-12-01 at 02.14.12

VideoStream is much like a VLC player which can stream movies, videos, mp3 and mp4 content right from your computer to your TV without any additional plugins needed.

Twitch:

Screen Shot 2015-12-01 at 02.14.39

Twitch has also added support for Chromecast. The app lets you stream game videos, play your favorite games and also receive broadcasts and watch other player play your favorite games.

Pandora:

Screen Shot 2015-12-01 at 02.14.25

The famous radio streaming app now comes with Chromecast support where you can explore more than 100 radio channels, browse genres and also customize your stations and more.

Big Web Quiz:

Screen Shot 2015-12-01 at 02.14.51

The Trivia game gets compatible with Chromecast where you can add upto 5 of your friends and answer Trivia questions in as little time as you can to be the winner. The questions are displayed on the bigger screen while each one of you will answer the questions from your devices.

iHeartRadio:

Screen Shot 2015-12-01 at 02.15.29

The famous music and radio streaming app has been designed to run with Chromecast and lets you stream several music genres, radio channels, news, sports channels, shows and more.

BBC iPlayer:

For those of you living in UK, good news is that you can now stream live TV, broadcasts and shows not only on your mobile device but on your TV as well through Chromecast compatible BBC iPlayer.

Screen Shot 2015-12-01 at 02.16.42

BubbleUPnP:

Screen Shot 2015-12-01 at 02.15.04

The app is capable of finding and deriving media from DLNA devices and servers as well as cloud storage and through your Chromecast you will be able to send or receive DLNA streams.

Vevo:

Screen Shot 2015-12-01 at 02.16.30

The famous Video streaming app is a great platform to explore latest content and keeps you updated with new releases from your selected favorite artists. The app has compatibility with Chromecast and so now you can stream the videos on your TV as well in full HD.

CastPad for Chromecast:

Screen Shot 2015-12-01 at 02.15.20

The drawing app lets you draw on your mobile device with several brushes, colors and brush adjuster options and while you draw on your phone, you can see it pop on your TV’s screen thanks to its Chromecast compatibility.

Pocket Casts:


Screen Shot 2015-12-01 at 02.15.39

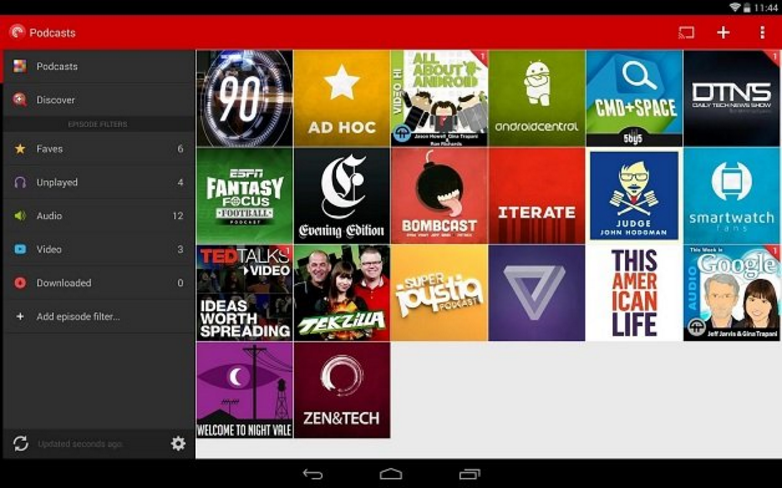
Pocket Casts is one of the Podcast player and catcher app that has the ability to sync between multiple devices and supports streaming for both audio and video content.

Crackle:

Screen Shot 2015-12-01 at 02.15.50

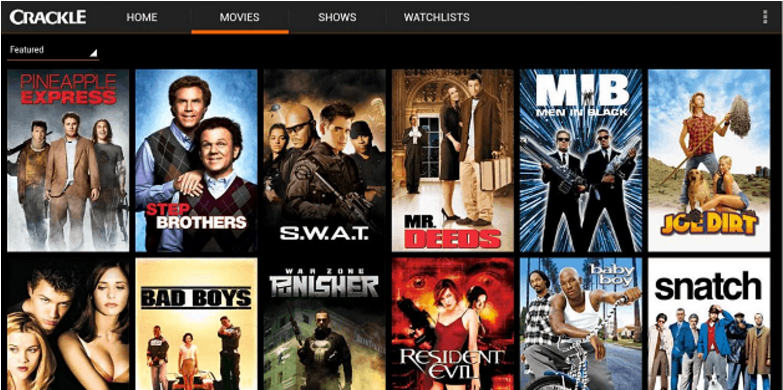
This is not the best movie-streaming app as far as the number of latest content is considered however, it does have featured movies and a list of famous ones to choose from and watch with its comfortable interface.

Hulu Plus:

Screen Shot 2015-12-01 at 02.16.04

Another one of the video streaming apps that gives you access to content from TV and movies and brings latest content from many TV serials while giving unlimited streaming on your TV through Chromecast.

Plex:

Screen Shot 2015-12-01 at 02.16.18

It gives you access to you personal media files, photos, videos, music and movies from your computer or mobile device as well as your cloud storage and lets you watch your content on TV.

MyCastScreen:

Screen Shot 2015-12-01 at 02.16.54

The app will cost you $0.99 and you can set your Chromecast homescreen just the way you like with weather, time and date, News feed, Traffic updates and much more.

Dayframe:

Screen Shot 2015-12-01 at 02.17.03

Want to turn your TV Screen into a powerpoint slideshow ? If so then this app will let you see photos from your social media account on your TV screen. The app can connect with your social media accounts including Facebook, Twitter, Google Plus, Instagram and more. The app is available for free and the Premium version can be bought for $0.99.

GamingCast:

Screen Shot 2015-12-01 at 02.17.13

This app is basically for the ones who love to play classic games like Snake, Tetris, Ping pong and more while with support from Chromecast, you can play these games on your TV as well.

Cast Store:

Screen Shot 2015-12-01 at 02.17.21

Lastly, you will need an app that will collect and organize all of your favorite Chromecast apps, putting them in categories to make it easier for you to find them.

Best HD Happy New Year 2016 Wallpapers For Your Desktop PC

0
Best HD Happy New Year 2016 Wallpapers For Your Desktop PC

Happy-New-Year-2016-HD-photos-WishesThe Year 2015 has almost ended. 2015 has been a great year for some and it left some people with sad memories. It’s time to say goodbye to this year and look towards a great new year, the year 2016. It’s time to forget the sorrows that you had in 2015, and look towards happiness in the year 2016. And it’s also the time for you to carry your moments of happiness as a sweet memory to the year 2016. Preparations of the celebrations for the year 2016 have already begun. Since it is also the christmas time, so the preparations are going on for these two events in a full swing. While you’re busy decorating your houses to welcome a this Christmas and the New Year 2016, we’ve come up with some stuff to add little charm to your preparations. Like every year, we have collected a collection of some cool Happy New Year 2016 Wallpapers for your desktop PC. You can use the Happy New Year 2016 Wallpapers on your Windows PC or Mac. Let’s go ahead and have a look on the collection of Happy New Year Wallpapers that we have for all of you this time around.New-Year-2016-HD-Wallpapers

Before you download these wallpapers, we would like to make it clear that we do not own of these images. All these wallpapers are picked up randomly from different sources and these are the property of their rightful owners. We have only compiled up these wallpapers to make a collection of Best HD Happy New Year 2016 Wallpapers for your Desktop PC. You may go ahead and click on your favourite wallpaper. Once your desired wallpaper opens up, right click on the image > save image > save it to your PC. Although these wallpapers are mainly intended for your Desktop PC, but you can also use these wallpapers on your Android or iOS powered smartphones / tablets as well. All these wallpapers are in HD resolution.


You can also download all these wallpapers form the all in one zip file for New Year 2016 Wallpapers.

That’s all. We wish a very Happy New Year 2106!

Install DN5 ROM on your Galaxy S6 / S6 Edge and get all Android Marshmallow Features

0
Install DN5 ROM on your Galaxy S6 / S6 Edge and get all Android Marshmallow Features

DN5, short for Ditto Note 5, ROM is now available for Galaxy S6 and S6 Edge. The ROM carries features from the latest test Marshmallow firmware that landed in for the T-Mobile Galaxy Note 5. By installing DN5 ROM on your Galaxy S6 / S6 Edge, you can get all features of Android 6.0 Marshmallow on your device right now. In the succeeding guide we will learn how to flash Ditto Note 5 (DN5) ROM on your Galaxy S6, Galaxy S6 Edge and get all Android 6.0 Marshmallow features right now.samsGalaxyS6__3__01

Galaxy Note 5, Galaxy S6, S6 Edge and some other past flagship devices of Samsung are looking forward to the Android 6.0 Marshmallow update. Galaxy S6 and S6 Edge’s Marshmallow update will be here sometime around February, 2016. Since the Galaxy Note 5 is the latest flagship device, this phablet will be getting its update first of all. Note 5’s Marshmallow update is all set to come out in December, 2015. Samsung pushed a test Marshmallow firmware to one lucky T-Mobile Galaxy Note 5 user. The firmware has been made available, linked above with the installation guide. Some Android enthusiasts couldn’t wait for the official update and they ported the new Android Marshmallow features from this test firmware of Note 5 to our beloved Galaxy S6 / S6 Edge. This great work has been done by Electron Team. In case you’re not familiar with these guys, these are the famous people behind the Ditto Note 2 ROM and then they continued this Ditto Note ROM series. Their latest ROM is Ditto Note 5 which is available for Galaxy Note 4 and now its also available for Galaxy S6 and S6 Edge.

Latest Ditto Note 5 ROM by Electron Team packs up almost all cool Android 6.0 Marshmallow features which include a new white background in the notification bar. A new settings application. New enhanced dialer and phone application. A lot of other applications have received a new UI. Samsung has improved the look of TouchWiz UI in the Marshmallow firmware. So, by installing this Ditto Note 5 ROM on your S6 and S6 Edge, you will be able to have a look and feel of Android 6.0 Marshmallow on your phone right now. Ditto Note 5 ROM for S6 and S6 Edge doesn’t carry the Android 6.0 Marshmallow features only, but it also carries all features of the Galaxy Note 5 for your phone. This ROM is based on Android 5.1.1 Lollipop ported from the Galaxy S6 Edge Plus. Let’s go ahead now and learn the method to install DN5 ROM on your phone.

  • This ROM is intended for the Galaxy S6 SM-G920 F/I/S/K/L/T/W8 and Galaxy S6 Edge SM-G925 F/I/S/K/L/T/W8. Read your device’s model number carefully in the “About Device” section and proceed only if your device’s model number is listed here.
  • Your Galaxy S6 and S6 Edge must be running latest Android Lollipop firmware.
  • Download and install TWRP Recovery on your Galaxy S6 or S6 Edge.
  • Backup EFS on your Galaxy S6 / S6 Edge
  • Make a Nandroid backup of your existing system.
  • Backup important messages,  contacts and call logs.
  • Download the ROM carefully for your device.
  • Follow this guide to the letter to avoid any mishaps.

Disclaimer:The methods involved in flashing custom recoveries, ROMs and rooting your phone are highly custom and may result in bricking your device, and has nothing to do with Google or the device manufacturer that is SAMSUNG in our case. Also rooting your device will void its warranty and you will be no longer eligible for any kind of free device services by the manufacturers/warranty providers. In case of any mishap we may not be held responsible. If your device has the Knox counter on the bootloader, it will be tripped and you won’t be able to reset it ever. Follow these instructions to the letter to avoid any mishap or bricking. Make sure that whatever you do, you are doing it at your own responsibility.

How To Install DN5 ROM on your Galaxy S6 / S6 Edge and get all Android Marshmallow Features

Before you flash this ROM, you need to make sure that you’ve read and applied all the guidelines explained above.

Required Downloads

  1. Download all the .zip files linked above according to your device and copy the downloaded files to the sd card of your Galaxy S6 or S6 Edge.
  2. Make sure that you’ve installed TWRP recovery on your Galaxy S6 / S6 Edge.
  3. Now boot into TWRP recovery, to  do so, turn off your device and then turn it on by pressing and holding Volume Up+ Home Button + Power Key. Select Wipe >Advanced Wipe > Wipe System, Cache and Dalvik Cache. You can also perform a factory data reset.
  4. Once you’re in TWRP recovery, tap Advanced option and perform a factory data rest.
  5. Now get back to the main menu in TWRP recovery and tap “Install > Locate the Ditto Note 5 ROM.zip file > Swipe finger to flash > flash the ROM”
  6. Now get back to the main menu once again, tap “Install > locate Fix Lockscreen DN5 V5.zip file > Swipe finger to flash > flash the file”.
  7. Similarly flash the SmartManager file.
  8. Once you’ve flashed all the files, tap Advanced wipe option and wipe cache + dalvik cache of your Galaxy S6 and S6 Edge.
  9. Now tap the Reboot option in TWRP recovery and reboot into system.
  10. Your S6 or S6 Edge will take a while to reboot into system. Once it boots up, you will have the Ditto Note 5 ROM installed with Android Marshmallow features on your phone. Enjoy!DN 5 S6 Edge DN5 S6 Edge

Credits: Electron Team

Download Traffic Rush 2 for PC – Windows and Mac

0
Download Traffic Rush 2 for PC – Windows and Mac

Following are the instruction on how to download and install Traffic Rush 2 for PC running Windows and Mac OS. Right now Traffic Rush 2 is only available for iOS so that’s why we’ll be using iPadian iOS simulator, it allows you to run iOS games on Windows. As soon as Traffic Rush 2 comes to Android, We’ll update the post with how to install Traffic Rush 2 for PC using BlueStacks and Andy. Before going any further let me give you an overview on Traffic Rush 2.

Traffic Rush 2 is the sequel of the famous arcade game smash hit, the theme of the game is simple, all you have to do is flick the cars on the road without crashing. In the following guide, I’ll tell you how to install Traffic Rush 2 for PC running Windows.

Traffic Rush 2 for PC

Download Traffic Rush 2 for PC Using iPadian:

ipadian for pc

  1. Download iPadian for Windows.
  2. Open iPadian.
  3. Tap on the App Store.
  4. Tap the Search Bar.
  5. Enter the Traffic Rush 2.
  6. If the app is available in iPadian store, then you’ll be promoted to Install it.
  7. Tap the Install button and Let the Installation begin.
  8. Once the Installation is over, head back to Main Page.
  9. Tap the Game icon to start using it.
  10. Enjoy!

How to enable hidden System UI Tuner in Android 6.0 Marshmallow and use it

0
How to enable hidden System UI Tuner in Android 6.0 Marshmallow and use it

Android 6.0 Marshmallow has a hidden System UI Tuner that allows customisation of the status bar. You can re-arrange and customise the quick settings and icons located in the status bar of your Android 6.0 Marshmallow using the hidden System UI Tuner. The System UI Tuner hides some cool options that may be used by Android power users. Wondering how you can locate this hidden System UI Tuner? Well, for that you’ll have to follow the instructions attached below. You can follow this guide to enable and access the System Tuner UI located inside Android 6.0 Marshmallow and customise your status bar.

It looks like Google has been learning quite a lot from the custom ROMs lately. Android came with only a few hidden settings until the Android 5.0 Lollipop. With the release of Android 6.0 Marshmallow, Google introduced a number of new features but kept them hidden. Android 6.0 Marshmallow has a hidden file manager, it also has a hidden multi-window mode, there are developer options that almost everyone of you knows and some other cool features like the Android logo hidden inside the version number of your Android device. These hidden settings are pretty much handy. If you’re an Android user having Android Marshmallow installed on your device, you must give a try to this newly discovered System UI Tuner to enhance your status bar.

How to enable hidden System UI Tuner in Android 6.0 Marshmallow

  1. Pull down the notification bar of your Android 6.0 Marshmallow powered phone or tablet.
  2. Long press the little gear icon located between the battery indicator and user profile picture in the status bar.
  3. Wait for 5 – 7 seconds while keeping the gear pressed, it will start spinning.
  4. One the gear starts spinning, it will display a notification as “Congrats! System UI Tuner has been added to settings.
  5. This will add System UI Tuner in the settings application of your Android 6.0 Marshmallow powered device.batch_12305962_10208050429561872_1054645433_n

How to access System UI Tuner after enabling it

  1. Once you’ve enabled System UI Tuner using the steps explained above, open the Settings app on your device.
  2. Scroll all the way down and locate “System UI Tuner” and tap it to open it.
  3. It will display you a warning messages as “Fun for some but not for all. These experimental features may change, break or disappear in future releases. Proceed with caution.”
  4. Tap “Got it” and proceed.batch_12309317_10208050429761877_1877827699_n

Customising the Status bar

Now that you’re inside the System UI Tuner settings, you will find a number of options. Here’s what you can do with these options.batch_12312493_10208050429041859_910427915_n

Quick Settings Tiles: You can make your desired quick settings tiles appear in the status bar using this option. You can also rearrange the tiles that appear in the status bar. You can also control the options that appear in the status bar such as battery percentage icon. After applying changes, you can enable a “Demo mode” to checkout your changes. In case you don’t like your applied changes and you want to reset these settings, you can simply tap the “Reset” button in quick settings tiles.batch_12297946_1203421076352843_799676498_o

Status bar: Using the Status bar option, you can hide icons from your status bar. In case you don’t want the icons of Hotspot, Do not disturb, Work profile, WiFi, Ethernet, Cellular Data, Airplane mode, Bluetooth, Cast to appear in your notification / status bar, you can hide these buttons using Status bar settings.batch_12312332_10208050430241889_91721235_n


Show embedded percentage option: This options helps you to modify the battery icon appearing atop of your status bar. For instance, if your device isn’t on charging, your device’s current battery percentage will be showing inside that little battery circle. You won’t have to pull down the notification bar to find out the remaining battery.

Demo mode: Demo mode wipes-off the status bar. It shows the full percentage for battery and full signal strength with time set to 6:00. Demo mode doesn’t seem to be purposeful as it only shows a wiped up notification bar.batch_12305622_10208050428881855_1486609105_n

That’s all. Let us know if you find this guide helpful. Thank all.