Home Blog Page 345

How To Manually Flash Updates Via Recovery And ADB

0
How To Manually Flash Updates Via Recovery And ADB

Most Android devices receive updates in two major ways – one is the release of Over The Air updates, or as we now know as the OTA Updates, and the other types are update patches, which the user can manually flash according to his/her liking. However, it takes quite a long time for an update to be released globally, and made available to all users of the specific device. Say, if the latest update for the Galaxy Note 5 was released in Europe, and it was scheduled for North America for a week later, then the desperate wait isn’t worth it.

Users can obtain the update file, which is normally around a few megabits, and flash it manually on their respective Android devices. In this procedure too, there are two types. One is to use the stock or custom Recovery to flash an update ZIP, or to go the official way is to flash the update file using the ADB and Fastboot commands, while connected on a PC.

maxresdefault

Flash Update Using Recovery:

1. Acquire the update file, and save it on your Android device.

2. Turn your device off, and boot into the recovery mode using a special button combo which is specific to all devices.

3. While in recovery, select ‘Apply Update’, or ‘Choose Update from SD Card’, and find and locate the update file you’ve earlier transferred.

4. Once located, select it using the power button, and confirm the flash by selecting ‘Yes’.

5. This might take several minutes depending upon the update size.

6. Once done, reboot your Android device and enjoy your new experience.

Flash Update Via ADB:

1. Make sure you have ADB and Fastboot setup on your PC, and download the update file, and rename it to ‘Update.Zip’ for ease.

adb reboot recovery

2. While in recovery mode, you are now to select on the phone the option which reads ‘Apply Sideload from Fastboot’, or any similar option.

adb sideload ota.zip

3. This will begin the OTA installation.

4. This process might take a lot of time, so just be patient.

5. Once done , reboot your device and disconnect it from your PC.

If you think our guide has helped you, share the word around. If you experienced any causalities while in the process, do let us know in the comments below.

Download 20 Happy New Year 2016 Mobile Wallpapers [ Free ]

0
Download 20 Happy New Year 2016 Mobile Wallpapers [ Free ]

New Year just around the corner and we’ve a perfect treat for all the smartphone users, We’ve have collected the 20 HD Happy New Year 2016 Mobile Wallpapers for all of you. Also we have posted some cool Happy New Year 2016 Wallpapers for your desktop PC. Enjoy the free Happy New Year 2016 Mobile Wallpapers.

happy-new-year-2016-hd-wallpaper

Download 20 Happy New Year 2016 Mobile Wallpapers

happy new year wallpaper 2015

happy_new_year_with_clock

Happy New Year Animated 3D Wallpaper

happy-new-year-2016-wallpapers-mobile

New Year 2015 packages for Party & Events

New Year 2016 Live Wallpaper 2

happy new year wallpaper mobile

happy-new-year-2016-images-2

New-year-images-2016-free-download-1

Happy-New-Year-2016-Wallpaper-Download-For-Mobile

N1

New-Year-2016-Celebrations-Photos

Happy-New-Year-2015-hd-wallpaper

Happy New Year 2015 Mobile Wallpaper

happy-new-year-2016-pics-wide-wallpaper

happy-new-year-2016-wallpaper-for-desktop

Happy-New-Year-2016-Animated-HD-wallpaper

Happy-New-Year-Goldn-Color-2016-Welcome-2016 New Year 2016 Live Wallpaper


Android 6.0 Marshmallow on the Galaxy Note 4 First Look [ Video ]

0
Android 6.0 Marshmallow on the Galaxy Note 4 First Look [ Video ]

As we told you earlier that Samsung Galaxy Note 4 received Android 6.0 Marshmallow update on model SM-N910F. Today the same source upload a video review of Android 6.0 Marshmallow on the Galaxy Note 4, as we all know that its early build and didn’t come on international version so we all have to wait for it.

Note-4-Android-6-0

Some important changes at a glance:

  • Faster user interface and smoother animations (Video on laggolt the system because of language change, but this is not typical at other times, faster overall, the new software)
  • New icons
  • New Air Command menu like Note 5
  • Quick note-taking options without unlocking the screen.

how to get free Wi-Fi anywhere [ Tips ]

0
how to get free Wi-Fi anywhere [ Tips ]

We all know the feeling, just when you least expect it, your perfect time turns into panic time when you can not get an internet connection. So what do you do ? Luckily, there are certain ways where you can find free Wi-Fi no matter where you are. Here is how you can get free Wi-Fi everywhere.

how to get free wifi
©Techbeasts

WeFi App:

If you want a quick way to scan your area for nearby hotspots, check out a free app called WeFi. This app is dedicated to finding available free Wi-Fi around you. The app includes around 200 million Wi-Fi hotspots worldwide. It will find a free Wi-Fi in your area and will automatically connect your device.

Android Scanner:

Luckily, your Android phone can also detect any available internet connections n your area and it also shows if the connection is secured or not. Simply go to Settings> Wi-Fi and see connections that are unsecured or Open. Go ahead and try your luck here as not everyone is finicky about protecting their Wi-Fi.

Ask a Stranger:

If you come across some who seems friendly and nice, you can try asking for their Wi-Fi passwords. Most people you meet in public places are not so over-protective about their Wi-Fi passwords and might just give them away to you for free internet. You might also want to look around and check for any Wi-Fi passwords written on a piece of paper or on a board.

Join InstaBridge Community:

This community is amazingly generous. Here you will find a compilation of Wi-Fi connections and Passwords and locations where they are available. The list is huge and includes password protected Wi-Fi that are secure to use.

Check Your Cable Company:

Depending on your provider, you might have access to free Wi-Fi and not even know it. Cablevision, Comcast, Time Warner, Bright house and Cox communications all provide more than 250,000 free hotspots. You can also visit your provider’s Wi-Fi homepage for more information.

Starbucks or McDonalds:

Otherwise, when nothing else works, you can simply go to McDonalds or Starbucks knowing that these big food chains welcome their customers with open arms and of course free Internet.

Library:

Just like Starbucks or McDonalds, your library will also welcome you with Wi-Fi and the password might just be written on a wall or you might have to ask someone out there for the password. Good thing is that you can enjoy your free Wi-Fi in peace unlike other public hangouts.

Ask Your Friends:

Your friends might have subscribed to a bigger data plan than yours and if this is the case, there is no harm in tethering your phone to your friend’s device. This will be enough for you to check quick notifications or your emails. However, you might not want to suck up their data by watching videos for long enough.

Give and Take Approach:

Lastly, remember to always have a give and take approach. Whether at work, at home or elsewhere, always be ready to share your Wi-Fi hotspot and if you use the privilege of free Wi-Fi from your friends, always return the favor and share yours too. No internet, No problem. Try these tips to find a free internet connection anytime, anywhere.

Install Android 6.0 Marshmallow on Galaxy Grand I9082/L via AOSP ROM

11
Install Android 6.0 Marshmallow on Galaxy Grand  I9082/L via AOSP ROM

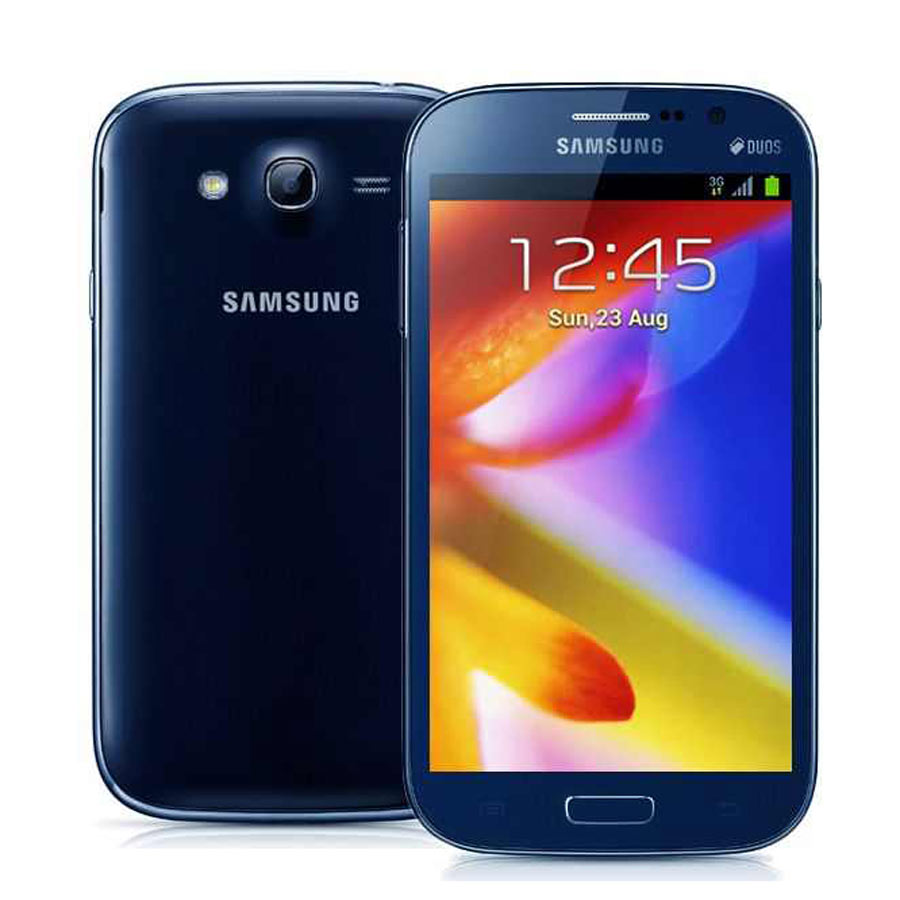
AOSP Android 6.0 Marshmallow custom ROM has made its way to the original Galaxy Grand GT-I9082 and GT-I9082L. If you’re looking for a way  to flash this custom ROM in order to give your Galaxy Grand a look and feel of the all new Android 6.0 Marshmallow, you may find this post pretty useful. We are going to learn a step-by-step set of instructions to install Android 6.0 Marshmallow AOSP custom ROM on our beloved Galaxy Grand GT-I9082 and I9082L in the succeeding guide. Before we install Marshmallow on Galaxy Grand, we will have a recap of this device.Samsung-Galaxy-Grand-Duos-I9082-Metallic-Black-01__45246

Galaxy Grand, Samsung’s mid-ranger popped up for the first time back in the year 2013. Samsung flaunted this phone with a 5-inch 480p display. Galaxy Grand caught an 8 MP shooter at its back and 2 MP on the front. A Dual-core CPU clocked at 1.2 GHz was fixed inside alongside a RAM of 1 GB. Galaxy Grand ran on Android 4.1.2 Jelly Bean and was upgraded to Android 4.2.2 Jelly Bean and that’s where its official software support died. Samsung didn’t look back at this device and since then, the only new life this device has been getting is by means of custom ROMs. Earlier we posted a method to update the Galaxy Grand to Android 5.0 Lollipop using a custom ROM as well. Now that Marshmallow custom ROM is available, we will flash this ROM on Galaxy Grand and enjoy the latest and greatest version of Google’s Android OS. Let’s learn a little bit about this AOSP Android 6.0 Marshmallow in order to be able to install it now.

Current version of Android 6.0 Marshmallow AOSP ROM is in the alpha stages. The ROM is expected to be buggy and unstable. The mainstream features like Calls, SMS, Mobile Data, Camera and sensors are found to be working. Some features like FM Radio, Google Play Movies are not working for now. You may flash this ROM on your device just to enjoy the Marshmallow firmware, but it may not be kept as a daily driver. Also make sure that you know how these custom ROMs work and how to handle them. We recommend newbies to be very careful while flashing this ROM. Let’s have a look on the working stuff and the known issues.

What’s working in this AOSP Android 6.0 Marshmallow for Galaxy Grand?

  • RIL (Calls, SMS, Mobile Data)
  • Wi-Fi/Bluetooth
  • Sensors (Accelerometer, Compass, Light, Proximity, etc.)
  • Camera
  • Video (playback & recording)
  • Audio (playback & recording)
  • GPS
  • Everything else not listed under “known issues”

What’s not working?

  • AOSP keyboard does not support gesture typing even with gapps installed. This is to prevent crash with not fully compatible gapps packages. If you want gesture typing, install Google Keyboard from the Play Store.
  • Google Play Movies (widevine DRM) does not work
  • FM Radio does not work
  • SELinux is in permissive mode
  • Runtime storage permission does not work properly (setns patches are not applied, see PermissionsHostTest CTS test)
  • Sometimes wake up causes music stutter

Pre-install instructions

  1. This guide is only intended for Galaxy Grand GT-I9082 and GT-I9082L. Do not try flashing this ROM on any other device, otherwise you will result in bricking it.
  2. Your device must be running stock Android 4.2.2 Jelly Bean before flashing this ROM. Do not flash this ROM over Android 4.1.2 Jelly Bean or any other custom ROM.
  3. Make sure that your phone is charged at least 50% to avoid power issues during the process.
  4. Install CWM recovery on your Galaxy Grand. This guide will work for both I9082 and I9082L variants.
  5. Create a Nandroid backup of your Galaxy Grand using the recovery.
  6. Also create an EFS Backup of your Galaxy Grand.
  7. Also backup your Contacts, Call Logs and SMS Messages.
  8. Follow the instructions carefully to avoid any mishap.

Disclaimer: Flashing custom ROMs is a highly risky process. In case of a mishap, TechBeasts or the ROM developer may not be held responsible. Make sure that you’re doing everything at your own risk.

How to Install Android 6.0 Marshmallow on Galaxy Grand  I9082/L via AOSP ROM

  1. Download latest AOSP Marshmallow.zip file for your device
  2. Download Gapps.zip file for Android Marshmallow.
  3. Connect your phone to your PC now.
  4. Copy all .zip files to the storage of your phone.
  5. Now disconnect your phone and turn it off complete.
  6. Boot into CWM recovery now, in order to do so, turn it on by pressing and holding Volume Up + Home Button + Power Key. You should see the recovery mode in a while.
  7. Now in CWM recovery, wipe cache, factory data reset and advanced options > dalvik cache.
  8. After wiping all these three, select “Install zip” option.
  9. Now select “Install zip > Choose Zip from SD card > Select AOSP Marshmallow.zip file > Yes”.
  10. This will flash the ROM in your phone, once done get back to the main menu in recovery.
  11. Now once again select “Install Zip > Choose Zip from SD card > Select Gapps.zip file > Yes”
  12. This will flash the Gapps in your phone.
  13. Reboot your device.
  14. You should see the Android 6.0 Marshmallow running on your device in a while.
  15. That’s all!

Got any queries? Reach us out through the comment box below.

Source

Install Surround Sound MOD on your LG Nexus 5X

0
Install Surround Sound MOD on your LG Nexus 5X

Surround Sound MOD is now available for LG Nexus 5X. If you’re looking for a guide to flash this MOD on your Nexus 5X to enhance it sound, you may have spotted the right place. You will find a proper set of instructions to flash this Surround Sound MOD on your LG Nexus 5X conveniently in the succeeding guide. Let’s have a look on what this Surround Sound MOD can do on your Nexus 5X and then head towards the guide.Nexus-5X

LG Nexus 5X comes with only one speaker which makes the sound less audible. If you’re disliking the music experience on your LG Nexus 5X, you may be in a need of some method to enhance the sound staying on the same device rather then being disappointing and thinking of moving on to another device. Since we have a great community of developers working at XDA, a solution was expected for sure and it’s here now. XDA senior member sshafranko has posted a Surround Sound MOD for our beloved Nexus 5X. What this MOD does is, it activates your earphone speaker to work with your phone’s main speaker at the same time while the music is being played or you’re watching a video, movie or any other sound coming out of your device. It doesn’t beat the Sound experience of the Nexus 6’s dual front speakers, but its fairly good as compared to that of the lone-speaker on this phone. This MOD is named as Surround Sound because it gives you a Surround Sound-Like experience, but its not the real Surround Sound sound effect. There are two different forms of this MOD available. You can flash Surround Sound and also flash a MOD to increase the volume coming out of your handset speaker. Let’s go ahead now and have a look on the guide.

Pre-install instructions

  • The Surround Sound MOD is available for Nexus 5X only. Do not try this MOD on any other phone. You may end up soft-bricking your device in that case.
  • Make sure that your phone’s battery is charged at least 50% to avoid any power issues during the flashing process.
  • Install TWRP recovery and root your Nexus 5X.
  • Backup Nandroid. This is highly recommended to make sure that if a mishap occurs, you still have access to all of your data and recover your device easily.
  • Follow the instructions carefully to avoid any mishap.

Disclaimer: Flashing custom recoveries, MODs and rooting the device voids its warranty. In case something goes wrong, TechBeasts or the MOD developers may not be held responsible. Make sure that you’re doing this at your own risk.

How to Install Surround Sound MOD on your LG Nexus 5X

  1. Download the following ZIP files and copy to your phone’s internal or external storage.
    1. SURROUND SOUND.zip
    2. UPPER (Handset) SPEAKER LOUD.zip
  2. Now boot into TWRP recovery on your phone.
  3. Select Install Zip option.
  4. Now locate the .zip files from the location you copied it to.
  5. Select the .zip files one by one and flash those.
  6. Once flashed, wipe cache and dalvik cache of your device.
  7. Reboot your device and play a song to checkout the Sound.
  8. Just in case you want to uninstall the MODs, simply flash the Nexus_5x_ReverttoStock.zip using the same instructions from step B to F.

That’s all. Stuck with something? Reach us out through the comment box below.

Source

Breaking News: Galaxy Note 4 just got Android 6.0 Marshmallow

1
Breaking News: Galaxy Note 4 just got Android 6.0 Marshmallow

Yes it’s true Samsung Galaxy Note 4 got Android 6.0 Marshmallow Update with the firmware build (version N910FXXU1DOL3X). That’s surprising because Note 5 and S6 Edge plus are in line two, but I think Samsung is thinking to give last year best device a taste of Android 6.0 Marshmallow before others. Check out screen shots of Android 6.0 Marshmallow on Samsung Galaxy Note 4.

Note-4-Android-6-0

Good cropping were shown as icons, which, incidentally, corresponds to the earlier expectations. The notification bar and fast switches, however, have not changed. Based on the first experience of the system it was faster than the previous version, and the animations are also much folyamatosabbak, which is definitely encouraging.

Screen Shot 2015-12-07 at 02.55.12

Screen Shot 2015-12-07 at 02.57.06

Source

How To Factory Reset Galaxy Note 4 [ Complete Guide ]

0
How To Factory Reset Galaxy Note 4 [ Complete Guide ]

If you happen to be one of those people who have a Samsung Galaxy Note 4, and also happen to be a true Android Geek like many of us, then you might have heavily or slightly tweaked your Samsung Galaxy Note 4, by rooting it, installing a Custom Recovery, or installing a Custom ROM. But the only down-side of using an Android device to its true potential is that the fact that it has a lot of bugs. So, your Samsung Galaxy Note 4 might be lagging a lot now, due to the Custom stuff that you have done with it. Your games could be crashing every now and then, or worse, your Samsung Galaxy Note 4 might be really laggy, and might even hang most of the times. You might think that the only possible way to get rid of the problems is to revert back to stock. But, the real solution starts from just having a Factory Reset done on your Samsung Galaxy Note 4. Statistics show that the majority of the problems that your Android device is suffering through right now, can be cured by just performing a factory reset. That’s what we are going to teach you all in this guide. So, with your Samsung Galaxy Note 4 beside you, start reading this guide with caution, and it might affect you in a positive way by discarding any such issues that you are experiencing on your Samsung Galaxy Note 4. So, without any further delay, let’s get right into the guide!

How-To-Fix-Galaxy-Note-4-Battery-Life-Issue-After-Lollipop-1000x500

How To Factory Reset Galaxy Note 4 [ Complete Guide ]:

Requirements:

  • In-order to successfully factory reset your Samsung Galaxy Note 4, you’ll need no special requirements, like a root or a Custom ROM.
  • You need basic knowledge about what a factory reset does to your device. It wipes off everything that is on your Samsung Galaxy Note 4.
  • You need to backup everything that’s left on your Samsung Galaxy Note 4 now. We insist you make a simple Nandroid Backup.
  • You also need to know how to enter the Recovery Mode in the Samsung Galaxy Note 4. In order to do so, just press-and-hold the Volume Up + Power Keys + Home Button at the same time.

Once everything you need is all-set, you just need to carefully follow the steps below to factory reset your Samsung Galaxy Note 4.

How to factory reset the Samsung Galaxy Note 4:

Follow each and every steps with caution.

1. Make sure that you have backed up everything that you feel is important. We insist you to take a full Nandroid backup of the ROM.

2. Now, quickly Power Off your Samsung Galaxy Note 4, and wait till it vibrates, which symbolizes that it is fully turned off.

3. Now, boot into the Recovery Mode using the instructions that I provided above.

4. Once you see the Recovery Mode, let go of the buttons, and then continue.

5. To navigate, you need to use the Volume Up and Down keys, and to select, the Power Button.

6. Good, now navigate and select the option which reads ‘Factory Data/Reset’.

7. Now, choose the option, and confirm by selecting ‘Ok’.

8. This process might take some time.

9. Now, your Samsung Galaxy Note 4 will boot. Note that the time this boot will take will be considerably more. Just be patient.

10. Once it boots up, you’ll be using a new Samsung Galaxy Note 4 in no time! No more bugs! Yay!

Great, good job! You’ve successfully factory reset your Samsung Galaxy Note 4. If you encountered any issues while in the process, then feels free to leave a comment below.

How To Block Calls On Android Devices [ Guide ]

0
How To Block Calls On Android Devices [ Guide ]

Don’t you get the annoying feeling of a specific person always irritating you with calls or text messages on your Android device all the time? Well, you can easily block the person using the in-app dialer or contacts application itself. However, the major OEMs like to hide it down in various buried down menus, and in order to find the specific option, it is normally a haste. We have created a guide where all the major OEMs have placed this option differently. Here’s how to block calls on Android devices.

How To Block Calls On Android Devices

How To Block Calls On Android Devices [ Guide ]:

Samsung Devices:

1. On a Samsung device, open the dialer application, and choose call logs from the various tabs you see.

2. Tap on the number you like to be blocked, and then tap on the button which reads more.

3. You will now see an option wherein you can block the user completely from sending you texts or calling you. Tap on the auto-reject option, and call it a day.

4. To revert the process, do the same exact thing, and instead of seeing an option to enable blocking of the specific contact, you will be able to see an option to unblock him/her instead.

Stock Android:

1. In the stock version of Android, you need the contact saved in your phonebook in order to block it.

2. First save the contact you want to block, and hop into Contacts application.

3. From there, tap on the name of the person you’d like to block, and tap the little pencil icon right beside it.

4. Now, enable the option which reads enable voicemail. Instead of directly displaying a block option, Google played it safely.

HTC Devices:

1. The same is with the case of HTC phones. Open up the dialer, and fire up the contact you want to be blocked.

2. Tap and hold on the contact, and select ‘ Block Caller’.

3. To enable the use of searching for blocked contacts, use the menu icon in your dialer application, and use the blocked contacts application.

Sony Devices:

1. Exact is the case with Sony devices, such as it is with Stock Android devices.

2. You need the contact saved in your phonebook in order to block it first.

3. Once saved, go ahead and open the contact.

4. Use the little menu button, and then select ‘All calls to Voicemail’.

Great going! You now no more need to be bugged of people you have no interest in talking or texting with! If you think our guide was helpful, please rate it and share it thoroughly.

How to enable OEM Unlock on Android Lollipop, Marshmallow

34
How to enable OEM Unlock on Android Lollipop, Marshmallow

Google introduced a new security feature in Android from Android 5.0 Lollipop onwards. The new feature named “OEM Unlock” has a meaningful purpose in the device. If you’ve tried rooting your device, unlocking its bootloader, flashing a custom recovery or ROM, you must have seen “OEM Unlock” option to be checked as a requirement for doing any of the aforementioned custom processes.

In case you’re wondering what is this “OEM Unlock” and why you need to enable it on your Android device before flashing any custom images, we have the answer for you here. We will learn about OEM Unlock and also go through a method to enable OEM Unlock on Android in the succeeding guide.

What is OEM Unlock?

The original equipment manufacturer unlocking option in your Android device is there to restrict the flashing of any custom images and bypassing its bootloader. This new security feature resides in your Android Lollipop + device to ensure that your device is not directly flashable without having the OEM Unlock option enabled. For instance, if your Android device is stolen or someone is trying to play with your device.

Luckily your Android device is password, pattern or pin protected and that someone is willing to flash some custom files on your device to get some data out of it or have access to it by flashing any custom images, he/she won’t be able to do so unless that person enables OEM Unlock from developer options. This is where this feature becomes handy. Custom images will be only flashed on your Android device if the option is enabled, if your device is already protected by some password or pin, no user will be able to enable this option.

The only thing that can be done in this case is wiping the factory data, that will result in wiping the device completely, that means no one will be able to access your data in this case but will lose it instead. That’s all about OEM Unlock. Now that you have got an idea about what this OEM Unlock is, let’s go ahead and enable OEM Unlock on your Android Lollipop or Android Marshmallow device.

How to enable OEM Unlock on Android Lollipop and Marshmallow

  1. On your Android device, go to settings.
  2. Now in settings, scroll all the way down and go to About device.
  3. Now in About device locate the build number of your device. If build number is not there in the About device section, it must be inside About device > Software. Tap the build number for 7 times to enable developer options.
  4. Once you’ve enabled developer options, develop options will appear in settings just above the About device option.
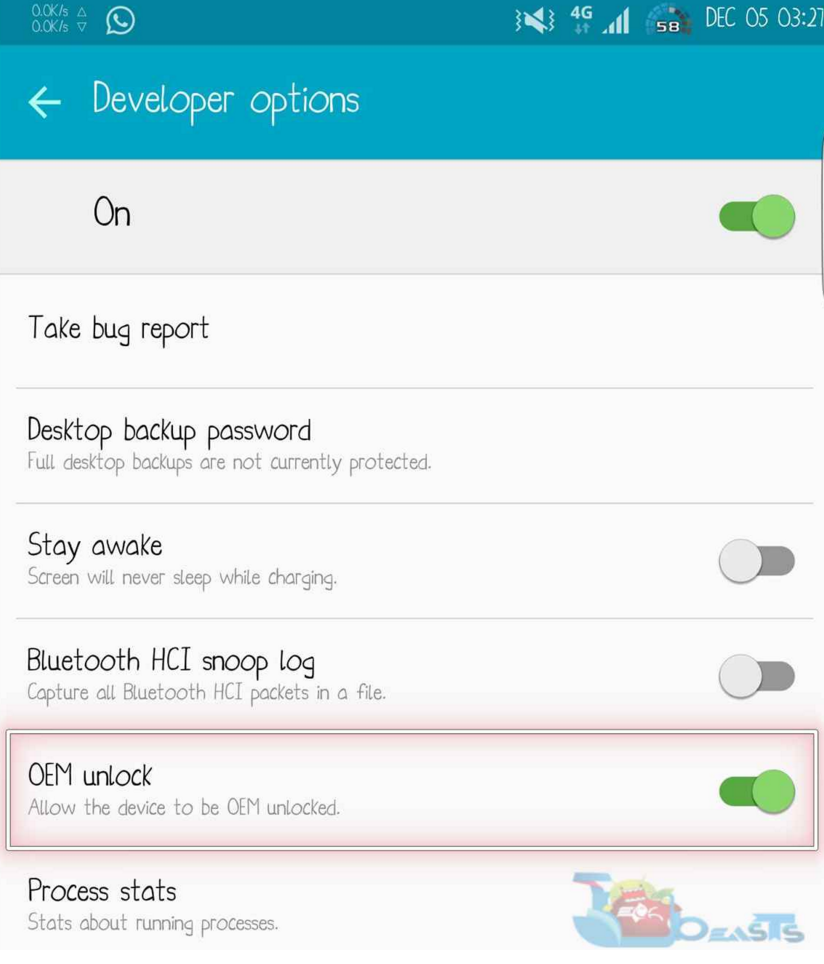
  5. Open developer options, the 4th or 5th option should be “OEM Unlock”. Turn on the small icon next to it and that’s all. You’ve enabled OEM Unlock.

Screenshot at Dec 29 16-06-52

Let us know if you’ve got any queries.

Install Android 6.0 Marshmallow on Samsung Galaxy S I9000 via OmniROM

4
Install Android 6.0 Marshmallow on Samsung Galaxy S I9000 via OmniROM

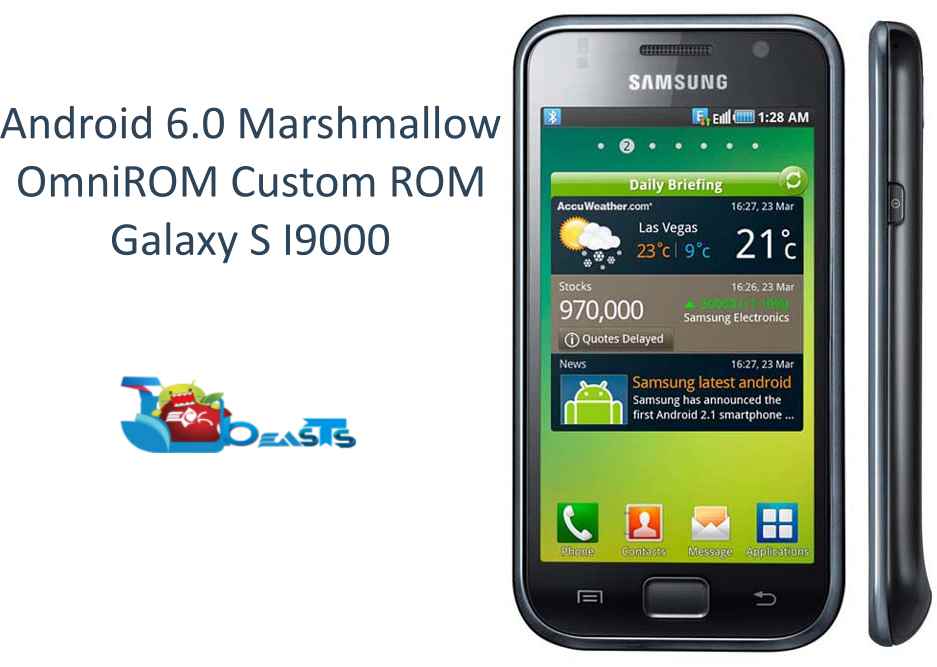
We are about to show you a step-by-step guide to install Android 6.0 Marshmallow via OmniROM on your Samsung Galaxy S GT-I9000.

Android 6.0 Marshmallow is now available for the very first Galaxy, the Samsung Galaxy S GT-I9000. This isn’t less then a surprise for the Android enthusiasts. If you have your Galaxy S lying around full of dust or you’ve locked it down in your drawer, its time to take it out and wipe the dust off to give it a new life. Android 6.0 Marshmallow has been made available for the original Samsung Galaxy by means of unofficial Omni custom ROM. The ROM is still in Alpha stage of development, but the mainstream features like WiFi, RIL, Bluetooth, Camera are found to be working pretty fine. You can flash this ROM on your Galaxy S by through a custom recovery and have a touch and feel of Android 6.0 Marshmallow. Let’s have a recap on the Samsung Galaxy S and then head towards the OmniROM Android 6.0 Marshmallow installation guide.Samsung-I9000-Galaxy-S-163

Samsung Galaxy S is the device that made Samsung enter into the smartphone business. Samsung Galaxy S brought Samsung a lot of good fortune. The device originated back in the year 2010 and ran on Android Eclair out of the box. Galaxy S’s software life ended on Android Gingerbread. Since then, Samsung has forgot this device. Samsung Galaxy S has been seeing higher versions of Android unofficially. The device was updated to Android Jelly Bean, Android KitKat and Android Lollipop by means of custom ROMs like CyanogenMod, OmniROM etc. The latest version of Android is Marshmallow, Marshmallow has made its way to the Galaxy S packed inside Omni ROM. Let’s go through the pre-installation instructions and then flash the ROM.

Pre-installation instructions

    1. This guide is only for Samsung Galaxy S GT I9000. Do not try this on any other device. Check your device’s model under Settings > About device.
    2. Make sure that your phone’s battery is charged enough to do all the process. It should be at least 80%. This is highly recommended to prevent any power issues during the flashing process.
    3. Your device must be rooted and have a custom recovery installed. Follow our full guide here to root and install CWM recovery.
    4. After you’ve installed CWM recovery, boot into it (Volume Up+Home Button + Power Key) and backup your current ROM/System using the backup option in the CWM. This is highly recommended in case something goes wrong and you want to go back to the previous working state of your phone immediately.
    5. Make sure that you’ve backed up all your important media content, contactscall logs and text messagesThis is highly recommended in case you need to wipe your phone during the installation process or something goes wrong.
    6. Flash this ROM only if you know what you are doing, if you have much knowledge about the Custom ROMs and if you can handle the nightly builds.
    7. As said earlier, this is an alpha build, and may contain a lot of bugs, this ROM may not be kept for every day use. We may not be held responsible for any kind of bugs or mishaps.
    8. Alright! Make sure that you applied all the pre requisites and pre cautions as explained, follow this guide to the letter to avoid any mishaps.

Disclaimer: The methods involved in flashing custom roms and rooting your phone are highly custom and may result in bricking your device, and has nothing to do with Google or the device manufacturer that is Samsung in our case. Also rooting your device will void its warranty and you will be no longer eligible for any kind of free device services by the manufacturers/warranty providers. In case of any mishap we may not be held responsible. Follow these instructions to the letter to avoid any mishap or bricking. Make sure that whatever you do, you are doing it at your own responsibility.

Install Android 6.0 Marshmallow on Samsung Galaxy S I9000 via Omni ROM

    1. Download Omni ROM Android 6.0 Marshmallow for Galaxy S1: omni-6.0-20151201-galaxysmtd-HOMEMADE.zip
    2. Download Gapps for Android 6.0 Marshmallow : open_gapps_galaxysmtd.tar.gz
    3. Place both the downloaded .zip files on your phone’s internal or external sd card.
    4. Boot into CWM recovery on your phone. To do so, turn off your device completely, now turn it on by pressing and holding Volume Up+Home Button+Power Key, you will see the CWM interface now.
    5. In CWM recovery wipe factory and cache.
    6. Now select “Install Zip > Choose Zip from Sd/Ext Sd > Select the Omni ROM.zip file ”.
    7. Select “Yes” and begin the flashing process, it will take a few minutes to install Android 6.0 Marshmallow OmniROM on your phone.
    8. Now once again select “Install Zip” in CWM recovery, and select Gapps.zip file this time.
    9. Select “Yes” and flash the Gapps for Android 6.0 Marshmallow.
    10. As soon as the flashing is done, Reboot! Phewww! You’ve successfully installed Omni custom ROM on your Samsung Galaxy S, you should see the Marshmallow OmniROM logo on the boot screen now.
    11. The first run will take some time to boot you into the home screen, in case the boot screen is stuck on the boot logo, boot into CWM recovery and wipe cache and dalvik cache, reboot and it should take you into the home screen.

That’s All! In case you have any queries, suggestions or face any difficulties, feel free to stop by the comment box below. We will try our best to catch you up. Thanks All!

Source

Temple Run 2 Frozen Shadows APK Download

0
Temple Run 2 Frozen Shadows APK Download

Imangi Studios updated their famous Temple Run 2 game. Temple Run 2 has a Frozen makeover now. The new updated game, Temple Run 2 Frozen Shadows brings some cool changes in this game and seems to be reviving the game among Android enthusiasts. Temple Run 2 Frozen Shadows brings a new Frozen land and Frozen Forests where you’ve to run as long as you can collecting coins and other different bonuses. The Snowy Monkey is running after you, make sure that he doesn’t catch and eat your character. Temple Run 2 Frozen Shadows also brings new costumes for your character. Over-all, this game has got some great cosmetical enhancements.Temple Run 2 Frozen Shadows

Temple Run 2 Frozen Shadows update is available in the Play Store. However, if you’re looking for its APK file to install it manually on your Android smartphone or tablet, then you can download it from here. We have grabbed Temple Run 2 Frozen Shadows APK file and linked it alongside the installation instructions. Just go ahead, download Temple Run 2 Frozen Shadows APK and install it on your device to enjoy this all new variant of Temple Run 2.

Temple Run 2 Frozen Shadows APK and How to Install

  1. Download Temple Run 2 Frozen Shadows APK
  2. Download the file to your phone straight away, or copy it to your phone from your PC.
  3. Now on your phone, go to settings > security > allow unknown sources > check this.
  4. Now using a file manager, locate the APK file that your just copied or downloaded.
  5. Tap the APK file and finish installation using the on-screen instructions.
  6. Once installed, access the newly installed game through app drawer.
  7. That’s all. Enjoy Temple Run 2 Frozen Shadows!