Home Blog Page 349

Top 3 Weather Applications For Android

0
Top 3 Weather Applications For Android

In today’s world, the weather is totally unpredictable, especially due to global warming, and sudden temperature rise. Anyways, this website isn’t to bore your wonder some readers with some environmental talk, and thus here we are with the top 3 weather applications for Android. Our picks are random, but we have ensured that the applications we’ve chosen are one of the finest.

Yahoo Weather:
Screen Shot 2015-11-19 at 01.24.21

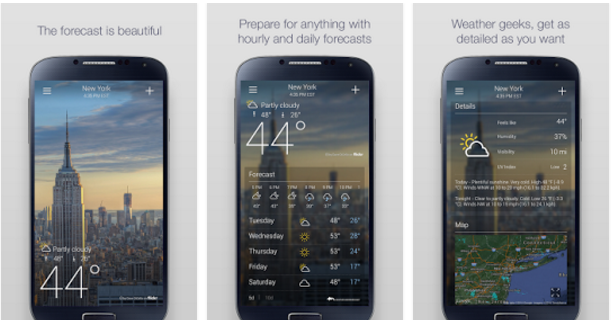
Not only is this application from one of the most well-known developers out there, but this application is one of the finest looking out there. There is the ever-changing wallpapers in the background of the entire application, which grabs some seriously amazing wallpapers from Flickr. You will also be notified about the latest weather in your status bar, moreover this application comes with a lot of different sized widgets.

Google Now (Card):

Screen Shot 2015-11-19 at 01.25.27

There is everything that Google implements in its applications, and there is a weather section in the google now feed on everyone’s device. The great part is that you need not install another application just for the weather. Google Now is just one swipe away from your homescreen, and gives an intuitive weather panel. You will be able to make out the weather for the next few days, and the way it displays is just beautiful.

1Weather:

Screen Shot 2015-11-19 at 01.26.11

There is no doubt that this application is one of the most beautiful amongst all other weather applications. In addition, it offers precipitation info, animated sunrise and sunsets, and an accurate 10-day weather forecast. On the design side, 1Weather has live weather backgrounds and live animated radars for severe weather, and gives you the option of creating your own background.

That’s it for our pick of the top 3 weather applications For Android, why won’t you want to stay tuned to our website for more content like this now?

Top 3 Free Android Applications To Download Music

0
Top 3 Free Android Applications To Download Music

Music is everywhere, and now that Android is one of the most versatile OS around the globe, it has paved way for many developers to port the best music streaming applications to our beloved Android devices. Every Android application comes with a curse and a boon, and many-a-times, the boon is the factor that we love to explore more about. Our research in finding the best music downloading applications for Android would never end, but the fact that there are numerous of them around is just sweet. This is our pick for the top 3 free android applications to download music.

free apps for music download

Google Play Music:

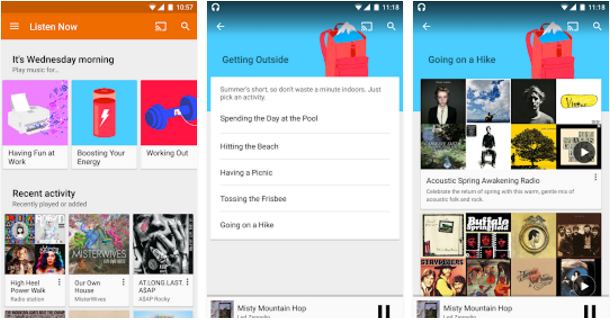
It sure is developed by one of the most precise developers out there, Google itself. Google Play Music is one of the many Play applications, which just joys Android users like us. Not only does it provide amazing timely updates, but also fancies the latest Android Marshmallow’s looks. Moreover, Google Play Music allows users to choose songs from a vast library of content, and download it for free on their devices. Google Play Music is as sweet as it gets, and you shouldn’t waste any more time looking for an alternative.

Screen Shot 2015-11-19 at 01.05.17

RockMyRun:

While this application might not be known much in the music genre, it is one of the best to choose from. RockMyRun doesn’t only have a wide array of content to choose and download from, but it has a lot of DJ Mixes you’ll love. Moreover, if your Android device is running out of memory, this application can just cache the song in the background, and get it offline for you, leaving the legal thingy out of the market.

Screen Shot 2015-11-19 at 01.09.56

4Shared Music:

One of the best file uploading service itself, 4Shared Music has over 6 Million songs to download. There is probably no song you couldn’t find in its enormous library. Music you download is automatically added to a 15 GB 4shared cloud folder, which is available to listen to offline. You can add your own tunes to that folder too. While its design language might seem quite out-of-date, it is no doubt that 4Shared Music is the best music downloading application you can get for free on the Google Play Store!

Screen Shot 2015-11-19 at 01.13.04

That’s it for our pick for the Top 3 Free Android Applications to Download Music. Make sure you stay tuned for more content such as this!

Download Bubble Shooter Birds for PC – Windows and Mac

0
Download Bubble Shooter Birds for PC – Windows and Mac

Following are the instruction on how to download and install Bubble Shooter Birds for PC, Bubble Shooter Birds is puzzle game designed for iOS and Android devices. The concept of Bubble Shooter Birds is same like all other match-3 puzzle games on Google Play, but in this game you have to shoot birds instead of bubbles and balloons. Bubble Shooter Birds is not available for PC but we can still install it using third-party emulators.

In the following guide I’ll be telling you two methods to install Bubble Shooter Birds for PC running Windows and Mac. We’ll be using third-party emulators like BlueStacks and Andy, follow the steps as mentioned below in order to successfully install Bubble Shooter Birds for PC.

Screen Shot 2015-11-18 at 02.07.34

How To Install Bubble Shooter Birds For PC or MAC Using BlackStacks

Method 1:

  1. Install Bluestacks on your PC or MAC.
  2. Download Bubble Shooter Birds Apk on your PC.
  3. Make sure that you have installed Bluestacks. Double-click the downloaded Bubble Shooter Birds Apk to install it.
  4. The APK will be installed through Bluestacks, once the notification pop-ups determining the installation completion, open Bluestacks.
  5. Now click on My Apps and then click on Bubble Shooter Birds.
  6. The application will open up. Now follow on-screen instructions to Bubble Shooter Birds.

Method 2:

  1. Install Bluestacks on your PC or MAC.
  2. Open Bluestacks and setup your Google Play Store account.
  3. Now open Google Play Store and search for “Bubble Shooter Birds“.
  4. Once found, install Bubble Shooter Birds.
  5. Now click on My Apps and then click on Bubble Shooter Birds.
  6. The game will open up. Now follow on-screen instructions to Play Bubble Shooter Birds.

How To Install Bubble Shooter Birds For PC or MAC Using Andy OS

  1. Download and install Andy OS on your Windows PC or MAC.
  2. Once downloaded, open Andy OS.
  3. Setup Google Play Account on it.
  4. Now open Apps > Google Play Store and search for “Bubble Shooter Birds“.
  5. Install Bubble Shooter Birds and wait for it to finish the installation.
  6. Once done, open “Uncategorized” portion in Andy and click on Bubble Shooter Birds to play it.
  7. That’s all.

Top 4 alternatives to FaceTime on Android

0
Top 4 alternatives to FaceTime on Android

FaceTime is built-in app for iOS users and its restricted to only Apple devices, FaceTime allows to video call from iPhone to iPhone and also now it support voice over IP calling too. Back in 2010 when FaceTime was introduced along with iPhone 4, Late Steve Jobs promised to make it open source so that we can use it on other smartphones, well till now it doesn’t seems that we are getting FaceTime on Android anytime soon. Since Facetime is not open source yet, we have top 4 alternatives to FaceTime on Android.

Following are the apps which work like Facetime and you easily download them from your Play Stores. The main reason why FaceTime never made it to other platforms is that Apple uses additional techniques to improve Facetime performance, but these techniques are not compatible with other operating system. But again we don’t need Facetime there are many other alternatives to FaceTime on Android.

facetime1-640x400

Top 5 alternatives to FaceTime on Android:

Skype – free IM & video calls:

Skype app is the best alternative to FaceTime and the best thing is free, you can use it mostly all other platforms. Video quality is very good and its also provides both features Video call and VOIP. You can also call to any number around the world but it’s not free, you have to pay for it.

Screen Shot 2015-11-18 at 01.22.08

Facebook Messenger:

Facebook messenger is 2nd best alternative to Facetime and it recently got the video and VIOP calling features, after getting calling feature more than 1 million calls made in first two days. So I think we can wait for FaceTime.

Screen Shot 2015-11-18 at 01.29.26

WhatsApp Messenger:

After WhatsApp rolled out its VOIP call feature, things get more excited. WhatsApp is the best cross messaging platform for nearly all smartphones and with calling feature there is no need for FaceTime.

Screen Shot 2015-11-18 at 01.35.18

Viber:

Viber is also competing with Facetime since it got the video calling features, but first you’ve to make a voice call and then when it’s connected, you can enable Video. One negative point for Viber is that its reception is not good as like others.

Screen Shot 2015-11-18 at 01.39.51

How to Backup and Restore EFS on Samsung Galaxy Note 5, S6 Edge Plus

5
How to Backup and Restore EFS on Samsung Galaxy Note 5, S6 Edge Plus

Planning to root and modify your Galaxy Note 5 or S6 Edge Plus? If so, the very first thing that you should do immediately after rooting your Galaxy Note 5 /S6 Edge Plus is to backup its EFS partition. Before you apply any changes to your new handset’s system, backing up some important data like EFS, Modem, Nandroid is pretty essential. Just in case the modification that you’re going to apply messes up the EFS partition of your phone and damages the networking capabilities of your device by resulting in making its IMEI null, flashing a backup will fix it and your device will be safe and sound once again. In case you’re wondering what is this EFS partition we are talking about, we will go through an over-view to clear it up.note-5-galaxy-s6-edge-plus-together-press-image

EFS partition stands for Encryption File System. This partition in your phone carries all the information of your device’s radios, Bluetooth and WiFi mac addresses, IMEI etc. This partition is way sensitive. If you mistakenly flash an invalid file i.e. an incompatible custom ROM, custom kernel or any other such file or MOD, that might result in making your EFS partition corrupt. Once the EFS partition goes corrupt, it makes the IMEI of your device NULL. It also results in making your handset a phone without any calling and messaging capabilities. That means you no longer can use the phone app to make any calls as your SIM will be giving you “No Service” error. There’s a lot more to be understood about the EFS partition, but I guess for newbies this much over-view is more then enough. We will put the explanation to an end here and head towards the EFS backup guide.

Now that the Note 5 and S6 Edge Plus have already been rooted, you can easily backup its EFS partition. After trying the method, I have compiled it up here for all of you. Let’s go ahead and learn the instructions to backup or restore EFS on our beloved Galaxy Note 5 and S6 Edge Plus.

How to Backup EFS/IMEI partition on Samsung GalaxyNote 5 or S6 Edge Plus

Make sure that you’ve rooted your device. To root, check out: Root Galaxy Note 5, Root Galaxy S6 Edge Plus.

  1. Now download and install Wanam’s Partitions Backup application on your device.
  2. Open the application now and grant SuperSu rights.
  3. Now click the small tool settings button at the top besides the information button and select the format in which you want to backup the EFS partition. (select .tar and .img formats)
  4. Now from the partitions list select EFS and RADIO  partition.
  5. Now tap the small arrow in the circle at the lower right corner.
  6. It will prompt a confirmation message, tap BACKUP here.
  7. That’s all. You will have your EFS files in the “Partitions Backup” folder located in your internet storage.

How to Restore EFS/IMEI partition on Samsung Galaxy Note 5 or S6 Edge Plus

  1. If you have accidentially corrupted your EFS partition, you can simply restore it using the same application.
  2. Make sure that you have already backed up the EFS partition in .img or any other format.
  3. Now open the partitions backup application and tap the small options button at the top right corner.
  4. Select restore a partition, and then select your radio and efs.img files from the partitions backup folder inside your internal storage.
  5. Once you’ve selected the files, follow on-screen instructions to restore your lost IMEI.
  6. That’s all.


How To Install Xposed Framework On Galaxy S6, S6 Edge, Note 4, Note 5 & S6 Edge+

1
How To Install Xposed Framework On Galaxy S6, S6 Edge, Note 4, Note 5 & S6 Edge+

Xposed Framework has been made available for Samsung Galaxy smartphones running Android Lollipop TouchWiz ROMs. You can now easily install Xposed Framework on your Samsung Galaxy S6, Galaxy S6 Edge, Galaxy Note 4, Galaxy Note 5 and Galaxy S6 Edge Plus running Android 5.1.1 Lollipop. You will find a comprehensive method to get Xposed Framework and install your desired Xposed Modules on your Samsung Galaxy in the succeeding guide. Let’s go through a brief over-view of Xposed before we head towards the installation instructions.note-5-galaxy-s6-edge-plus-together-press-image

Xposed Framework is meant to be for those Android users who do not like flashing custom ROMs and still want to modify their device without getting into any complexity. The framework modifies your existing system and brings in all of your desired features without making you go through any hard and fast rules. By installing Xposed, your device stays on your stock OS, but you are able to use it just like you would use a custom ROM. Xposed has a hefty list of features that you can load in your Android smartphone and change its functionality according to your liking. Over the past few months, Xposed has gained a lot of popularity and it has become a basic need for an Android power user now. Xposed made its way starting from Android 4.0.3 Ice Cream Sandwich. Xposed’s functionality was extend to Android 4.4.4 KitKat without any hiccups here and there. Tough time for Xposed began with the release of Android 5.0.2 Lollipop because of Google’s changes in the core system and security enhancements. It took quite a while, but Xposed was made available for Android Lollipop somehow. Xposed works on almost all Android smartphones, but for Samsung’s Android Lollipop powered TouchWiz UI, Xposed needed to be modified a bit more. This job was successfully done by famous XDA recognised developer Wanam. Wanam’s Xposed works pretty great on almost all Samsung Galaxy smartphones running Android 5.0.2 or 5.1.1 Lollipop TouchWiz ROMs.

To have a look on list of Xposed Modules, check out this link. After checking the list, follow the guide below to install Xposed right away.

How To Install Xposed Framework On Galaxy S6, S6 Edge, Note 4, Note 5 & S6 Edge+

  1. Your Android Lollipop 5.1.1 device must be rooted and also have a custom recovery (CWM or TWRP) installed on it.
  2. Download Xposed-sdk.zip file according to your device’s CPU architecture.
    1. for ARM devices: xposed-v78.0-sdk22-arm-custom-build-by-wanam-20151116.zip
    2. for ARM 64 devices: xposed-v78.0-sdk22-arm64-custom-build-by-wanam-20151116.zip
    3. Xposed uninstaller for ARM devices: xposed-uninstaller-20151116-arm.zip
    4. Xposed uninstaller for ARM 64 devices: xposed-uninstaller-20151116-arm64.zip
    5. You can use an application like “Hardware Info” to check out your smartphone’s CPU architecture.
  3. Also download Xposed Installer APK file: XposedInstaller_3.0_alpha4.apk
  4. Now copy both .zip and XposedInstaller APK files to your phone’s internal or external storage.
  5. Now boot your phone into recovery mode. The button combination to boot into recovery mode varies from device to device, but if you have ADB and Fastboot drivers installed on your PC you can boot into recovery mode using the following command: adb reboot recovery
  6. Once you’re in recovery, select Install or Install Zip depending on your recovery.
  7. Locate the xposed-sdk.zip file that you just copied.
  8. Select the file and flash it following the on-screen instructions.
  9. Once you’re done flashing, reboot your device.
  10. Now locate the XposedInstaller APK file using a file manager like ES File Explorer or Astro File Manager.
  11. Install the XposedInstaller APK.
  12. You will have Xposed Installer in app drawer now.
  13. Open Xposed Installer now and apply your favourite tweaks from the list of available and working Modules.
  14. To uninstall Xposed, simply flash xposed-uninstaller.zip file and it will be wiped off from your device.
  15. That’s all.

Let us know what modules are you going to apply on your Lollipop 5.1.1 powered device. In case you’re stuck with something, feel free to reach us out through the comment box below. Best of luck 🙂

Source

How to open MOBI files in Kindle for Android

0
How to open MOBI files in Kindle for Android

When it comes e-books Amazon has the biggest collection of e-books on the Web, also thanks to Amazon Kindle app we can open e-books on other Android devices. Amazon Kindle app allows you to open all the type of documents, you can view PDF (.pdf) and MOBI (.mobi) files not only AZW (.azw). To open a PDF file in Amazon Kindle app all you have to do is tap on the file and select Amazon Kindle app. But when it comes to open a MOBI (.mobi) files most of the time you’ll get a error message, when you directly open it from your file manager.

In the following guide I’ll tell you how to open MOBI files in Kindle for Android, there is no rocket science to open MOBI files in kindle. Just follow the given instruction and you are all good to go.

open-mobi-in-Kindle-for-Android

How to open MOBI files in Kindle for Android:

Step #1: Open file manager on your Android device, if you don’t have a file explorer you can always install a third-party file explorer from Google play.

Step #2: In your File manager, locate your MOBI file (it has a filename extension of .mobi).

Step #3: Copy MOBI file and go back, search for Kindle folder and paste the copied file there.

Step# 4: Once you’ve copied the file in Kindle folder, close your file manager.

Step #5: Open you kindle app and you’ll see the file you have copied in kindle folder is added in your carousel. If you still didn’t see your file, just go to your Kindle app menu and tap on Sync.

After trying all these step, still there is no success then you can use alternate app to open MOBI files in Kindle for Android. I’ll update the post with alternative apps for Android to open MOBI files.

How to install Xposed Framework on Android Marshmallow 6.0

0
How to install Xposed Framework on Android Marshmallow 6.0

The all time popular Xposed Framework is now available for Android Marshmallow 6.0. You can now add extra features and functions to your Android Marshmallow 6.0 device. In the following post, you will find a step-by-step method to install Xposed Framework to run all Xposed Modules on your Android Marshmallow 6.0 device.

Before we head towards the installation guide, let’s have an overview of Xposed Framework. If you’re one of the users who do not like to flash custom ROMs or who is lazy enough to do some efforts and tweak the device by means of a custom ROM and you still want to modify your device, Xposed is probably for you. Xposed Framework adds extra features and functions to your device. Basically, Xposed Framework modifies your system and brings a number of handy features that you would love having on your device. Xposed is a much better choice as compared to a custom ROM. When you flash a custom ROM, it changes the whole system of your device. To recover your device you’ve to flash a stock ROM. There’s a number of useful custom ROMs available around, but not all the users have that kind of experties to handle a custom ROM. This is where Xposed plays its role. Xposed comes in the form of a flashable zip, and to handle Xposed Modules you simply need to install its APK file. Xposed tweaks your existing system and adds your desired features that you can select from the list of available Modules in Xposed application. You can modify your stock ROM the way you want. Using Xposed your device will stay on a stock-modified ROM rather then a full custom ROM. Just in case you don’t like Xposed’s existence in your Android smartphone or tablet, you can simply uninstall it and that’s all. Android-6.0-Marshmallow

Earlier, Xposed Module was available for previous versions of Android (Android 4.0.3+). It took quite a while for developers to enable Xposed to work with Android Lollipop. Now that Marshmallow is out, all the users were keeping their eyes on Xposed Framework to be available for this firmware. Thanks to Rovo89,  Xposed developer who has just added support for Android Marshmallow 6.0 in Xposed Framework and cheered all of us up. Let’s get back to work now.

Just in case you’re wondering what Modules you will be able to use on your Marshmallow device, here’s a list of working Xposed Modules for Marshmallow.

Burnt Toast
CrappaLinks
Play Store Changelog
XXSID Indicator
Greenify
Amplify
YouTube adaway
Xposed GEL Settings (beta)
Cool tool
NotifyClean
Min min guard
BootManager
ReceiverStop
EnhancedToast
Force immersive mode
Swype Tweaks
Swipeback 2
Spotify skip
Lollistat
Flat Style Keyboard
Force Fast Scroll
Flat style colored bars
Materialised xposed (working for some)
App settings
Lockscreen music art remover
NetStrenght
LWInRecents
Screen Filter
BubbleUPNP’s Audio cast
Snapcolors 3.4.12

Partially working:
Gravity box (very limited)
XBridge
Boot manager (working for some)

How to install Xposed Framework on Android Marshmallow 6.0

  1. Your Android Marshmallow device must be rooted and also have a custom recovery (CWM or TWRP) installed on it.
  2. Download Xposed-sdk.zip file according to your device’s CPU architecture.
    1. for ARM devices: xposed-v77-sdk23-arm.zip
    2. for ARM 64 devices: xposed-v77-sdk23-arm64.zip
    3. for x86 devices: xposed-v77-sdk23-x86.zip
    4. You can use an application like “Hardware Info” to check out your smartphone’s CPU architecture.
  3. Also download Xposed Installer APK file: XposedInstaller_3.0_alpha4.apk
  4. Now copy both .zip and XposedInstaller APK files to your phone’s internal or external storage.
  5. Now boot your phone into recovery mode. The button combination to boot into recovery mode varies from device to device, but if you have ADB and Fastboot drivers installed on your PC you can boot into recovery mode using the following command: adb reboot recovery
  6. Once you’re in recovery, select Install or Install Zip depending on your recovery.
  7. Locate the xposed-sdk.zip file that you just copied.
  8. Select the file and flash it following the on-screen instructions.
  9. Once you’re done flashing, reboot your device.
  10. Now locate the XposedInstaller APK file using a file manager like ES File Explorer or Astro File Manager.
  11. Install the XposedInstaller APK.
  12. You will have Xposed Installer in app drawer now.
  13. Open Xposed Installer now and apply your favourite tweaks from the list of available and working Modules.
  14. That’s all.

Let us know what modules are you going to apply on your Marshmallow powered device. In case you’re stuck with something, feel free to reach us out through the comment box below. Best of luck 🙂

Source

15 Moto X Play Wallpapers Download for Free

0
15 Moto X Play Wallpapers Download for Free

Motorola new devices are the best mid-range Android devices, if you happened to own Moto X Play or Moto X then I’ve a special treat for all of you. I’ve collected 15 Moto X Play Wallpapers in HD quality, just choose the best one for your device.

WXAxZgK

15 Moto X Play Wallpapers Download for Free

Download Moto X Play Stock Wallpapers:

Moto-X-Play-Stock-Wallpapers.zip

Download Mobile Strike for PC – Windows and Mac.

4
Download Mobile Strike for PC – Windows and Mac.

There are hundreds of Strategy games for iOS and Android play stores, but recently a new developer team named as Epic war released an awesome strategy game ” Mobile Strike “. Main concept of this game is same as all other famous Strategy games, you have to build your base, train your army and meet your friends on battle-field. I love to play Strategy games on PC and now-a-days we are getting more and more games on smartphones rather than PC. Today I’ll tell you how to download Mobile Strike for PC running Windows and Mac.

To install Mobile Strike for PC, I’ll be using third party emulators like BlueStacs and Andy. If you don’t have BlueStacks or Andy installed on your PC use our guide. Mobile Strike is basically designed for iOS and Android devices, so it’s not available in any Pc game format.

Mobile Strike for PC

How To Install Mobile Strike For PC or MAC Using BlackStacks

Method 1:

  1. Install Bluestacks on your PC or MAC.
  2. Download Mobile Strike Apk on your PC.
  3. Make sure that you have installed Bluestacks. Double-click the downloaded Mobile Strike Apk to install it.
  4. The APK will be installed through Bluestacks, once the notification pop-ups determining the installation completion, open Bluestacks.
  5. Now click on My Apps and then click on Mobile Strike.
  6. The application will open up. Now follow on-screen instructions to Mobile Strike.

Method 2:

  1. Install Bluestacks on your PC or MAC.
  2. Open Bluestacks and setup your Google Play Store account.
  3. Now open Google Play Store and search for “Mobile Strike“.
  4. Once found, install Mobile Strike.
  5. Now click on My Apps and then click on Mobile Strike.
  6. The game will open up. Now follow on-screen instructions to Play Mobile Strike.

How To Install Mobile Strike For PC or MAC Using Andy OS

  1. Download and install Andy OS on your Windows PC or MAC.
  2. Once downloaded, open Andy OS.
  3. Setup Google Play Account on it.
  4. Now open Apps > Google Play Store and search for “Mobile Strike“.
  5. Install Mobile Strike and wait for it to finish the installation.
  6. Once done, open “Uncategorized” portion in Andy and click on Mobile Strike to play it.
  7. That’s all.

How to control PlayStation 3 from your Android device

2
How to control PlayStation 3 from your Android device

The best thing about an Android device is that you can do a lot of awesome stuff, the open nature of this platform can give freedom to achieve so many things which we cannot do in closed platform like iOS. Today I’ll tell you how to control PlayStatio 3 from your Android device. Bet you can’t do this on iOS devices.

Now before we start the process, first we have to ensure that we had all the things that are required to successfully control PlayStation 3 from your Android device. First we a PlayStation 3, Android smartphone or tablet with root access. If need to root your Android device, you can check our Rooting section. Now let’s start the process.

control ps3 with android

How to control PlayStation 3 from your Android device:

  • First enable Bluetooth on your Android device. Settings> wireless controls> Bluetooth.
  • Turn on your console, now head to settings>Manage Bluetooth devices>register a new device. Now go back to your smartphone.
  • Make sure your smartphone Bluetooth is visible, Settings>wireless controls> Bluetooth> Tap on check located below My Device. Now go back to you console screen.
  • Click on Register new device, you’ll be taken to a new Windows where you have to start scaning.
  • Once scanning is complete, select your smartphone. You’ll be provided a six-digit password to enter on your smartphone. Once you have entered the six-digit password your smartphone will be paired with the console.
  • Open Google Play on your smartphone and search for BlueputDroid and install it.
  • Now that BlueputDroid is installed on your Android device, run the app. It will show you the list of devices that can be connected.
  • Select Play Station 3 from the list of Bluetooth devices, All Done.

Now you can control your Play Station 3 from your Android device, if you face any problem regarding this guide please do tell me in comments.

Download Pixduel™ for PC Online – Windows and Mac

0
Download Pixduel™ for PC Online – Windows and Mac

The best thing about Trivia games is that you never get bored and you learn interesting things while playing such type of games. The best Trivia game is Trivia Crack, but the game I am about to tell you is getting a lot of heat in trivia category. The latest trivia sensation is Pixduel, basic concept of this game is same like all the other apps, such as Trivia Crack, QuizUp and Trivial Pursuit and Friends. In the following gudie, I’ll tell you how to install Pixduel for Pc running Windows and Mac.

Pixduel is an entertaining, colorful and up-to-date social trivia game where you can battle your friends and other players to games of picture trivia. To install Pixduel for PC we’ll be using third-party emulators like BlueStacks and Andy, because Pixduel is not available in PC version.

Pixduel for Pc

How To Install Pixduel For PC or MAC Using BlackStacks

Method 1:

  1. Install Bluestacks on your PC or MAC.
  2. Download Pixduel Apk on your PC.
  3. Make sure that you have installed Bluestacks. Double-click the downloaded Pixduel Apk to install it.
  4. The APK will be installed through Bluestacks, once the notification pop-ups determining the installation completion, open Bluestacks.
  5. Now click on My Apps and then click on Pixduel.
  6. The application will open up. Now follow on-screen instructions to Pixduel.

Method 2:

  1. Install Bluestacks on your PC or MAC.
  2. Open Bluestacks and setup your Google Play Store account.
  3. Now open Google Play Store and search for “Pixduel“.
  4. Once found, install Pixduel.
  5. Now click on My Apps and then click on Pixduel.
  6. The game will open up. Now follow on-screen instructions to Play Pixduel.

How To Install Pixduel For PC or MAC Using Andy OS

  1. Download and install Andy OS on your Windows PC or MAC.
  2. Once downloaded, open Andy OS.
  3. Setup Google Play Account on it.
  4. Now open Apps > Google Play Store and search for “Pixduel“.
  5. Install Pixduel and wait for it to finish the installation.
  6. Once done, open “Uncategorized” portion in Andy and click on Pixduel to play it.
  7. That’s all.