Home Blog Page 350

Download Google GApps for Android 6.0 Marshmallow [All ROMs]

1
Download Google GApps for Android 6.0 Marshmallow [All ROMs]

Last month Google released the 6th iteration of Android named as Android 6.0 Marshmallow. Google has made system enhancements in the Android 6.0 Marshmallow which make it the biggest update of Android so far. Android 6.0 Marshmallow is the most stable and most secure version of Android. As soon as Android Marshmallow came out, manufacturers started working on Android 6.0 Marshmallow for their flagship devices. While the official Marshmallow firmware rolls out, developers have already started working on custom ROMs based on Android 6.0 Marshmallow. A number of ROMs for various devices has already landed in, and we are seeing the count getting big. Also, thMarshmallow-6.0-gappse devices which won’t be getting the official Android 6.0 Marshmallow update, custom ROMs are making a way to those devices as well.

It’s just been a few days since the custom ROM development started. We will be seeing a number of custom ROMs in the upcoming days. The official version of CyanogenMod 13 is all set to come out in the coming days, we will be seeing SlimKat, Paranoid Android, OmniROM and other famous custom ROM titles based on Android 6.0 Marshmallow. At the time of writing this post, the only custom ROMs available are AOSP Android 6.0 Marshmallow and Unofficial CyanogenMod 13.

In case you’re already familiar with custom ROMs, you probably have an idea that custom ROMs do not contain any applications installed by default (we are talking about Google applications). In a freshly installed ROM, you will not find Google Play Services, Google Play Store, Gmail, Google Chrome or Hangouts applications. Since these Google apps are essential for your device and are the very basic applications for any Android device, you must flash these applications on your device after flashing an Android 6.0 Marshmallow custom ROM in order to get your device working properly.

There are quite many GApps package files available for Android 6.0 Marshmallow, but not all of those GApps package files are supposed to work. You need to find a stable version of GApps for Android 6.0 Marshmallow that works with all Android 6.0 Marshmallow ROMs without any hiccups here and there. We have spotted the Google GApps version that will work with any Android 6.0 Marshmallow ROM. The download link is embedded below. Go ahead and download the GApps for Android 6.0 Marshmallow and go through the instructions to install it on your phone.

Download GApps for Android 6.0 Marshmallow

  • Download Google GApps for Android 6.0 Marshmallow:  gapps-mm-fix.zip | Mirror
  • Copy the GApps.zip file to your phone’s internal or external storage.
  • Boot into custom recovery on your phone now.
  • Select “Install Zip > Choose Zip from SD card > Locate GApps.zip” and flash it.
  • Once done, reboot your phone.
  • You will have all GApps installed now. That’s all.

Download CyanogenMod C-Apps Package

0
Download CyanogenMod C-Apps Package

CyanogenMod is the most widely used aftermarket version of Android OS. In the recent few years, CyanogenMod has greatly improved and also happened to be the certified commercial OS that comes pre-installed on smartphones like OnePlus One, YU, Andromax Q and some others. CyanogenMod gives the users a very close-to-stock experience of Android. CyanogenMod carries minimum bloatware, and these firmwares are usually quite small in size. As far as the speed and responsiveness of this firmware is concerned, it works extremely fast.

When Cyanogen OS made its way as an in-built firmware for the aforementioned devices, Cyanogen loaded the OS with a handful of useful applications. These applications were greatly liked by the users, but these were only available for Cyanogen OS powered retail smartphone. Now, CyanogenMod has announced a standalone package of these files and its available for all users. The package is named as C-Apps [Cyanogen Apps Package].

Cyanogen apps package includes Theme Store, Audio FX, Cyanogen Accounts, Gallery, Dialer with TrueCaller Integration and Email powered by  Boxer. The package is available in the form of  flashable zip file and requires a device with CM 12.1 or higher version of CyanogenMod. CyanogenMod C-Apps package is now available for download. The download link and instructions to install C-Apps package are available below. Go ahead and get the C-Apps package for your CM powered device.C-Apps Package

Download C-Apps Package And How To Install It

  • Download CyanogenMod C-Apps package Official Link | Mirror
  • Copy the C-Apps.zip file to your phone’s internal or external storage.
  • Boot into custom recovery or Cyanogen OS recovery on your phone now.
  • Select “Install Zip > Choose Zip from SD card > Locate C-Apps.zip” and flash it.
  • Once done, reboot your phone.
  • You will have all C-Apps installed now. That’s all.

How to Enable Privacy Guard on CM12 [ Tips ]

0
How to Enable Privacy Guard on CM12 [ Tips ]

If you are running CyanogenMod 12 on your device and you haven’t enabled the privacy guard on your device then follow the instruction below in order to enable privacy guard on CyanogenMod 12. Privacy Guard allows you to set permission for individual app, if you are running stock rom on your Android device it doesn’t allow you to set permission of indiviual app for e.g on official rom when an app requires permission to access your location you simply cannot decline it. This is the main reason i like rooting my devices, you get to control everything on your device. Now lets start the process of how to enable privacy guard on CyanogenMod 12.

Before going any further you have to get a device with root access and CyanogenMod 12 installed on it. We won’t be needing any Pc or software to enable privacy guard on your Andorid device. Follow all the steps carefully in order to successfully enable privacy guard on CyanogenMod 12.

Privacy_Guard_Menu1

How to Enable Privacy Guard on CyanogenMod 12:

Step # 1: Open settings on your Android device.

Step # 2: Now scroll down and Tap on privacy.

Step # 3: In privacy settings search for Privacy Guard.

Step # 4: Tap on the switched button to enable the privacy guard.

Step # 5: Once its enabled you’ll see a list of all the apps.
Now that you have enabled privacy guard on CyanogenMod 12, after that you see the complete list of all the apps whom you can give permissions. Just tap on the app on which you want to set permissions.

Install AOSP Android 6.0 Marshmallow On Galaxy Tab S 10.5

0
Install AOSP Android 6.0 Marshmallow On Galaxy Tab S 10.5

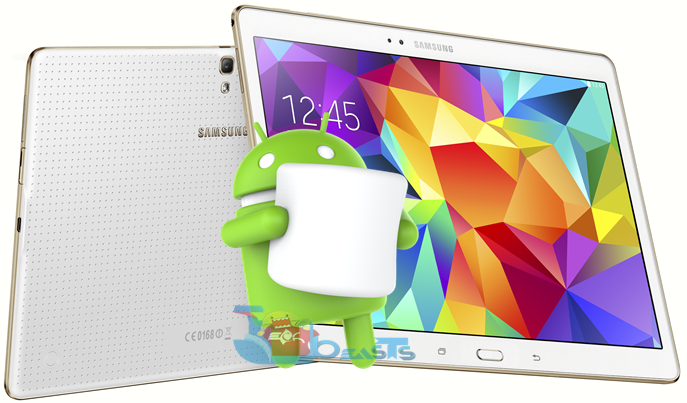
Galaxy Tab S 10.5 was recently updated to Android 5.1.1 Lollipop. At the time, this is the latest software version for Samsung Galaxy devices. Samsung will be updating some of its flagship devices to Android 6.0 Marshmallow in a few months, but we haven’t spotted the Galaxy Tab S 10.5 in the list of devices expected to get the Marshmallow updated. We are not sure whether the devices will be updated to Android 6.0 Marshmallow officially or not, but this Tablet device has already got the all new Marshmallow firmware by means of AOSP custom ROM. Android 6.0 is pretty new at the moment and the custom ROMs for various devices have just started landing in. A number of bugs is expected to be there in the early builds, but these custom ROMs are good enough to experience Android 6.0 Marshmallow for a while. If you’re one of the Android freaks who cannot resist checking out what’s new in Android 6.0 Marshmallow, you must give a try to this ROM and fulfill your appetite.Tab S 10.5

The only thing that isn’t working in this ROM at the moment is the Camera application and fingerprint scanner. Rest of the components are expected to work fine. If you can compromise these features for a while, you can flash the AOSP Android 6.0 Marshmallow ROM on your Galaxy Tab S 10.5. If you’re a newbie and you don’t have an idea of how these custom ROMs work, we do not recommend you from going ahead as it may not be kept for everyday use. We only recommend Android power users to flash this ROM on their Galaxy Tab S. Just in case you’ve started wondering about how you’re going to get this ROM on your Tab S, you need to hold your horses for a while.

To read what’s new in Android 6.0 Marshmallow, you may checkout this.

We are about to flash AOSP Android 6.0 Marshmallow on our beloved Galaxy Tab S 10.5 SM-T800 (WiFi) and SM-T805 (LTE). Scroll down and go through the method to get it done. Don’t forget to read the pre-installation instructions carefully.

Early Preparations

  1. This ROM is only for Samsung Galaxy Tab S 10.5 SM-T800 and SM-T805. Also make sure that your phone is running Android Lollipop. Do not try this on any other device, please check your device’s model and firmware in Settings > About Devicel.
  2. Your device must have a custom recovery installed, in case you’re missing it you may Follow our full guide here to install TWRP 2.8 recovery on your Tab S 10.5.
  3. Your device’s battery should be charged at least over 60%. This is highly recommended in order to prevent any power issues during the flashing process.
  4. Make sure that you backup your important media content, ContactsCall Logs Messages. This is highly recommended just in case something goes wrong and you need to reset your phone.
  5. If you already have rooted your device, use Titanium Backup to back up all your important apps + system data.
  6. Also if you are using a custom recovery, it is recommended that you backup your current system using that first. [Just for the sake of safety]. Here’s our full Nandroid Backup guide.
  7. You will have to go through Data Wipes during installation of this ROM, so make sure that you have backed up all the mentioned data.
  8. Make an EFS backup of your phone before you flash this ROM.
  9. You need enough confidence to flash this ROM.
  10. Alright! Go ahead and flash the custom firmware, follow this guide to the letter.

Disclaimer: The methods involved in flashing custom roms and rooting your phone are highly custom and may result in bricking your device, and has nothing to do with Google or the device manufacturer that is SAMSUNG in our case. Also rooting your device will void its warranty and you will be no longer eligible for any kind of free device services by the manufacturers/warranty providers. In case of any mishap we may not be held responsible. Follow these instructions to the letter to avoid any mishap or bricking. Make sure that whatever you do, you are doing it at your own responsibility.

How To Install Android 6.0 Marshmallow On Samsung Galaxy Tab S 10.5 Using AOSP Custom ROM

  1. Download AOSP Marshmallow.zip file according to your device
  2. Download Gapps.zip file for Android Marshmallow.
  3. Download SuperSu 2.50.zip file
  4. Connect your phone to your PC now.
  5. Copy all .zip files to the storage of your phone.
  6. Now disconnect your phone and turn it off complete.
  7. Boot into TWRP recovery now, in order to do so, turn it on by pressing and holding Volume Up + Home Button + Power Key. You should see the recovery mode in a while.
  8. Now in TWRP  recovery, wipe cache, factory data reset and advanced options > dalvik cache.
  9. After wiping all these three, select “Install” option.
  10. Now select “Install > Choose Zip from SD card > Select AOSP 6.0.zip file > Yes”.
  11. This will flash the ROM in your phone, once done get back to the main menu in recovery.
  12. Now once again select “Install > Choose Zip from SD card > Select Gapps.zip file > Yes”
  13. This will flash the Gapps in your phone.
  14. Reboot your device.
  15. You should see the Android 6.0 Marshmallow running on your device in a while.
  16. That’s all!Marshmallow

First boot may take up to 10 minutes, you may not worry if it’s taking that much long. In case it’s taking too long, you may boot into TWRP recovery and wipe cache and dalvik cache and reboot your device as it may fix the issue. In case your device is having issues, you may return to your old system using the Nandroid backup or follow our guide here to install stock firmware.

Got any queries? Reach us out through the comment box below.

Source

Install Android 6.0 Marshmallow On Galaxy Tab S 8.4 [AOSP ROM]

11
Install Android 6.0 Marshmallow On Galaxy Tab S 8.4 [AOSP ROM]

Galaxy Tab S 8.4 is currently running on Android 5.0.2 Lollipop. This device is in the que to get Android 5.1.1 Lollipop. Google has already released Android 6.0 Marshmallow. Since we are 2 iterations behind, we do not expect this device nearing Android 6.0 Marshmallow anytime soon. There hasn’t been any hint from Samsung either regarding updating the Tab S lineup to Marshmallow. While Samsung is silent on this, an AOSP custom ROM has already landed in for our beloved Tab S 8.4. You can now easily install this AOSP Android 6.0 Marshmallow custom ROM on your Galaxy Tab S 8.4 SM-T700 and enjoy a look and feel of all new Android 6.0 on your tablet.Tab S 8.4 1

Before we head towards the installation instructions, let’s have a recap on the Tab S 8.4. Samsung released this device back in July 2014 equipping an 8.4 inch 1600 x 2560 pixels dispay. Samsung planted an 8MP camera at the back, and a 2.1 MP on the front. Tab S 8.4 is powered up with Exynos 5420 CPU and a 3 GB RAM. It runs on Android 4.4 KitKat out of the box.

Let’s go ahead and flash AOSP Android 6.0 Marshmallow on Galaxy Tab S 8.4 SM-T700 (WiFi) now.

Early Preparations

  1. This ROM is only for Samsung Galaxy Tab S 8.4 SM-T700. Also make sure that your phone is running Android Lollipop. Do not try this on any other device, please check your device’s model and firmware in Settings > About Devicel.
  2. Your device must have a custom recovery installed, in case you’re missing it you may Follow our full guide here to install TWRP 2.8 recovery on your Tab S 8.4.
  3. Your device’s battery should be charged at least over 60%. This is highly recommended in order to prevent any power issues during the flashing process.
  4. Make sure that you backup your important media content, ContactsCall Logs Messages. This is highly recommended just in case something goes wrong and you need to reset your phone.
  5. If you already have rooted your device, use Titanium Backup to back up all your important apps + system data.
  6. Also if you are using a custom recovery, it is recommended that you backup your current system using that first. [Just for the sake of safety]. Here’s our full Nandroid Backup guide.
  7. You will have to go through Data Wipes during installation of this ROM, so make sure that you have backed up all the mentioned data.
  8. Make an EFS backup of your phone before you flash this ROM.
  9. You need enough confidence to flash this ROM.
  10. Alright! Go ahead and flash the custom firmware, follow this guide to the letter.

Disclaimer: The methods involved in flashing custom roms and rooting your phone are highly custom and may result in bricking your device, and has nothing to do with Google or the device manufacturer that is SAMSUNG in our case. Also rooting your device will void its warranty and you will be no longer eligible for any kind of free device services by the manufacturers/warranty providers. In case of any mishap we may not be held responsible. Follow these instructions to the letter to avoid any mishap or bricking. Make sure that whatever you do, you are doing it at your own responsibility.

To read what’s new in Android 6.0 Marshmallow, you may checkout this.

How To Install Android 6.0 Marshmallow On Samsung Galaxy Tab S 8.4 Using AOSP Custom ROM

  1. Download AOSP ROM.zip
  2. Download Gapps.zip file for Android Marshmallow.
  3. Download SuperSu 2.50.zip file.
  4. Connect your phone to your PC now.
  5. Copy all .zip files to the storage of your Tab.
  6. Now disconnect your phone and turn it off complete.
  7. Boot into TWRP recovery now, in order to do so, turn it on by pressing and holding Volume Up + Home Button + Power Key. You should see the recovery mode in a while.
  8. Now in TWRP  recovery, wipe cache, factory data reset and advanced options > dalvik cache.
  9. After wiping all these three, select “Install” option.
  10. Now select “Install > Choose Zip from SD card > Select AOSP 6.0.zip file > Yes”.
  11. This will flash the ROM in your phone, once done get back to the main menu in recovery.
  12. Now once again select “Install > Choose Zip from SD card > Select Gapps.zip file > Yes”
  13. This will flash the Gapps in your phone.
  14. Reboot your device.
  15. You should see the Android 6.0 Marshmallow running on your device in a while.
  16. That’s all!Marshmallow

First boot may take up to 10 minutes, you may not worry if it’s taking that much long. In case it’s taking too long, you may boot into TWRP recovery and wipe cache and dalvik cache and reboot your device as it may fix the issue. In case your device is having issues, you may return to your old system using the Nandroid backup or follow our guide here to install stock firmware.

Got any queries? Reach us out through the comment box below.

Source

How To Install Android Marshmallow 6.0 On Galaxy S2 Plus [Pure AOSP]

2
How To Install Android Marshmallow 6.0 On Galaxy S2 Plus [Pure AOSP]

Galaxy S2 Plus’s life ended on Android 4.2.2 Jelly Bean. We haven’t seen any update for this device in a long while nor we are expecting Samsung to have a look back. Due to hardware limitations, Galaxy S2 Plus has to stay on Android 4.2.2 Jelly Bean now. The device got higher versions of Android but in the form of custom ROMs. We already have posted the guides to update your Galaxy S2 Plus to Android 4.4 KitKat, Android 5.0 Lollipop. Now that Google has released Android 6.0 Marshmallow, the next firmware that Galaxy S2 Plus users are expecting is the custom Android Marshmallow ROM. The good news is, a pure AOSP custom ROM has already made its way towards the Galaxy S2 Plus I9105 and I9105P.Samsung-Galaxy-S-II-Plus

AOSP Android 6.0 Marshmallow is in the very early stages of development at the moment, but most of the mainstream features are found to be working in this ROM. The working features include Calls, SMS, Mobile Data, Camera, WiFi etc. We will be flashing this ROM on our beloved Galaxy S2 Plus in a while. We only recommend you to go ahead if you’re an Android power user and you have a great idea of custom ROMs. Although this ROM has got most of the features working but we still do not recommend to keep it as a daily driver until we see a complete stable and intact version coming out.

Time to go ahead now and flash this Pure AOSP Android 6.0 Marshmallow on Samsung Galaxy S2 Plus I9105 and I9105P. Before flashing the ROM, make sure that you read the pre-installation instructions carefully.

What’s Working?

  • Wi-Fi
  • Bluetooth
  • RIL (Calls, SMS, Mobile Data)
  • Sensors (Accelerometer, Compass, Light, Proximity, etc.)
  • Camera
  • Video (playback & recording)
  • Audio (playback & recording)
  • GPS
  • Everything else not listed under “known issues”

What’s not working?

  • SELinux is in permissive mode

  • Runtime storage permission does not work properly (setns patches are not applied, see PermissionsHostTest CTS test)

  • Sometimes wake up causes music stutter

Early Preparations

  1. This ROM is only for Samsung Galaxy S2 Plus I9105/P. Also make sure that your phone is running Android 4.2.2 Jelly Bean. Do not try this on any other device, please check your device’s model and firmware in Settings > About Devicel.
  2. Your device must have a custom recovery installed, in case you’re missing it you may Follow our full guide here to install TWRP 2.8 recovery on your S2 Plus I9105/P.
  3. Your device’s battery should be charged at least over 60%. This is highly recommended in order to prevent any power issues during the flashing process.
  4. Make sure that you backup your important media content, ContactsCall Logs Messages. This is highly recommended just in case something goes wrong and you need to reset your phone.
  5. If you already have rooted your device, use Titanium Backup to back up all your important apps + system data.
  6. Also if you are using a custom recovery, it is recommended that you backup your current system using that first. [Just for the sake of safety]. Here’s our full Nandroid Backup guide.
  7. You will have to go through Data Wipes during installation of this ROM, so make sure that you have backed up all the mentioned data.
  8. Make an EFS backup of your phone before you flash this ROM.
  9. You need enough confidence to flash this ROM.
  10. Alright! Go ahead and flash the custom firmware, follow this guide to the letter.

Disclaimer: The methods involved in flashing custom roms and rooting your phone are highly custom and may result in bricking your device, and has nothing to do with Google or the device manufacturer that is SAMSUNG in our case. Also rooting your device will void its warranty and you will be no longer eligible for any kind of free device services by the manufacturers/warranty providers. In case of any mishap we may not be held responsible. Follow these instructions to the letter to avoid any mishap or bricking. Make sure that whatever you do, you are doing it at your own responsibility.

How To Install Android 6.0 Marshmallow On Samsung Galaxy S2 Plus Using AOSP Custom ROM

  1. Download AOSP.zip file according to your device
  2. Download Gapps.zip file for Android Marshmallow.
  3. Download SuperSu 2.50.zip file.
  4. Connect your phone to your PC now.
  5. Copy all .zip files to the storage of your phone.
  6. Now disconnect your phone and turn it off complete.
  7. Boot into TWRP recovery now, in order to do so, turn it on by pressing and holding Volume Up + Home Button + Power Key. You should see the recovery mode in a while.
  8. Now in TWRP  recovery, wipe cache, factory data reset and advanced options > dalvik cache.
  9. After wiping all these three, select “Install” option.
  10. Now select “Install > Choose Zip from SD card > Select AOSP…….zip file > Yes”.
  11. This will flash the ROM in your phone, once done get back to the main menu in recovery.
  12. Now once again select “Install > Choose Zip from SD card > Select Gapps.zip file > Yes”
  13. This will flash the Gapps in your phone.
  14. Reboot your device.
  15. You should see the Android 6.0 Marshmallow running on your device in a while.
  16. That’s all!

First boot may take up to 10 minutes, you may not worry if it’s taking that much long. In case it’s taking too long, you may boot into TWRP recovery and wipe cache and dalvik cache and reboot your device as it may fix the issue. In case your device is having issues, you may return to your old system using the Nandroid backup or follow our guide here to install stock firmware.

Got any queries? Reach us out through the comment box below.

Source

How To Fix Phone not connecting with your AOL Mail [ Trouble shooting ]

0
How To Fix Phone not connecting with your AOL Mail [ Trouble shooting ]

Following are the instruction how to fix Phone not connecting with your AOL Mail. There are many famous mail services like Gmail, Yahoo, Outlook and Hotmail, but the one I find is the best is AOL mail. It’s simple, free and provides the safe and delightful mail experience. But few days back I’ve seen hundreds of complaints from AOL user that they are facing Phone not connecting with your AOL Mail problem. So today I’ve prepared a step by step guide to fix Phone not connecting with your AOL Mail issue.

The most common issues which can cause this problem are “We detected unusual activity,” or “Your Username or Password is incorrect”?. To get these fixed all you have to do is open account.aol.com and reset you password and for “We detected unusual activity ” contact their support and in no time you’ll get you account back.

fix phone not connecting with Aol mail

How To Fix Phone not connecting with your AOL Mail:

  • First sign in on AOL Webmail.
  • Once you logged in AOL Webmail, refresh your page.
  • Now upgrade your Adobe Flash player.
  • Clear your browser cache and clear your cookies.
  • If you are using Internet Explorer please restore you default web browser security levels.
  • Try installing other browsers like FireFox or Chrome and then open webmail.aol.com and sign in.
  • Update your Antivirus or disable it and then try logging in. If you don’t have any Antivirus installed, i would recommend installing Avast Antivirus.
  • If you are using security/firewall software’s, first update them to latest version or uninstall them and reinstall them.
  • Open your web browser and reset your privacy and security settings to default.
  • If you are using ISP’s DNS server, try using Open DNS servers.
  • If still you are facing the same issue, try waiting for few minutes and the login again on webmail.aol.com. Sometimes you face such kind of issues because of servers.
  • In the end try rebooting your systems.

Download Blossom Blast Saga for Pc ( Windows and Mac )

0
Download Blossom Blast Saga for Pc ( Windows and Mac )

When it comes to puzzle games for smartphones the first name comes into our mind is King, the creator of famous Candy Crush Saga and Farm Hero Saga, now they have launched a new exciting game Blossom Blast Saga. The concept of this game is same as all other games but this time something is new, you have to link 3 or more buds to make it a bloom and clear the garden area before you run out of moves.

Following are the instruction on how to install Blossom Blast Saga for Pc running Windows and Mac. We’ll be using third-party emulators like BlueStacks and Andy. Basically Blossom Blast Saga is designed for iOS and Android devices, but we can install Blossom Blast Saga for Pc using emulators.

Blossom Blast Saga for Pc

How To Install Blossom Blast For PC or MAC Using BlackStacks

Method 1:

  1. Install Bluestacks on your PC or MAC.
  2. Download Blossom Blast Apk on your PC.
  3. Make sure that you have installed Bluestacks. Double-click the downloaded Blossom Blast Apk to install it.
  4. The APK will be installed through Bluestacks, once the notification pop-ups determining the installation completion, open Bluestacks.
  5. Now click on My Apps and then click on Blossom Blast.
  6. The application will open up. Now follow on-screen instructions to Blossom Blast.

Method 2:

  1. Install Bluestacks on your PC or MAC.
  2. Open Bluestacks and setup your Google Play Store account.
  3. Now open Google Play Store and search for “Blossom Blast“.
  4. Once found, install Blossom Blast.
  5. Now click on My Apps and then click on Blossom Blast.
  6. The game will open up. Now follow on-screen instructions to Play Blossom Blast.

How To Install Blossom Blast For PC or MAC Using Andy OS

  1. Download and install Andy OS on your Windows PC or MAC.
  2. Once downloaded, open Andy OS.
  3. Setup Google Play Account on it.
  4. Now open Apps > Google Play Store and search for “Blossom Blast“.
  5. Install Blossom Blast and wait for it to finish the installation.
  6. Once done, open “Uncategorized” portion in Andy and click on Blossom Blast to play it.
  7. That’s all.

20 Free Wallpapers for Android Smartphones and Tablets. [ Top Rated ]

0
20 Free Wallpapers for Android Smartphones and Tablets. [ Top Rated ]
Free Wallpapers for Android

Wallpapers are the best thing which can change our screens looks, today I’ve collected 20 Free Wallpapers for Android Smartphones and Tablets. All of these Wallpapers are top rated and in HD quality, download the best of them all.

7f03a9ffbe08f6443b81449c07d5dba4

20 Free Wallpapers for Android Smartphones and Tablets:

How To Mirror Your Android Screen to a PC or Mac Without Root

0
How To Mirror Your Android Screen to a PC or Mac Without Root

Smartphones are making our lives much easier but also sometimes they become distraction, for e.g while working on our office, driving and more. Thanks to the manufacturers for releasing the features like screen mirroring, this features helps us to mirror our Android device screen to a Pc or Mac. In the following guide I’ll tell you how to mirror your Android screen to a PC or Mac without Root access.

There are hundreds of methods to mirror your Android screen to a Pc once you have root access on your Android device. But what if you don’t want to root your Android device and also want to mirror your device screen with a PC or Mac? Here’s how you can do it.

Screen Shot 2015-11-11 at 03.40.13

How To Mirror Your Android Screen to a PC or Mac Without Root:

Things you need:

Mirror Your Android Screen to a PC or Mac Without Root [ Guide ]:

Step#1: First you have to enable USB Debugging Mode on your Android smartphone or tablet, follow the steps mentioned below in order to enable USB Debugging Mode.

  • Open Settings on your Android device.
  • Scroll down and tap on About phone.
  • Now tap Build Number seven times.
  • Go back into settings and you’ll see developer options. Tap on it.
  • Scroll down and enable USB debugging mode.

Step#2: Now start Vysor from the Chrome App Launcher.

Step#3: Connect your device with Pc or Mac.

Step#4: Click on Find devices in Vysor app and select your phone,

Step#5: Vysor will start up and you’ll see your device screen on your computer.

How to Share Your Screen Wirelessly:

  • First download AllCast Receiver for Chrome.
  • Also download Mirror for Android.
  • Now use the same WiFi network on both smartphone and your Pc.
  • Open the Chrome App Launcher and start the AllCast Receiver.
  • On your Android device run Mirror.
  • Now all you have to do is choose the network device that matches your Pc.

All Done.

Download Mitosis for PC – Windows and Mac

0
Download Mitosis for PC – Windows and Mac

Following are the instruction on how to download Mitosis for Pc running Windows and Mac. Mitosis is the game sample like Agar.io, concept of both games are same but Mitosis is much improved and has a lot of new features like, Guild system with chatroom, private rooms to play with your friends, custom skins for your cells and much more.

Following is a step by step guide on how to install Mitosis for Pc, we’ll be using third-party emulators like BlueStacks and Andy. You can also check our main guide in which we have covered ” How to install Android Games and Apps on PC “.

Mitosis for PC

How To Install Mitosis For PC or MAC Using BlackStacks

Method 1:

  1. Install Bluestacks on your PC or MAC.
  2. Download Mitosis Apk on your PC.
  3. Make sure that you have installed Bluestacks. Double-click the downloaded Mitosis Apk to install it.
  4. The APK will be installed through Bluestacks, once the notification pop-ups determining the installation completion, open Bluestacks.
  5. Now click on My Apps and then click on Mitosis.
  6. The application will open up. Now follow on-screen instructions to Mitosis.

Method 2:

  1. Install Bluestacks on your PC or MAC.
  2. Open Bluestacks and setup your Google Play Store account.
  3. Now open Google Play Store and search for “Mitosis“.
  4. Once found, install Mitosis.
  5. Now click on My Apps and then click on Mitosis.
  6. The game will open up. Now follow on-screen instructions to Play Mitosis.

How To Install Mitosis For PC or MAC Using Andy OS

  1. Download and install Andy OS on your Windows PC or MAC.
  2. Once downloaded, open Andy OS.
  3. Setup Google Play Account on it.
  4. Now open Apps > Google Play Store and search for “Mitosis“.
  5. Install Mitosis and wait for it to finish the installation.
  6. Once done, open “Uncategorized” portion in Andy and click on Mitosis to play it.
  7. That’s all.

4 Ways to fix AMOLED burn-in on Android display [ Tips ]

2
4 Ways to fix AMOLED burn-in on Android display [ Tips ]

When Super AMOLED was introduced, it changed the era of LEDs. AMOLED is awesome in many ways, colors are sharp, display is super bright etc. But there is a problem with AMOLED display, it burn-in the display on Android devices, pictures get blurry as in old days of CRT screens. Well no need to get worry AMOLED burn-in can be fixed.

In the following guide I’ll tell you how to fix AMOLED burn-in on Android devices, we are not using any root methods nor black and white wallpaper trick. All you have to do is install a third-party app on your device and boom its fixed. Also I’ll tell more methods that will prevent AMOLED burn-in on Android display.

amoled-screen-burn

How to fix Amoled burn-in on Android:

  • First open Google Play on your Android device.
  • Search for AMOLED Burn-In Fixer and install it.
  • Run the AMOLED Burn-In Fixer from your app drawer.
  • First it will tell test you device whether burn-in has happened or not. Also it will hide the UI parts to prevent the burn-in.
  • If you device is having AMOLED burn-in issue AMOLED Burn-In Fixer will fix it.

All done.

Method #2:

  • Open settings on your Android device.
  • Tap on display.
  • Reduce your screen brightness or set it on automatic.
  • Reduce your screen timeout, set to 10 seconds.

All Done.

Method #3:

  • Open Settings on your device.
  • Tap on Accessibility.
  • Select Display from the list.
  • Find Color inversion and turn it on.

All Done.

Method #4:

  • Open Google Play on your device.
  • Search for Nova Launcher and install it.
  • Once installed enable the Nova Launcher and select it as default.
  • Also change your home screen wallpaper to a solid color wallpaper.

All Done.

After applying all these methods if still you facing AMOLED burn-in issue on your Android display, then you should head to manufacturer service center to get it fixed.