Home Blog Page 351

Update Galaxy Note 4 N910F, N910G To Android 6.0 Marshmallow [Unofficial CyanogenMod 13]

0
Update Galaxy Note 4 N910F, N910G To Android 6.0 Marshmallow [Unofficial CyanogenMod 13]

Galaxy Note 4 is in the que to get Android 6.0 Marshmallow, but having a look on Samsung’s track record of updating the devices, we do not expect this update to come out anytime soon. While we are waiting for the official update to reach us out, the unofficial CyanogenMod 13.0 Android 6.0 Marshmallow has already made its way. Android 6.0 Marshmallow CyanogenMod 13 custom ROM is available for Galaxy Note 4 N910F and N910G. RIL and some other features are working fine on this ROM, but there’s a list of features that isn’t going to function at this time. We expect the future builds of this ROM to fix the bugs slowly, but for now this ROM is good enough to have a touch and feel of Android 6.0 Marshmallow. Keeping the bugs in view, this ROM may not be kept as a daily driver. You may only proceed to flash it on your Galaxy Note 4 if you’re familiar with custom ROMs and you can also handle any mishaps that may occur after flashing this custom ROM. In the succeeding guide we will be showing you a method which will help you to install this Android 6.0 Marshmallow CyanogenMod 13 ROM on your Galaxy Note 4 N910F and N910G. Let’s go through a set of instructions and flash this ROM now and get Marshmallow for Note 4.Note 4 N910G:F

Early Preps

  • This guide is intended for Galaxy Note 4 N910G/N910F only. Do not try flashing this ROM on any other device.
  • Charge your phone up to 80% to make sure that your phone doesn’t die during the flashing process.
  • Flash latest TWRP recovery on your Galaxy Note 4 N910G & N910F
  • Make sure that you backup your important media content, ContactsCall Logs Messages. This is highly recommended just in case something goes wrong and you need to reset your phone.
  • If you already have rooted your device, use Titanium Backup to back up all your important apps + system data.
  • Also if you are using a custom recovery, it is recommended that you backup your current system using that first. [Just for the sake of safety]. Here’s our full Nandroid Backup guide.
  • You will have to go through Data Wipes during installation of this ROM, so make sure that you have backed up all the mentioned data.
  • Make an EFS backup of your phone before you flash this ROM.
  • You need enough confidence to flash this ROM.
  • Alright! Go ahead and flash the custom firmware, follow this guide to the letter.
  • Disclaimer: The methods involved in flashing custom roms and rooting your phone are highly custom and may result in bricking your device, and has nothing to do with Google or the device manufacturer that is SAMSUNG in our case. Also rooting your device will void its warranty and you will be no longer eligible for any kind of free device services by the manufacturers/warranty providers. In case of any mishap we may not be held responsible. Follow these instructions to the letter to avoid any mishap or bricking. Make sure that whatever you do, you are doing it at your own responsibility.

Install Android 6.0 Marshmallow On Galaxy Note 4 N910F/G

  1. Download  cm-13.0-20151107-UNOFFICIAL-trltexx.zip file.
  2. Download 511Blobsv1.0.zip file.
  3. Download Gapps.zip file for CM 13.
  4. Connect your phone to your PC now.
  5. Copy the all three .zip files to the storage of your phone.
  6. Now disconnect your phone and turn it off complete.
  7. Boot into TWRP recovery now, in order to do so, turn it on by pressing and holding Volume Up + Home Button + Power Key. You should see the recovery mode in a while.
  8. Now in TWRP  recovery, wipe cache, factory data reset and advanced options > dalvik cache.
  9. After wiping all these three, select “Install” option.
  10. Now select “Install > Choose Zip from SD card > Select cm-13…….treltexx.zip file > Yes”.
  11. This will flash the ROM in your phone, once done get back to the main menu in recovery.
  12. Now once again select “Install > Choose Zip from SD card > Select Gapps.zip file > Yes”
  13. This will flash the Gapps in your phone.
  14. Reboot your device.
  15. You should see the Android 6.0 Marshmallow running on your device in a while.
  16. That’s all!

First boot may take up to 10 minutes, you may not worry if it’s taking that much long. In case it’s taking too long, you may boot into TWRP recovery and wipe cache and dalvik cache and reboot your device as it may fix the issue. In case your device is having issues, you may return to your old system using the Nandroid backup or follow our guide here to install stock firmware.

Got any queries? Reach us out through the comment box below.

ROM Credits

Install Android 6.0 Marshmallow On At&t Galaxy S3 [CyanogenMod 13]

3
Install Android 6.0 Marshmallow On At&t Galaxy S3 [CyanogenMod 13]

Good news for At&t Galaxy S3. A new life has been given to this device. Android 6.0 Marshmallow based on unofficial CyanogenMod 13 custom ROM is now available for our beloved At&t Galaxy S3.This ROM has been compiled by XDA senior member matrixzone, so all the credit goes to him. If you’re interested in updating your At&t Galaxy S3 to Android 6.0 Marshmallow using a custom ROM, you may follow this guide as we will be helping you to do so.

In case you don’t know about the Android 6.0 Marshmallow, let’s have a recap on it. Android 6.0 Marshmallow is the 6th iteration in Android family. This firmware is the successor of Android Lollipop.  Android 6.0 Marshmallow, Googled worked on the cosmetics of the OS but in Android 6.0 Marshmallow, Google worked on the core Android system. There’s a number of powerful enhancements that make the Android 6.0 Marshmallow a major Android update. Google has upgraded the security of OS. New app permissions feature is pretty cool, and the doze mode for saving battery life is proved to be pretty awesome as well. Android 6.0 Marshmallow is available  for Nexus device or only a few top-notch devices at the moment.At&t S3

It’s quite a surprise for a device like Galaxy S3 to get a custom ROM based on unofficial CM 13.0 Android 6.0 Marshmallow because Samsung forgot this device after updating it to Android 4.3 Jelly Bean. By installing this custom ROM, you will be able to have a touch and feel of Android 6.0 Marshmallow on your phone. The ROM is still in development stages, so a number of crashes is expected. This ROM isn’t a daily driver, as of now it’s experimental. You may only install it if you’re interested in checking out a feel of Android 6.0. We do not recommend newbies to flash this ROM. Proceed with the flashing process if you have an idea about custom ROMs and you can handle any mishap(if occurs).

Preparations


  • This guide is intended for At&t Galaxy S3 SGH I747 only. Do not try flashing this ROM on any other device.
  • Charge your phone up to 80% to make sure that your phone doesn’t die during the flashing process.
  • Flash latest TWRP recovery on your At&t Galaxy S3.
  • Make sure that you backup your important media content, ContactsCall Logs Messages. This is highly recommended just in case something goes wrong and you need to reset your phone.
  • If you already have rooted your device, use Titanium Backup to back up all your important apps + system data.
  • Also if you are using a custom recovery, it is recommended that you backup your current system using that first. [Just for the sake of safety]. Here’s our full Nandroid Backup guide.
  • You will have to go through Data Wipes during installation of this ROM, so make sure that you have backed up all the mentioned data.
  • Make an EFS backup of your phone before you flash this ROM.
  • You need enough confidence to flash this ROM.
  • Alright! Go ahead and flash the custom firmware, follow this guide to the letter.
  • Disclaimer: The methods involved in flashing custom roms and rooting your phone are highly custom and may result in bricking your device, and has nothing to do with Google or the device manufacturer that is SAMSUNG in our case. Also rooting your device will void its warranty and you will be no longer eligible for any kind of free device services by the manufacturers/warranty providers. In case of any mishap we may not be held responsible. Follow these instructions to the letter to avoid any mishap or bricking. Make sure that whatever you do, you are doing it at your own responsibility.


Install Android 6.0 Marshmallow On At&t Galaxy S3 [CyanogenMod 13]

  1. Download  cm-13.0-20151108-UNOFFICIAL-d2att.zip file.
  2. Download Gapps.zip file for CM 13.
  3. Connect your phone to your PC now.
  4. Copy the both the .zip files to the storage of your phone.
  5. Now disconnect your phone and turn it off complete.
  6. Boot into TWRP recovery now, in order to do so, turn it on by pressing and holding Volume Up + Home Button + Power Key. You should see the recovery mode in a while.
  7. Now in TWRP  recovery, wipe cache, factory data reset and advanced options > dalvik cache.
  8. After wiping all these three, select “Install” option.
  9. Now select “Install > Choose Zip from SD card > Select cm-13…….d2att.zip file > Yes”.
  10. This will flash the ROM in your phone, once done get back to the main menu in recovery.
  11. Now once again select “Install > Choose Zip from SD card > Select Gapps.zip file > Yes”
  12. This will flash the Gapps in your phone.
  13. Reboot your device.
  14. You should see the Android 6.0 Marshmallow running on your device in a while.
  15. That’s all!

First boot may take up to 10 minutes, you may not worry if it’s taking that much long. In case it’s taking too long, you may boot into TWRP recovery and wipe cache and dalvik cache and reboot your device as it may fix the issue. In case your device is having issues, you may return to your old system using the Nandroid backup or follow our guide here to install stock firmware.

Got any queries? Reach us out through the comment box below.

Install Ditto Note 5 ROM on Galaxy Note 4 and get all Note 5 features

0
Install Ditto Note 5 ROM on Galaxy Note 4 and get all Note 5 features

Everytime Samsung pulls the curtains off from its Note flagship, Samsung brings a handful of new mouth watering features. This year Samsung unveiled the 5th iteration of Galaxy Note family. As usual, the new Galaxy Note device turned out to be a huge success for Samsung. Galaxy Note 5 sported a completely new design and build, the phone is equipped with top-notch specifications. Samsung used its latest TouchWiz UI on this device. Apart from these cosmetic changes, Samsung loaded it with some handy features which include a new Air Command menu at the top. The new TouchWiz UI is pretty impressive. After seeing the features on the Galaxy Note 5, many Note 4 users wanted to get their hands on those features as well but due to the some new changes introduced by Samsung, Note 4 owners didn’t want to switch to a Galaxy Note 5. Since we are blessed by an open source operating system in the form of Android, anything is possible here. You can now easily enjoy all the features of the Galaxy Note 5 on your Galaxy Note 4 and you do not need to switch your device to checkout the new stuff introduced by Samsung.Note 4

Electron Team, the guys behind all-time famous Ditto Note 2 ROM have joined the Note 4 community now. Eelectron Team has come up with Ditto Note 5 ROM for our beloved Galaxy Note 4. The ROM serves the same purpose for the Galaxy Note 4 as it served for the Galaxy Note 2. Ditto Note 5 ROM is based on Note 5’s software framework. The ROM has almost all new features including the Air Command, Direct Pen input, Multiuser feature and others from the Galaxy Note 5. The ROM doesn’t carry the features from Galaxy Note 5 only, but it also got some cool additional features. Ditto Note 5 ROM has a call recording feature, 5way reboot feature, delay message feature etc. The ROM is rooted and deodexed.

Ditto Note 5 ROM is available for Galaxy Note 4 N910C. The ROM is based on the stock firmware of Galaxy Note 5 N920C and its Android 5.1.1 Lollipop. Since its a stock based custom ROM, you’re not going to find  any prominent bugs in this ROM. Ditto Note 5 ROM is pretty smooth and stable and can be kept for everyday use on your Galaxy Note 4 N910C. If you’re looking for a nice custom ROM that can give your device a whole new life, we recommend flashing Ditto Note 5 ROM on your Galaxy Note 4 and get all features from the all new Galaxy Note 5. In the succeeding post we will be taking you through a detailed method to install Ditto Note 5 ROM on your Galaxy Note 4 N910C. Let’s go through some instructions and then get it working on your phone.

Early Preparations:

1. This is only for Samsung Galaxy Note 4 SM-N910C

This custom ROM is only for the device mentioned above. Make sure that your model number matches the one listed above. To do so, go to Settings > About Device on your device and see your model number. Flashing this ROM on any other device will result in bricking it so make sure that you meet this requirement first of all.

Also make sure that your device is running Android 5.1.1 Lollipop. If it’s running an older version, you may need to update its bootloader to Android 5.1.1 Lollipop first and then flash this ROM. You can use this guide to flash the bootloader only.

2. Battery should be charged at least over 60%

Make sure that your battery is charged enough to complete the flashing process. In case your battery is low and your device goes dead during the flashing process, you may end up soft bricking your device as it won’t complete the flashing process.

3. Flash a Custom Recovery

A custom recovery is required for flashing this ROM. You may flash TWRP recovery using this guide.

4. Backup everything!

Just to be on the safe side, you may consider backing up each and everything from your Android device. This is highly recommended so that in case anything goes wrong, you still have the access to all of your data and you can restore it immediately. You may backup everything as listed below.

5. Disclaimer

The methods involved in flashing custom recoveries, ROMs and rooting your phone are highly custom and may result in bricking your device, and has nothing to do with Google or the device manufacturer that is SAMSUNG in our case. Also rooting your device will void its warranty and you will be no longer eligible for any kind of free device services by the manufacturers/warranty providers. In case of any mishap we may not be held responsible. If your device has the Knox counter on the bootloader, it will be tripped and you won’t be able to reset it ever. Follow these instructions to the letter to avoid any mishap or bricking. Make sure that whatever you do, you are doing it at your own responsibility.

How to install Ditto Note 5 ROM on Galaxy Note 4 N910C

Before you flash this ROM, you need to make sure that you’ve read and applied all the guidelines explained above.

  1. Also, make sure that you’re currently running your Galaxy Note 4 on Android 5.1.1. Upgrading from an older version of Android will cause issues.
  2. Now boot into TWRP recovery, to  do so, turn off your device and then turn it on by pressing and holding Volume Up+ Home Button + Power Key. Select Wipe >Advanced Wipe > Wipe Cache and Dalvik Cache.
  3. Download the Ditto Note 5 ROM [DN5_v0.4_N910C_by_E-Team.zip] and place it on your phone’s sd card.
  4. Also download DN 5 update.zip file and copy it to your phone’s SD card as well.
  5. Boot into TWRP Recovery again, select install > DN4_v0.4_N910C_by_E-Team.zip file and flash it.
  6. The ROM will take a while to get flashed. As soon as the installation is done, factory reset the phone using the wipe option in TWRP recovery.
  7. Reboot now and setup your new ROM in order to enjoy the features of Galaxy Note 5.

Credits: Electron Team

Root and Install CWM/TWRP On Xperia Z Ultra 14.6.A.1.216 Firmware

Root and Install CWM/TWRP On Xperia Z Ultra 14.6.A.1.216 Firmware

Xperia Z Ultra is seeing a new update which moves the build number to 14.6.A.1.216. The new update has completely fixed the wide-spread Stagefright vulnerability. Xperia Z Ultra users do not need to worry about this annoying bug anymore. In the previous Android updates, Sony missed a fix to this vulnerability, but all the Lollipop goodies made their way to the device. In the new update, we are not seeing any new features or apparent enhancements. The new update is only meant to fix the Stagefright bug. Since this is a complete new update, if you’re going to flash or you’ve already flashed it, its going to result in loosing root access. In order to gain root access on this latest firmware, you have to adapt a different approach because the traditional rooting methods do not work on Lollipop anymore.Xperia_Z_Ultra_04

As per required by our loyal users, we have written down this comprehensive guide which will help you to root your Xperia Z Ultra running this latest 14.6.A.1.216 firmware. You will also be able to install a custom recovery like TWRP or CWM. The guide will work for both, Locked and Unlocked bootloaders.

1. This is only for Sony Xperia Z Ultra C6802, Z Ultra C6806 and Z Ultra C6833

This rooting method is only for the device mentioned above. Make sure that your model number matches the one listed above. To do so, go to Settings > About Device on your device and see your model number. Flashing this firmware on any other device will result in bricking it so make sure that you meet this requirement first of all.

2. Battery should be charged at least over 60%.

Make sure that your battery is charged enough to complete the flashing process. In case your battery is low and your device goes dead during the flashing process, you may end up soft bricking your device as it won’t complete the flashing process.

3. Backup everything!

Just to be on the safe side, you may consider backing up each and everything from your Android device. This is highly recommended so that in case anything goes wrong, you still have the access to all of your data and you can restore it immediately. You may backup everything as listed below.

  • Backup SMS Messages
  • Backup Call Logs
  • Backup Contacts
  • Backup Media – Copy your files manually to your PC or Laptop.
  • Titanium Backup – If already rooted, use Titanium Backup to backup all of your apps, system data and other important content. If you haven’t rooted your device previously, skip this step.
  • Backup Nandroid  If CWM  or TWRP installed previously, otherwise skip this step and perform this at the end of flashing.

4. Enable USB Debugging Mode on your device.

Enable USB debugging mode on your device. To do so, tap settings>developer options>USB debugging. If you can’t find developer options in settings, then tap settings > about device and tap “Build Number” for 7 times and you’ll get em’ activated under settings.

5. Install and setup Sony Flashtool.

You must have installed Sony Flashtool. Find the full guide here.

After installing Sony Flashtool, open the Flashtool folder from the drive where you installed it. Now open Flashtool>Drivers>Flashtool-drivers.exe and install the Flashtool, Fastboot & Xperia Z Ultra drivers from the list. If you do not find the Flashtool drivers in Flashmode, skip this step and install Sony PC Companion instead, for drivers support. [Important]

6. Use OEM data cable to establish connection.

Make sure that you use the phone’s original data cable to establish connection between your phone and the PC. Using a different data cable might result in interrupting the firmware installation.

Steps For Rooting Xperia Z Ultra 14.6.A.1.216 Firmware

1. Downgrade to .108 Firmware and Root It

  1. If you have already updated your smartphone to Android 5.1.1 Lollipop, then you have to downgrade your device to KitKat OS and Root it.
  2. Use this guide to Install .108 firmware.
  3. Root using this guide.
  4. Now Install XZ Dual Recovery.
  5. Now phone is rooted, USB Debugging must be enabled.
  6. Download latest installer for Xperia Z Ultra from here. (ZU-lockeddualrecovery2.8.10-RELEASE.installer.zip)
  7. Connect phone to PC using OEM date cable and run install.bat.
  8. It will install the custom recovery.
  9. Now work here is done. Lets move on to next step.

2. Make A Pre-Rooted Flashable Firmware For 14.6.A.1.216 FTF

  1. Download 14.6.A.1.216 FTF and place it anywhere on PC (The Firmware must be specific to your device).
  2. Download ZU-lockeddualrecovery2.8.x-RELEASE.flashable.zip
  3. Now create a pre-rooted firmware using this complete guide.
  4. Now copy the pre-rooted firmware to the phone’s internal storage.
  5. Our work in this step is now done. Move on to next step.

3. Root and Install Recovery on Z Ultra C6802/C6806/C6833 5.1.1 Lollipop Firmware

  1. Custom recovery was installed in the first step.
  2. The pre-rooted firmware was created and copied to phone in next step.
  3. Now you have to turn off phone.
  4. Turn it on again and press volume up or down repeatedly to enter custom recovery.
  5. Click on install and locate the folder where you placed the flashable zip earlier.
  6. Tap on it and install it.
  7. Now reboot the phone.
  8. Your phone will boot up, find out SuperSu in app drawer.
  9. Phewww! You’re rooted with TWRP & CWM recovery installed on your Z Ultra. That’s all.

Let us know how did it go for you. In case you’re stuck with something, reach us out through the comment box below. We would love to help you out.

Root and Install CWM/TWRP On Xperia Z1 Compact 14.6.A.1.216 Firmware

Root and Install CWM/TWRP On Xperia Z1 Compact 14.6.A.1.216 Firmware

Recently Sony updated its very first Compact smartphone, the Xperia Z1 Compact to Android 5.1.1 Lollipop. Xperia Z1 got all Lollipop goodies in this update, the only thing that Sony missed out was the complete patch of annoying Stagefright bug. Stagefright has been eating up all Xperia Z1 Compact, and users were pretty disappointed that Sony couldn’t fix this bug in such a major Android update. Now, Sony has finally come up with a complete fix to this bug. The latest update based on the build number 14.6.A.1.216 patches the Stagefright vulnerability. You don’t have to bother about this vulnerability anymore. Since this is a complete new firmware, if you’re going to flash it, it will wipe the root access from your device and you will have to root your device running 14.6.A.1.216 firmware from scratch. If you’re looking for a method to root your Xperia Z1 Compact on this firmware, you may have spotted the right place. Z1 Compact

In the following post, you will find a detailed method to install CWM or TWRP recovery and then root your Xperia Z1 Compact on 14.6.A.1.216 firmware. The method explained below will work for both Locked and Unlocked bootloaders. Let’s go ahead and break the jails of your Xperia Z1 Compact now.

1. This is only for Sony Xperia Z1 Compact D5503

This rooting method is only for the device mentioned above. Make sure that your model number matches the one listed above. To do so, go to Settings > About Device on your device and see your model number. Flashing this firmware on any other device will result in bricking it so make sure that you meet this requirement first of all.

2. Battery should be charged at least over 60%.

Make sure that your battery is charged enough to complete the flashing process. In case your battery is low and your device goes dead during the flashing process, you may end up soft bricking your device as it won’t complete the flashing process.

3. Backup everything!

Just to be on the safe side, you may consider backing up each and everything from your Android device. This is highly recommended so that in case anything goes wrong, you still have the access to all of your data and you can restore it immediately. You may backup everything as listed below.

  • Backup SMS Messages
  • Backup Call Logs
  • Backup Contacts
  • Backup Media – Copy your files manually to your PC or Laptop.
  • Titanium Backup – If already rooted, use Titanium Backup to backup all of your apps, system data and other important content. If you haven’t rooted your device previously, skip this step.
  • Backup Nandroid  If CWM  or TWRP installed previously, otherwise skip this step and perform this at the end of flashing.

Note: This method will work for both, Locked & Unlocked bootloaders.

How To Root & Install Recovery On Xperia Z1 Compact Android 5.1.1 14.6.A.1.216 Firmware

1. Downgrade to .108 Firmware and Root It

  1. If you have already updated your smartphone to Android 5.1.1 Lollipop, then you have to downgrade your device to KitKat OS and Root it.
  2. Use this guide to Install .108 firmware.
  3. Root using this guide.
  4. Now Install XZ Dual Recovery.
  5. Now phone is rooted, USB Debugging must be enabled.
  6. Download latest installer for Xperia Z1 Compact from here. (Z1 Compact-lockeddualrecovery2.8.X-RELEASE.installer.zip)
  7. Connect phone to PC using OEM date cable and run install.bat.
  8. It will install the custom recovery.
  9. Now work here is done. Lets move on to next step.

2. Make A Pre-Rooted Flashable Firmware For .216 FTF

  1. Download 14.6.A.0.216 FTF and place it anywhere on PC.
  2. Download Z1 Compact-lockeddualrecovery2.8.X-RELEASE.flashable.zip
  3. Now create a pre-rooted firmware using this guide: How To Create Sony Xperia Pre-Rooted Firmware With PRF Creator
  4. Once the Flashable ROM is created, it will show the successful message.
  5. Do not touch any other option while creating the pre-rooted firmware.
  6. Now copy the pre-rooted firmware to the phone’s internal storage.
  7. Our work in this step is now done. Move on to next step.

Note: If you do not want to create a pre-rooted flashable zip for your phone yourself, then you can download it for your phone’s specific model number and use it in the guide.

D5503 14.6.A.1.216 Pre-Rooted Flashable Zip

3. Root and Install Recovery on Z1 Compact D5503 5.1.1 Lollipop Firmware

  1. Custom recovery was installed in the first step.
  2. The pre-rooted firmware was created and copied to phone in next step.
  3. Now you have to turn off phone.
  4. Turn it on again and press volume up or down repeatedly to enter custom recovery.
  5. Click on install and locate the folder where you placed the flashable zip earlier.
  6. Tap on it and install it.
  7. Now reboot the phone and find SuperSu in app drawer.
  8. Install Root Checker from the Play Store to verify root access now.
  9. Pheww! That’s all. You’re rooted and have the custom recovery installed.

Got any questions? Ask me in the comments below

Root and Install CWM/TWRP On Xperia Z1 14.6.A.1.216 Firmware

Sony just rolled out a new update for its Xperia Z1. The new update is based on the same Android 5.1.1 Lollipop, and brings nothing new and prominent but fixes an annoying bug. The bug we are talking about here is Stagefright. In the previous Lollipop updates, the Stagefright bug wasn’t fixed completely. Sony seems to be taking this Stagefright vulnerability pretty serious, so we are seeing this new update. This new update is reaching out the users through OTA and PC companion. Just in case you’ve updated, you must have lost the root access or in case you’re going to update your device, you will loose root access. Since the traditional rooting methods do not work on Android Lollipop, you need a different method to root your device running this latest firmware now.xperia-Z1-hero-white-1240x840-f9b9916d16a90faba4e6e2fc3de5e289

We are going to overview a comprehensive method that will help you to install CWM or TWRP recovery and gain root access on your Xperia Z1 running this latest Android 5.1.1 Lollipop 14.6.A.1.216 Firmware.

Note: This method will work for both, locked & unlocked bootloaders.

1. This is only for Sony Xperia Z1 C6902, C6903 and Xperia Z1 C6906

This rooting method is only for the device mentioned above. Make sure that your model number matches the one listed above. To do so, go to Settings > About Device on your device and see your model number. Flashing this firmware on any other device will result in bricking it so make sure that you meet this requirement first of all.

2. Battery should be charged at least over 60%.

Make sure that your battery is charged enough to complete the flashing process. In case your battery is low and your device goes dead during the flashing process, you may end up soft bricking your device as it won’t complete the flashing process.

3. Backup everything!

Just to be on the safe side, you may consider backing up each and everything from your Android device. This is highly recommended so that in case anything goes wrong, you still have the access to all of your data and you can restore it immediately. You may backup everything as listed below.

  • Backup SMS Messages
  • Backup Call Logs
  • Backup Contacts
  • Backup Media – Copy your files manually to your PC or Laptop.
  • Titanium Backup – If already rooted, use Titanium Backup to backup all of your apps, system data and other important content. If you haven’t rooted your device previously, skip this step.
  • Backup Nandroid  If CWM  or TWRP installed previously, otherwise skip this step and perform this at the end of flashing.

Note: This method will work for both, Locked & Unlocked bootloaders.

How To Root & Install Recovery On Xperia Z1 Android 5.1.1 14.6.A.1.216 Firmware

1. Downgrade to .108 Firmware and Root It

  1. If you have already updated your smartphone to Android 5.1.1 Lollipop, then you have to downgrade your device to KitKat OS and Root it.
  2. Use this guide to Install .108 firmware.
  3. Root using this guide.
  4. Now Install XZ Dual Recovery.
  5. Now phone is rooted, USB Debugging must be enabled.
  6. Download latest installer for Xperia Z1 from here. (Z1-lockeddualrecovery2.8.X-RELEASE.installer.zip)
  7. Connect phone to PC using OEM date cable and run install.bat.
  8. It will install the custom recovery.
  9. Now work here is done. Lets move on to next step.

2. Make A Pre-Rooted Flashable Firmware For .216 FTF

  1. Download 14.6.A.1.216 FTF and place it anywhere on PC.
  2. Download Z1-lockeddualrecovery2.8.10-RELEASE.flashable.zip
  3. Now create a pre-rooted firmware using this guide: How To Create Sony Xperia Pre-Rooted Firmware With PRF Creator
  4. Once the Flashable ROM is created, it will show the successful message.
  5. Do not touch any other option while creating the pre-rooted firmware.
  6. Now copy the pre-rooted firmware to the phone’s internal storage.
  7. Our work in this step is now done. Move on to next step.

Note: If you do not want to create a pre-rooted flashable zip for your phone yourself, then you can download it for your phone’s specific model number and use it in the guide.

C6902 14.5.A.0.216 Pre-Rooted Flashable Zip | C6903 14.6.A.1.216 Pre-Rooted Flashable Zip

3. Root and Install Recovery on Z1 C6902/C6903/C6906 5.1.1 Lollipop Firmware

  1. Custom recovery was installed in the first step.
  2. The pre-rooted firmware was created and copied to phone in next step.
  3. Now you have to turn off phone.
  4. Turn it on again and press volume up or down repeatedly to enter custom recovery.
  5. Click on install and locate the folder where you placed the flashable zip earlier.
  6. Tap on it and install it.
  7. Now reboot the phone and find SuperSu in app drawer.
  8. Install Root Checker from the Play Store to verify root access now.
  9. Pheww! That’s all. You’re rooted and have the custom recovery installed.

Got any questions? Ask me in the comments below

How to reduce mobile data usage on Android [ Tips ]

0
How to reduce mobile data usage on Android [ Tips ]

Mobile data is the basic necessity in our daily life, but as unlimited data plans are going out every single MB is precious now, so we have to be very careful where we spend it. What if I tell you that you can cut your mobile data usage in half just in seconds, would you go for it.? Yes! I know every one of you want that, that’s why we have prepared a step by step guide on how you can reduce mobile data usage on Android. 

Before going any further let me tell you few things, there is no rooting method involved so every can adapt these settings. I’ll be changing settings of apps that is used most frequently, most of these apps are then ones which are used by 90% of Android users.

reduce your mobile data usage on Android

How to reduce mobile data usage on Android [ Tips ]:

Compress Chrome pages

Step #1: if you use chrome for web browsing then all you have to do is enable Data Saver mode. This will help you to save 30-35 percent of your mobile data while broswing. Open chrome on your device, Setting>Data Saver> Tap on it to turn on.

Opera Video comprasion

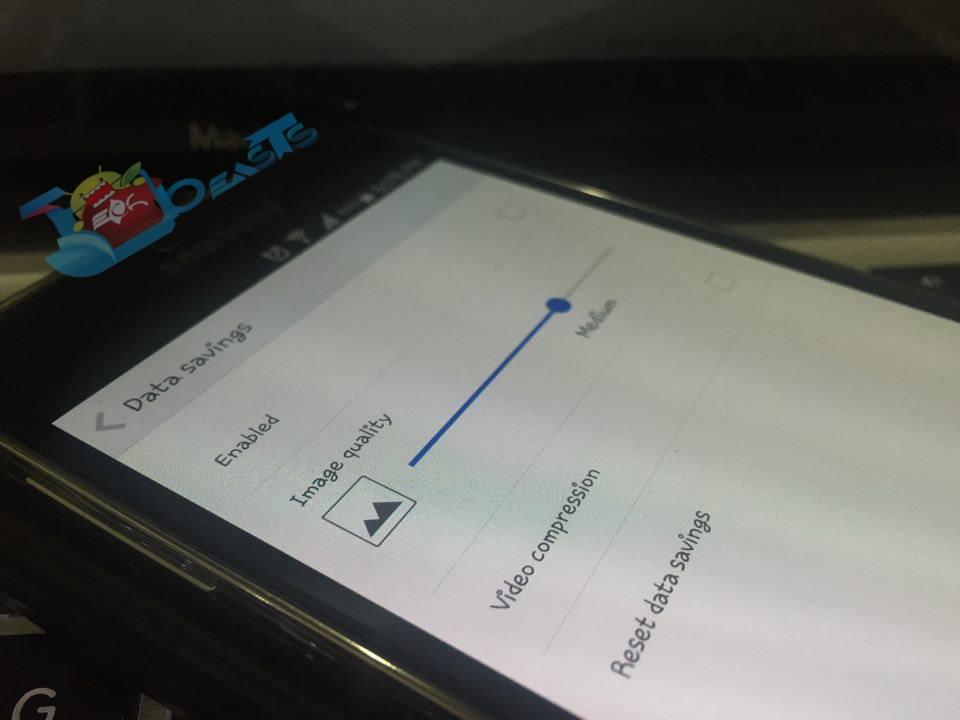
Step #2: If you use Opera on your Android for watching videos and more, then good news is that Opera has a very useful feature ” video compression ” it can save you loads of data and also it will load video more fast then others. Open Opera on your Android device go to Settings>Data Saving>Tap on video compression to enable it.

Ditch Facebook app

Step #3: Facebook app is the biggest data consumer on Android and also it cause battery drain. We can replace Facebook with other apps, but the problem remains. You can try Facebook Lite to reduce mobile date usage, but frankly it won’t give you the best result. Try a wep app named as Tinfoil which display Facebook webiste.

enable restrict data backgroud

Step #4: The best and easiest way is to use restrict background data, you have option to use it on some specific apps or for everything. All you have to do is to open settings on your Andorid device> Settings > Data usage > Restrict Background Data.

disable auto update apps

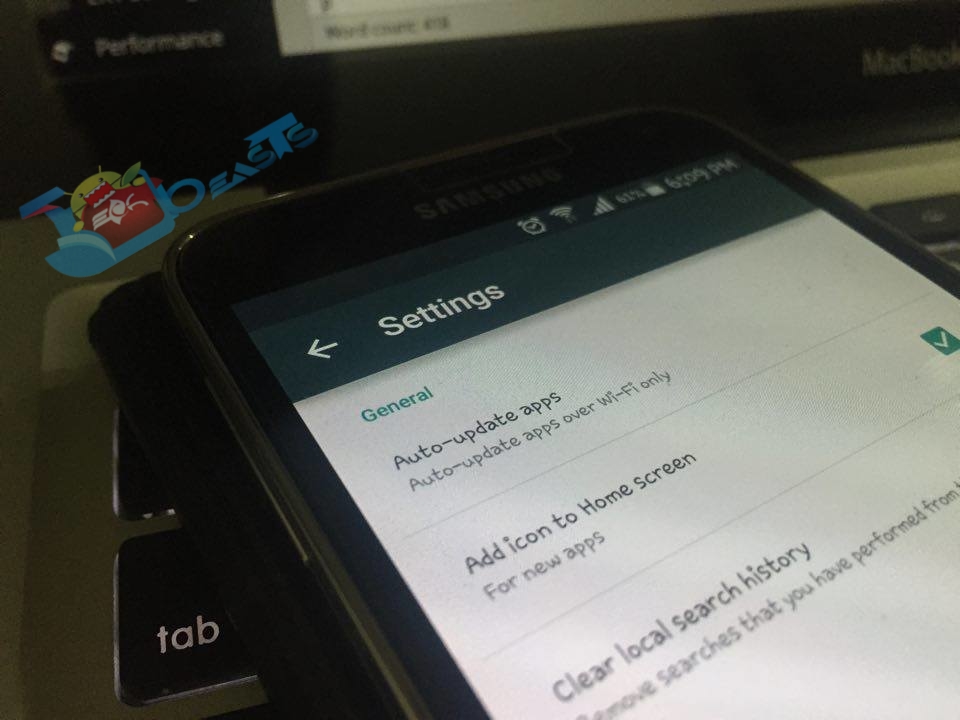
Step #5: As far as i know auto updating apps is the one which consumes the most of our mobile data. Open Google Play on your device, Swipe to left>Tap on Settings>Tap on Auto update apps> now either your turn if off or select Auto-update apps over Wi-Fi only.

stopr streaming online services

Step #6: Stop using online streaming service like Youtube, Spotify, Vine, Soundcloud and more. Try to add songs on you device.

Fix ‘Unfortunately app has stopped’ errors [ Tips ]

0
Fix ‘Unfortunately app has stopped’ errors [ Tips ]

If you are an Android user then your are familiar with Unfortunately app has stopped error, this is the most irritating error when its start popping up. There are a lot of reasons that can trigger Unfortunately app has stopped error, previously we have covered fix Unfortunately WhatsApp  has stopped, Viber, Snapchat, Facebook, Messenger and many more. Today I’ll tell you how you can fix unfortunately app has stopped, means you can apply these steps on any app.

There is no rooting involved in the guide, all you have to do is follow the simple steps mentioned below. This error seems little but once it starts appearing you cannot use anything on your device. Following are the four different methods to fix Unfortunately app has stopped.

unfortunately app has stopped

How To Fix ‘Unfortunately app has stopped’ errors [ Tips ]:

Method #1: 

  • First goto settings on your device.
  • Now scroll down and look for Application manager.
  • In Application manager swipe left and find all tab.
  • Scroll down and find the that’s causing this error and tap on it.
  • Now tap on clear data and clear cache.
  • All Done !

Method #2:

First check which app is causing this issue, after that navigate to settings on your device. Scroll down and tap on Application manager, swipe left to go all Apps tab. Locate the app and tap on it->hit Uninstall, wait until the app is uninstalled. Now open Google Play and install the app which you have deleted.

Method #3:

Try to perform a soft reset by turning off your device, remove the battery and wait for few seconds. Now insert the battery and turn on your device. This might help you because if your device is turned on for a long time it become slow and laggy.

Method #4:

If none of given methods worked for you then you’ve to perform a factory reset. Before proceeding any further backup your device. Once you’ve the back up, open settings on your device-> Backup and reset -> Factory data reset.

How to transfer WhatsApp conversations to new devices

0
How to transfer WhatsApp conversations to new devices

WhatsApp is the top cross messaging app for every smartphone, more than 900 million users are using WhatsApp daily. But what if you got a new phone and you want all you WhatsApp conversation on your new device because old conversation don’t go there automatically. No need to worry in the following guide I’ll tell you how to transfer WhatsApp conversations to new devices.

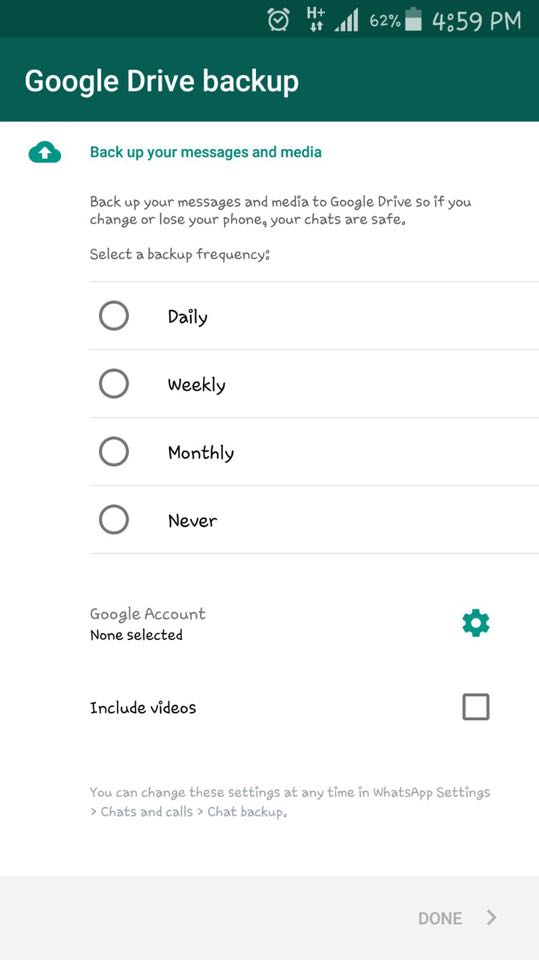
There are two methods to transfer WhatsApp conversation to a new device, one is to use Google drive and other is to copy message backup from your device memory. Note that WhatsApp is rolling out new updates in which all you have to do is enable the automatic Google Drive backups. If you haven’t got the Google drive backup option then you can always use 2nd Option.

 transfer Whatsapp conversation to new device

How to transfer WhatsApp conversations to new devices:

 whatsapp backup daily whatsapp backup daily

  • OpenWhatsApp on your device and tap on three dots located on your top left side of screen.
  • Now Tap on chats and calls.
  • Tap on backup chat, here you can choose to manually backup or select Google drive.
  • You can also set when you want to backup of your chat daily, weekly and monthly.

Method # 2:

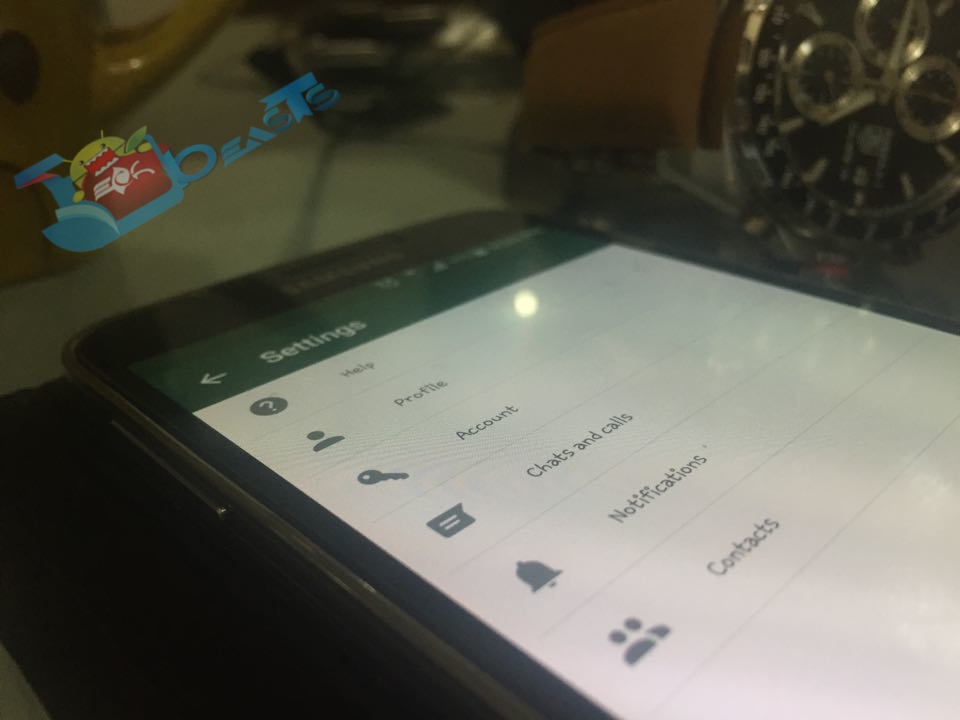
  • First open WhatsApp on your mobile, Tap on 3 dots and select settings> Chats and calls > Chat backup.
  • Now connect your device with PC.
  • Open your device internal memory, search for WhatsApp folder.
  • Open WhatsApp folder -> Database. Here all of you chats backups are stored, copy the latest backup file and paste it on your desktop.
  • Now on your new device install WhatsApp but don’t open it. Once WhatsApp is installed, connect your device with Pc and open WhatsApp folder > Database. Now copy the backup file from your desktop and paste it here.
  • Open WhatsApp on your device, You should now get a notification that a message backup was found. Tap on restore and you are done.

* Note* : If you want to transfer complete backup of WhatsApp conversation to new device along with all the media, all you have to do is connect your old device with Pc and copy the WhatsApp folder. Now install WhatsApp on your new device, don’t open it. Connect your device with PC and copy the WhatsApp folder of your old device and replace it with the new one. Now open WhatsApp on your device, You should now get a notification that a message backup was found. Tap on restore and you are done.

Download Casper for PC Windows and Mac

0
Download Casper for PC Windows and Mac

Following are the instruction on how to download Casper for PC running Windows, Casper is a alternative client for Snapchat it helps you to Save Snaps, Send Snaps from your Gallery and much more. You cannot download Casper from Google Play, for some reason it’s removed from Play store. I’ve prepared a step by step guide to download and install Casper for Pc using third party emulators like BlueStacks and Andy.

casper for pc

How To Install Casper For PC or MAC Using BlackStacks

Method 1:

  1. Install Bluestacks on your PC or MAC.
  2. Download Casper Apk on your PC.
  3. Make sure that you have installed Bluestacks. Double-click the downloaded Casper Apk to install it.
  4. The APK will be installed through Bluestacks, once the notification pop-ups determining the installation completion, open Bluestacks.
  5. Now click on My Apps and then click on Casper.
  6. The application will open up. Now follow on-screen instructions to Casper.

Method 2:

  1. Install Bluestacks on your PC or MAC.
  2. Open Bluestacks and setup your Google Play Store account.
  3. Now open Google Play Store and search for “Casper“.
  4. Once found, install Casper.
  5. Now click on My Apps and then click on Casper.
  6. The game will open up. Now follow on-screen instructions to Play Casper.

How To Install Casper For PC or MAC Using Andy OS

  1. Download and install Andy OS on your Windows PC or MAC.
  2. Once downloaded, open Andy OS.
  3. Setup Google Play Account on it.
  4. Now open Apps > Google Play Store and search for “Casper“.
  5. Install Casper and wait for it to finish the installation.
  6. Once done, open “Uncategorized” portion in Andy and click on Casper to play it.
  7. That’s all.

Download Rop for PC Online – Windows and Mac

0
Download Rop for PC Online – Windows and Mac

Following are the instruction on how to download Rop for Pc running Windows and Mac, Rop is a free puzzle game, but it will blow your minds when you’ll see how much it’s difficult to play. I’ve played a lot of puzzle games, but I think Rop is the best from all, it’s addictive, mind-bending, minimal puzzle game with dozens of levels. In the following guide, I will tell you how to download and install Rop for PC using third party emulators like BlueStacks and Andy.

Rop for PC

Rop Features:

– Beautifully crafted minimal puzzle game
– 77 mind bending levels
Get ready for the new puzzle experience..

Optimized for human brains

How To Install Rop For PC or MAC Using BlackStacks

Method 1:

  1. Install Bluestacks on your PC or MAC.
  2. Download Rop Apk on your PC.
  3. Make sure that you have installed Bluestacks. Double-click the downloaded Rop Apk to install it.
  4. The APK will be installed through Bluestacks, once the notification pop-ups determining the installation completion, open Bluestacks.
  5. Now click on My Apps and then click on Rop.
  6. The application will open up. Now follow on-screen instructions to Rop.

Method 2:

  1. Install Bluestacks on your PC or MAC.
  2. Open Bluestacks and setup your Google Play Store account.
  3. Now open Google Play Store and search for “Rop“.
  4. Once found, install Rop.
  5. Now click on My Apps and then click on Rop.
  6. The game will open up. Now follow on-screen instructions to Play Rop.

How To Install Rop For PC or MAC Using Andy OS

  1. Download and install Andy OS on your Windows PC or MAC.
  2. Once downloaded, open Andy OS.
  3. Setup Google Play Account on it.
  4. Now open Apps > Google Play Store and search for “Rop“.
  5. Install Rop and wait for it to finish the installation.
  6. Once done, open “Uncategorized” portion in Andy and click on Rop to play it.
  7. That’s all.

How To Save All Pictures from MMS Text Messages on Android [ Guide ]

0
How To Save All Pictures from MMS Text Messages on Android [ Guide ]

Following are the instruction on how to save all pictures from MMS text messages on Android, we send and receive tons of MMS messages daily and sometimes we need to get a specific picture from MMS messages, so instead of scrolling down and start checking each message, why not extract all the pictures from MMS messages on Android. All you have to do is install an app from Google Play.

save all pictures form mms on android

How To Save All Pictures from MMS Text Messages on Android:

  • First you have to install “Save MMS” from Google Play.

save_mms_in_play_store

  • Once the app is installed run it from your app drawer.
  • When you’ll run the app, it will automatically download all the attachments (pictures, audio, video, etc.) from your MMS messages.
  • Once all the pictures are downloaded, search the on you want to download and as soon as you found it tap on it.
  • A dialog box will open where you have to enter the name or you can go with the default one. Tap on save.
  • To access the saved images you have to goto My Files on your device and open the SavedMMS” folder.

All Done !