Home Blog Page 352

Change the Names of the Icons on Your Android Home Screen [ Tip ]

1
Change the Names of the Icons on Your Android Home Screen [ Tip ]

Every app you install on your Android device comes with default name, in the following guide I’ll tell you how you can Change icon names on Android Home Screen. The Android system don’t allow to change the default name of the App, but there is an which can easily change any app name on Android, no need to root your device.

change apps name in android

Change the Names of the Icons on Your Android Home Screen:

  • First you have to download an app from Google Play Store. Open Google Play and search for QucikShortCuts.

Screenshot_2015-11-03-05-07-21

  • Once the app is installed. launch it from your app drawer by tapping on its icon. Now you’ll see the list of all apps, scroll down and find the app for which you want to change the name. Tap on the App.

Screenshot_2015-11-03-05-09-43

  • All the information of the app will be displayed, tap on the “Tap to change label”.

Screenshot_2015-11-03-05-09-56


  • When you tap on change the label a new dialog box will show up, rename the shortcut and tap on Ok.

Screenshot_2015-11-03-05-10-09

  • Now new name displays at the top of the right pane.

Screenshot_2015-11-03-05-11-52

  • You’ll see a create button at the bottom of the screen, Tap on it to create a new app shortcut.
  • Once its done you’ll see a pop-up asking for the ranking.

Screenshot_2015-11-03-05-12-10

All Done.

Install TWRP Recovery And Root Huawei MediaPad X2

0
Install TWRP Recovery And Root Huawei MediaPad X2

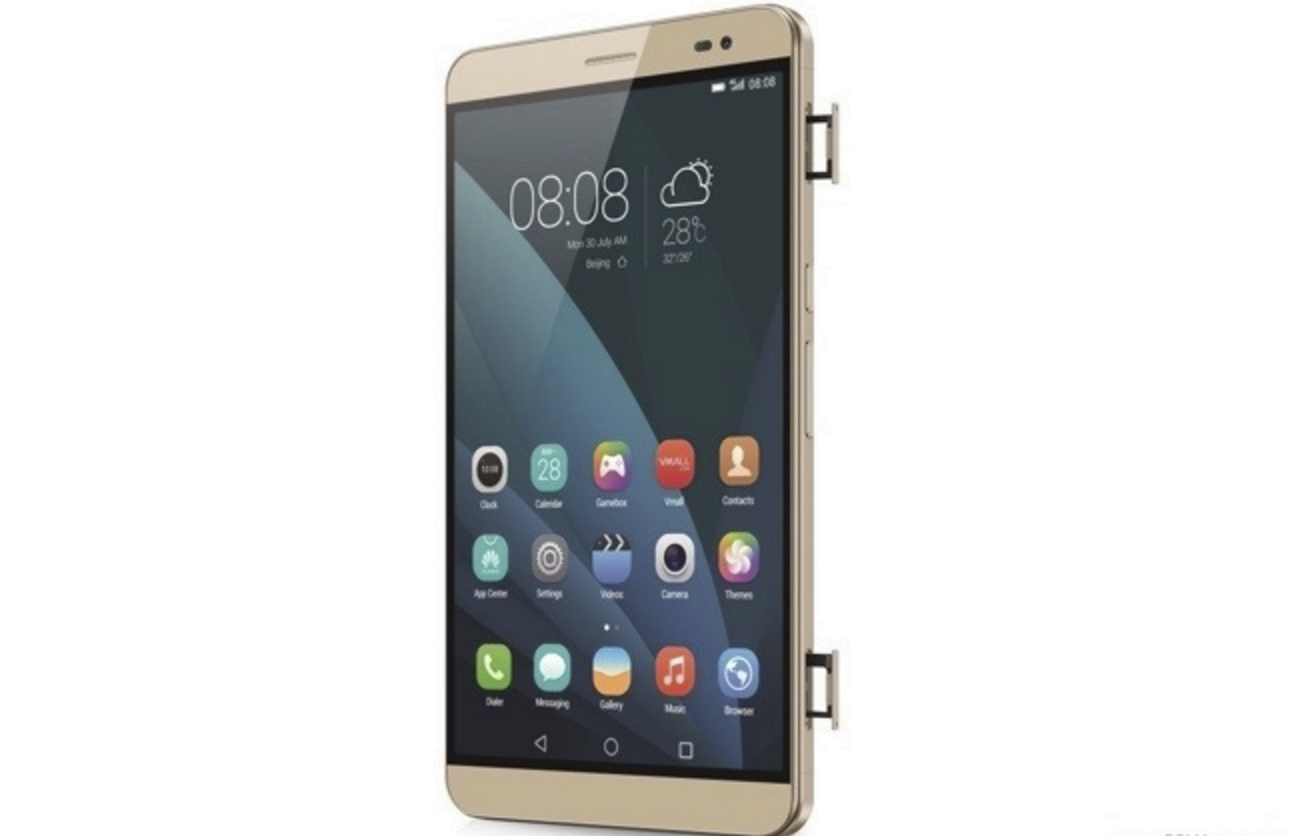
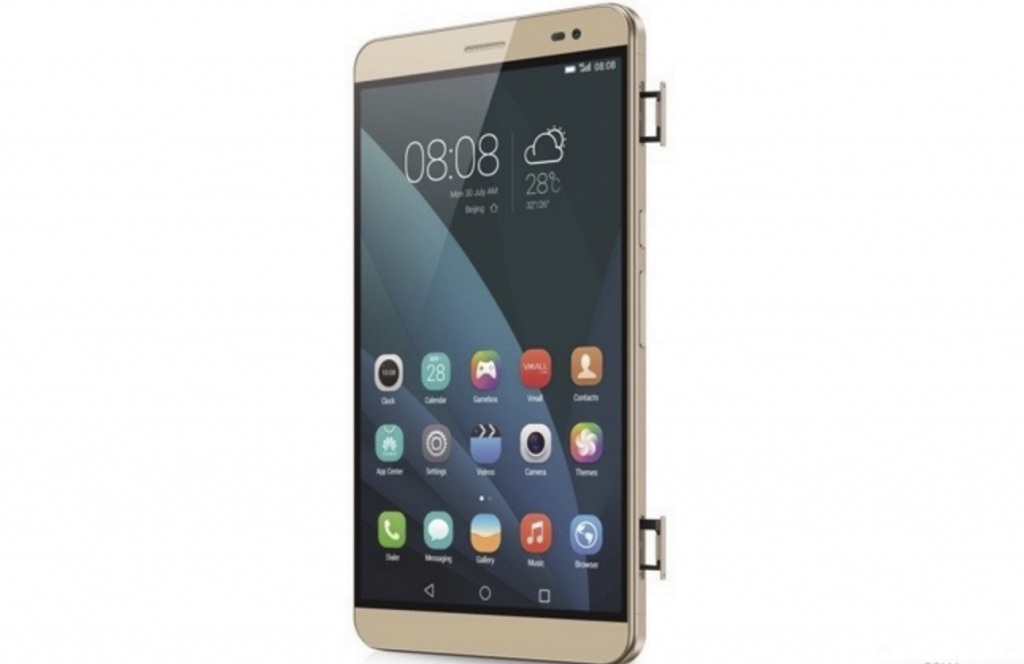
MediaPad X2 is Huawei’s 2015 tablet. Huawei flaunted this device with a 7.0-inch screen having a resolution of 1200 x 1290 pixels and 323 ppi pixel density. Huawei equipped MediaPad X2 with Hisilicon Kirin 930 Quad-core CPU clocked at 1.5 GHz, this was accompanied by a Mali-T628 MP4 GPU. Under the hood we have a 2 GB RAM with 16 GB internal storage or 3 GB RAM with 32 GB internal storage. MediaPad X2 has an external mircoSD slot as well which supports up to 128 GB. We saw a 13 MP shooter placed at the back and a 5 MP shooter on the front. MediaPad X2 has a huge 5000 mAh battery, that is good enough to last for days. Overall, Huawei did a great job by putting some top-notch specifications in a tablet which is quite a rare thing.MP X2
MediaPad X2 runs on Android 5.0 Lollipop out of the box. Lollipop development has increased up to a very good amount in the past few months, there’s a number of custom stuff that you can do no your Lollipop powered device now. Good news for Huawei MediaPad X2 owners is, they can now easily flash a TWRP recovery and root their MediaPad X2 running Android 5.0 Lollipop. Those of you who do not have an idea about TWRP recovery, they may be interesting in knowing that TWRP is one of the two all-time famous custom recoveries. TWRP allows users to flash zip files, create and restore Nandroid, EFS and other partitions backups. It also allows users to wipe cache and dalvik cache. Now if you can flash TWRP on your device, that means you can root it as well and that’s what we are exactly gonna do.

In the first part of the succeeding guide, we will show you how you can flash TWRP 2.8 recovery on your beloved MediaPad X2. After flashing TWRP recovery we will head towards the 2nd part where we will show you the procedure to flash SuperSu.zip file on your MediaPad X2 and gain root access on it. Let’s go through some pre-installation instructions and then get it done afterwards.

Precautions & Prep

  • This guide is intended for MediaPad X2 only. Do not try this method on any other device otherwise you may result in bricking it.
  • Make sure that your phone’s battery is charged up to 80% in order to avoid any power issues during the flashing process.
  • Backup all of your important contacts, call logs, sms messages and media content to stay on a safe end.
  • Use your original data cable to establish connection between your phone and your PC.
  • Follow this guide to the letter to avoid any mishap.

Disclaimer: The methods involved in flashing custom recoveries and rooting the device are highly custom. Rooting the device and flashing a custom recover is never recommended by a device manufacturer. In case something goes wrong, TechBeasts or the device manufacturers may not be held responsible. Make sure that you’re doing everything at your own risk.

Required downloads & installations

  1. Unlock the bootloader of your MediaPad X2 using this guide.
  2. Download ADB & Fastboot packege with TWRP recovery.img file. Extract this ADB & Fastboot file on your desktop to access its contents.
  3. Download SuperSu.zip file and copy it to your phone’s internal storage.

How To Install TWRP Recovery on MediaPad X2

Step#1: Make sure that you’ve followed all the steps explained above.

Step#2: Now connect your MediaPad X2 to your PC. If it asks for some permission on the phone, check allow this PC and tap ok.

Step#3: Now open the extracted Minimal ADB & Fastboot folder.

Step#4: Now click on py_cmd.exe file in order to open the command prompt.

Step#5: Enter the following commands in command prompt one by one.

Step#6: adb devices

This command will list the connected adb devices. You can verify whether your device is connected properly or not.

Step#7: adb reboot-bootloader 

This command will reboot your MediaPad X2 in bootloader mode.

Step#8: fastboot flash recovery recovery.img

This will flash TWRP recovery on your MediaPad X2.

Step#9: As the recovery flashing is over, select recovery from Fastboot mode on your phone. You will now see the TWRP logo on the screen, that means you’ve successfully flashed TWRP recovery.

Step#10: Tap Reboot > System in TWRP recovery in order to reboot your MediaPad X2 now & let’s root it now.

The recovery you just flashed above is not in English language. In order to change the language to English, follow these steps.

  1. Download TWRP recovery theme folder. It should be a .zip file.
  2. Now rename the downloaded folder to ui.zip.
  3. Now open internal storage your phone using a file manager.
  4. Create a new folder named as “TWRP”. Inside the TWRP folder, create another folder named as “theme”.
  5. Copy the renamed “ui.zip” file in this theme folder.
  6. Now boot into TWRP recovery. You will have TWRP in English.

How To Root MediaPad X2

Step#1: Make sure that you’ve copied SuperSu.zip file to your phone. In case you haven’t, do it now.

Step#2: Now boot your phone in to TWRP recovery mode. To do so, turn it off completely first. Now turn it on by pressing and holding Volume Down + Power Key.

Step#3: As you see TWRP recovery, tap “Install > Locate the copied SuperSu.zip file (should be at bottom) > tap this file > Swipe the bar at the bottom of screen to confirm flash”.

Step#4: As soon as SuperSu.zip file is flashed, go back to main menu in TWRP and tap reboot > system.

Step#5: Your device will boot up now. Find SuperSu in app drawer. Install Root Checker app to verify root access.

That’s all. Stuck with something? Don’t worry! Reach us out through the comment box below.

Source

Install TWRP Recovery And Root Huawei Ascend G620S, Honor 4X

21
Install TWRP Recovery And Root Huawei Ascend G620S, Honor 4X

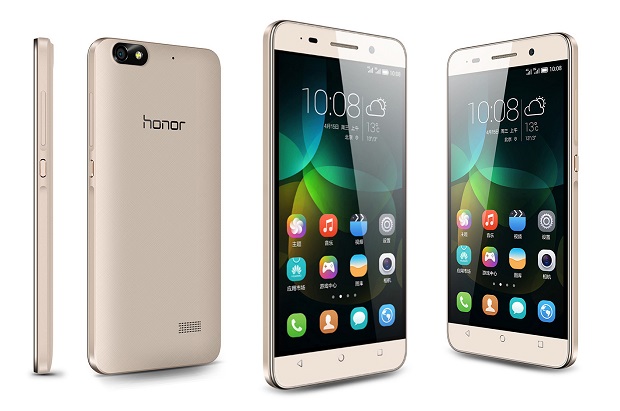
Huawei Honor series has brought a lot of respect in Huawei’s house. Last year we saw Huawei Ascend G620S, also known as Honor 4 Play and Huawei Honor 4X coming out. Honor series does a great justice with the price it gets offered in. We saw the 4X equipping a 5.5-inch 720p display having a 5 MP selfie shooter. At the back we found a 13 MP shooter capable of recording 1080p videos. Huawei powered the Honor 4X with its HiSilicon Kirin 620 or Qualcomm Snapdragon 410 CPU. The device is either powered up with Mali-450 GPU or Adreno 306 GPU. Huawei Honor 4X runs on Android 4.4.2 out of the box, but the device recently received Android Lollipop update. Huawei has the plans to update this device to Android 6.0 Marshmallow as well. Huawei Ascend G620S is considered to be the younger brother of Honor 4X carrying some low-end specifications. This device is also known as Honor 4 Play.Huawei-Honor-4C-3

Its been a long while since this device is around. This time is enough to make the users bored of the stock stuff on this device. In the last 1 year, we witnessed a great number of custom stuff including Mods and custom ROMs raining on the development forums. If you’re considering unleashing the real power of your Huawei Ascend G620S or Honor 4X, then this may be the right time for you. In the succeeding guide we have written down the methods to flash TWRP recovery and root our beloved Huawei Ascend G620S and Honor 4X. Those of you who do not have an idea about TWRP recovery and root access, they may be interesting in knowing that TWRP recovery is a custom boot image that helps you to flash zip files on your Android smartphone. TWRP recovery also allows you to create and restore Nandroid, Modem and other partitions backup. You can also perform factory data reset without loosing your internal storage and also wipe cache and dalvik cache by means of TWRP. By root your device, you unlock the core system of your phone. On a rooted device you can install root specific applications like Titanium Backup, Greenify, System Tuner, Root Explorer and others. Using root specific applications you can enhance the performance and battery life of your Android smartphone.

As you move forward, you will come across two different parts. In the first part we will flash TWRP recovery on our beloved Huawei Honor 4X and Ascend G620S. In the second part we will flash SuperSu.zip file to gain root access on this device. Let’s go ahead and learn the method now.

Precautions & Prep

  • This guide is intended for all variants of Huawei Ascend G620S or Huawei Honor 4X. Do not try this method on any other device otherwise you may result in bricking it.
  • Make sure that your phone’s battery is charged up to 80% in order to avoid any power issues during the flashing process.
  • Backup all of your important contacts, call logs, sms messages and media content to stay on a safe end.
  • Use your original data cable to establish connection between your phone and your PC.
  • Follow this guide to the letter to avoid any mishap.

Disclaimer: The methods involved in flashing custom recoveries and rooting the device are highly custom. Rooting the device and flashing a custom recover is never recommended by a device manufacturer. In case something goes wrong, TechBeasts or the device manufacturers may not be held responsible. Make sure that you’re doing everything at your own risk.

Required downloads & installations

  1. Unlock the bootloader of your Huawei Ascend G620S and Honor 4X using this guide.
  2. Download ADB & Fastboot packege with TWRP recovery.img file. Extract this ADB & Fastboot file on your desktop to access its contents.
  3. Download SuperSu.zip file and copy it to your phone’s internal storage.

How To Install TWRP Recovery on Huawei Ascend G620S & Honor 4X

Step#1: Make sure that you’ve followed all the steps explained above.

Step#2: Now connect your Huawei G620S or Honor 4X to your PC. If it asks for some permission on the phone, check allow this PC and tap ok.

Step#3: Now open the extracted Minimal ADB & Fastboot folder.

Step#4: Now click on py_cmd.exe file in order to open the command prompt.

Step#5: Enter the following commands in command prompt one by one.

Step#6: adb devices

This command will list the connected adb devices. You can verify whether your device is connected properly or not.

Step#7: adb reboot-bootloader 

This command will reboot your Huawei G620S or Honor 4X in bootloader mode.

Step#8: fastboot flash recovery recovery.img

This will flash TWRP recovery on your Huawei G620S or Honor 4X.

Step#9: As the recovery flashing is over, select recovery from Fastboot mode on your phone. You will now see the TWRP logo on the screen, that means you’ve successfully flashed TWRP recovery.

Step#10: Tap Reboot > System in TWRP recovery in order to reboot your Huawei Ascend G620S or Honor 4X now & let’s root it now.

How To Root Huawei Ascend G620S Honor 4X

Step#1: Make sure that you’ve copied SuperSu.zip file to your phone. In case you haven’t, do it now.

Step#2: Now boot your phone in to TWRP recovery mode. To do so, turn it off completely first. Now turn it on by pressing and holding Volume Down + Power Key.

Step#3: As you see TWRP recovery, tap “Install > Locate the copied SuperSu.zip file (should be at bottom) > tap this file > Swipe the bar at the bottom of screen to confirm flash”.

Step#4: As soon as SuperSu.zip file is flashed, go back to main menu in TWRP and tap reboot > system.

Step#5: Your device will boot up now. Find SuperSu in app drawer. Install Root Checker app to verify root access.

That’s all. Stuck with something? Don’t worry! Reach us out through the comment box below.

Source

Download Microsoft Arrow Launcher APK

0
Download Microsoft Arrow Launcher APK

Microsoft seems to be pretty active towards its way to take over Android smartphones. Microsoft’s most recent step was the introduction its Arrow Launcher in the Google Play Store. Arrow Launcher is the all new Android launcher that makes your phone look pretty cool. The launcher has a pretty simply and user friendly UI which makes it very easy to switch between different screens i.e. applications, recent and others. Arrow manages your preferences for you, it learns from your everyday use and keeps your recent stuff on the front. One of the things that attracted me the most was almost no complexity. Unlike other launchers, Arrow doesn’t get you confused between the options. The launcher does contain a plethora of features, but the features won’t get you caught in a confusion. There is a pull-up panel, that comes up by simply swiping the  thumb upside from the launcher’s home button. Arrow launcher is highly custoimzable. The elegance and smooth performance is going to enhance your Android experience. The launcher comes with a bunch of beautiful wallpapers.arrow launcher
You can download and install  Arrow launcher using Google Play Store. If you’re unable to access Arrow launcher in Google Play Store at your end, or if the Play Store itself isn’t working at your end, you may be interested in adapting some other method to install Arrow Launcher on your Android smartphone. For users unable to access Arrow Launcher directly, we have extracted the APK file from the Play Store. Using this APK file you can install Arrow launcher on your Android smartphone manually. Arrow launcher works on all Android devices running Android 4.0.3 or higher. Let’s go ahead and grab the latest APK file of Microsoft Arrow Launcher. 

How to Clear Your Google Search History on Android [ Tips ]

0
How to Clear Your Google Search History on Android [ Tips ]

Here’s how you can easily clear your Google search history on Android devices, I’ll tell you two methods to clear the search terms from Google search history, depends on what you want to delete. If you want to delete some specific search terms then it will be quick but if you want to delete all the search history then you’ve to work a little bit more.

How to Clear Your Google Search History on Android

How to Clear Your Google Search History on Android [ Tips ]:

  • First open Google App on your device.

Screenshot_2015-11-02-05-57-37

  • Now tap on search bar, a drop-down list of your recent search will show. Tap any search term whom you want to delete.

Screenshot_2015-11-02-05-57-49

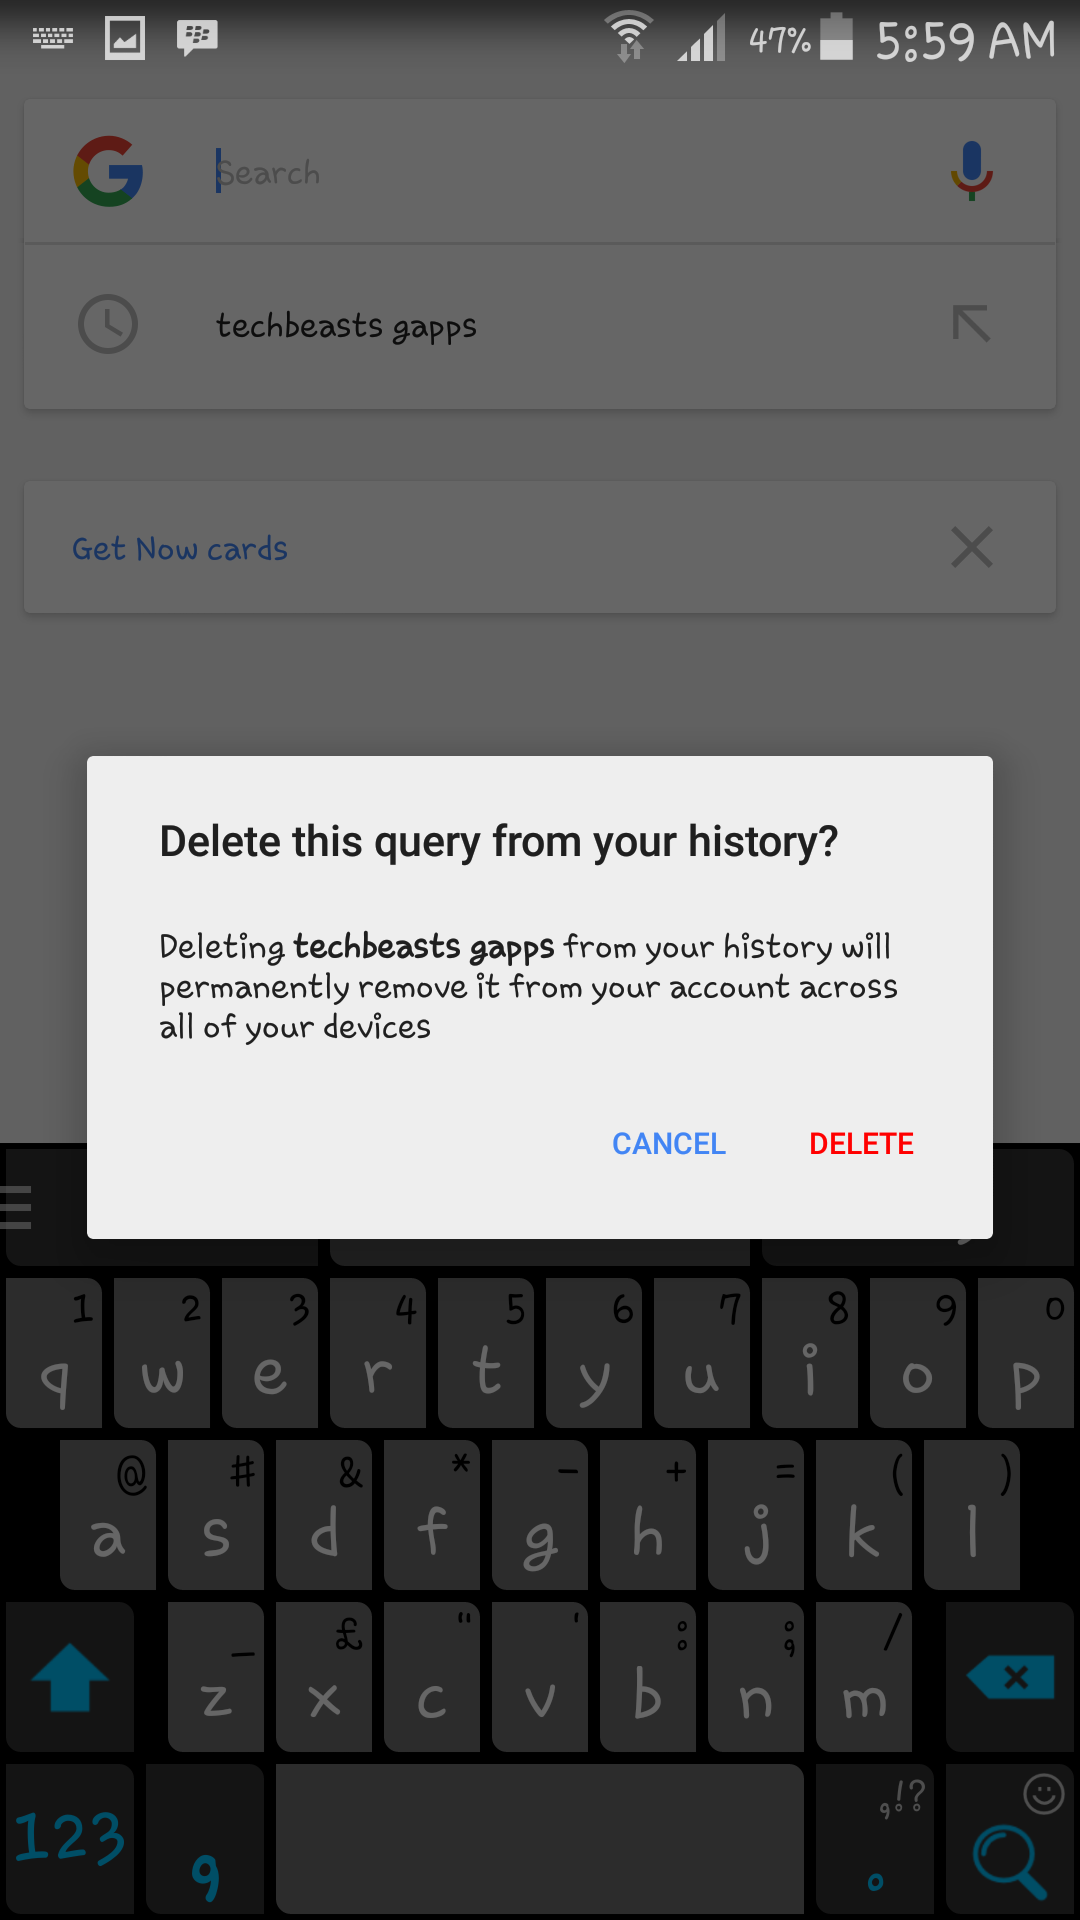
  • You’ll see a pop-up saying ” Delete this query from your history “, Tap on Delete.

Screenshot_2015-11-02-05-59-15

  • Now if you want to delete all the history from your browser, Open Google mail on your Android browser and log in to your account.

Screenshot_2015-11-02-06-01-22

  • Tap on the settings located at the bottom of your browser and select history.

Screenshot_2015-11-02-06-02-23#1

  • There you’ll see all of your browsing history select the searched terms you want to delete. Once you’ve selected your search terms tap on delete.
  • All done !


Stop Android apps running in the background [ How To ]

0
Stop Android apps running in the background [ How To ]

Following are the instruction on how to stop Android apps running in the background, now before going any further let me tell you that not all the apps running in background are causing issues or eating up your battery. Apps such as Google Search, Google Play services, Google Contacts Sync, Google Keyboard and Google Play Store, no need to stop any of these apps.

12177863_10207874122994318_1492623063_n

How To Stop Android apps running in the background:

  • First enable the developer option by going into Settings > About Device and now tap on build number 7 times.
  • Go to Settings > Developer options > Process stats and now tap on any app to see the stats.
  • Now go back to settings and tap on the battery, now check individual app.

How to disable, stop and uninstall background apps:

  1. Settings > Applications > Application manager > tap on the app and then disable it.
  2. If you are running Android Lollipop or Android Marshmallow then you can close the recent apps by tapping the Recent Apps navigation button.
  3. You can delete the app by going to settings > Applications > Application manager, tap on the app and then tap on Uninstall.
  4. Goto Settings > Applications > Application Manager, tap in Running apps tab, then tap on force stop.
  5. Install third party apps like Greenify or Hibernate.

References:

https://www.androidpit.com/how-to-stop-apps-running-in-the-background-on-android

http://gs5.wonderhowto.com/how-to/automatically-hibernate-apps-for-better-battery-life-no-root-required-0157251/

http://forums.androidcentral.com/verizon-samsung-galaxy-s4/377139-how-stop-apps-running.html

http://www.howtogeek.com/166140/you-dont-need-to-install-a-task-manager-how-to-manage-running-apps-on-android/

http://androidadvices.com/enable-disable-apps-running-background-android-ics-devices/

Enable Edge Screen Features on Samsung Galaxy Note 5

0
Enable Edge Screen Features on Samsung Galaxy Note 5

Following are the instruction on how you can enable edge screen features on Samsung Galaxy Note 5, Yes the same features introduced on Samsung Galaxy S6 edge. There is no doubt that you have to root your device in order to install edge screen feature Mod on Galaxy Note 5. Once again the famous developer from XDA developers Androidwizzard has created this Mod for us, after installing this Edge Screen Mod you’ll get Edge apps and Edge contacts functionality same as Samsung Galaxy S6 Edge.

Also See: How to Root Samsung Galaxy Note 5

samsungnote5titaniumsilver_news

Requirements:

  • Your Galaxy Note 5 must have root access.
  • Custom Recovery installed on your Note 5
  • You should be using deodexed Stock ROM
  • Edge featureforN5.zip

How To Enable Edge Screen Features on Samsung Galaxy Note 5:

  • First of all download the zip file.
  • Now copy the downloaded file to your device.
  • Boot your device in recovery mode by Power +Volume Up+ Home for few seconds.
  • In recovery mode, backup your current ROM.
  • Once you are done with backup, go back to the main menu and select install Zip.
  • Now locate the file you downloaded in the 1st step.
  • Tap on it to install, once done reboot your device.
  • In the end when your device boots up, go into settings and there you’ll see Edge Screen options.

All Done.

Also See:

How To Enable Multi Window Mode on Android Marshmallow 6.0

0
How To Enable Multi Window Mode on Android Marshmallow 6.0

Android Marshmallow is the latest OS released by the Google and with this latest update Google has added tons of new features, but one thing that is needed the most on Google Nexus devices was Multi Window Mode. Good news is that Multi Window Mode comes pre-loaded in Android 6.0, but it’s hidden so today I’ll tell you how you can enable Multi Window Mode on Android 6.0.

12177863_10207874122994318_1492623063_n

There are two methods to enable Multi Window Mode on Android 6.0, one method is for rooted users and other is for non-rooted users. If you haven’t rooted your Nexus device then visit our Rooting guide section.

Method #1:

  • First boot your device into recovery mode, hold power and volume button for few seconds.
  • Now mount your system by going into mounts.
  • Download ADB Tools on your computer.
  • Connect your device with your computer.
  • Now open ADB tools folder and right click on blank space while holding shift key.
  • Select ” Open Command Window here “.
  • Type the following command as it is.

adb pull/system/build.prop

  • Now open the build.prop using any editor you want.
  • Find the line ” ro.build.type”.
  • Now you have to change the text after ‘=’ to “userdebug” from “user”.
  • Save the file after editing the values.
  • Open command windows and type the following line.

adb push build.prop /system/

  • Open a shell in the command windows and type the following line.

adb shell

  • Once a new ADB shell is open, enter the following lines.

cd system

chmod 644 build.prop

  • Now all you have to do is reboot the device.
  • When your device boots up, goto developer options and scroll down. Enable multi-window and have some fun!

Method 2: For Rooted Users

  1. First Download Build.prop editor.
  2. Search “ro.build.type”.
  3. Edit the value “userdebug” from “user”.
  4. Reboot when prompted.
  5. When your device boots up, goto developer options and scroll down. Enable multi-window and have some fun!

How To Install Dolby Digital Plus/Beats Sound Mod on Sony Xperia Z Series

1
How To Install Dolby Digital Plus/Beats Sound Mod on Sony Xperia Z Series

Following are the instruction to install Dolby Digital Plus and Beats Sound Mod on Sony Xperia Z Series, if you are a music lover then you know the difference between normal and Dolby sound, not every Android or iOS device get this privilege to have both Dolby Digital Plus/Beats Sound Mod. Only Xperia Z series have these mods but not all the devices, today I will tell you how to install  Dolby Digital Plus/Beats Sound Mod on Sony Xperia Z Series. 

dolby-digital-plus-and-beats-sound-mod-for-sony-xperia-z-series

Requirements:

Dolby Digital and Beats sound mod [ Download ]

Fix for no speaker sound [ Download ]

Method:

  • First you have to download both files from the link given above.
  • Now transfer the both files into your phone storage.
  • Reboot your device into Recovery mode. [ To boot your device in to recovery mode press and hold volume down and power button ].
  • Once you are in recovery, click on install and select the mod zip file from the list.
  • To confirm the install the zip file tap on OK.
  • Wait for installation to complete, once installed reboot your system.
  • Once your device boots up, go to your app drawer and open SELinux Mod Changer App. Set the mod to Permissive.
  • In the end all you have to do is enable the Dolby Digital Sound Mod from Music Settings.

All Done !

Also see:

To check more guides on how to root Sony Xperia Z series, please visit our Rooting section. [ Click Here ]

Credits: XDA

How to change Nexus 6 display density [ Tips ]

0
How to change Nexus 6 display density [ Tips ]

Following are the instructions to change your Nexus 6 display density, yes you can easily change your Nexus 6 display density by using the following method mentioned below. Nexus 6 has a large space free on the screen and with the bigs icons it doesn’t seem cool at all, so today I will tell you how you can make your Nexus 6 screen bigger and add an extra row of icons on app drawer.

12177863_10207874122994318_1492623063_n

Method 1: Using ADB commands.

  • Go to settings and enable USB Debugging from developer option.
  • Download ADB Tools on your computer.
  • Connect your Nexus 6 with Pc using USB cable.
  • Open Windows explorer on your PC and  open ADB Tools folder.
  • Now in ADB folder, hold Shift and right-click on a blank space. Choose Open Command Window Here.
  • To make sure your Nexus 6 is being recognized, use the following command in Command windows.

adb devices

  • You’ll see a number in command windows identifying your Nexus 6. [ If you don’t then you have to download Google USB Driver and after installing them, you have to repeat the step 6.
  • Now type the following command in order to change your nexus 6 display density, by default its set on 560 in the system.

adb shell wm density 480

  • Reboot your Nexus 6 in order to see the effects, once your device boots up you’ll see a lot of changes.
  • If you wish to go back to default display density, all you have to do is type the following command.

adb shell wm density reset

Method 2: editing the build.prop file (requires root)

If your Nexus 6 is rooted then things are even more easier, all you have to do is install ES File Explorer and edit a file from a system folder. If your device is not rooted then first you have to root your Nexus 6.

  • First install ES Explorer from Google Play.
  • Once the app is installed launch it, make sure Root explorer is enabled.
  • Goto /device/system.
  • You’ll see a number of different folders, scroll down and tap on build.prop. Select ES Note Editor from the pop-up.
  • Tap on the pencil located on top right corner, now scroll down until you find ” ro.sf.lcd_density=560 “.
  • Change the display density 560 to 480 and now press the back arrow to exit. Tap on save.
  • Now Reboot your Nexus 6 to see the effect.

Download Cheating Tom 2 for Pc – Windows and Mac

0
Download Cheating Tom 2 for Pc – Windows and Mac

Following are the instruction on how to download Cheating Tom 2 for Pc using third party emulators, Cheating Tom 2 is simple arcade game in which you have to cheat in order to complete every stage, but you have to be very quick. I’ve prepared a step by step guide on how to install Cheating Tom 2 for Pc using emulators like BlueStacks and Andy. Before going any further let me give you an overview on Cheating Tom 2.

Cheating Tom 2 for Pc

Cheating Tom 2 Features:

100 challenging levels & extra special game modes for hours of procrastination.
> Choose your avatar – Tom and Tammy
> Watch Tom and Tammy show off their groovy new dance moves!
> New upgradeable power ups and in-game currency to enhance gameplay
> Hilarious animated storyline!
> 10 nasty teachers & 11 totally nerdy students with new behaviors!
> 12 crazy classroom settings!
> Awesome yearbook with tons of ridiculous students and teachers to collect!

for more visit Google Play.

How To Install Cheating Tom 2 For PC or MAC Using BlackStacks

Method 1:

  1. Install Bluestacks on your PC or MAC.
  2. Download Cheating Tom 2 Apk on your PC.
  3. Make sure that you have installed Bluestacks. Double-click the downloaded Cheating Tom 2 Apk to install it.
  4. The APK will be installed through Bluestacks, once the notification pop-ups determining the installation completion, open Bluestacks.
  5. Now click on My Apps and then click on Cheating Tom 2.
  6. The application will open up. Now follow on-screen instructions to Cheating Tom 2.

Method 2:

  1. Install Bluestacks on your PC or MAC.
  2. Open Bluestacks and setup your Google Play Store account.
  3. Now open Google Play Store and search for “Cheating Tom 2“.
  4. Once found, install Cheating Tom 2.
  5. Now click on My Apps and then click on Cheating Tom 2.
  6. The game will open up. Now follow on-screen instructions to Play Cheating Tom 2.

How To Install Cheating Tom 2 For PC or MAC Using Andy OS

  1. Download and install Andy OS on your Windows PC or MAC.
  2. Once downloaded, open Andy OS.
  3. Setup Google Play Account on it.
  4. Now open Apps > Google Play Store and search for “Cheating Tom 2“.
  5. Install Cheating Tom 2 and wait for it to finish the installation.
  6. Once done, open “Uncategorized” portion in Andy and click on Cheating Tom 2 to play it.
  7. That’s all.

Download Pop the Lock for Pc Online – Windows and Mac

0
Download Pop the Lock for Pc Online – Windows and Mac

Following are the instruction on how to download Pop the Lock for Pc using third party emulators. Pop the Lock is a simple arcade game designed for iOS and Android. All you have to do is Tap in sequence to crack the code and pop the lock, in the following guide I’ll tell you how you can download and install Pop the Lock for Pc using emulators like BlueStacks and Andy.

Pop the Lock for Pc

Pop the Lock Deatils:

Tap in sequence to crack the code and pop the lock, but don’t make a mistake or you’ll have to start from the beginning.

How many locks can you pop?

How far will you go?

for more Google Play.

How To Install Pop the Lock For PC or MAC Using BlackStacks

Method 1:

  1. Install Bluestacks on your PC or MAC.
  2. Download Pop the Lock Apk on your PC.
  3. Make sure that you have installed Bluestacks. Double-click the downloaded Pop the Lock Apk to install it.
  4. The APK will be installed through Bluestacks, once the notification pop-ups determining the installation completion, open Bluestacks.
  5. Now click on My Apps and then click on Pop the Lock.
  6. The application will open up. Now follow on-screen instructions to Pop the Lock.

Method 2:

  1. Install Bluestacks on your PC or MAC.
  2. Open Bluestacks and setup your Google Play Store account.
  3. Now open Google Play Store and search for “Pop the Lock“.
  4. Once found, install Pop the Lock.
  5. Now click on My Apps and then click on Pop the Lock.
  6. The game will open up. Now follow on-screen instructions to Play Pop the Lock.

How To Install Pop the Lock For PC or MAC Using Andy OS

  1. Download and install Andy OS on your Windows PC or MAC.
  2. Once downloaded, open Andy OS.
  3. Setup Google Play Account on it.
  4. Now open Apps > Google Play Store and search for “Pop the Lock“.
  5. Install Pop the Lock and wait for it to finish the installation.
  6. Once done, open “Uncategorized” portion in Andy and click on Pop the Lock to play it.
  7. That’s all.