Home Blog Page 353

How To Unlock Huawei Bootloader

1
How To Unlock Huawei Bootloader

Huawei devices come with a locked bootloader. The reason for Huawei to put this restriction on the bootloader of their smartphones is to make sure that the devices stay safe and secure in the hands of users. A locked bootloader basically prevents the users from flashing custom kernel images, custom recoveries and custom ROMs.

huawei-mate-s

While the bootloader is basically the architecture that makes your device boot up, if this partition of your device has malfunctioned, it will result in bricking your device. Another reason for the bootloader restriction is to prevent any software vulnerabilities from landing in your Android device.

Its not Huawei alone that locks the bootloader, other manufacturers like Sony, LG, HTC, Motorola and even Google locks down the bootloader of its devices. Samsung doesn’t put any such restriction on its devices. Carrier branded smartphones usually have a locked bootloader as well.

The bootloader may come in the locked form originally, but manufacturers do allow unlocking the bootloader officially. Purpose of putting this restriction is to warn the users and then allow them to tweak their device at their own risk. Manufacturers like Huawei, LG, Sony and others have their bootloader unlock pages, but they require you to accept the terms and agreement first that you will be responsible for unlocking your phone’s bootloader. Unlocking the bootloader also results in voiding the warranty of your device, that means once unlocked, you’re on your own afterward.

Playing with the bootloader of your device isn’t going to cause any harm as long as you know what you’re doing and you know if you’re flashing the right files or not. For Android power users, a locked bootloader really doesn’t matter. If you want to become an Android power user as well, you will also have to unlock the bootloader. Once you’ve unlocked the bootloader of your smartphone, you can flash a custom kernel as mentioned above. Flashing a custom recovery is a great choice as it allows you to backup Nandroid and all partitions of your phone. A custom recovery also allows you to wipe cache and Dalvik cache. You may want to flash zip files as well. Flashing custom ROMs is also possible only if your phone’s bootloader is unlocked.

If you own a Huawei smartphone and the bootloader restriction is stopping you from going ahead, you may want to break this barrier now. If you’re looking to learn the method to unlock your Huawei’s bootloader, you’re in the right spot at the moment. We are about to unlock Huawei smartphones’ bootloader. We will be simplifying the guide as much as possible. Let’s go ahead and get it done now.

Getting Bootloader Unlock Code

  1. Go to Huawei’s official page and click on register for free.Huawei
  2. On the next page click on “Register Email Address”.
  3. Now enter your email address and other details to sign up.
  4. If you’re using Google Chrome browser, you may click on translate page. Otherwise the page will be displayed in Chinese. I’ve translated the page, and made the tutorial in english. If Chrome fails to translate the page automatically, you may click on “try again” button to translate the page. It will work.Screenshot at Oct 26 12-33-15
  5. Open your email inbox that you used to sign up on Huawei’s site. Find Huawei’s email and click on the verification link to activate your account.
  6. Now after verifying your account, go to Huawei’s official page once again and this time sign in using the account that you just made.
  7. After signing in, you will be redirected to the agreement page for unlocking the bootloader.unlock agreement
  8. Scroll to the bottom. Check the small box for accepting the agreement and click on the “Next” button.
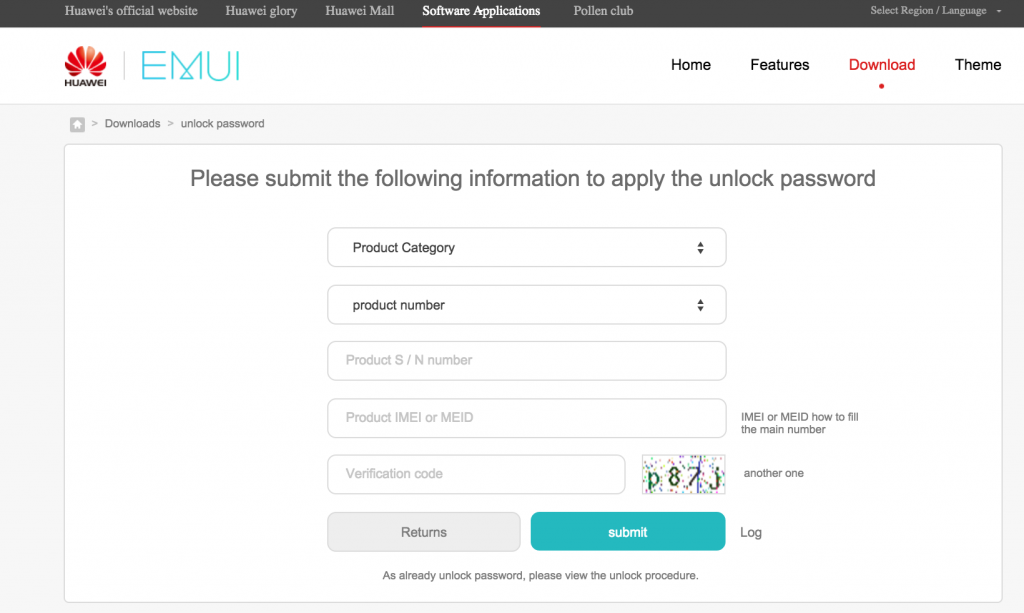
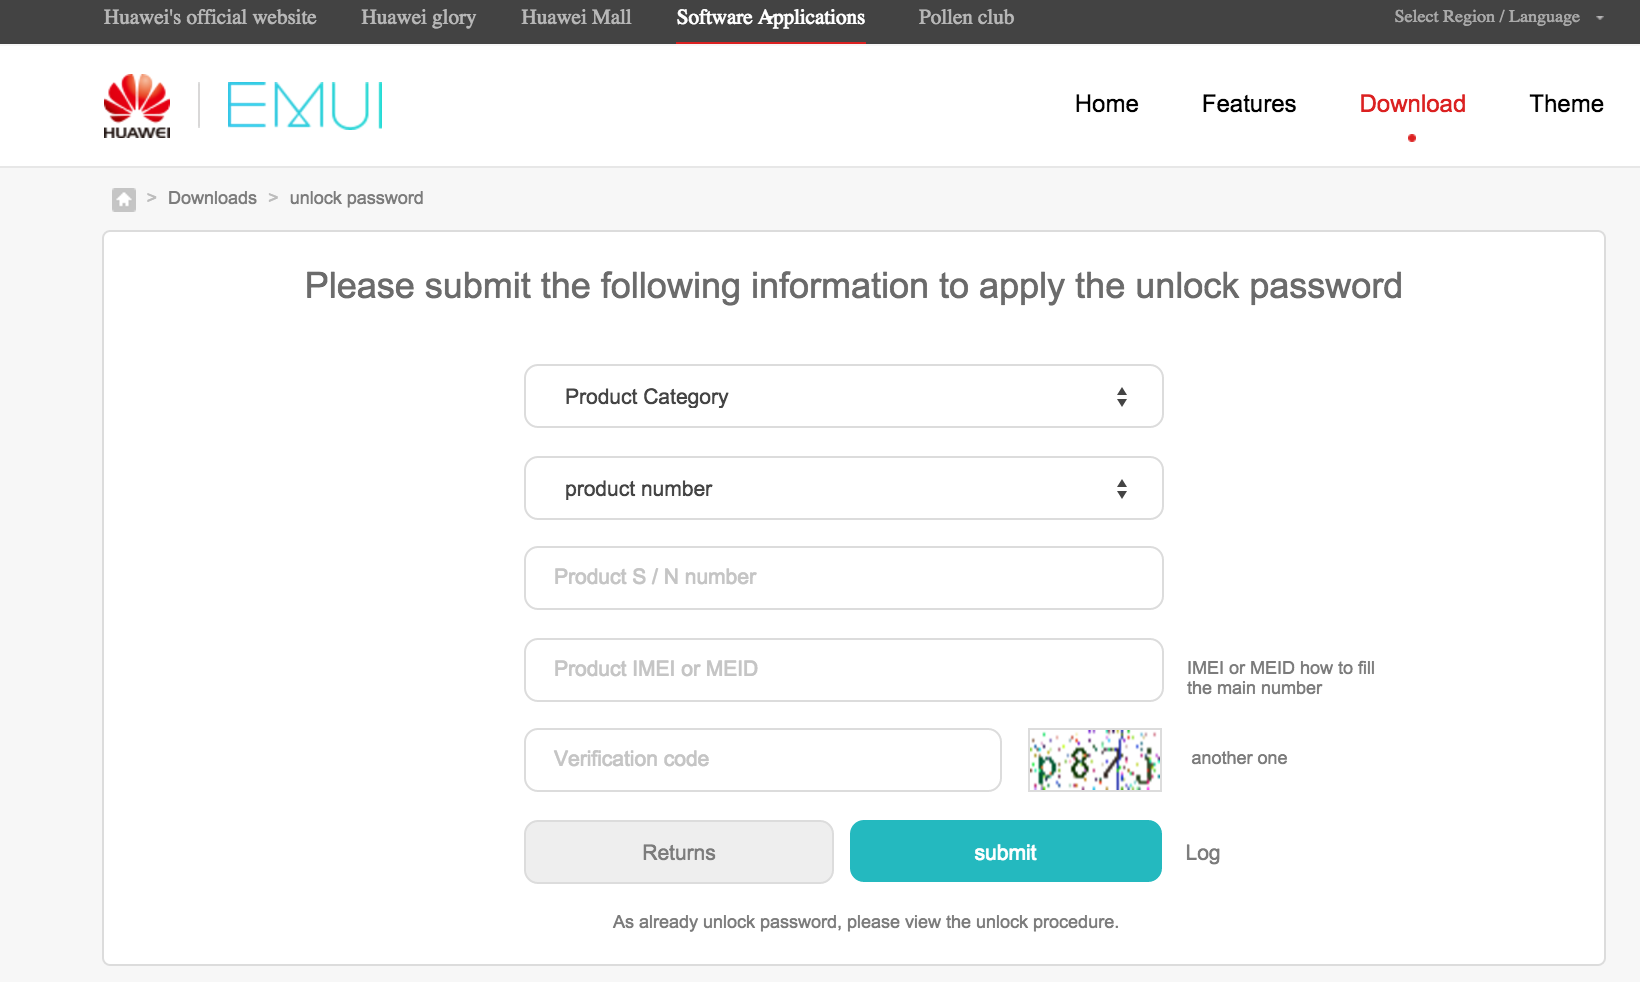
  9. Now on the next page, select smartphone in the product category and enter all the details of your phone. You can find all these details in Settings > About device.
  10. After adding all the details, click the submit button that is on the right side.Phone details
  11. You will now get the 16 digit unlock code. Save the code somewhere you can easily access from.

How To Unlock Bootloader Of Your Huawei Smartphone Now

  1. Now install Minimal ADB & Fastboot drivers on your windows PC. Mac users can install ADB & Fastboot for Mac.
  2. Enable USB Debugging mode on your phone and turn it off.
  3. Now press and hold the volume down key, while keeping it pressed plug in the data cable in order to establish connection between your PC and your phone.
  4. Now open Minimal ADB & Fastboot.exe file from your desktop. If you don’t have this file on your desktop then go to your windows installation drive > program files > Minimal ADB & Fastboot > open the py_cmd.exe file. Mac users can follow the Mac guide to open the file that will work for them. This will open a command window on your PC or Mac.
  5. Once the command window is up, type the following commands one by one.

fastboot devices

This will verify your device’s connection in fastboot mode.

fastboot oem unlock xxxxxxxxxxxxxxxx 

Replace the xxxxxxxxxxxxxxxx with your 16 digit code that you got after doing the process explained above. After putting the code, hit enter key.

This will unlock the bootloader of your Huawei phone and your phone will reboot. You will loose all the data, your phone will perform a factory reset after unlocking the bootloader. 

That’s all. You can now flash recovery and kernel images, and custom ROMs as  well on your Huawei smartphone. If you’re facing any issues while doing this process, reach us out through the comment box below.

How To Unlock Bootloader, Install TWRP & Root Huawei Nexus 6P

6
How To Unlock Bootloader, Install TWRP & Root Huawei Nexus 6P

Just a month back Google released the all-new Nexus 6P. This time Google partnered with Huawei for its new flagship device. The name 6P suggests that this is a premium iteration of the Nexus 6. Huawei has put a lot of effort into making this device beautiful and stunning. The spec sheet carries a 5.7-inch QHD display with an 8 MP selfie shooter at the top. We have a 12.3 MP shooter at the back accompanied by Nexus imprint.

Snapdragon 810 v2.1 clocked at 2.0 GHz is powering this device up, and GPU is Adreno 430. We have a whopping  3GB RAM and internal storage begins from 32 GB. A massive battery with the capacity of 3450 mAh is placed under the hood to make this device run for long. Nexus 6P also brought Android 6.0 Marshmallow out of the curtains. The elegant design and premium build quality make this device a rockstar.Google-Nexus-6P-images (1)

Nexus 6P was available for users right after the moment it was released by Google. The device is now seeing its way towards Android development and we have the custom stuff landing in now. Google always makes it pretty easy for developers to tweak its devices, the same has happened with the Nexus 6P as well. Issuing a few commands will help you to unlock the bootloader of your phone and then you’re all set to flash custom recoveries, root your phone or flash custom ROMs.

Users who are new to the word custom in the world of Android, they may want to know that custom recoveries allow you to create and restore Nandroid backup, flash zip files, backup modem, efs and other such partitions. It also allows you to wipe cache, Dalvik cache and there’s a lot more than you can do using a custom recovery. Flashing a custom ROM changes the system of your phone. Custom ROMs are the aftermarket versions of Android. Rooting your device allows you to install root-specific applications and make system level tweaks to your Android phone. To do all this stuff, you need an unlocked bootloader.

How To Unlock Bootloader, Install TWRP & Root Huawei Nexus 6P

Nexus 6P users can now easily unlock the bootloader, flash a custom recovery and then root their device. In the succeeding guide, we will be unlocking the bootloader of Huawei Nexus 6P. After unlocking the bootloader we will flash TWRP recovery on this device. In the end we will flash SuperSu.zip file in TWRP recovery to root Huawei Nexus 6P. Let’s go ahead and learn the steps now.

Preparations

  1. This guide is only for Huawei Nexus 6P. Do not try this on any other phone.
  2. Your phone’s battery must be charged up to 70% to avoid any power issues.
  3. Use original data cable to establish a connection between your phone and your PC.
  4. Backup all of your important media content, contacts, call logs and text messages.
  5. Enable USB debugging mode on your phone. To do so, go to settings > about device > tap build number for 7 times. You will have developer options enabled in settings. Open developer options > Enable USB debugging mode.
  6. Also turn on “Enable OEM Unlock” under developer options.
  7. Download and install Google USB drivers.
  8. Download and setup Minimal ADB & Fastboot drivers.  Mac users can use this guide to install ADB & Fastboot drivers.
  9. Disable Windows Firewall or Antivirus if you have enabled.
  10. Follow this guide to the letter to avoid any mishap.

Disclaimer: Methods involved in flashing custom recoveries and rooting the device are highly custom. In case of a mishap, Techbeasts or Huawei may not be held responsible. Make sure that you’re doing everything at your own risk.

Unlock Huawei Nexus 6P Bootloader

  1. Make sure that you’ve downloaded and installed Google USB drivers and also installed Minima ADB & Fastboot drivers on your Windows PC or installed Mac ADB & Fastboot for Mac.
  2. Also make sure that USB debugging mode is enabled, OEM Unlock is also enabled. We are going to connect your phone to your PC in Fastboot mode.
  3. Now turn off your phone completely. Turn it on by pressing and holding Volume Down + Power Key.
  4. Connect your phone to your PC now.
  5. Now open Minimal ADB & Fastboot.exe from your desktop. If you do not have this file on your desktop, then go to your Windows installation drive i.e. C drive > Program Files > Minimal ADB & Fastboot > Open py_cmd.exe file in order to open the command window. Mac users can see in the Mac guide for the file they will be opening.
  6. Now in the command window enter the following commands one by one.
    • fastboot devices

      This command will verify the connection of your device with your PC in fastboot mode.

    • fastboot oem unlock

      This command will unlock the bootloader. As soon as you press the enter key after typing this command, you will get a message in your phone asking for the confirmation of bootloader unlocking. Use volume up & down keys to navigate through options and confirm unlocking.

    • fastboot reboot

      This command will reboot your phone. That’s all, disconnect your phone.

How To Flash TWRP Recovery On Your Nexus 6P

  1. Download TWRP Recovery.img file. Rename the file to only “recovery.img”.
  2. Copy recovery.img file to Minimal ADB & Fastboot folder which is located in program files in your windows installation drive.
  3. Now boot your Nexus 6P into fastboot mode as suggested in step 3 above.
  4. Connect your Nexus 6P to your PC now.
  5. Open Minimal ADB & Fastboot.exe or Py_cmd.exe as explained in step 5 above.
  6. Now in the command window enter following commands:
  • fastboot devices

  • fastboot flash recovery recovery.img

  • fastboot reboot

This will flash TWRP recovery on your Huawei Nexus 6P.

How To Root Huawei Nexus 6P

  1. Download SuperSu v2.52.zip file and copy it to your phone’s SD card.
  2. Boot into TWRP recovery on your phone.
  3. Tap Install > Scroll all the way down > Select SuperSu.zip file > Confirm flashing.
  4. Once flashed, reboot your phone.
  5. Locate SuperSu in the application drawer. Verify root access using Root Checker.

That’s all. Need help with something? Reach us out through the comment box below.
How To Unlock Bootloader, Install TWRP & Root LG Nexus 5X

0
How To Unlock Bootloader, Install TWRP & Root LG Nexus 5X

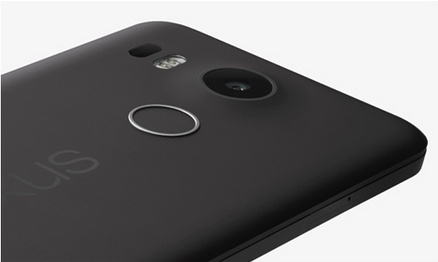
Google revived the Google Nexus 5 as Google Nexus 5X. The device came in collaboration with LG once again. Google calls the Nexus 5X a compact device with a top-notch spec sheet. Having it powered up with Snapdragon 808 CPU and Adreno 418 GPU, Google has used a 2GB RAM in this phone and internal storage begins from 16 GB. On the front, there is a 5 MP camera and a 12.3 MP camera at the back. Nexus 5X has a 2700 mAh battery. This device also runs on Android 6.0 Marshmallow out of the box. Nexus-5X

Nexus 5X was available for users right after Google released it. It didn’t take long for the developers to get their hands on this device and tweak it. Nexus 5X’s bootloader has already been unlocked, a recovery has been flashed and the device has been rooted as well. That means if you own a Nexus 5X, you are free to unleash its potential and explore the open nature Android world. Users who’ve been looking for a method to unlock the bootloader, flash a custom recovery and root their Nexus 5X, we have a good news for them. In the succeeding post, we are going to help you to unlock the bootloader of your LG Nexus 5X. After unlocking the bootloader we will flash TWRP recovery. In the end, we will flash SuperSu.zip file in TWRP recovery to root this phone. We also disable encryption on this device by means of a custom boot.img file. Let’s begin with the precautions.

Preparations

  1. This guide is only for LG Nexus 5X. Do not try this on any other phone.
  2. Your phone’s battery must be charged up to 70% to avoid any power issues.
  3. Use original data cable to establish a connection between your phone and your PC.
  4. Backup all of your important media content, contacts, call logs and text messages.
  5. Enable USB debugging mode on your phone. To do so, go to settings > about device > tap build number for 7 times. You will have developer options enabled in settings. Open developer options > Enable USB debugging mode.
  6. Also turn on “Enable OEM Unlock” under developer options.
  7. Download and install Google USB drivers.
  8. Download and setup Minimal ADB & Fastboot drivers.  Mac users can use this guide to install ADB & Fastboot drivers.
  9. Disable Windows Firewall or Antivirus if you have enabled.
  10. Follow this guide to the letter to avoid any mishap.

Disclaimer: Methods involved in flashing custom recoveries and rooting the device are highly custom. In case of a mishap, Techbeasts or LG may not be held responsible. Make sure that you’re doing everything at your own risk.

Unlock LG Nexus 5X Bootloader

  1. Make sure that you’ve downloaded and installed Google USB drivers and also installed Minima ADB & Fastboot drivers on your Windows PC or installed Mac ADB & Fastboot for Mac.
  2. Also, make sure that USB debugging mode is enabled, OEM Unlock is also enabled. We are going to connect your phone to your PC in Fastboot mode.
  3. Now turn off your phone completely. Turn it on by pressing and holding Volume Down + Power Key.
  4. Connect your phone to your PC now.
  5. Now open Minimal ADB & Fastboot.exe from your desktop. If you do not have this file on your desktop, then go to your Windows installation drive i.e. C drive > Program Files > Minimal ADB & Fastboot > Open py_cmd.exe file in order to open the command window. Mac users can see in the Mac guide for the file they will be opening.
  6. Now in the command window enter the following commands one by one.
    • fastboot devices

      This command will verify the connection of your device with your PC in fastboot mode.

    • fastboot oem unlock

      This command will unlock the bootloader. As soon as you press the enter key after typing this command, you will get a message in your phone asking for the confirmation of bootloader unlocking. Use volume up & down keys to navigate through options and confirm unlocking.

    • fastboot reboot

      This command will reboot your phone. That’s all, disconnect your phone.

How To Flash TWRP Recovery On Your Nexus 5X

  1. Download TWRP Recovery.img file. Rename the recovery file to only “recovery.img“.
  2. Copy the recovery.img file to Minimal ADB & Fastboot folder which is located in program files in your windows installation drive.
  3. Now boot your Nexus 5X into fastboot mode as suggested in step 3 above.
  4. Connect your Nexus 5X to your PC now.
  5. Open Minimal ADB & Fastboot.exe or py_cmd.exe as explained in step 5 above.
  6. Now in the command window enter following commands:
  • fastboot devices

  • fastboot flash recovery recovery.img

  • fastboot reboot

This will flash TWRP recovery on your LG Nexus 5X.

How To Root LG Nexus 5X

  1. Download SuperSu v2.52.zip file and copy it to your phone’s SD card.
  2. Boot into TWRP recovery on your phone.
  3. Tap Install > Scroll all the way down > Select SuperSu.zip file > Confirm flashing.
  4. Once flashed, reboot your phone.
  5. Locate SuperSu in the application drawer. Verify root access using Root Checker.

That’s all. Need help with something? Reach us out through the comment box below.

Install AOSP Android 6.0 Marshmallow On Google Nexus 7 2012

0
Install AOSP Android 6.0 Marshmallow On Google Nexus 7 2012

Google Nexus 7 2012 is out of the Android Marshmallow league. Marshmallow requires an upgraded hardware to run on, which is not possible on the Google Nexus 7 2012. To serve the Nexus 7 2012 with Android 6.0 Marshmallow sweetness, XDA member dmitrygr has put forward a custom AOSP Android 6.0 Marshmallow ROM. The ROM works with both WiFi and 3G variants of the Nexus 7 2012. Initial builds of this ROM are found to have a working Camera, Bluetooth, GPS, WiFi, NFC and Sensors. In case you’ve been living in a bit of disappointment because of Google’s decision of not updating this device to Android Marshmallow, you may want to try this out and give your device a makeover of Android 6.0 Marshmallow.Nexus7

This ROM is still in development stages and it is not guaranteed to work without any errors. This build of ROM is intended for Android power users who are good with custom ROMs, and who know how to handle the device in case something goes wrong. We do not recommend flashing this ROM as a daily driver. You may flash this ROM only for the sake of experiencing Android 6.0 Marshmallow temporarily. We expect the ROM stability to improve in the future builds.

In the succeeding guide we will flash this AOSP Android 6.0 Marshmallow custom ROM on Google Nexus 7 2012 WiFi & 3G both. Follow the instructions carefully in order to get it done.

Pre-installation instructions

  • This guide is intended for Google Nexus 7 2012 WiFi & 3G. Do not try this on any other device. Before going ahead, check your device’s model number in settings > about device.
  • Backup all of your important data including contacts, sms messages, call logs and media content.
  • Charge your phone up to 80% before proceeding.
  • Install TWRP recovery on your Nexus 7 2012 and create a Nandroid backup using the Backup feature in TWRP. You may backup all partitions as well including EFS, Modem etc. Copy this backup to your PC.
  • Follow this guide to the letter to avoid any mishap.

Install TWRP 2.8 recovery on your Nexus 7 2012

Download and install Minimal ADB and Fastboot drivers with recovery.img file: Nexus 7 2012 WiFi |  Nexus 7 2012 3G

Step#1: Make sure that you’ve followed all the steps explained above.

Step#2: Now connect your Nexus 7 2012 to your PC. If it asks for some permission on the phone, check allow this PC and tap ok.

Step#3: Now open the extracted Minimal ADB & Fastboot folder.

Step#4: Now click on py_cmd.exe file in order to open the command prompt.

Step#5: Enter the following commands in command prompt one by one.

Step#6: adb devices

This command will list the connected adb devices. You can verify whether your device is connected properly or not.

Step#7: adb reboot-bootloader 

This command will reboot your Nexus 7 2012 in bootloader mode.

Step#8: fastboot flash recovery recovery.img

fastboot reboot

This will flash TWRP recovery on your Nexus 7 2012.

Now Install AOSP Android 6.0 Marshmallow On Nexus 7 2012

  1. Download AOSP Android 6.0 Marshmallow Custom ROM for Google Nexus 7 2012: Nexus 7 2012 3G | Nexus 7 2012 WiFi
  2. Download Google GApps for Android 6.0 Marshmallow.
  3. Copy both the downloaded .zip files to your Nexus 7 2012’s internal SD card.
  4. Now boot your Nexus 7 2012 in recovery mode. To do so, power off your Nexus 7 2012 completely. Now turn it on by pressing and holding Volume Down + Power Keys. You will boot into TWRP recovery.
  5. A clean install is always preferred so perform a factory data reset using the wipe option in TWRP.
  6. Now get back to the main menu in TWRP and tap Install > scroll all the way down and tap the ROM.zip file that you just copied. Swipe finger from left to write on the bottom of screen to flash.
  7. Once flashed, get back to the main menu and tap Install again. Now scroll all the way down and select GApps.zip file this time and flash it.
  8. Get back to the main menu again and wipe cache and dalvik cache from wipe option.
  9. Now reboot your phone, you will have the all new AOSP based Android 6.0 Marshmallow running on your Nexus 7 2012.

That’s all. Stuck with something? Feel free to reach us out through the comment box below.

Install Android Marshmallow Concept ROM On Xperia Z3, Xperia Z3 Compact

7
Install Android Marshmallow Concept ROM On Xperia Z3, Xperia Z3 Compact

Sony recently launched a Marshmallow Android Concept beta program through which it accepted a number of Xperia users into its Marshmallow program. Sony allowed the users to install the Marshmallow concept ROM on their Xperia Z3, Z3 Concept and experience Android Marshmallow. A limited number of users was accepted into this program. Just in case you’ve missed the chance to try out the all new Android Marshmallow on your Xperia Z3 or Z3 Compact, you may still have a chance to get it running on your phone.

Android 6.0 Marshmallow Concept ROM’s FTF files for Xperia Z3 and Z3 Compact are available now. These files are installed as normal FTF through Sony Flashtool. Before we proceed towards the method to install this FTF, we will highlight some features that are a part of this new Android 6.0 Marshmallow Concept ROM. The ROM seems to be very fast, stable and smooth. The battery life is pretty good as per the reports suggested. New application permissions and the Doze mode are present in this ROM. Sony has also included a new Home launcher in this ROM. There’s a number of features missing in this ROM, but Sony has managed to add all basic features.android-marshmallow-sony-xperia-z3

In the succeeding guide, we will be showing you how you can install this Android 6.0 Marshmallow Concept ROM on your Xperia Z3 D6603 and Xperia Z3 Compact D5803 using Sony Flashtool. Scroll down and learn the method to get it done now.

Early Preparations:

1. This is only for Sony Xperia Z3 D6603, Z3 Compact D5803

This ROM is only for the device mentioned above. Make sure that your model number matches the one listed above. To do so, go to Settings > About Device on your device and see your model number. Flashing this firmware on any other device will result in bricking it so make sure that you meet this requirement first of all.

2. Battery should be charged at least over 60%.

Make sure that your battery is charged enough to complete the flashing process. In case your battery is low and your device goes dead during the flashing process, you may end up soft bricking your device as it won’t complete the flashing process.

3. Backup everything!

Flashing the Concept ROM may result in wiping all the data. You may consider backing up each and everything from your Android device. This is highly recommended so that in case anything goes wrong, you still have the access to all of your data and you can restore it immediately. You may backup everything as listed below.

4. Enable USB Debugging Mode on your device.

Enable USB debugging mode on your device. To do so, tap settings>developer options>USB debugging. If you can’t find developer options in settings, then tap settings > about device and tap “Build Number” for 7 times and you’ll get em’ activated under settings.

5. Install and setup Sony Flashtool.

You must have installed Sony Flashtool.  Find the full guide here. After installing Sony Flashtool, open the Flashtool folder from the drive where you installed it.Now open Flashtool>Drivers>Flashtool-drivers.exe and install the Flashtool, Fastboot & Xperia Z3 / Z3 Compact drivers from the list. [Important]

6. Use OEM data cable to establish connection.

Make sure that you use the phone’s original data cable to establish connection between your phone and the PC. Using a different data cable might result in interrupting the firmware installation.

How To Install Android Marshmallow Concept ROM On Xperia Z3, Xperia Z3 Compact

Before moving forward, please make sure that you’ve read the pre requisites and ensure that you are set to go ahead.

  1. Download the Android 6.0 Marshmallow Concept ROM FTF file.
    1. For Xperia Z3 D6603: Download
    2. For Xperia Z3 Compact D5803: Download 
  2. Copy the file and paste in Flashtool>Firmwares folder.
  3. Open Flashtool.exe now.
  4. Hit the small lightening button on the top left corner and select Flashmode.
  5. Select the FTF firmware file that you placed in the Firmware folder.
  6. From the right side, select what do you want to wipe. Data, cache and apps log, all wipes are recommended, perhaps you may select if you don’t want.
  7. Click on OK, and it will start preparing the firmware for flashing. This may take a little while to load.
  8. As soon as the firmware is loaded, it will prompt you to attach the phone by turning it off and keeping the back key press.
  9. For Xperia Z3, Z3 Compact, Volume Down key will do the job of back key, just turn off your phone, keep the Volume Down key pressed and plug in the data cable.
  10. When Flashtool asks you for the FSC script, click “No
  11. As soon as the phone is detected in Flashmode, the firmware will start flashing, Do not leave the Volume Down key until the process is complete.
  12. As soon as you see “Flashing ended or Finished Flashing” leave the Volume Down key, plug the cable out and reboot.
  13. That’s All! Congrats! You’ve installed latest Android 6.0 Marshmallow Concept ROM on your Xperia Z3 and Z3 Compact. Enjoy

In case you got any queries or face any problems regarding this guide, please feel free to stop by the comment box below and let us know. We will get back to you as soon as possible. Thanks all!

How To Enable Tethering On Android 6.0 Marshmallow

0
How To Enable Tethering On Android 6.0 Marshmallow

You can now easily enable tethering on your Android 6.0 Marshmallow powered device. You can now easily ditch your SIM card carrier and share the internet from your Android smartphone to any other device around. In the succeeding guide will be showing you how you can enable tethering on Android 6.0 Marshmallow.

Before jumping towards the method, let’s get into some details of Tethering in Android. Starting from Android 4.1.2 Jelly Bean, Google introduced a change in the Android system which allows the carriers to track the internet data usage of their customers. This feature helps the operators to identify the users who are making an excessive use of the internet and then bring different offers for them regarding and upgraded data plan. Users have to pay for the upgraded data plan, which is completely unfair as they can use the existing data plan without any restrictions. Just in case you’ve no idea about Tethering and Hotspot, let’s have a brief overview and learn about it first.

WiFi tethering is one of the most useful features when you have a huge data plan and you want to share the internet from your Android device to another. Its been quite long since Android smartphones are coming out equipped with this feature. You don’t need to carry an extra internet device with you, you can easily share your smartphone’s internet with your laptop or with any other device by making it a WiFi hotspot. Unfortunately, this cool feature is put under limits by carriers like At&t, Verizon, Sprint and others. The reason for carriers to lock down this feature is to make sure that you don’t use excessive data and your data usage stays restricted to your smartphone only. Internet is meant to be for freedom, so such restrictions shouldn’t stop you from sharing your internet with your other devices and taking its full advantage.reverse_7

How To Enable Tethering On Android 6.0 Marshmallow

  1. The easiest method to enable multi-window is through root access. Make sure that your Android 6.0 Marshmallow is rooted.
  2. Now install a file manager like Root Explorer on your phone.
  3. Now open root explorer, give it root rights and go to “/System”
  4. Now under “/System” tap the R/W button to enable Read-Write permissions. This button should be at the top right.
  5. Now in the same /System directory, locate “build.prop” file.
  6. Long press the build.prop file again in order to open it through a text editor.
  7. Add the following code to the bottom of build.prop file: net.tethering.noprovisioning=true
  8. Save the file.
  9. Reboot your phone.
  10. That’s all. You’ve Tethering feature enabled on your Android 6.0 Marshmallow device now.

Facing any problem? Reach us out through the comment box below.

Download New Android 6.0 Marshmallow Stock Wallpapers

0
Download New Android 6.0 Marshmallow Stock Wallpapers

Google just introduced two new wallpapers for Android 6.0 Marshmallow. Earlier we saw some cool wallpapers lying in the very first build of Android 6.0 Marshmallow, but it looks like Google so wanted us to come across some new pieces of art. The new wallpapers sure are cool. Before we head towards the wallpapers, we would like to add it to your knowledge that the Marshmallow material design wallpapers are not design on computers, but these are the pictures of sculptural objects. The objects were first prepared, painted, posed against each other and then photographed. We have found the new couple of wallpapers and linked below, go ahead, download wallpapers and save it to your PC or save it to your phone and then use it as a wallpaper on your desired location.

Download New Android Marshmallow Wallpapers

How To Enable Multi-Window On Android 6.0 Marshmallow

0
How To Enable Multi-Window On Android 6.0 Marshmallow

Android 6.0 is a major Android update which brings a number of changes to the core Android system. Google has focused on improving the security of the software, enhancing its performance and making it more intact. In Lollipop we saw Google focusing on the cosmetics, but this time the system level enhancements have caught much of the attention from the developers. Google has embedded some features in the Android 6.0 Marshmallow system which are not apparently accessible but are lying down in the system. One of those features is the Multi Window feature that allows the users to access multiple applications in one same window. We saw this feature coming in Samsung’s TouchWiz UI, but now Google seems to be making this feature a part of core Android system. While this feature is in experimental stages, Google has locked it down which makes it unaccessible for naive Android users. If you’re an Android power user, there’s a way for you to get your hands on the Multi-Window feature hidden in Android 6.0 Marshmallow.

XDA recognised contributor Quinny899, and XDA senior member xperiacle have come up with two different methods to enable the Multi-Window feature on Android 6.0 Marshmallow. The method by Quinny899 requires you to go through a little-longer method. It requires you to have a custom recovery using which we will mount your Android system with your PC and pull the build.prop file to edit it. The method introduced by xperiacle seems to be much easy and much more suitable. It only requires you to have root access on your Android 6.0 Marshmallow powered device, you will only need to add a single line code in your build.prop file which will activate the Mutli-Window feature on your Android 6.0 Marshmallow.multie window android marshmallow

In the succeeding guide we will go through both these methods one by one and enable Multi-Window on Android 6.0 Marshmallow. Let’s put a full stop to our conversation here and go ahead now.

How To Enable Multi-Window On Android 6.0 Marshmallow Via Root

  1. The easiest method to enable multi-window is through root access. Make sure that your Android 6.0 Marshmallow is rooted.
  2. Now install a file manager like Root Explorer on your phone.
  3. Now open root explorer, give it root rights and go to “/System”
  4. Now under “/System” tap the R/W button to activate Read-Write mode. This button should be at the top right.
  5. Now in the same /System directory, locate “build.prop” file.
  6. Long press the build.prop file again in order to open it through a text editor.
  7. Add the following code to the bottom of build.prop file: persist.sys.debug.multi_window=true
  8. Save the file.
  9. Reboot your phone.
  10. That’s all. You’ve the multi-window feature enabled on your phone.


How To Enable Multi-Window On Android 6.0 Marshmallow Using Custom Recovery

Step#1: As mentioned above, to use this method you must have the bootloader of your device unlocked and you must have a custom recovery installed.

Step#2: Also install and setup ADB & Fastboot drivers on your computer. You can also try installing Minimal ADB & Fastboot drivers.

Step#3: Now boot into custom recovery on your phone.

Step#4: Connect your phone to your PC now.

Step#5: In custom recovery select Mounts > Tick system in order to mount your system. Mount option can be hidden under advanced options in CWM recovery.

Step#6: Now click Minimal ADB & Fastboot .exe file from your desktop to open cmd in ADB mode if you have installed Minimal ADB & Fastboot drivers. If you have installed full ADB & Fastboot, then go to drive C > ADB & Fastboot > Platform Tools and now press and hold shift key and then press the right click button of the mouse. Now click on “open command window here”. Once you have the command prompt open either via Minimal ADB or via full ADB, you need to push following commands in the command prompt.

Step#1: adb pull /system/build.prop

Step#7: This command will pull build.prop file to the Minimal ADB & Fastboot folder or the Platform-tools folder under the ADB & Fastboot folder.

Step#8: Now open this build.prop file using a text editor like Notepade++. If you’re on Macbook, you may use Sublime Text.

Step#9: Now find the following text: ro.build.type=user

Step#10: After the “=user”, change the text to “=userdebug“.

Step#11: The new line should look like: “ro.build.type=userdebug

Step#12: Save the file.

Step#13: Now we need to push the file back. Open the command window once again the same way you did above.

Step#14: Now in the command window issue the following commands.

adb push build.prop /system/
adb shell

cd system
chmod
644 build.prop

Step#15: Reboot your phone now. Now go to settings > developer options > scroll to the bottom and locate multi-window feature in drawing category. Activate it and enjoy running multiple apps in one screen. That’s all.

Multiwindow marshmallow

Download Google Play Store 5.10.30 APK

0
Download Google Play Store 5.10.30 APK

Another update of Google Play Store has just rolled out. The new update of Play Store takes the version number to 5.10.30. In the latest update Google has resized the search bar. The logo of Play Store has been changed. Apart from these changes, Google has also changed the colour of My Apps. The colour is soft-light green instead of green now. Google has also redesigned the application permission pop-up. The buttons in the permission popup are a little big as compared the previous UI. These changes are not prominently notable, but Google has been working constantly hard to improve Google Play Store’s experience. The new version of Play Store is Marshmallow compatible as well. You can install it on your Android device running from Android 2.3 Gingerbread to Android 6.0 Marshmallow.google_play_logo_720-1900x700_c

New version of Play Store is available in the form of APK file as well. In case you’re willing to update your Play Store manually, you may be in a need of its APK. We have pulled out the APK file of Google Play Store 5.10.30 and embedded the download link below. Just go ahead and have a look on the instructions to get the latest Play Store running on your Android smartphone.

Download Google Play Store 5.10.30 APK


Root Samsung Galaxy Note 4 N910C, N910F Android 5.1.1 Lollipop

1
Root Samsung Galaxy Note 4 N910C, N910F Android 5.1.1 Lollipop

Galaxy Note 4 was recently updated to Android 5.1.1 Lollipop. Users who had their devices rooted earlier, they must have lost the root access after updating to this latest Android version. Thanks to Google’s new restrictions that makes the Android 5.1.1 Lollipop a very hard nut to crack. Directly rooting this firmware seems impossible now. Earlier, the Galaxy Note 4 was easily rooted using CF Auto Root or by flashing a custom recovery and then flashing SuperSu.zip, but things are different now. To root your Galaxy Note 4 on Android 5.1.1 Lollipop, you need to have a custom kernel on your device. It took quite a while for developers to come up with custom kernels that allow rooting the Galaxy Note 4 running Android 5.1.1 Lollipop.Root Note 4 LP 5.1.1

So, the good news is, you can now easily root your Galaxy Note 4 on Android 5.1.1 Lollipop. If you’ve been stuck on your device without root, it may be the time for you to get over it and unleash the Android 5.1.1 Lollipop on your Note 4. In the on-going guide, we will be showing you a method to install a TWRP recovery first of all. After installing TWRP recovery, we will flash the custom kernel and then we will flash SuperSu in the end that will have our device rooted.

Users who are new to rooting stuff and are going to root Galaxy Note 4 on Android 5.1.1 Lollipop for the very first time, they may want to have a little idea about rooting. Rooting your device basically gives you the access to the core of your Android system. Once rooted, you can make system-level changes on your Android smartphone. You can also install root specific applications to enhance the performance and battery life of your Android smartphone. By means of root access, you can turn on tons of features in your Android phone which are apparently locked by the manufacturer. It was easily possible to root the previous versions of Android using different exploits available around, since we have moved to Android 5.1.1 Lollipop now, it requires the users to go through a little complicated method to break the jail.

Preparations:

  1. This guide is intended for Galaxy Note 4 N910F & N910C only. Do not try this on any other device. Trying an incompatible file on some other device may result in bricking it. Make sure that you check your device’s model number in settings > general > about device before you proceed.
  2. Make sure that you’ve charged your battery up to 60% at the least. This is recommended in order to prevent any power issues during the flashing process.
  3. Backup your important media content, contacts, text messages and call logs. This is recommended so that in case something goes wrong during the flashing process, you still have all your data safe and secure.
  4. Follow this guide to the letter to prevent any mishap. Read the disclaimer carefully.

Disclaimer: The methods involved in flashing custom recoveries, ROMs and rooting your phone are highly custom and may result in bricking your device, and has nothing to do with Google or the device manufacturer that is SAMSUNG in our case. Also rooting your device will void its warranty and you will be no longer eligible for any kind of free device services by the manufacturers/warranty providers. Galaxy Note 4 comes with Knox counter on the bootloader, once tripped you won’t be able to reset it again. In case of any mishap we may not be held responsible. Follow these instructions to the letter to avoid any mishap or bricking. Make sure that whatever you do, you are doing it at your own responsibility.

Required downloads

Let’s Root Samsung Galaxy Note 4 N910C, N910F Android 5.1.1 Lollipop

  1. Make sure that you’ve installed TWRP recovery on your Note 4 N910C and N910F.
  2. Make sure that you’ve copied custom kernel and SuperSu.zip files to your phone.
  3. Now boot into TWRP recovery on your phone. To do so, first of all turn off your phone completely. Now turn it on by press and holding Volume Up + Home + Power Key simultaneously. Once your device boots up, leave the keys. You will boot into TWRP recovery.
  4. Now in TWRP recovery tap “Install > Scroll all the way to the bottom and select the Kernel.zip file that you copied.”.
  5. Now swipe from left to right on the bottom in order to confirm flashing. This will flash the custom kernel on your Note 4.
  6. Now get back to the main menu in TWRP recovery and once again tap “Install > scroll all the way to the bottom and tap SuperSu.zip file that you copied”. Now swipe from left to right on the bottom to confirm flashing. This will flash SuperSu.zip file on your phone which will root your device.
  7. Once done, reboot into system.
  8. After your device boots up, locate SuperSu in app drawer.
  9. Verify root access using Root Checker application. You can find it in Google Play Store.
  10. That’s all.

In case you’re stuck with something, reach us out through the comment box below.

Root & Install TWRP Recovery On Samsung Galaxy Core 2 SM-G355H/G355HN

11
Root & Install TWRP Recovery On Samsung Galaxy Core 2 SM-G355H/G355HN

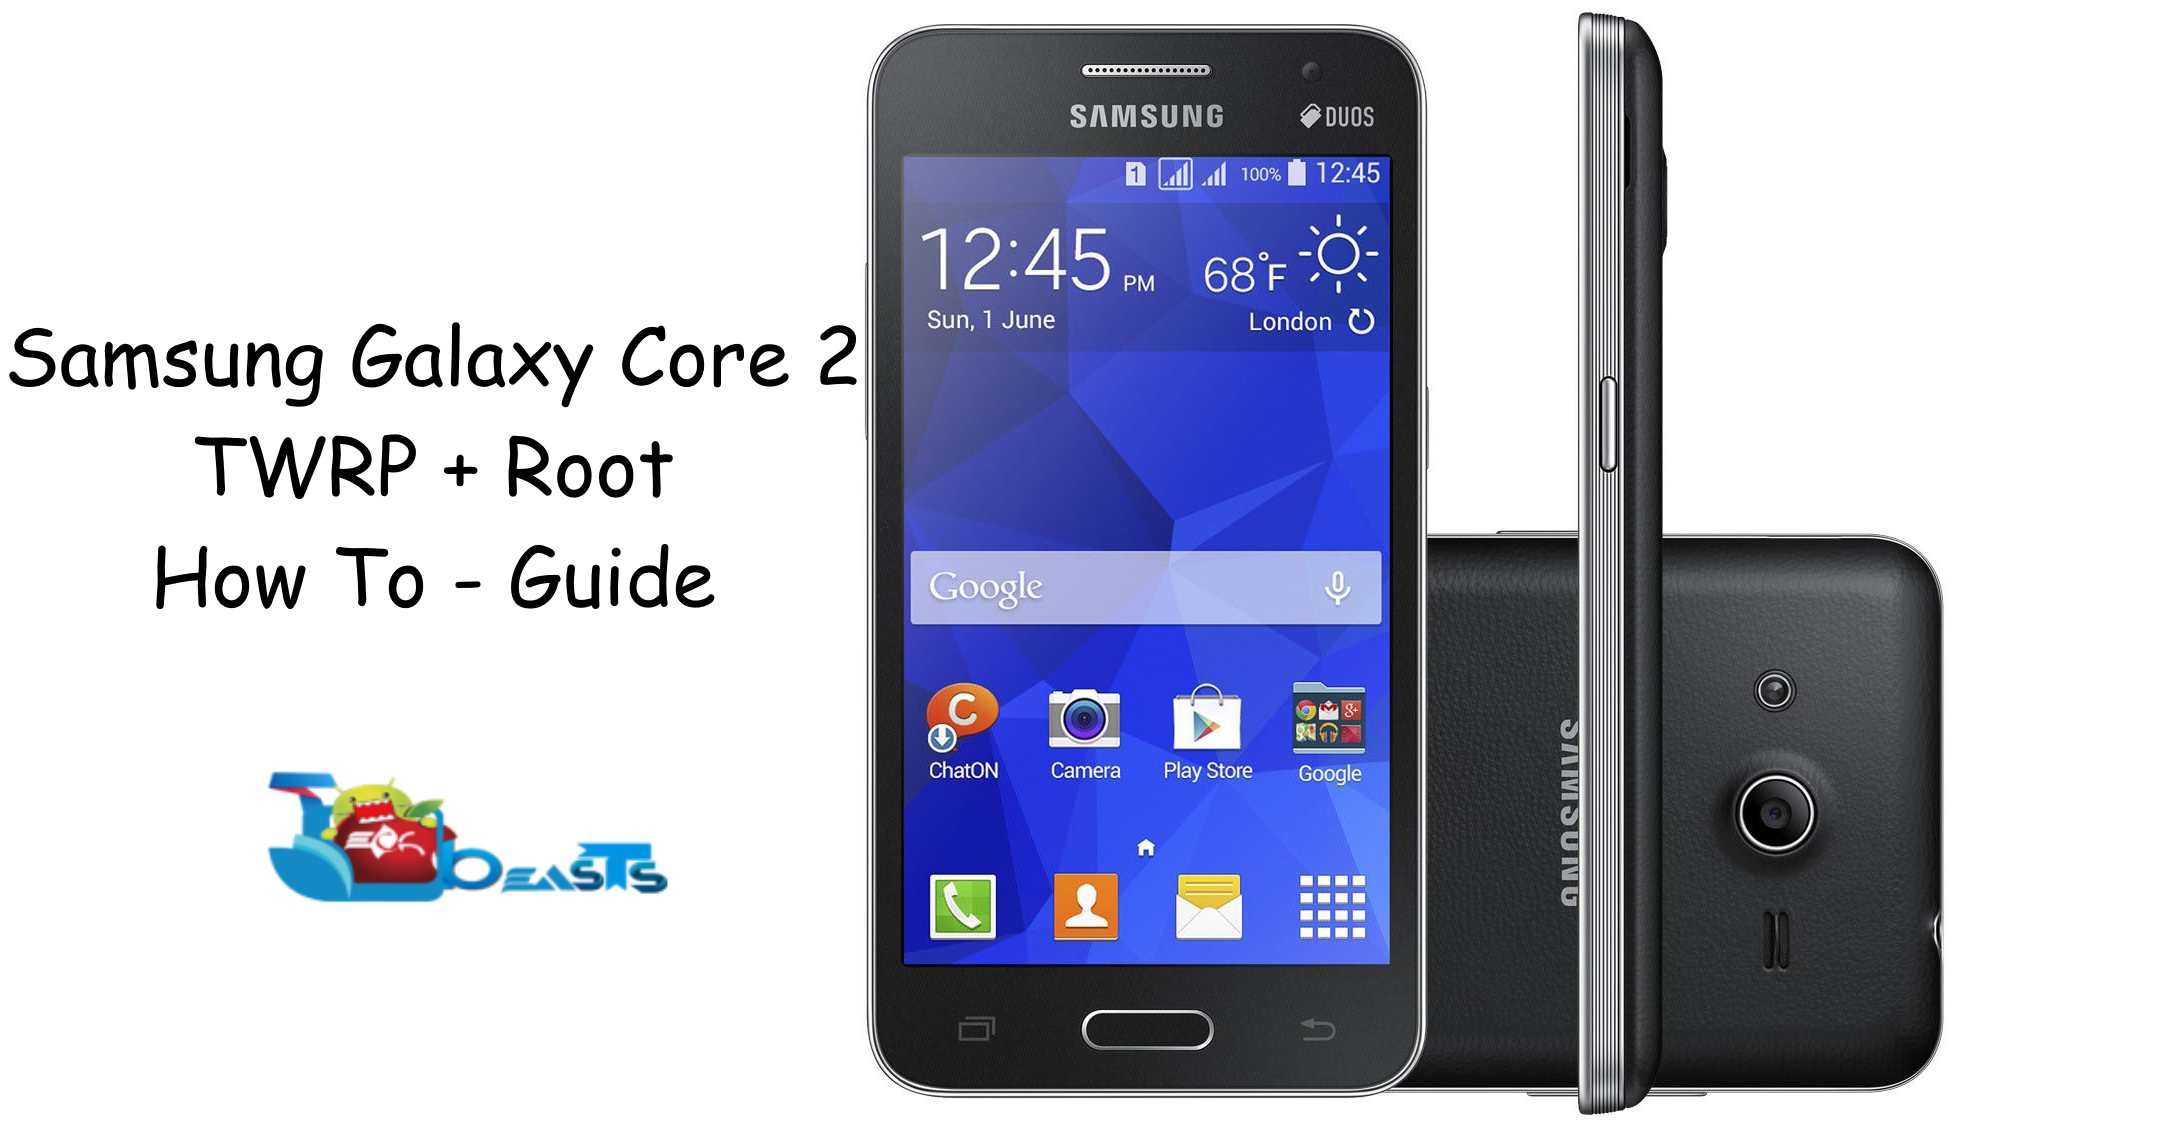
Galaxy Core 2 is Samsung’s 2014 low-end device, which is a successor of the original Galaxy Core. Samsung equipped this device with a 4.5-inch 480p display. A 5 MP shooter is planted at the back and the secondary cam is VGA. Samsung used a 768 MB RAM accompanying a Quad Core 1.2 GHz CPU. Internal storage is 4 GB with an external card slot having the support up to 64 GB. Galaxy Core 2 runs on Android 4.4.2 KitKat, Samsung hasn’t announced any plans to update this device to any higher version of Android. In case you’re a Galaxy Core 2 owner and you’re not looking forward to enhance and tweak the performance of your device by means of custom ROMs or by applying system tweaks using different root specific applications, you might be in a need to be capable of doing all this custom stuff on your Galaxy Core 2.smartphone-samsung-galaxy-core-2-duos-dual-chip-3gandroid-4.4-cam.-5mp-tela-4.5-34-proc.-quad-core-086774700

To begin with the custom stuff, the very first thing you need is to gain the root access on your phone. After having it rooted, you will be able to install applications like Titanium Backup, Greenify, System Tuner etc. Having the device rooted will allow you to access the core of your Android system and you will be able to make changes to improve performance and battery life of your device. The second important thing to play with custom stuff is to have a custom recovery installed on your device. There are two popular custom recoveries, CWM and TWRP. Custom recovery allows you to create and restore Nandroid backup, mount your system from recovery mode, wipe cache and dalvik cache, flash zip files of custom ROMs and Mods etc. Now that TWRP recovery is available for our beloved Galaxy Core 2, we will be installing it on this device in the succeeding guide.

We are about to show you how you can install TWRP 2.8 recovery on your Galaxy Core 2 SM-G355H and SM-G355HN. After installing TWRP, we will flash SuperSu.zip file to root this device. Let’s go ahead and get this done now.

Preparations

  • This guide is only for Galaxy Core 2 SM-G355H and SM-G355HN. Do not try this on any other device.
  • Charge your device up to 50%.
  • Use original data cable to establish connection between your PC and your phone.
  • Backup your important data as a safety measure.
  • Follow this guide to the letter to avoid any mishap.

Disclaimer: Flashing custom recovery and rooting the device void its warranty. In case of a mishap, TechBeasts or Samsung may not be held responsible. Make sure that you’re doing everything at your own risk and with your full understanding.

Required Downloads:

Install TWRP & Root Galaxy Core 2 SM-G355H and SM-G355HN

  1. Open Odin3 V3.10.6.exe that you extracted on your PC.
  2. Put your Tab S 10.5 in download mode now. To do so, turn it off completely. Now turn it on by pressing and holding Volume Down + Home + Power Key. Once your phone boots up, press the Volume Up key to continue.
  3. Connect your phone to your PC now. The ID:COM box in the top-left corner of Odin3 should  turn blue. This indicates that your phone is connected properly.
  4. Now click the “AP” tab in Odin and select the TWRP Recovery.tar file that you downloaded. It will take a second or two for Odin3 to load this file.
  5. If the Auto-reboot option is unticked, tick it. Leave all other options in Odin3 as they are.Odin 3.10.6 Explained_Techbeasts
  6. Now you’re all set to flash the recovery. Just click the start button in Odin3 and sit back.
  7. Once the process box above ID:COM box shows green light and flashing process is finished, disconnect your device. Let it reboot
  8. Now turn off your device properly as we are going to boot into recovery mode.
  9. Now turn it on by pressing and holding Volume Up + Home + Power Key. This will boot your device in recovery mode. It should be TWRP recovery that you just installed.
  10. Now in TWRP recovery, select Install > locate the SuperSu.zip file and flash it.
  11. Once flashed, reboot your device.
  12. Checkout the SuperSu in application drawer. Also install BusyBox from Play Store.
  13. Verify root access using Root Checker.
  14. That’s all. You’re now set to unleash the open source nature of Android.

Stuck with anything? Reach us out through the comment box below!

Credits: Dhruvit Pokharna

Download Google Play Store 5.10.29 APK

0
Download Google Play Store 5.10.29 APK

Google just rolled out a new update of its Google Play Store. Google Play Store, being the essential part of any Android smartphone, so keeping it up to date is a thing you must do. In the most recent update, Google added some new animations and some other minor changes were made. New version of Play Store is definitely more responsive and better then the previous versions. Google now allows copying the application descriptions and changelog straight from the Play Store application. RTL support has been added to the Play Store as well. If you’re looking forward to update the version of Play Store on your device, you can do it by grabbing the APK and installing it on your phone right away.google_play_logo_720-1900x700_c

We have grabbed the APK file of Google Play store 5.10.29 and embedded the download link below. Just go ahead, download the file and copy it to your phone or download it directly on your phone. Once you have the Google Play Store APK file on your phone, you can install it as a normal APK. This will update the existing version of Play Store on your Android smartphone.

Download Google Play Store 5.10.29 APK

NEW: Download Google Play Store 5.10.30 APK