Home Blog Page 354

Update Sony Xperia Z Ultra To AOSP Android 6.0 Marshmallow Custom ROM

2
Update Sony Xperia Z Ultra To AOSP Android 6.0 Marshmallow Custom ROM

Xperia Z Ultra debuted running Android Jelly Bean. Sony brought this device to Android 5.1.1 Lollipop and now this is where its software support will end. Xperia Z Ultra won’t be getting and higher version of Android, that means no new Marshmallow for Z Ultra. This may make the Z Ultra users a little bit sad, but there’s no need to worry about Marshmallow as long as we have some great developers working on this device. To fulfil the Marshmallow thirst of Z Ultra owners, XDA member Ev3rtH came up with Android 6.0 Marshmallow AOSP custom ROM.xperia-z-ultra-hero-black-620x420-a82de52b739491a12b1212ca4f27a18d

The ROM is in its WIP stage. The initial build is good enough to give you a touch and feel of Android Marshmallow, some of the features in this ROM may not work which do not let this ROM become a daily driver. We will be helping you to install this ROM on your Z Ultra but while we do, you may keep in mind that flashing this ROM is recommended for Android power users only who know how to deal with custom ROMs and handle the phone if anything goes wrong. For now Camera, NFC, GPS are not working on this ROM, but we expect these features to work in the future builds. Let’s go ahead and flash the AOSP based Android 6.0 Marshmallow on our beloved Xperia Z Ultra.

Early Preparations:

Disclaimer: Unlocking bootloader and flashing custom ROMs voids the warranty of device. In case of any mishap, Techbeasts or Sony may not be held responsible. Make sure that you’re going to do everything at your own risk.

Required Downloads

How To Install AOSP Android 6.0 Marshmallow Custom ROM On Xperia Z Ultra

Step#1: Now go to your Windows drive (i.e. C drive) > Program files > Minimal ADB & Fastboot folder.

Step#2: Copy all the ROM files (boot.img, cache.img, system.img etc) to this Minimal ADB & Fastboot folder.

Step#3: Now connect your phone to your PC in fastboot mode. To do so, turn off your Xperia Z Ultra completely. Now press and hold Volume Up and plug the data cable in. Your phone will be connected to your PC in fastboot mode.

Step#4: Now open the Minimal ADB & Fastboot folder from Program files and open “Py_cmd.exe” file.

Step#5: Now in the command window, issue the following commands one by one.

fastboot devices

This will verify the connection of your device in fastboot mode.

fastboot flash boot boot.img

This will flash the boot into your device in order to make the Marshmallow firmware boot up.

fastboot flash cache cache.img

This will flash the cache partition on your device.

fastboot flash system system.img

This will flash the AOSP Android Marshmallow system.

fastboot flash userdata userdata.img

This will flash the userdata of the target ROM.

Step#6: Once all of the above steps are done, reboot your phone.

How To Install Google GApps

  1. Copy the downlaoded GApps.zip file to your Xperia Z Ultra.
  2. Now boot into TWRP or CWM recovery on your Xperia Z Ultra. To do so, turn off your phone completely. Now turn it on and as soon as you see the boot screen press Volume Up or Down key to boot into TWRP or CWM.
  3. Now depending on your recovery, select the install zip option  and locate the GApps.zip file. Flash the file and reboot.
  4. You’re all done and you’ve installed GApps as well.

How To Root AOSP Android Marshmallow on your Xperia Z Ultra

  1. Copy the downlaoded SuperSu.zip file to your Xperia Z Ultra.
  2. Now boot into TWRP or CWM recovery on your Xperia Z Ultra. To do so, turn off your phone completely. Now turn it on and as soon as you see the boot screen press Volume Up or Down key to boot into TWRP or CWM.
  3. Now depending on your recovery, select the install zip option  and locate the SuperSu.zip file. Flash the file and reboot.
  4. You’re all done and you’ve rooted your Xperia Z Ultra running Android 6.0 Marshmallow.

That’s all. In case you’re stuck with something, feel free to reach us out through the comment box below. Thanks all.

Update Sony Xperia Z1 Compact To AOSP Android 6.0 Marshmallow Custom ROM

5
Update Sony Xperia Z1 Compact To AOSP Android 6.0 Marshmallow Custom ROM

Xperia Z1 Compact was recently updated to Android 5.1.1 Lollipop. A sad news for Xperia Z1 Compact owners is, this is the last firmware update that this device ever got. Sony might roll out software improvement updates in future, but Xperia Z1 Compact won’t be getting any further version of Android. This may be because of hardware limitations, the Android 6.0 Marshmallow needs an upgraded hardware to work on. The official software support may end, but as long as we have some developers working to keep these devices alive, we won’t be setting ourselves on a lower version of Android. To fulfil the Marshmallow appetite, XDA member Ev3rtH has brought us the AOSP based Android 6.0 Marshmallow for our beloved Xperia Z1 Compact.xperia-z1-compact-gallery-02-1240x840-dad66cd05b7d66abf67ab3f1e7cee212

The ROM is in early development stages and isn’t meant to be for everyday use. While we are going to show you how you can install this AOSP Android 6.0 Marshmallow on your Xperia Z1 Compact, you need to keep in mind that you should only proceed if you are an Android power user and you also know how to handle custom ROMs if anything goes wrong on your phone. Some of the features may not work in this ROM, but we expect the future builds to fix the bugs. Let’s go ahead and flash AOSP Android 6.0 Marshmallow on Xperia Z1 Compact.

Early Preparations:

Disclaimer: Unlocking bootloader and flashing custom ROMs voids the warranty of device. In case of any mishap, Techbeasts or Sony may not be held responsible. Make sure that you’re going to do everything at your own risk.

Required Downloads

How To Install AOSP Android 6.0 Marshmallow Custom ROM On Xperia Z1 Compact

Step#1: Now go to your Windows drive (i.e. C drive) > Program files > Minimal ADB & Fastboot folder.

Step#2: Copy all the ROM files (boot.img, cache.img, system.img etc) to this Minimal ADB & Fastboot folder.

Step#3: Now connect your phone to your PC in fastboot mode. To do so, turn off your Xperia Z1 Compact completely. Now press and hold Volume Up and plug the data cable in. Your phone will be connected to your PC in fastboot mode.

Step#4: Now open the Minimal ADB & Fastboot folder from Program files and open “Py_cmd.exe” file.

Step#5: Now in the command window, issue the following commands one by one.

fastboot devices

This will verify the connection of your device in fastboot mode.

fastboot flash boot boot.img

This will flash the boot into your device in order to make the Marshmallow firmware boot up.

fastboot flash cache cache.img

This will flash the cache partition on your device.

fastboot flash system system.img

This will flash the AOSP Android Marshmallow system.

fastboot flash userdata userdata.img

This will flash the userdata of the target ROM.

Step#6: Once all of the above steps are done, reboot your phone.

How To Install Google GApps

  1. Copy the downlaoded GApps.zip file to your Xperia Z1 Compact.
  2. Now boot into TWRP or CWM recovery on your Xperia Z1 Compact. To do so, turn off your phone completely. Now turn it on and as soon as you see the boot screen press Volume Up or Down key to boot into TWRP or CWM.
  3. Now depending on your recovery, select the install zip option  and locate the GApps.zip file. Flash the file and reboot.
  4. You’re all done and you’ve installed GApps as well.

How To Root AOSP Android Marshmallow on your Xperia Z1 Compact

  1. Copy the downlaoded SuperSu.zip file to your Xperia Z1 Compact.
  2. Now boot into TWRP or CWM recovery on your Xperia Z1 Compact. To do so, turn off your phone completely. Now turn it on and as soon as you see the boot screen press Volume Up or Down key to boot into TWRP or CWM.
  3. Now depending on your recovery, select the install zip option  and locate the SuperSu.zip file. Flash the file and reboot.
  4. You’re all done and you’ve rooted your Xperia Z1 Compact running Android 6.0 Marshmallow.

That’s all. In case you’re stuck with something, feel free to reach us out through the comment box below. Thanks all.

Update Sony Xperia Z1 To AOSP Android 6.0 Marshmallow Custom ROM

7
Update Sony Xperia Z1 To AOSP Android 6.0 Marshmallow Custom ROM

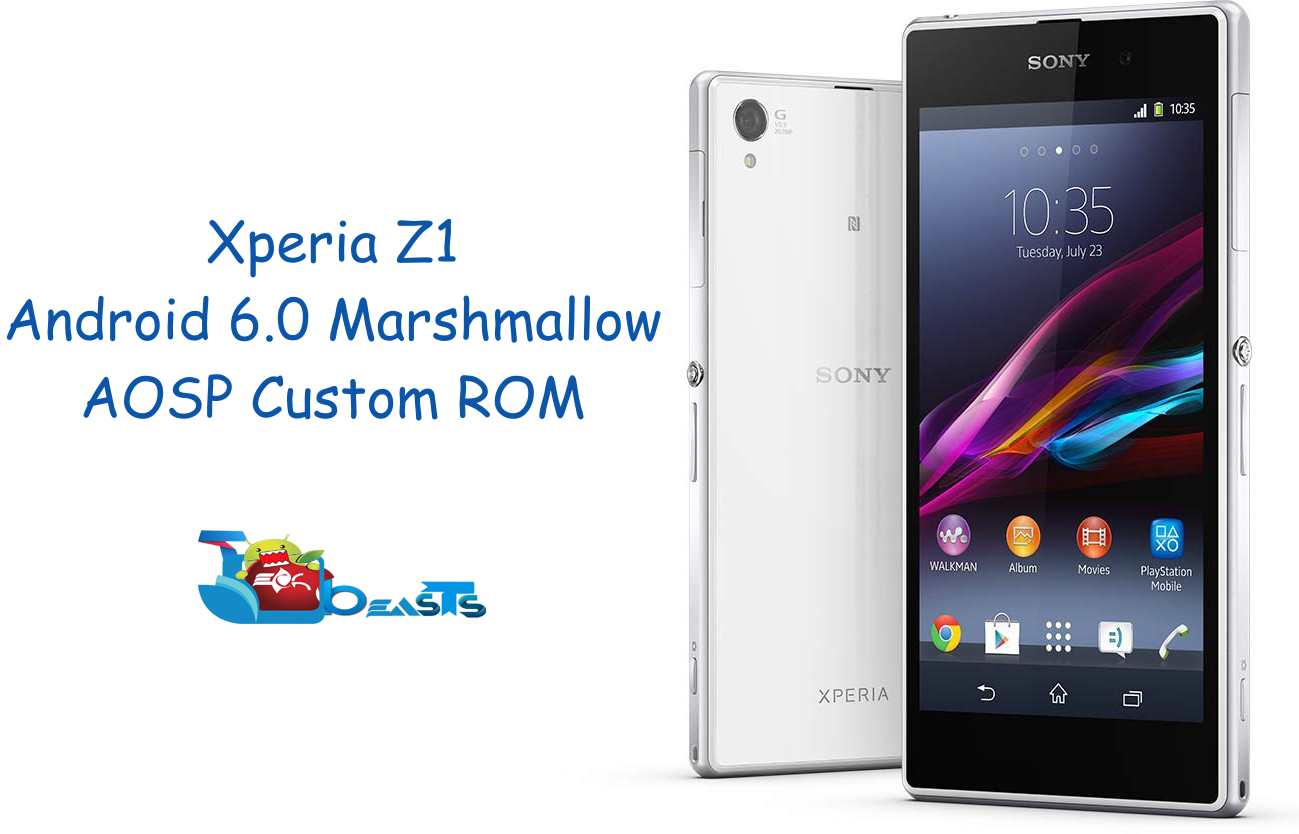
A few days ago Sony announced the devices that will be getting Android 6.0 Marshmallow. Unfortunately, the update journey of Sony Xperia Z1 comes to an end now. Sony won’t be updating this device to Android 6.0, Xperia Z1 will stick to Android 5.1.1 Lollipop now. This might be a sad news for Xperia freaks, but updating the Z1 to Android 5.1.1 Lollipop is something that we should appreciate Sony for. Sony might forget the software updates for Z1, but the developers working on XDA will never let this device’s life come to an end. Sony released the AOSP Android M 6.0 software binaries, which means the developers have some stuff around to play with now. XDA junior member Ev3rtH brought us the AOSP based Android 6.0 Marshmallow for our beloved Xperia Z1.Sony Z1

As of now the ROM is in very early stages. The WIP build is meant to be for pure Android power users. Some features like Camera, NFC, GPS are not working in this build, these features will be fixed in the next builds. In a while we will be showing you how you can install this AOSP Android 6.0 Marshmallow on your Xperia Z1. Before we proceed, you must keep in mind that this build is not meant to be for everyday use and is not a daily driver at all. You should only flash it if you have an idea of how to deal with Android custom ROMs and also have a great idea about Android flashing. Let’s go through some precautions and then flash Android 6.0 Marshmallow AOSP custom ROM on our beloved Xperia Z1.

Early Preparations:

Required Downloads

How To Install AOSP Android 6.0 Marshmallow Custom ROM On Xperia Z1

Step#1: Now go to your Windows drive (i.e. C drive) > Program files > Minimal ADB & Fastboot folder.

Step#2: Copy all the ROM files (boot.img, cache.img, system.img etc) to this Minimal ADB & Fastboot folder.

Step#3: Now connect your phone to your PC in fastboot mode. To do so, turn off your Xperia Z1 completely. Now press and hold Volume Up and plug the data cable in. Your phone will be connected to your PC in fastboot mode.

Step#4: Now open the Minimal ADB & Fastboot folder from Program files and open “Py_cmd.exe” file.

Step#5: Now in the command window, issue the following commands one by one.

fastboot devices

This will verify the connection of your device in fastboot mode.

fastboot flash boot boot.img

This will flash the boot into your device in order to make the Marshmallow firmware boot up.

fastboot flash cache cache.img

This will flash the cache partition on your device.

fastboot flash system system.img

This will flash the AOSP Android Marshmallow system.

fastboot flash userdata userdata.img

This will flash the userdata of the target ROM.

Step#6: Once all of the above steps are done, reboot your phone.

How To Install Google GApps

  1. Copy the downlaoded GApps.zip file to your Xperia Z1.
  2. Now boot into TWRP or CWM recovery on your Xperia Z1. To do so, turn off your phone completely. Now turn it on and as soon as you see the boot screen press Volume Up or Down key to boot into TWRP or CWM.
  3. Now depending on your recovery, select the install zip option  and locate the GApps.zip file. Flash the file and reboot.
  4. You’re all done and you’ve installed GApps as well.

How To Root AOSP Android Marshmallow on your Xperia Z1

  1. Copy the downlaoded SuperSu.zip file to your Xperia Z1.
  2. Now boot into TWRP or CWM recovery on your Xperia Z1. To do so, turn off your phone completely. Now turn it on and as soon as you see the boot screen press Volume Up or Down key to boot into TWRP or CWM.
  3. Now depending on your recovery, select the install zip option  and locate the SuperSu.zip file. Flash the file and reboot.
  4. You’re all done and you’ve rooted your Xperia Z1 running Android 6.0 Marshmallow.

That’s all. In case you’re stuck with something, feel free to reach us out through the comment box below. Thanks all.

Root Google Nexus 4 Running AOSP Android 6.0 Marshmallow

0
Root Google Nexus 4 Running AOSP Android 6.0 Marshmallow

AOSP Android 6.0 Marshmallow is now available for Google Nexus 4. If you’ve already updated your Nexus 4 to this AOSP based Marhsmallow, you must have lost the root access. In order to root Android 6.0 Marshmallow on Nexus 4, you need to flash a modified boot image and flash SuperSu.zip afterwards. If you’re looking for a comprehensive guide, you may have spotted the right place. In the proceeding guide we will be flashing the modified boot image on our beloved Google Nexus 4 running AOSP Android 6.0 Marshmallow and we will flash SuperSu.zip file in the end.Nexus-4-Specs1

Pre-installation instructions

  • This guide is intended for LG Nexus 4 D820 or D821. Do not try this on any other device. Before going ahead, check your device’s model number in settings > about device.
  • Your device must be running on AOSP Android 6.0 Marshmallow. Follow our guide to Install AOSP Android 6.0 Marshmallow On Nexus 4
  • Backup all of your important data including contacts, sms messages, call logs and media content.
  • Charge your phone up to 80% before proceeding.
  • Install TWRP recovery on your Nexus 4 and create a Nandroid backup using the Backup feature in TWRP. You may backup all partitions as well including EFS, Modem etc. Copy this backup to your PC.
  • Follow this guide to the letter to avoid any mishap.

Disclaimer: Rooting and flashing custom ROMs voids the warranty of the device. In case of any mishap, TechBeasts or the Device manufacturers may not be held responsible. Make sure that you’re going to do everything at your own risk.

Required downloads:

Copy both the downloaded files to your Nexus 4 now.

How To Root Google Nexus 4 Running AOSP Android 6.0 Marshmallow

  1. Make sure that you’ve backed up each and everything and have also copied the downloaded files.
  2. Now boot your phone into TWRP recovery. To do so,power off your Nexus 4 completely. Now turn it on by pressing and holding Volume Down + Power Keys. You will boot into TWRP recovery.
  3. Now in TWRP recovery tap Install > look for Image files at the bottom-right and tap it. You will find image files that are in your phone. Spot the copied Fixed_Data_root.img file and tap it, swipe the finger from left to right on the bottom of screen to flash this file.
  4. Once flashed, get back to the main menu and tap Install once again. Scroll all the way to the bottom and find SuperSu.zip file. Tap the file and flash it as well.
  5. Once flashed, reboot your phone.
  6. As soon as you get in to the system, checkout SuperSu in app drawer. Also verify root access using Root Checker in Play Store.
  7. That’s all.

Stuck with something? Feel free to reach us out through the comment box below.

Credits: ktetreault14

Download Casper APK

0
Download Casper APK

Back in 2003 when Facebook was launched, it helped Social media to move in an entirely new direction. The revolution brought by Facebook in the Social Media industry gave birth to a number of new social media platforms, and each of these new platforms came up with some unique functionality. These were either a big hit or were buried in the history. A few years ago, a new social media platform named as Snapchat came up, which gained a lot of popularity and also got acquisition offers from Facebook. Snapchat’s functionality grabbed millions of users within in not time. The fun way to chat helped Snapchat to become a company worth billions of dollars in a very short span of time. While Snapchat allows its users to have fun and interact with their buddies through pictures, it also has certain limitations that may annoy a number of users. A part from the limitations, Snapchat’s short feature list is also one reason that keeps some users away from it.

Since we are living in a very fast moving world, the limitations do not really matter. To put such limits off from Snapchat and provide the users with some new cool features, a new application named as Casper made its way. Casper acts as an Android client for Snapchat. Using this application you can act as a ghost and save the incoming pictures on your phone, the sender will never know that you’ve saved the pictures, this thing is apparently not possible on Snapchat, but Casper helps the users with it. You can also forward the received snaps to anyone on your list. Casper also contains a number of filters using which you can modify your pictures. There are stickers and emoticon which you can add to your pictures and express your emotions. Over all, Casper acts as a feature rich client for Snapchat that takes the Snapchat functionality to a next level.casper_1200x6301

Casper is not available on Google Play Store. If you’re looking to enhance your Snapchat experience using Casper, you will have to download and install it using the Casper APK file. In case you’re looking for the APK file,  we’ve already grabbed it and linked below. Go ahead and download latest version of Casper APK and enjoy Snapchatting with your buds.

Download Casper APK

Top 20 Free Jailbreak Tweaks for iOS 9

0
Top 20 Free Jailbreak Tweaks for iOS 9

As the new jailbreak for iOS 9- iOS 9.0.2 was released, most of the apps and tweaks did not get updated initially. However, within 24 hours of the release, the developers did an efficient job and now many tweaks and apps have been updated to work with the jailbreak for iOS 9.

tweaks-cydia-ios-8-jailbreak-2 (1)

Here are the top 20 free jailbreak tweaks for iOS 9.

  1. Anemone is a new favorite theme manager that brings overlays, masks, interface colors, icon shadows and customizations and more. It is advised to download the tweak from the link here: Anemone
  2. WinterBoard helps you completely change the look of your phone by downloading custom themes from Cydia.
  3. Apple File Conduit 2 will help you access system files of your iPhone, iPad or iPod Touch.
  4. DietBar  will make the navigation bar look thinner than usual.
  5. iCleaner helps you clean up your device and get rid of unwanted files, cache, cookies, etc hence securing more free space in storage.
  6. iFile If you are not happy with the iCloud Drive app, you can get this file manager to view files of various formats on your device.
  7. Bloard is also a customization tweak that will convert the traditional keyboard into a dark-themed keyboard instead.
  8. Forcy The app enables 3D Touch pop up menus for apps like Camera, Mail, Contacts, Notes, etc on the older versions of iPhone.
  9. Instagram++ Here is the brand new look of Instagram app with new features that will now let you download videos and photos from Instagram as well as see timestamps, hide comments and more.
  10. RoundDock As the name suggest, the tweak will round the corners of the top of the screen. The simple tweak does not come with any icon or settings.
  11. Priority Hub helps you prioritize your notifications, organize them and choose how they should appear on the lock screen.
  12. Speed Intensifier The tweak basically makes annimations appear faster where you can choose from three different modes; Simple, Fusion and Advanced.
  13. Open SSH helps you remotely access your jailbroken iPhone, iPad or iPod Touch.
  14. Zepplin If you want to change your device’s carrier logo, this is the tweak you are looking for.
  15. Rounder Similar to RoundDock, the Rounder tweak will round corners of the Control Center.
  16. Numerals If you are more of a user of Roman numbers, this app will help you display Notification Badge in Roman.
  17. LockGlyph uses Apple Pay’s sound to unlock your device through TouchID.
  18. Berry C8 This makes it easier and efficient for you to launch apps, that you use the most, from the lockscreen.
  19. HideMe8 Lite The brilliant app will let you hide sensitive stuff on your device.
  20. Date In Statusbar The app simply display date on the status bar so that you are able to check the date while using any app.


A New Jailbreak Tweak Will Be Able to Enable 3D Touch on Older Versions

0
A New Jailbreak Tweak Will Be Able to Enable 3D Touch on Older Versions

As said earlier, most developers have been left to a surprise as well as panic upon the sudden and unannounced release of iOS 9.0.2 jailbreak. The developers did not get much time to update the tweaks and apps in time to make them work with the new jailbreak, Pangu 9.

As people wait for their favrite tweaks and apps to get updated to be compatible with the latest jailbreak for iOS 9 and iOS 9, we come across a teaser from one developer for a new tweak that will be able to enable 3D menu for older iPhone versions.

A developer from team Cydia, Spookyninja (George), announced in one of his recent tweets that he has been successful in getting 3D menu pop for the older versions of iPhone including iPhone 6. Spookyninja also shared screenshots of the 3D menu for Camera and Mail.

managed to get the 3d touch menu popping up. just need to add a gesture recognizer to make it pop up – Spookyninja (George)

3d-touch-tweak-2

George also told that he has teamed up with other developers to work on this project to make it available for public.

So it’s @evilgoldfish01, @GreenyDev and I somehow working on this project

For the developer to work on such a new tweak will be exciting for many of you out there, especially the users of older versions of iPhone. By getting the images of the tweak, we now know that it will take too long for the tweak to arrive at Cydia. For updates regarding the new tweak, stay tuned with us.

Tweaks Compatible With iOS 9 – iOS 9.0.2 Jailbreak

0
Tweaks Compatible With iOS 9 – iOS 9.0.2 Jailbreak

So we now have solution for jailbreaking iOS 9 as Pangu has released Pangu 9 as the latest version to jailbreak iOS 9.0.2. Although, the release of Pangu 9 was too sudden and surprising, Saurik also managed to release the updated Cydia Substrate along with Cydia Installer yesterday, shortly after the release of Pangu 9.

jailbreak-ios-9

However, Saurik also warned users that due to such a short notice, most developers were not able to update the tweaks and apps for iOS 9 and advised users not to install any tweaks or apps until they are updated to be compatible with the new update.

iOS 9 changed the 32-bit pagesize on 64-bit CPUs from 4096 bytes to 16384: all 32-bit binaries must now be compiled with -Wl,-segalign,4000. – Tweet by Saurik (Jay Freeman)

Phone-6s-cydia-yellow-1024x677

Hence, here is the list of the apps and tweaks that have been updated and are compatible with iOS 9, iOS 9.0.2 jailbreak, sorted in alphabetical order for your convenience.

20 Second Lockscreen
ABCopyTXT
Acapella II
AccountLabels
AdvancedSettings8
AFVideo
AKMessages
AlarmVolume
AlbumShot
AlienBlue++
Alkaline
Allarm
Almpoum
AndroidLock XT
Apex 2
Apple File Conduit “2”
AppList
AppSync Unified
Aria 2
Assistant+
ASUpdateHider
AutoTouch for iOS 8
Barrel
BatteryLife
BerryC8
betterFiveColumnHomescreen
betterFiveIconDock
BetterFourByFourFolders
BetterNC7
betterShutdown
BetterWifi7
Bloard
Bridge
CacheClearer
Callback for Messages
CC Deseparator
CCBackground
CCLoader
CCMeters
CCNowPlaying
CCPinfo for Control Center
CCSliders
CircleIcons
ClassicDock
CleanSheets
Cloaky
CocoaTop
ColorBadges
ColorFlow 2
CrashReporter
CustomCover
CyDelete8
Cylinder
DailyPaper
DataMeter
Date in Statusbar
DietBar
Dim
Disk Pie
DockShift
DynamicText
F.lux
Facebook++
Faces
Flat Notes
Flex 2
FlipControlCenter
Flurry
Flyer
Forcy
Fuse
GlowBadge
GroupMe
Hide Labels
iAdministrator
iCaughtU Pro
iCleaner
Icon Renamer
IconSupport
IDBox
iFile
iKeyWi8
InfiniBoard
InfiniDock
InfiniFolders
InstaBetter
Instagram++
KeyShortcut Pro
Lithium
LockGlyph
LockSafety
MapsOpener
Minimal Hosts Blocker
Minimal HUD
Mousai
MsgServiceSwitch
NCIfNeeded
No Percent Sign
NoAlarmVibrate
NoAppStoreRedirect
NoCarrier
NoLiveClock
NoLockBounce
NoMoreSeperators
NoMotion
NoSafariTopBlur
Notate
NoUpdateAll
OnlineNotify
OpenSSH
Orangered (iOS 8)
Package Update Notifier
PDANet
Persian Keyboard iOS8
Phantom for Snapchat
PhoneCaller
PhotoSize
Power Saver Mode
PowerApp
PowerBanners
PreferenceLoader
Priority Hub
Protean
QuickActivator
Remove Badges
Return To Sender
RoundDock
RoundScreenCorners
Safari Downloader+
SameStatus
SaveGram
ScramblePass
SelectiveReading
ShiftCycle
showallchanges
ShowALLUpdates
SimplerPhotos
Sixbar
SleekCode
Snooscreens
SnoozeHelper
Speed Intensifier
Spin
StatusBarTimer
StatusHUD 2
StatusModifier
StatusVol X
Sticky
Superslam
SwipeExpander
Swipeformore
SwipeSelection (Free and Pro)
SwipeShiftCaret
Tabless
TagExplorer
TetherMe for iOS 8+
TimePasscode Pro
TimeWiz
TinyBar
ToneEnabler
TransparentDock
Twitter++
Typingprivacy
TypingPrivacy
UniFaces
UnlimTones
UnlockSound8
Upscale
VirtualHome
VolumeWiz
vWallpaper2
WatchNotifications
WhatsApp++
WhatsAppCustomizer
WhatWereYouThinkingYT
Whoozit Pro
WiCarrier
WiFi Explorer
Wink
WinterBoard
Xenok
YouTube++
Xgress
MusicMod

If you can not find your favorite tweaks and apps in the list above, you will have to be patient for some time as the developers update the tweaks. And as soon as any new tweaks become available for iOS 9, we will update you, so stay tuned.

Source

How To Jailbreak iOS 9.0.2 On iPhone, iPad, iPod touch Using Pangu 9

0
How To Jailbreak iOS 9.0.2 On iPhone, iPad, iPod touch Using Pangu 9

Following are the instruction on how to Jailbreak iOS 9.0.2 on iPhone, iPad, iPod touch Using Pangu 9, Pangu team has released their latest Jailbreak today. Before going any further let me tell you Pre-requisites.

jailbreak ios 9.0.2

Pre-requisites:

  • Backup your device before proceeding.
  • If you updated your device to iOS 9 using OTA update, then you should install a fresh version of iOS 9.0.2 from iTunes. [ else Jailbreak process will fail ].
  • Pangu 9 is only released for Windows.

Supported devices:

  • iPhone 6s/6s Plus.
  • iPhone 6/6 Plus
  • iPhone5s/5c/5/4s.
  • Pad 4/3/2.
  • iPad mini 4/3/2/1.
  • iPad Air 2/1 and iPod touch 5/6.

How To Jailbreak iOS 9.0.2 On iPhone, iPad, iPod touch Using Pangu 9:

Step #1: First turn of Find My iPhone on your iPhone, iPad or iPod touch.

Step #2: Turn off Passcode and Touch ID unlock.

Step #3: Turn on Airplane Mode from Settings.

Step #4: Download Pangu 9 for your Windows. [ Download Pangu 9 from here ].

Step #5: Connect your device with your system and launch Pangu 9.

Step #6: Now click on the start button on Pangu 9.

Step #7: On the next screen select ‘Already backup’ to continue.

Step #8: Once the Jailbreak process starts, you’ll see two apps on your home screen Pangu and WWDC. Your device will automatically reboot after that Pangu tool will ask you to unlock your device and turn on Airplane mode.

Step #9: When you’ll turn on Airplane mode, Pangu tool will continue the jailbreaking process.

Step #10: After few minutes tool will ask you to run Pangu app from your home screen, tap on the Pangu app and grant access.

Step #11: Now wait for few minutes, once the Jailbreaking process is complete you’ll see a message “Jailbreak completed” on the tool. Your device will reboot now.

All Done !


Sonic Dash 2 for Pc Download – Windows and Mac

0
Sonic Dash 2 for Pc Download – Windows and Mac

Following are the instruction on how to download Sonic Dash 2 for PC using third party emulators. Everyone love sonic characters that’s why SEGA developers have released Sonic Dash 2. This game is basically designed for Android and iOS, but we can install Android and iOS games on our PC using third party emulators like BlueStacks and Andy. Before going any further let me give you an overview on Sonic Dash 2.

Sonic Dash 2 for Pc Download - Windows and Mac

Sonic Dash 2 for Pc Features:

New and amazing 3D worlds, challenges and game play. Play as Sonic the Hedgehog, Tails, Amy, Knuckles, and Sonic’s new friend, Sticks. Let’s do this!

SONIC DASH 2 FEATURES
– RACE with up to three characters in new Team Play mode! Swap runners mid-race to earn high scores
– UNLEASH new special powers – Amy’s Hammer, Knuckle’s Slam attack, Sonic’s even faster Dash, and more
– CONQUER new obstacles and Badniks
– DASH on new fast-paced tracks in and above the beautiful Sonic Boom world
– MASTER new Swing & Tilt gameplay with the super charged Enerbeam; tilt your device to swing the runner towards the rings and orbs
– COLLECT, evolve, and run with new magical Sprites
– EARN special prizes in new Events and Daily SEGA Challenges

for more visit Google Play:

How To Install Sonic Dash 2 For PC or MAC Using BlackStacks

Method 1:

  1. Install Bluestacks on your PC or MAC.
  2. Download Sonic Dash 2 Apk on your PC.
  3. Make sure that you have installed Bluestacks. Double-click the downloaded Sonic Dash 2 Apk to install it.
  4. The APK will be installed through Bluestacks, once the notification pop-ups determining the installation completion, open Bluestacks.
  5. Now click on My Apps and then click on Sonic Dash 2.
  6. The application will open up. Now follow on-screen instructions to Sonic Dash 2.

Method 2:

  1. Install Bluestacks on your PC or MAC.
  2. Open Bluestacks and setup your Google Play Store account.
  3. Now open Google Play Store and search for “Sonic Dash 2“.
  4. Once found, install Sonic Dash 2.
  5. Now click on My Apps and then click on Sonic Dash 2.
  6. The game will open up. Now follow on-screen instructions to Play Sonic Dash 2.

How To Install Sonic Dash For PC or MAC Using Andy OS

  1. Download and install Andy OS on your Windows PC or MAC.
  2. Once downloaded, open Andy OS.
  3. Setup Google Play Account on it.
  4. Now open Apps > Google Play Store and search for “Sonic Dash 2“.
  5. Install Sonic Dash 2 and wait for it to finish the installation.
  6. Once done, open “Uncategorized” portion in Andy and click on Sonic Dash 2 to play it.
  7. That’s all.

Install AOSP Android 6.0 Marshmallow On Nexus 4

0
Install AOSP Android 6.0 Marshmallow On Nexus 4

Google Nexus 4 won’t be getting the official Android 6.0 Marshmallow update. Nexus 4’s Android updates ended at Android 5.1.1 Lollipop. Updating the device to Android Lollipop is a big move by Google as no other OEMs have tried to update such an old device to a firmware like Android Lollipop. Nexus devices are always the luckiest ones to get plethora of custom ROMs which keeps these devices alive. To fulfil the Marshmallow appetite of Nexus 4 owners, XDA senior member vocoderism came up with pure AOSP Android 6.0 Marshmallow ROM. The ROM is intended give you a full touch and feel of the all new Android 6.0 on your Nexus 4. The ROM is in beta stages for now, but it’s good enough to try out the latest and greatest version of Android on your Nexus 4.Nexus-4-Specs1

In the on-going guide we will be showing you a comprehensive method to install this AOS Android 6.0 Marshmallow on your Nexus 4. In the first part, we will be showing you a method to install latest TWRP recovery on your Google Nexus 4. After installing TWRP recovery, we will flash Android 6.0 Marshmallow, and in the end we will install Google GApps for Android 6.0 Marshmallow.

Pre-installation instructions

  • This guide is intended for LG Nexus 4 D820 or D821. Do not try this on any other device. Before going ahead, check your device’s model number in settings > about device.
  • Backup all of your important data including contacts, sms messages, call logs and media content.
  • Charge your phone up to 80% before proceeding.
  • Install TWRP recovery on your Nexus 4 and create a Nandroid backup using the Backup feature in TWRP. You may backup all partitions as well including EFS, Modem etc. Copy this backup to your PC.
  • Follow this guide to the letter to avoid any mishap.

Install TWRP 2.8 recovery on your Nexus 4

Download and install Minimal ADB and Fastboot drivers with recovery.img file.

Step#1: Make sure that you’ve followed all the steps explained above.

Step#2: Now connect your Nexus 4 to your PC. If it asks for some permission on the phone, check allow this PC and tap ok.

Step#3: Now open the extracted Minimal ADB & Fastboot folder.

Step#4: Now click on py_cmd.exe file in order to open the command prompt.

Step#5: Enter the following commands in command prompt one by one.

Step#6: adb devices

This command will list the connected adb devices. You can verify whether your device is connected properly or not.

Step#7: adb reboot-bootloader 

This command will reboot your Nexus 4 in bootloader mode.

Step#8: fastboot flash recovery recovery.img

fastboot reboot

This will flash TWRP recovery on your Nexus 4.


Now Install AOSP Android 6.0 Marshmallow On Nexus 4

  1. Download AOSP Android 6.0 Marshmallow Custom ROM for Google Nexus 4.
  2. Download Google GApps for Android 6.0 Marshmallow.
  3. Copy both the downloaded .zip files to your Nexus 4’s internal SD card.
  4. Now boot your Nexus 4 in recovery mode. To do so, power off your Nexus 4 completely. Now turn it on by pressing and holding Volume Down + Power Keys. You will boot into TWRP recovery.
  5. A clean install is always preferred so perform a factory data reset using the wipe option in TWRP.
  6. Now get back to the main menu in TWRP and tap Install > scroll all the way down and tap the ROM.zip file that you just copied. Swipe finger from left to write on the bottom of screen to flash.
  7. Once flashed, get back to the main menu and tap Install again. Now scroll all the way down and select GApps.zip file this time and flash it.
  8. Get back to the main menu again and wipe cache and dalvik cache from wipe option.
  9. Now reboot your phone, you will have the all new AOSP based Android 6.0 Marshmallow running on your Nexus 4.

That’s all. Stuck with something? Feel free to reach us out through the comment box below.

Survivalcraft Online for PC Download – Windows and Mac

0
Survivalcraft Online for PC Download – Windows and Mac

Following are the instruction for how to download Survivalcraft for Pc running Windows 10,8.1,8,7, Xp and Mac. Survivalcraft is basically designed for iOS and Android, but we can run Survivalcraft on Pc using, third-party emulators. Before going any further let tell about main features of Survivalcraft.

Survivalcraft for Pc

Survivalcraft Main Features:

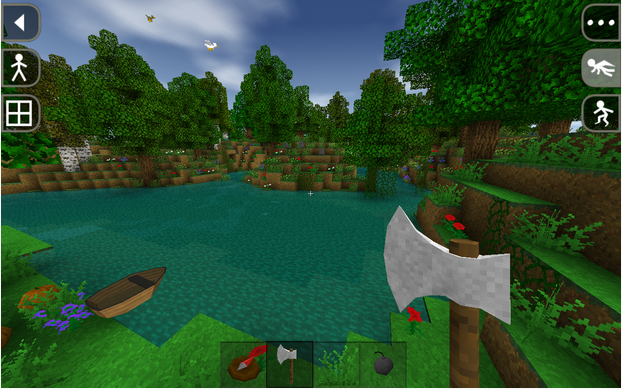
You are marooned on the shores of an infinite blocky world. Explore, mine resources, craft tools and weapons, make traps and grow plants. Tailor clothes and hunt animals for food and resources. Build a shelter to survive cold nights and share your worlds online. Ride horses, camels or donkeys and herd cattle to protect them from predators. Blast your way through the rock with explosives. Build complex electric devices. Possibilities are infinite in this long-running sandbox survival and construction game series.

for more visit Google Play.

 Note: Survivalcraft is paid Application in order to install it on your Pc/Mac you have to purchase it first.

How To Install Survivalcraft For PC or MAC Using BlackStacks

Method 1:

  1. Install Bluestacks on your PC or MAC.
  2. Download Survivalcraft Apk on your PC.
  3. Make sure that you have installed Bluestacks. Double-click the downloaded Survivalcraft Apk to install it.
  4. The APK will be installed through Bluestacks, once the notification pop-ups determining the installation completion, open Bluestacks.
  5. Now click on My Apps and then click on Survivalcraft.
  6. The application will open up. Now follow on-screen instructions to Survivalcraft.

Method 2:

  1. Install Bluestacks on your PC or MAC.
  2. Open Bluestacks and setup your Google Play Store account.
  3. Now open Google Play Store and search for “Survivalcraft“.
  4. Once found, install Survivalcraft.
  5. Now click on My Apps and then click on Survivalcraft.
  6. The game will open up. Now follow on-screen instructions to Play Survivalcraft.

How To Install Survivalcraft For PC or MAC Using Andy OS

  1. Download and install Andy OS on your Windows PC or MAC.
  2. Once downloaded, open Andy OS.
  3. Setup Google Play Account on it.
  4. Now open Apps > Google Play Store and search for “Survivalcraft“.
  5. Install Survivalcraft and wait for it to finish the installation.
  6. Once done, open “Uncategorized” portion in Andy and click on Survivalcraft to play it.
  7. That’s all.