Home Blog Page 355

How To Fix iOS 9 Bad Battery Life Issue [ Tips ]

0
How To Fix iOS 9 Bad Battery Life Issue [ Tips ]

If you have recently updated your iPhone to latest iOS 9 and now you are facing battery drain issue on your iPhone, then follow the instruction below in order to fix iOS 9 Bad Battery Life Issue. I have seen many users reporting that they are facing issue after upgrading to iOS 9 although Apple has released a new update of iOS to fix all the bugs, but still there are many left.

Also See: Fix iCloud backup is not working on iOS 9.

fix ios 9 battery life issues

How To Fix iOS 9 Bad Battery Life Issue:

Following are the instructions on how to fix bad battery life issue on iOS 9. If none of this helps you then, try going to service center of Apple and let them take a look what’s wrong with your device.

Look Into Your Apps:

First I would suggest that you look into your Apps how? Goto Settings->Battery, here you’ll see which apps are using the most of the battery. Some apps consume battery while screen is turn on and some while screen is turned off. After finding the app which is eating up your battery, delete it, check if there is updated version or try to reinstall it.

how to fix ios 9 bad battery life

Start Using Low Power Mode:

As far as i know this is the best option to save your battery life all you have to do is goto Settings > Battery > Low Power Mode > turn it on.

how to fix ios 9 bad battery life 1

Disable iCloud Keychain:

This is the most effective till now i’ve seen many users have reported after disabling the iCloud Keychain, they have seen bump to battery life. Goto Settings > iCloud > Keychain > Toggle iCloud Keychain off.

how to fix ios 9 bad battery life 2

Background App Refresh:

There are many apps which still work in background while you have closed it, they still consume battery while running in background. You can set limit or disable background app refresh by going to Settings > General > Background App Refresh > choose the app whom you don’t want to run in background or disable the background app refresh.

how to fix ios 9 bad battery life 3

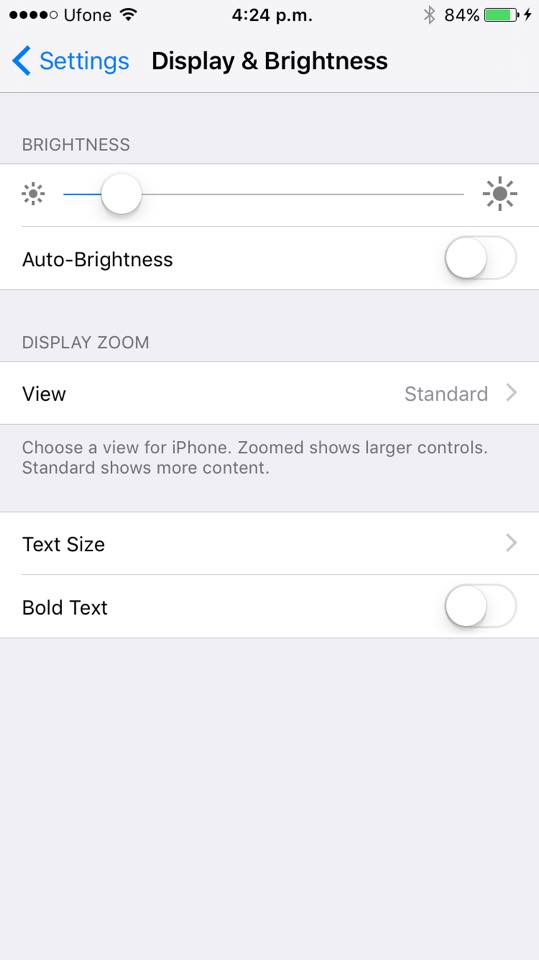
Manage Display:

If you are using auto brightness then you should turn it off and set brightness level manually, this trick always help so goto Settings > Display & Brightness > Auto-Brightness > Off.
how to fix ios 9 bad battery life 4

Reset All Settings:

There are several factors that can cause battery drain issue on iOS 9, if you cannot find any particular reason which is causing this issue then you should reset your device. Goto Settings > General > Reset > Reset All Settings.

how to fix ios 9 bad battery life 5

Restore the iOS 9 Update:

This will be your last option if none of this works, then you should restore your iOS 9 update. That means you have to backup all your data and use iTunes to restore the update.

  1. Connect your device with PC.
  2. Turn off the Find My Phone option.
  3. Open iTunes.
  4. Click on restore.
  5. Once iOS 9 is restored on your iPhone or iPad, now you can click on restore from backup.
  6. All done

Xiaomi MI 16000 mAh Powerbank At GearBest for $23.99

0
Xiaomi MI 16000 mAh Powerbank At GearBest for $23.99

Smartphones are becoming a more basic need of our everyday life. You always need your phone with you to stay connected with your friends, family and colleagues. It’s not only about staying in touch with others anymore, smartphones serve the purpose of a computer these days. Platforms like Android and iOS have given the developers the opportunities to build millions of useful applications. Running tons of applications on your Android or iOS device sure helps you learn a lot of new things. To run different applications on your smartphone, you do not only need a compatible device, but to make sure that you keep your phone turned on for long time, you need a charged up battery as well. Life is getting fast today, so its not easily possible to plug in a wall charger and keep your phone attached all the time. In such circumstances, you need a portable source of charging, and when it comes to a portable source of charging, you need to make sure that you chose the one that meets your phone’s charging needs properly.

To charge the smartphones portably, we have tons of powerbanks having different battery capacity and coming under the umbrella of different brands. You may find a powerbank of 1000 mAh or of 50000 mAh as well, but it depends on your needs which one will be enough for charging your device 3-4 times from 0 – 100%.  Although smartphone manufacturers are packing up whopping batteries in their smartphones, but that battery capacity is never enough to make our device last for a day.

While choosing a powerbank for myself, I came across Xiamo’s MI 16000 mAh powerbank on GearBest.com which is available for $23.99 only. As a trial, GearBest.com sent us a trial unit, which proved to be a great battery companion. After a few days experience with the Xiaomi MI 16000 mAh powerbank, we can say that this is one of the most powerful and reliable powerbank. To have a deeper look into this powerbank, let’s start with its design.Xiaomi MI

Xiaomi’s powerbanks sport a very elegant design. The CNC-finished edges stay smooth in your hands. The powerbank is packed inside a complete aluminium shell, which makes it a strong enough to bear a pressure limit of up to 50 Kg. The aluminium casing does not only add to the beauty of this charger, but it also makes it water and corrosion resistant. The powerbank has a small button, which is placed at the bottom very efficiently accompanied by 4 led light indicators. There are two USB ports, means you can charge two devices simultaneously.

Xiaomi has used the premim Li-ion battery cells from manufacturers like LG and Panasonic. These Li-on battery cells have energy densities up to 725Wh/L, which add an extra power of 16000 mAh battery to your smartphone. You can charge your Android smartphone, iPhone, Android tablet or iPad, your digital cameras or any other similar device. Xiaomi Mi 16000 mAh supports almost all smarpthones by Apple, Samsung, LG, Motorola, HTC, Sony, Huawei, OnePlus one and other giants. A battery of 3000 mAh can be charged for up to 3.5 times in one cycle of this powerbank, that means if you own an iPhone 6, you can charge it for over 6 times using this powerbank. The powerbank has a charging efficiency of 93%, which charges any smartphone really quick.
Screenshot at Oct 12 13-48-26

Xiaomi has managed to make this powerbank temperature resistant. The device also comes with short-circuit protection, the motherboard is pretty much resistant to short circuits. The power button at the bottom of this powerbank resets the powerbank by simply pressing the button once. The Over-Voltage Protection mechanism doesn’t let the powerbank provide extra voltages to your device and result in any harm. If you have plugged in the charger incorrectly, it won’t charge your device. Output Overcurrent, Output Overvoltage, Over-discharge and PTC Protective Circuits make this device intact. Screenshot at Oct 12 13-48-06


Install Android 5.1.1 Lollipop On Galaxy S2 Plus I9105/P Using CyanogenMod 12.1

5
Install Android 5.1.1 Lollipop On Galaxy S2 Plus I9105/P Using CyanogenMod 12.1

Galaxy S2 Plus came out in the year 2013 as a sibling of the original Galaxy S2. Specifications of the Galaxy S2 plus were not much different from the original Galaxy S2. This device also sported a 4.3 inch 480 x 800 pixels touch screen. 8 MP camera at the back and a VGA camera for video calls on the front. 1 GB RAM and 8 GB internal storage were fixed on the-board. Samsung used Broadcom BC28155 Dual Core chipset on this device. Galaxy S2 Plus ran on Android 4.1.2 Jelly Bean, and sadly, the device received only one update, and that too was to Android Jelly Bean, with a different version number i.e. 4.2.2.

Google has already pulled out Android 6.0 Marshmallow. Smartphone manufacturers are now busy cooking the Marshmallow update for their flagship devices. Samsung too is planning to update its devices to Marshmallow, but only the mainstream ones. Samsung usually forgets its old mid-range devices, and unfortunately Galaxy S2 Plus happens to be one of those unlucky devices. After Android 4.2.2 Jelly Bean, Samsung never rolled out any update for the S2 Plus. The device didn’t see any KitKat or Lollipop, we can’t even think of Marshmallow. Google Nexus 4 came in 2012, and the device received official Android Lollipop update, which disappointed the Galaxy S2 Plus users even more. Now the only way to update your Galaxy S2 Plus to any higher version of Android is through a custom ROM.galaxy-s2-plus2

Luckily we have a lot of great developers who are working hard to keep these devices alive. CyanogenMod 12.1, which is the aftermarket version of Android 5.1.1 Lollipop, is already available for our beloved Galaxy S2 Plus. Even if Samsung is keeping the users disappointed, CyanogenMod 12.1 by andixlm may bring a new life to your device. The good thing about the ROM we are talking about is, it doesn’t have any known issues so far. That means installing to for everyday use won’t cause any harm at all. In case you’ve just started wondering about how you will install this ROM on your Galaxy S2 Plus, you may stop doing so. In the succeeding guide we are going to update our beloved Galaxy S2 Plus I9105, I9105P to Android 5.1.1 Lollipop CyanogenMod 12.1 custom ROM. Let’s go ahead now and get it done.

Early Preparations

  1. This ROM is only for Samsung Galaxy S2 Plus I9105/P. Also make sure that your phone is running Android 4.2.2 Jelly Bean. Do not try this on any other device, please check your device’s model and firmware in Settings > About Devicel.
  2. Your device must have a custom recovery installed, in case you’re missing it you may Follow our full guide here to install TWRP 2.8 recovery on your S2 Plus I9105/P.
  3. Your device’s battery should be charged at least over 60%. This is highly recommended in order to prevent any power issues during the flashing process.
  4. Make sure that you backup your important media content, ContactsCall Logs Messages. This is highly recommended just in case something goes wrong and you need to reset your phone.
  5. If you already have rooted your device, use Titanium Backup to back up all your important apps + system data.
  6. Also if you are using a custom recovery, it is recommended that you backup your current system using that first. [Just for the sake of safety]. Here’s our full Nandroid Backup guide.
  7. You will have to go through Data Wipes during installation of this ROM, so make sure that you have backed up all the mentioned data.
  8. Make an EFS backup of your phone before you flash this ROM.
  9. You need enough confidence to flash this ROM.
  10. Alright! Go ahead and flash the custom firmware, follow this guide to the letter.

Disclaimer: The methods involved in flashing custom roms and rooting your phone are highly custom and may result in bricking your device, and has nothing to do with Google or the device manufacturer that is SAMSUNG in our case. Also rooting your device will void its warranty and you will be no longer eligible for any kind of free device services by the manufacturers/warranty providers. In case of any mishap we may not be held responsible. Follow these instructions to the letter to avoid any mishap or bricking. Make sure that whatever you do, you are doing it at your own responsibility.

How To Install Android 5.1.1 Lollipop On Samsung Galaxy S2 Plus Using CM 12.1 Custom ROM

  1. Download CM 12.zip file according to your device
  2. Download Gapps.zip file for CM 12.
  3. Connect your phone to your PC now.
  4. Copy the both the .zip files to the storage of your phone.
  5. Now disconnect your phone and turn it off complete.
  6. Boot into TWRP recovery now, in order to do so, turn it on by pressing and holding Volume Up + Home Button + Power Key. You should see the recovery mode in a while.
  7. Now in TWRP  recovery, wipe cache, factory data reset and advanced options > dalvik cache.
  8. After wiping all these three, select “Install” option.
  9. Now select “Install > Choose Zip from SD card > Select cm12.1…….zip file > Yes”.
  10. This will flash the ROM in your phone, once done get back to the main menu in recovery.
  11. Now once again select “Install > Choose Zip from SD card > Select Gapps.zip file > Yes”
  12. This will flash the Gapps in your phone.
  13. Reboot your device.
  14. You should see the Android 5.1.1 Lollipop running on your device in a while.
  15. That’s all!

First boot may take up to 10 minutes, you may not worry if it’s taking that much long. In case it’s taking too long, you may boot into TWRP recovery and wipe cache and dalvik cache and reboot your device as it may fix the issue. In case your device is having issues, you may return to your old system using the Nandroid backup or follow our guide here to install stock firmware.

Got any queries? Reach us out through the comment box below.

Best HD Happy Halloween 2015 Wallpapers For Your Desktop PC

0
Best HD Happy Halloween 2015 Wallpapers For Your Desktop PC

The month of October is coming to an end and we are heading towards Halloween 2015. Its just a matter of 20 days and the festival will be here. Get read to play trick-or-treating, get your costumes designed to freak out your friends and attend the parties and get your houses decorated. It’s the time to turn the pumpkins into jack-o-lanterns. You may setup a screen in your house to watch some horror movies or tell others some horrifying stories to get the maximum out of this Halloween. There sure is a lot more you can do, but while you’re preparing for Halloween 2015, don’t forget to give your computers, smartphones or laptops a touch and feel of Halloween as well. To make sure that you don’t have to spend any time finding out the makeover for your desktop screens, we have already collected the best HD Happy Halloween 2015 wallpapers.

All wallpapers we collected are in HD resolution. You can download and use these wallpapers on your Desktop’s screen, on your smartphone’s screen and also on your Macbook’s screen. Simply go ahead and pick up your favourite wallpaper and the save it to your computer or smartphone, or else download all the wallpapers from the all in one link attached below.

Be reminded that we do not own any of the images linked below. All the images are randomly picked up from different sources. All these images are the property of their rightful owners.Scary-Halloween-2012-Outdoor-Decorations-HD-Wallpaper-21

Download all Happy Halloween 2015 Wallpapers

Update Xperia M2 To Official Android 5.1.1 Lollipop 18.6.A.0.175 Firmware

0
Update Xperia M2 To Official Android 5.1.1 Lollipop 18.6.A.0.175 Firmware

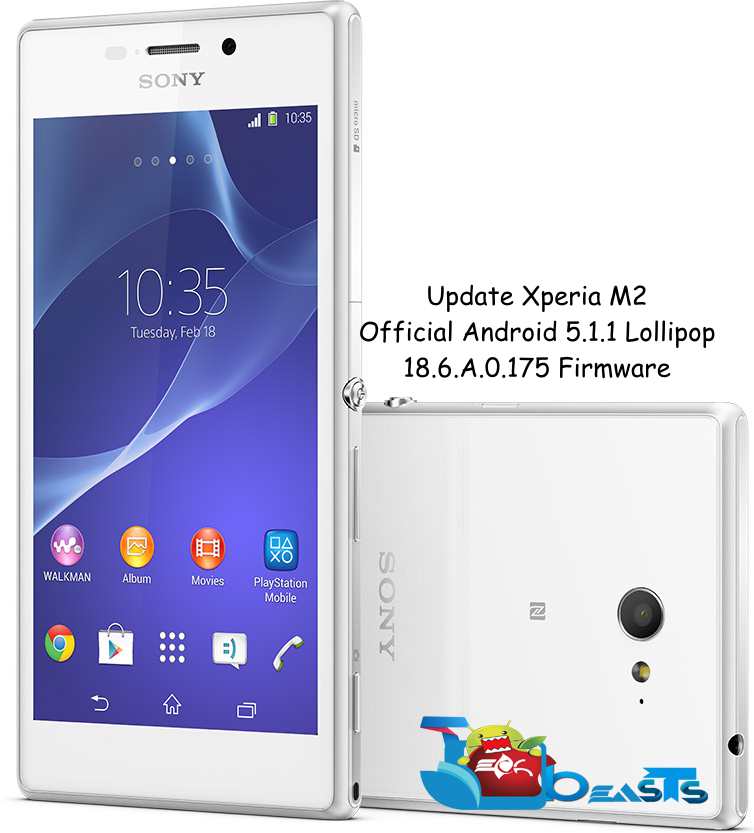
Xperia M2, Sony’s 2014 mid-ranger is now seeing Android 5.1.1 Lolllipop update. Sony skipped Android 5.0.2 Lollipop for this device and update it to Android 5.1.1 Lollipop straight from Android 4.4.4 KitKat. This is more of a surprise for Xperia M2 users as Sony has been pretty much kind to its loyal users. The new update brings all new goodies of Lollipop which include a new UI based on Material Design, new notifications on lockscreen, new notification bar icons, performance and battery life enhancements and a fix to the annoying Stagefright bug. Sony started seeding this update to the users through OTA and PC Companion. The update will be hitting all regions around the world depending on the region priority set by Sony.xperia-m2-white-1240x840-7837b196a4903e9807a89f0829ee22bb

Xperia M2 users who do not want to rely on the OTA update to hit their device, they may be willing to get this latest Lollipop firmware running on their device right now. In case you’re looking for a method, you may have spotted the right place already. In the on-going post we will be updating our beloved Xperia M2 D2303, D2305 and D2306 to Android 5.1.1 Lollipop 18.6.A.0.175 by means of Sony flashtool. Scroll down and go through the method to get it done now.Xperia M2

Early Preparations:

1. This is only for Sony Xperia M2 D2303, D2305 & D2306

This ROM is only for the device mentioned above. Make sure that your model number matches the one listed above. To do so, go to Settings > About Device on your device and see your model number. Flashing this firmware on any other device will result in bricking it so make sure that you meet this requirement first of all.

2. Battery should be charged at least over 60%.

Make sure that your battery is charged enough to complete the flashing process. In case your battery is low and your device goes dead during the flashing process, you may end up soft bricking your device as it won’t complete the flashing process.

3. Backup everything!

Just to be on the safe side, you may consider backing up each and everything from your Android device. This is highly recommended so that in case anything goes wrong, you still have the access to all of your data and you can restore it immediately. You may backup everything as listed below.

4. Enable USB Debugging Mode on your device.

Enable USB debugging mode on your device. To do so, tap settings>developer options>USB debugging. If you can’t find developer options in settings, then tap settings > about device and tap “Build Number” for 7 times and you’ll get em’ activated under settings.

5. Install and setup Sony Flashtool.

You must have installed Sony Flashtool.  Find the full guide here. After installing Sony Flashtool, open the Flashtool folder from the drive where you installed it.Now open Flashtool>Drivers>Flashtool-drivers.exe and install the Flashtool, Fastboot & Xperia M2 drivers from the list. [Important]

6. Use OEM data cable to establish connection.

Make sure that you use the phone’s original data cable to establish connection between your phone and the PC. Using a different data cable might result in interrupting the firmware installation.
How To Update Sony Xperia M2 D2303, D2305 & D2306 To 18.6.A.0.175 Android 5.1.1 Firmware

 Before moving forward, please make sure that you’ve read the pre requisites and ensure that you are set to go ahead.

  1. Download the latest firmware Android 5.1.1 Lollipop 18.6.A.0.175 FTF file.
    1. For Xperia M2 D2303 [Generic/Unbranded] Link 1  Create your own FTF using this guide
    2. For Xperia M2 D2305 [Generic/Unbranded] Link 1  Create your own FTF using this guide.
    3. For Xperia M2 D2306 [Generic/Unbranded] Link 1  Create your own FTF using this guide.
  2. Copy the file and paste in Flashtool>Firmwares folder.
  3. Open Flashtool.exe now.
  4. Hit the small lightening button on the top left corner and select Flashmode.
  5. Select the FTF firmware file that you placed in the Firmware folder.
  6. From the right side, select what do you want to wipe. Data, cache and apps log, all wipes are recommended, perhaps you may select if you don’t want.
  7. Click on OK, and it will start preparing the firmware for flashing. This may take a little while to load.
  8. As soon as the firmware is loaded, it will prompt you to attach the phone by turning it off and keeping the back key press.
  9. For Xperia M2, Volume Down key will do the job of back key, just turn off your phone, keep the Volume Down key pressed and plug in the data cable.
  10. As soon as the phone is detected in Flashmode, the firmware will start flashing, Do not leave the Volume Down key until the process is complete.
  11. As soon as you see “Flashing ended or Finished Flashing” leave the Volume Down key, plug the cable out and reboot.
  12. That’s All! Congrats! You’ve installed latest Android 5.1.1 Lollipop on your Xperia M2. Enjoy

In case you got any queries or face any problems regarding this guide, please feel free to stop by the comment box below and let us know. We will get back to you as soon as possible. Thanks all!

Update Xperia M2 Dual D2302 To Official Android 5.1.1 Lollipop 18.6.A.0.175 Firmware

2
Update Xperia M2 Dual D2302 To Official Android 5.1.1 Lollipop 18.6.A.0.175 Firmware

Sony doesn’t forget its loyal mid-range device users. Earlier we saw Sony rolling out Android 5.1.1 Lollipop update for the entire Xperia Z family, which was a very good step by Sony. Now Sony has started rolling out the Android 5.1.1 Lollipop official update for its 2014 mid-ranger, the M2 and M2 Dual. The new Android 5.1.1 Lollipop update moves the build number to 18.6.A.0.175. Since this happens to be the very first Lollipop build for Xperia M2, its going to be worth installing and experiencing the all new Android Lollipop. New firmware brings a completely new and revamped UI in accordance with the Material Design. New notifications on lockscreen have arrived, new icons in the notification bar, performance and battery enhancements are a part of this update. Stagefright bug, which has become a pain for many manufacturers, has been fixed completely in this update as well. So we can conclude that this happens to be a major update for Xperia M2. Sony started rolling out this update through OTA and PC Companion.Xperia M2 Dual

Android freaks like me will never want to wait for OTA and try to look for a way to update their Xperia M2 to the latest Android 5.1.1 Lollipop right now. The good news is, we have already come up with a method. In the succeeding guide you will be going through a comprehensive method to install latest Android 5.1.1 Lollipop 18.6.A.0.175 FTF on your Xperia M2 Dual by means of Sony Flashtool. Let’s move towards the method in order to get the phone updated now.Xperia M2

Early Preparations:

1. This is only for Sony Xperia M2 Dual D6503, D6502 & D6543

This ROM is only for the device mentioned above. Make sure that your model number matches the one listed above. To do so, go to Settings > About Device on your device and see your model number. Flashing this firmware on any other device will result in bricking it so make sure that you meet this requirement first of all.

2. Battery should be charged at least over 60%.

Make sure that your battery is charged enough to complete the flashing process. In case your battery is low and your device goes dead during the flashing process, you may end up soft bricking your device as it won’t complete the flashing process.

3. Backup everything!

Just to be on the safe side, you may consider backing up each and everything from your Android device. This is highly recommended so that in case anything goes wrong, you still have the access to all of your data and you can restore it immediately. You may backup everything as listed below.

4. Enable USB Debugging Mode on your device.

Enable USB debugging mode on your device. To do so, tap settings>developer options>USB debugging. If you can’t find developer options in settings, then tap settings > about device and tap “Build Number” for 7 times and you’ll get em’ activated under settings.

5. Install and setup Sony Flashtool.

You must have installed Sony Flashtool.  Find the full guide here. After installing Sony Flashtool, open the Flashtool folder from the drive where you installed it.Now open Flashtool>Drivers>Flashtool-drivers.exe and install the Flashtool, Fastboot & Xperia M2 Dual drivers from the list. [Important]

6. Use OEM data cable to establish connection.

Make sure that you use the phone’s original data cable to establish connection between your phone and the PC. Using a different data cable might result in interrupting the firmware installation.

How To Update Sony Xperia M2 Dual D2302 To 18.6.A.0.175 Android 5.1.1 Firmware

 Before moving forward, please make sure that you’ve read the pre requisites and ensure that you are set to go ahead.

  1. Download the latest firmware Android 5.1.1 Lollipop 18.6.A.0.175 FTF file.
    1. For Xperia M2 Dual D2302 [Generic/Unbranded] Link 1 |  Create your own FTF using this guide
  2. Copy the file and paste in Flashtool>Firmwares folder.
  3. Open Flashtool.exe now.
  4. Hit the small lightening button on the top left corner and select Flashmode.
  5. Select the FTF firmware file that you placed in the Firmware folder.
  6. From the right side, select what do you want to wipe. Data, cache and apps log, all wipes are recommended, perhaps you may select if you don’t want.
  7. Click on OK, and it will start preparing the firmware for flashing. This may take a little while to load.
  8. As soon as the firmware is loaded, it will prompt you to attach the phone by turning it off and keeping the back key press.
  9. For Xperia M2 Dual, Volume Down key will do the job of back key, just turn off your phone, keep the Volume Down key pressed and plug in the data cable.
  10. As soon as the phone is detected in Flashmode, the firmware will start flashing, Do not leave the Volume Down key until the process is complete.
  11. As soon as you see “Flashing ended or Finished Flashing” leave the Volume Down key, plug the cable out and reboot.
  12. That’s All! Congrats! You’ve installed latest Android 5.1.1 Lollipop on your Xperia M2 Dual. Enjoy

In case you got any queries or face any problems regarding this guide, please feel free to stop by the comment box below and let us know. We will get back to you as soon as possible. Thanks all!

How To Fix Samsung Galaxy Note 5 Not Registered On Network

0
How To Fix Samsung Galaxy Note 5 Not Registered On Network

Following are the instruction on how to Fix Samsung Galaxy Note 5 Not Registered On Network, previously we have covered general issue like Not registered on Network, Restore Null IMEI, unknown baseband and how restore EFS backup on Samsung Galaxy devices. Today we’ll tell you how to fix Samsung Galaxy Note 5 Not Registered On Network. 

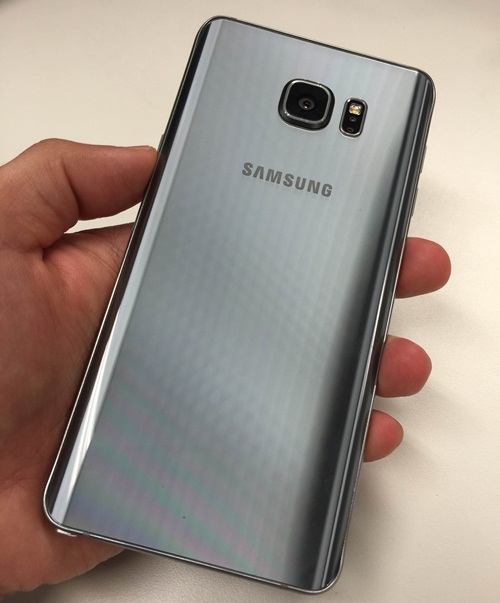
samsungnote5titaniumsilver_news

How To Fix Samsung Galaxy Note 5 Not Registered On Network:

^ First of turn off all the wireless connection on your device and enable the Airplane mode, wait for 2-3 mins and turn off the Airplane mode.

^ Turn off your device and take out the sim card, now insert back the sim card and turn on your Galaxy Note 5.

^ Please make sure that your sim is nano sim, otherwise it won’t work properly.

^ Update your device to latest OS, it may be the reason that your device is running on old OS that’s why it is showing not registered on Network. One more reason is that cause of incomplete software update you are facing such issue, to fix not registered on network you have to flash the stock rom using Odin on your Samsung Galaxy Note 5.

^ Open mobile networks from settings on your Galaxy Note 5, now press the Home button for 2 seconds along with power button for 15 seconds. Now your device will blink few times and it will reboot.

^ If none of these methods worked for you then last option is to restore IMEI and Efs backup, please use this guide to restore efs backup on Samsung Galaxy S6 and S6 edge.

Please do tell me in comments which method worked for you, and if you have any suggestion please do tell me so i can add and share it.

Smashy Road: Wanted for PC Download – Windows \ Mac

0
Smashy Road: Wanted for PC Download – Windows \ Mac

Following are the instruction on how to download Smashy Road Wanted for PC, although this game is not available in any PC format, but you can download Smashy Road: Wanted for PC using third party emulators like Bluestacks and Andy. Basically Smashy Road: Wanted is designed for Android and iOS, the main concept of this game is you have to smash everything and keep driving. Before going any, further let me give you an overview on Smashy Road: Wanted features.

Smashy Road: Wanted for PC

Smashy Road: Wanted Features:

– 30 unlockable vehicles!!
– Random generated environment with chance to encounter secret locations
– All vehicles have their own behaviour. Find your favourite!
– Great visuals and sound

for more visit Google Play.

How To Install Smashy Road: Wanted For PC or MAC Using BlackStacks

Method 1:

  1. Install Bluestacks on your PC or MAC.
  2. Download Smashy Road: Wanted Apk on your PC.
  3. Make sure that you have installed Bluestacks. Double-click the downloaded Smashy Road: Wanted Apk toinstall it.
  4. The APK will be installed through Bluestacks, once the notification pop-ups determining the installation completion, open Bluestacks.
  5. Now click on My Apps and then click on Smashy Road: Wanted.
  6. The application will open up. Now follow on-screen instructions to Smashy Road: Wanted.

Method 2:

  1. Install Bluestacks on your PC or MAC.
  2. Open Bluestacks and setup your Google Play Store account.
  3. Now open Google Play Store and search for “Smashy Road: Wanted“.
  4. Once found, install Smashy Road: Wanted.
  5. Now click on My Apps and then click on Smashy Road: Wanted.
  6. The game will open up. Now follow on-screen instructions to Play Smashy Road: Wanted.

How To Install Smashy Road: Wanted For PC or MAC Using Andy OS

  1. Download and install Andy OS on your Windows PC or MAC.
  2. Once downloaded, open Andy OS.
  3. Setup Google Play Account on it.
  4. Now open Apps > Google Play Store and search for “Smashy Road: Wanted“.
  5. Install Smashy Road: Wanted and wait for it to finish the installation.
  6. Once done, open “Uncategorized” portion in Andy and click on Smashy Road: Wanted to play it.
  7. That’s all.

Root & Install CWM Recovery On Galaxy S6 Edge+ G928S, G928K & G928L

Root & Install CWM Recovery On Galaxy S6 Edge+ G928S, G928K & G928L

Got your hands on the all new mighty Galaxy S6 Edge+, well if so, then we would like to congratulate you first of all. If you’ve already explored your device, you may not be able to find enough stuff to play with. Galaxy S6 Edge+ is one of the most high devices today, and the device is a perfect toy for Android power users. If you’re not an Android power user and you’ve got this device, it may be the time for you to learn about terms like root, custom recovery, custom ROMs and become an Android power user right away as this device has brought this opportunity for you. Methods to root the Galaxy S6 Edge+ and install a CWM recovery are already available. In the succeeding post we will be showing you how you can install Philz Advanced CWM on your S6 Edge+ G928S, G928K and G928L. Once we have install CWM recovery, we will root the S6 Edge+ by flashing a custom kernel and SuperSu.S6-Edge-plus-official

Before we head towards the method, let’s have a recap on the Galaxy S6 Edge+. The spec sheet of this device includes a 5.7-inch QHD display having a 5 MP shooter on the top-right corner. A 16 MP shooter is fixed at the back. We have Samsung’s Exynos 7420 SoC powering up this device. Samsung used a whopping 4 GB RAM in the S6 Edge+. Internal storage begins at 32 GB, there’s no external SD card slot on this device. S6 Edge+ can be found running Android 5.1.1 Lollipop out of the box.

Users who are not familiar with root and custom recovery so far, they may want to know that rooting an Android smartphone gives you the complete control of your phone’s core. You can bring in the root-specific applications to boost up the battery life, performance of your phone and also bring in new features. Using a custom recovery like Philz Advanced CWM, original CWM or TWRP allows you to create and restore Nandroid Backup, wipe dalvik cache and a lot more that you may come across once you’ve install a recovery. Let’s go ahead now and do the process to get both these things on our beloved Galaxy S6 Edge+.

Preparations

  • This guide is only for Galaxy S6 Edge+ G928S, G928K & G928L. Do not try this on any other device.
  • Charge your device up to 50%.
  • Use original data cable to establish connection between your PC and your phone.
  • Backup your important data as a safety measure.
  • Follow this guide to the letter to avoid any mishap.

Disclaimer: Flashing custom recovery and rooting the device void its warranty. In case of a mishap, TechBeasts or Samsung may not be held responsible. Make sure that you’re doing everything at your own risk and with your full understanding.

Required Downloads:

Install Philz Advanced CWM & Root Galaxy S6 Edge+ G928S, G928K & G928L

  1. Open Odin3 V3.10.6.exe that you extracted on your PC.
  2. Enable OEM Unlock on your phone. To do so on your phone, go to settings > about device > tap the build number for 7 times to enable developer options. Get back to the settings and open developer options. Under developer options turn on “OEM unlock.
  3. Put your S6 Edge+ in download mode now. To do so, turn it off completely. Now turn it on by pressing and holding Volume Down + Home + Power Key. Once your phone boots up, press the Volume Up key to continue.
  4. Connect your phone to your PC now. The ID:COM box in the top-left corner of Odin3 should  turn blue. This indicates that your phone is connected properly.
  5. Now click the “AP” tab in Odin and select the philz advacned cwm.tar file that you downloaded. It will take a second or two for Odin3 to load this file.
  6. Make sure that your Odin3 looks like this. The only option ticked should be F. Reset Time.

  7. Odin 3.10.6 Explained_Techbeasts
  8. Now you’re all set to flash the recovery. Just click the start button in Odin3 and sit back.
  9. Once the process box above ID:COM box shows green light and flashing process is finished, disconnect your device.
  10. Now turn off your device properly as we are going to boot into recovery mode.
  11. Now turn it on by pressing and holding Volume Up + Home + Power Key. This will boot your device in recovery mode. It should be CWM recovery that you just installed.
  12. Now in CWM recovery, select Install zip > Choose Zip from SD card > locate the Arter97 Kernel file and flash it.
  13. Once flashed, Once again in CWM recovery, select Install zip > Choose Zip from SD card > locate the SuperSu.zip file this time and flash it.
  14. Once done, reboot your device using recovery.
  15. As it boots up, checkout the SuperSu in application drawer. Also install BusyBox from Play Store.
  16. Verify root access using Root Checker.
  17. That’s all. You’re now set to unleash the open source nature of Android.

Stuck with anything? Reach us out through the comment box below!

Root & Install CWM Recovery On Galaxy S6 Edge+ G928F, G928C & G928I

Root & Install CWM Recovery On Galaxy S6 Edge+ G928F, G928C & G928I

Galaxy S6 Edge+ is the elder sibling of Samsung’s most beautiful smartphone, S6 Edge. S6 Edge+ sports a same design and build as that of the Galaxy S6 Edge, the only different is in the spec-sheet and the display size. We have a beautiful 5.7-inch display with a resolution of 2560 x 1440 pixels and 518 ppi. Samsung’s Exynos 7420 Octa Core 64 bit chipset is powering this device up. Samsung used a RAM of 4GB on this phone. A 16 MP shooter is fixed at the back and a 5 MP on the front. This handset runs on Android 5.1.1 Lollipop out of the box.Samsung-Galaxy-S6-Edge-vs-Galaxy-Note-5

Galaxy S6 Edge+ maybe the most high end device to the date. Such devices are a really great deal if you have an idea of unleashing their real power, which can be done by means of root access and having a CWM recovery installed on it. If you have never rooted your device or had a custom recovery installed it, you may want to know a little bit about both these terms yet. Basically, the root privileges give you the access to the core of your smartphone’s system. Once rooted, your device is not bound to any manufacturer restrictions and you’re free to install any root-specific applications in order to boost up the performance or battery life of your phone. Custom recovery is somewhat similar to root access, you can flash zip files to bring new features or flash a whole new custom firmware on your phone using custom recovery. Another great advantage of custom recovery is backing up and restoring Nandroid. You can also wipe cache and dalvik cache of your phone through a custom recovery. This is not it, this was just to give you an idea of root access and custom recovery. There’s a lot more you can do using root and recovery on your phone.

Let’s get back to our topic. The specifications carried by Galaxy S6 Edge+ make it good enough to cross the barriers and breach the limits. If you’re one lucky owner of the S6 Edge+ and you’re already looking for a way to root and install custom recovery, then you’re at the right place. We are about to install Philz Advanced CWM recovery on our beloved S6 Edge+ G928F, G928C and G928I. Once installed CWM, we will easily root the S6 Edge+. Time to put out conversation to an end and go ahead without any further ado to get it done.

Preparations

  • This guide is only for Galaxy S6 Edge+ G928F, G928C & G928I. Do not try this on any other device.
  • Charge your device up to 50%.
  • Use original data cable to establish connection between your PC and your phone.
  • Backup your important data as a safety measure.
  • Follow this guide to the letter to avoid any mishap.

Disclaimer: Flashing custom recovery and rooting the device void its warranty. In case of a mishap, TechBeasts or Samsung may not be held responsible. Make sure that you’re doing everything at your own risk and with your full understanding.

Required Downloads:

Install Philz Advanced CWM & Root Galaxy S6 Edge Plus G928F, G928C & G928I

  1. Open Odin3 V3.10.6.exe that you extracted on your PC.
  2. Enable OEM Unlock on your phone. To do so on your phone, go to settings > about device > tap the build number for 7 times to enable developer options. Get back to the settings and open developer options. Under developer options turn on “OEM unlock.
  3. Put your S6 Edge+ in download mode now. To do so, turn it off completely. Now turn it on by pressing and holding Volume Down + Home + Power Key. Once your phone boots up, press the Volume Up key to continue.
  4. Connect your phone to your PC now. The ID:COM box in the top-left corner of Odin3 should  turn blue. This indicates that your phone is connected properly.
  5. Now click the “AP” tab in Odin and select the philz advacned cwm.tar file that you downloaded. It will take a second or two for Odin3 to load this file.
  6. Make sure that your Odin3 looks like this. The only option ticked should be F. Reset Time.

  7. Odin 3.10.6 Explained_Techbeasts
  8. Now you’re all set to flash the recovery. Just click the start button in Odin3 and sit back.
  9. Once the process box above ID:COM box shows green light and flashing process is finished, disconnect your device.
  10. Now turn off your device properly as we are going to boot into recovery mode.
  11. Now turn it on by pressing and holding Volume Up + Home + Power Key. This will boot your device in recovery mode. It should be CWM recovery that you just installed.
  12. Now in CWM recovery, select Install zip > Choose Zip from internal storage > locate the Arter97 Kernel file and flash it.
  13. Once flashed, Once again in CWM recovery, select Install zip > Choose Zip from internal storage > locate the SuperSu.zip file this time and flash it.
  14. Once done, reboot your device using recovery.
  15. As it boots up, checkout the SuperSu in application drawer. Also install BusyBox from Play Store.
  16. Verify root access using Root Checker.
  17. That’s all. You’re now set to unleash the open source nature of Android.

Stuck with anything? Reach us out through the comment box below!


12 Best HD Wallpapers for iPhone 6s – Download Free

12 Best HD Wallpapers for iPhone 6s – Download Free

Here are the 12 best HD Wallpapers for iPhone 6s download them for free, Apple has released their new flagship iPhone 6s few days ago, its same in specs and size but this time Apple has given the best display ( 750 x 1334 pixels (~326 ppi pixel density). To add up more charm to display download the following HD Wallpapers for your iPhone 6s.

12 Best HD Wallpapers for iPhone 6s - Download Free

12 Best HD Wallpapers for iPhone 6s

Magic Rush: Heroes for Pc Download Free

0
Magic Rush: Heroes for Pc Download Free

Following are the instruction on how to download Magic Rush: Heroes for Pc, although Magic Rush: Heroes for PC is not yet available, but we can install Android games on Pc using third party emulators like BlueStacks and Andy. We’ve prepared a step by step guide on how to install Magic Rush: Heroes for Pc running Windows and Mac. Before going any further let me give you an overview on main features fo Magic Rush: Heroes.

Magic Rush: Heroes for Pc Download Free

Magic Rush: Heroes Features:

Magic Rush: Heroes Features:
War Strategy With 3 Epic Gameplay Styles
Tower defense missions earn you extra loot to power up your heroes
The newest RPG gameplay with innovative skill-aiming controls make for a true test of skills in campaign mode
Real time strategy War breaks out on the world map – Choose an Alliance, expand your kingdom and battle for resources

for more visit Google Play.

How To Install Magic Rush: Heroes For PC or MAC Using BlackStacks

Method 1:

  1. Install Bluestacks on your PC or MAC.
  2. Download Magic Rush: Heroes Apk on your PC.
  3. Make sure that you have installed Bluestacks. Double-click the downloaded Magic Rush: Heroes Apk toinstall it.
  4. The APK will be installed through Bluestacks, once the notification pop-ups determining the installation completion, open Bluestacks.
  5. Now click on My Apps and then click on Magic Rush: Heroes.
  6. The application will open up. Now follow on-screen instructions to Magic Rush: Heroes.

Method 2:

  1. Install Bluestacks on your PC or MAC.
  2. Open Bluestacks and setup your Google Play Store account.
  3. Now open Google Play Store and search for “Magic Rush: Heroes“.
  4. Once found, install Magic Rush: Heroes.
  5. Now click on My Apps and then click on Magic Rush: Heroes.
  6. The game will open up. Now follow on-screen instructions to Play Magic Rush: Heroes.

How To Install Magic Rush: Heroes For PC or MAC Using Andy OS

  1. Download and install Andy OS on your Windows PC or MAC.
  2. Once downloaded, open Andy OS.
  3. Setup Google Play Account on it.
  4. Now open Apps > Google Play Store and search for “Magic Rush: Heroes“.
  5. Install Magic Rush: Heroes and wait for it to finish the installation.
  6. Once done, open “Uncategorized” portion in Andy and click on Magic Rush: Heroes to play it.
  7. That’s all.