Home Blog Page 336

How To Fix “Unfortunately messaging has stopped” Error

4
How To Fix “Unfortunately messaging has stopped” Error

Here’s how to fix the Unfortunately messaging has stopped error any android device, I hate to say that this one error in Android is the biggest annoying pinch you’ll ever get. People are complaining in many forums that they are seeing Unfortunately messaging has stopped error on their Android devices and because of that their device got crashed. I know the pain once this error starts popping up, not to worry I have a perfect working solution for all of you. Let’s start the tutorial on how to fix Unfortunately messaging has stopped error on Android.

Unfortunately messaging has stopped

Read More: How To Fix Unfortunately WhatsApp Has Stopped on Android

How To Fix “Unfortunately LG Keyboard has stopped” Error

Before going any further you must see our ultimate guide on how to Fix ‘Unfortunately app has stopped’ errors.

Unfortunately messaging has stopped

Step#1: Open Settings on your Android device.

Step#2: Now tap on More tab.

Step#3: Tap on Application Manager form the list.

Step#4: Now select All Application by swipe to left.

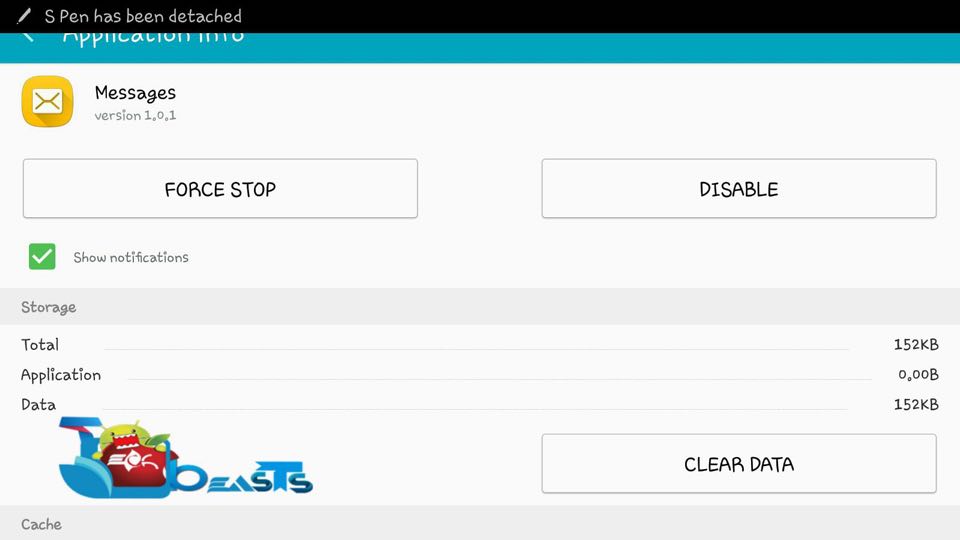
Step#5: There you’ll see all your installed apps, Tap on Messages.

Step#6: Now all you have to do tap on Clear Cache and Clear data.

Step#7: Now goto home screen and restart your device.

All Done ….

Tip: ” If still you are facing this issue i would recommend you that install a third-party messaging app like Textra, Handcent SMS or Go SMS. After installing one of these, select the app as your default messaging app.”

How To Fix ‘android.process.acore has stopped’ Error [ Tutorial ]

0
How To Fix ‘android.process.acore has stopped’ Error [ Tutorial ]

Android is an open source project from Google and it’s not perfect or bug proof, don’t get so sad none of the operating system including iOS is perfect. Today I’ll help to get rid of another annoying Android error, ‘android.process.acore has stopped’. The main reason of android.process.acore error is that you have same contacts in your multiple accounts that are being synced on Android. Yet again we have a solution to fix android.process.acore has stopped error. Follow the Step by step guide below, in order to fix this error.

Read More:

fix android.process.acore has stopped

How To Fix “Unfortunately android.process.acore has stopped” Error

Before going any further you must see our ultimate guide on how to Fix ‘Unfortunately app has stopped’ errors.

Step#1: Open Settings on your Android device.

Step#2: Now tap on More tab.

Step#3: Tap on Application Manager from the list.

Step#4: Now select All Application by swipe to left.

Step#5: There you’ll see all your installed apps, Tap on Contacts Storage.

Step#6: Now all you have to do tap on Clear Cache and Clear data.

Step#7: Now goto home screen and restart your device.

All Done ….

Warning:Before proceeding any further, let me tell you one thing after performing this procedure all of your contacts will be deleted from your device. It would be wise to make a backup of all your contacts.

How to Root Nexus 6, Nexus 7 and Nexus 9 on Android 6.0.1 Factory Images

0
How to Root Nexus 6, Nexus 7 and Nexus 9 on Android 6.0.1 Factory Images

Returning to the Stock version of the Firmware is better than everything else, especially if you are looking to sale your device or you just want to revert everything back to stock and looking to refresh your device for once, giving it some rest while you look for more customizations. However, we all know that flashing the Stock ROM or the factory images on your customized device will erase everything that you have installed, which also includes the root access and the custom recovery. So, the only way to get it back is by re-flashing all the stuff that you have lost, which is why we are here and we will show you exactly how you can do it.

How to Root Nexus 6, Nexus 7 and Nexus 9 on Android 6.0.1 Factory Images

For those who have updated their device to the Android 6.0.1 Factory Image, namely only 3 devices have received it yet and if you have followed our guide to Flash the Android 6.0.1 Factory Images on them, then you must have been waiting to Root the device of yours and also to install the Custom recovery on it.In the on-going guide we are going to show you How to Root Nexus 6, Nexus 7 and Nexus 9 on Android 6.0.1 Factory Images. Let’s put a full stop to our discussion here and get the task done right away.

Here are some pre-requisites in order to make this installation safe and secure

  1. This guide is only for Google Nexus 5, 7, 9. Do not try this tutorial on any other device. It may result in bricking it.
  2. Your phone’s battery should be charged at least over 50%. This is recommended in order to avoid power issues during the flashing process.
  3. Enable USB debugging mode on your device. You have to enable developer options first. You can do so by going in to settings > tap build number for 7 times. Now you will have developer options in settings. Open developer options > Enable USB debugging.
  4. Backup all your important contacts, text messages and call logs. Also copy your media content to your PC. Backup is recommended as your device will be wiped during the flashing process.
  5. Download and install latest Google USB drivers. Installation of these drivers will be a little different. Download the file from the attached link and unzip it. Now connect your phone to your PC. Right click “Computer or This PC > Click on Manage > Device Manager > Find your device i.e. Nexus 5 or Nexus 6 > Right click Update driver > Browse My Computer For Driver Software > Locate and select the Google USB folder that you got after unzipping > select install now”.
  6. Once the installation has been completed, your device will be shown as Android  Composite ADB Interface.
  7. Download and install Minimal Android ADB & Fastboot drivers on your computer.

Download The Custom Recovery image file according to your phone.

  • Nexus 5 GSM/LTE: Link
  • Google Nexus 7 (2013): Link
  • Google Nexus 9: Link
  • Super Su 2.66: Link

How To Flash Custom Recovery:

  1. Download the Recovery Image
  2. Rename it to recovery and paste it in the Fastboot folder, created in adb and fastboot guide
  3. Turn Off your Device
  4. Now go to Bootloader/Fastboot mode, Press and hold Power + Volume Down Buttons till you see some text on-screen
  5. Now Open Command prompt in Fastboot Folder.  How? Hold Shift Key and Right Click anywhere in the Fastboot folder.
  6. Connect your Device with PC.
  7. Now Type fastboot flash recovery recovery.img to flash the TWRP Recovery on your device
  8. Type fastboot reboot, to reboot your device
  9. After a proper reboot, your device will be running TWRP Recovery

How To Root Your Device:

  1. Reboot your device to Recovery Mode.
  2. Navigate to ‘advance’ and choose ‘Dalvik Wipe Cache’, so you won’t get in any bootloop.
  3. Navigate to ‘Install zip from sd card’ another windows will open in front of you.
  4. Select ‘choose zip from sd card’ from the Options.
  5. Select the Super SU 2.66.zip file and confirm the installation on next screen.
  6. Once the Installation is Over, Select +++++Go Back+++++
  7. Select Reboot Now to Reboot the System.

After a Successful reboot, Look for Super SU app in your drawer or use any Root checker app to confirm root access.

How to Block Popup Ads on Android Devices

0
How to Block Popup Ads on Android Devices

disable-popup-ads

Advertisements are the major source of income for a majority of blogs and websites on the Internet. In fact, it is one of the founding principles of the Internet, a marketing strategy that provides the subscribers with the content they love along with the ADs that might help them purchase something they’re looking for. Most websites use the cookies in your browser to deliver ADs that are relevant to your taste rather than some random stuff. This helps many aspiring bloggers to share their love on various niches and also grab an earning from what they love. Isn’t that what we all want? Earning by doing things we love.

As a freelancer and enthusiastic blogger, I support the idea of having adverts on blogs and websites and I don’t usually use any Adblock apps or extensions (although I blacklist some of the annoying websites). However, Popup ADs are something that gets on to my nerves and I seriously avoid such websites that spoil the Internet culture with the ambition to earn more at the cost of user experience. The Popup ads fire at the users like hell and downloads heavy web content which is unnecessary for the user. So, we would like to help you in getting rid of the popup ads on you Android device.

How to Block Popup Ads on Android Devices

We will list out various ways to block popup Ads on your Android device. Follow the methods that fit your requirement.

1. Disable Popups in Browsers

This is the basic thing to get rid of popup Ads on your Android device. All you need to do is to disable popups in the browsers you use. For stock Android browser, click on the three-dot menu icon on the top right-hand corner and choose Settings from the list. In the Settings menu, select Advanced and ensure that Block Popups is enabled in the next screen. In some devices, you’ll find this option under Content Settings of Advanced menu.

stock-browser-disable-popups

Google Chrome is the most used Android browser and it has the ability to block popups as well. Open Chrome, and then click on the three dots menu icon in the top right-hand corner. Select Settings from the menu. Now, select, Site Settings, and then Pop-ups. By default popups are blocked in Chrome, so you’ll see ‘Pop-ups Block (recommended)’. If popups are allowed, toggle the slider to disable the popups.

chrome-disable-popups

2. AdBlock Browser

Adblock has launched its own browser for Android users which will right away block all the Ads in websites. You can download the Adblock Browser for Android from the Google Play Store for free. However, not everyone wishes to change their browser just for the sake of Ads. Moreover, the Adblock browser is not as versatile as Google Chrome. So, if you’d rather use the Chrome, we’ll show you how to install Adblock settings on Chrome in the next method.

3. Install Adblocker on Chrome

You need to have a rooted device to enable an Adblocker on Android device but you can manually set the Adblock proxy on non-rooted devices as well. There are plenty of Adblockers on Play Store, we recommend the fabled Adblock Plus.  Be advised that the Adblock proxy settings need to be configured in every WiFi network you use. So, this isn’t a one-time setup unless you use a single WiFi network most of the time.

Install the Adblock Plus on your Android device and open the app. In the Adblock Plus app, click on Configure in the top right-hand corner and take a note of the proxy configuration displayed on the screen. Now, navigate to Settings » WiFi Settings » Long tap on connected WiFi network » Modify Network. Now change the proxy settings from None to Manual. 

adblock-proxy

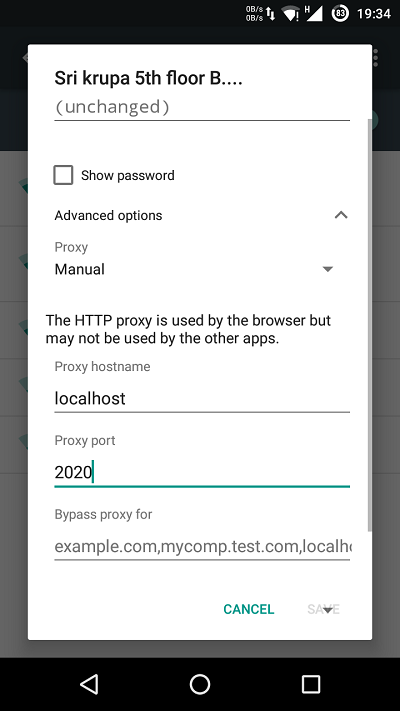
Go to ‘Proxy settings’, and change the drop-down from ‘None’ to ‘Manual’. Now, change the proxy information to the values prescribed from the Adblock Plus. For us, it is “localhost” and the port “2020.” After saving the settings, you’ll see no Ads on websites you browse from the configured network.

Modify-proxy

So, have you got rid of those annoying popup Ads on your Android device?

How to hide / remove your number from Truecaller

0
How to hide / remove your number from Truecaller

Here’s a comprehensive guide on how to hide / remove your number from Truecaller on Android, iOS or Windows.  Hiding your number from Truecaller will restore your phone number’s privacy and no one (unknown person) will be able to know your name or see your picture anymore.

Truecaller is a nice application as far as you’re okay with it. But at a certain point, this applications becomes  a pain. Truecaller basically acts as a caller ID for your device. If an unknown number is calling your phone, and that number has fortunately or unfortunately signed up on Truecaller once in a lifetime, Truecaller is going to show you the person’s name on your screen and the same happens when you call someone after you’ve signed up on this application once. It doesn’t matter if you delete Truecaller, deactivate your Truecaller profile, it still will keep your name and even the profile picture saved. Everytime you’re going to call someone unknown having Truecaller installed on their phone, they will get to know your name and also get a chance to see your picture.tc-device-480x582-201601261600

Truecaller is a nice tool as long as you want to identify unknown incoming calls and block some annoying phone numbers, but sometimes you just don’t want someone unknown to know your real name or see your image. At this point you will realise that signing up on Truecaller was a mistake, and you will want to find a way out. Until a while ago, there was no proper method available to get rid of Truecaller. But now Truecaller has given the users a choice to complete delete their Truecaller profile and also unlist their number for Truecaller profile list. Doing this will wipe off all of your information from Truecaller. No one will be able to know your name or see your picture with the help of Truecaller once you’ve done this. But how are you going to get this done? Well, that’s what this guide is meant to be for.

How to hide / remove your number from Truecaller

  1. If you’ve removed Truecaller for the sake of getting rid of it, you will need to install it once again in order to completely unlist your number. You can download and install Truecaller from Google Play Store, Windows Store or Apple App Store. If you’ve already installed it, skip the installation and proceed to the next step.
  2. Android Users > Now open your Truecaller from app-drawer and set it up. Skip this step too if you’ve already installed it and it’s configured as well. Now tap on the small profile icon on the top-left. A menu will open up, click on settings here. In settings, tap About Us > Deactivate account > Yes.12637187_10207719568119859_437119721_o-side
  3. iPhone users > Open Truecaller > tap the small gear on the top right corner > About Truecaller > Scroll all the way down > tap Deactivate True Caller.
  4. Windows Mobile Users > Open Truecaller > Tap the three dots on bottom right corner > Settings > Help > tap Deactivate Account.
  5. Now delete / uninstall Truecaller from your Android smartphone or Apple iPhone.
  6. Now open Truecaller unlist page.
  7. On the unlist page, enter your phone number that you want to remove from Truecaller. Select the reason and enter the captcha given at the bottom.
  8. After filing the unlist form, click UNLIST.Screenshot at Feb 02 03-33-22
  9. That’s all. Truecaller will completely remove your number within next 24-48 hours. Enjoy the freedom once again now.


Here’s what the Galaxy S7 and Galaxy S7 Edge’s rear might look like

0
Here’s what the Galaxy S7 and Galaxy S7 Edge’s rear might look like

Just a couple of days ago, the veteran leakster @evleaks brought us an exclusive look of Galaxy S7 and it’s elder brother the Galaxy S7 Edge. The pictures gave us an idea about the design aesthetics of upcoming Galaxy flagships. From the leaked pictures, it can be clearly seen that the Galaxy S7 and Galaxy S7 Edge are going to follow the design line of the Galaxy S6 and Galaxy S6 Edge.

Just today, @evleaks came up with another leaked image. The new leaked picture shows us the back of the Galaxy S7 and Galaxy S7 Edge. The rear of the Galaxy S7 and S7 Edge in the leaked picture further conform the device’s design matching to that of its predecessor. The only difference that can be seen here is the slightly curved back.samsung-galaxy-s7-rear

We are only 21 days away from the official unveiling of the Galaxy S7 and S7 Edge. The new rumours seem to be wiping off the surprise that Samsung has kept for its users. Although the leaked renders seem pretty real, we will still recommend you to take this with a pinch of salt as things might just go in the opposite direction at MWC, 2016.

Those of you who do not know much about this device; Samsung Galaxy S7 and S7 Edge both are expected to come with a QHD display. Samsung will equip these devices with Exynos 8890 or Snapdragon 820 SoC and 4 GB RAM. A microSD card slot is going to be there, this might be a good news for many. Both these devices are also expected come with larger batteries under the hood. A 12 MP shooter at the back and a 5 MP shooter on the front is expected.

We are keeping our eyes on MWC, 2016 to know what this device is going to come up with. Till then, stay connected and let us know your thoughts on this latest leak.

Source: @evleaks

Fix “Connection to Server Lost, Touch to Retry” Error on YouTube

2
Fix “Connection to Server Lost, Touch to Retry” Error on YouTube

Screenshot_20160128-180351

YouTube is one of the most popular websites in the Internet highway and it consistently ranks among the top 10 most visited websites. With millions of videos and terabytes of media content, YouTube holds a complete monopoly over the niche. Android has a YouTube app which has a great design and features to enjoy the endless stream of videos on the smartphone. A majority of Android users prefer to watch YouTube videos on the app rather than in the web browsers.

The YouTube app is indeed great but sometimes we face an error like “Connection to Server Lost, Touch to Retry” which is really annoying at times. Usually, you might face this error after updating the Android version or installing a custom ROM or sometimes even with nothing changed in the device. It’s one of the popular bugs of the YouTube app which doesn’t have a strong solution yet. But we have many workarounds that will help you get over with this annoying error.

In this post, I will list out some of the popular fixes that I’ve tried and had success fixing the issue. It’s not granted that all the fixes work in all the situations but I’m sure that either of the fixes will help you resolve the issue. So, without any further ado, let’s see what we can do to fix the “Connection to Server Lost, Touch to Retry” error on YouTube.

How to Fix “Connection to Server Lost, Touch to Retry” Error on YouTube

Considering the technical aspects of the issue, I believe that it’s related to proxy settings on your Android device or some other app that is causing the issue. So, first let’s see how to make sure your proxy and DNS settings of your WiFi network are proper.

Fix 1: Disable Manual Proxy in WiFi Settings

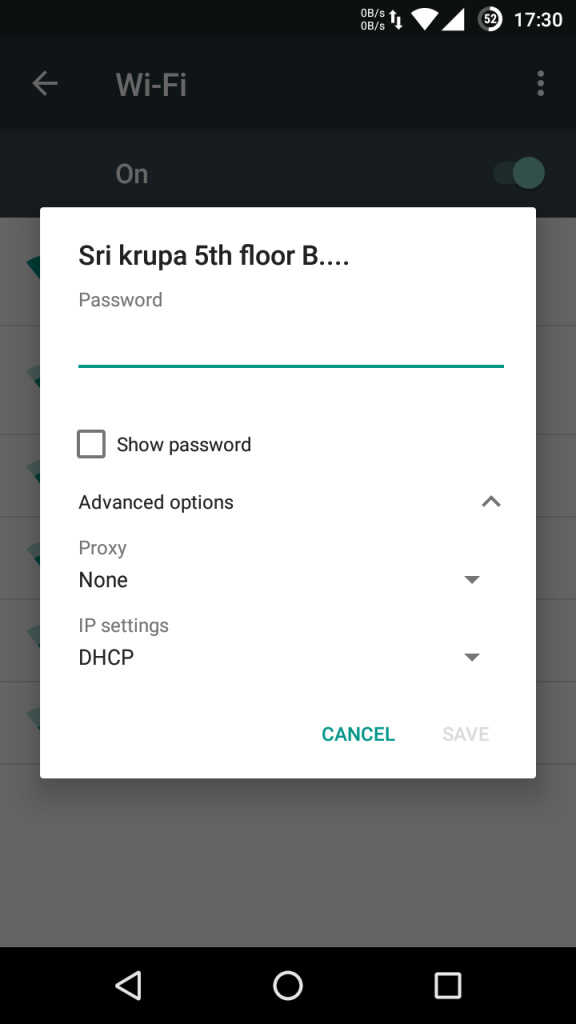
I’ve seen some Android users making tweaks to their WiFi network to improve speed and finally end up messing some other components. Using manual proxy settings is not always an issue as long as you configure the network properly. If you’re using manual proxy settings, then disable it from the WiFi settings to see if the YouTube issue is fixed. For that, navigate to Settings » WiFi Settings » Long tap on connected WiFi network » Modify Network. If you’re using manual proxy settings, you’ll see the Proxy Settings set to Manual rather than None.

Wifi proxy

If you observe that you’re using manual settings, just set the Proxy settings to None again and this should probably fix the issue. Open the YouTube and check whether you’re able to play videos or not. If the issue still persists, try the next fix which changes the DNS servers of your WiFi network.

Fix 2: Use Google DNS/Open DNS Settings

By default, you’ll use the ISP provided DNS servers which resolve the DNS information of your queries. Sometimes, it’s possible that the ISP’s DNS blocks some websites or Google itself blocks some websites in that DNS servers so that no one can access the particular domains from that DNS route. So, we can try changing the DNS servers to popular Google Public DNS or Open DNS servers. To do this:

  1. Open Settings » WiFi Settings » Long tap on connected WiFi network » Modify Network.
  2. Click on the “Show advanced option”.
  3. In here, under the IP settings, change the settings from DHCP to Static.
  4. Don’t change the IP address of your device, just change the DNS1 address to 8.8.8.8 and DNS2 to 8.8.4.4.
    Wifi manual DNS
  5. Save it and check YouTube videos now.

Note: For using Open DNS, change DNS1 to 208.67.222.222 and DNS2 to 208.67.220.220.

Fix 3: Disable Adblock Proxy if any

If you’re using any Adblock apps on your device, try disabling them. The Adblock proxies somehow interfere with the YouTube proxies and doesn’t allow to connect to YouTube’s media servers. So, it’s important that you disable the Adblock proxy before uninstalling the app. After you change the settings, you might need to reboot your device for the changes to take effect. Once the device boots up, try playing the YouTube videos and you might get lucky again. If not, try the further fixes.

Fix 4: Clear YouTube app Cache

If the above proxy and DNS fixes didn’t help you, then you might need to clear the old cache of YouTube app or else re-install it again.

  1. First, disconnect from WiFi/Mobile Data on your device.
  2. Open Settings » Application Settings » YouTube.
  3. Now, tap on Force Stop, then clear data and clear cache.
    Youtube cache clear
  4. Also, repeat the same thing with Google play services which might hold some redundant data of the network settings.
  5. Reboot your device again and try playing YouTube videos again.

We believe that after the above fixes, the YouTube’s “Connection to Server Lost, Touch to Retry” error vanishes. Please let us know if the above fixes worked for you or not.

How To Fix “Unfortunately LG Keyboard has stopped” Error

0
How To Fix “Unfortunately LG Keyboard has stopped” Error

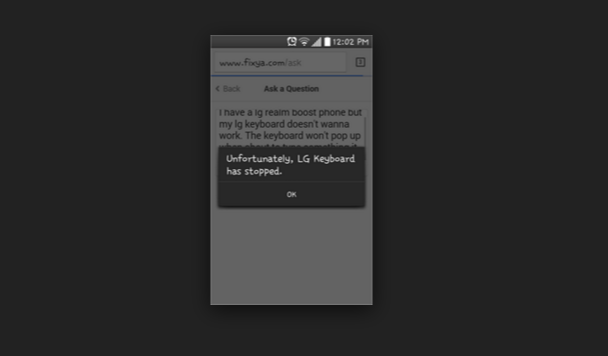
The most common error on any Android device is Unfortunately App has Stopped, we covered many apps error regarding Unfortunately App has stopped. Today I’ll guide you to fix Unfortunately LG Keyboard has stopped. While using keyboard on your LG smartphones you may have seen this error, once its start popping up you cannot use your LG keyboard. Either you have to fix this issue or start using third-party keyboard app, you can find many keyboard apps on Google Play but if you really want to use third-party keyboard on your LG device we will recommend you to use Swift keyboard and if you don’t want to use it, then follow the tutorial to fix Unfortunately LG Keyboard has stopped.

Read More: How To Fix Unfortunately WhatsApp Has Stopped on Android

Unfortunately LG Keyboard has stopped

How To Fix “Unfortunately LG Keyboard has stopped” Error:

Before going any further you must see our ultimate guide on how to Fix ‘Unfortunately app has stopped’ errors.

Step#1: Open Settings on your Android device.

Step#2: Now tap on More tab.

Step#3: Tap on Application Manager from the list.

Step#4: Now select All Application by swipe to left.

Step#5: There you’ll see all your installed apps, Tap on LG Keyboard.

Step#6: Now all you have to do tap on Clear Cache and Clear data.

Step#7: Now goto home screen and restart your device.

All Done ….

How to Fix iTunes Error 53 While Updating iPhone

0
How to Fix iTunes Error 53 While Updating iPhone

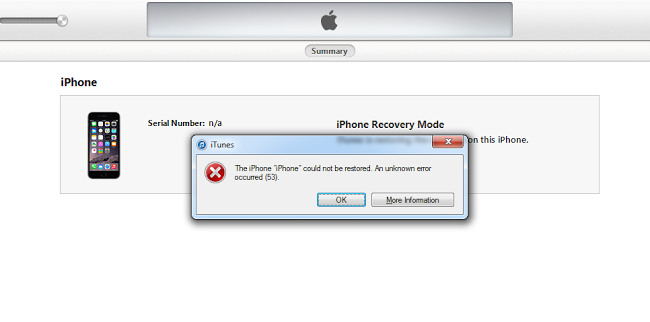
Few days back I connected my iPhone 6 with iTunes to update it to the latest version of iOS. After connecting iPhone with iTunes, I got an error message showing ” An unknown error occurred (53) “. Well, at first I thought it was just a server error but after restarting my device it got stuck on connect with iTunes logo. I started browsing the web to find what this error is and after searching for like an hour, I finally found few working solution. In the following guide, I will tell you how to Fix iTunes Error 53 While Updating iPhone.

iTunes is a great media player and also it help us to organize our iPhone data, but iTunes is not free of errors and the most annoying error is Error 53 and it mostly occurs while restoring / updating process.

fix iTunes error 53

How to Fix iTunes Error 53 While Updating iPhone:

Step #1: Wipe the registry clean: One of the most effective method is to clean your system register, you can do it by Clean Registry. It’s is available for both Windows and Mac. Once its done restart your Pc or Mac.

Step #2: Wipe Clean Junk Files: We use our browser at daily basis and by default our operating system store tons of cache and log files. It would really set things right if you clear all you cache and log files on your Mac and Windows. Once it’s done relaunch iTunes and connect your device with it.

Step #3: Install Latest OS: Some times your operating is not up to date and iTunes doesn’t support the old version, it may cause iTunes error 53. In order to get the best out of iTunes update your Windows to the latest version and if you are using Mac, do the same.

Step #4: Update Drivers: This is the very important step, make sure your device drivers are updated. If your driver are not update to date it can cause iTunes error 53.

  • Mac users can choose iTunes from the iTunes Menu and look for Updates.
  • Windows users can choose Help from the menu bar and check for Updates.

Step #5: Reinstall iTunes: The best and working solution i get is that uninstall iTunes on your Mac and Windows. Then reinstall the latest iTunes version, this will help you to get rid of error 53 on iTunes.

These are all the possible steps to fix iTunes error 53, after applying all these steps i hope error 53 will be fixed. If none of this helps you then i would suggest you, go to the nearest Apple store and give them to fix it.

for more information on iTunes error 53, check the following video.

for more information:

Best HD Nature Wallpapers for your Desktop and Smartphones

0
Best HD Nature Wallpapers for your Desktop and Smartphones

Those who are a fan of Nature just like, we have collected the Best HD Nature Wallpapers for you. These Wallpapers are FHD and you can use them on your PC, Desktop, Tablet & Smartphones.

Nature has its way to attract everyone. Moreover, as per reports, if you live close to nature, you’ll have a healthy life. Everyone adores nature and there is no doubt that the beauty of nature has no equivalent. Since we are so busy in our lives and we don’t have time to enjoy the real beauty of the world. We have brought Nature close to your life. Download these amazing Nature Wallpapers and always feel it near you.

Best HD Nature Wallpapers:

Nature wallpapers are always a good source to have a feel and essence of the glamorous beauty lying in the fresh clouds, the greenery and the wonderful rivers, oceans.

I love to change Wallpapers on my device and desktop PC, that is the main reason, I have a huge collection of HD Wallpapers you can see them here.

HD Nature Wallpapers

Best HD Nature Wallpapers for your Desktop and Smartphones

nature wallpaper nature wallpaper nature wallpaper nature wallpaper nature wallpaper nature wallpaper nature wallpaper nature wallpaper

HD Nature Images:

Download PhotoDirector Photo Editor for PC

0
Download PhotoDirector Photo Editor for PC

With the help of this guide, you will be able to download PhotoDirector Photo Editor for PC. The methods we are providing will work on Windows 10, Mac, Laptop, Desktop.

PhotoDirector Photo Editor:

Those who want a personal editor for their smartphone since they take a larger number of photos. We would say that PhotoDirector Photo Editor is the one you should go far. The best editing app, it allows you to easily Edit Photos, Resize, Fix Photos, and add effects. Moreover, PhotoDirector Photo Editor allows to easily make a collage of tons of photos.

There are hundreds of special effects provided in PhotoDirector Photo Editor. You can also change the White balance, saturation. Moreover, you can also apply effects in real-time while you are taking a photo.

PhotoDirector Photo Editor gives you a number of Tools through which you can make your photo awesome. There is so much more but you need to explore it for yourself. Download the PhotoDirector Photo Editor on your smartphones and enjoy the endless possibilities.

The main reason to make this post is to tell you how you can download PhotoDirector Photo Editor for PC on Windows & Mac. Since it is designed for smartphones, well you will be glad to know that we can. We can install Android Apps on our Desktop PC’s using third-party Android Emulators.

PhotoDirector Photo Editor for PC

How To Install PhotoDirector Photo Editor For PC or MAC Using BlackStacks:

Heed the instructions below to download PhotoDirector Photo Editor on Windows 10 & Mac.

Method 1:

  1. Install Bluestacks on your PC or MAC.
  2. Download PhotoDirector Photo Editor Apk on your PC.
  3. Make sure that you have installed Bluestacks. Double-click the downloaded PhotoDirector Photo Editor Apk to install it.
  4. The APK will be installed through Bluestacks, once the notification pop-ups determining the installation completion, open Bluestacks.
  5. Now click on My Apps and then click on PhotoDirector Photo Editor.
  6. The application will open up. Now follow on-screen instructions to PhotoDirector Photo Editor.

Method 2:

  1. Install Bluestacks on your PC or MAC.
  2. Open Bluestacks and set up your Google Play Store account.
  3. Now open Google Play Store and search for “PhotoDirector Photo Editor“.
  4. Once found, install PhotoDirector Photo Editor.
  5. Now click on My Apps and then click on PhotoDirector Photo Editor.
  6. The game will open up. Now follow on-screen instructions to Play PhotoDirector Photo Editor.

How To Install PhotoDirector Photo Editor For PC or MAC Using Andy OS

  1. Download and install Andy OS on your Windows PC or MAC.
  2. Once downloaded, open Andy OS.
  3. Setup Google Play Account on it.
  4. Now open Apps > Google Play Store and search for “PhotoDirector Photo Editor“.
  5. Install PhotoDirector Photo Editor and wait for it to finish the installation.
  6. Once done, open “Uncategorized” portion in Andy and click on PhotoDirector Photo Editor to play it.
  7. That’s all.

Also, See:

How to Install TWRP Recovery 2.8.7.1 On Galaxy Note 5 GSM

0
How to Install TWRP Recovery 2.8.7.1 On Galaxy Note 5 GSM

Since the arrival of Android 6.0 Marshmallow for Galaxy Note 5, those who updated their device to the latest version, must have lost the Root access and everything else that is custom on their device. Once again they are looking for the Rooting method, which was actually provided with the updating method, now that they device has been rooted, it is time to install Custom Recovery on it. CWM recovery was already available for it, however, those who rely more on TWRP must have been waiting for it to be released for Note 5, well they don’t have to wait anymore, with the latest release, TWRP is finally in its stable condition with everything else is here for Galaxy Note 5 GSM only.
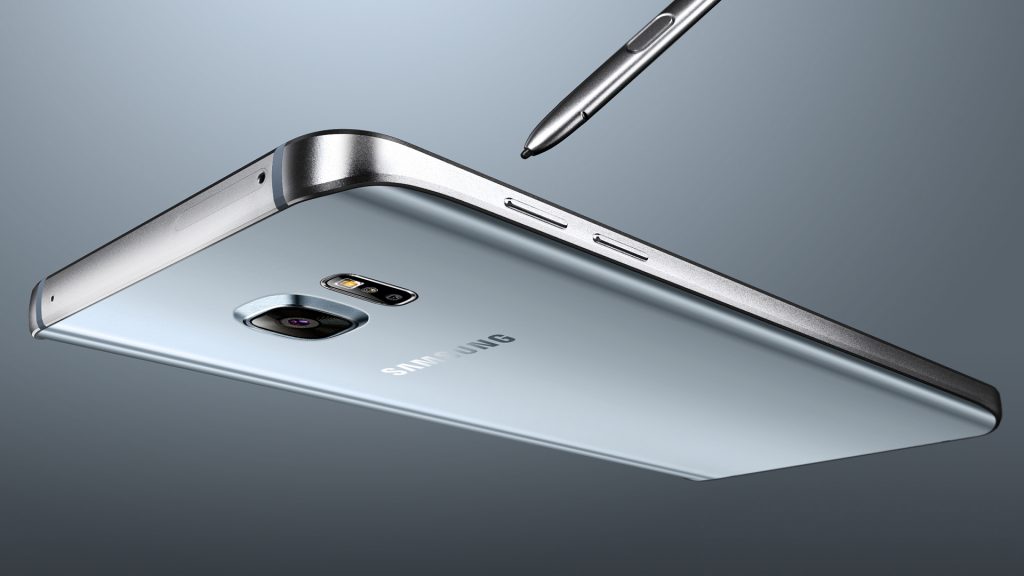
How to Install TWRP Recovery 2.8.7.1 On Galaxy Note 5 GSM

One thing you might wanna do after flashing TWRP on your Note 5, is to create a Back-up cause the CWM back-ups won’t work on it. Full touch-screen display lets you do your work faster than usual, all your settings in TWRP will be saved in your Sdcard and they will persist through reboots. Easy selection of Storage gives you better control over your savings, the on-screen keyboard lets you search for your files faster than usual. After rooting the device, all you need to do is to download all the files and to follow the instructions given below to be successful in this process. Let’s go down now and Install TWRP Recovery 2.8.7.1 On Galaxy Note 5 GSM.

Early Preparations

1. This guide is only for Samsung Galaxy Note 5 GSM

Make sure that your device is exactly as mentioned above. To check out what device you have, go to Settings > More/General > About Device or Settings > About Device and match the model number. Be careful about the device model number, flashing a file on a device not listed here might result in bricking it up. In that case, we may not be held responsible.

2. Battery should be charged at least 60%!

Your device’s battery should not be weak. In case your device goes dead during the flashing process, your device may get soft bricked and you might be in need of flashing stock firmware and that will ultimately result in wiping up your data as well. So, make sure that you charge your device before you start the flashing process.

3. Use the OEM data cable to establish connection!

Always use the original data cable to establish connection between your Android device and your computer / laptop. Using ordinary data cables might interrupt the flashing process, so to avoid any mishap, you need to meet this requirement as well.

4. Backup everything!

Just to be on the safe side, you may consider backing up each and everything from your Android device. This is highly recommended so that in case anything goes wrong, you still have the access to all of your data and you can restore it immediately. Also, clean install is always recommended, that means you will probably have to wipe your device to install the new firmware. So, you may backup everything as listed below.

Backup SMS Messages
Backup Call Logs
Backup Contacts
Backup Media – Copy your files manually to your PC or Laptop.
Backup EFS – If rooted, otherwise skip this step.

5. Install Samsung USB drivers

In order to be able to establish connection between your PC and your Galaxy S6, you need to have the Samsung USB drivers installed on your PC. You can find all Android USB drivers here on our site.

6. Turn off Samsung Kies and other softwares while using Odin3!

Make sure that you turn off Samsung Kies while using Odin3 flashtool. Samsung Kies will interrupt Odin3 and will result in causing errors and may not let you flash your desired firwmrae. Also, make sure that you turn off any antivirus software you’ve installed and also disable firewall to avoid any connection and flashing issues.

Required Downloads & Installations

  1. Download and extract Odin3 v3.10.6.
  2. Download Recovery file in .tar.md5 format.

How To Install TWRP Recovery on Galaxy Note 5

  1. Make sure that you read the instructions listed above carefully and you’re all set to go ahead now.
  2. Optional: Wipe your device complete in order to attain a neat installation. You may boot into the recovery mode and perform a factory data reset.
  3. Open Odin3.exe.
  4. Put your Galaxy Note 5 in download mode. To do so, turn it off and wait for 10 seconds. Turn it on by pressing and holding Volume Down + Home Button + Power Key simultaneously, You should see a warning, press Volume Up to continue. In case this method doesn’t work for you, try one from this guide.
  5. Connect your device to your PC.
  6. As soon as Odin detects your phone, the ID:COM box should turn blue.  Make sure that you’ve installed Samsung USB drivers before connecting.
  7. For Odin 3.09 or 3.10.6 hit the AP tab. Select the recovery.tar.md5, that you downloaded above.
  8. If you’re using Odin 3.07, you will select “PDA” tab instead of the AP tab, rest of the options remain untouched.
  9. Make sure that the options selected in your Odin are exactly as shown in the pic.Odin 3.10.6 Explained_Techbeasts
  10. Hit start and wait till the recovery flashing is complete, The flashing process box will turn green upon successful flashing.
  11. Once the flashing process has been completed successfully, disconnect your device and reboot it manually.
  12. Once the device boots up, checkout the recovery now.
  13. Once done, enter the recovery mode to confirm the installation.
  14. That’s all!

Got any queries? Make sure that you drop em’ in the comment box below. Good Luck!