Home Blog Page 337

How to install Remix OS 2.0 on Macbook Pro, Macbook Air & iMac
0
How to install Remix OS 2.0 on Macbook Pro, Macbook Air & iMac

It’s been almost 3 weeks since the Remix OS 2.0 has landed in. In case you don’t already know about this new OS, it’s a new software built by Jide in collaboration with Android-x86 project. Remix OS is the kind of Android virtual operating system that simply puts the traditional Android emulators to dust. If you’re an Android freak, you must have given a try to a variety of Android emulators like BlueStacks, BlueStacks 2, Andy OS, Droid4X etc. None of these emulators could work up to the expectation of users and provide a smooth experience. Remix OS 2.0 fulfils these requirements of Android freaks by allowing them to take their full Android experience to either a Windows PC / laptop and also a Mac OS X Macbook, iMac.1453346099373_HGtFx5_PC

After getting my hands on Remix OS 2.0, I could easily declare that it was the best ever Android emulator that I ever came across. Remix OS gives you the freedom to use Android on your PC just as you would use on an Android smartphone or a tablet. You can setup your Android device and use it the way you wish. You can install applications, games, access the web, watch youtube videos, install communication applications, use bluetooth and a lot more. Jide has definitely worked hard on the UI of Remix OS. Remix OS 2.0 hosts a remarkable bunch of graphics. After playing some games on Remix OS 2.0, I fell in love with it and wanted to share the method to install it on a Macbook or iMac with our beloved viewers.

Installing Remix OS 2.0 on a Windows PC is pretty easy. Remix OS comes with a USB boot tool that makes a Remix OS 2.0 bootable USB for your Windows PC. Unfortunately, it doesn’t contain any such tool for Mac OS X. In order to install Remix OS 2.0 on Mac OS X, you need to follow a little different method. In case you’re here to find the method, then you’re most welcome to go ahead and get Remix OS 2.0 running on your Mac OS X powered Macbook or iMac right away.

How to install Remix OS 2.0 on Macbook & iMac

Required downloads & hardware

  • Download Remix OS 2.0.iso file and rename it to simply “Remix_OS.iso” to avoid any confusion during the whole process. Copy this file to your Macbook or iMac’s desktop.
  • You need a USB 3.0 stick with 8-16 GB storage. I personally used a SanDisk 32 GB USB 3.0 pen drive. Note that a USB 2.0 won’t work with it.
  • Download and install UNetBootin on your Mac OS X device.
  • A Macbook Pro, Macbook Air or an iMac.
  1. Convert Remix OS 2.0.iso file to Remix OS 2.0.img file

First of all we need to convert the Remix OS 2.0.iso file into Remix OS 2.0.img file in order to make a bootable USB. Make sure that you’ve renamed the downloaded Remix OS 2.0.iso file to Remix_OS.iso. Now in order to get this done, follow these steps carefully.

  1. Open “Terminal” on your Mac OS X device. You can open terminal from the launchpad or by simply pressing command + space key and typing “terminal”.
  2. Now in terminal, type the following command and hit enter:
    1. hdiutil convert -format UDRW -o Desktop/Remix_OS.img Desktop/Remix_OS.iso

    2. Remix_OS
  3. Once done, the Terminal will drop a new file on your desktop named as Remix_OS.img.dmg. Rename this file to “Remix_OS.img” only.Remix


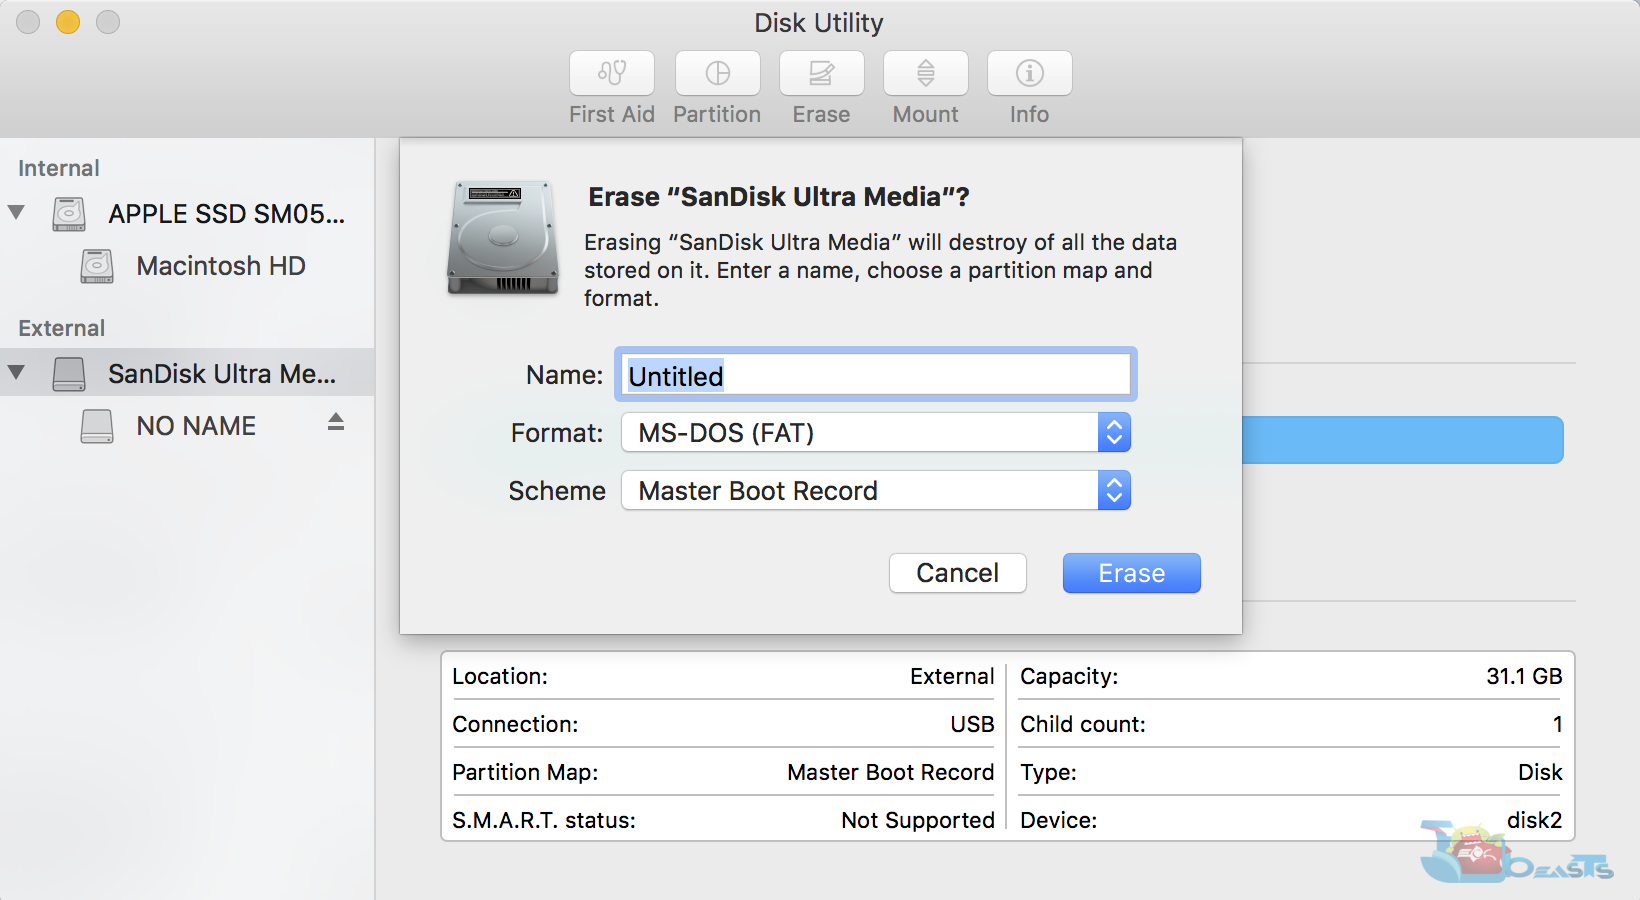
2. Format your USB 3.0 pen drive to MS-DOS (FAT) format.

  1. Plug in the USB 3.0 disk into your Mac OS X device.
  2. Open Disk Utility on your Mac OS X device.
  3. Now in Disk Utility, select the device that you’ve just plugged in.
  4. Click on Erase.
  5. In the Partition Map Scheme select “Master Boot Record”.
  6. Erase the device using MS-DOS (FAT) format. The USB device will be completely erased and ready to write the Remix OS 2.0 on it.remix 7

3. Make the USB Bootable using UNetbootin to boot Remix OS 2.0

  1. Download and install UNetbootin as mentioned in the required downloads section above.
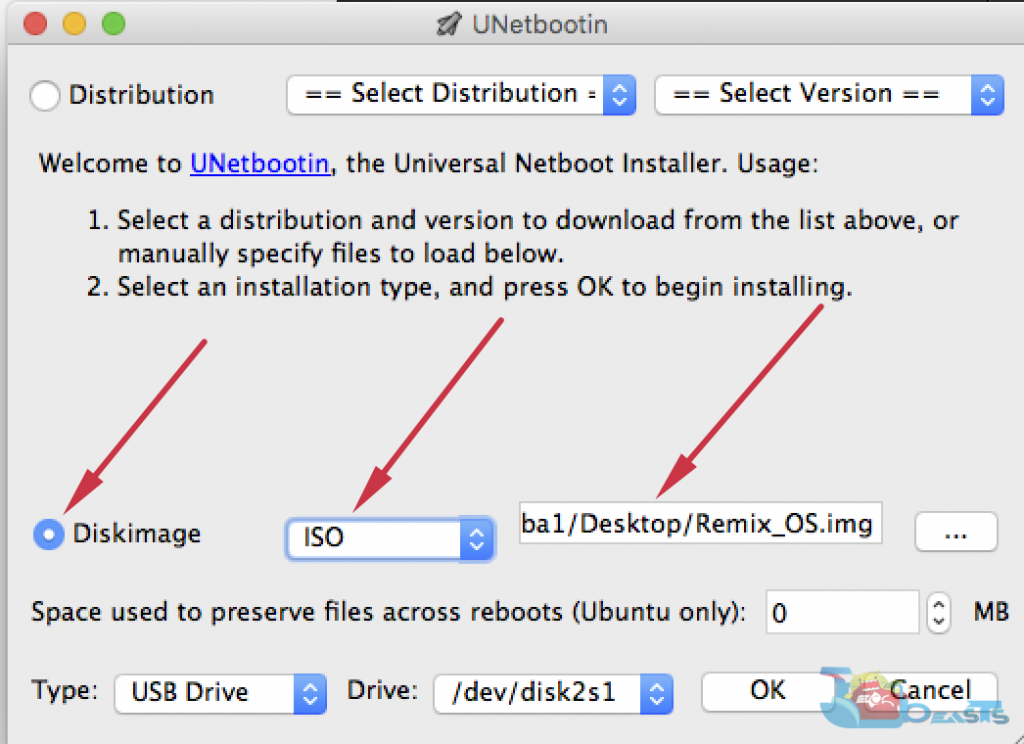
  2. Open UNetbootin on your Mac OS X.
  3. Click on “Disk Image” option.
  4. Now click on the three dots in the same line where Disk Image is and select the Remix_OS.img file from your desktop.
  5. Now there will be “Floppy” appearing right next to Disk Image. Click on Floppy and change it to “ISO”.
  6. Now click on “Ok” and it will start writing Remix OS 2.0 to make the bootable Remix OS 2.0 USB for you.Remix 5
  7. Wait until the process is complete, it can take up to 10 – 15 minutes. Once done, head towards the next step.remix 9

4. Boot into Remix OS 2.0

We are now ready to boot into Remix OS 2.0. Let’s have a look on the instructions.

  1. Shut down your Macbook Pro, iMac or Macbook Air.
  2. Make sure that the USB 3.0 pen drive is plugged into your device.
  3. Now turn on your Mac OS X computer and press and hold the “Option” key to get to the boot menu.
  4. In the boot menu, it will ask you whether you want to boot into Macintosh HD or Windows. If Windows doesn’t appear here, that means something went wrong with your bootable disk, you may consider repeating the first 3 steps to make the bootable USB once again. If Windows appears here, you’re all good to go ahead.
  5. Click on “Windows” now and sit back tighter as you’re all set to enjoy Remix OS now.batch_12654388_10207707386335322_1067778851905960593_n
  6. The Remix OS will boot up now and ask you whether you want to go ahead as a “Guest” or in the “Resident Mode”.
  7. You will probably want to go with “Resident Mode” as it will keep all your data saved, so select it.batch_12645210_10207707387015339_7244840923760949380_n
  8. Now a screen will come up showing you different logs, wait until it set ups the whole Remix OS for you. It can take a few minutes so wait patiently.batch_12644779_10207707387215344_5956372426651091735_n
  9. Once the Resident Mode has been set up, it will boot you into the Remix OS.
  10. Phewww! It’s time to set up the Remix OS 2.0 now.

5. Setting up Remix OS 2.0 

  1. As Remix OS 2.0 boots up, you will find Remix OS logo on the screen. Wait for a while till it takes you to the configuration screen.batch_12512620_10207707388495376_4384354272862343509_n
  2. Once you’re into the beautiful welcome screen of Remix OS, you will be required to choose the language. Select your desired language and click next.batch_12647448_10207707389735407_1629434151730546404_n
  3. Now you will be displayed with the User Agreement. Read it and click next.
  4. Now you will have to connect to the internet. Select your WiFi connection and connect it.batch_12650883_10207707389415399_2392456275912729136_n
  5. Once you’re done and Remix OS displays a “Setup is complete” message, click Start.
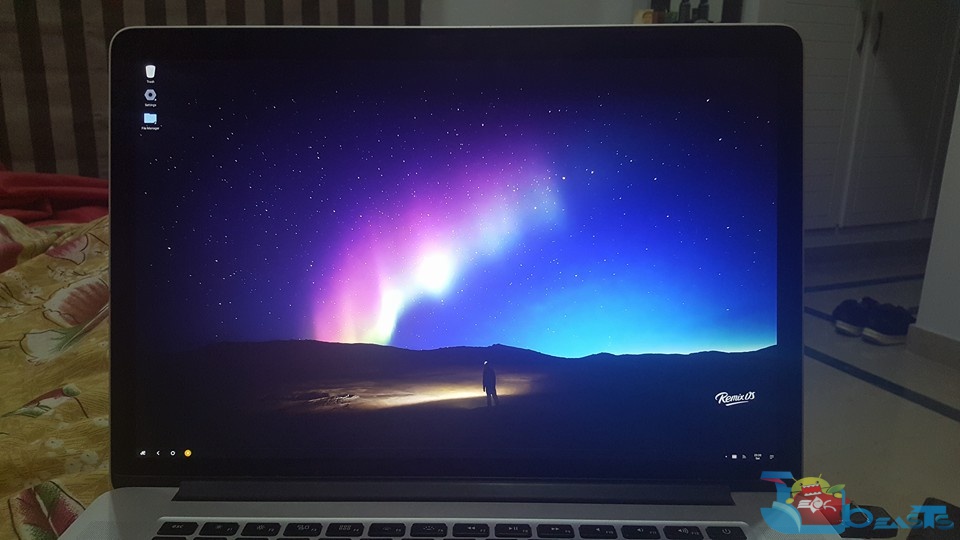
  6. That’s all. You will be amazed seeing the home-screen of Remix OS 2.0 now.
  7. Congratulations. You’ve successfully setup and installed Remix OS 2.0 on your Macbook Pro, Macbook Air or iMac device.batch_12642980_10207707391175443_1750601144817425583_n

6. Install Google Play Services and Google Play Store on your Remix OS 2.0

Remix OS 2.0 comes with a bunch of handy applications, but it misses the important applications like Google Play Services and Google Play Store which are actually your way towards the freedom in the world of Android. You will want to install Google Play Services and Google Play Store right after setting up Remix OS 2.0, so here are the instructions to do so.

  1. Download and install GMInstaller.apk file on your Remix OS 2.0. You can download this file straight to your Remix OS 2.0 by using its browser and you can also copy this file to your Remix OS using a USB drive.
  2. Now click on the app drawer icon on the bottom left and open GMInstaller application.
  3. Now click on “One-click to install Google Services” and let it install all Google Services on your newly setup Remix OS.
  4. Once done, go to settings in app drawer. In settings, open applications and locate Google Play Services.
  5. Clear the cache of Google Play Services.
  6. Restart your Remix OS 2.0.
  7. Start using Google Play Store and download your desired applications.
  8. That’s all. Best of luck 🙂

So, that was all with the Remix OS 2.0 installation and configuration. Let us know how did this go for you. In case you’re stuck with something or you’ve got any queries, feel free to reach us out through the comments section.
Install Android 5.1.1 Lollipop 30.1.A.1.33 Firmware on Sony Xperia M5 E5603, E5653 & E5606

0
Install Android 5.1.1 Lollipop 30.1.A.1.33 Firmware on Sony Xperia M5 E5603, E5653 & E5606

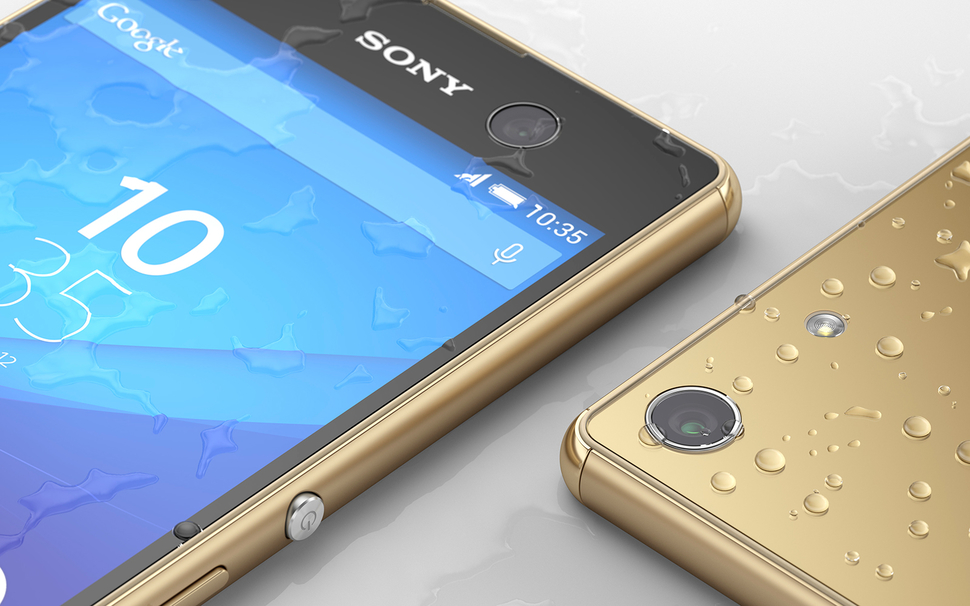
Xperia M5 came out running on Android 5.0 Lollipop last year. Just yesterday, Sony rolled out Android 5.1.1 Lollipop for this device. The new update is based on the build number 30.1.A.1.33 and is live for Sony Xperia M5 E5603, E5606 and E5653. The new update brings a plethora of new features. There are quite many notable changes in this update. The manual ISO in low light doesn’t lag anymore. Sony has improved the battery charging time of the device. Apart from these changes, Sony has fixed many known bugs like app crashes, 4K video playback has been fixed. There are new icons in settings menu. Sony has also optimised some applications in this new update.phpuol4pj

Android 5.1.1 Lollipop for the Xperia M5 in no way is an update that you may want to skip. The update is on a slow roll out at the moment. As you all know that these are regional updates, if it hasn’t hit your region already, it may take a while for Sony to cook it up and send it your way. If you do not want this update to reach you out through OTA or through PC companion, you may consider flashing it right away using Sony Flashtool. You will need a proper guide to do that, and we have the guide right here for you.

You are about to go flash the latest Android 5.1.1 Lollipop 30.1.A.1.33 official firmware on your Sony Xperia M5 E5603, E5606 and E5653 using Sony Flashtool. Follow the guide carefully in order to get it done.

Early Preparations:

1. This is only forSony Xperia M5 E5603, E5606 and E5653

This ROM is only for the device mentioned above. Make sure that your model number matches the one listed above. To do so, go to Settings > About Device on your device and see your model number. Flashing this firmware on any other device will result in bricking it so make sure that you meet this requirement first of all.

2. Battery should be charged at least over 60%.

Make sure that your battery is charged enough to complete the flashing process. In case your battery is low and your device goes dead during the flashing process, you may end up soft bricking your device as it won’t complete the flashing process.

3. Backup everything!

Just to be on the safe side, you may consider backing up each and everything from your Android device. This is highly recommended so that in case anything goes wrong, you still have the access to all of your data and you can restore it immediately. You may backup everything as listed below.

4. Enable USB Debugging Mode on your device.

Enable USB debugging mode on your device. To do so, tap settings>developer options>USB debugging. If you can’t find developer options in settings, then tap settings > about device and tap “Build Number” for 7 times and you’ll get em’ activated under settings.

5. Install and setup Sony Flashtool.

You must have installed Sony Flashtool.  Find the full guide here. After installing Sony Flashtool, open the Flashtool folder from the drive where you installed it.Now open Flashtool>Drivers>Flashtool-drivers.exe and install the Flashtool, Fastboot & Xperia M5 drivers from the list. [Important]

6. Use OEM data cable to establish connection.

Make sure that you use the phone’s original data cable to establish connection between your phone and the PC. Using a different data cable might result in interrupting the firmware installation.

Install Android 5.1.1 Lollipop 30.1.A.1.33 Firmware on Sony Xperia M5 E5603, E5653 & E5606

 Before moving forward, please make sure that you’ve read the pre requisites and ensure that you are set to go ahead.

  1. Download the latest firmware Android 5.1.1 Lollipop 30.1.A.1.33 FTF file.
    1. For Xperia M5 E5603 [Generic/Unbranded] Link 1  Create your own FTF using this guide
    2. For Xperia M5 E5653 [Generic/Unbranded] Link 1  Create your own FTF using this guide.
    3. For Xperia M5 E5606 [Generic/Unbranded]  Create your own FTF using this guide.
  2. Copy the file and paste in Flashtool>Firmwares folder.
  3. Open Flashtool.exe now.
  4. Hit the small lightening button on the top left corner and select Flashmode.
  5. Select the FTF firmware file that you placed in the Firmware folder.
  6. From the right side, select what do you want to wipe. Data, cache and apps log, all wipes are recommended, perhaps you may select if you don’t want.
  7. Click on OK, and it will start preparing the firmware for flashing. This may take a little while to load.
  8. As soon as the firmware is loaded, it will prompt you to attach the phone by turning it off and keeping the back key press.
  9. For Xperia M5, Volume Down key will do the job of back key, just turn off your phone, keep the Volume Down key pressed and plug in the data cable.
  10. As soon as the phone is detected in Flashmode, the firmware will start flashing, Do not leave the Volume Down key until the process is complete.
  11. As soon as you see “Flashing ended or Finished Flashing” leave the Volume Down key, plug the cable out and reboot.
  12. That’s All! Congrats! You’ve installed latest Android 5.1.1 Lollipop on your Xperia M5. Enjoy

In case you got any queries or face any problems regarding this guide, please feel free to stop by the comment box below and let us know. We will get back to you as soon as possible. Thanks all!

Update Xperia M5 Dual to Android 5.1.1 Lollipop 30.1.B.1.33 Official Firmware

6
Update Xperia M5 Dual to Android 5.1.1 Lollipop 30.1.B.1.33 Official Firmware

Sony updated the Xperia M5 Dual to Android 5.1.1 Lollipop today. The new firmware carries the build number 30.1.B.1.33 and is live for Xperia M5 Dual E5633, E5663 and E5643. Xperia M5 Dual ran on Android 5.0 out of the box. This update happens to be a major Android update for this device and comes with notable improvements, features. The update fixes quite many annoying bugs, brings new application optimisations, enhances charging speed of the device and also fixes the ISO mode lag. There are some new icons introduced in the settings applications. The firmware stability has been improved over all. At the time of writing this post, Sony is rolling out this update through OTA and through Sony PC Companion.xperia-m5-black-1280x840-34de1dc253b42f0b5d7fd512014d8e5b

If you own any of the variants listed above and you haven’t already got this update, you might have to wait a little bit more. Since these are regional updates, it can take sometime for Sony to roll it your way. If you do not want to wait, you can update your device manually right away. We have this comprehensive guide written here which will help you to achieve the mentioned goal.

You will learn the method to update your Xperia M5 Dual D5633, D5663 and D5643 to Android 5.1.1 Lollipop 30.1.B.1.33 official firmware in the succeeding guide. We will be using Sony Flashtool to update our beloved Xperia M5 Dual. Let’s go through some early preparations and then flash this firmware.

Early Preparations:

1. This is only for Sony Xperia M5 Dual D5633, D5663 and D5643

This ROM is only for the device mentioned above. Make sure that your model number matches the one listed above. To do so, go to Settings > About Device on your device and see your model number. Flashing this firmware on any other device will result in bricking it so make sure that you meet this requirement first of all.

2. Battery should be charged at least over 60%.

Make sure that your battery is charged enough to complete the flashing process. In case your battery is low and your device goes dead during the flashing process, you may end up soft bricking your device as it won’t complete the flashing process.

3. Backup everything!

Just to be on the safe side, you may consider backing up each and everything from your Android device. This is highly recommended so that in case anything goes wrong, you still have the access to all of your data and you can restore it immediately. You may backup everything as listed below.

4. Enable USB Debugging Mode on your device.

Enable USB debugging mode on your device. To do so, tap settings>developer options>USB debugging. If you can’t find developer options in settings, then tap settings > about device and tap “Build Number” for 7 times and you’ll get em’ activated under settings.

5. Install and setup Sony Flashtool.

You must have installed Sony Flashtool.  Find the full guide here. After installing Sony Flashtool, open the Flashtool folder from the drive where you installed it.Now open Flashtool>Drivers>Flashtool-drivers.exe and install the Flashtool, Fastboot & Xperia M5 Dual drivers from the list. [Important]

6. Use OEM data cable to establish connection.

Make sure that you use the phone’s original data cable to establish connection between your phone and the PC. Using a different data cable might result in interrupting the firmware installation.

How to Update Xperia M5 Dual to Android 5.1.1 Lollipop 30.1.B.1.33 Official Firmware

Before moving forward, please make sure that you’ve read the pre requisites and ensure that you are set to go ahead.

  1. Download the latest firmware Android 5.1.1 Lollipop 18.6.A.0.175 FTF file.
    1. For Xperia M5 Dual E5633 [Generic/Unbranded] Link 1  Create your own FTF using this guide
    2. For Xperia M5 Dual E5663 [Generic/Unbranded] Link 1  Create your own FTF using this guide.
    3. For Xperia M5 Dual E5643 [Generic/Unbranded]  Create your own FTF using this guide.
  2. Copy the file and paste in Flashtool>Firmwares folder.
  3. Open Flashtool.exe now.
  4. Hit the small lightening button on the top left corner and select Flashmode.
  5. Select the FTF firmware file that you placed in the Firmware folder.
  6. From the right side, select what do you want to wipe. Data, cache and apps log, all wipes are recommended, perhaps you may select if you don’t want.
  7. Click on OK, and it will start preparing the firmware for flashing. This may take a little while to load.
  8. As soon as the firmware is loaded, it will prompt you to attach the phone by turning it off and keeping the back key press.
  9. For Xperia M5 Dual, Volume Down key will do the job of back key, just turn off your phone, keep the Volume Down key pressed and plug in the data cable.
  10. As soon as the phone is detected in Flashmode, the firmware will start flashing, Do not leave the Volume Down key until the process is complete.
  11. As soon as you see “Flashing ended or Finished Flashing” leave the Volume Down key, plug the cable out and reboot.
  12. That’s All! Congrats! You’ve installed latest Android 5.1.1 Lollipop on your Xperia M5 Dual. Enjoy

In case you got any queries or face any problems regarding this guide, please feel free to stop by the comment box below and let us know. We will get back to you as soon as possible. Thanks all!

How To Fix Unfortunately UC Browser Has Stopped On Android

0
How To Fix Unfortunately UC Browser Has Stopped On Android

Here’s How you can Fix Unfortunately UC Browser Has Stopped On Android. UC Browser is a third-party browser designed for Android devices. It is famous because of its speed and security, but sometimes due to some glitches, it starts cashing. This is when you start seeing this error message, Unfortunately UC Browser Has Stopped.

In this post, we are providing you with some potential fixes for this specific error. Through these workarounds, you will be able to fix this problem. Let’s get to it.

Read More: How To Fix Unfortunately WhatsApp Has Stopped on Android

UC Browser Has Stopped

Before going any further you must see our ultimate guide on how to Fix ‘Unfortunately app has stopped’ errors .

How To Fix Unfortunately UC Browser Has Stopped on Android:

Clear UC Browser Data and Cache.

  1. One your Android device, open Settings > Applications / Applications Manager > All Apps
  2. Scroll all the way down and locate Prisma.
  3. Tap Prisma to open its settings.
  4. If you’re using Android Marshmallow or higher, you will have to tap UC Browser > Storage to open cache and data options.
  5. Now tap Clear Data and Clear Cache.
  6. Now restart your Android device now.
  7. Once done, open Prisma and the issue should have been resolved by now.

Clear cache of your Android device

Just in case you’ve recently updated your Android device or made any potential changes in the system of your phone, it may have hampered the working of Prisma.

To resolve this issue, you simply need to wipe the cache of your device. In order to clear the cache, boot into the stock or custom recovery of your Android device and locate “Wipe Cache or Cache Partition” option.

Wipe the cache and restart the phone. After restarting, try opening the Prisma app and it should be working fine.

Old Android Versions:

1: Open Settings on your Android device.

2: Now tap on More tab. [ I am using Galaxy Note 3 ]

3: Tap on Application Manager form the list.

4: Now select All Application by a swipe to left.

5: There you’ll see all your installed apps, Tap on UC Browser.

6: Now all you have to do tap on Clear Cache and Clear data.

7: Now goto home screen and restart your device.

All Done ….

If this method is not working for you then you have to uninstall the UC Browser and re-install the latest updated version from Google Play. If by any means still, you are facing the same issue, i think you should try to install the old version of UC Browser app that will help you to get rid of Unfortunately UC Browser Has Stopped.

How to Install TWRP Recovery on Samsung Galaxy E7

0
How to Install TWRP Recovery on Samsung Galaxy E7

We all love to mess around with our devices, installing custom ROMs, tweaks and mods are like an everyday hobby for an active Android user and even if one is not interested in installing such mods and tweaks, yet they end up messing up their device. However, there are some requirements needed in order to get everything done the right way. The very first steps involves rooting the device, in case of no bootloader being separately unlocked by the user, otherwise unlocking bootloader is the first part, then came the rooting and then the Last step, that is flashing the custom recovery.

How to Install TWRP Recovery on Samsung Galaxy E7

Samsung Galaxy E7 recently received the update of Android 5.1.1 Lollipop and all those who has updated it, probably have lost the Root access and also anything custom installed on it, so once again gather all the necessary things that are being given below to install the Custom recovery again on your device and start messing with it again. However,first of all make sure to root your Samsung Galaxy E7, then all you need to do is to download all the files and to follow the instructions given below to be successful in this process. Let’s go down now and Install TWRP Recovery on Samsung Galaxy E7 E700H & E700F.

Early Preparations

1. This guide is only for Samsung Galaxy E7 E700H & E700F

Make sure that your device is exactly as mentioned above. To check out what device you have, go to Settings > More/General > About Device or Settings > About Device and match the model number. Be careful about the device model number, flashing a file on a device not listed here might result in bricking it up. In that case, we may not be held responsible.

2. Battery should be charged at least 60%!

Your device’s battery should not be weak. In case your device goes dead during the flashing process, your device may get soft bricked and you might be in need of flashing stock firmware and that will ultimately result in wiping up your data as well. So, make sure that you charge your device before you start the flashing process.

3. Use the OEM data cable to establish connection!

Always use the original data cable to establish connection between your Android device and your computer / laptop. Using ordinary data cables might interrupt the flashing process, so to avoid any mishap, you need to meet this requirement as well.

4. Backup everything!

Just to be on the safe side, you may consider backing up each and everything from your Android device. This is highly recommended so that in case anything goes wrong, you still have the access to all of your data and you can restore it immediately. Also, clean install is always recommended, that means you will probably have to wipe your device to install the new firmware. So, you may backup everything as listed below.

Backup SMS Messages
Backup Call Logs
Backup Contacts
Backup Media – Copy your files manually to your PC or Laptop.
Backup EFS – If rooted, otherwise skip this step.

5. Install Samsung USB drivers

In order to be able to establish connection between your PC and your Galaxy S6, you need to have the Samsung USB drivers installed on your PC. You can find all Android USB drivers here on our site.

6. Turn off Samsung Kies and other softwares while using Odin3!

Make sure that you turn off Samsung Kies while using Odin3 flashtool. Samsung Kies will interrupt Odin3 and will result in causing errors and may not let you flash your desired firwmrae. Also, make sure that you turn off any antivirus software you’ve installed and also disable firewall to avoid any connection and flashing issues.

Required Downloads & Installations

  1. Download and extract Odin3 v3.10.6.
  2. Download Recovery file in .tar.md5 format.

How To Install TWRP Recovery on Samsung Galaxy E7

  1. Make sure that you read the instructions listed above carefully and you’re all set to go ahead now.
  2. Optional: Wipe your device complete in order to attain a neat installation. You may boot into the recovery mode and perform a factory data reset.
  3. Open Odin3.exe.
  4. Put your Galaxy E7 in download mode. To do so, turn it off and wait for 10 seconds. Turn it on by pressing and holding Volume Down + Home Button + Power Key simultaneously, You should see a warning, press Volume Up to continue. In case this method doesn’t work for you, try one from this guide.
  5. Connect your device to your PC.
  6. As soon as Odin detects your phone, the ID:COM box should turn blue.  Make sure that you’ve installed Samsung USB drivers before connecting.
  7. For Odin 3.09 or 3.10.6 hit the AP tab. Select the recovery.tar.md5, that you downloaded above.
  8. If you’re using Odin 3.07, you will select “PDA” tab instead of the AP tab, rest of the options remain untouched.
  9. Make sure that the options selected in your Odin are exactly as shown in the pic.Odin 3.10.6 Explained_Techbeasts
  10. Hit start and wait till the recovery flashing is complete, The flashing process box will turn green upon successful flashing.
  11. Once the flashing process has been completed successfully, disconnect your device and reboot it manually.
  12. Once the device boots up, checkout the recovery now.
  13. Once done, enter the recovery mode to confirm the installation.
  14. That’s all!

Got any queries? Make sure that you drop em’ in the comment box below. Good Luck!

Download Color Switch for PC – Windows,Mac,Computer

0
Download Color Switch for PC – Windows,Mac,Computer

Following are the instruction on how to download Color Switch for PC, YES ! you can play Color Switch on PC.

Color Switch is the top free games on both iOS and Android play stores. This game has set addiction level to new heights you can’t stop playing this game and as you go further it gets more difficult to play. Color Switch is basically designed for iOS and Android devices, that means there is no PC version of Color Switch is available. However, you can install Color Switch for Pc on Windows & Mac, using third-party emulators like BlueStacks and Andy.

In the following guide, I’ll explain to you how you can install Color Switch on PC to play online. There are many Color Switch fake versions are available on the web to play online, but none of them are original. Ok now let start the process to install Color Switch on Pc.

Color Switch for PC

Read More: How to download Mobile Strike for PC

How To Install Color Switch For PC or MAC Using BlackStacks

Method 1:

  1. Install Bluestacks on your PC or MAC.
  2. Download Color Switch Apk on your PC.
  3. Make sure that you have installed Bluestacks. Double-click the downloaded Color Switch Apk to install it.
  4. The APK will be installed through Bluestacks, once the notification pop-ups determining the installation completion, open Bluestacks.
  5. Now click on My Apps and then click on Color Switch.
  6. The application will open up. Now follow on-screen instructions to Color Switch.

Method 2:

  1. Install Bluestacks on your PC or MAC.
  2. Open Bluestacks and set up your Google Play Store account.
  3. Now open Google Play Store and search for “Color Switch“.
  4. Once found, install Color Switch.
  5. Now click on My Apps and then click on Color Switch.
  6. The game will open up. Now follow on-screen instructions to Play Color Switch.

How To Install Color Switch For PC or MAC Using Andy OS

  1. Download and install Andy OS on your Windows PC or MAC.
  2. Once downloaded, open Andy OS.
  3. Setup Google Play Account on it.
  4. Now open Apps > Google Play Store and search for “Color Switch“.
  5. Install Color Switch and wait for it to finish the installation.
  6. Once done, open “Uncategorized” portion in Andy and click on Color Switch to play it.
  7. That’s all.

Also, See:

How to take screenshot on Snapchat without them knowing

0
How to take screenshot on Snapchat without them knowing

This is how you can take screenshot on Snapchat without letting anyone know. We all know that whenever you take a screenshot of a snap on Snapchat. The recipient gets a notification, that someone took a screenshot of your snap. This gets awkward sometimes but not anymore, heed the instructions below. We’ll tell you how to take screeshot on SnapChat without letting them know.

Snapchat is the top picture sharing social media, which allows you to send photos and videos to friends and family. Whenever a friend sends you a snap and you take a screenshot of it, Snapchat automatically sends a notification to the sender.

It seems very bizarre that you took a screenshot of a snap and they know about that, Well today I’ll tell you how to take screenshot on Snapchat without them knowing.

screenshot on Snapchat

How to take screenshot on Snapchat without them knowing:

I have two methods for you and they both are working 100%. In the first method we’ll do a little trick with settings of our device and in the second method we’ll use third-party apps to save snaps or you can say Snapchat clients. Now start the guide on how to take screenshot on Snapchat without the knowing.

Step #1: Now open Snapchat on your device, swipe right to access the list of your sent and received Snapchats. Now here you have to be very careful, when you received a Snapchat it automatically loads and displays, but it displays tap to load then tap it and make sure not to open it.

Step #2: Now once you’ve loaded the Snap, go to settings and turn on Airplane mode.

Also, See Best SnapChat Clients for Android.

Step #3: Once Airplane mode is activated, go back to Snapchat and open the SnapChat, take the screenshot as you do.

Step #4: Now that you have taken the screenshot of Snapchat, close the app. Make sure Snapchat is not running in the background, to close all the apps running in the background on iOS double tap the home button->Swipe up to close the running apps. In Android access the multitasking window and close it.

Step #5: Go back to the settings on your device and deactivate the Airplane mode. Now open the Snapchat and happy snapping.

Also, See: 

Method # 2: How to take screenshot on Snapchat without them knowing:

There are many clients that will let you save all the SnapChats and even send Snaps from your gallery. The best third party SnapChat client is Casper unfortunately, SnapChat doesn’t allow such type of clients to use their API and that is the reason Casper is not available on Google Play. You can download Casper Apk directly from their website and install it on your Android device.

How To Update Galaxy S6 Edge G925S To Android 6.0.1 Marshmallow Official

0
How To Update Galaxy S6 Edge G925S To Android 6.0.1 Marshmallow Official

Better late than never. Samsung has finally broken the barrier of silence and rolled out the much awaited Android 6.0.1 Marshmallow update for two of its device, the Galaxy S6 and Galaxy S6 Edge. The update first hit the South Korean variants of the devices, which are known as G920S and G925S respectively. Samsung started seeding out this update through OTA and through Samsung Kies. The update has hit the South Korean region only now, so if you own a Galaxy S6 Edge G925S under the South Korean region, only then you’re going to be able to update it through OTA or through Samsung Kies. Users who own the Galaxy S6 Edge G925S and live outside the South Korea, they can update this device to Android Marshmallow using an alternative method. Since Samsung has already made the users wait for months, it won’t be a good idea to wait for the update to land in the device on its own, it will be worth updating the device manually right away.galaxy-s6-edge_gallery_front_black

The method to update Galaxy S6 Edge G925S to Android 6.0.1 Marshmallow official firmware manually is the Odin3 method. We will be using this flashtool Odin3 to update our beloved Galaxy S6 Edge to Marshmallow. The update is completely official and untouched. It doesn’t involve any risky processes and doesn’t even void the warranty of your device. All you’ve to do is to download the file properly and follow the instructions carefully.

To know what’s new in this update, you may checkout this news that came out a while ago. We can go ahead now and follow the process to update Galaxy S6 Edge G925S to Android 6.0.1 Marshmallow official firmware.

Early Preparations

1. This guide is only for Samsung Galaxy S6 Edge G925S

Make sure that your device is exactly as mentioned above. To check out what device you have, go to Settings > More/General > About Device or Settings > About Device and match the model number. Be careful about the device model number, flashing a file on a device not listed here might result in bricking it up. In that case, we may not be held responsible.

2. Battery should be charged at least 60%!

Your device’s battery should not be weak. In case your device goes dead during the flashing process, your device may get soft bricked and you might be in need of flashing stock firmware and that will ultimately result in wiping up your data as well. So, make sure that you charge your device before you start the flashing process.

3. Use the OEM data cable to establish connection!

Always use the original data cable to establish connection between your Android device and your computer / laptop. Using ordinary data cables might interrupt the flashing process, so to avoid any mishap, you need to meet this requirement as well.

4. Backup everything!

Just to be on the safe side, you may consider backing up each and everything from your Android device. This is highly recommended so that in case anything goes wrong, you still have the access to all of your data and you can restore it immediately. Also, clean install is always recommended, that means you will probably have to wipe your device to install the new firmware. So, you may backup everything as listed below.

Backup SMS Messages
Backup Call Logs
Backup Contacts
Backup Media – Copy your files manually to your PC or Laptop.
Backup EFS – If rooted, otherwise skip this step.

5. Install Samsung USB drivers

In order to be able to establish connection between your PC and your Galaxy S6 Edge, you need to have the Samsung USB drivers installed on your PC. You can find all Android USB drivers here on our site.

6. Turn off Samsung Kies and other softwares while using Odin3!

Make sure that you turn off Samsung Kies while using Odin3 flashtool. Samsung Kies will interrupt Odin3 and will result in causing errors and may not let you flash your desired firwmrae. Also, make sure that you turn off any antivirus software you’ve installed and also disable firewall to avoid any connection and flashing issues.

Required Downloads & Installations

  1. Download and extract Odin3 v3.10.6.
  2. Download and extract firmware file to get the .tar.md5 file.

Firmware Details:

  • Model: SM-G925S – Galaxy S6 Edge
  • Country: Korea (SK Telecom)
  • Version: Android 6.0.1 Marshmallow
  • Changelist: 7037264
  • PDA: G920SKU3DPAC
  • CSC: G920SSK3DPAC
  • Build Date: January 22, 2016.

How To Update Galaxy S6 Edge G925S To Android 6.0.1 Marshmallow Official

  1. Make sure that you read the instructions listed above carefully and you’re all set to go ahead now.
  2. Wipe your device complete in order to attain a neat installation. You may boot into the recovery mode and perform a factory data reset.
  3. Open Odin3.exe.
  4. Put your Galaxy S6 Edge in download mode. To do so, turn it off and wait for 10 seconds. Turn it on by pressing and holding Volume Down + Home Button + Power Key simultaneously, You should see a warning, press Volume Up to continue. In case this method doesn’t work for you, try one from this guide.
  5. Connect your device to your PC.
  6. As soon as Odin detects your phone, the ID:COM box should turn blue.  Make sure that you’ve installed Samsung USB drivers before connecting.
  7. For Odin 3.09 or 3.10.6 hit the AP tab. Select the firmware.tar.md5 or firmware.tar, that you downloaded and extracted above.
  8. If you’re using Odin 3.07, you will select “PDA” tab instead of the AP tab, rest of the options remain untouched.
  9. Make sure that the options selected in your Odin are exactly as shown in the pic.Odin 3.10.6 Explained_Techbeasts
  10. Hit start and wait till the firmware  flashing is complete, The flashing process box will turn green upon successful flashing.
  11. Once the flashing process has been completed successfully, disconnect your device and reboot it manually.
  12. Once the device boots up, checkout the new firmware now.
  13. Your device will be running on official Android 6.0.1 Marshmallow Official firmware.
  14. Once updated to stock, do not try to downgrade, or else you will result in messing up EFS partition of your device.
  15. That’s all!

Got any queries? Make sure that you drop em’ in the comment box below. Good Luck!

How To Flash Official Android 6.0.1 Marshmallow on Galaxy S6 G920S

0
How To Flash Official Android 6.0.1 Marshmallow on Galaxy S6 G920S

Galaxy S6 G920S has started receiving Android 6.0.1 Marshmallow official update in South Korea. The update is happening over-the-air and through Samsung Kies. Samsung has surprised the users today after making them wait for months, so the users will definitely want to update their devices without any further delay. If the OTA update or the Samsung Kies update hasn’t followed your way yet, you may be in need of an alternative method to update your Galaxy S6 G920S to official Android 6.0.1 Marshmallow firmware.galaxys6_black_v3

Apart from the OTA and Samsung Kies update, another method to install latest version of Android on your Galaxy S6 is by means of Odin3 which is Samsung’s flashtool. Odin3 is pretty handy whether you want to update your device to official firmware, or you want to unroot your device to restore it to factory state or if you want to recovery your device from a soft-bricked state. In our case, we need to update the Galaxy S6 to latest stock firmware, so we will be using Odin only for that purpose.

As you begin to update your Galaxy S6, be reminded that this is an official and completely untouched firmware. It doesn’t involve any risk as long as you are following all the instructions properly and carefully. Flashing this firmware will not even void the warranty of your device. It will simply make the latest Android version run on your device within a few minutes without any wait. All you need to do is, you need to download the latest firmware which is attached below and then you need to follow the instructions given below to be successful in this process. Let’s go down now and flash official Android 6.0.1 Marshmallow on Galaxy S6 G920S.

Early Preparations

1. This guide is only for Samsung Galaxy S6 G920S

Make sure that your device is exactly as mentioned above. To check out what device you have, go to Settings > More/General > About Device or Settings > About Device and match the model number. Be careful about the device model number, flashing a file on a device not listed here might result in bricking it up. In that case, we may not be held responsible.

2. Battery should be charged at least 60%!

Your device’s battery should not be weak. In case your device goes dead during the flashing process, your device may get soft bricked and you might be in need of flashing stock firmware and that will ultimately result in wiping up your data as well. So, make sure that you charge your device before you start the flashing process.

3. Use the OEM data cable to establish connection!

Always use the original data cable to establish connection between your Android device and your computer / laptop. Using ordinary data cables might interrupt the flashing process, so to avoid any mishap, you need to meet this requirement as well.

4. Backup everything!

Just to be on the safe side, you may consider backing up each and everything from your Android device. This is highly recommended so that in case anything goes wrong, you still have the access to all of your data and you can restore it immediately. Also, clean install is always recommended, that means you will probably have to wipe your device to install the new firmware. So, you may backup everything as listed below.

Backup SMS Messages
Backup Call Logs
Backup Contacts
Backup Media – Copy your files manually to your PC or Laptop.
Backup EFS – If rooted, otherwise skip this step.

5. Install Samsung USB drivers

In order to be able to establish connection between your PC and your Galaxy S6, you need to have the Samsung USB drivers installed on your PC. You can find all Android USB drivers here on our site.

6. Turn off Samsung Kies and other softwares while using Odin3!

Make sure that you turn off Samsung Kies while using Odin3 flashtool. Samsung Kies will interrupt Odin3 and will result in causing errors and may not let you flash your desired firwmrae. Also, make sure that you turn off any antivirus software you’ve installed and also disable firewall to avoid any connection and flashing issues.

Required Downloads & Installations

  1. Download and extract Odin3 v3.10.6.
  2. Download and extract firmware file to get the .tar.md5 file.

Firmware Details:

  • Model: SM-G920S – Galaxy S6
  • Country: Korea (SK Telecom)
  • Version: Android 6.0.1 Marshmallow
  • Changelist: 7037264
  • PDA: G920SKU3DPAC
  • CSC: G920SSK3DPAC
  • Build Date: January 22, 2016.

How To Flash Official Android 6.0.1 Marshmallow on Galaxy S6 G920S

  1. Make sure that you read the instructions listed above carefully and you’re all set to go ahead now.
  2. Wipe your device complete in order to attain a neat installation. You may boot into the recovery mode and perform a factory data reset.
  3. Open Odin3.exe.
  4. Put your Galaxy S6 in download mode. To do so, turn it off and wait for 10 seconds. Turn it on by pressing and holding Volume Down + Home Button + Power Key simultaneously, You should see a warning, press Volume Up to continue. In case this method doesn’t work for you, try one from this guide.
  5. Connect your device to your PC.
  6. As soon as Odin detects your phone, the ID:COM box should turn blue.  Make sure that you’ve installed Samsung USB drivers before connecting.
  7. For Odin 3.09 or 3.10.6 hit the AP tab. Select the firmware.tar.md5 or firmware.tar, that you downloaded and extracted above.
  8. If you’re using Odin 3.07, you will select “PDA” tab instead of the AP tab, rest of the options remain untouched.
  9. Make sure that the options selected in your Odin are exactly as shown in the pic.Odin 3.10.6 Explained_Techbeasts
  10. Hit start and wait till the firmware  flashing is complete, The flashing process box will turn green upon successful flashing.
  11. Once the flashing process has been completed successfully, disconnect your device and reboot it manually.
  12. Once the device boots up, checkout the new firmware now.
  13. Your device will be running on official Android 6.0.1 Marshmallow firmware.
  14. Once updated to stock, do not try to downgrade, or else you will result in messing up EFS partition of your device.
  15. That’s all!

Got any queries? Make sure that you drop em’ in the comment box below. Good Luck!

Install Android 6.0.1 Marshmallow on Galaxy S2 Skyrocket via CyanogenMod 13 Custom ROM

1
Install Android 6.0.1 Marshmallow on Galaxy S2 Skyrocket via CyanogenMod 13 Custom ROM

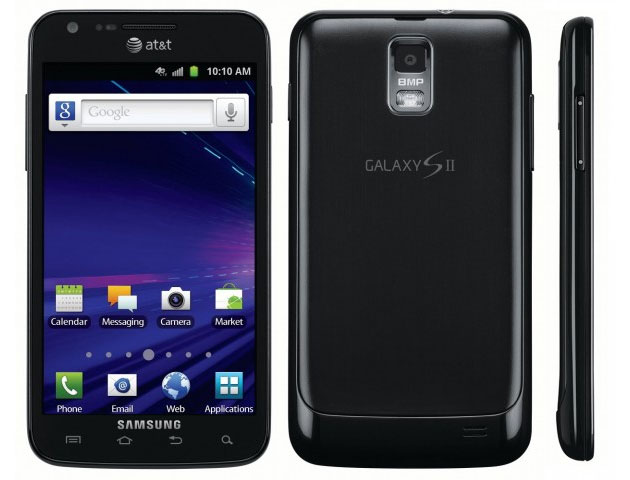
Install Android 6.0.1 Marshmallow on Galaxy S2: Galaxy S2 Skyrocket SGH I727 came under the umbrella of At&t. This sibling of the original Samsung Galaxy S2 carried only a few variations which differentiated between these two devices. Official software support for the Galaxy S2 Skyrocket ended on Android 4.1.2 Jelly Bean.

Let’s Make Things more Clearer:

Since Jelly Bean, there hasn’t been any sign of further Android updates for this device and it started relying on custom ROMs. Galaxy S2 Skyrocket was successfully updated to Android KitKat by means of a CyanogenMod 11 ROM, the device was also successfully updated to Android 5.1.1 Lollipop by means of CyanogenMod 12.1 custom ROM.

Now that Google has rolled out Android 6.0.1 Marshmallow and all mainstream manufacturers are busy updating their flagship smartphones to Marshmallow, the Galaxy S2 Skyrocket owners must be wishing to get their hands on Marshmallow as well. To fulfill their appetite, XDA senior member bryan2894 has put forward an unofficial build of CyanogenMod 13.0 based on Android 6.0.1 Marshmallow for our beloved Galaxy S2 Skyrocket.

Install Android 6.0.1 Marshmallow on Galaxy S2

That means you can now enjoy the all-new Android Marshmallow on your phone. If you’ve put it on a desk and stopped using it, it may be the time to wipe off the dust from it and add a new life via Android Marshmallow.

Android 6.0.1 Marshmallow CyanogenMod 13 ROM:

The Android 6.0.1 Marshmallow CyanogenMod 13 ROM for Galaxy S2 Skyrocket is in its early development stages but you will find most of the features working on this ROM. The basic features like RIL, Camera, WIFI, Bluetooth are found to be working pretty fine.

At the moment there are no major bugs known for this ROM, but since it’s only a nightly build, except some bugs to come up and spare cursing the developer. You may proceed only if you’re an Android power user and you’re good at handling custom ROMs. Newbies can proceed by following the guide attached below being very careful.

Let’s go through the early preparations and the begin flashing the ROM update Galaxy S2 Skyrocket SGH-I727 to Android 6.0.1 Marshmallow CyanogenMod 13 custom ROM.

Precautions:

  1. This ROM is intended for Galaxy S2 Skyrocket SGH I727. Do not try flashing this ROM on any other device otherwise you will result in bricking it. Check your device’s model number under settings > about device.
  2. Charge your phone up to 50% to avoid any power issues during the flashing process.
  3. Flash a TWRP recovery on your Galaxy S2 Skyrocket SGH I727.
  4. Backup everything including your important contacts, call logs and text messages.
  5. Don’t forget to create a Nandroid backup. This is highly recommended so that you can revert back to your previous system in case of a mishap.
  6. Backup EFS partition to avoid EFS corruption later on.
  7. Follow the instructions to the letter.

Disclaimer: Flashing custom ROMs voids the warranty of a device and its not recommended officially. While you’re going to do this, make sure that you’re doing this at your own risk. In case of a mishap TechBeasts, Samsung or the device manufacturers may not be held responsible.

How To Install Android 6.0.1 Marshmallow on Galaxy S2 Skyrocket via CyanogenMod 13 Custom ROM

  1. First of all, make sure that you’ve installed the latest TWRP recovery from the link we attached above.
  2. Make sure that you’ve created a Nandroid backup as well.
  3. Now boot your phone into TWRP recovery. In TWRP recovery select Wipe > Advanced Wipe > check Internal Storage > Tap “Repair or Change File System > Tap “Change File System” > “Tap EXT4” and swipe on the screen to format the internal SD card.
  4. Once done, go back to the main menu in TWRP recovery and select Wipe > Advanced Wipe > Select Data, Cache and System and then swipe a finger on the screen to wipe it.
  5. Now download and copy this new TWRP Recovery.zip file to your phone’s SD card. In order to copy this file, you can mount your system as USB storage in TWRP recovery and then copy the file.
  6. Now go back the main menu in TWRP recovery, select Install > select newly copied TWRP recovery and flash it.
  7. Once flashed the TWRP recovery, reboot your device into recovery mode using the reboot option in the main menu of TWRP.
  8. No in new TWRP, tap “Mount”. Under mount uncheck and recheck “Data”.
  9. Download latest CyanogenMod 13.0.zip file and GApps.zip [Aroma package] file.
  10. Now while your phone is in mount mode, connect it to your PC and copy both the downloaded files to your phone.
  11. Now once again, get back to the main menu in TWRP recovery.
  12. Tap Install > Select CyanogenMod 13.0.zip file < Swipe finger to flash it.
  13. Once done, flash GApps.zip file using the same instructions in the above step.
  14. Reboot the device into the system now.
  15. Copy your desired backup to your internal SD card now.
  16. That’s all. You’re done.

Important Note:

First boot may take up to 10 minutes, you may not worry if it’s taking that much longer. In case it’s taking too long, you may boot into TWRP recovery and wipe cache and dalvik cache and reboot your device as it may fix the issue. In case your device is having issues, you may return to your old system using the Nandroid backup or follow our guide here to install stock firmware.

Got any queries? Reach us out through the comment box below.

Credits

Update Galaxy Tab 3 8.0 to Android 6.0.1 Marshmallow via CyanogenMod 13 Custom ROM

19
Update Galaxy Tab 3 8.0 to Android 6.0.1 Marshmallow via CyanogenMod 13 Custom ROM

With the help of this guide, you will be able to Update Galaxy Tab 3 8.0 to Android 6.0.1. Galaxy Tab 3 8.0 runs on Android 4.4.2 KitKat and the device won’t be getting any higher version of Android. Samsung hasn’t announced any plans to provide any update for the Tab 3. In case you own this device and now you’re wishing to try some new software on it, then the use of a custom ROM maybe the best choice for you. Custom ROMs have always proved out to be the best choice for the device which have been forgotten by the device manufacturers. You can easily update your device to the latest possible version of Android if you’re lucky enough to get a custom ROM. The good news is, Galaxy Tab 3 8.0 owners happen to be really lucky.

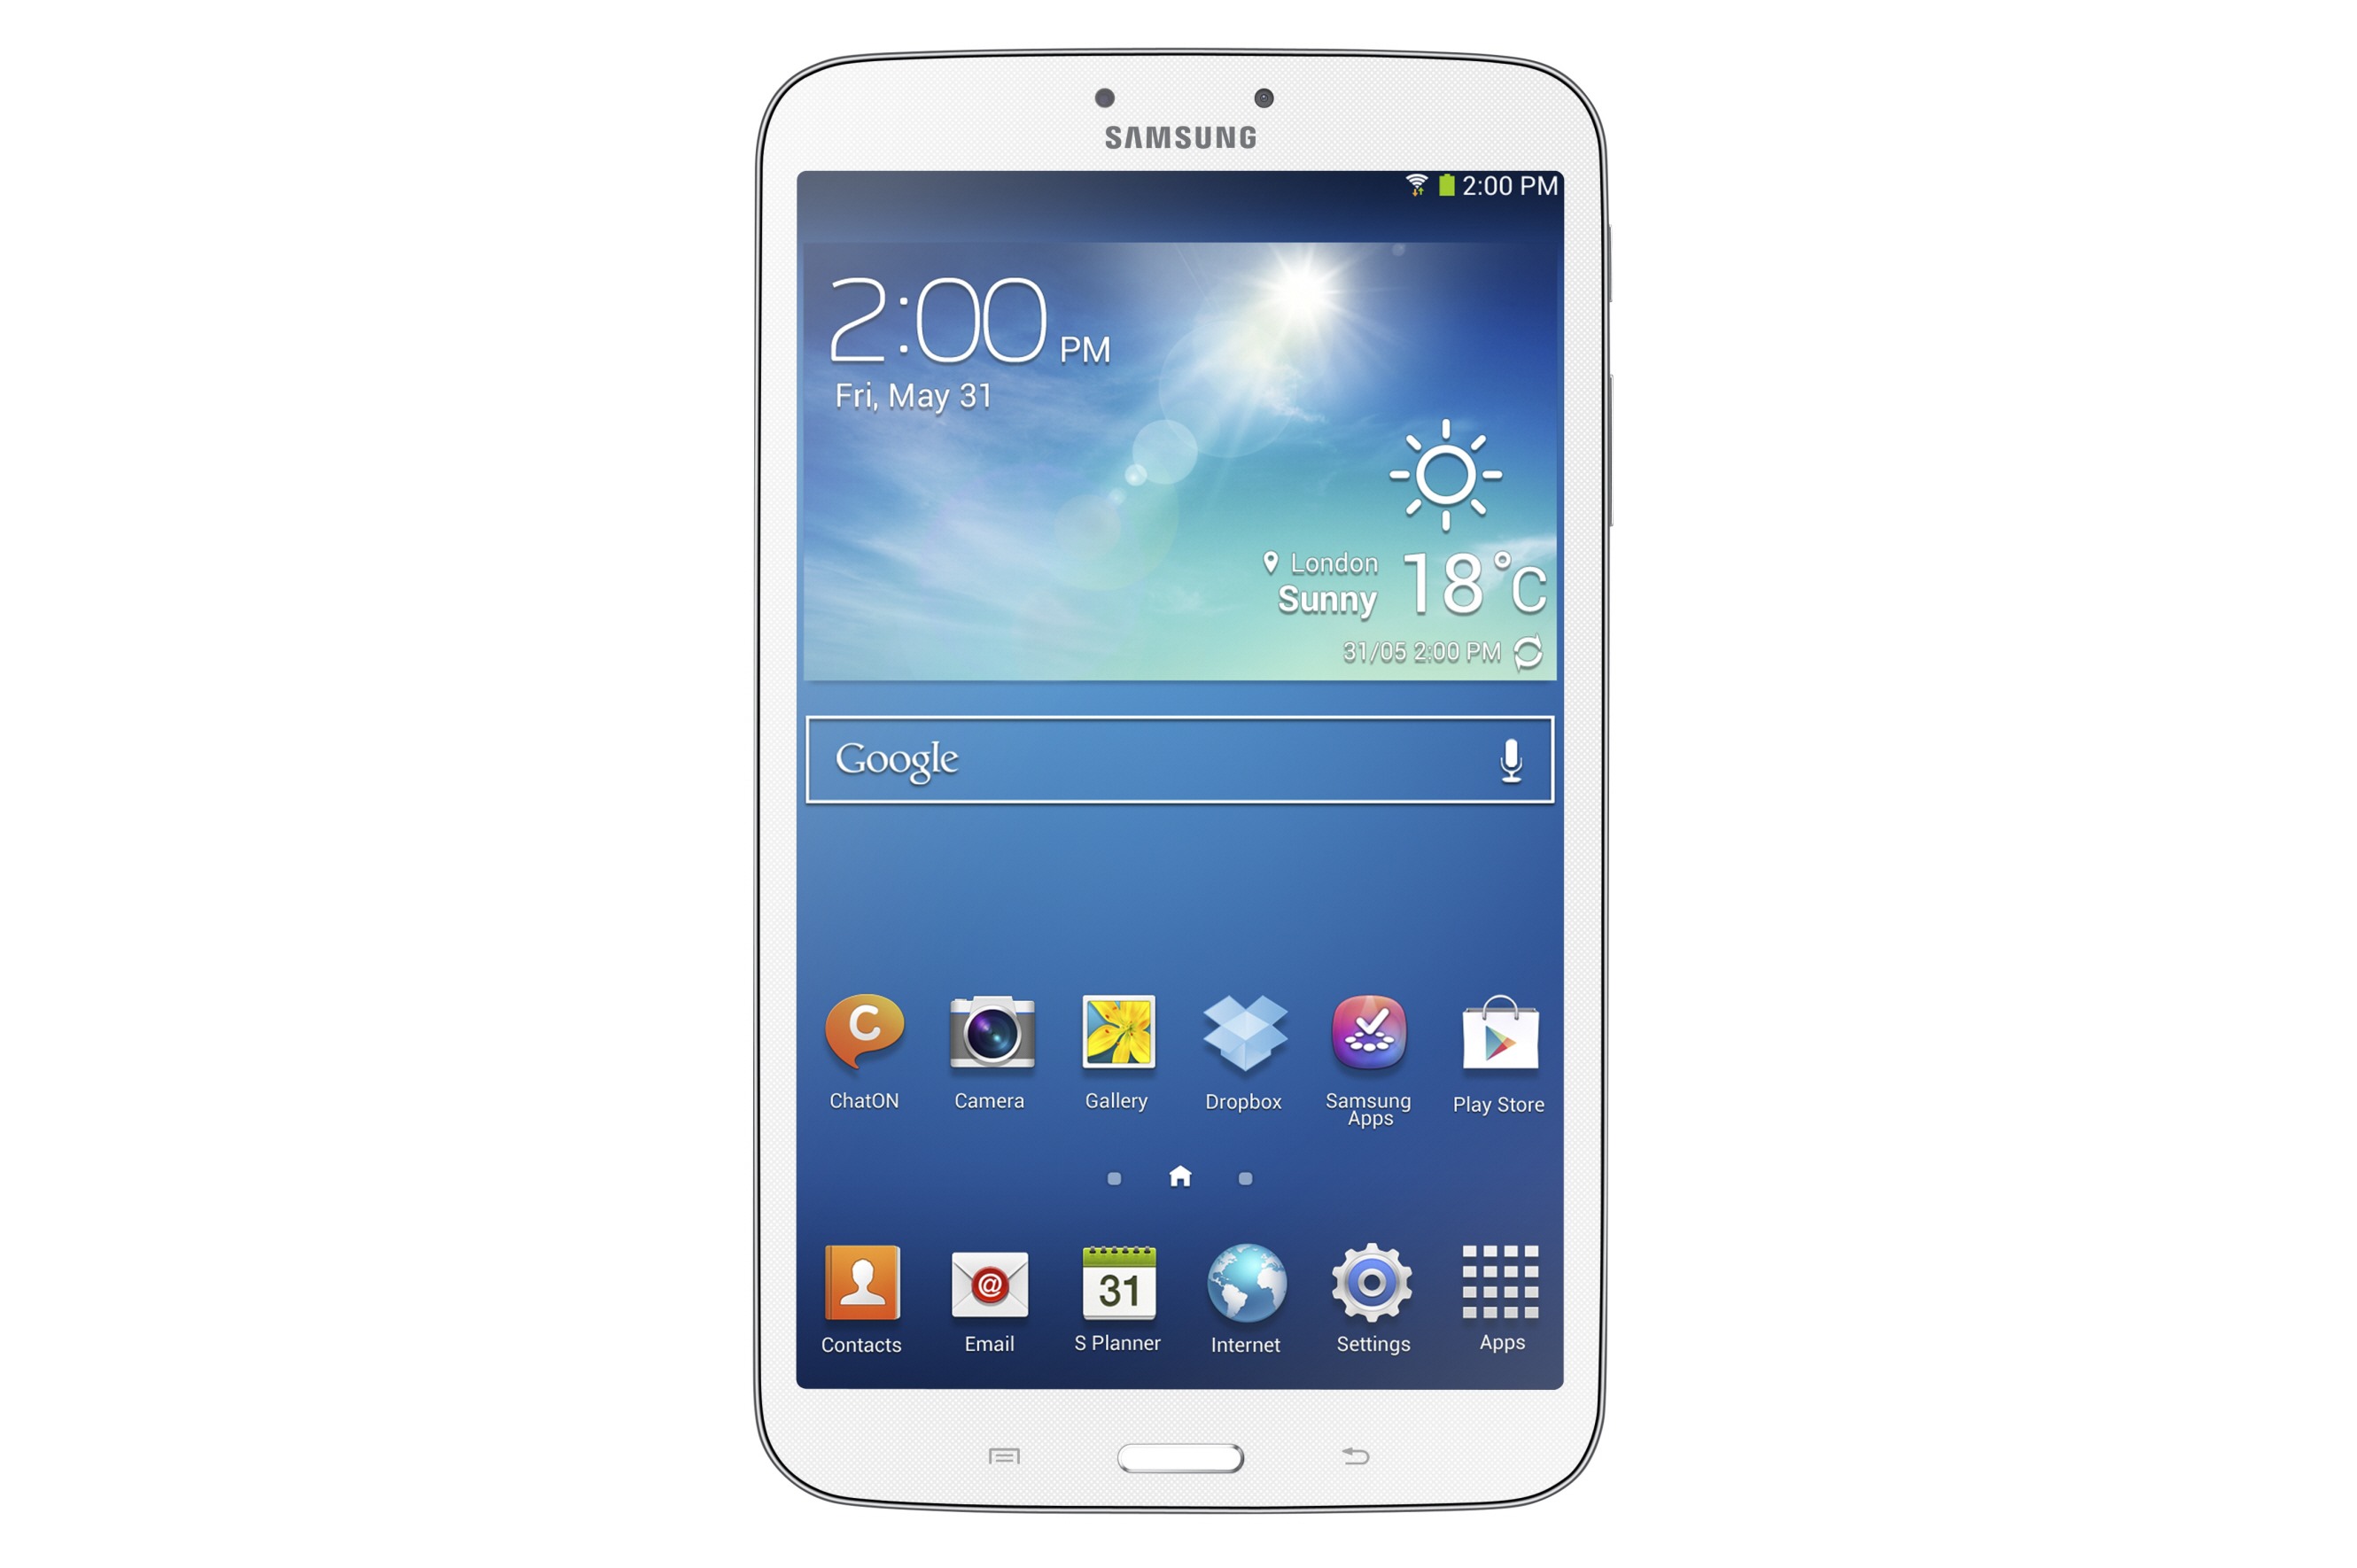
XDA recognised contributor gr8nole has brought us the unofficial build of CyanogenMod 13.0 based on Android 6.0.1 Marshmallow. This ROM works with all variants of Galaxy Tab 3 8.0 including SM-T310, SM-T311 & SM-T315. The ROM is in very early development stages. A lot of features are expected to crash so flash it only if you’re willing to have a look and feel of Marshmallow on your Galaxy Tab 3. This ROM may not be kept as a daily driver at all. Follow the instructions listed below carefully to avoid any mishap. Let’s have  a look on some precautions and then upgrade our beloved Tab 3 8.0 T310, T311 and T315 to Android 6.0.1 Marshmallow CyanogenMod 13 custom ROM.nexusae0_GALAXY-Tab-3-8-inch-1

Precautions:

  1. This ROM is intended for Galaxy Tab 3 8.0 T310, T311. Do not try flashing this ROM on any other device otherwise, you will result in bricking it. Check your device’s model number under settings > about the device.
  2. Charge your phone up to 50% to avoid any power issues during the flashing process.
  3. Flash a custom recovery on your Galaxy Tab 3 8.0 T310, T311.
  4. Backup everything including your important contacts, call logs and text messages.
  5. Don’t forget to create a Nandroid backup. This is highly recommended so that you can revert back to your previous system in case of a mishap.
  6. Backup EFS partition to avoid EFS corruption later on.
  7. Follow the instructions to the letter.

Disclaimer: Flashing custom ROMs voids the warranty of a device and its not recommended officially. While you’re going to do this, make sure that you’re doing this at your own risk. In case of a mishap TechBeasts, Samsung or the device manufacturers may not be held responsible.

How To Update Galaxy Tab 3 8.0 to Android 6.0.1 Marshmallow via CyanogenMod 13 Custom ROM

  1. Download latest CyanogenMod 13.zip file according to your device
    1. CyanogenMod 13 Android 6.0.1.zip file
  2. Download Gapps.zip [arm, 6.0.zip] file for Android 6.0.1 Marshmallow.
  3. Connect your phone to your PC now.
  4. Copy all .zip files to the storage of your phone.
  5. Now disconnect your phone and turn it off completely.
  6. Boot into TWRP recovery now, in order to do so, turn it on by pressing and holding Volume Up + Home Button + Power Key. You should see the recovery mode in a while.
  7. Now in TWRP  recovery, wipe cache, factory data reset and advanced options > dalvik cache.
  8. After wiping all these three, select the “Install” option.
  9. Now select “Install > Choose Zip from SD card > Select cm-13.0…….zip file > Yes”.
  10. This will flash the ROM in your phone, once done get back to the main menu in recovery.
  11. Now once again select “Install > Choose Zip from SD card > Select Gapps.zip file > Yes”
  12. This will flash the Gapps in your phone.
  13. Reboot your device.
  14. You should see the Android 6.0.1 Marshmallow CyanogenMod 13.0 running on your device in a while.
  15. That’s all!

First boot may take up to 10 minutes, you may not worry if it’s taking that muchlongerg. In case it’s taking too long, you may boot into TWRP recovery and wipe cache and dalvik cache and reboot your device as it may fix the issue. In case your device is having issues, you may return to your old system using the Nandroid backup or follow our guide here to install stock firmware.

Got any queries? Reach us out through the comment box below.

Credits

Install Android 6.0.1 Marshmallow on Galaxy Note N7000 via CM 13 custom ROM

6
Install Android 6.0.1 Marshmallow on Galaxy Note N7000 via CM 13 custom ROM

Install Android 6.0.1 Marshmallow on Galaxy Note: Good news for the Galaxy Note GT-N7000 owners. You can now update it to the all new Android 6.0.1 Marshmallow firmware. Wondering how? Well, that’s possible by means of a custom ROM as usual. CyanogenMod 13 based NightOwl ROM will help you to update your Galaxy Note to Android 6.0.1  Marshmallow. The ROM is the result of hard work of XDA recognized developer bauner.

In the succeeding post, we are going to show you a method to update your Galaxy Note GT-N7000 to this Android 6.0.1 Marshmallow CM13 NightOwl custom ROM. Before flashing the ROM, be reminded that this is a beta build and it may contain quite many bugs. So, this ROM may not be kept as a daily driver as it’s only intended to give you a look and feel of Android Marshmallow for now. We expect future builds to bring stability. As the new builds come up, we will be updating the very same post. For now, let’s go ahead and flash the currently available build.2011-12-21-product-7

Precautions:

  1. This ROM is intended for Galaxy Note N7000. Do not try flashing this ROM on any other device otherwise, you will result in bricking it. Check your device’s model number under settings > about the device.
  2. Charge your phone up to 50% to avoid any power issues during the flashing process.
  3. Flash a custom recovery on your Galaxy Note N7000.
  4. Backup everything including your important contacts, call logs and text messages.
  5. Don’t forget to create a Nandroid backup. This is highly recommended so that you can revert back to your previous system in case of a mishap.
  6. Backup EFS partition to avoid EFS corruption later on.
  7. Follow the instructions to the letter.

Disclaimer: Flashing custom ROMs voids the warranty of a device and its not recommended officially. While you’re going to do this, make sure that you’re doing this at your own risk. In case of a mishap TechBeasts, Samsung or the device manufacturers may not be held responsible.

How To Install Android 6.0.1 Marshmallow on Galaxy Note N7000 via CM 13 custom ROM

  1. Download CyanogenMod 13.zip file according to your device
    1. Nightowl-cm13-beta2-n7000.zip
  2. Download Gapps.zip file.
  3. Connect your phone to your PC now.
  4. Copy all .zip files to the storage of your phone.
  5. Now disconnect your phone and turn it off completely.
  6. Boot into CWM recovery now, in order to do so, turn it on by pressing and holding Volume Up + Home Button + Power Key. You should see the recovery mode in a while.
  7. Now in CWM  recovery, wipe cache, factory data reset and advanced options > dalvik cache.
  8. After wiping all these three, select the “Install” option.
  9. Now select “Install > Choose Zip from SD card > Select cm-13.0…….zip file > Yes”.
  10. This will flash the ROM in your phone, once done get back to the main menu in recovery.
  11. Now once again select “Install > Choose Zip from SD card > Select Gapps.zip file > Yes”
  12. This will flash the Gapps in your phone.
  13. Reboot your device.
  14. You should see the Android 6.0.1 Marshmallow CyanogenMod 13.0 running on your device in a while.
  15. That’s all!

First boot may take up to 10 minutes, you may not worry if it’s taking that much longer. In case it’s taking too long, you may boot into CWM or TWRP recovery and wipe cache and dalvik cache and reboot your device as it may fix the issue. In case your device is having issues, you may return to your old system using the Nandroid backup or follow our guide here to install stock firmware.

Got any queries? Reach us out through the comment box below.

Credits