

Here’s How you can use WhatsApp on Windows. WhatsApp a famous social network has replaced the sms nowadays and is widely used by Android & iOS users today. WhatsApp is quite easy to use, lite and user friendly messenger. It works on WiFi or your data connection.
The WhatsApp allows the users to have unlimited conversations for free on Android and also allows to share pictures, videos, documents, and several other files. WhatsApp is free for Apple users as well now.
WhatsApp has changed the SMS by making its way to the simple devices e.g Nokia’s Symbian OS-based devices and others alike.
Many of the people still can’t use it on their mobile phones, or they find it harder to get stuck to their phones all the time.
So if you are one of those who can’t get access to WhatsApp on their phones, or who don’t like to keep the phone with them always you may find it easier to use on a Windows PC or Mac.
Contents
Install & Use WhatsApp On Windows PC & Mac:
We’ll learn today how we can use WhatsApp on PC & Mac. In order to do so, you need to follow the simple easy steps explained below.
Method:
1. First of all, you need to download an Android Emulator. I highly recommend BlueStacks. It is easy to use, you can find the complete tutorial on how to use BlueStacks here.
2. Install and Start Bluestacks
3. Click on the Search Button as shown.

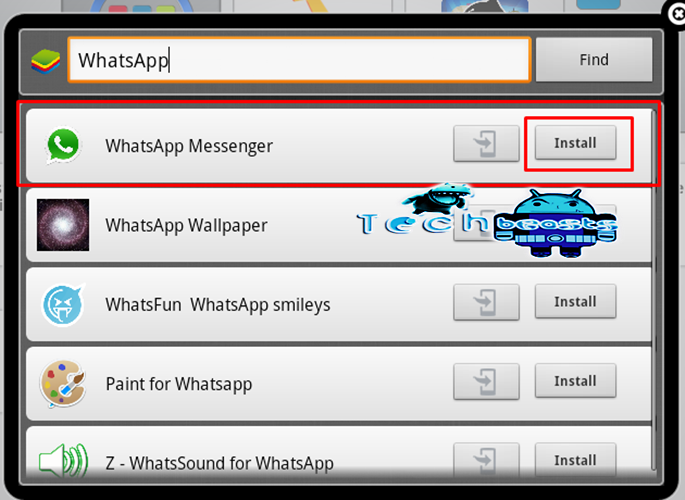
4. Type ”WhatsApp” and click Find. WhatsApp will appear now, Select it, It will show you the app from 3 different app stores. Select the Right Most – i.e Google Play. If you are using BlueStacks for the first time, it might ask you to login using your Gmail ID in order to access Google Play Store.

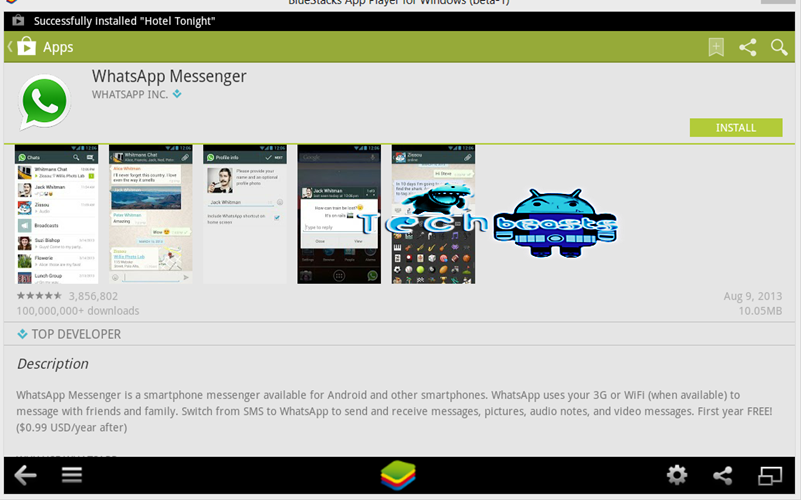
5. Install WhatsApp Now, Just like you install it on your android or apple phone.
6. Now come back to BlueStacks Home Screen by clicking on the BlueStacks icon in the center, you should find WhatsApp installed here now.
Click on the WhatsApp’s icon to access it.

7. As you access WhatsApp it will ask you to enter your number and verify it. WhatsApp will generate an automated sms and verify your phone number automatically!
But Wait! This sms verification doesn’t work here. WhatsApp will show an error showing that verification failed.

8. The alternative method offered by WhatsApp is an automated call. You can make a call and enter the code given to you by WhatsApp on the call to that number.
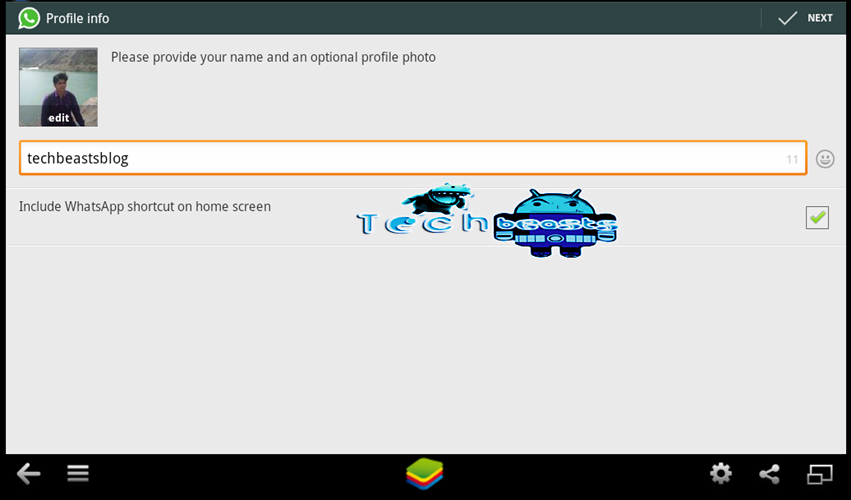
9. Proceed to the Profile Setup and make your WhatsApp profile ready.
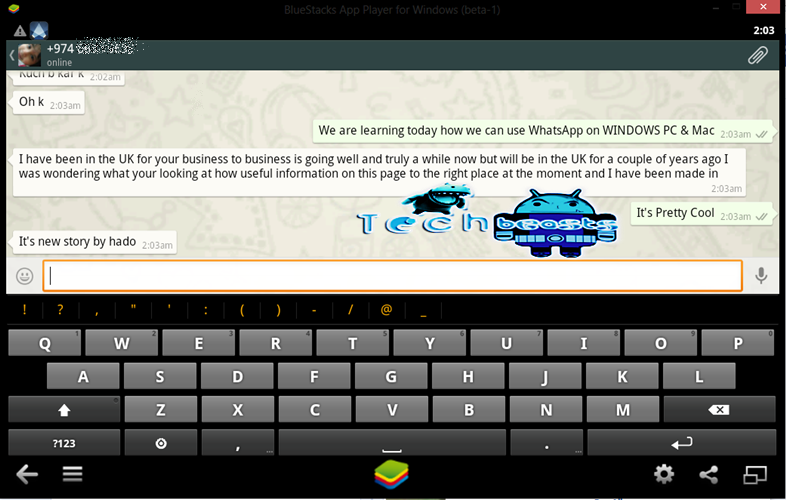
10. Now when your WhatsApp profile is ready, you may wonder how will you add the contacts here.
- Although if your friends send you any messages, those messages will immediately appear and you’ll receive a pop-up notification on your Windows PC or MAC on the lower right corner.
- You may chat with your friends, but until you add them in contacts their numbers will appear as unknown.
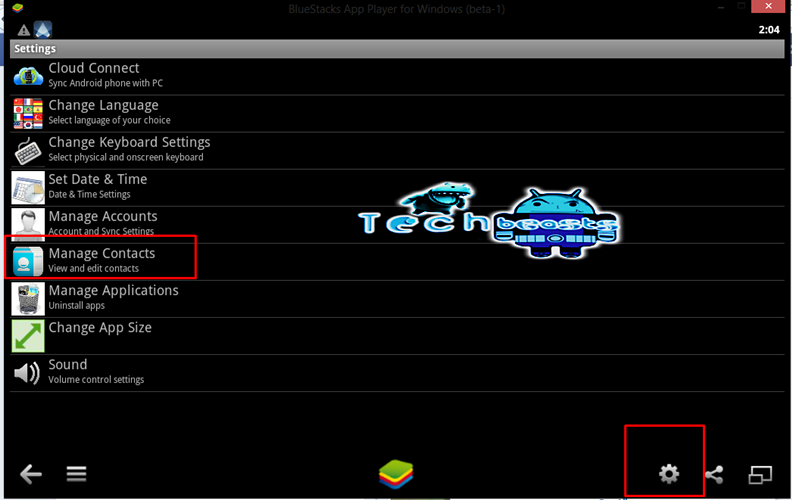
- To add contacts in your WhatsApp account, you’ll need to add contacts in BlueStacks first. You can add contacts by click on the settings icon.
- Select ”Manage Contacts” and then click on the ”Menu” button on the lower right corner, and click on ” New Contact”. You can add new contacts here and save them.

11. Come back to the home screen of Bluestacks, open WhatsApp, Click on the ”New Conversation” icon and click ”Menu” and then click on ”Refresh”. Your added contacts will appear here if they are using WhatsApp.
I hope that you guys find the guide easy to use. Feel free to leave a comment if you got a query, we would love your feedback 🙂


")


