Home Blog Page 452

How to re-enable Mobile tethering in KitKat with T-Mobile Network
0
How to re-enable Mobile tethering in KitKat with T-Mobile Network

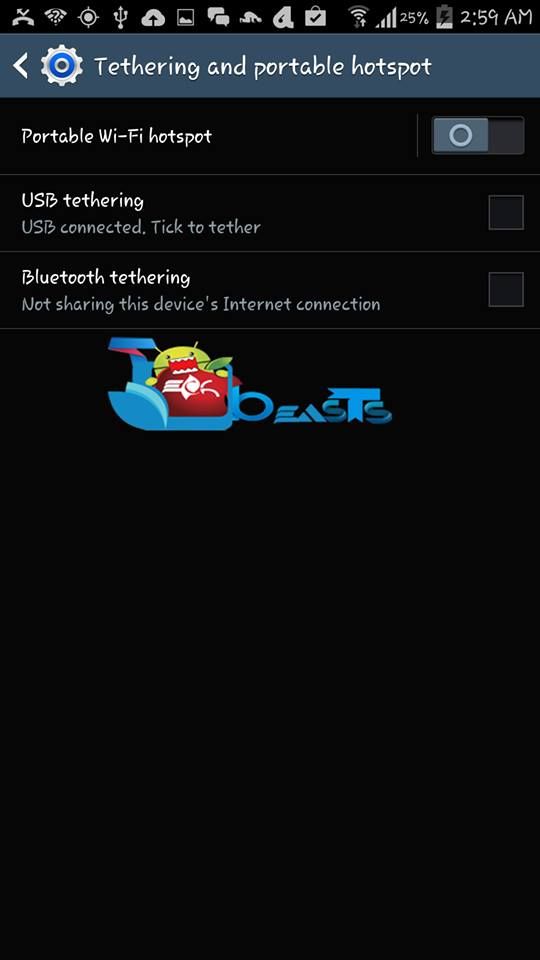
Mobile tethering helps when there is no WiFi connection and Android devices are better at broadcasting. Frankly speaking I am not a big user of tethering, but I do use when WiFi isn’t available. I’ve  heard that T-Mobile has different plans for tethering, means if you are using mobile tethering on Android 4.4 then you cannot use your mobile data plans on tethering. There was no such issue on Jellybean and on other old version but T-Mobile sets a flag for tethering, meaning if you are using tethering on normal mobile data plan, it won’t work. So today I’ll tell you how to re-enable tethering in KitKat with T-Mobile. After performing the following method on your Android devices, you can again use normal mobile data plan for tethering in KitKat.

tethering in KitKat

How to re-enable Mobile tethering in KitKat with T-Mobile Network:

Follow all the steps carefully in order to re-enable Mobile tethering in KitKat with T-Mobile Network. Please do it at your own risk and make your data plan allows you to tethering.

Important Things To Do:

Guide:

  • First OEM unlock your device and Root your device.
  • Now use Root Explorer. ( navigate to /data/data/com.android.providers.settings/databases/ and make a copy of settings.db ).
  • Now Install a SQL editor.
  • Tap the APPS tab->Settings Storage.
  • Now Tap on settings.db->Global.
  • Edit the value field type 0 and Save it.
  • Now to your device setting and open Mobile networks then APNs.
  • Make sure your network configuration setting are selected.
  • Now set APN protocol and APN roaming protocol to IPv4.
  • Make sure APN is set to fast.t-mobile.com.
  • Reboot Your device.

Source: Pocketnow


Easily speed up your original Nexus 7 [ How To ]

0
Easily speed up your original Nexus 7 [ How To ]

When nexus 7 came in 2012, it broke the iPad monopoly after such a long time as it was cheap and fast iPad then. Common people don’t go for specs and most of them buy the thing that is cheap and that works well. So, Nexus 7 was the particular thing that time but as time has passed away, I’ve observed that Nexus 7 becomes a slow and people are started going back to iPad etc. So today I’ll tell you how to easily speed up your original Nexus 7 through an easy guide.

nexus-7-2013

How To Easily speed up your original Nexus 7:

  • First Download the LegoKernel for your tablet. LegoKernel-F2FS-140228.
  • Now Download a TWRP recovery image.
  • Flash LegoKernel with your current recovery.
  • Now Flash the ” Special ” TWRP recovery with Fastboot.
  • Go to in to Recovery.
  • Go in to Wiper Menu.
  • Select Format Data.
  • Reboot your device and enjoy the fast speed.

Follow our guide on Nexus 7:


How To Add Status Bar Indicator For iPhone LED Flash Light

0
How To Add Status Bar Indicator For iPhone LED Flash Light

Apple added the support of using the LED Light as a flashlight and even flashlight toggle was added to Notification Center, which was a great addition to iOS 7. However, a slight problem arose, that there was no indicator to let us know whether the flashlight is on or not, which by the way isn’t a very important thing to give attention to. And that happened to me that I forgot my iPhone with the Flashlight on and within two hours the battery was gone, and I didn’t even realize till I heard the battery warning.

So, I searched a little web and Jailbreak section, Voila! Found the perfect solution. Bulb is a Jailbreak tweak that makes sure that you have an indicator on your Status bar till the Flashlight is on, it seems like the developer has also suffered from the same situation, thus developing this tweak to help others. It is a really simple tweak, not meant for everyone, but still an important one for those who have forgotten many times to turn-off flashlight.

Bulb-Status-Bar

Jailbreak your iOS Device.

Since the following tutorial needs an iOS device which is Jailbroken, you need to Jailbreak your device. If your device is still in its normal condition. Follow our Jailbreak Section to find out how to Jailbreak your device.

Download Blub:

  1. Open Cydia.
  2. Search for Bulb .
  3. Tap Bulb once the search is over.
  4. Tap Install on the top right corner.
  5. Tap Confirm.
  6. Restart your Device.

How To Use Bulb:

  1. There isn’t much configuration required to use this tweak.
  2. Once you have installed it, all you need is to open the Flashlight and the Indicator will start working.

Bring Essential Information To LockScreen In iOS 7 With LockInfo7

0
Bring Essential Information To LockScreen In iOS 7 With LockInfo7

There is one thing that I don’t like is, the unlocking process of phone every time I need to see something very important and when it comes to lock screen improvement’s tweaks and mods, there are not much that do anything as they promised. Even when we talk about Apple there aren’t much tweaks either, on the other hand Android is something different but we are not talking about Android here. In the Jailbreak Section, you’ll find Convergence and IntelliScreenX, both promise to offer functionality to Lock-Screen, but still not enough.

However, as the demands increase, developers have  made something that can enhance the functionality of a Lock-Screen. LockInfo7 by David Ashman does the job, that expands the functionality of Lock-Screen in various ways. So, before we get to the installation and configuring process, let’s read a little bit about the Tweak itself.

lockinfo7banner


The Tweak Merges the Notification Center with Lock-Screen to display Notification, Events, Reminders and almost everything that you want to see in the drop down Menu. It combines the Widgets and Notifications into one Menu which is easy to Scroll, thus eliminating the Today tab that is usually found in Notification Center. You can dismiss the Notification by Swiping to the right, and if you swipe to the left, you will be directed to the app responsible for the Notification.

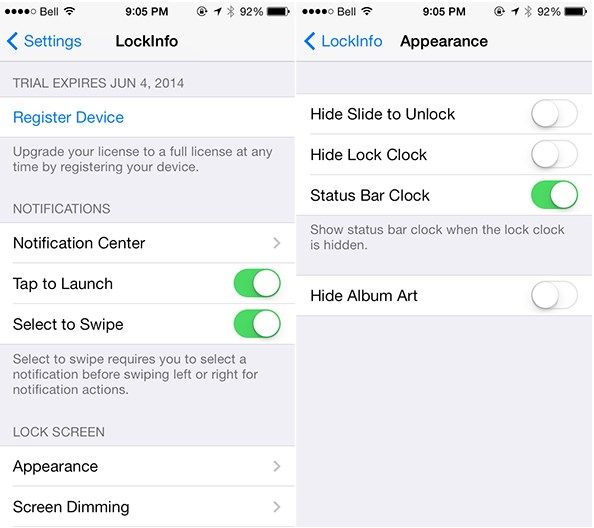
In the Settings, you will find many ways to configure the app, you can remove the Slide to lock option and also the Clock on screen. The settings of Notification Center are bundled up within the app itself, you can edit it from there. So, without any further explanation and leaving things to you, let’s see how we can install it.

Screenshot_8

Jailbreak your iOS Device.

Since the following tutorial needs an iOS device which is Jailbroken, you need to Jailbreak your device. If your device is still in its normal condition. Follow our Jailbreak Section to find out how to Jailbreak your device.

Download LockInfo7:

  1. Open Cydia.
  2. Search for LockInfo7.
  3. Tap LockInfo7once the search is over.
  4. Tap Install on the top right corner.
  5. Tap Confirm.
  6. Restart your Device.
  7. The trail is only for 14 days then you need to pay a sum of $4.99 to continue using it.

Add Real Keyboard Shortcuts To iOS Using KeyShortcut

0
Add Real Keyboard Shortcuts To iOS Using KeyShortcut

Using Keyboard on your Mobile phone is an everyday exercise. However, when it comes to some other things, like copying and pasting the text, undoing or redoing or selecting the whole sentence, then we face a little problem for doing so and as no default keyboard supports that. We have to tap and hold for the Selector to appear, then we select the text and afterwards perform copy or cut to the Clipboard, from there we can either paste it at the same point, delete all of it or keep it for future reference.

However, in the world of Jailbroken devices, things like this are possible. KeyShortcut is a tweak that helps everyone who wants to set real shortcuts on their Keyboard. Like if you want to select the whole text, you shouldn’t have to tap and hold instead you Long hold the Keyboard Key and your whole text is selected. If you are interested in it, then let’s see how we can install it and use it.

Screenshot_8

Jailbreak your iOS Device.

Since the following tutorial needs an iOS device which is Jailbroken, you need to Jailbreak your device. If your device is still in its normal condition. Follow our Jailbreak Section to find out how to Jailbreak your device.

Download KeyShortcut:

  1. Open Cydia.
  2. Search for KeyShortcut.
  3. Tap KeyShortcut once the search is over.
  4. Purchase the App and wait for the install button to appear.
  5. Tap Install on the top right corner.
  6. Tap Confirm.
  7. Restart your device

How To Use KeyShortcut:

Screenshot_7

  1. You have to go to settings to enable this tweak.
  2. In the settings of KeyShortcut, you will see all the default Shortcuts.
  3. ‘A’ key will select all the Text, ‘C’, ‘X’ and ‘V’ will copy, cut and paste the text respectively.
  4. ‘Z’ and ‘R’ will Undo and Redo the text respectively.
  5. You can create your own profile and save them in the number from 0-9 and set the Shortcuts according to your need.
  6. Choose the profile that suits particular conditions the best.

How To Import/Download Videos From YouTube In iOS 7

0
How To Import/Download Videos From YouTube In iOS 7

YouTube is no doubt the biggest database in the World even if it is not but everyone still considered it to be. YouTube app is available for all the Embedded Platforms, and unlike any other app, the experience is same in all of the apps. You can watch HD/SD videos with great speed and smoothness, and since it is an official app, you don’t have to worry about any sort of spam and bugs. However, despite being so perfect, this app lacks something that is provided in any other Online video streaming app.

Unlike Dailymotion app, which at least has the option to Sync the videos for Offline use, YouTube doesn’t offer any sort of Offline Experience, and it doesn’t matter which downloader we intend to use, nothing supports to download videos from YouTube because of their Policies. However, if you have a Jailbroken iOS device and wants to download videos from YouTube, we can help you in this matter as InTube is a Jailbreak tweak that does this Job. All you need is to add Bigboss repo to Download this from Cydia, only available for $1.99.

InTube-Starting

Download InTube :

  1. Open Cydia.
  2. Search for InTube.
  3. Tap InTube once the search is over.
  4. Puchase the App and wait for the install button to appear.
  5. Tap Install on the top right corner.
  6. Tap Confirm.
  7. Restart your device

How To Use InTube:

InTube-Options (1)

  1. Open YouTube.
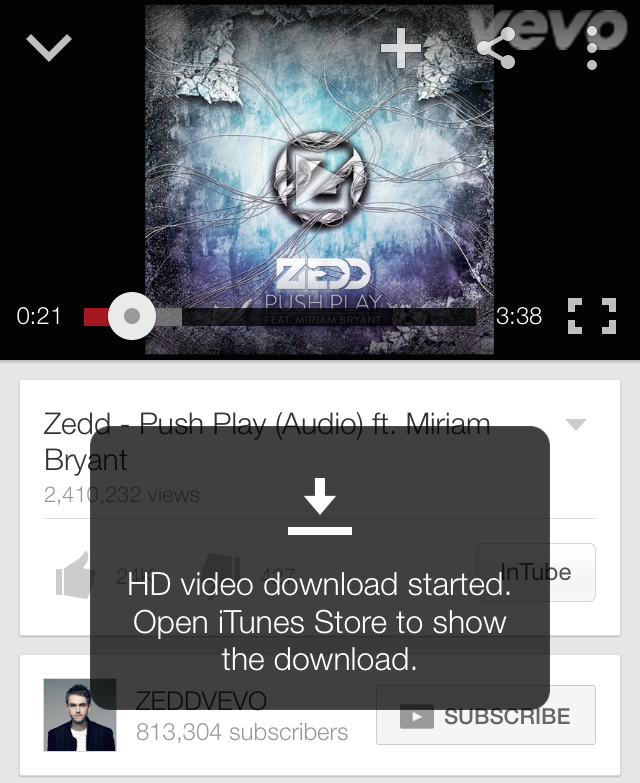
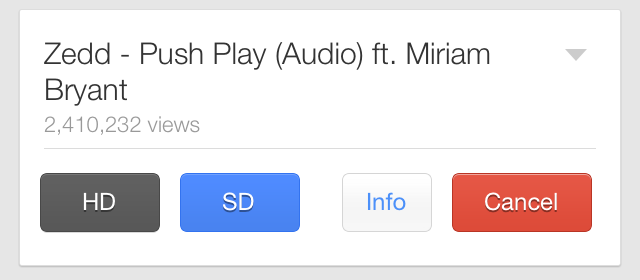
  2. The Download buttons will appear automatically, as HD and SD.
  3. Once you press the Download button, simply the download starts.
  4. Download Progress will be shown within the Download tab in the iTunes app store.
  5. You can view the ETA and manage the downloads in that tab.
  6. Once the Download is complete, the Video will automatically be transported to Stock Music/Video app, thus making it available Offline as well.

Set GIF As a Wallpaper In iOS Using GIFPaper

1
Set GIF As a Wallpaper In iOS Using GIFPaper

When iOS 7 introduced Dynamic Wallpapers to the world, something that I liked, after what haven’t seen in previous versions of iOS and thanks to the Jailbreak section for giving us more and better things. Today, we have encountered another tweak that allows users to change their wallpaper. Well if you are thinking about something normal or a little different like Dynamic Wallpaper, then you are wrong, this tweak has almost raised the hopes to set live wallpaper for iOS. However, instead of live wallpaper it is a GIF image.

GIFPaper is a Jailbreak tweak, that allows users to access such thing and as written in the description of GIFPaper:

Make your wallpaper come to life with GIFPaper! GIFPaper allows you to set animated GIF images as your devices wallpaper. Set them on your home screen, lock screen, or both. Set any GIF wallpaper by holding down on the GIF in Safari, and then selecting “Set Wallpaper” from the menu that appears. You can also set a GIF wallpaper by typing in its URL on the GIFPaper settings page. GIFPaper is perfect for anyone who wants an exciting, animated wallpaper!

owl

Download GIFPaper:

  1. Open Cydia.
  2. Search for GIFPaper.
  3. Tap GIFPaper once the search is over.
  4. Puchase the App and wait for the install button to appear.
  5. Tap Install on the top right corner.
  6. Tap Confirm.
  7. Restart your device

How To Configure GIFPaper:

  1. Open Settings.
  2. Find GIFPaper.
  3. Open it and you’ll see a variety of GIF wallpapers to choose from, for Now.
  4. At first you will see a Wallpaper mode, which gives you three wallpaper modes, Home Screen, Lock Screen and Both.
  5. Below you’ll find a option allowing you to set the scaling mode of GIF image, meaning how the GIF appears when activated.
  6. In “Scale to Fit” Mode, the GIF stays normal and fit to the width of screen.
  7. In ‘Scale to Fil‘, the GIF will stretch and fit into the screen.
  8. You can even use a URL to set the Wallpaper.

Screenshot_5

One of the best part about this tweak, is that the ease of setting the GIF, you open Safari Browser, navigate to any GIF, Tap and hold on the Image and you’ll be presented with the Option to ‘Set as wallpaper‘, after selecting it, you will be promoted to choose the Wallpepr mode, select and the GIF will be your Wallpaper. Unlocking the Phone, if you set the Wallpaper mode as Both, causes no glitches at all and so far, no one complained about fast drain in battery life too.

How To Add Emoji In HomeScreen Folders In Android

1
How To Add Emoji In HomeScreen Folders In Android

In the past we have shared a lot of articles, about how to increase performance of Android devices, enhance it’s battery life, remove bloats from it etc. But not all the time the tutorial is about battery life or accessing things easily, sometimes it is about something that is not much of importance and many don’t even know how it works, but it is noticeable and something really new. You have been used Emoji in messages and I believe only messages, but this time we will show you how to add them in something that is in front of your eyes all the times.

Android 4.4 Kit-Kat has brought a lot of new things in Android OS and one of them is that you can add Emoji in the Home-Screen Folders or any folder at all and it is quite neat. So, without further ado, let’s find out how.

nexusae0_11_thumb

Add Emoji In HomeScreen Folders

nexusae0_22_thumb

  1. Create a Folder.
  2. Once created open it and Tap its name.
  3. On the Google Keyboard, Long press the ‘Done’ button to switch to emoji.
  4. If you are using any other Keyboard, then Emoji button might be different.
  5. The only problem you will see is a Weird Rendering Quirk when you close the Folder and a Few dark lines behind the emoji, which is unnoticeable.
  6. This works best on Android 4.4 Kit-Kat, on Android 4.3 you might have some luck, do try it.


SevenShare Brings iOS 6 Share Buttons Back To Notification Center

0
SevenShare Brings iOS 6 Share Buttons Back To Notification Center

When Apple usually adds new features to their OS, users like them but there is this one feature that has been stripped badly right after the release of iOS 7  and it is the Sharing button in the Notification Center. There are those who claimed this change and then there are those who said that we used this thing very often, in this case Apple didn’t give many ways to get rid of it. However, Jailbreak community can help you in this matter.

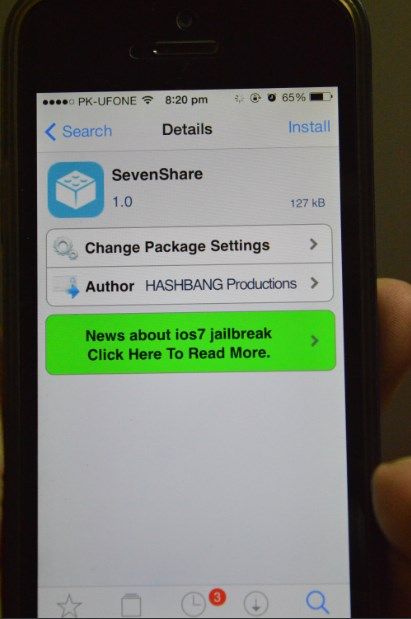
SevenShare is a Jailbreak Tweak, which adds the Social networking sites to the sharing part with the ability to compose a text message too, but in a more polished way. The Tweak is actually a Notification Center Widget and you have to activate it from the settings and it is compatible with Auki, TwitkaFly and biteSMS. So, without any further ado, let’s see what we can do to install and activate it.

Screenshot_9

Here is a description about SevenShare On Cydia:

SevenShare is the replacement for the missing share widget in iOS 7’s Notification Center. A tap of a button opens a composer for you to start typing a Tweet, Facebook post, or message, from anywhere in iOS. Holding a button for a moment will automatically attach the latest photo in your Camera Roll.

Download and Configure SevenShare

sevenshare0

  1. Open Cydia.
  2. Search for TapToUnlock 7.
  3. Tap TapToUnlock 7 once the search is over.
  4. Tap Install on the top right corner.
  5. Tap Confirm.
  6. Restart your device
  7. Now Open Settings.
  8. Tap on Notification Center.
  9. Scroll to the bottom until you find Seven Share.
  10. To enable this Tweak, tap Edit on the Top right corner.
  11. Drag the SevenShare to the Include Section.
  12. You’ll see SevenShare in All tab and it is all the way on top

How To Share Videos, Photos Between iPhone and Android Quickly

0
How To Share Videos, Photos Between iPhone and Android Quickly

After the porting of Bluetooth in Mobile Phones, data transferring has become really easy; just turn on the Bluetooth, Pair with other device and share the data while doing other stuff. You can even connect a Headset to listen to music using Bluetooth and in these hours of technology, Bluetooth is even available in all of the devices and with fast transferring speed too. However, when it comes to an Apple device, simply an iPhone, things are a lot more different.

Apple devices have Bluetooth ported in them, but it can only be used for connecting Bluetooth devices, not for ‘Transferring data’. So, if you have an Android device and you want to transfer data to an iPhone, you can’t just except to transfer data using Bluetooth. However, Wi-Fi can be used to do such a thing, all you need is to download an Application and start transferring.

iPhone-android

How To Transfer Media Between Android and iPhone

Screenshot_7

  1. Open App stores on both the devices, and Downlaod Photo Sync.
  2. Android version is free with Ads, while on iOS you need to pay $2.99.
  3. Make Sure both the devices are connected to the same Network.
  4. Open the app and Select the Photos and Videos.
  5. Once you have selected them all, Tap the Red Sync Button on the Top.
  6. After that Choose the Transfer mode, in this case it is Phone/Tablet.
  7. The app will then search for the nearby devices with Photo Sync installed on them.
  8. Now all that left is to tap the device to which you want to share with and Transfer the files.
  9. If by any chance App does not search for devices automatically, you can configure the IP manually.
  10. The Files will be transfered via Wi-Fi connectivity, hence noticeably faster than Bluetooth.

Chicago Nights Wallpapers HD – Download Here

0
Chicago Nights Wallpapers HD – Download Here

If you people love travelling, then you should definitely go to Chicago and enjoy the beautiful nights there. Chicago is the 3rd most popular city of USA and at night this city presents a spectacular view, for this very reason I have collected the best Chicago nights wallpapers for your desktop, Mac and mobiles.

For More Please Check out my Wallpapers Collection Here.

chicago_nights-wide

Source

inspiringwallpapers.net-chicago-at-night-640x480

Source

chicago-night-city-architecture

Source

chicago-night-skyline-lights-river-reflections-hudson-cityscape-216011Source

chicago_winter-wideSource

chicago_at_night_panorama

Source

Chicago-Bean-at-Night-and-Day-Chicago-Illinois-United-States-485x728

Source

Jrballe_july_2004_chicago_skyline_at_night

Source

Another iOS 7.1.1 Jailbreak Demo Appears On Web

0
Another iOS 7.1.1 Jailbreak Demo Appears On Web

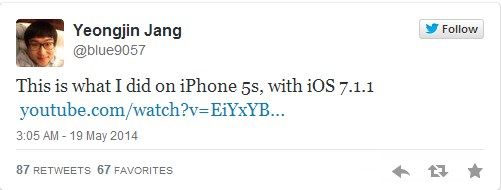
Yesterday,  we heard the news form winocm and i0n1c about the successful Jailbreaking iOS 7.1.1. Today we heard the same news about iOS 7.1.1, but from a Different Hacker. Hacker Yeongjin Jang posted a 4-minute long video featuring about the Demo of Jailbreaking iOS 7.1.1. The video shows how he installed an App remotely and got the Unsigned apps to work on his iPhone 5s with iOS 7.1.1. However, he mentioned that one has to run a recovery app after a Reboot to run an Unsigned app, making this Jailbreak a non-tethered one.

winocm and i0n1c used a different method to Jailbreak iOs 7.1.1, Yeongjin Jang on the other hand isn’t clear whether he had followed the same one or has he found a different method to Jailbreak it. winocm and i0n1c are most likely to release their Jailbreak method for Public in near future, but i0n1c has often showed his Dislike among Jailbreak community because of Piracy while winocm plans to Join Apple very soon.

Screenshot_5

Please Note, that any site claiming to have Jailbreak of iOS 7.1 or 7.1.1 is a Scam, so make sure to stay away from such sites. If there will be any Jailbreak available, it will be free and we will make sure to be the first one’s to Mention it. Till then keep coming back and stay tuned for more News and Tutorials.