Home Blog Page 416

Download Asphalt Overdrive for PC ( Windows 8.1,8,7,XP and Mac )

0
Download Asphalt Overdrive for PC ( Windows 8.1,8,7,XP and Mac )

Asphalt Overdrive for PC, you can download and install Asphalt Overdrive on your Pc by using a third party emulator. Playing games on a smartphone is a different experience and play mobile games on PC is a totally different experience. Asphalt Overdrive is basically launched for Android and iOS devices. But a game like this played on a Pc is worth giving a try. Before starting the guide let me give you an overview on Asphalt Overdrive.

Asphalt Overdrive for PC

About Asphalt Overdrive:

  • Asphalt Overdrive is a sequel of famous Asphalt racing games.
  • Asphalt Overdrive, an intense arcade racing experience packed to go.
  • You have to outrun cops with the top racing cars.
  • Asphalt Overdrive has new characters and all new set of cars.
  • You have to win the races in order to proceed to the next level.
  • After each victory you’ll get rewards through which you can upgrade your cars.

Asphalt Overdrive Main Features:

AN ORIGINAL MISSION-BASED ARCADE DRIVING GAME
– Unlock and drive 30 high-performance, fully licensed vehicles such as the iconic Lamborghini Countach and Ferrari Testarossa!
– Improve and upgrade your car to dominate the California streets
– Challenge yourself in 7 different mission types: Escape the cops, defeat bosses, avoid obstacles, and perform impressive stunts while you race!

A UNIQUE RETRO STYLE
– Drive fast across the gorgeous highways of Southern California
– Enjoy a subtly retro “new ’80s” atmosphere
– Stunning visuals thanks to real-time lighting and particle effects

CHALLENGE THE WORLD
– Connect to Facebook to play with or against your friends
– Join a gang to team up with friends and achieve weekly objectives full of speed and action!
– Track your progress and show off your skills as you advance in League championships
– Compete in limited-time, Gang, and League events as you battle your way to the top of the leaderboards!

Also See: Download Kill Shot for PC free

Download and Install Asphalt Overdrive for PC:

  1. To download Asphalt Overdrive for PC, you will need an Android emulator like Bluestacks. If you do not have it already, you can download it from the website Bluestacks.com.
  2. Open Bluestacks and search for Asphalt Overdrive using search tool on the top of the homepage.
  3. Click on install button. The game will automatically download and install.
  4. Once the app has been installed, go to My Apps in Bluestacks homepage.
  5. The icon for the game will appear in My Apps.
  6.  Click on this icon to open Asphalt Overdrive.

Now, you can start playing the game any time on your Pc simply by opening it from My Apps. Get mesmerized by the amazing graphics of the game.

Hopefully, you will be able to install the game easily on your PC through this guide. If you still have any issues, please let us know and we will help you solve them. Enjoy !

Download Kill Shot for PC ( Windows 8.1,8,Xp,7 and Mac )

0
Download Kill Shot for PC ( Windows 8.1,8,Xp,7 and Mac )

We all know Kill Shot was a movie released in 2008 this movie was based on Elmore Leonard’s 1989 novel of the same name. But I am not telling about the movie its about the new top game Kill Shot which is available on both stores. This guide is about how you can install Kill Shot on PC and play on windows 8.1, 8, Xp, 7 and Mac. Before starting the guide let me give you an overview on Kill Shot.

Also See: Angry Birds Stella for Pc

Kill Shot for PC

About Kill Shot:

  • Kill Shot is mission based game in which you have to go as covert special ops soldier and complete dangerous military attacks.
  • You have to face silent assassin missions with powerful guns to finish the mission.
  • You have to go in enemy territory to locate and eliminate hidden targets.
  • The way to complete the all the mission is , be silent , no sudden movements, Take a breath…and pull the trigger to make the Kill Shot.

Features of Kill Shot:

HIGH VELOCITY GAMEPLAY
– Over 160 first person shooter missions to complete.
– Awesome 3D graphics.
– Unforgettable bullet cam kill shot moments.
– 12 unique maps and stunning locations.

DEADLY WEAPONS
– Maximize your firepower with 4 weapon classes:
+ Sniper Rifle,
+ Assault Rifle
+ Shotgun
+ SAW Gun
– Unlock powerful upgrades for every weapon.
– 20 different weapons to choose from with more coming soon.

KILLER POWER-UPS
– Spotter – quickly find all enemies.
– Slow-Mo – slow down time to line up the perfect Kill Shot.
– Armor-Piercing Bullets – if you can hit it, you will kill it.

GOOGLE PLAY SUPPORT
– 3 Leaderboards to challenge your friends.
– 50 Achievements to complete and earn in-game rewards.

Also See: FIFA 15 for PC

Download and Install Kill Shot for PC:

  1. To download Kill Shot for PC, you will need an Android emulator like Bluestacks. If you do not have it already, you can download it from the website Bluestacks.com.
  2. Open Bluestacks and search for Kill Shot using search tool on the top of the homepage.
  3. Click on install button. The game will automatically download and install.
  4. Once the app has been installed, go to My Apps in Bluestacks homepage.
  5. The icon for the game will appear in My Apps.
  6.  Click on this icon to open Kill Shot.

Now, you can start playing the game any time on your Pc simply by opening it from My Apps. Get mesmerized by the amazing graphics of the game.

Hopefully, you will be able to install the game easily on your PC through this guide. If you still have any issues, please let us know and we will help you solve them. Enjoy !

How To Download and Install Technical Preview of Windows 10

0
How To Download and Install Technical Preview of Windows 10

Microsoft unveiled the Windows 10 a couple of days ago and like any other Windows version, the developer preview or Technical Preview of latest Windows Image is available for download and Install, after a little bit of requirements and time. The main purpose of this preview is so Miscorosft can learn the Mistakes in the System for further updated, but also what else can be put in this Windows. Technically it is only for developers, but Microsoft has given the option to everyone and those who wants to try a little taste of Windows 10, they can fulfill the requirements and download and install the Developer preview of Windows 10, on the other hand, a great publicity stunt for Microsoft too, to promote the upcoming Windows without any help from 3rd party.

However, installing such things also has some danger, since they are beta release without any security at all, and also with too less compatibility, you can expect a lot of Crashes, unnecessary deleting of your data, lag, might be no smoothness at all,simply means bugs and issues will be at every corner of this Technical Preview, if you still want to Continue, ready your device and follow ahead. For that you will need a Machine with Windows compatibility, at-least 1GHz of Processor, 1GB of RAM for 32-bit 2GB for 64-bit and at-least 16GB of storage, a Graphic Chip with DirectX 9 or above an active internet connection and a Microsoft account.

How To Download and Install Windows 10 Technical Preview:

Screenshot_6

  1. Visit insider.windows.com and click “Join Now” and Sign-up.
  2. Once you are over with Sign-up, download the ISO Specific to your device and your need.
  3. Once you have downloaded the ISO, you need to burn it to USB drive, also create a bootable one, Follow the Link to find out how
  4. Now all you need is to start the installation from the Boot Menu and follow on-screen instructions to complete the Installation.
  5. That’s it, since it is only a Preview, it won’t take any long, after the installation, you’ll be directly taken to the Configure screen, from there you’ll see some of the nifty features Microsoft has ported in Windows 10.
  6. Good luck and Enjoy

How To Install Multiple ROMs on HTC One M8 with MultiROM v28

0
How To Install Multiple ROMs on HTC One M8 with MultiROM v28

For an Android user, and by that means a person who purchased an Android device just because so he can use try different thing on his device, installing different ROMs is one of the best things ever, something that no other Platform has and if they have a chance to install Multiple ROMs on a single device, I don’t think a pure Android users, will let go of such opportunity. Multi-ROM v28 has been released and for those who don’t know what it is, we will tell you. Simply you can install a Single Primary OS on your device, no more than One, however, there are ways that you can crack that code and install more than one ROM on a Single device, however, you’ll be able to use one ROM at a time.

HTC One M8 is HTCs latest Flagship device and have enough potential to Run the Stock ROM without any problem or Lag, unlike Samsung. Multi-ROM is available for HTC One M8, means that you can install more than one ROM on it without any problem, and as I mentioned that it has more than enough power to run more than one ROM on it. However, you need to change a little things for it to install this Multi-ROM mod on it. If you are interested in Other ROMs, you can Visit our Custom ROMs section or you can install this MOD on your HTC One M8 by following our tutorial below. Remember, this is not a ROM, but only a MOD to let you install more than one ROM on HTC One M8.

HTC-One-M8

Early Preparations:

1. This is only for HTC One M8!

This custom ROM is only for the device mentioned above. Make sure that your model number matches the one listed above. To do so, go to Settings > About Device on your device and see your model number. Flashing this ROM on any other device will result in bricking it so make sure that you meet this requirement first of all.

2. Battery should be charged at least over 60%

Make sure that your battery is charged enough to complete the flashing process. In case your battery is low and your device goes dead during the flashing process, you may end up soft bricking your device as it won’t complete the flashing process.

3. Flash a Custom Recovery

A custom recovery, whether a TWRP or CWM is required to flash this ROM. You may find Philz Advanced CWM recovery on our site, make sure that you flash this one using the instructions explained in the guide.

4. Backup everything!

Just to be on the safe side, you may consider backing up each and everything from your Android device. This is highly recommended so that in case anything goes wrong, you still have the access to all of your data and you can restore it immediately. You may backup everything as listed below.

5. Disclaimer

The methods involved in flashing custom recoveries, roms and rooting your phone are highly custom and may result in bricking your device, and has nothing to do with Google or the device manufacturer that is HTC in our case. Also rooting your device will void its warranty and you will be no longer eligible for any kind of free device services by the manufacturers/warranty providers. In case of any mishap we may not be held responsible. Follow these instructions to the letter to avoid any mishap or bricking. Make sure that whatever you do, you are doing it at your own responsibility.

Downloads Required:

 Modified TWRP Recovery: Link

Multi-ROM: Link

Modified Kernels: Link

How To Install Multi-ROM:

  • Make Sure that USB Debugging is enabled, go to Settings > Developers Option and Tick the USB debugging.
  • Make sure that Fastbboot/ADB is configured on PC. How? How to Install Android Adb & Fastboot Drivers on Your Windows PC [Guide].
  • Then Download the Recovery File and Kernel image from the above links.
  •  Copy and paste both the recovery.img and boot.img to the Fastboot Folder.
  • Turn off your phone and open Bootloader/Fastboot mode. How? Press and hole Volume Down + Power buttons until you see some text on screen.
  • Now Open Command prompt in Fastboot Folder, How? Hold Shift Key and Right Click anywhere in the Fastboot folder.
  • Now type in the following command: fastboot flash recovery recovery.img Press Enter.
  • Then type in the following command: fastboot reboot.
  • After the reboot, take out the battery and wait for at least 10 seconds.
  • Then re-insert the battery
  • Now Once again, enter bootloader mode.
  • Now in command Prompt type: fastboot flash boot boot.img
  • Once again, type: fastboot reboot
  • Now wait till it is properly booted up and GO back to Bootloader mode and Choose Recovery

TWRP Users.

  1. Tap On Back-Up and Select System and Data
  2. Swipe the Confirmation Slider
  3. Tap on Wipe Button and Select Cache.
  4. Swipe the Confirmation Slider.
  5. Go back to Main Menu and Tap Install Button.
  6. Locate the Multi-ROM.zip, Swipe the Slider To install it.
  7. Once the Installation is Over, you will be promoted to Reboot System Now
  8. Select Reboot Now to Reboot the System.

That’s it, now just wait for tutorials on installing Multi-ROMs on your HTC One M8

How To Root Bluestacks App Player

14
How To Root Bluestacks App Player

If you ever had a chance to take your Android experience to a desktop PC, you must be well aware of Bluestacks App Player, but just in case you’ve no idea, let me tell you a little bit about this great application. Bluestacks App Player is an Android Emulator, that acts as a virtual Android device on your desktop PC, the software is available for different platforms like Windows and  MAC OSX.

The greatest advantage of Bluestacks is, you don’t need any Android device and yet you can experience the best you will on a real device. Bluestacks has no compatibility issues with any applications, it always runs the latest and greatest version of Android available around.

You can simply add your Gmail account on Bluestacks, set up Google Play Store and install applications straight to your Emulator. Apart from that, you can also install Android applications in Bluestacks using APK files, just like you do on a real Android device.

A question might come upon your mind, why would you use Bluestacks and use Android on a PC instead of using it on an Android device, well, half of it is already answered above but if you only want to get convinced, Bluestacks, at first will let you experience your favorite applications on a big screen, there won’t be any storage limits, there won’t be compatibility issues with the Android version, there won’t be any hiccups here and there that will interrupt your smooth use with Bluestacks.

All you need is, you need a computer that is capable of running Bluestacks App Player flawlessly. There are so many others reasons as well but I guess, for now, these are enough.

That was all about Bluestacks, let’s talk a little about unleashing the true power of an Android device now. You can always cross the boundaries set by the device manufacturers by rooting it, once you’re done, you can load a plethora of root applications and make your device fly high.

Rooting allows you to make a number of tweaks on your device that are normally not possible at all, but you will definitely require Android running on a device to attain root access, right? Well, not! You can also root the Bluestacks app player and unleash that power of Android on your Windows, laptop, desktop PC or a MAC device. Wondering how you can do so?

It’s time to get back to our topic for that now. We are going to install the pre-rooted Bluestacks App Player in the succeeding post. Once you’ve installed this rooted version of Bluestacks, you’re free to modify your virtual Android device the way you want, make tweaks to it, and enjoy the cool features that the root applications usually pack up.How To Root Bluestacks App Player

The pre-rooted version of Bluestacks is powered up with Android 4.4.2 KitKat. You will have an Android tablet’s experience on your target device by installing this pre-rooted version of Bluestacks. Obviously, there’s a number of methods to root Bluestacks, but our priority is to find out the best and the easiest one in order to keep our viewers away from any kind of complexity. Let’s learn how to install pre-rooted Bluestacks App Player now.

Before you install Pre-rooted BlueStacks

Make sure that while you uninstall your old Bluestacks, you do not remove its data. In case you loose your data, you won’t be able to enjoy Google Play Store inside the rooted Bluestacks. You may install Play Store using the apk file, grab it from out site here. But there aren’t any good chances that this will actually work as smooth as it will do from your old data.

Another drawback of having no play store in Bluestacks is, you will be only left with one option to install applications and that is using an APK file.  Alternatively, you can also use the cloud connect option in Bluestacks and sync all of the applications installed on your Android device with your PC running the Bluestacks. You may not actually worry about these drawbacks as these are not a big deal when there’s quite a lot to mess with on a rooted emulator.

How To Root Bluestacks App Player

  1. Download Pre-rooted BlueStacks App Player 0.9.3.4070 (KitKat 4.4.2)
  2. Uninstall any previous version of Bluestacks if installed, while uninstalling it will ask you whether you want to save your previous data or not, make sure that you save your data and only uninstall the application. [Important]
  3. Once completely uninstalled previously installed Bluestacks, install the downloaded Pre-rooted Bluestacks 0.9.3.4070.
  4. Proceed with the installation and complete it.
  5. Once installed, open it and enjoy the great Tablet experience on your Windows PC or MAC.
  6. You will have all of your old data in the newly installed rooted Bluestacks as well.
    Rootedbluestacks4RootedBluestacks3
  7.  

That’s all. In case you got any queries, make sure that you drop em’ in the comment box below. We will get back to you immediately.

Make sure that you check out How To Run Any Android App On PC In Chrome Browser.

How To Boost the Brightness of Sony Xperia Z1,Z1 Compact and Xperia Z2 LED

0
How To Boost the Brightness of Sony Xperia Z1,Z1 Compact and Xperia Z2 LED

Despite we don’t appreciate Physical Flashlights, yet they play a very important role in our lives, especially when you are a part of a Country, where load shedding is a part of everyday experience, you really need a Powerful Flashlight. Sine we keep our mobile phones to our closest distance, OEMs gave us a better option by letting us use the Camera Flash as a flashlight and on Sony Devices they even have a Mod to enhance the brightness level to extreme. Now if we want OEMs to put whole Flashlight thing in Mobiles, then we can pretty much understand how huge the size will be.

However, since we have a Navigator to find Keys and other stuff in Dark, and that navigator is called Mobile Flashlight, the only thing it misses is the awesome intensity, which one can only dream of, however, as I mentioned above, if you own a  Sony Xperia Z1 and looking for a way to enhance the Brightness of LED light, we can help you in this matter. XDA member,  olokos, has found a way to do it and has shared the Mod with everyone. As expected, installing this mod will increase the brightness of LED, but leaving it On for a Considerable time will sure to damage the LED of your Sony Xperia Z1, keen to know whether it works or not, just follow the guide and finds out.

xperia-z1-compact-features-intelligent-camera-5aae3ad7ddbacd41edb5cd6984998b05-620

Requirements:

  1. A Sony Xperia Z1, Z1 Compact, Xperia Z2
  2. CWM or TWRP Recovery installed.
  3. Rooted device.

Downloads:

Xperia Torch Mod: Link

Disclaimer

The methods involved in flashing custom recoveries, roms and rooting your phone are highly custom and may result in bricking your device, and has nothing to do with Google or the device manufacturer that is Sony in our case. Also rooting your device will void its warranty and you will be no longer eligible for any kind of free device services by the manufacturers/warranty providers. In case of any mishap we may not be held responsible. Follow these instructions to the letter to avoid any mishap or bricking. Make sure that whatever you do, you are doing it at your own responsibility.

How To Install Brightness MOD:

  • Copy the LED Mod to your device Sd card.
  • Turn off your phone and open Bootloader/Fastboot mode. How? Press and hole Volume Down + Power buttons until you see some text on screen.
  • Now Once again, enter bootloader mode and Choose Recovery from it

CWM/PhilZ Touch Recovery Users.

  1. Navigate to ‘Install zip from sd card’ another windows will open in front of you.
  2. Select ‘choose zip from sd card’ from the Options.
  3. Select the Revert to stock Z1 torch.zip file and confirm the installation on next screen.
  4. Once the Installation is Over, Select +++++Go Back+++++
  5. Select Reboot Now to Reboot the System.

TWRP Users.

  1. Go to Main Menu and Tap Install Button.
  2. Locate the Revert to stock Z1 torch.zip, Swipe the Slider To install it.
  3. Once the Installation is Over, you will be promoted to Reboot System Now
  4. Select Reboot Now to Reboot the System.

From Windows 8 to Windows 10, A Surprise From Microsoft

0
From Windows 8 to Windows 10, A Surprise From Microsoft

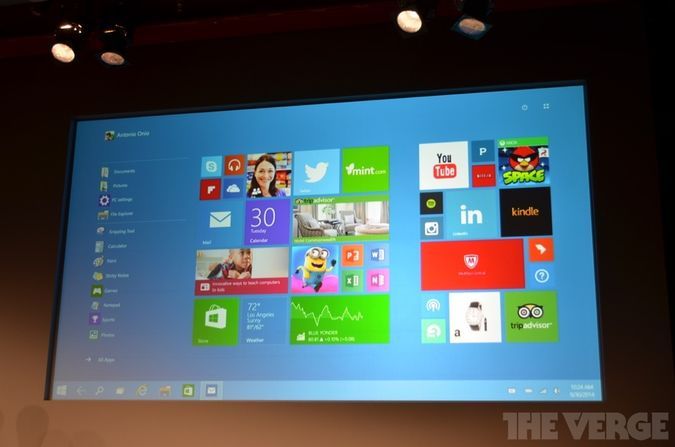
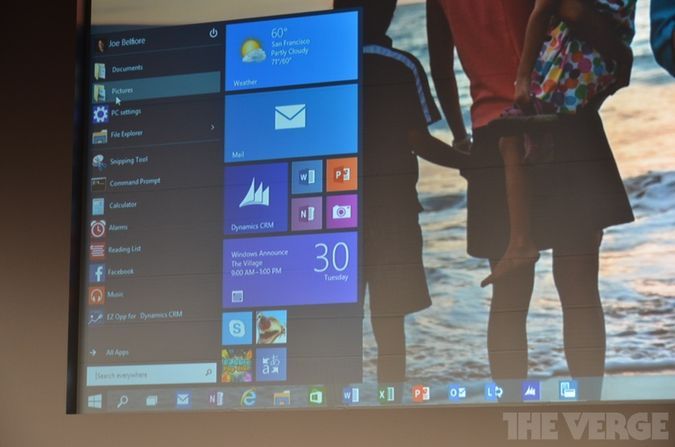
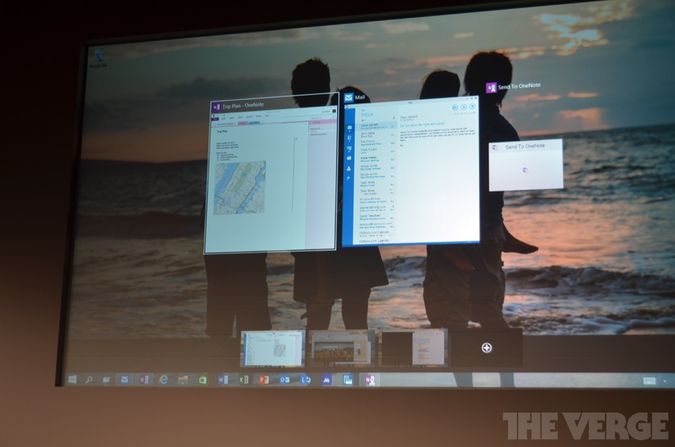
What were we expecting from Microsoft, in simple words I can say a Windows 9, or may be Windows 8.2 and the highest anticipations were about Windows 9 also, even most site gave designs about how they are expecting to see Windows 9. If we look at the sequel, from Vista to Windows 7 then Windows 8, the next take on throne legally belongs to Windows 9, but No!. Microsoft gave everyone a huge Surprise by unveiling the Windows 10 instead of Windows 9,for both Mobile and Desktop.

VRG_1080.0

Windows 10 has been described by Microsoft as “most comprehensive platform ever“. I don’t know why people say such things, don’t they have any plan for next update, or they just believe the Tomorrow is the Dooms day and this is the last thing they’ll ever release, they should put it as, “Another step to the most comprehensive platform ever”, nonetheless, Microsoft Windows 10 will run on all the Microsoft Compatible devices, from 4-inch to 80-inch screen size.

VRG_1095.0

Putting it all together, we have Windows 7 + Windows 8 = Windows 10, since no one liked the Concept of no Start Menu, this time Microsoft has decided to bring it again and we will see the Famous Start Menu in Windows 10. According to Terry Myerson” Windows 10 will deliver the right experience to right device on the right time”, no who knows, how much of it will be true in future, as most of people are still criticising the Windows 8 and most are still using Windows 7 like me. Well it was out job to give you a head start, you can find more at the Microsoft official Site, Stay tuned with us, who know we might have another leak of Microsoft Latest OS.

VRG_1110.0

Via: TheVerge

Update Verizon Galaxy Note 3 SM-N900V With JasmineROM

0
Update Verizon Galaxy Note 3 SM-N900V With JasmineROM

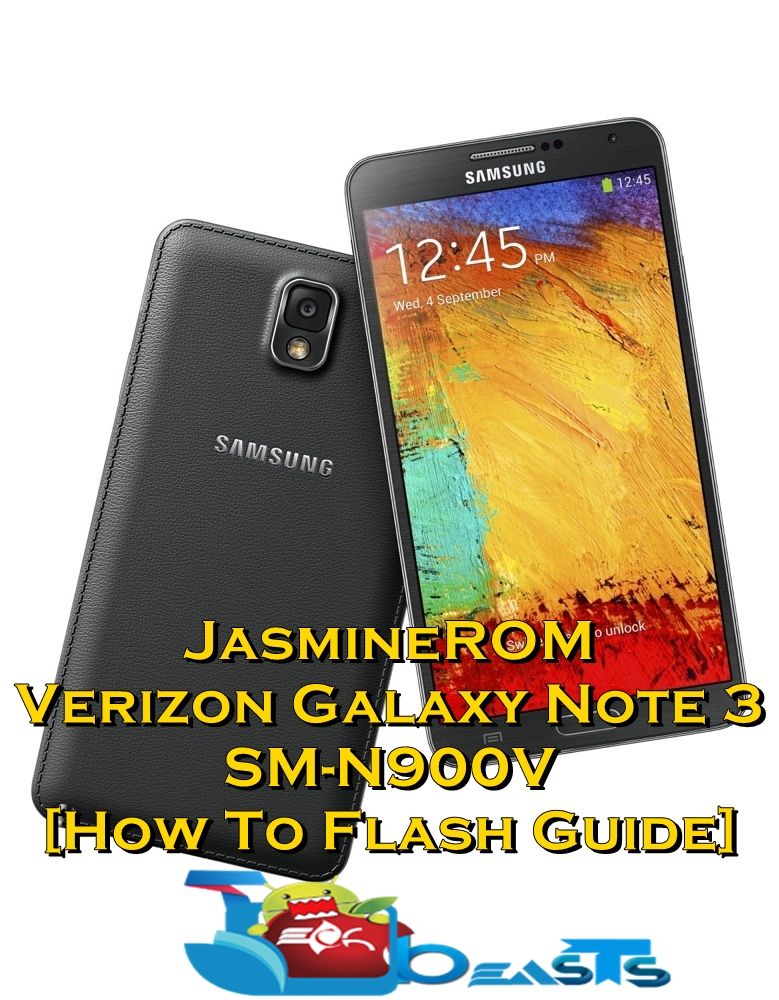
Verizon’s Galaxy Note 3 is currently running on Android 4.4.4 KitKat, that makes it one of the most lucky Samsung devices as well as it stands in that list of a few running this latest and greatest firmware. Although the stock firmware and the features it occupies are good enough to satisfy an everyday user, but if you still are willing to go out of the wear and taste something else on your Verizon Galaxy Note 3, you may flash some nice custom ROM on your device and unleash its true power. The ROM that will serve you this purpose is JasimineROM.

JasmineROM is based on stock Android 4.4.4 VRUNC4 KitKat firmware for the Verizon Galaxy Note 3.  It’s stock based custom ROM, that means having stock firmware on the core, this ROM packs up a number of features that will let your device fly high and you can enjoy so many features from Android L and Samsung Galaxy S5 that you won’t be able to do normally. A part from that, this ROM is stable, there aren’t so many chances of bugs, performance of the OS is great and it’s pretty much neat. Thanks to XDA senior member hsbadr who brought us up this nice ROM. Let’s go through the features of this ROM now.

Galxy-Note3_029_combination3_Jet-Black1

JasmineROM Features
      – The first & only custom ROM that supports NC4 kernel
      – OTA updates for ROM & kernel may get supported later
      – Hybrid S5 Port based on the latest S5 & Note 3 firmwares
      – Fully featured/loaded ROM for personal debloating
      – “Official” device status (no custom splashscreen)
      – Grid settings is the default style & tab/list styles are supported
      – Developer options enabled in Settings by default
      – Infinite scrolling enabled (disable My Magazine)
      – All hidden toggles + WiFiHotspot + Flashlight enabled
      – All Settings widgets/launchers enabled + WiFiHotspot/Tethering
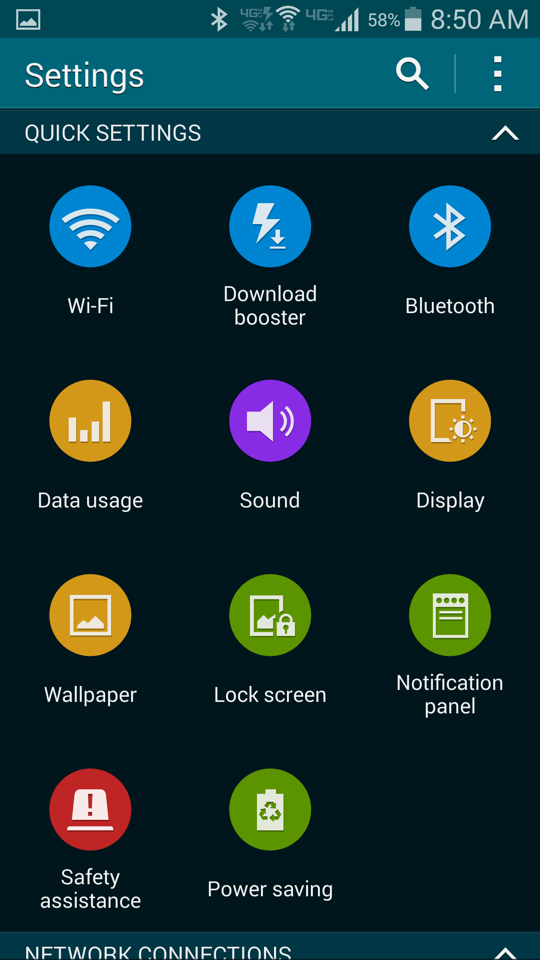
      – Download booster toggle & icon in Settings
      – All rotations & launcher scrolling are enabled by default
      – Custum Bootanimation.zip support
      – Power ON/OFF sounds disabled
      – Most recent updates integrated + Google apps 4.4.x
      – Android L boot animation & sounds
      – Android L keyboard MOD’d for more features & Material style
      – S5 launcher themes + PullUp + extra themes
      – Theme Chooser in Display Settings
      – Xposed framework, App Ops (Application permissions) in Settings
      – Dark-themed stock apps (Phone, Contacts, Music, … etc)
      – Call recording enabled & fixed
      – Optional packages including S5/N3 Settings/Camera/Keyboard/… etc
      – Two MOD’d Setting apps: S5 Settings & Note 3 Settings
      – Note 3 Setting (S5-Themed) incudes all Note 3 options + Dock settings
      – Note 3 Camera (S5-Themed) updated + “Virtual tour” mode
      – Note 3 VVM with the free basic subscription
      – Complete/Most updated Samsung + extra apps
      – Revised colors/icons for SystemUI & launcher
    – Several performance & features tweaks

Wondering how you can install this ROM on your Verizon Note 3? Well, that’s what we are going to do in the succeeding guide. We will be flashing JasmineROM v2.3.4 on our beloved Verizon Galaxy Note 3 SM-N900V. Make sure that you just follow these instructions carefully and get it done without any hiccups here and there.

Early Preparations:

This is only for Verizon Samsung Galaxy Note 3 SM-N900V!

This custom ROM is only for the device mentioned above. Make sure that your model number matches the one listed above. To do so, go to Settings > About Device on your device and see your model number. Flashing this ROM on any other device will result in bricking it so make sure that you meet this requirement first of all.

Battery should be charged at least over 60%

Make sure that your battery is charged enough to complete the flashing process. In case your battery is low and your device goes dead during the flashing process, you may end up soft bricking your device as it won’t complete the flashing process.

Flash a Custom Recovery

A custom recovery is required for flashing this ROM. You may flash Safestrap recovery using this guide.

4. Backup everything!

Just to be on the safe side, you may consider backing up each and everything from your Android device. This is highly recommended so that in case anything goes wrong, you still have the access to all of your data and you can restore it immediately. You may backup everything as listed below.

5. Disclaimer

The methods involved in flashing custom recoveries, roms and rooting your phone are highly custom and may result in bricking your device, and has nothing to do with Google or the device manufacturer that is SAMSUNG in our case. Also rooting your device will void its warranty and you will be no longer eligible for any kind of free device services by the manufacturers/warranty providers. In case of any mishap we may not be held responsible. Follow these instructions to the letter to avoid any mishap or bricking. Make sure that whatever you do, you are doing it at your own responsibility.

How To Update Verizon Galaxy Note 3 SM-N900V With Jasmine ROM

    1. Make sure that you’ve installed a custom recovery. There’s Safestrap linked above.
    2. Download  JasmineROM_v2.3.2.zip file.
    3. Download JasmineROM_v2.3.4.zip file.
    4. Copy both the .zip files to your phone’s SD card.
    5. Boot into Safestrap recovery mode on your phone now. To do so, open the Safestrap application on your phone and reboot your device. As soon as it reboots and you see a splash on your phones screen, press the menu key to boot into Safestrap.
    6. Once in recovery, perform and factory data reset and also wipe cache.
    7. Now select “Install Zip > Choose Zip from SDcard > locate the JasmineROM_v2.3.2.zip  file > Yes” and flash it.
    8. Once the ROM flashing is complete, once again select “Install Zip > Choose Zip from SDcard > locate the JasmineROM_v2.3.4.zip   file > Yes” and flash it this time.
    9. Once flashed both the , wipe cache and dalvik cache from the Safestrap recovery.
    10. As soon as your device boots up, you will see the JasmineROM Android 4.4.4 KitKat ROM.
    11. First boot may take up to 10 minutes, hold on tight till it boots up completely.
    12. That’s all. Enjoy Modified KitKat on your device now.

Here are some screenshots uploaded by the developer

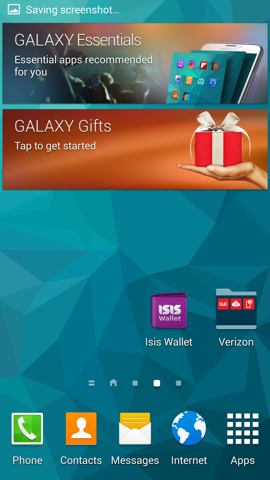
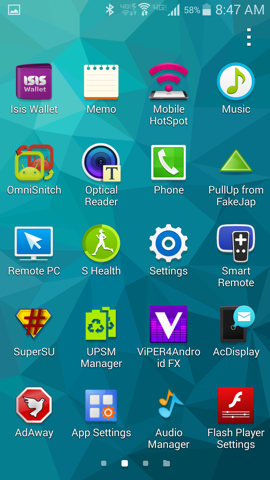
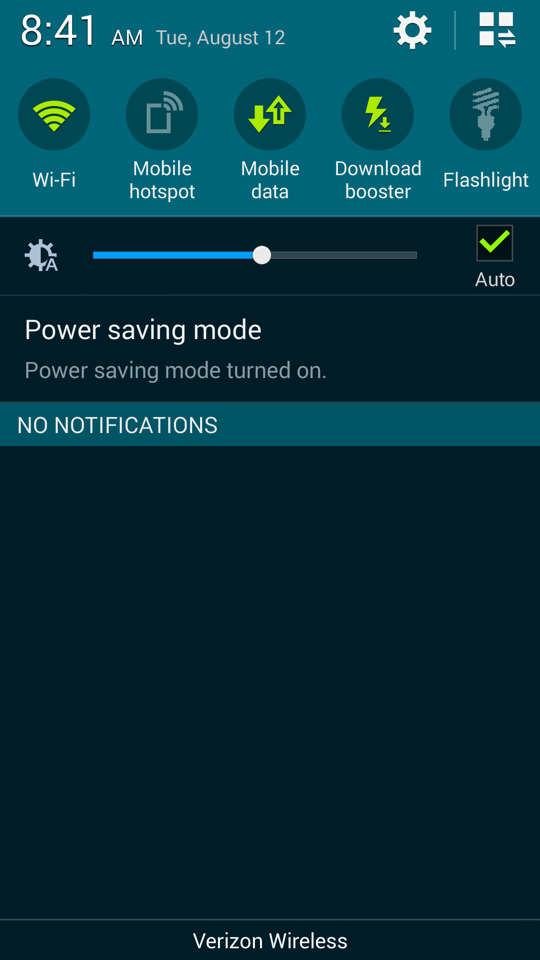
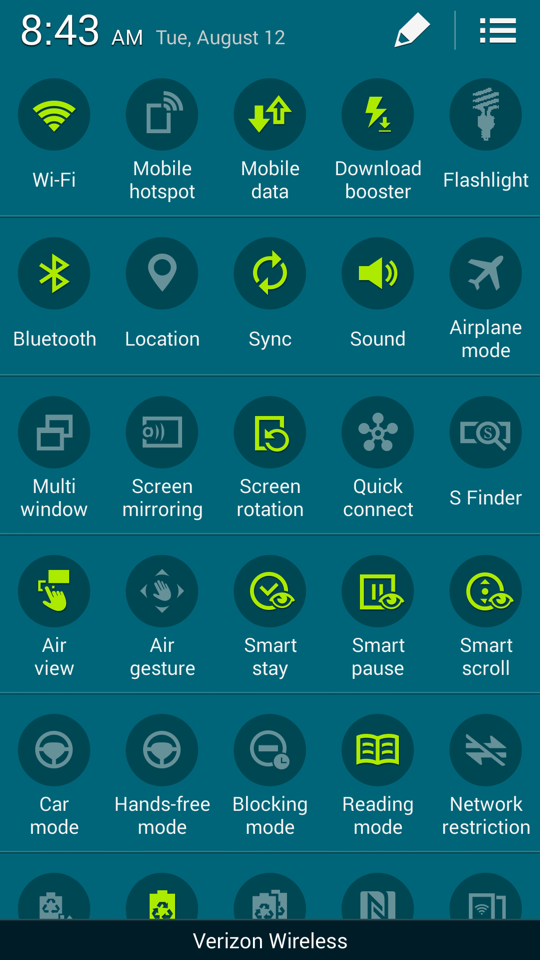
01 02 03
04 05 07
That’s all. Just in case you need any help regarding this post, make sure that you drop your query in the comment box below. We surely will get back to you immediately.

Cosmos Browser: Access The Web Without Internet Connectivity

0
Cosmos Browser: Access The Web Without Internet Connectivity

Wondering about what the title says? Well, that’s true. You can now access internet on your Android device without having internet connectivity through WiFi, 3G or Edge. Cosmos Browser, a new application that just made its way to the Google Play Store today makes it possible. Cosmos definitely happens to be a milestone in the history of Android as this application has a cool functionality that gives you access to your important web contact instantly without requiring you to go online.  The application is in early testing stages and is expected to contain a lot of bugs, but the purpose it serves for now explains it all.

The application works using your carrier’s SMS.  Once you’ve installed this application, you need to put the URL of the website you want to access in Cosmos Browser. As soon as you put it and proceed, Cosmos will generate an SMS in order to connect to that website’s servers and it will remove all the images / heavy content from the web page and send it back to your device in the form of an SMS. Cosmos compresses the content in the sms and creates a web page to give you the appropriate web browsing experience. You only need to have a working SMS plan, nothing else is required.Cosmos

As mentioned, the application is in development stage and there’s a chance of bugs, it may not work to its full potential. As more and more users come across the application and they report the bugs to the developers, great improvements will arrive. From what we can see right now, this seems to be a great concept. If you want to test this application, you may grab the beta version from the Google Play Store for free and test it out.

Make sure that you support the developers as well. Let us know how your experience goes with the Cosmos Browser and what do you think about this great pioneering application.

Here’s How to Change the Keyboard in iOS 8

0
Here’s How to Change the Keyboard in iOS 8

Since Apple has released iOS 8 and iPhone 6 few days back with iOS 8 come third party apps option. In iOS 8 Apple added a new feature in which you can download a third party keyboard and use it as your default. Finally, Apple is opening doors to developers and frankly its a good sign. Well right at the moment you only have Swiftkey is the only one real to use and today I’ll explain how to change the keyboard in iOS 8.

Keyboard-Featured-Image


Here’s How to Change the Keyboard in iOS 8 Guide:

  1. Open App Store on your iPhone.
  2. Search for iOS 8 Keyboard.
  3. Choose SwiftKey for the list.
  4. Now open settings.
  5. Tap on General from the settings.
  6. Now select keyboard.
  7. Tap on Keyboards.
  8. Now tap on Add new keyboard.
  9. Select Swiftkey from the list.
  10. Allow full access to Swiftkey.
  11. Open messaging app.
  12. Tap on the world icon on your current keyboard.
  13. A pop-up will appear choose Swiftkey.
  14. All done when ever you want to type Swiftkey will appear as a default keyboard.

How To Install TWRP Recovery On Sony Xperia Z3 D6653, D6633, D6603 & Root It

How To Install TWRP Recovery On Sony Xperia Z3 D6653, D6633, D6603 & Root It

Sony unveiled its latest flagship, the Xperia Z3 on 3rd of September, 2014. The device is a minor upgrade over the Xperia Z2, there aren’t any hardware changes but there surely is a number of new features packed up inside the device’s software. On the front there’s a 5.2 inches  full HD screen, a 20.7 MP shooter is fixed at the back and a 2.2 MP on the front. There’s a 3 GB RAM on the board. Xperia Z3 is powered up with Qualcomm’s Snapdragon 801 Quad Core CPU clocked at 2.5 GHz accompanied by Adreno 330 GPU. Out of the box, Xperia Z3 runs on Android 4.4.4 KitKat.

Well, I guess that was enough to give you guys a flashback of the Xperia Z3. In case you’re planning to get your hands on this new beast by Sony, you would like to unleash the true power of your device as soon as you start exploring it. The very thing that will let you do so is the root access and to go beyond the boundaries a little further, you will need a custom recovery as well. Thanks to XDA senior member monx who just came up with Adv Stock Kernel for the Xperia Z3 that will let you load TWRP 2.8 recovery on your device and you can root it once you have the recovery running on it. That means you won’t have to wait once you get your device, the device isn’t available around the world as yet and the recovery and root access are already available, this definitely happens to be a great development. Before you start looking out for the methods to install recovery and gain root access, we’ve already done this job for you. xperia-z3-gallery-04-1240x840-fe27e87def32fabb3a19331b9126f00b

As you move forward in the proceeding post, you will come across a comprehensive guide that will help you to install TWRP 2.8.0.1 recovery on your Sony Xperia Z3 D6653, D6633 and D6603 and you will be able to root your device as well. Let’s go through the instructions now and get across the wall now.

Install TWRP Recovery On Sony Xperia Z3

Early Preparations:

1. This is only for Sony Xperia Z3 D6653, D6633, D6603!

This guide  is only for the devices mentioned above. Make sure that your model number matches the one listed above. To do so, go to Settings > About Device on your device and see your model number. Flashing these files on any other device will result in bricking it so make sure that you meet this requirement first of all.

2. Battery should be charged at least over 60%.

Make sure that your battery is charged enough to complete the flashing process. In case your battery is low and your device goes dead during the flashing process, you may end up soft bricking your device as it won’t complete the flashing process.

3. Backup everything!

Just to be on the safe side, you may consider backing up each and everything from your Android device. This is highly recommended so that in case anything goes wrong, you still have the access to all of your data and you can restore it immediately. You may backup everything as listed below.

4. Enable USB Debugging Mode on your device.

Enable USB debugging mode on your device. To do so, tap settings>developer options>USB debugging. If you can’t find developer options in settings, then tap settings > about device and tap “Build Number” for 7 times and you’ll get em’ activated under settings.

5. You must have Android ADB & Fastboot drivers installed

Android ADB & Fastboot drivers are essential for flashing Adv. Stock Kernel. That’s how you will load the .img file on your device. You may install em’ using the full guide here or use the Minimal ADB & Fastboot guide.

6. Your device’s bootloader must be unlocked

You can only flash Adv. Stock Kernel if your device has an unlocked bootloader. You can read all about unlocking your device’s bootloader and unlock it using this guide. Make sure that you do this carefully.

7. Use OEM data cable to establish a connection.

Make sure that you use the phone’s original data cable to establish a connection between your phone and the PC. Using a different data cable might result in interrupting the firmware installation.

Disclaimer: The methods involved in flashing custom roms and rooting your phone is highly custom and may result in bricking your device, and has nothing to do with Google or the device manufacturer that is SONY in our case. Also rooting your device will void its warranty and you will be no longer eligible for any kind of free device services by the manufacturers/warranty providers. In case of any mishap we may not be held responsible. Follow these instructions to the letter to avoid any mishap or bricking. Make sure that whatever you do, you are doing it at your own responsibility.

How to Install TWRP Recovery On Sony Xperia Z3

Download Advanced Stock Kernel according to your device:

  1. Download  Advanced Stock Kernel.img from above.
  2. Place the downloaded .img file in the Minimal ADB & Fastboot folder that you created using our ADB & Fastboot Quick Setup Guide.
  3. If you are using Android ADB & Fastboot full package, you can place the downloaded Recovery.img file in the Fastboot folder or in the Platform-tools folder.
  4. Open the folder where you placed the Boot.img  file. E.g Minimal ADB & Fastboot or Fastboot or Platform Tools.
  5. Press and hold the shift key and right click on an empty area within the folder, and click on “Open Command Window Here”.
  6. Turn off your Xperia Z3 completely.
  7. Now press the Volume Up Key and while keeping it pressed plug in the USB cable.
  8. You should see a blue light in the notification light of your phone, that means your device is now connected in Fastboot mode.
  9. Now type the following command:

     fastboot flash boot [filename].img

  10. Hit Enter and it will quickly flash TWRP recovery in your Xperia Z3.
  11. Once recovery is flashed, now issue this command

    “fastboot reboot”

  12. Your device will reboot now, as soon as you see the Sony logo,  and the pink LED, press Volume Up & Down Key simultaneously to enter TWRP recovery.
  13. Congrats! You should now see the custom recovery.

How To Root Your Xperia Z3

  1. Download latest SuperSu.zip file.
  2. Copy the downloaded .zip file to your phone’s sd card.
  3. Now boot your device into recovery mode using the step 12 explained above.
  4. Once you’re in TWRP recovery, tap “Install > locate SuperSu.zip” and flash it.
  5. One done flashing, reboot your device and find SuperSu in app drawer.
  6. That’s all. You can install “Root Checker” from Play Store and verify root access.

That’s all. If you have any queries regarding this guide, make sure that you drop em’ in the comment box below. We will definitely get back to you as soon as we receive em’. Thank you all.

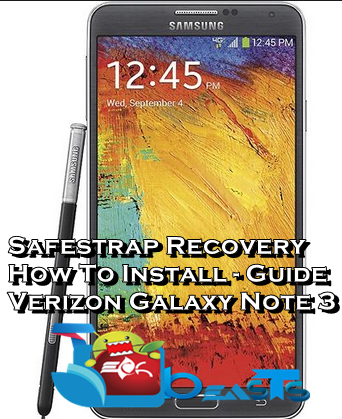
How To Install Safestrap Recovery On Verizon Galaxy Note 3 SM-N900V

How To Install Safestrap Recovery On Verizon Galaxy Note 3 SM-N900V

When it comes to carrier branded smartphones, one of the biggest hurdles is to get across the boundaries and obtain root access on these device and get a custom recovery working on these devices. The only reason is, these devices come with a locked bootloader and the carriers do not allow getting across the bootloaders easily. Verizon and At&t happen to be the toughest carriers in this regard, this can be easily presumed from what we saw with the Galaxy S5, it took months for developers to get root access on the device, there was a great bounty as well for the milestone. The same root application rooted Verizon Galaxy Note 3 as well.

That’s a matter of past now, since we got the root access, this paved way for great developments and Safestrap Recovery by XDA recognized developer Hashcode is a result of that. Custom recoveries usually need a device with an unlocked bootloader, but Safestrap doesn’t require touching the bootloader of your Verizon Galaxy Note 3. Basically, Safestrap recovery is the modified form of TWRP 2.7 recovery and has a touch interface. It doesn’t touch the primary system of your device and it flashes the Safestrap on the series of virtual ROM slots located on the internal emmc area/sdcard of your device, you may read all about Safestrap recovery on the developer’s thread. For now, our goal is to get this Safestrap recovery running on our beloved Verizon Galaxy Note 3 SM-N900V.  Just in case you’ve been looking for a method that will lead you to the successful installation of Safestrap recovery on your Verizon SGN 3, you may follow this guide carefully and get it done.

Verizon Note 3

Here are the early preparations

Here are the early preparations

1. This guide is only for Samsung Galaxy Note 3 SM-V900!

Make sure that your device is exactly as mentioned above. To check out what device you have, go to Settings > More/General > About Device or Settings > About Device and match the model number. Be careful about the device model number, flashing a file on a device not listed here might result in bricking it up.

2. Your device must be rooted & have Busybox installed

Make sure that your Verizon Galaxy Note 3 SM-V900 is rooted, you can root your device using this guide. Also make sure that it has Busybox installed on it. Just in case you don’t have Busybox installed, you can grab it from the Google Play Store and install it.

3. Battery should be charged at least 60%!

Your device’s battery shouldn’t be weak. In case your device goes dead during the flashing process, your device may get soft bricked and you might be in need of flashing stock firmware and that will ultimately result in wiping up your data as well. So, make sure that you charge your device before you start the flashing process.

4. Backup everything!

Just to be on the safe side, you may consider backing up each and everything from your Android device. This is highly recommended so that in case anything goes wrong, you still have the access to all of your data and you can restore it immediately. You may backup everything as listed below.

  • Backup Media – Copy your files manually to your PC or Laptop.
  • Titanium Backup – If already rooted, use Titanium Backup to backup all of your apps, system data and other important content.

How To Install Safestrap Recovery On Verizon Galaxy Note 3 SM-N900

  1. Download Safestrap APK.
  2. Download the APK directly to your phone or copy it to your phone from your PC.
  3. Now on your phone, go to Settings > General > Security > Allow Unknown Sources.
  4. Once allowed, locate the Safestrap APK and tap it to install it.
  5. Proceed and finish the installation.
  6. Now open the Safestrap application from the app drawer.
  7. Now tap the “Install Recovery” button and let it do the job.
  8. Once installed, it will display the message “installed”.
  9. Now reboot your device using this application, as soon as your device boots up, you will see a splash on the screen. While this happens, press the Menu key on your phone in order to enter Safestrap recovery.