Home Blog Page 411

How To Jailbreak iOS 8-8.1Untethered Using Pangu Jailbreak Tool
0
How To Jailbreak iOS 8-8.1Untethered Using Pangu Jailbreak Tool

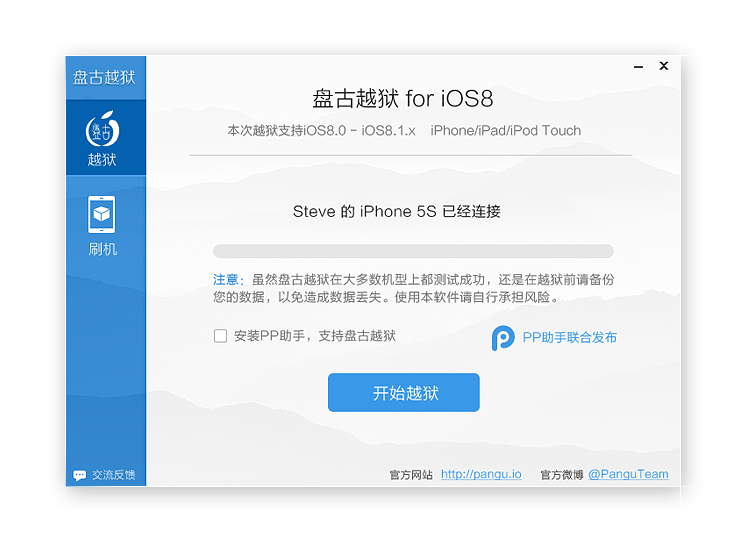
Good news for iPhone user who loves to Jailbreak their devices, Pangu has released iOS 8 and iOS 8.1 Jailbreak. Well it was real quick and first one to release the iOS 8 – 8.1 Jailbreak. You can Jailbreak iPhone 6 and iPhone 6 Plus using Pangu tool, they have tested it on all the iOS 8 and 8.1 Compatible devices.

pangu2_ui

Compatible Devices:

  • iPhone 6, iPhone 6 Plus, iPhone 5s, iPhone 5c, iPhone 5 and iPhone 4s
  • iPad Air, iPad 4, iPad 3 and iPad 2
  • Retina iPad mini, 1st gen iPad mini
  • 5th generation iPod touch

Pangu add the following details on their Website:

  • Preparations for jailbreak.

Backup before using pangu jailbreak tool. Although this tool is tested successfully on most devices, we still hope you backup your data to avoid data loss. Please turn off the screen password lock and close the “find my iPhone” feature in the iCloud settings before jailbreak.

  • the firmware upgraded via OTA may cause failure.

The firmware upgraded via OTA will have a lot of influence factors. If you have several failed attempts, Please try to download the latest firmware and restore your iOS devices. In addition, Pangu (iOS 8) tool now add a function to restore iOS devices and execute automatic activation, you can try click the jailbreak button after restoring, and Pangu will automatically activate your device and do jailbreak.

  • “Storage capacity is almost full.”?

This is because the jailbreak program will write important files into the system directory and cause alarm, it will not affect the result. When the Cydia be compatible, click on the Cydia will launch the directory moving process.

  • About afc2?

Because Apple made a lot of adjustments to the system, you cannot use afc2 plug-ins at present.

  • Do not delete “com.apple.mobile.softwareupdated.plist”

Do not delete “com.apple.mobile.softwareupdated.plist”, otherwise it will cause system failure.

  • Processing method of jailbreak failure

Please enable the Airplane mode and close Wifi and then try to jailbreak, or if not successful, please restart your devices and then try. If it still fails, please use the Pangu restore function and jailbreak again.

Download Pangu Jailbreak Tool for iOS 8 and 8.1.

 How To Jailbreak iOS 8 and 8.1Using Pangu:

Step 1: First download Pangu for your Mac or Desktop.

Step 2: Now plugin in your device running iOS 8 – 8.1.

Step 3: Open Pangu on your Mac or Desktop. Wait for device to be detected.

Step 4: Click on the blue button.

Step 5: Now follow all the steps show on your screen.

Step 6: Once all the process are done Jailbreak will automatically start.

Step 7: After a few minutes Pangu will ask you to open the Pangu app icon on your iPhone.

Step 8: Tap on Pangu to launch the app and tap continue.

Step 9: During the process pangu will ask you to unlock your device after it reboot.

Step 10: All Done.

As it is stated in Pangu Web Site that there will no Cyida in Pangu Jailbreak for iOS 8.1. Well tell you how to install Cydia in our next guide.
Android 5.0 Google Keep 2.4.12 apk Android direct download

0
Android 5.0 Google Keep 2.4.12 apk Android direct download

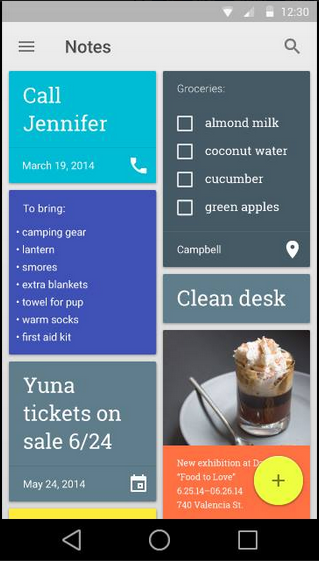
Now that Google has announced Android 5.0 all the stocks apps are getting updated. A few hours back we have added Gmail new material design apk and now i am adding Google Keep 2.4.12 apk extracted from Android 5.o stock apps. Google Keep come by default in Android devices so when you’ll receive Android 5.0 update all the new updated stock apps come along with it. But if you cannot wait for Android 5.0 update then you can download Android 5.0 Google Keep 2.4.12 apk from the following links.

gk1

Main Features of Google Keep 2.4.12:

• Add notes, lists and photos to Google Keep. Pressed for time? Record a voice memo and Keep will transcribe it so you can find it later.

Find what you need, fast
• Color code notes to quickly organize and get on with your life. If you need to find something you saved, a simple search will turn it up.

Always within reach
• Keep works on your phone, tablet and computer. Everything you add syncs across all of your devices so your thoughts are always with you.

The right note at the right time
• Need to remember to pick up some groceries? Set a location-based reminder to pull up your grocery list right when you get to the store.

Whats New:

  • Android Wear
  • Take a note, see reminders, and view and check off lists on Android wearables.
  • Bug fixes and performance improvements.

Download Android 5.0 Google Keep 2.4.12 Android APK:

Download Android 5.0 Google Keep 2.4.12 apk. [ Link 1 ]

How To Install Google Keep 2.4.12 on Your Android Devices:

  1. Copy the downloaded APK file to your phone.
  2. On your Android device, go to settings > security > unknown sources > allow.
  3. Now locate the APK file on your phone and tap it to start installation.
  4. Complete the installation, once done, start the application from the app drawer.
  5. Follow the on-screen instructions.

[ Guide ] [ iOS 8.1 ] How to Setup Apple Pay in iOS 8.1

0
[ Guide ] [ iOS 8.1 ] How to Setup Apple Pay in iOS 8.1

When Apple released iPhone 6 and iOS 8.1 they have added a bunch of new features. The one i like most is Apple pay this service is same like Google Wallet. The best is that now we don’t have to carry our cards with us after successfully setting up Apple pay all you need is use your device as a credit card. In the following guide i’ll tell you how to step up Apple Pay in iOS 8.1.

Passbook_ApplePay_JPEG_800

How to Setup Apple Pay in iOS 8.1:

  1. First Tap Settings icon on your iPhone 6.
  2. From the list tap on Passbook & Apple Pay.
  3. Tap on Add Credit or Debit Card.
  4. Select Add a new Credit Card.
  5. Now add your card credentials.
  6. Read and Accept the Apple Pay terms.
  7. After tapping on Agree a location Pop-up will appear. Tap on Allow.
  8. Now that you have added information of your card. Now you have to verify it through what ever you have selected in your security options.
  9. When you receive the confirmation Passcode head back to Apple pay.
  10. Now select the card you have added.
  11. You’ll see a verification message on your screen tap on enter code.
  12. Enter the verification code that you have received from the bank.
  13. Now tap on done.

Here you go if you had followed all the steps carefully then your card is added and activated. If you face any kind of issue regarding this guide you can tell me in comments.

Check out the Video Guide.


Video Credit: theunlockr

How To Backup EFS On Samsung Galaxy Note 4

0
How To Backup EFS On Samsung Galaxy Note 4

Galaxy Note 4 is finally making its way to different markets all around the world. The device is a true beast and happens to be Samsung’s most powerful device ever. Atop we have a 5.7 QHD display having a resolution of 1440 x 2560 pixels accompanied by 515 ppi. Under the hood there’s a 3 GB RAM, internal storage begins at 32 GB, an external SD card slot can be found on-board as well. Samsung has powered it up wither with Snapdragon 800 CPU or it’s very own Exynos 5433 chipset, a massive 3220 mAh battery can be found that makes this device alive. Out of the box, Galaxy Note 4 can be found running on Android 4.4.4 KitKat having Samsung’s latest TouchWiz UI.

These specifications make the Galaxy Note 4 a very nice device to play with across the beyond the boundaries. And if you happen to be an Android power user as well, you probably won’t be able to stop yourself from unleashing the real power of Samsung’s latest iteration in the Galaxy Note series. Before you start the rooting, flashing and tweaking stuff, the very first thing you should do once you get your device is, you must backup the EFS partition of your device. Downgrading the firmware on your device, flashing a wrong file with an invalid kernel or a wrong bootloader, or flashing any file that is not supported by your device can result in messing up your EFS. EFS partition includes all the information of your device’s radio and modem, the imei number is written on this partition and if some how you mess up this partition, you will end up getting a generic IMEI or a you will simply get a nulled IMEI. As a result, your device will become a gadget without a phone feature. You won’t be able to make any calls, you won’t be able to send any sms messages and same goes for other connectivity parameters on your device. You may read all about EFS here.Samsung-Galaxy-Note-4

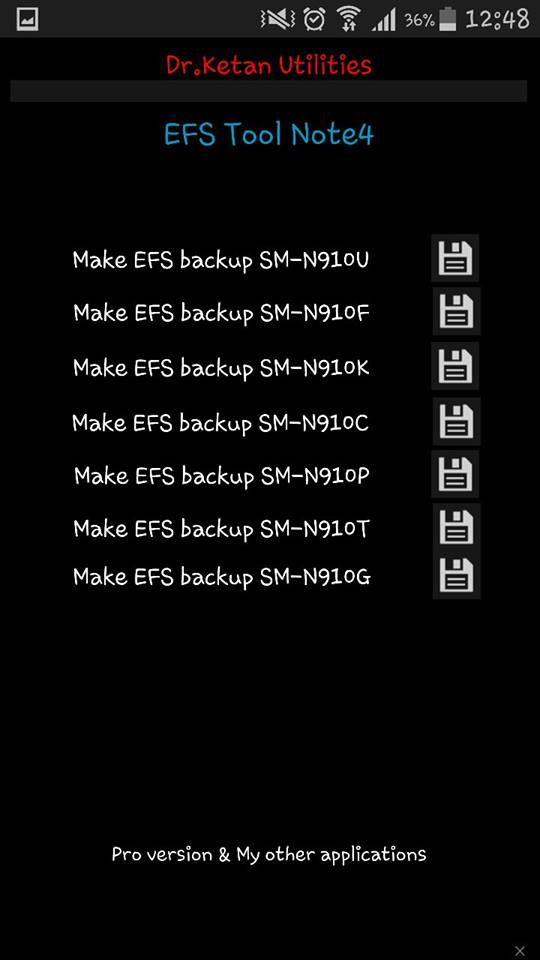
Before you start looking for a method to backup EFS on your newly owned Galaxy Note 4, our beloved friend Dr Ketan has already come up with a tool that backups the EFS on Samsung Galaxy Note 4 SM-N910U and SM-N910F, SM-N910C, SM-N910S, SM-N910K, SM-N910H, SM-N910G. The tool is a simple little application, all you need is, you need to install it on your rooted device and tap the button to do the magic and you’re all safe to tweak your device the way you want. Let’s learn the method now.

How To Backup EFS On Samsung Galaxy Note 4

  1. Download EFS Tool Note 4 and install it on your rooted Galaxy Note 4 | Play Store Link
  2. Once installed, open the application from the app drawer.
  3. Long tap the button infront of your device model number.
  4. It will ask for SuperSu rights, grant and it will quickly backup your EFS.
  5. It will create a backup folder on the internal SD named as MyEFSNote4.
  6. You can use the same application to restore the EFS backup.
  7. That’s all.

10749565_10204551535921034_536587879_n 10752106_10204551535881033_1417350195_n 
 That’s all. Let us know how this tool works for you. In case you face any problems, make sure that you drop your query in the comment box below.

Skype Qik: Group Video Chat 1.2.0.3772-release APK

0
Skype Qik: Group Video Chat 1.2.0.3772-release APK

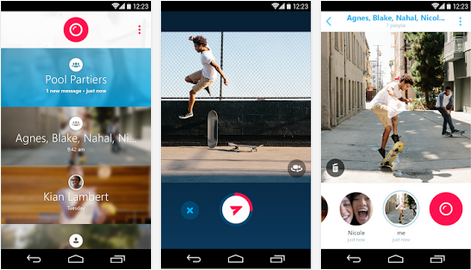
With Skype Qik, Microsoft-owned Skype seems to be taking communication to a new level. One of its-own-kind, this application has some features that you might have never seen any such application before. Skype Qik allows you to pick up some contacts of yours and create a quick group on this applications and go online with them in a group chat, whether it’s a video chat or a conversation. Just in case you’re not ready for a quick response, you can pre-record Qik Fliks and share em’ with your friends right away. Skype Qik seems to have some ideas grabbed from snapchat, the application automatically deletes your messages from the conversation after two weaks, moreover, you can delete your message by selecting it and it will vanish from the conversation as well.

Skype Qik focuses more on videos, rather then photos and text messages. The app requires no login ID and password, all you need is a working internet connection and you need to have some friends up to go live with in a group. Skype Qik seems to be working pretty nice and in a very short span the app has become a great choice for thousands of users. Although you can install this application for free from the Google Play Store, but just in case you fail to find it in the Play Store or the app isn’t available in your region yet, you might have to use an APK file to install it in your phone. Before you start looking for it, we’ve already done this job and pulled out Skype Qik: Group Video Chat 1.2.0.3772-release APK for you. Let’s go through the app description by the developer now and then head towards the download and install guide.Skype Qik

• Create groups in a flash: grab a bunch of friends from your phone’s address book and start a private chat.
• Pre-record and send video clips (Qik Fliks): can’t respond right away? Thumbs-ups, smileys and more, starring you.
• Erase your message and it disappears from the conversation.**
• Keep it fresh—messages are automatically erased from Qik after two weeks.
• Start a conversation any time—no login, usernames, or passwords needed.

Skype Qik: Group Video Chat 1.2.0.3772-release APK

  1. Download Skype Qik 1.2.0.3772 APK.
  2. Copy the downloaded APK file to your phone.
  3. On your Android device, go to settings > security > unknown sources > allow.
  4. Now locate the APK file on your phone and tap it to start installation.
  5. Complete the installation, once done, start the application from the app drawer.
  6. Follow the on-screen instructions and have fun on Skype Qik!

How To Play Youtube Videos Having Your Android Phone’s Screen Turned Off

0
How To Play Youtube Videos Having Your Android Phone’s Screen Turned Off

The best place to look for your favorite music, any tutorial, any method, movies or whatever you’re looking for, happens to be Youtube. Google owned Youtube has revolutionized the world and there is no doubt in that, Youtube has become an essential too for the people, an essential source of entertainment and a lot more it can do to help the people all around the globe. If you happen to be a Youtube freak, you might be staying connected all the time to Youtube listening to your favorite music on your Android device, but the only thing that might annoy you is, while Youtube is turned onn on your Android, it eats up a lot of battery putting all the load on your device’s display. You can popout Youtube videos and let them play in a separate small window, but even that will stop playing the video if your device’e screen is turned off.  In this case you would love to find a work around and use youtube while your phone’s screen is turned off. This will not only save your phone’s battery life, but will also make Youtube work like a music player or Soundcloud’s player.

While we’re using Youtube’s official application, we can only talk or think about such a feature knowing that there isn’t any such option available in it. This seems to be a much needed feature and keeping it in view, theos0o, who happens to be a Senior Member at XDA developers has modified the Youtube application according to his needs, and this feature has come up as a result. The modified version of Youtube is capable of playing Youtube videos in background while your device’s screen is turned off. Let’s go through the method to install this modified version of Youtube and get the videos running in background on your Android device.YouTube

How To Play Youtube Videos Having Your Android Phone’s Screen Turned Off

  1. Uninstall the previously installed official Youtube application, you need root access to do so. Once you’ve rooted your Android device, install any file manager / root explorer and remove the Youtube application from /system/app/Youtube.apk, also remove any updates from /data/app. Alternatively, you may use Root App Uninstall to remove the stock Youtube application. Also, make sure that your Android device is capable of 720P/1080P decoding.
  2. Now download the modded Youtube APK.| Youtube Downloader
  3. Copy the APK file to your phone.
  4. Locate the APK file on your phone and install it.
  5. Start newly installed Youtube from the app drawer.
  6. Go to Advanced settings and select “Screen Off Playback”.
  7. Now play any video and check it out by turning of your screen.
  8. That’s all.

How To Speed Up 3G On Your Android Smartphone

0
How To Speed Up 3G On Your Android Smartphone

Everyone probably loves to surf the internet at the maximum available speed, but at times, you’re network carriers are not fair enough.

You might not be able to access internet on your GSM Android device using your cellular data/3G data at its fullest. Apparently, there isn’t any workaround available for this, you might have to depend on your carrier and rely on your network’s 3G strength, but since Android is already there, you can expect something out of the way for sure.

Thanks to XDA senior member bahathir , who discovered a very nice hack that will help you to get across the corner by speeding up your 3G connection’s speed and unleash the internet.

The hack includes the modification of the internet configuration file placed in the root directory of your Android device.

By removing the line #18 that has “novj” code, it activates “Van Jacobson TCP / IP header compression“, that doubles up the 3G connection speed of your device immediately.

The hack is reported to be working for a number of users, but it depends if your network provider supports this feature or not. In case it doesn’t support, you might not be able to find any changes in your 3G connection’s speed.

The file has been uploaded by bahathir, you don’t need to edit the file in your device, you only need place the Options.7z file attached in the early preparations below. Let’s go through the guide now.android-internet

How To Speed Up 3G On Your Android Smartphone

Here are some early preparations

  1. Your device must be rooted. Find the guide to root your device here.
  2. Download Options.7z file
  3. Install Root Explorer or ES File Explorer on your Android device.

Speed Up 3G On Android

  1. Download the Options.7z file and unzip it.
  2. Connect your Android device to your PC and copy the Options file to your phone, on a location you won’t forget.
  3. Now open Root Explorer or ES File Explorer, give it root privileges.
  4. For ES File Explorer, you will have to activate the Root Explorer from Menu first.
  5. Now locate the options file in Root Explorer or in ES File Explorer
  6. Long press the Options file and select Copy.
  7. Now go to the location System/etc/ppp within the root explorer.
  8. If you’re using Root Explorer, tap the Mount R/W button atop first.
  9. Now Paste the Options file here in the ppp folder.
  10. Now you need to change the permissions of the options file, for root explorer long top the options file, now select Permissions, and select “r-w-r-r”.
  11. 10735628_10204450348511412_942929992_n10726235_10204450348591414_779260417_n
  12. For ES File Explorer, long tap the options file, now go to Properties > Edit Permissions > deactivate the options in Write, Set ID, Set UID, Stick Bit, and activate all others.
  13. Now tap OK.
  14. Phewww! You’re done. Now connect your 3G and perform a speed test using Speedtest.net application for Android.

Just in case this mod doesn’t work for you, you may simply delete the Options file and it will revert back your 3G configuration to the previous state. Keep in mind that the method isn’t guaranteed to work, it works with the carriers that allow this tweak. Let us know if it worked for you or not.

How To Add Emoji Support In Your Xperia Device Running Jelly Bean

0
How To Add Emoji Support In Your Xperia Device Running Jelly Bean

Though it was a little disappointment, learning that iOS has this thing for a long time and the Emoji Support for Android arrived in the Kit-Kat update. However, the Android world is not restricted as iOS, so if they don’t give something in Official Support, we get it by the 3rd Party one. Like if you own a Sony Xperia device running Android 4.1/ 4.2 or 4.3 Jelly Bean, and looking for a way to add Emoji Support in it, we got you covered as the XDA Member, niaboc79 , has found a way to add Emoji Support in Xperia device keyboard. The Process is not that easy, so if you are familiar with Apktool working then proceed ahead, otherwise, look for an Android 4.4 Kit-Kat Custom ROM for your device. We got a whole Custom ROM section just for this purpose, do give it a visit.

The Process goes like this, you will first decompile the Xperia Keyboard apk, downloaded from anywhere, decompile it using the APktool, go to the Smali section and add a few lines provided by the developer, recompile the apk and install it, the whole process is small and you’ll see your modified Keyboard with Emoji support ready for you to be used, without further ado, let’s begin.

mobile-300x156

 How To Add Emoji Support In Xperia Keyboard:

  • Download ApkTool (Decompiling method is there too)
  • Download Xperia Keyboard Apk
  • Decompile the Apk using Apktool
  • Now Open smali/com/sonyericsson/textinput/uxp/configuration/TextInputRequirements.smali
  • Search for this Method:

method private getSymbolsType(Landroid/content/res/Resources;)Ljava/lang/String;

  • In this Method, Replace the Word Smily by Emoji Like this:

.method private getSymbolsType(Landroid/content/res/Resources;)Ljava/lang/String;
.locals 2
.param p1, “res” # Landroid/content/res/Resources;

.prologue
.line 222
sget v0, Landroid/os/Build$VERSION;->SDK_INT:I

const/16 v1, 0x13

if-lt v0, v1, :cond_0

.line 228
const v0, 0x7f0a0003

invoke-virtual {p1, v0}, Landroid/content/res/Resources;->getString(I)Ljava/lang/String;

move-result-object v0

.line 230
:goto_0
return-object v0

:cond_0
const-string v0, “emoji”

goto :goto_0
.end method

  • Recompile and Sign the Apk.
  • Now Copy the Apk to your device.
  • Install it like any normal Apk.
  • Enjoy

Source: XDA

How to get rid of Windows 10 Home folder [ Guide ]

0
How to get rid of Windows 10 Home folder [ Guide ]

Windows 10 preview edition is out most of us have installed it to see what new features are coming. We all know its a beta version so we will face alot of bugs, but there is a new feature in Windows 10 ( home folder ). Home folder shows a list of  File Explorer Favorites, folders that you frequent, and your recently-accessed files. I don’t think this a good thing so I though to get rid of Windows 10 Home folder. In the following guide i’ll explain you how to remove Windows 10 Home folder.

Windows_10_Home_folder_lede

How to get rid of Windows 10 Home folder:

  • First of all open Windows registry by going to search bar and write “regedit”.
  • Now click on regedit.exe.
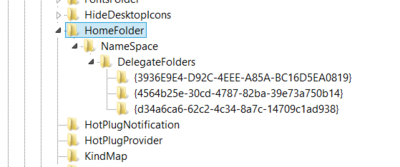
  • Now Nevigate to HKEY_LOCAL_MACHINE\SOFTWARE\Microsoft\Windows\CurrentVersion\Explorer\HomeFolder\NameSpace\DelegateFolder.

HomeFolder_Registry

  • Click on Home Folder.
  • You’ll see each subkey in the DelegateFolders, represents one of the sections in the Home Folder view.

Folders

  • Now right click on the folder whom you want to delete.

DeleteHomeFolder1

  • Confirm your selection and after that you won’t see that content in the home folder.

Image Credit: Wpcentral Source: Neowin (forums);

How To Spy On Your WhatsApp Contact’s Last Seen With WhatsDog

22
How To Spy On Your WhatsApp Contact’s Last Seen With WhatsDog

323985_462685727083559_766208862_oFacebook acquired the world’s most popular social chat app, WhatsApp few months back and the very first thing Facebook did was the addition of some features including privacy. Many of the users wanted to have the privacy settings on WhatsApp so that they can protect their profile picture, WhatsApp status, last seen status etc. Some third party applications allowed the users to restrict their last seen, but that was quite manual and those apps always turned off the WiFi whenever the user  connected WhatsApp. With the roll out of WhatsApp privacy settings, it’s much easy for the users to hide their last seen status, they can show it to only those who have saved their number, they can hide it from everyone, and they can show it to everyone. Now that this feature is there, it might freak out some people, specially when you’ve to talk to someone keeping a check on their availability or you just talk too much with someone whether it’s some friend of yours or your boyfriend or girl  friend, and he/she suddenly hides the WhatsApp last seen status, its going to freak you out when you can’t catch them online, and they just give you this lame excuse that they never came online and they never saw your message while actually they did see it and ignored by choice. What would you do in such a case? you can’t tell the other person, you can’t blame him/her until and unless you find him online, otherwise you’re never going to know when that person came up on WhatsApp and when was the last time your message was seen.

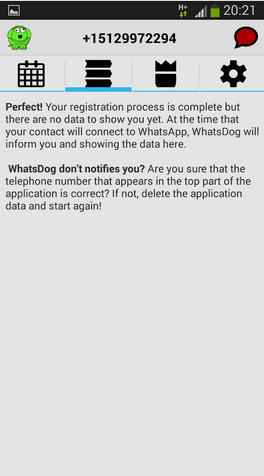
It might frustrate some people, but since we live in a too advanced era, nothing is hard to tackle down and something new and interesting comes every second and when we specifically talk about Android, we have to forget the impossibilities and limits. One such thing has been done for WhatsApp as well. A new application, named as “WhatsDog. Your WhatsApp Watchdog”  by Second Lemon allows the users to spy on the activities of their WhatsApp contacts. WhatsDog stays connected in the background and intelligently detects your desired contacts activity, it records when the person came online, for how long he stayed online and when he/she left WhatsApp, in short, it not only tells you the last seen time, it tells you every single thing about that person’s online span. All it requires is, you need to add the number you want to spy and WhatsDog will do the job. WhatsDog displays a very nice calender which has a record of your contact’s activities with the date and time. You can enable the notifications and as soon as it detects your desired contact’s activity, a notification will pop up in the notification bar. WhatsDog comes with a plethora of features that you may try out once you start using this application. This might be best solution to get rid of any lame excuses if you’re coming across and handle the situation nicely.

Let’s get back to our topic. As you move forward, you will come across a guide that will explain how you can use WhatsDog to spy on your contact’s activities and how you can keep a track of a person’s last seen status, it doesn’t matter whether the person has hidden it, or you’re simply blocked, or the person is using and Android device or an iPhone. WhatsDog will still work and inform you. Let’s go through the features and use of this application now.

WhatsDog features:

Why should I use WhatsDog?
– No more excuses
– Because your boyfriend/girlfriend won’t be able to lie anymore
– Because you will be capable of monitoring if he/she went out yesterday
– Because you’ll be alert: you’ll know when WhatsApp is opened by your contact

Prominent characteristics:
– You can sign in with multiple Google accounts.
– WhatsApp connections monitoring of the number you choose.
– A notification will be sent to your device at every connection of the monitored number.
– You’ll find a direct access button to WhatsApp in WhatsDog.
– List of all the recent WhatsApp connections/disconnections .
– There’s going to be an intuitive and simple calendar with WhatsApp history connections/disconnections.
– WhatsDog is going to assess the WhatsApp level of addiction of your contact and a statistical overview of the connections/disconnections.
– Configure the settings in order to silence notifications.

How To Spy On Your WhatsApp Contact’s Last Seen With WhatsDog

  1. Download and install WhatsDog on your Android device.
  2. Open WhatsDog from app drawer
  3. Select / add the contact, of whom you want to monitor the last seen status / activity.
  4. Now wait for WhatsDog to get activated.
  5. Once done, you will start receiving activity notifications.
  6. You can explore WhatsDog settings and set the notification tones and other options.
  7. You can find the calender button atop of this application that has the history of activities.
  8. That’s all.

WhatsDog1 WhatsDog2 WhatsDog3 WhatsDog4
That’s all with the use of WhatsDog. We hope that you will find this application useful. Just in case you got any queries, drop em’ in the comment box below.

Nexus 6 HD Wallpapers For Free – Download Here

0
Nexus 6 HD Wallpapers For Free – Download Here

Nexus 6 is released 3 days ago with contribution of Motorola and this device is the best out there. Nexus 6 display is Quad HD that means it way awesome than the other devices in the market. I love wallpapers for devices and I am sure Nexus 6 will the best among others so that’s why I’ve collected Nexus 6 HD Wallpapers. Download all of these wallpapers for free.

You can also see my Wallpaper collection for other smartphones in our Gallery . Visit Here

Nexus 6 Wallpapers

Nexus 6 HD Wallpapers For Free

Download Final iOS 8.1IPSW Firmware – [ Direct Links ]

0
Download Final iOS 8.1IPSW Firmware – [ Direct Links ]

iOS 8 is finally here and we all know Apple, like what they did with iOS 6, one can always expect that if iOS 8 won’t spread like they think it will, they will force everyone to upgrade their device to iOS 8 by eliminating its support at back end, thus disabling you people to use iTunes and other official stuff. However, upgrading from iOS 7 to iOS 8 is completely different than upgrading your device to iOS 7 from iOS 6. iOS 8 has a lot of new things, not new for an Android user as 3rd party apps always has their back, on iOS 3rd party apps is something that is not their at its peek like in Android.

ios 8.1 direct download links

iOS has a lot of new features, SMS relay is pretty good, that if your Mac is near by your iPhone, you can use your Mac to send and receive SMS, which was previously restricted to iMessages. Instant Hotspot, allows you to see the Signal Strength and Battery level within the Wi-Fi drop menu. Apple Pay is there, to help you pay all your bills and purchases with just a Finger scan, the device will be available at stores pretty soon. Furthermore, Camera Roll and iCloud Photo Library is there to give you something new. We are providing you the Direct links to download iOS 8.1 IPSW Firmwares, download and enjoy.

iOS 8.1: