Home Blog Page 412

Download Android L 5.0 Lollipop HD Wallpapers for Android

0
Download Android L 5.0 Lollipop HD Wallpapers for Android

Google has announced their latest OS named as Android L 5.0 Lollipop along with Nexus 6 and Nexus 9. This will be the biggest interface change from Google and i am sure it will be the best OS ever came. Now that new OS is on the way so new wallpapers that means you are getting a lollipop treat from me. Following are the Android L 5.0 Lollipop HD Wallpapers for Android devices. Enjoy !.

dcmvu2pba9q8hmdpr9m6

Android L 5.0 Lollipop HD Wallpapers for Android

Download Android L (Lollipop) Wallpapers

0
Download Android L (Lollipop) Wallpapers

Android L Was announced two days ago by Google an everyone was expecting Android LimePie, however, the L stood for Lollipop and now it is the era of Android Lollipop, that reminds me of the game, Chainsaw Lollipop, where a simple and Burger type girl is killing everyone with a Chainsaw. The Official Firmware will be seen in the Nexus 6 only, which is on hold till the 29th of October, but we already have the developer preview of Android L on both Nexus 5 and Nexus 7 with the updated API Changes. Android L also features some of the new wallpapers too, though they are not that unique, but they are the part of Android L and if you want your device OS to look like Android L, Wallpapers are the first thing that will do that.

As far as the Official update is concern, it will take quite a time, first we have to wait for Nexus 6 and Nexus 9, then it will be rolled out for other devices. The First one to receive this update is sure to be the Nexus 5 and Nexus 4, then we will see it on other OEMs Android devices. However, the element of surprise is still there, who know who will get it first. The Download link is given below, download the Official Wallpapers of Android L and enjoy them on your device.

default_wallpaper

Download Android 5.0 (LolliPop) Wallpapers

How To Transfer Files Between iPhone and Mac Over Wi-Fi

0
How To Transfer Files Between iPhone and Mac Over Wi-Fi

Wires are the part of Old Timers,but, we still need them to charge our electronic devices, the world hasn’t gone that far that they could start charging devices wirelessly. Still I would love to see that time, when people will complain that they are having electric shocks in mid-air, someone else is stealing their power because they didn’t put the password to protect the wireless charging, it would be a fun to watch those moments. However, that time is far away and we have to concentrate on the point that modern technology let us transfer files and other type of data over the Wi-Fi connection, the limitations are there, but more than enough, you don’t need to take your cables everywhere just to transfer data between devices using Wi-Fi connectivity.

At first we saw this feature in Android, Wi-Fi File Transfer Pro, lets you transfer files between Android devices and PC or Mac, no matter how huge that file it, the transfer speed was almost 2MB. no matter how much slow or fast your internet is. All you need was to put the given URL by the app in the Browser and you’ll see everything you have in your Phone in that particualr window where you pasted the URL, from thereon, you can select and upload files or select and download files. The Same Process is now brought in the iPhone, after a long time, though it is better to have something than nothing. We will use WifiTransfer App in this process, cause I found it far useful than any other, in fact that was the only one I found.

How To Use WifiTransfer App:

IMG_1630

  1. Download the App from App Store.
  2. After the installation, Open the app.
  3. Now on PC or Mac, you’ll need modern browser like FireFox, Google Chrome, Safari Works too.
  4. On the Bottom left corner of app, you’ll see a switch.
  5. Tap on it to see a Web Address.
  6. Open the Browser on PC/Mac and type that address.
  7. Now you’ll see the Dashboard of that app to transfer files.
  8. Click on Choose file and once you are done, Tap the Upload button to upload them.
  9. The app will sort the Files itself, you don’t have to go and categorize the files manually.
  10. However, there is no progress bar to tell you the Progress, once the transfer is done, you’ll be notified and that is the only way to know the progress.

How is your experience with the app, do let us know in the comments

Hide Files and Photos In iPhone – How To

0
Hide Files and Photos In iPhone – How To

Surely you can keep your device away from a lot of people, just by putting a Passcode on it, but on iOS that Passcode is of 4 digits only and if anyone sees it, you are done. That person can explore your whole device while you are taking a nap or a bath or not paying attention towards the device. On the other hand, if you have kids who doesn’t know much about your device, and only wants to use it to play games on it, you have some sensitive data saved on your iPhone and don’t want it to be deleted or manipulated in any way, especially by the hands of little ones, then what you need to do is to make sure that these files remain hidden from others, the reason can be anything else that what I mentioned, who know you wanted to hide something from your Girlfriend,who pays close attention to what you do or how you do.

shutterstock_126766460


Credits: shuttershock

The Simplest and easiest way is to upload it to the DropBox, but recently we heard that most of the DropBox accounts were compromised and besides you need an active internet connection to visit DropBox everytime, and you don’t want to feel embarrassed while you want to show someone something good and you can’t simply because you don’t have an active internet connection. In such cases, some of the 3rd party apps comes in handy, now on Android, you’ll find plenty of them, however, on iOS you have the iVault, which is available in both free and paid versions, of course paid version won’t disturb you with ads and pop-ups, while the free version won’t let you go without them. Without further ado, let’s see how we can use this iVault.


How To Hide Data in iPhone:

  • Download, install and launch iVault.
  • Assign a Password and continue, make sure to remember it, otherwise you gotta say goodbye to your Data.
  • Now Create a folder using iVault and Tap the + button.

IMG_1642

  • Now add the Photos and files to that folder.
  • You can even import photos directly after taking them, even from a Bluetooth.

IMG_1641

  • You an even import Files from your computer as this app features that too.
  • Connect your device and PC to the Same Network.
  • Open Browser on your PC.
  • Enter the address that the app is telling you.

IMG_1640

  • Choose the Files you want and Tap Upload to Sync them.
  • The best part is, that the Sync apps will exclusively be seen in iVault folder only, no other app has any access to it.
  • When you no longer need the files to be private, just tap the Share button.

IMG_1658

  • You’ll get the the options where you can share the Data.

Here’s how to fix iTunes Wifi Sync not Working with iOS 8

0
Here’s how to fix iTunes Wifi Sync not Working with iOS 8

Fews days back one our reader contact me and told me that he is facing iTunes Wifi sync not working with iOS 8. Well i didn’t face such issue but now i do so i decided to fix it. I’ve tried alot of methods and after hard work of two hours finally i found a solution. All you have to do is follow all the steps below in order to fix iTunes Wifi Sync not Working with iOS 8.

ios-8-on-iphone-5s-1


How to fix iTunes Wifi Sync not Working with iOS 8:

  1. First of all check that your iPhone is up to date.
  2. Goto Setting on your iPhone or iPad.
  3. Now tap on General.
  4. Tap on Software Update.
  5. Update your device if appears that update is required.

Update iTunes:

  1. On your MacBook Goto Mac Store.
  2. Now Goto updates.
  3. See if there an update for iTunes download and install it.

Now Restart iTunes and all of your devices.

Forget and rejoin your wifi network on iPhone or iPad:

  1. Open your settings on your iPhone or iPad.
  2. Tap on Wifi to open it.
  3. Now tap on the info icon next your connected wifi.
  4. Tap on forget this network and select confirm.
  5. Now reconnect with Wifi.

Forget and rejoin your wifi network on Mac:

  1. Click on WiFi bars on your top of your Mac.
  2. Open Network Preferences.
  3. Now click on advance.
  4. Select the Wifi network you want to forget.
  5. Now click on Minus.
  6. Rejoin the network again.

Reset network settings on your iPhone or iPad:

  1. Open setting on your iPhone.
  2. Tap on General form the settings.
  3. Tap on reset.
  4. Scroll down and tap on Reset Network Settings.
  5. Now type your password.
  6. Tap on confirm that you want to reset network settings when pop-up appears.

Please Share with me your Tips on fix iTunes Wifi Sync not Working with iOS 8 in the comments.

Clear the Google Chrome DNS cache on Windows 7,8,8.1 [ Guide ]

0
Clear the Google Chrome DNS cache on Windows 7,8,8.1 [ Guide ]

Sometimes users complain that they are having problems with the host connection, that they are experiencing some errors in host connection while using Google Chrom or any other browser. The reason is quite simple, it is time for you to flush the DSN cache of your Browser, Domain Name System is just a small databank that stores all the IP addresses of any website you visit or access. The main purpose of this databank is to let you access that IP easily, when the serves changes or they create new servers. When the IP address changes and they change the server, you, sometimes, experience the DNS error. The reason of this error is that you might have accessed that site a lot more times and the Previous IP is saved in the Cache and it is not saving the new one. In such cases, Clearing the DNS Cache comes in handy.

The Process is quite simple and can be done through any of the Browser, whether it is Chrome or Firefox. You can even solve this problem using the command prompt window in Windows 7 or 8, some codes can be run and you’ll get a brand new DNS cache to save new IPs of old or new sites. To Flush the DNS cache, Follow the steps below:

Step 1: Open Google Chrome and Type chrome://net-internals/#dns.

Step 2: Now look for active entries, that means your Browser has saved the number of Active entries in Cache.

Screen Shot 2014-10-16 at 01.49.40

Step 3: Now look for the button saying, Clear hot cache. Click it more than once to make sure that it works.

Screen Shot 2014-10-16 at 01.47.13

Step 4: Now Navigate to chrome://net-internals/#sockets or Click the DNS and select Sockets.

Screen Shot 2014-10-16 at 01.47.36

Step 5: Now Click the both Options, first “Close Idle Sockets”, then “Flush Socket Pools”

Screen Shot 2014-10-16 at 01.47.46

Flush DNS with Command Prompt in Windows:

Step 1: Click Start and type cmd in search bar and run it as admin,

Step 2: Now Type ipconfig/flushdns and press Enter to flush the DNS cache

Screen Shot 2014-10-16 at 01.47.55

Step 3: Now Type ipconfig/displaydsn to see whether the DNS has been flushed or not

Step 4: If you receive the message saying “Could Not Display the DNS Resolve Cache”, then that means you are successful.

Screen Shot 2014-10-16 at 01.48.05

Print SMS and WhatsApp Messages on Android – How To

0
Print SMS and WhatsApp Messages on Android – How To

Well I don’t think that there will be any need of that, but still there are sometimes, when you need a Hard Copy back-up of your Text Messages. Especially if you use your Mobile phone for Business conversations. E-Mail prints are pretty easy to take, but everyone knows that and some 3rd party people won’t be sending you messages over the E-Mail and after the ease provided by the WhatsApp and Mobile Network connectivity, I don’t think that people talk over the mail now a days, they prefer to use Whatsapp or Default Messaging app.

However, you never know when you might need something like this, better safe than sorry. So, we have prepared a Guide on How To Print Txt Messages or WhatsApp messages on Android OS. The work around is not something difficult, all you need is an app and an active internet connection and you are good to do, so without any further ado, let’s get started.

SMS-Backup-3

How To Print Text Messages:

By Default there isn’t any option to do something like this, but if you can’t do something like this in Android, then this world is over. There are a couple of apps available, that will take part in this process, we are going to use SMSBackup + App. It is totally simple and free to use. The basic idea is to transfer all your messages to G-Mail account and Print it from the Official G-mail app or from PC.

  1. Download and Install SMSBackup +.
  2. Once installed open it.
  3. Grant the app access over the G-Mail account.
  4. Once done, just press the Back-Up button.
  5. The app will back-up all your messages to your G-Mail account.
  6. By Default all your messages will be stored under the SMS label and Mark as read.
  7. The Conversation chain will be shown as an E-Mil chain and that is what we are use to Print
  8. Now From PC, Log-in to your G-Mail account.
  9. Navigate to SMS label to find all the Back-up messages.
  10. Click on the Conversation you want to print and Click the Print Entire Chain icon on Top.
  11. The Browser will load the entire chain to print, then press the print button.

SMS-Backup-2

The same app allows you to Back-Up messages of WhatsApp too, so if you want to Print Whatsapp messages, just do the same as above.

OnePlus One Apps Ported to CM 11 Devices – How To Install

0
OnePlus One Apps Ported to CM 11 Devices – How To Install

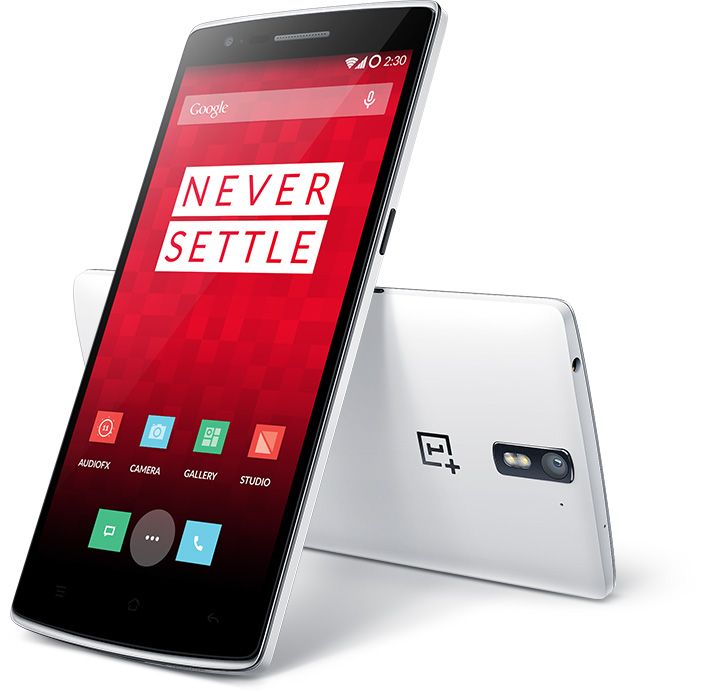
The Flagship killer, OnePlus One, is getting popular among users, since getting it is quite a heck of a job, so those who can’t get their hands on it start asking for its default applications, Like Gallery, lock-Screen, Camera etc., So those developers who purchased the OnePlus One, start porting these apps to other devices, but the OS compatibility was a problem, in the end it was decided that all the devices running CM 11 or CM 11 based Firmwares can install these Apps. OnePlus One is running CM11S which is quite a popularity gainer itself, after the release of OnePlus One to general public,everyone thought that CM11S will also be released for other devices too, but that didn’t happen, another reason why these apps are being ported to CM 11 devices.

However, you won’t get these apps with another update of CM11, you need to manually flash them, since the enthusiasts users of Android doesn’t want to give up on this devices just like that, so they are making sure that everyone who can’t get their hands on OnePlus One, shouldn’t feel bad, at-least a little. The XDA member, Geo411mwho ported the Gallery, Camera, Lock-Screen and Audio FX of OnePlus One to CM11, So all you need for now is the CM11 installed on your device.

composition-main

Early Preparations:

1. This is only for Devices Running CM11!

These Apps is only for the device running CM11. Make sure that your device is running the mentioned OS, otherwise, we are not responsible for a bricked device

2. Battery should be charged at least over 60%

Make sure that your battery is charged enough to complete the flashing process. In case your battery is low and your device goes dead during the flashing process, you may end up soft bricking your device as it won’t complete the flashing process.

3. Flash a Custom Recovery

A custom recovery, a CWM  or TWRP is required to flash this ROM. You need to root your device too, so follow the Root link to do so

4. Backup everything!

Just to be on the safe side, you may consider backing up each and everything from your Android device. This is highly recommended so that in case anything goes wrong, you still have the access to all of your data and you can restore it immediately. You may backup everything as listed below.

5. Disclaimer

The methods involved in flashing custom recoveries, roms and rooting your phone are highly custom and may result in bricking your device, and has nothing to do with Google or the device manufacturer that is OnePlus in our case. Also rooting your device will void its warranty and you will be no longer eligible for any kind of free device services by the manufacturers/warranty providers. Incase of any mishap we may not be held responsible. Follow these instructions to the letter to avoid any mishap or bricking. Make sure that whatever you do, you are doing it at your own responsibility.

Downloads Required:

OnePlus One apps: Link

How To Install These Apps.

  • Connect your device with PC.
  • Copy and Paste the Above zip files to the root of your sdcard.
  • Disconnect the cable.
  • Turn Off your Device
  • Open Bootloader mode. How? Press and hold the Volume Down + Power buttons until you see some text on screen.
  • Highlight Recovery In Bootloader, and Press Power Button To Select it

CWM/PhilZ Touch Recovery Users.

  1. Back-up your ROM using the Recovery.
  2. To Perform a Back-up, Navigate to Back-up and Restore on Next screen, Choose Back-up again.
  3. Go back to Main Screen after the Back-up is complete.
  4. Then Navigate to ‘advance’ and choose ‘Devlik Wipe Cache’, so you won’t get in any bootloop.
  5. Navigate to ‘Install zip from sd card’ another windows will open in front of you.
  6. Select ‘choose zip from sd card’ from the Options.
  7. Select the zip files and confirm the installation on next screen.
  8. Install all the Zip files one by one
  9. Once the Installation is Over, Select +++++Go Back+++++
  10. Select Reboot Now to Reboot the System.

TWRP Users.

  1. Tap On Back-Up and Select System and Data
  2. Swipe the Confirmation Slider
  3. Tap on Wipe Button and Select Cache, System, Data.
  4. Swipe the Confirmation Slider.
  5. Go back to Main Menu and Tap Install Button.
  6. Locate the Zip files and select themSwipe the Slider To install it.
  7. Once the Installation is Over, you will be promoted to Reboot System Now
  8. Select Reboot Now to Reboot the System.

After a successful reboot, your device will be showing you the Beautiful apps of CM11s, of OnePlus One

Unlock Moto 360’s Bootloader & Root It [How To]

0
Unlock Moto 360’s Bootloader & Root It [How To]

Although It’s been quite long since the concept of smart watches came into being, but a competition was yet to start. This credit goes to Samsung, that introduced the Galaxy Gear, the very first smart watch of its own kind and kick started a new gadget war. Before the Galaxy Gear,  smart watches from Sony and some other manufacturers didn’t get the spotlight as much as the Galaxy Gear got. The original Gear ran on Android, and packed up some features that were mouth watering. This new revolution urged Google to introduce a complete new Android OS for the wearable gadgets only, and then other manufacturers followed Samsung’s footsteps and came up with their smart watches and some other wearables.

Google unveiled Android for wearables, named as Android Wear at Google I/O developer’s conference 2014, at the same time, it also shown off a round smart watch, the Moto 360. The Moto 360 eventually wins the ground when it stands in competition with its rivals like LG’s G-Watch, Samsung’s Galaxy Gear 1, 2, Gear S and Gear Fit, and now, even Apple has jumped in the competition and unveiled its Apple Watch. While playing with the Galaxy Gear and Gear Fit for a while, I was able to conclude that Samsung has done a great job, but as soon as coming across Moto 360, the watch took all of my attention. At first, Moto 360 sports a great design. The watch looks likes some premium and classic wrist watch, the metallic round frame is eye-catching. The very thing I was disappointed with, on the Galaxy Gear was its battery life, while Motorolla has learnt quite a lot from Samsung’s mainstream wearable gadget and placed a good battery inside the Moto 360.

Moto 360 runs on Android Wear, and now that Android is there, the watch becomes customizable. Any device that runs Android, can probably be rooted and it’s real potential can be unleashed by putting up the applications that require root access.  The advantage I had after rooting my Galaxy Gear was I was able to run some non-gear applications on the watch, make some tweaks, load custom recovery and other stuff. Something similar can be done here as well. You can definitely move here and there by running root applications, flashing mods and other stuff on your Moto 360 and get the maximum out of it once you’ve rooted it. Before you head towards the rooting your Moto 360, you will have to unlock the bootloader as well as you are going to flash a boot.img file in order to gain the root access, once you’ve unlocked you’re all set to perform root operations.
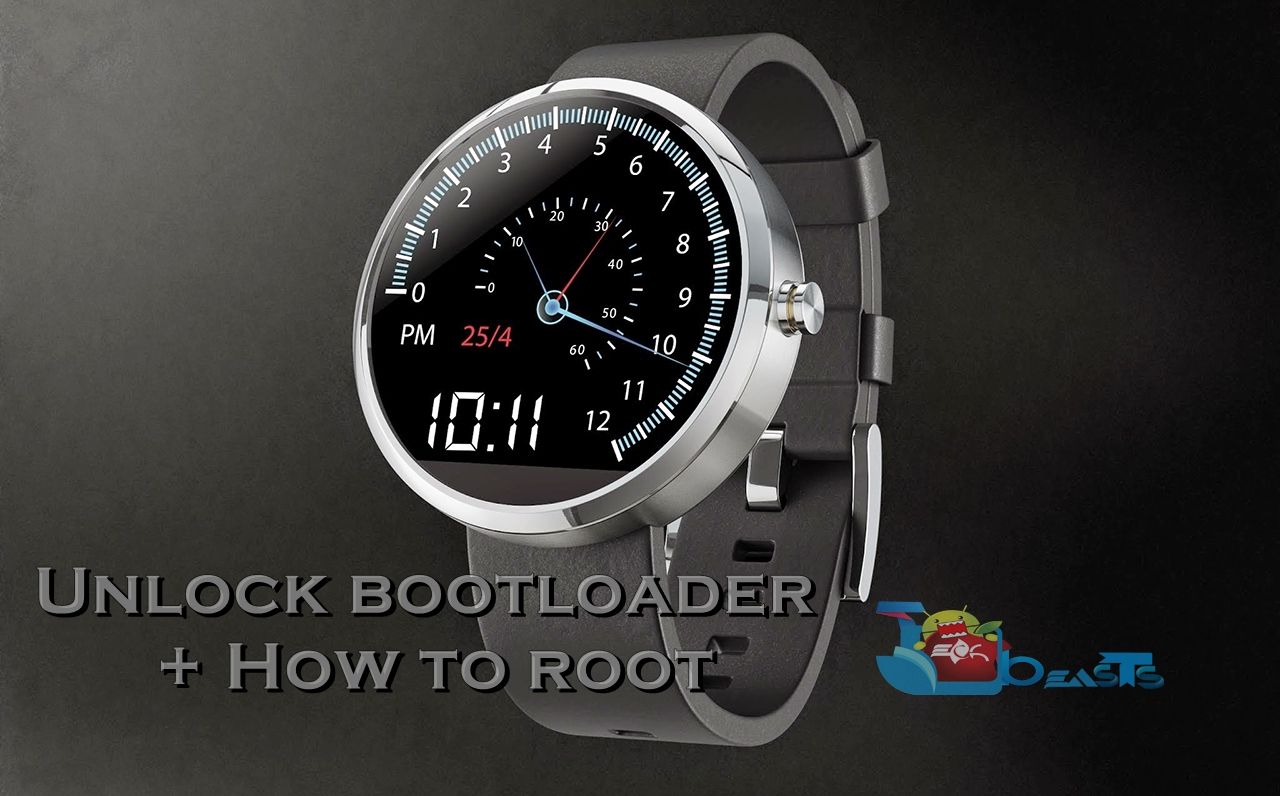
Moto 360 Product Template - SPEEDO

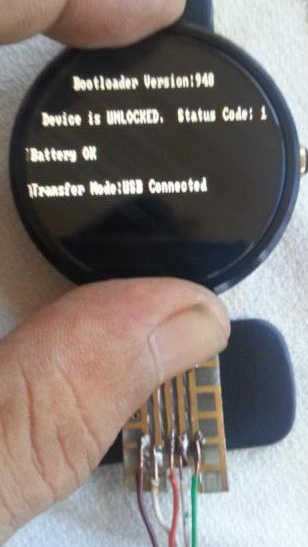
Unlocking the bootloader and rooting your Moto 360 might not be a tough job, but the only tough thing you will be coming across is connecting your Moto 360 to your PC. Unlike the Galaxy Gear smart watches, the Moto 360 doesn’t have a dock that let’s the users connect it with a PC. Moto 360 supports wireless charging. ADB is supported over bluetooth, but you won’t be able to issue any fastboot commands until and unless you make a connector and connect it to your PC.

Let’s go through the steps one by one and get the whole procedure done.

Early preparations:

1. This guide is only for Motorola Moto 360

Make sure that your device is exactly as mentioned above. In case you try this method on any other device, you might end up killing your device permanently.

2. Battery should be charged at least 60%!

Your device’s battery shouldn’t be weak. In case your device goes dead during the flashing process, your device may get soft bricked and you might be in need of flashing stock firmware and that will ultimately result in wiping up your data as well. So, make sure that you charge your device before you start the flashing process.

3. Install Android ADB & Fastboot and Motorola USB Drivers

Make sure that you’ve installed and setup ADB & Fastboot drivers. Here’s our quick Minimal ADB & Fastboot guide. Apart from that, you need to have the Motorola USB drivers installed on your PC as well. Find all Android USB drivers here.

4. Create a custom USB connector for your Moto 360

As mentioned above, this is going to be the hardest part. Moto 360 doesn’t support any USB connecter, it charges wireless and supports ADB over Bluetooth. But to unlock the bootloader, you need to perform Fastboot commands and that’s not possible without USB connection. Here’s a very nice method by RootJunky that will help you to create a custom USB cable for your Moto 360.

5. Disclaimer:

This is a highly custom method. We shall not be held responsible in case you end up bricking your device or any other mishap happens. Make sure that whatever you’re going to do, you’re doing at your own risk. Neither us, nor the device manufacturer should be pointed at later on.

How To Unlock Bootloader Of Your Moto 360 Now:

  1. Turn off your Moto 360 completely.
  2. Now turn on your Moto 360 by pressing and holding the Power Key. Keep key pressed until your Moto 360 vibrates thrice and takes you to the bootloader screen showing the bootloader version number atop.
  3. Now connect your Moto 360 to your PC using the connector you made using the guide linked above. Make sure that you connect your device properly. Just in case this part goes wrong, you might end up bricking your Moto 360.Moto 360 Connector
  4. Now open Minimal ADB and Fastboot.exe file from your desktop.
  5. Now issue the following command
    1. adb devices

  6. This will enlist the devices connected to your PC in adb mode. You can verify the connection of your Moto 360 by seeing its serial number on the screen.  Once done verifying the connection, issue this command
    1. fastboot oem unlock

  7. Once done, reboot your device by issuing this command
    1. fastboot reboot

  8. Phewww! That’s all. You’ve unlocked your Moto 360’s bootloader successfully now.

How to Root Moto 360 Now:

  1. Download KGW42Nrooted_boot.img.
  2. Renamed the downloaded .img file to “Boot.img” only.
  3. Now copy the renamed file to the Minimal ADB & Fastboot installation directory. This should be located under program files in your Windows drive.
  4. Now open the Minimal ADB & Fastboot.exe to launch command prompt.
  5. Reboot your Moto 360 into bootloader mode using the method in step 2 above.
  6. Now connect your Moto 360 to your PC using the customized connector.
  7. Now in the Minimal ADB & Fastboot command window, issue the following command
    1. fastboot flash boot boot.img

  8. This will root your Moto 360 and it will reboot once done.
  9. That’s all, you’re rooted now. Enjoy!

That’s all. In case you’re stuck with anything or you got any queries, make sure that you use the comment box below. Thank you all.

Source

Download Skype Qik for Windows Phone (free)

0
Download Skype Qik for Windows Phone (free)

Now a days cross messaging apps are getting popular and they are adding tons of new features to stay on the top. Apps like Whatsapp, Viber, Snapchat, KIK, WeChat and many more are giving free text messages, voice calls, video message and image sharing. Today the video messenger Gaint Skype released a new app Skype Qik which works same as other but this only for video messaging. Set up a group and immediately start shooting and swapping videos. Skype Qik is released for all mobile platforms iOS, Android and Windows Phones.

Skype Qik for Windows 8.1

 It’s easy to swap video messages with groups of friends and show everyone what’s happening down at the pub, catch up on the latest gossip, or make everyone jealous with your thrift shopping finds. But don’t worry, your silly videos won’t live on for all eternity and come back to haunt you. Each video lasts exactly 2 weeks. And if you send a message by mistake, or don’t like the video, don’t panic! You can erase any video you’ve sent from the chat, whether it’s been watched it or not. If you don’t want to receive messages from someone, you have the ability to block contacts on Android and Windows Phone. This feature will be available on iPhone in the coming months. Via : Skype blog

Main Features of Skype Qik:

• Create groups in a flash: grab a bunch of friends from your phone’s address book and start a private chat.

• Erase your message and it disappears from the conversation.**

• Keep it fresh—messages are automatically erased from Qik after two weeks.

• Start a conversation any time—no login, usernames, or passwords needed.

* Mobile data rates may apply.. We recommend using an unlimited data plan or WiFi connection.

** It may be possible for recipients to capture and save videos elsewhere before you delete them from Qik. Not only is Qik brand new, it’s the very first app from Skype…since Skype. That’s as new as it gets.

Download Skype Qik for Windows Phone:

Download New Words With Friends v2.102 apk for Android

0
Download New Words With Friends v2.102 apk for Android

New Words With Friends is the best social and informative game i’ve ever played on a mobile device, this app lets you play with friends online. You can challenge your friends to play a words match not only its fun playing game but you can also get a chance to improve your vocabulary with Dictionary and Word of the Day. New Words With Friends got a new update you can download New Words With Friends v2.102 apk for your Android devices from the links giving below.

Screen Shot 2014-10-14 at 20.08.04

Main Features of New Words With Friends:

• CONNECT with players of similar skill with Smart Match

• EXPAND your vocabulary with Dictionary and Word of the Day

• TRACK your performance and improvement with detailed stats

• CHAT with your friends in-game

• ACCESS your games across all your devices

• DOWNLOAD to access new features, fully backwards compatible with your current game.

What’s New:

  • Happy Fifth Anniversary Wordies!
  • We are happy to introduce a number of improvements to your play experience, including exciting new features based on your feedback with Community Match, Solo Play and an in-game Dictionary.
  • We’ve also fixed several bugs that were causing some of your games to crash, chat to disappear, games being stuck on the games list, and other inconveniences. Thank you for playing and please keep the feedback coming.
  • May The Best Friend Win!
  • Words With Friends

Download New Words With Friends v2.102 apk [ Google Drive ]