Home Blog Page 413

How To Use Private Browsing in Android and Hide Your Tracks

0
How To Use Private Browsing in Android and Hide Your Tracks

One of the best, however, un-secure thing about modern browsers is the Saving of Information, its a good thing that they save our Passwords, history and other stuff, yet sometimes there are certain things, that pushes us not to save the data in any way an those browsers collectin history and other stuff are sure to save it too, while you can delete all of these things, still why even give them a chance to save it, when you can use it in a Private way. Now that Private browsing doesn’t mean that someone standing behind you can’t see it, but the browser can’t be able to save any of your data, until you do it yourself.

While On PC, you have a lot of chance that you won’t get caught in it, but while on Mobile, where everyone from your family,your friends use it,even the little ones use it, you just don’t want them to know what you are doing on your Mobile. Now if you own an Android device, it can be helped. Android features browsers like Google Chrome, FireFox and Dolphin, that doesn’t mean that there aren’t other browsers available, but these are the most popular ones, and I will show you How To Browser Privately on them.

00_lead_image_private_browsing_android

1. Google Chrome:

Screenshot_7

  1. To Browse privately on your Chrome, you need to open the “Incognito” tab.
  2. To Open it, you need to Tap the Menu button or three Dots on the Top Left.
  3. Then Touch the “New Incognito Window“.
  4. Now you’ll see another window with an Agent face on it, to open another tab in Incognito Window, just tap the + button on top
  5. To Stop doing things Privately, close all the Incognito windows

2. FireFox:

Screenshot_6

  1. To Browse privately on your Chrome, you need to open the “Private” tab.
  2. To Open it, you need to Tap the Menu button or three Dots on the Top Left.
  3. Then Touch the “New Private Tab”.
  4. Now you’ll see another window with a Mask face on it, to open another tab in Private Window, just tap the + button on top
  5. To Stop doing things Privately, close all the Private windows

3. Dolphin:

Screenshot_8

  1. To Browse privately on your Chrome, you need to open the Private Mode
  2. To Open it, you need to Tap the Dolphin Icon on the bottom left, and then Tap Menu icon.
  3. Touch the “Settings” button on the toolbar that pop-ups.
  4. Scroll down and Touch “Privacy and Personal Data”
  5. Switch the Private mode button to On.
  6. Now Browse whatever you like and all will be done secretly.
  7. After the use, touch the Exit to Close Dolphin and all Windows you opened up

How To Use and Set-up Touch ID-Enabled Apps in iOS 8

0
How To Use and Set-up Touch ID-Enabled Apps in iOS 8

Despite we hate Apple, yet we all know that for the least, Apple has some good things in it. One of the best, yet not so secure is the Finger Print ID. Though it is one of the most Clever ideas of Apple, however, before iOS 8 the Touch ID scope was very limited, letting you only to authenticate yourself when Unlocking the iPhone or Purchasing apps is not something that users wants to with a Feature this good. Now with the Arrival of iOS 8, Apple has brought some reasonable changes in it and Touch ID in iOS 8 is now compatible with almost every app available, including 3rd Party apps. Not all the apps will work with it from the Start, developers have to add support of Touch ID in their Apps, there aren’t much available yet, and we also knows a little amount of apps, but as the time will pass, we are sure to see more apps with Touch ID enabled in it.

iOS-8-Touch-ID-Explained

Before we begin you have to enable Touch ID in your iPhone, if you have already done it, skip this section, however, if you haven’t done it, here is a quick tutorial to enable it.

  1. Go To “Settings“.
  2. Locate the “Touch ID and Passcode” option.
  3. Now Tap the “Add a FingerPrint” to start adding yours.

If you have problems with your Fingerprint Option or Scanner, follow the Fixing Guide to Solve them.

Using the Touch ID:

Now that you can use your Touch ID in some of the third party apps beside unlocking and Purchasing, here is a list of apps currently working with the Touch ID, however, a lot more support will be added in future of-course, so always keep an eye on the update of your Favorite apps.

  • 1Password
  • Mint Personal Finance
  • Discover Mobile
  • Amazon
  • Day One
  • Evernote
  • Transmit iOS

However, there is no consistent way in which this Touch ID can be used, which leads to some Confusion for the user, so we are basically going to show you, what you can do in some 3rd party apps, lets say in Amazon.

  • Once you have downloaded the Amazon app, Open it.
  • You’ll be promoted to Log-into your account the conventional way.
  • Even after you have added items in your cart, the app won’t ask for authentication.
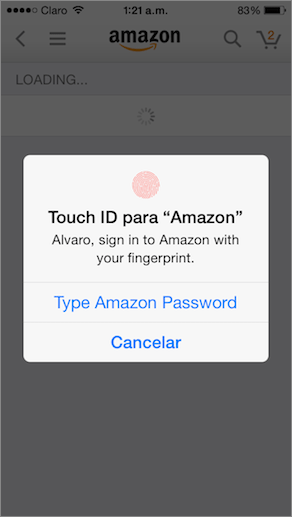
  • However, if you try to change your Password or account, then App will ask for your Fingerprint Authentication

Amazon-iPhone-Touch-ID

On Evernote, Touch ID is available for Premium users, just allowing the users to Unlock app with it

Now 1Password, can be the best app with TouchID, it replaces your master password, allowing you to forget all the Passwords or any other password you have.

1Password-Touch-ID-Unlocking

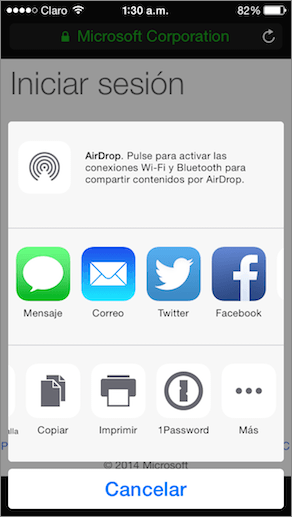
Another, and the best way to use Apple Touch ID is the extensions available, for example, Safari Doesn’t support the Touch ID while logging-in to some sites, but with the 1Password extension it will. Thus allowing you to log-into any site with your Fingerprint.

Hotmail-Safari-iOS-1Password-Extension

How to Sync Your Browser Data in Any Browser to use it anywhere

0
How to Sync Your Browser Data in Any Browser to use it anywhere

Now a days there are many browsers in the web and everybody bookmarks a lot of pages so they easily access the main page. But not all the time you are at home or office so when ever we need to access the pages we have bookmarked on our PC browser, we have to be there. Thanks to Sync setting in browsers now we don’t need to be there, all you have to do is sync your browser data and you can access it from anywhere on your smartphone, tablet or laptop.

How to Sync Your Browser Data in Any Browser

How to Sync Your Browser Data in Any Browser:

Chrome:

  • First click on Chrome’s menu.
  • Now Sign in with your Google account.
  • Goto settings.
  • Now open the Settings screen.
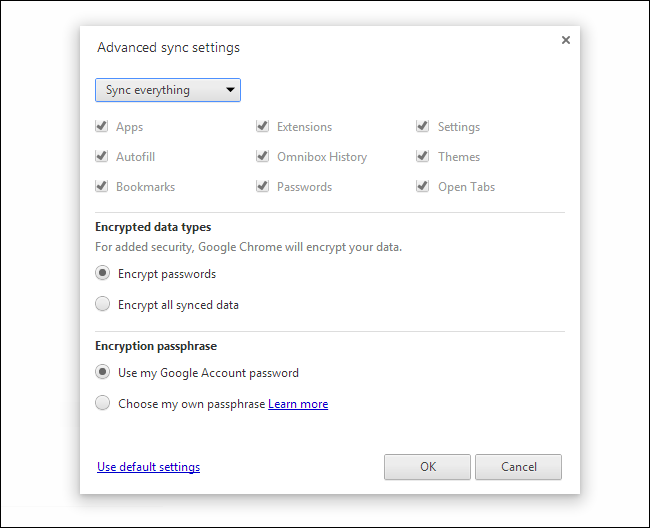
  • Click on Advanced sync settings.
  • By default Chrome sync ( your apps, autofill data, bookmarks, extensions (address bar history), passwords, settings, themes, and open tabs. )

650x528xgoogle-chrome-advanced-sync-settings.png.pagespeed.ic.JO1MmnmlVE


Now you can use this data on other computers and smartphones by Sign in on Chrome with the same Google account.

  • Open Chrome on your Android or iOS  device and login with the Google account, the one you have used in the second step.
  • Now you can access your system open tabs, access your bookmarks and history.

Firefox:

  • Open Firefox.
  • Open options window.
  • Select the Sync icon.
  • If you are using Firefox sync first time then you have to create an account for Firefox sync.

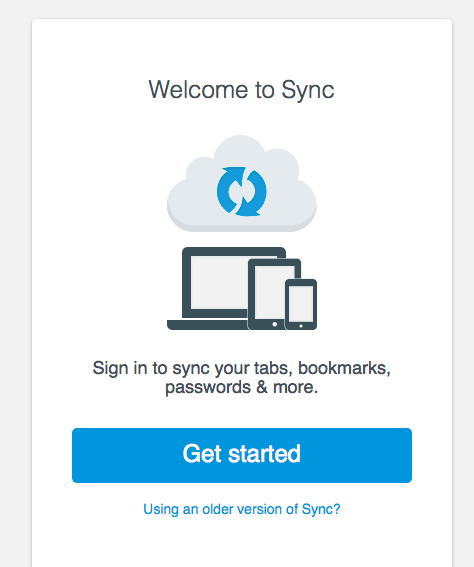
Screen Shot 2014-10-14 at 05.46.02

  • Click on Get started.
  • Add the following information.

Screen Shot 2014-10-14 at 05.46.57

  • Now choose from the options to sync your data.

Screen Shot 2014-10-14 at 05.51.14

  • Once selection is completed click on OK.
  • Firefox sync works with all the operating system. ( Windows, OS X, and Linux ).
  • Now open Firefox on your Android device.
  • Goto settings tap on sync.
  • Sign in with your login id that you have created using sync on your PC.
  • You can access all of your Firefox browser data on your Android device.

Opera:

  • Open Opera on your PC.
  • Goto Settings.
  • Select Synchronize Opera.
  • Now log in with your Opera account.
  • You can create Opera account by going to https://link.opera.com/.

522x594xwelcome-to-opera-link.png.pagespeed.ic.V518m1ivYz

  • Open Opera Mini on a phone or tablet.
  • Go to Menu.
  • Select Settings.
  • Select Opera Link, and then log in from there.

Once you’ve activated Opera Link, it will synchronize your favorite stuff from any device where you’ve logged in to the browser. Opera Link updates automatically whenever you make changes to your Speed Dial or add a new bookmark.

Safari:

  • Open Safari.
  • Choose System Preferences.
  • Click iCloud
  • Enter your Apple ID.
  • Select the services you’d like to enable.

Screen Shot 2014-10-14 at 06.11.59

  • You now sync open tabs, bookmarks, and other browser data.
  • Open Safari on your iPhone iPads, and iPod touches.
  • Use the same iCloud id which you are using on your Macbook.
  • Safari automatically import open tabs, bookmarks, and other browser data.

Simple Steps to install Windows 10 Technical Preview [ How To ]

0
Simple Steps to install Windows 10 Technical Preview [ How To ]

Now that Microsoft has announced their new operating system Windows 10 along with Windows 10 Technical Preview. Most of you have tried it and enjoying the latest features coming with Windows 10. But still there are other who don’t know how to install Windows 10 Technical Preview on the operating system. No need to worry about that I’ve prepared a simple guide on how to install Windows 10 Technical Preview.

12102541771000

How To install Windows 10 Technical Preview on your Laptops and Desktop Pc.

Before Installing:

  1. Technical Preview means a beta OS. [ Not Final version ].
  2. This not a complete version you might face issues.
  3. You have to follow tons of updates in order to get the best results.
  4. Windows 7 SP1, Windows 8.0 and Windows 8.1 can all take the Technical Preview.
  5. Touchscreen computers not supported.
  6. Right now its best for laptop or desktop PC.
  7. You must create a recovery drive.
  8. Kindly read Microsoft’s Frequently Asked Questions page.

Installation Guide:

  • First sign up for the Windows Insider Program.
  • Now you will be directed to download and ISO file. [ 4GB file Size ].

Win10 Install Screenshot 1

  • When the download is complete, burn the ISO image to a DVD.
  • Now extract the files from the ISO image.

Note: You can extract the files from ISO image or you can mount the ISO image as a virtual drive. If you are using Windows 8 then you can easily mount the images by right clicking on the file and select mount.

  • Place the ISO image in C:\ drive for installation.
  • Now click on setup.exe once you are ready.

Win10 Install Screenshot 2

All you have to do is follow the instruction given on the screen, the process will take 20-25 minutes.

Please do tell me your experience with Windows 10 Technical Preview or if you face any issue regarding this guide tell me in comments.

How to easily transfer your Gmail Contacts to Outlook.com

0
How to easily transfer your Gmail Contacts to Outlook.com

Gmail is no doubt the best mail operating hub and used by billions of people. But I find Gmail is bit lazy so I though to move to outlook and the big headache was to the contacts because i am using Gmail from last 9 years. So i started to search the easiest way to transfer my all Gmail contacts to outlook and after few hours i got succeed transferring my contacts. In the following guide i’ll tell you how to transfer your Gmail Contacts to Outlook.com.

Gmail-Login

How to transfer your Gmail Contacts to Outlook.com

  1. log into your Google contacts page.
  2. Click on more button and select Export.
  3. Now choose all of your contacts and Choose Google CSV format click on Export.
  4. Save the file on your desktop so you can easily locate it.

GoogleContactsExport1

  1. Now login on Outlook.com People hub.
  2. Click on the click drop-down arrow in the top left and select People.
  3. Click on the smart arrow under Import Contacts.
  4. Choose Google from the options.

GoogleContactsExport1a

  • Now click on Browse and locate the file that you’ve exported in 3rd step.
  • Click on Import. [ Make sure your uploading the right file ].
  • When the list process is complete outlook will ask that it is correct.
  • Now click the import button and your contacts will be shown on Outlook.com.


How To Root T-Mobile Galaxy Avant SM-G386T

2
How To Root T-Mobile Galaxy Avant SM-G386T

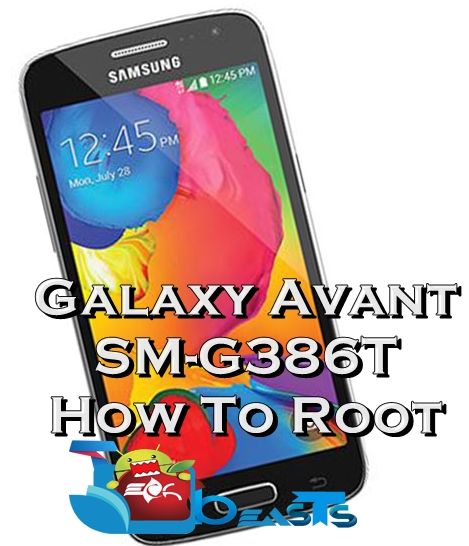
Samsung’s Galaxy Avant came out in July, 2014 under the umbrella of T-Mobile. It’s a mid-range device by Samsung, costs around 160 Euros Off-Contract. Galaxy Avant sports a 4.5-inch with 540 x 950 pixels having 245 ppi. A 5 MP camera is fixed at the back while a VGA cam can be found on the front for video calling. Under the hood, Samsung has used Snapdragon 400 Quad-Core CPU clocked at 1.2 GHz accompanied by Adreno 305 GPU. A RAM of 1.5 GB can be found on-board, internal storage is 16 GB. A 2100 mAh battery is placed inside this device. Galaxy Avant runs on Android 4.4.2 KitKat out of the box. These specifications make it a great choice under the price tag it comes along and also helps Samsung to retain its mid-range spot against the rivals.

Galaxy Avant’s specifications make it a nice device to unleash its capabilities. You may want to apply use some root applications to enhance the working and functionality of your device or you may want to load some custom stuff on it, for this very purpose, root access is a must. For the Galaxy Avant, XDA recognized developer Chainfire’s CF-Auto-Root is already up, that means you no longer need to look here and there in order to get across the boundaries on your device. To save your time while searching for the method, we’ve already written it all up here in the succeeding post. As you move forward, you should come across a comprehensive guide that will help you to root your T-Mobile Samsung Galaxy Avant SM-G386T. Before we head towards the guide, it is important to go through a brief introduction of the root access in order to help the newbies to wipe off any confusions they might have.

182888-blog-avant

Rooting your phone gives you complete access over all the data which is apparently locked by the manufacturers. This includes removal of the factory restrictions and making changes to the internal system and the operating system. Gaining the root access gives you the privileges to install various applications to enhance the performance of your device, allows you to remove the built-in applications/programs, helps you to upgrade the battery life of your device & install the apps which require the root access for the proper functionality and modify your device in so many other ways e.g using mods and flashing custom recoveries and custom ROMs. Here’s our collection of 10 Best Root Apps.

Early Preps:

1. This guide is only for Samsung Galaxy Avant

Make sure that your device is exactly as mentioned above. To check out what device you have, go to Settings > More/General > About Device or Settings > About Device and match the model number. Be careful about the device model number, flashing a file on a device not listed here might result in bricking it up.

2. Battery should be charged at least 60%!

Your device’s battery shouldn’t be weak. In case your device goes dead during the flashing process, your device may get soft bricked and you might be in need of flashing stock firmware and that will ultimately result in wiping up your data as well. So, make sure that you charge your device before you start the flashing process.

3. Use the OEM datacable to establish connection!

Always use the original data cable to establish connection between your Android device and your computer / laptop. Using ordinary data cables might interrupt the flashing process, so to avoid any mishap, you need to meet this requirement as well.

4. Backup everything!

Just to be on the safe side, you may consider backing up each and everything from your Android device. This is highly recommended so that in case anything goes wrong, you still have the access to all of your data and you can restore it immediately. You may backup everything as listed below.

5. Turn off Samsung Kies and other softwares while using Odin3!

Make sure that you turn off Samsung Kies while using Odin3 flashtool. Samsung Kies will interrupt Odin3 and will result in causing errors and may not let you flash your desired recovery or root file. Also, make sure that you turn off any antivirus software you’ve installed and also disable firewall to avoid any connection and flashing issues.

6. Disclaimer

The methods involved in flashing custom recoveries, roms and rooting your phone are highly custom and may result in bricking your device, and has nothing to do with Google or the device manufacturer that is SAMSUNG in our case. Also rooting your device will void its warranty and you will be no longer eligible for any kind of free device services by the manufacturers/warranty providers. If your device comes with a Knox counter on the bootloader, it will be tripped and you won’t be able to reset it again. In case of any mishap we may not be held responsible. Follow these instructions to the letter to avoid any mishap or bricking. Make sure that whatever you do, you are doing it at your own responsibility.

How To Root T-Mobile Samsung Galaxy Avant SM-G386T

Downloads Required:

Download and extract Odin3 v3.09.
Download and Install Samsung USB drivers
Download and extract CF-Auto-Root file.


How to root now:

  1. Extract the downloaded CF-Auto-Root  file once only to get the .tar.md5 file.
  2. Open Odin3.exe.
  3. Put your Galaxy Avant in download mode. To do so, turn it off and wait for 10 seconds. Turn it on by pressing and
    holding Volume Down + Home Button + Power Key simultaneously, You should see a warning, press Volume Up to continue. In case this method doesn’t work for you, try one from this guide.
  4. Connect your device to your PC.
  5. As soon as Odin detects your phone, the ID:COM box should turn blue.  Make sure that you’ve installed Samsung USB drivers before connecting.
  6. For Odin 3.09 hit the AP tab. Select the CF-Auto-Root.tar.md5, that you downloaded and extracted above.
  7. If you’re using Odin 3.07, you will select “PDA” tab instead of the AP tab, rest of the options remain untouched.
  8. Make sure that the options selected in your Odin are exactly as shown in the pic.Odin-3.09-explained.-2
  9. Hit start and wait till the rooting process is complete, as soon as your device restarts, remove it from PC.
  10. Find SuperSu in app drawer now.
  11. That’s all with the rooting, let’s verify the root access now.

How To Verify Root Access:

  1. To do so, go to Google Play Store on your Galaxy Avant.
  2. FindRoot Checker and install it.
  3. Open Root Checker.
  4. Tap “Verify Root”.
  5. It will ask you for SuperSu rights, tap “Grant”.
  6. It should show you Root Access Verified Now!
  7. That’s All!

If you’re stuck with anything regarding this guide, feel free to utilize the comment box below and reach us. We will get back to you immediately. Thank you all.

Credits: Chainfire XDA

How To Root Samsung Galaxy Alpha SM-G850F/K/L/M/S/FQ

8
How To Root Samsung Galaxy Alpha SM-G850F/K/L/M/S/FQ

Galaxy Alpha was Samsung’s perfect answer to the Apple iPhone 6. Samsung packed up very nice specification under a premium body and a great design. Galaxy Alpha helped Samsung to gain some respect as it was greatly criticize over coming up with the same design and cheap build quality again and again. Galaxy Alpha happens to be Samsung’s very first metallic device. On the front, there’s a 4.7 inch Super AMOLED screen with 720 x 1280 pixels resolution and 326 ppi. RAM of 2 GB can be found on board, internal storage begins at 32 GB. Samsung has powered up this device with its very own Exynos 5 Octa 5430 CPU. A 13 MP camera shooter is fixed at the back whereas a 2 MP is fixed on the front. Samsung has used an 1860 mAh battery to add life to this device. Out of the box, Galaxy Alpha runs on Android 4.4.4 KitKat. At the time of writing this post, the Galaxy Alpha is already out in almost all regions, the device comes as modeled under different variants.

Galaxy Alpha is a great choice to go with. If you’re planning to spend your valued bucks on this device, you might be willing to check out the capabilities of your device by unleashing its true potential. That’s only possible by having root access and then tweaking it to get the maximum performance outputs. A number of variants of Galaxy Alpha has already been rooted by XDA recognized developer Chainfire, who happens to be a root master for various Android devices. Chainfire has rooted this device using his famous CF-Auto-Root exploit. While you’re wondering how you can use the CF-Auto-Root to root your Galaxy Alpha, we’ve the comprehensive method already up here in the on-going post.

As you move forward, you will come across a method that will help you to root your Samsung Galaxy Alpha SM-G850F, SM-G850K, SM-G850L, SM-G850M, SM-G850S & SM-G850FQ. But wait, are you a newbie? Well, if so, you may want to learn what is root access and why you should root your Galaxy Alpha. Let’s have a look on the answer and then head towards the guide then.galaxy-alpha-official-6

Rooting your phone gives you complete access over all the data which is apparently locked by the manufacturers. This includes removal of the factory restrictions and making changes to the internal system and the operating system. Gaining the root access gives you the privileges to install various applications to enhance the performance of your device, allows you to remove the built-in applications/programs, helps you to upgrade the battery life of your device & install the apps which require the root access for the proper functionality and modify your device in so many other ways e.g using mods and flashing custom recoveries and custom ROMs. Here’s our collection of 10 Best Root Apps.

Early Preps:

1. This guide is only for Samsung Alpha – Variants mentioned above.

Make sure that your device is exactly as mentioned above. To check out what device you have, go to Settings > More/General > About Device or Settings > About Device and match the model number. Be careful about the device model number, flashing a file on a device not listed here might result in bricking it up.

2. Battery should be charged at least 60%!

Your device’s battery shouldn’t be weak. In case your device goes dead during the flashing process, your device may get soft bricked and you might be in need of flashing stock firmware and that will ultimately result in wiping up your data as well. So, make sure that you charge your device before you start the flashing process.

3. Use the OEM datacable to establish connection!

Always use the original data cable to establish connection between your Android device and your computer / laptop. Using ordinary data cables might interrupt the flashing process, so to avoid any mishap, you need to meet this requirement as well.

4. Backup everything!

Just to be on the safe side, you may consider backing up each and everything from your Android device. This is highly recommended so that in case anything goes wrong, you still have the access to all of your data and you can restore it immediately. You may backup everything as listed below.

5. Turn off Samsung Kies and other softwares while using Odin3!

Make sure that you turn off Samsung Kies while using Odin3 flashtool. Samsung Kies will interrupt Odin3 and will result in causing errors and may not let you flash your desired recovery or root file. Also, make sure that you turn off any antivirus software you’ve installed and also disable firewall to avoid any connection and flashing issues.

6. Disclaimer

The methods involved in flashing custom recoveries, roms and rooting your phone are highly custom and may result in bricking your device, and has nothing to do with Google or the device manufacturer that is SAMSUNG in our case. Also rooting your device will void its warranty and you will be no longer eligible for any kind of free device services by the manufacturers/warranty providers. If your device comes with a Knox counter on the bootloader, it will be tripped and you won’t be able to reset it again. In case of any mishap we may not be held responsible. Follow these instructions to the letter to avoid any mishap or bricking. Make sure that whatever you do, you are doing it at your own responsibility.

How To Root Samsung Galaxy Alpha

Downloads Required:

Download and extract Odin3 v3.09.
Download and Install Samsung USB drivers
Download and extract CF-Auto-Root file.


How to root now:

  1. Extract the downloaded CF-Auto-Root  file once only to get the .tar.md5 file.
  2. Open Odin3.exe.
  3. Put your Galaxy Alpha in download mode. To do so, turn it off and wait for 10 seconds. Turn it on by pressing and
    holding Volume Down + Home Button + Power Key simultaneously, You should see a warning, press Volume Up to continue. In case this method doesn’t work for you, try one from this guide.
  4. Connect your device to your PC.
  5. As soon as Odin detects your phone, the ID:COM box should turn blue.  Make sure that you’ve installed Samsung USB drivers before connecting.
  6. For Odin 3.09 hit the AP tab. Select the CF-Auto-Root.tar.md5, that you downloaded and extracted above.
  7. If you’re using Odin 3.07, you will select “PDA” tab instead of the AP tab, rest of the options remain untouched.
  8. Make sure that the options selected in your Odin are exactly as shown in the pic.Odin-3.09-explained.-2
  9. Hit start and wait till the rooting process is complete, as soon as your device restarts, remove it from PC.
  10. Find SuperSu in app drawer now.
  11. That’s all with the rooting, let’s verify the root access now.

How To Verify Root Access:

  1. To do so, go to Google Play Store on your Galaxy Alpha.
  2. FindRoot Checker and install it.
  3. Open Root Checker.
  4. Tap “Verify Root”.
  5. It will ask you for SuperSu rights, tap “Grant”.
  6. It should show you Root Access Verified Now!
  7. That’s All!

If you’re stuck with anything regarding this guide, feel free to utilize the comment box below and reach us. We will get back to you immediately. Thank you all.

Credits: Chainfire XDA

How To Install TWRP Recovery On LG G3 Using Bump! (D855 & All Variants)

2
How To Install TWRP Recovery On LG G3 Using Bump! (D855 & All Variants)

LG’s latest flagship, the G3 was a big hit. G3 helped LG to pocket a lot of respect. To have a start, With a stunning 5.5 inches QHD display on the front accompanied by a 2.1 MP front cam, the device stood very well next to its rivals including Samsung Galaxy S5, HTC’s One M8, Xperia Z2 and others. G3 happens to be LG’s very first device with a QHD display while helps LG to be the very first smartphone giant introducing a QHD display in a smartphone after Oppo. LG G3’s display has a resolution of 1440 x 2560 pixels with 534 ppi that makes it super-crisp. There’s a 13 MP shooter at the back with laser auto-focus. G3 is powered up with Qualcomm Snapdragon 801 Quad-Core CPU clocked at 2.5 GHz accompanied by Adreno 330 GPU. Under the hood, there’s a 2 or 3 GB RAM and the internal storage starts from 16 or 32 GB. A massive 3000 mAh battery is placed inside to add life to this device.

G3 is out for quite a long time now. The development for this device was in runs, we already saw the methods to root this device quiet early but there wasn’t a workaround available to get across the bootloader and unlock it which caused a lot of trouble for Android power users who just couldn’t experience any custom ROM goodies on their beast because of the limitations. Finally! A workaround is available that will allow the users to load custom recoveries, kernels and custom ROMs on their LG G3. This has been made possible by XDA senior member thecubed and his team (Thanks to them). The workaround is dubbed as “Bump!” and packs up TWRP recovery. All it requires is root access and you’re good to go with it. Wondering how you can do this? Well, that’s what we are here for.

As you go ahead, you will come across a comprehensive guide to install Bumped! TWRP Recovery on your International LG G3 D855, Canadian LG G3 D852, AT&T LG G3 D850, Korean LG G3 F400, T-Mobile LG G3 D851, Canada Wind, Sasktel, Videotron D852G, Sprint LG G3 LS 990, Verizon LG G3 VS985.  You will only need to follow this guide carefully in order to get it done successfully. Let’s go through early preparations and then head towards Bump! installation guide.527201482115PM_635_lg_g3
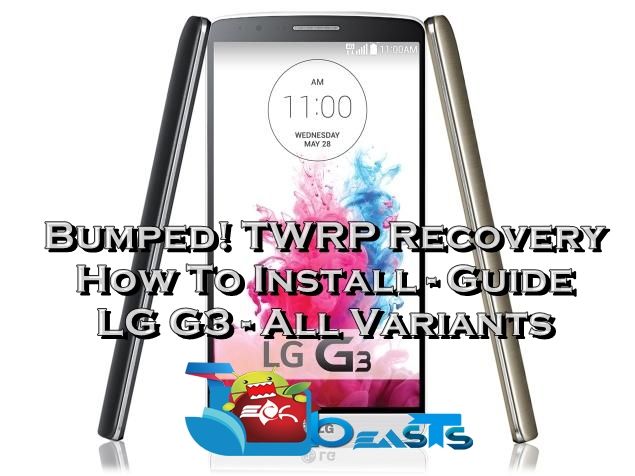
Early Preps:

1. This guide is only for LG G3 – All Variants!

Make sure that your device is exactly as mentioned above. To check out what device you have, go to Settings > More/General > About Device or Settings > About Device and match the model number. Be careful about the device model number, flashing a file on a device not listed here might result in bricking it up.

2. Battery should be charged at least 60%!

Your device’s battery shouldn’t be weak. In case your device goes dead during the flashing process, your device may get soft bricked and you might be in need of flashing stock firmware and that will ultimately result in wiping up your data as well. So, make sure that you charge your device before you start the flashing process.

3. Use the OEM datacable to establish connection!

Always use the original data cable to establish connection between your Android device and your computer / laptop. Using ordinary data cables might interrupt the flashing process, so to avoid any mishap, you need to meet this requirement as well.

4. Backup everything!

Just to be on the safe side, you may consider backing up each and everything from your Android device. This is highly recommended so that in case anything goes wrong, you still have the access to all of your data and you can restore it immediately. You may backup everything as listed below.

5. Your LG G3 must be Rooted

Make sure that you’ve rooted your LG G3. To load Bumped TWRP recovery on your device, root access is a must. Root your LG G3 the following guides.

6. Install ADB & Fastboot drivers

Android ADB & Fastboot drivers are required for this procedure. Follow our Minimal ADB & Fastboot guide to install the drivers within 2 minutes.

7. Enable USB Debugging on your LG G3

USB Debugging must be enabled. It is located under developer options in settings. Just in case you fail to find the developer options in settings, you will have to activate em’. To do so, go to settings > about device > tap the build number for 7 times and you will get the developer options in settings. You can activate USB debugging now.

8. Disclaimer

The methods involved in flashing custom recoveries, roms and rooting your phone are highly custom and may result in bricking your device, and has nothing to do with Google or the device manufacturer that is LG in our case. Also rooting your device will void its warranty and you will be no longer eligible for any kind of free device services by the manufacturers/warranty providers.. In case of any mishap we may not be held responsible. Follow these instructions to the letter to avoid any mishap or bricking. Make sure that whatever you do, you are doing it at your own responsibility.

Let’s Learn How To Install TWRP Recovery On LG G3 Using Bump!

Installing TWRP Recovery using Flashify [No PC required]

  1. Download Bump! TWRP recovery.img file for your LG G3.
  2. Make sure you’re rooted.
  3. Copy the downloaded recovery.img file to your phone’s internal sd card.
  4. Download and install Flashify on your LG G3.
  5. Now open Flashify from the app drawer.
  6. In flashify, select “Recovery Image”.
  7. Now locate and select the copied recovery.img file.
  8. When it asks you for confirmation, tap on “Yup”.
  9. It will quickly flash TWRP recovery on your LG G3, once installed the device will reboot into TWRP itself.
  10. To enter into TWRP recovery later on, turn off your device completely and then turn it on by pressing and holding Volume Down + Power Key. Leave the keys as you see the TWRP interface.
  11. That’s all.

Installing TWRP Recovery using PC

  1. Download the recovery.img file according to your device from here: Bump! TWRP.
  2. Now connect your LG G3 to your PC and copy the downloaded recovery.img file to your phone’s internal storage.
  3. Execute the Minimal ADB & Fastboot file from your desktop now.
  4. If the mobile prompts with USB Debugging permission, check trust this PC.
  5. Now in Minimal ADB & Fastboot command window, issue the following commands having replaced the DOWNLOADED_RECOVERY with the file name you just downloaded above.

       adb shell

       su 

       dd if=/dev/zero of=/dev/block/platform/msm_sdcc.1/by-name/recovery 

       dd if=/sdcard/DOWNLOADED_RECOVERY.img of=/dev/block/platform/msm_sdcc.1/by-name/recovery

  6. Running these commands will instantly load TWRP recovery on your device. Once done, reboot your device.
  7. To enter into TWRP recovery, turn off your LG G3 completely. Now turn it on by pressing and holding Volume Down + Power Key. Do not leave the keys until you see the TWRP recovery.
  8. That’s all. You’re good go with flashing and tweaking your device now.

Make sure that you create a Nandroid Backup now.

That’s all. In case you’re stuck with anything regarding this guide, make sure that you utilize the comment box below. We will get back to you immediately.

How To Root Samsung Galaxy Note 4 SM-N9109W TD-LTE Duos

0
How To Root Samsung Galaxy Note 4 SM-N9109W TD-LTE Duos

TD-LTE Duos variant of the Galaxy Note 4, that’s going to be China-specific most probably, has already been rooted by XDA recognized developer Chainfire. If you’re going to be a lucky Galaxy Note 4 owner having this model number, you may want to cross the boundaries and unleash the real power of your latest beast by Samsung. SM-N9109W TD LTE-Duos can be easily rooted by using CF-Auto-Root, that is Chainfire’s famous root tool, and works for hundreds of Android devices including a major number of Samsung’s Galaxy series.

Wondering how you can use this root package to root your Note 4? Well, that’s what we are here for. In the succeeding guide, we are going to have a look on a method that will teach you to root your Samsung Galaxy Note 4 SM-N9109W TD-LTE Duos using CF-Auto-Root. If you’re a first timer and you’ve no idea about root access and its advantages, you may not worry about it as we will first go through a brief introduction of the root access and then head towards the early preparations.

Galaxy Note 4 SM-N9109W

Rooting your phone gives you complete access over all the data which is apparently locked by the manufacturers. This includes removal of the factory restrictions and making changes to the internal system and the operating system. Gaining the root access gives you the privileges to install various applications to enhance the performance of your device, allows you to remove the built-in applications/programs, helps you to upgrade the battery life of your device & install the apps which require the root access for the proper functionality and modify your device in so many other ways e.g using mods and flashing custom recoveries and custom ROMs. Here’s our collection of 10 Best Root Apps.

Early Preps:

1. This guide is only for Samsung Galaxy Note 4 SM-N9109W

Make sure that your device is exactly as mentioned above. To check out what device you have, go to Settings > More/General > About Device or Settings > About Device and match the model number. Be careful about the device model number, flashing a file on a device not listed here might result in bricking it up.

2. Battery should be charged at least 60%!

Your device’s battery shouldn’t be weak. In case your device goes dead during the flashing process, your device may get soft bricked and you might be in need of flashing stock firmware and that will ultimately result in wiping up your data as well. So, make sure that you charge your device before you start the flashing process.

3. Use the OEM datacable to establish connection!

Always use the original data cable to establish connection between your Android device and your computer / laptop. Using ordinary data cables might interrupt the flashing process, so to avoid any mishap, you need to meet this requirement as well.

4. Backup everything!

Just to be on the safe side, you may consider backing up each and everything from your Android device. This is highly recommended so that in case anything goes wrong, you still have the access to all of your data and you can restore it immediately. You may backup everything as listed below.

5. Turn off Samsung Kies and other softwares while using Odin3!

Make sure that you turn off Samsung Kies while using Odin3 flashtool. Samsung Kies will interrupt Odin3 and will result in causing errors and may not let you flash your desired recovery or root file. Also, make sure that you turn off any antivirus software you’ve installed and also disable firewall to avoid any connection and flashing issues.

6. Disclaimer

The methods involved in flashing custom recoveries, roms and rooting your phone are highly custom and may result in bricking your device, and has nothing to do with Google or the device manufacturer that is SAMSUNG in our case. Also rooting your device will void its warranty and you will be no longer eligible for any kind of free device services by the manufacturers/warranty providers. If your device comes with a Knox counter on the bootloader, it will be tripped and you won’t be able to reset it again. In case of any mishap we may not be held responsible. Follow these instructions to the letter to avoid any mishap or bricking. Make sure that whatever you do, you are doing it at your own responsibility.

How To Root Samsung Galaxy Note 4 SM-N9109W

Downloads Required:

  1. Download and extract Odin3 v3.09.
  2. Download and Install Samsung USB drivers
  3. Download and extract CF-Auto-Root file.

How to root now:

  1. Extract the downloaded CF-Auto-Root  file once only to get the .tar.md5 file.
  2. Open Odin3.exe.
  3. Put your Galaxy Note 4 SM-N9109W in download mode. To do so, turn it off and wait for 10 seconds. Turn it on by pressing and
    holding Volume Down + Home Button + Power Key simultaneously, You should see a warning, press Volume Up to continue. In case this method doesn’t work for you, try one from this guide.
  4. Connect your device to your PC.
  5. As soon as Odin detects your phone, the ID:COM box should turn blue.  Make sure that you’ve installed Samsung USB drivers before connecting.
  6. For Odin 3.09 hit the AP tab. Select the CF-Auto-Root.tar.md5, that you downloaded and extracted above.
  7. If you’re using Odin 3.07, you will select “PDA” tab instead of the AP tab, rest of the options remain untouched.
  8. Make sure that the options selected in your Odin are exactly as shown in the pic.Odin-3.09-explained.-2
  9. Hit start and wait till the rooting process is complete, as soon as your device restarts, remove it from PC.
  10. Find SuperSu in app drawer now.
  11. That’s all with the rooting, let’s verify the root access now.

How To Verify Root Access:

  1. To do so, go to Google Play Store on your Galaxy Note 4 SM-N9109W
  2. Find “Root Checker and install it.
  3. Open Root Checker.
  4. Tap “Verify Root”.
  5. It will ask you for SuperSu rights, tap “Grant”.
  6. It should show you Root Access Verified Now!
  7. That’s All!

If you’re stuck with anything regarding this guide, feel free to utilize the comment box below and reach us. We will get back to you immediately. Thank you all.

Credits: Chainfire XDA

How To Root Canadian Galaxy Note 4 SM-N910W8

0
How To Root Canadian Galaxy Note 4 SM-N910W8

Canadian Galaxy Note 4 has started making its way to the markets under the tag of different carriers. The device comes modeled as SM-N910W8, and happens to be a successor of the Galaxy Note 3 SM-N900W8. The device differs because of the carriers and connectivity only, while the specifications remain the same as other Galaxy Note 4(s). On the front, there’s a 5.7-inch QHD display having 515 ppi. The device comes with LTE – A connectivity  while under the hood it packs up Qualcomm’s Snapdragon 805 Quad Core CPU clocked at 2.7 GHz. A RAM of 3 GB is placed inside, internal storage starts at 32 GB and there’s an external SD card slot available on the device as well. A 3.7 MP shooter is fixed on the front whereas a 16 MP shooter is there at the back of this phone. Samsung has used a massive 3220 mAh battery to add life to the Galaxy Note 4. Out of the box, Galaxy Note 4 runs on Android 4.4.4 KitKat.

That was a recap on the Galaxy Note 4, let’s save some time and get back to our topic now. Before the users get their hands on this device, XDA recognized developer Chainfire has successfully rooted a plethora of Galaxy Note 4 variants using his famous CF-Auto-Root and the Canadian variant happens to be one of the lucky devices. That means you will be able to break Samsung’s jails on your Canadian Galaxy Note 4 as well, as soon as you get your hands on it. While you’re going to need the method to use CF-Auto-Root, we’ve it already up here. In the on-going post, we are going to root the Canadian Galaxy Note 4 SM-N910W8. We will first go through a brief overview of the root access in order to wipe off any confusions that the newbies might come across, and then head towards the early preparations.Galaxy Note 4 Canadian

Rooting your phone gives you complete access over all the data which is apparently locked by the manufacturers. This includes removal of the factory restrictions and making changes to the internal system and the operating system. Gaining the root access gives you the privileges to install various applications to enhance the performance of your device, allows you to remove the built-in applications/programs, helps you to upgrade the battery life of your device & install the apps which require the root access for the proper functionality and modify your device in so many other ways e.g using mods and flashing custom recoveries and custom ROMs. Here’s our collection of 10 Best Root Apps.

Early Preps:

1. This guide is only for Samsung Galaxy Note 4 SM-N910W8

Make sure that your device is exactly as mentioned above. To check out what device you have, go to Settings > More/General > About Device or Settings > About Device and match the model number. Be careful about the device model number, flashing a file on a device not listed here might result in bricking it up.

2. Battery should be charged at least 60%!

Your device’s battery shouldn’t be weak. In case your device goes dead during the flashing process, your device may get soft bricked and you might be in need of flashing stock firmware and that will ultimately result in wiping up your data as well. So, make sure that you charge your device before you start the flashing process.

3. Use the OEM datacable to establish connection!

Always use the original data cable to establish connection between your Android device and your computer / laptop. Using ordinary data cables might interrupt the flashing process, so to avoid any mishap, you need to meet this requirement as well.

4. Backup everything!

Just to be on the safe side, you may consider backing up each and everything from your Android device. This is highly recommended so that in case anything goes wrong, you still have the access to all of your data and you can restore it immediately. You may backup everything as listed below.

5. Turn off Samsung Kies and other softwares while using Odin3!

Make sure that you turn off Samsung Kies while using Odin3 flashtool. Samsung Kies will interrupt Odin3 and will result in causing errors and may not let you flash your desired recovery or root file. Also, make sure that you turn off any antivirus software you’ve installed and also disable firewall to avoid any connection and flashing issues.

6. Disclaimer

The methods involved in flashing custom recoveries, roms and rooting your phone are highly custom and may result in bricking your device, and has nothing to do with Google or the device manufacturer that is SAMSUNG in our case. Also rooting your device will void its warranty and you will be no longer eligible for any kind of free device services by the manufacturers/warranty providers. If your device comes with a Knox counter on the bootloader, it will be tripped and you won’t be able to reset it again. In case of any mishap we may not be held responsible. Follow these instructions to the letter to avoid any mishap or bricking. Make sure that whatever you do, you are doing it at your own responsibility.

How To Root Samsung Galaxy Note 4 SM-N910W8

Downloads Required:

  1. Download and extract Odin3 v3.09.
  2. Download and Install Samsung USB drivers
  3. Download and extract CF-Auto-Root file.
    1. CF-Auto-Root-trltecan-trltecan-smn910w8.zip

How to root now:

  1. Extract the downloaded CF-Auto-Root  file once only to get the .tar.md5 file.
  2. Open Odin3.exe.
  3. Put your Galaxy Note 4 SM-N9106W in download mode. To do so, turn it off and wait for 10 seconds. Turn it on by pressing and
    holding Volume Down + Home Button + Power Key simultaneously, You should see a warning, press Volume Up to continue. In case this method doesn’t work for you, try one from this guide.
  4. Connect your device to your PC.
  5. As soon as Odin detects your phone, the ID:COM box should turn blue.  Make sure that you’ve installed Samsung USB drivers before connecting.
  6. For Odin 3.09 hit the AP tab. Select the CF-Auto-Root.tar.md5, that you downloaded and extracted above.
  7. If you’re using Odin 3.07, you will select “PDA” tab instead of the AP tab, rest of the options remain untouched.
  8. Make sure that the options selected in your Odin are exactly as shown in the pic.Odin-3.09-explained.-2
  9. Hit start and wait till the rooting process is complete, as soon as your device restarts, remove it from PC.
  10. Find SuperSu in app drawer now.
  11. That’s all with the rooting, let’s verify the root access now.

How To Verify Root Access:

  1. To do so, go to Google Play Store on your Galaxy Note 4 SM-N910W8.
  2. Find “Root Checker” and install it.
  3. Open Root Checker.
  4. Tap “Verify Root”.
  5. It will ask you for SuperSu rights, tap “Grant”.
  6. It should show you Root Access Verified Now!
  7. That’s All!

If you’re stuck with anything regarding this guide, feel free to utilize the comment box below and reach us. We will get back to you immediately. Thank you all.

Credits: Chainfire XDA

How To Root Galaxy Note 4 LTE SM-N910S

0
How To Root Galaxy Note 4 LTE SM-N910S

Samsung’s Galaxy Note 4 is finally in reach and making its way to the markets all around the world. The LTE variant is modeled as SM-N910S, that comes with Snapdragon 805 Quad Core CPU accompanied by Adreno 420 GPU. If you’re planning to get your hands on this variant of the Galaxy Note 4, it is highly unlikely that you will stay with everything stock on your device and limit yourself. Unleashing the true potential of the Galaxy Note 4 is going to be a great experience for Android power users as the device sports some serious top-notch specifications and features. To begin with this, you will definitely need root access, that’s already available.

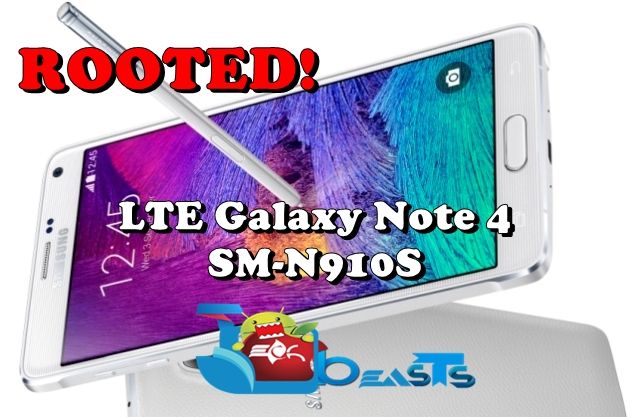
Whenever we talk about the flagship device of Samsung, greater developments are expected. As usual, XDA developer Chainfire has managed to root a number of variants of the Galaxy Note  4 using his famous CF-Auto-Root and becomes the very first person to root the Galaxy Note 4. While you start wondering for the method to do so, we would like to save a few minutes of yours as you’ve spotted the right place at the moment. In the proceeding guide, we are going to root our beloved Samsung Galaxy Note 4 SM-N910S LTE using CF-Auto-Root. If you happen to be a newbie and you’ve no idea about what is root access, don’t worry, we will first go through a brief introduction of the root access.Galaxy-Note-4-white

What is root access and why you should root your device? here’s the answer!

Rooting your phone gives you complete access over all the data which is apparently locked by the manufacturers. This includes removal of the factory restrictions and making changes to the internal system and the operating system. Gaining the root access gives you the privileges to install various applications to enhance the performance of your device, allows you to remove the built-in applications/programs, helps you to upgrade the battery life of your device & install the apps which require the root access for the proper functionality and modify your device in so many other ways e.g using mods and flashing custom recoveries and custom ROMs. Here’s our collection of 10 Best Root Apps.

Early Preps:

1. This guide is only for Samsung Galaxy Note 4 SM-N910S

Make sure that your device is exactly as mentioned above. To check out what device you have, go to Settings > More/General > About Device or Settings > About Device and match the model number. Be careful about the device model number, flashing a file on a device not listed here might result in bricking it up.

2. Battery should be charged at least 60%!

Your device’s battery shouldn’t be weak. In case your device goes dead during the flashing process, your device may get soft bricked and you might be in need of flashing stock firmware and that will ultimately result in wiping up your data as well. So, make sure that you charge your device before you start the flashing process.

3. Use the OEM datacable to establish connection!

Always use the original data cable to establish connection between your Android device and your computer / laptop. Using ordinary data cables might interrupt the flashing process, so to avoid any mishap, you need to meet this requirement as well.

4. Backup everything!

Just to be on the safe side, you may consider backing up each and everything from your Android device. This is highly recommended so that in case anything goes wrong, you still have the access to all of your data and you can restore it immediately. You may backup everything as listed below.

5. Turn off Samsung Kies and other softwares while using Odin3!

Make sure that you turn off Samsung Kies while using Odin3 flashtool. Samsung Kies will interrupt Odin3 and will result in causing errors and may not let you flash your desired recovery or root file. Also, make sure that you turn off any antivirus software you’ve installed and also disable firewall to avoid any connection and flashing issues.

6. Disclaimer

The methods involved in flashing custom recoveries, roms and rooting your phone are highly custom and may result in bricking your device, and has nothing to do with Google or the device manufacturer that is SAMSUNG in our case. Also rooting your device will void its warranty and you will be no longer eligible for any kind of free device services by the manufacturers/warranty providers. If your device comes with a Knox counter on the bootloader, it will be tripped and you won’t be able to reset it again. In case of any mishap we may not be held responsible. Follow these instructions to the letter to avoid any mishap or bricking. Make sure that whatever you do, you are doing it at your own responsibility.

How To Root Samsung Galaxy Note 4 SM-N910S

Downloads Required:

  1. Download and extract Odin3 v3.09.
  2. Download and Install Samsung USB drivers
  3. Download and extract CF-Auto-Root file.

How to root now:

  1. Extract the downloaded CF-Auto-Root  file once only to get the .tar.md5 file.
  2. Open Odin3.exe.
  3. Put your Galaxy Note 4 SM-N910S in download mode. To do so, turn it off and wait for 10 seconds. Turn it on by pressing and
    holding Volume Down + Home Button + Power Key simultaneously, You should see a warning, press Volume Up to continue. In case this method doesn’t work for you, try one from this guide.
  4. Connect your device to your PC.
  5. As soon as Odin detects your phone, the ID:COM box should turn blue.  Make sure that you’ve installed Samsung USB drivers before connecting.
  6. For Odin 3.09 hit the AP tab. Select the CF-Auto-Root.tar.md5, that you downloaded and extracted above.
  7. If you’re using Odin 3.07, you will select “PDA” tab instead of the AP tab, rest of the options remain untouched.
  8. Make sure that the options selected in your Odin are exactly as shown in the pic. Odin-3.09-explained.-2
  9. Hit start and wait till the rooting process is complete, as soon as your device restarts, remove it from PC.
  10. Find SuperSu in app drawer now.
  11. That’s all with the rooting, let’s verify the root access now.

How To Verify Root Access:

  1. To do so, go to Google Play Store on your Galaxy Note 4 SM-N9106W
  2. Find “Root Checker” and install it.
  3. Open Root Checker.
  4. Tap “Verify Root”.
  5. It will ask you for SuperSu rights, tap “Grant”.
  6. It should show you Root Access Verified Now!
  7. That’s All!

If you’re stuck with anything regarding this guide, feel free to utilize the comment box below and reach us. We will get back to you immediately. Thank you all.
Credits: Chainfire XDA

Clash Of Titans: iPhone 6 Vs Galaxy S5 Vs HTC One M8 Speed Test Video

0
Clash Of Titans: iPhone 6 Vs Galaxy S5 Vs HTC One M8 Speed Test Video

When ever a new device comes out everybody wants to get hands on it and want to enjoy the new things, but there are other people who always want the best in different ways. iPhone 6 was released back in September along with iPhone 6 plus both devices got an awesome response, but there are other device in the market from other manufactures ( Samsung and HTC ) who are giving a tough time to iPhone 6. Now if you want a high end device you’ll see what is best out there, who is worthy to pay a handsome amount.

GS5-iPhone-6-M8-main-copy

To clear all thing in your mind we have found a speed test video of iPhone 6 Vs Galaxy S5 Vs HTC One M8, so check out the following video and select the fastest device.Before going the speed test video kindly check out the main specs of all three device in the following table, that will help you more to understand why a device is faster than the other.

Apple iPhone 6Samsung Galaxy S5HTC One M8
138.1 x 67 x 6.9 mm (5.44 x 2.64 x 0.27 in)142 x 72.5 x 8.1 mm (5.59 x 2.85 x 0.32 in)146.4 x 70.6 x 9.4 mm (5.76 x 2.78 x 0.37 in)
LED-backlit IPS LCD, capacitive touchscreen, 16M colorsSuper AMOLED capacitive touchscreen, 16M colorsSuper LCD3 capacitive touchscreen, 16M colors
8 MP, 3264 x 2448 pixels, phase detection autofocus, dual-LED (dual tone) flash16 MP, 5312 x 2988 pixels, phase detection autofocus, LED flashDual 4 MP, 2688х1520 pixels, autofocus, dual-LED (dual tone) flash
iOS 8, upgradable to iOS 8.0.2Android OS, v4.4.2 (KitKat)Android OS, v4.4.2 (KitKat), upgradable to v4.4.3 (KitKat)
Apple A8Qualcomm MSM8974AC Snapdragon 801Qualcomm MSM8974AB Snapdragon 801
Dual-core 1.4 GHz Cyclone (ARM v8-based)Quad-core 2.5 GHz Krait 400Quad-core 2.3 GHz (US/EMEA)/ 2.5 GHz (Asia, China) Krait 400
PowerVR GX6450 (quad-core graphics)Adreno 330Adreno 330