Home Blog Page 387

MWC 2015: What to expect?

0
MWC 2015: What to expect?

Just a few hours to go for the one of the biggest tech events for 2015, the Mobile World Congress. The stalls are set and the manufacturers are ready to dazzle the consumers with their latest wares. Months  of debates, leaks, rumors and speculations comes to an end. The biggest question that loomed large in everyone’s mind was what will the product lineup of different manufacturers, are going to present something new and innovative or will stay away from the limelight this time around.

Mobile World Congress provides all the manufacturers a platform to come together, introduce their latest products and impress people with their work. So let’s have a look at what the industry giants will introduce.

Samsung

Samsung, one of the industry leaders will be in the lime light as they announce their new S-series flagship at the event. After Galaxy S5 apparent failure in trying to charm customers, the company went back to the drawing board to start of their Project Zero from scratch. As far as different reports go, the company has made several needed changes in their new flagship. One of the biggest one is the selection of a metal unibody over plastic.

Samsung will be introducing not one but two variants of the new flagship: Galaxy S6 and Galaxy S6 Edge. Galaxy S6 Edge will sport a dual-sided curved display like the one introduced by the company in Galaxy Note Edge. Samsung has also used their own Exynos chip in the flagship and going by different benchmark scores, the decision seems to have paid off. The company has also revamped TouchWiz user interface too.

Samsung-Galaxy-S6-Edge-Promotional-Material-Leak

Along with the smartphones we will be looking at the new smart watch from the company too, the ‘Orbis Watch’. This time around the company will be going for a round-dial display with a rotating bezel. Most of the features have been assigned to the rotating bezel, from accepting and declining calls to navigate between music tracks to name just a few functions.

Samsung-Orbis-smartwatch-1

Apart from the devices Samsung may introduce their own payment system as well as they acquired LoopPay a few weeks back. LoopPay payment system is different from ApplePay as it does not require the installation of NFC. Samsung’s lineup sure looks great, you never know maybe they may surprise us with something altogether new.

HTC

HTC will be introducing their new flagship device, the HTC One M9 and M9 Plus at the event. The HTC M9 will sport a 5-inch, 1080pixel display. It will be powered by 64-bit Qualcomm Snapdragon 810 chipset along with a 3 GB RAM. HTC One M9 is expected to sport a 20-megapixel main camera and will run on Android 5.0 Lollipop along with Sense 7.0 UI.

3930032_sd

HTC One M9 Plus is reported to sport a 5.5-inch Quad HD display. One the main differences is the size of the two devices, here HTC will be catering to the people leaning towards the phablet category. Most of its other features will be the same as HTC One M9 but Plus is expected to sport a duo camera on its back and will also have a fingerprint scanner as well.

HTC will also be dipping into the wearable market this time around. They will be introducing a smartband HTC Petra which will have a 1.8-inch PMOLED display with a 32 x 160 resolution display. The band will be powered by a ST Micro STM32L chipset. Not much is known about the fitness band. HTC’s entry into the wearable market will definitely shake things up and will make the domain more competitive.

LG

A lot of fans were vouching for MWC to be the platform where the LG G4 gets introduced, but sadly the company last month announced that they will be introducing that somewhere in the summer as they are working on honing its features. So the bog questions arises, if LG is not introducing a flagship, what does it have up its sleeve for such a major event.

The company is planning to introduce a smartwatch ‘Watch Urbane’ at the event. Watch Urbane will sport a round-dial design, and on the first look it may not look like a smartwatch but a watch this is what LG had aimed for. It will be wppowerd by 1.2 GHz Qualcomm Sanpdragon 400 processor, and will be equipped with 512 MB RAM and 4 GB on internal storage. It will offer fitness and tracking ability as well. It will run on Android Wear. The watch looks good and LG seems to have a winner at hands.

LG-Watch-Urbane-1

At the CES the company introduced the Active Bending Device, LG’s take on a dual-sided curved display. At that time they showed a prototype of the device to select partners, wouldn’t it be great that LG introduces that at the MWC, but we all know it’s a long shot.
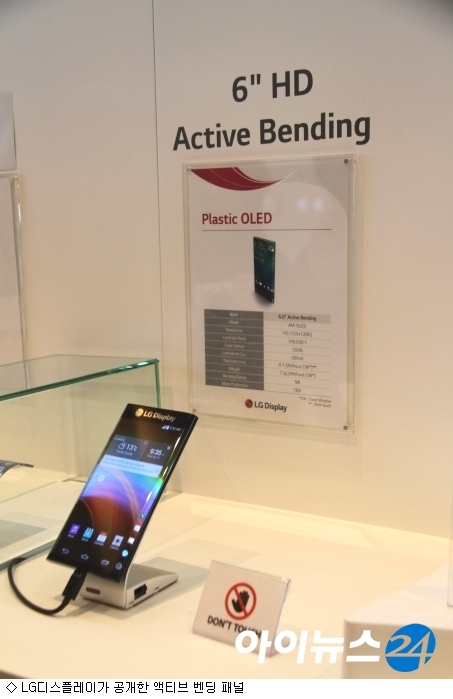
Active-Bending-Prototype

Sony

Sony like LG will not be announcing their flagship at the event, they will instead introduce Xperia Z4 Tablet and Xperia M4 Aqua. The tablet will be Sony’s star at the event as it will sport a 2k resolution display. Leaked pictures suggest it to be sleek device and the company claims that it will be a powerhouse with the best and fastest processor in the market. Fitting that bill currently is the 64-bit Qualcomm Snapdragon 810 chipset along with a 4 GB RAM.

And-this-is-probably-the-Xperia-Z4-Tablet.

The M4 Aqua does look like Xperia Z3 but in terms of specifications will be a mid rage device. It will sport a 5.2-inch, 720 x 1280 resolution display. It will be powerd by a 64-bit Snapdragon 610 chipset with a 2 GB internal storage. Both the devices are expected to be water resistant with IP68 certification.

This-seems-to-be-the-Xperia-M4-Aqua.

Huawei

Huawei will be introducing a smartwatch the Huawei Watch’ at the event. The company had kept this device under warps and it is just in the last two days that we got to see the promotional image and the leaked video of the device. The company is planning to market it as a luxury smartwatch.  As far as specifications go 42 mm in diameter, the company wanted it to be usable by both males and females and it will have a sapphire glass display along with a metal unibody. The watch will run on Android Wear and will have a heart-rate monitor and a fitness tracker as well. The watch will be available in three different classic finishes: silver, gold and black.

huawei_watch-5

Lenovo

Lenovo’s lineup for the MWC is impressive, the company is not introducing one but 5 new devices. Vibe X3 will be Lenovo’s flagship and apart from that we will get to look at Vibe S1, P1, P1 Pro and Vibe Shot. Vibe P1 and P1 Pro are aimed at the business community as they have an expanded battery life. Lenovo sure is upping their game in the smartphone arena and we are excited to see their lineup.

Lenovo-MWC-lineup-family

Which manufacturer do you think will dazzle us with their innovative products? Would the smartwatches rule the MWC? Let us know what you think. MWC’s first event is just an hour way, do let us know what you think.

How to Factory Reset a Windows Phone [ Simple Guide ]

How to Factory Reset a Windows Phone [ Simple Guide ]

Here’s how you can factory reset a Windows Phone to get back to the stock settings. Windows Phone are getting a lot of heat after adding new and improved features, more and more users are getting switching from iOS and Android to Windows Phone. As new features are making their way to Windows Phone, we can face performance issues so at some point you have to reset your Windows Phone for some reason.

I’ve prepared a simple guide on how to reset a Windows Phone, most of you people knows but for those who are new to Windows Phone you can use my guide to reset a Windows Phone.

how reset windows phone

How to Factory Reset a Windows Phone [ Simple Guide ]:

Step#1: Turn on your Windows Phone.

Step#2: Enter the passcode if you have added.

Step#3: Open settings on your Windows Phone, mostly its pinned on home screen if not then swipe left to open the menu.

Step#4: Now in settings scroll down and tap on System.

Step#5: In system menu scroll down and tap on About.

Step#6: Now scroll down and tap on Reset Your Phone button.

Step#7: You’ll see a confirmation message, Tap on Yes to proceed.

All Done.. !!!

Update Xperia Z1 C6902/C6903 to Android 5.0 Lollipop with SlimLP Custom ROM

0
Update Xperia Z1 C6902/C6903 to Android 5.0 Lollipop with SlimLP Custom ROM

Sony Xperia Z1 is powered by Snapdragon 800 chipset along with 2 Gigs of RAM. Although it was released about a year ago, but still this phone can offer a good competition to other flagships devices. Xperia Z1 is running official Android 4.4.4 KitKat at the time of writing. In past few months, Sony was pretty much active when it came to releasing updates but it has not released Android 5.0 update for any device yet neither there are any signs of these updates yet. It is expected that Xperia Z4 will be released with Android 5.0 Lollipop onboard which will open the doors for updates for Xperia Z series.

Xperia Z1 users can enjoy the Android Lollipop firmware on their smartphones by using custom ROM. The custom ROM being used in this guide is SlimLP custom ROM. It is the descendant of SlimKat custom ROM. It is more stable that any other custom ROMs available for this device at the moment. Moreover, it is officially supported so you can expected timely bug fixes and future released for your device. This custom firmware can be installed on C6902 and C6903. Do not attempt to install it on any other variant of Xperia Z1. Follow all the instructions given below to install Lollipop custom ROM on Xperia Z1 C6902 and C6903.

Requirements

  • Unlock Bootloader of Xperia Z1. If you do not know how to do it or you have no idea about what it is, then follow this guide to unlock Bootloader of your phone. How to Unlock Bootloader of Xperia Smartphones
  • Install USB Drivers for Xperia Z1 using the drivers installer from the Flashtool installation folder. Download Flashtool from here. After installing USB Drivers, connect phone to PC using the USB cable so that USB drivers are installed properly and connection is established properly.
  • Install ADB and Fastboot Drivers. | Mac ADB And Fastboot Drivers. To avoid the lengthy installation, use the Minimal ADB and Fastboot tools for your PC to make the installation quick. ADB Drivers work best on Windows 7. ADB and Fastboot Drivers might not work on Windows 8 or Windows 8.1.
  • Charge your phone up to 50%. It is very important because phone should not turn off during flashing process. If the phone turns off during the flashing process, it can damage the device.
  • Make a backup of all Contacts and Messages on phone. – Guide
  • Backup SMS Messages
  • Backup Call Logs
  • Make a Nandroid Backup if any custom Recovery is installed already. If not, you will find a custom recovery later in this guide. – Guide
  • Copy all the media files and anything else stored in the internal memory to a PC before flashing to save this data.

Disclaimer

The methods involved in flashing custom recoveries, ROMs and rooting your phone are highly custom and may result in bricking your device, and has nothing to do with Google or the device manufacturer that is SONY in our case. Also rooting your device will void its warranty and you will be no longer eligible for any kind of free device services by the manufacturers/warranty providers. In case of any mishap we may not be held responsible. Follow these instructions to the letter to avoid any mishap or bricking. Make sure that whatever you do, you are doing it at your own responsibility.

Required Downloads

Steps to Install SlimLP Android 5.0 Lollipop on Xperia Z1

  1. Make sure that bootloader is unlocked and phone is charged to 50% at least.
  2. Extract boot.img from ROM zip.
  3. Copy ROM zip and Gapps zip to phone’s internal memory.
  4. Now turn off phone wait for 5 seconds.
  5. Hold volume up button and connect phone to PC.
  6. The LED should remain blue, which means that phone is in fastboot mode.
  7. Now copy boot.img to Fastboot folder or Minimal ADB and Fastboot installation folder.
  8. Open that folder, hold shift button on keyboard and right-click on mouse.
  9. Click on Open Command Window Here.
  10. Type fastboot devices and press Enter.
  11. It should only one fastboot connected device in return. If it showing more that one, then disconnect any other connected device or close any Android Emulator. Also make sure that PC Companion is completely disabled if installed.
  12. Now type fastboot flash boot boot.img and press Enter.
  13. Type fastboot reboot and press Enter.
  14. While phone is booting up, press Volume up/down/power to enter recovery mode.
  15. In the recovery mode, select Install and navigate to the folder where ROM zip is placed.
  16. Install the ROM zip.
  17. Install Gapps zip the same way and reboot the phone.
  18. Performing factory reset and wiping Dalvik cache after installing ROM is highly recommended!
  19. The phone will boot up to home screen in 5 minutes.
  20. To install Google Applications, copy downloaded Gapps zip file to phone and flash it the same way as ROM. Factory reset is not required this time.
  21. That’s all!
  22. To root your phone after updating, flash SuperSU in the recovery.

Got any question? Ask me in the comments below 🙂

Update Xperia Z C6602/C6603 to Android 5.0.2 Lollipopp with SlimLP Custom ROM

0
Update Xperia Z C6602/C6603 to Android 5.0.2 Lollipopp with SlimLP Custom ROM

SlimROMs are built from the Android Open Source Code and the main purpose of these custom ROMs is to make a slimmed down version of Android. This would save up lot of memory and ultimately make the phone work faster. The SlimROMs are based on AOSP and there are no significant changes in the UI. The software is optimized to consume less RAM and memory. SlimKat was a huge success which offered Android 4.4.x KitKat custom firmware. The work continues with SlimLP custom ROM. It is based in Android 5.0 Lollipop. The version of SlimLP used in this guide is Android 5.0.2 which happens to be the latest version of Android OS at the time of writing. This firmware is officially supported by developers are bugs are fixed. You can view the screenshots here.

This Lollipop custom ROM is available for Xperia Z C6602 and C6603 model number. If you are using any other version of Xperia Z, then you should not try this custom ROM. Also make sure that your phone is already updated to latest official Android 4.4.4 KitKat firmware. If your phone meets these requirements and you want your phone to enjoy the awesomeness of Lollipop, then follow the guide given below to update Xperia Z to Lollipop custom firmware.

Requirements

  • Unlock Bootloader of Xperia Z. If you do not know how to do it or you have no idea about what it is, then follow this guide to unlock Bootloader of your phone. How to Unlock Bootloader of Xperia Smartphones
  • Install USB Drivers for Xperia Z using the drivers installer from the Flashtool installation folder. Download Flashtool from here. After installing USB Drivers, connect phone to PC using the USB cable so that USB drivers are installed properly and connection is established properly.
  • Install ADB and Fastboot Drivers. | Mac ADB And Fastboot Drivers. To avoid the lengthy installation, use the Minimal ADB and Fastboot tools for your PC to make the installation quick. ADB Drivers work best on Windows 7. ADB and Fastboot Drivers might not work on Windows 8 or Windows 8.1.
  • Charge your phone up to 50%. It is very important because phone should not turn off during flashing process. If the phone turns off during the flashing process, it can damage the device.
  • Make a backup of all Contacts and Messages on phone. – Guide
  • Backup SMS Messages
  • Backup Call Logs
  • Make a Nandroid Backup if any custom Recovery is installed already. If not, you will find a custom recovery later in this guide. – Guide
  • Copy all the media files and anything else stored in the internal memory to a PC before flashing to save this data.

Disclaimer

The methods involved in flashing custom recoveries, ROMs and rooting your phone are highly custom and may result in bricking your device, and has nothing to do with Google or the device manufacturer that is SONY in our case. Also rooting your device will void its warranty and you will be no longer eligible for any kind of free device services by the manufacturers/warranty providers. In case of any mishap we may not be held responsible. Follow these instructions to the letter to avoid any mishap or bricking. Make sure that whatever you do, you are doing it at your own responsibility.

Required Downloads

Steps to Install SlimLP Android 5.0 Lollipop on Xperia Z

  1. Make sure that bootloader is unlocked and phone is charged to 50% at least.
  2. Extract boot.img from ROM zip.
  3. Copy ROM zip and Gapps zip to phone’s internal memory.
  4. Now turn off phone wait for 5 seconds.
  5. Hold volume up button and connect phone to PC.
  6. The LED should remain blue, which means that phone is in fastboot mode.
  7. Now copy boot.img to Fastboot folder or Minimal ADB and Fastboot installation folder.
  8. Open that folder, hold shift button on keyboard and right-click on mouse.
  9. Click on Open Command Window Here.
  10. Type fastboot devices and press Enter.
  11. It should only one fastboot connected device in return. If it showing more that one, then disconnect any other connected device or close any Android Emulator. Also make sure that PC Companion is completely disabled if installed.
  12. Now type fastboot flash boot boot.img and press Enter.
  13. Type fastboot reboot and press Enter.
  14. While phone is booting up, press Volume up/down/power to enter recovery mode.
  15. In the recovery mode, select Install and navigate to the folder where ROM zip is placed.
  16. Install the ROM zip.
  17. Install Gapps zip the same way and reboot the phone.
  18. Performing factory reset and wiping Dalvik cache after installing ROM is highly recommended!
  19. The phone will boot up to home screen in 5 minutes.
  20. To install Google Applications, copy downloaded Gapps zip file to phone and flash it the same way as ROM. Factory reset is not required this time.
  21. That’s all!

Got any question? Ask me in the comments below 🙂

How to Fix Samsung Galaxy S5 Battery Life After Lollipop Update

0
How to Fix Samsung Galaxy S5 Battery Life After Lollipop Update

If you recently updated your Samsung Galaxy S5 to Android 5.0 and now you are facing bad battery life, want to fix it ? Here’s how you can Fix Samsung Galaxy S5 Battery Life After Lollipop Update. This is not the first time users are reporting bad battery life after updating their devices, we’ve faced same issue when we got Android KitKat update on Samsung devices.

In the following guide i’ll tell you all possible solution which will help you to get the maximum battery life. There are several factor which cause bad battery life on Samsung Galaxy S5 after updating to Lollipop.

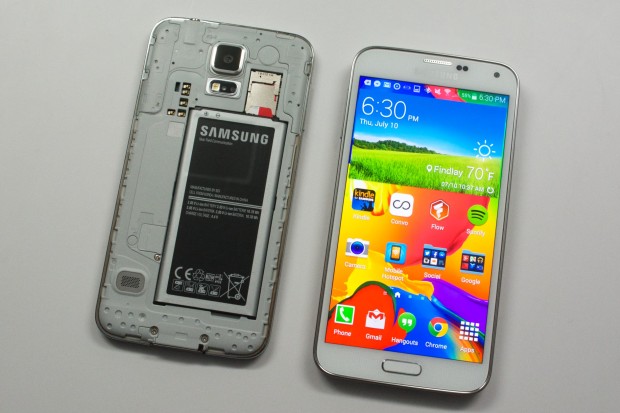
Galaxy-S5-Review-11-620x413 How to Fix Samsung Galaxy S5 Battery Life After Lollipop Update:

Method #1:

Step#1: Go to settings on your Samsung Galaxy S5.

Step#2: Tap on Battery icon from the System tab.

Step#3: There you’ll see which is using most of the battery. Now either you have to stop that or reinstall it.

Step#4: Go to setting main menu.

Step#5: Tap on Application Manager.

Step#6: Clear the cache and data of the app which is consuming the battery most.

Step#7: Tap on uninstall in order to check.

By some reason you cannot locate the apps which are causing the battery drain, you have to boot your Samsung Galaxy S5 in to safe mod.

Step#1: Turn off your device.

Step#2: press & hold the Power button and volume down key.

Step#3: Once your device is turned on release the power button.

Step#4: When you successfully enter in to safe mode, you’ll see a white text on your bottom screen.

1: Restart your device.

2: Disable all the services.

3: Start using a black paper rather then colorfull.

4: Stop using the third party launcher.

5: Downgrade your Galaxy s5 to Android 4.4.

6: Perform a factory reset on Galaxy S5.

All Done !!!

Update Xperia Z C6602/C6603 to Android 5.0 Lollipop Using CM 12 Custom ROM

0
Update Xperia Z C6602/C6603 to Android 5.0 Lollipop Using CM 12 Custom ROM

Sony Xperia Z is the pioneer of the most successful Android smartphones series by Sony. Sony introduced a completely new form factor in mobile market and because of the build quality, this phone was one of the most popular ones at  the times of its release. Sony Xperia Z is officially running Android 4.4.4 KitKat. It is the latest firmware for Xperia Z by Sony yet. Official updates should be released for this device later on. Xperia Z C6602 and Xperia Z C6603 can be updated to Android 5.0 Lollipop using the infamous CyanogenMod 11 custom ROM. Android 5.0 Lollipop is loaded with Material design. It is the latest and most intuitive makeover of Android OS yet. Android 5.0 is both a good performer and battery-friendly. That is why this version of Android is one of the most awaited ones. Sony Xperia Z users can update their devices to Android 5.0 Lollipop with the CM 12 custom ROM. Make sure that follow each and every step while installing CM 12 on Xperia Z C6602 or C6603.

Requirements

  • Unlock Bootloader of Xperia Z. If you do not know how to do it or you have no idea about what it is, then follow this guide to unlock Bootloader of your phone. How to Unlock Bootloader of Xperia Smartphones
  • Install USB Drivers for Xperia Z using the drivers installer from the Flashtool installation folder. Download Flashtool from here. After installing USB Drivers, connect phone to PC using the USB cable so that USB drivers are installed properly and connection is established properly.
  • Install ADB and Fastboot Drivers. | Mac ADB And Fastboot Drivers. To avoid the lengthy installation, use the Minimal ADB and Fastboot tools for your PC to make the installation quick. ADB Drivers work best on Windows 7. ADB and Fastboot Drivers might not work on Windows 8 or Windows 8.1.
  • Charge your phone up to 50%. It is very important because phone should not turn off during flashing process. If the phone turns off during the flashing process, it can damage the device.
  • Make a backup of all Contacts and Messages on phone. – Guide
  • Backup SMS Messages
  • Backup Call Logs
  • Make a Nandroid Backup if any custom Recovery is installed already. If not, you will find a custom recovery later in this guide. – Guide
  • Copy all the media files and anything else stored in the internal memory to a PC before flashing to save this data.

Disclaimer

The methods involved in flashing custom recoveries, ROMs and rooting your phone are highly custom and may result in bricking your device, and has nothing to do with Google or the device manufacturer that is SONY in our case. Also rooting your device will void its warranty and you will be no longer eligible for any kind of free device services by the manufacturers/warranty providers. In case of any mishap we may not be held responsible. Follow these instructions to the letter to avoid any mishap or bricking. Make sure that whatever you do, you are doing it at your own responsibility.

Required Downloads

Steps to Install CM 12 on Xperia Z

  1. Make sure that bootloader is unlocked and phone is charged to 50% at least.
  2. Extract boot.img from ROM zip.
  3. Copy ROM zip and Gapps zip to phone’s internal memory.
  4. Now turn off phone wait for 5 seconds.
  5. Hold volume up button and connect phone to PC.
  6. The LED should remain blue, which means that phone is in fastboot mode.
  7. Now copy boot.img to Fastboot folder or Minimal ADB and Fastboot installation folder.
  8. Open that folder, hold shift button on keyboard and right-click on mouse.
  9. Click on Open Command Window Here.
  10. Type fastboot devices and press Enter.
  11. It should only one fastboot connected device in return. If it showing more that one, then disconnect any other connected device or close any Android Emulator. Also make sure that PC Companion is completely disabled if installed.
  12. Now type fastboot flash boot boot.img and press Enter.
  13. Type fastboot reboot and press Enter.
  14. While phone is booting up, press Volume up/down/power to enter recovery mode.
  15. In the recovery mode, select Install and navigate to the folder where ROM zip is placed.
  16. Install the ROM zip.
  17. Install Gapps zip the same way and reboot the phone.
  18. Performing factory reset and wiping Dalvik cache after installing ROM is highly recommended!
  19. The phone will boot up to home screen in 5 minutes.
  20. To install Google Applications, copy downloaded Gapps zip file to phone and flash it the same way as ROM. Factory reset is not required this time.
  21. That’s all!

Got any question? Ask me in the comments below 🙂

Best 4K Wallpapers for Your Desktop PC – Download Here

Best 4K Wallpapers for Your Desktop PC – Download Here

Once there was a time when we download HD wallpapers for our Desktop, but now its time for 4K Wallpapers. Today i’ve collected the best 4K Wallpapers for your Desktop PC, Download Ultra HD 4K Wallpapers in 3840×2160 HD & Widescreen Resolution.

You can check our Wallpapers collection for Desktop, iPhone, iPad and all the Android devices, enjoy the fresh and colorfull wallpapers.

Waterfall-Wallpaper1

How To Fix Unfortunately Instagram Has Stopped on Android

0
How To Fix Unfortunately Instagram Has Stopped on Android

A few days back I’ve posted about how to fix unfortunately Facebook has stopped, today I’ll tell you how to fix unfortunately Instagram has stopped. There is much reason which can cause this error “unfortunately Instagram has stopped “. Once you start getting this error you cannot use Instagram properly so in order to get rid of this annoying situation follow my step by step guide below.

[note]

Download Latest Instagram Apk from a credible source.

or

Download the Old stable version of Instagram [/note]

fix unfortunately instagram stopped

How To Fix Unfortunately Instagram Has Stopped on Android:

Step#1: Open Settings on your Android device.

Step#2: Now tap on More tab. [ I am using Galaxy Note 3 ]

Step#3: Tap on Application Manager form the list.

Step#4: Now select All Application by swipe to left.

Step#5: There you’ll see all your installed apps, Tap on Instagram.

Step#6: Now all you have to do tap on Clear Cache and Clear data.

Step#7: Now goto home screen and restart your device.

All Done ….

If this method is not working for you then you have to uninstall the Instagram app and install the latest updated version from Google Play. If by any means still you are facing the same issue, i think you should try to install the old version of Instagram app that will help you to get rid of Unfortunately Instagram Has Stopped.

How To Play The Hidden Lollipop Game On Samsung Galaxy Devices

0
How To Play The Hidden Lollipop Game On Samsung Galaxy Devices

Android 5.0 Lollipop came up with a lot of goodies. Google has managed to unveil it as the best version of Android in its history. It happens to be the biggest update in the graphics aspects as well. Google has introduced a new UI, named as “Material Design” that makes the interaction with the elements on the device quite realistic. The new UI is way smooth, flat and eye-soothing. Android 5.0 Lollipop packs up a lot of performance enhancements as well. Security of the OS has been enhanced, a part from this, there’s a plethora of features packed up inside the latest iteration of Android. You may come across a lot of interesting features once you get this firmware running on your device. Google has already rolled out Android 5.0 Lollipop for all of its mainstream devices, Samsung is almost done with the roll out of this update for the its current and past flagships, while or manufacturers are also trying their best to join-in this on-going race.

If you’re a Samsung Galaxy owner and as soon as you get your hands on this latest and greatest version of Android running on it, you would love to give a try to the amazing and at the same time, annoying Droid game, the Lollipop Hidden game. It looks like Android 5.0 developers were pretty much impressed by flappy bird and they packed up a flappy bird inspired game inside the Android Lollipop and made it hidden. You won’t be able to locate this game in your apps or anywhere in the features, but you will have to play a small trick to play this game and get your droid going through the lollipop safe and sound. Willing to play this hidden Lollipop game on your Samsung Galaxy S4, S5, Note 2, Note 3 or Note 4? Well, here’s a method that will explain you how you can access this game.

How To Play The Lollipop Hidden Game On Samsung Galaxy Devices

  1. Make sure that your Samsung Galaxy device is running on Android 5.0 Lollipop.
  2. Now go to settings.
  3. In settings, go to system.
  4. In system, locate About device.lollipop hidden game samsung galaxy (4)
  5. Now in “About device” tap the Android version for a few times and wait for the Android 5.0 Lollipop screen to appear.lollipop hidden game samsung galaxy (5)
  6. Once the Lollipop screen appears, tap the Lollipop once.
  7. Now tap and hold the lollipop for a while, it will open the Hidden Android 5.0 Lollipop game.lollipop hidden game samsung galaxy (2)
  8. Once the game is opened, tap the screen to start playing.
  9. Enjoy! and let us know if you manage to pass through a few Lollipops.

lollipop hidden game samsung galaxy (3)lollipop hidden game samsung galaxy (1)

Update Xperia U ST25i to Android 5.0.2 Lollipop with OmniROM Custom ROM

1
Update Xperia U ST25i to Android 5.0.2 Lollipop with OmniROM Custom ROM

While most of the Xperia legacy devices are receiving Android 5.0 update via CyanogenMod 12 custom ROM, Xperia U receives update via OmniROM custom ROM. This custom ROM is based on Android 5.0.2 Lollipop. It is the latest version of Android available at the time of writing. This custom ROM is based on the pure AOSP model which is the true material design introduced in Lollipop. The software is pretty smooth to use and battery-friendly. Like every other new custom ROM, it is not completely free of bugs but it is being fixed in daily basis. The developer of this ROM is active and working hard to make this one a stable ROM. So if you are looking for an Android 5.0 Lollipop based custom ROM for Xperia U, then this is the most suitable choice. Follow this guide for all the installation instructions on installing this custom ROM on Xperia U.

Requirements

  • Unlock Bootloader of Xperia U. If you do not know how to do it or you have no idea about what it is, then follow this guide to unlock Bootloader of your phone. How to Unlock Bootloader of Xperia Smartphones
  • Install USB Drivers for Xperia U using the drivers installer from the Flashtool installation folder. Download Flashtool from here. After installing USB Drivers, connect phone to PC using the USB cable so that USB drivers are installed properly and connection is established properly.
  • Install ADB and Fastboot Drivers. | Mac ADB And Fastboot Drivers. To avoid the lengthy installation, use the Minimal ADB and Fastboot tools for your PC to make the installation quick. ADB Drivers work best on Windows 7. ADB and Fastboot Drivers might not work on Windows 8 or Windows 8.1.
  • Charge your phone up to 50%. It is very important because phone should not turn off during flashing process. If the phone turns off during the flashing process, it can damage the device.
  • Make a backup of all Contacts and Messages on phone. – Guide
  • Backup SMS Messages
  • Backup Call Logs
  • Make a Nandroid Backup if any custom Recovery is installed already. If not, you will find a custom recovery later in this guide. – Guide
  • Copy all the media files and anything else stored in the internal memory to a PC before flashing to save this data.

Disclaimer

The methods involved in flashing custom recoveries, ROMs and rooting your phone are highly custom and may result in bricking your device, and has nothing to do with Google or the device manufacturer that is SONY in our case. Also rooting your device will void its warranty and you will be no longer eligible for any kind of free device services by the manufacturers/warranty providers. In case of any mishap we may not be held responsible. Follow these instructions to the letter to avoid any mishap or bricking. Make sure that whatever you do, you are doing it at your own responsibility.

Required Downloads

Steps to Install OmniROM on Xperia U ST25i

  1. Make sure that bootloader is unlocked and phone is charged to 50% at least.
  2. Extract boot.img from ROM zip.
  3. Copy ROM zip and Gapps zip to phone’s internal memory.
  4. Now turn off phone wait for 5 seconds.
  5. Hold volume up button and connect phone to PC.
  6. The LED should remain blue, which means that phone is in fastboot mode.
  7. Now copy boot.img to Fastboot folder or Minimal ADB and Fastboot installation folder.
  8. Open that folder, hold shift button on keyboard and right-click on mouse.
  9. Click on Open Command Window Here.
  10. Type fastboot devices and press Enter.
  11. It should only one fastboot connected device in return. If it showing more that one, then disconnect any other connected device or close any Android Emulator. Also make sure that PC Companion is completely disabled if installed.
  12. Now type fastboot flash boot boot.img and press Enter.
  13. Type fastboot reboot and press Enter.
  14. While phone is booting up, press Volume up/down/power to enter recovery mode.
  15. In the recovery mode, select Install and navigate to the folder where ROM zip is placed.
  16. Install the ROM zip.
  17. Install Gapps zip the same way and reboot the phone.
  18. Performing factory reset and wiping Dalvik cache after installing ROM is highly recommended!
  19. The phone will boot up to home screen in 5 minutes.
  20. To install Google Applications, copy downloaded Gapps zip file to phone and flash it the same way as ROM. Factory reset is not required this time.
  21. That’s all!

Got any question? Ask me in the comments below 🙂

Update Xperia Sola MT27i to Android 5.0.2 Lollipop with CM 12 Custom ROM

17
Update Xperia Sola MT27i to Android 5.0.2 Lollipop with CM 12 Custom ROM

Sony Xperia Sola is one of the lucky legacy devices to receive the unofficial Android 5.0 Lollipop update. The update is based on unofficial Android 5.0.2 CyanogenMod 12 custom ROM. It is not an official release from Sony. It is a custom firmware built from the source code so that those devices which are no longer supported by their manufacturers can be updated to latest Android versions. This is closest to stock Android experience based on Lollipop and Material design. This phone is powered by a Dual Core processor so this phone should have no problem in running Android Lollipop firmware. Rest of the installation instructions are given below. Make sure that you follow each and every step to make the installation bug free.

Requirements

  • Unlock Bootloader of Xperia Sola. If you do not know how to do it or you have no idea about what it is, then follow this guide to unlock Bootloader of your phone. How to Unlock Bootloader of Xperia Smartphones
  • Install USB Drivers for Xperia Sola using the drivers installer from the Flashtool installation folder. Download Flashtool from here. After installing USB Drivers, connect phone to PC using the USB cable so that USB drivers are installed properly and connection is established properly.
  • Install ADB and Fastboot Drivers. | Mac ADB And Fastboot Drivers. To avoid the lengthy installation, use the Minimal ADB and Fastboot tools for your PC to make the installation quick. ADB Drivers work best on Windows 7. ADB and Fastboot Drivers might not work on Windows 8 or Windows 8.1.
  • Charge your phone up to 50%. It is very important because phone should not turn off during flashing process. If the phone turns off during the flashing process, it can damage the device.
  • Make a backup of all Contacts and Messages on phone. – Guide
  • Backup SMS Messages
  • Backup Call Logs
  • Make a Nandroid Backup if any custom Recovery is installed already. If not, you will find a custom recovery later in this guide. – Guide
  • Copy all the media files and anything else stored in the internal memory to a PC before flashing to save this data.

Disclaimer

The methods involved in flashing custom recoveries, ROMs and rooting your phone are highly custom and may result in bricking your device, and has nothing to do with Google or the device manufacturer that is SONY in our case. Also rooting your device will void its warranty and you will be no longer eligible for any kind of free device services by the manufacturers/warranty providers. In case of any mishap we may not be held responsible. Follow these instructions to the letter to avoid any mishap or bricking. Make sure that whatever you do, you are doing it at your own responsibility.

Required Downloads

Steps to Install CM 12 on Xperia Sola MT27i

  1. Make sure that bootloader is unlocked and phone is charged to 50% at least.
  2. Extract boot.img from ROM zip.
  3. Copy ROM zip and Gapps zip to phone’s internal memory.
  4. Now turn off phone wait for 5 seconds.
  5. Hold volume up button and connect phone to PC.
  6. The LED should remain blue, which means that phone is in fastboot mode.
  7. Now copy boot.img to Fastboot folder or Minimal ADB and Fastboot installation folder.
  8. Open that folder, hold shift button on keyboard and right-click on mouse.
  9. Click on Open Command Window Here.
  10. Type fastboot devices and press Enter.
  11. It should only one fastboot connected device in return. If it showing more that one, then disconnect any other connected device or close any Android Emulator. Also make sure that PC Companion is completely disabled if installed.
  12. Now type fastboot flash boot boot.img and press Enter.
  13. Type fastboot reboot and press Enter.
  14. While phone is booting up, press Volume up/down/power to enter recovery mode.
  15. In the recovery mode, select Install and navigate to the folder where ROM zip is placed.
  16. Install the ROM zip.
  17. Install Gapps zip the same way and reboot the phone.
  18. Performing factory reset and wiping Dalvik cache after installing ROM is highly recommended!
  19. The phone will boot up to home screen in 5 minutes.
  20. To install Google Applications, copy downloaded Gapps zip file to phone and flash it the same way as ROM. Factory reset is not required this time.
  21. That’s all!

Got any question? Ask me in the comments below 🙂

How To Connect A USB Flash Drive To Your Android Device

0
How To Connect A USB Flash Drive To Your Android Device

If you own an Android device, it must be playing a great role in your every day life. Android smartphones / devices have become an essential part of the daily routine as they act as a great utility in certain tasks of our life. Gone are the days when Android devices were limited to a few features only. You can use your Android devices in a number of ways now, it doesn’t matter whether you’re a businessman, a student or you belong to some other profession, an Android device is going to help you playing the role of a complete computing device. You don’t always need to carry your laptop with you, most of your basic tasks can be done using the little Android powered gadget inside your pocket. Just in case you’ve already loaded your Android device with a lot of music tracks, videos, documents, a lot of applications and now you’re running low on space to store some more content, you will need some extra memory to save your content.

A USB flash drive can be handy in such case. You can keep your important data in a USB flash disk and keep it in your pocket, you can always connect it with your Android device and access your important files / data on the go. You must be wondering about a USB flash drive with an Android device here. Well, Android devices allow the users to mount a USB flash drive using a USB OTG (on-the-go) cable. OTG makes it pretty easy to establish connection between your USB drive and Android device, and instantly allows the device to mount the USB storage that appears as a separate partition inside your file manager.

It’s pretty easy to connect a USB flash drive to a Samsung, Sony  or HTC device since they run their modified Android firmware, you don’t need to root your device or any other tweak. However, to connect a USB flash drive to a Nexus device or any other device running pure stock Android firmware, you need root access and stick mount installed in order to mount the USB drive. In the following post, we will explain a method to connect USB storage device to your Android device. Let’s go ahead and learn it now.USB Connection_Techbeasts (4)

Requirements:

  1. An Android device.
  2. A USB OTG Cable
  3. A USB Flash Drive or a Pen Drive
  4. Stick Mount [Root] [Only for Nexus users or users running stock Android firmware on their device. If you are using a Samsung, HTC or Sony device, skip this step.]
  5. File Manager [You can use stock file manager if you have it, or else download and install ES File Explorer]

How To Connect A USB Flash Drive To Your Android Device

  1. If you’re using a Nexus device or a device with stock Android firmware, make sure that you’re rooted it and installed Stick Mount on it. If you’re using a Samsung, Sony or HTC device, skip this step.
  2. Now connect the USB drive into an OTG.USB Connection_Techbeasts (5)
  3. Connect the other end of the OTG into your smartphone’s charger/USB port now.USB Connection_Techbeasts (6)
  4. As soon as you connect you OTG to your device, a pop-up will open up, check “Use by default for this device” and tap “ok”. In case you’re using a non-Nexus or non-stock Android device, you won’t get any popup, you will only get a notification in the notification determining the successful connectivity of USB drive with your Android device.
  5. One connected, open the file manager. USB drive will appear as a separate folder/partition/drive in the file manager now. Access it by tapping the drive folder.
  6. You will find all of your content saved on the USB flash drive.
  7. You can now copy or move data between your phone’s storage and the external USB storage.
  8. That’s all.

USB Connection_Techbeasts (2)USB Connection_Techbeasts (3)USB Connection_Techbeasts (1)