Home Blog Page 388

How To Manually Set APN Settings for US Network Providers [ Android Devices ]

0
How To Manually Set APN Settings for US Network Providers [ Android Devices ]

Here’s how you can manually set APN settings for US network provides, when ever we insert a sim card in our device carrier providers automatically send APN settings. But sometimes we get into a situation where we have to manually set APN settings because of some reason we didn’t receive APN Settings from Network Providers.

Every network providers has it own APN settings, you can search it on Google or contact network providers. In the following guide i’ll tell you how to manually set APN settings for US network providers.

11009001_10206120090984614_65790836_n

How To Manually Set APN Settings for US Network Providers:

Following are the APN details of the AT&T, Sprint, T-Mobile, Verizon and more. Follow all the steps carefully to set APN settings.

AT&T APN Settings

Name: ATT Phone, (ATT Broadband for tablets)
APN: phone (broadband for tablets)
Proxy: <Not Set>
Port: <Not Set>
Username: <Not Set>
Password: <Not Set>
Server: <Not Set>
MMSC: http://mmsc.mobile.att.net (Not Set for tablets)
MMS proxy: proxy.mobile.att.net (Not Set for tablets)
MMS port: 80
MCC: 310
MNC: 410
Authentication type: <Not Set>
APN type: default,supl,mms,hipri (Also ‘fota’ for tablets)
APN Protocol: IPv4 (Enabled for tablets)
Bearer: <Default>

T-Mobile APN Settings

Name: T-MOBILE
APN: epc.tmobile.com, or fast.tmobile.com (LTE)
Proxy: <Not Set>
Port: <Not Set>
Username: <Not Set>
Password: <Not Set>
Server: wap.voicestream.com
MMSC: http://mms.msg.eng.t-mobile.com/mms/wapenc
MMS proxy: 216.155.165.50
MMS port: <Not Set>
MCC: 310
MNC: 260
Authentication type: <Not Set>
APN type: <Not Set> or Internet + MMS
APN Protocol: IPv4
Bearer: <Not Set>

Sprint APN Settings

Name: Sprint
APN: cinet.spcs
Proxy: <Not Set>
Port: <Not Set>
Username: [email protected]
Password: your MSID
Server: wap.voicestream.com
MMSC: http://mmsc1.uscc.net/mmsc/mms
MMS proxy: 68.28.31.7
MMS port: <Not Set>
MCC: 234
MNC: 15
Authentication type: <Not Set>
APN type: <Not Set>
APN Protocol: iPv4
Bearer: <Not Set>

Verizon APN Settings

Name: Verizon
APN: internet
Proxy: <Not Set>
Port: <Not Set>
Username: <Not Set>
Password: <Not Set>
Server: <Not Set>
MMSC: http://mms.vtext.com/servlets/mms
MMS proxy: <Not Set>
MMS port: 80
MCC: 310
MNC: 012
Authentication type: <Not Set>
APN type: <Not Set> or Internet + MMS
APN Protocol: <Default>
Bearer: <Not Set>

US Cellular APN Settings

Name: USCC
APN: internet
Proxy: <Not Set>
Port: <Not Set>
Username: [email protected]
Password: your MSID
Server: wap.voicestream.com
MMSC: http://mmsc1.uscc.net/mmsc/mms
MMS proxy: blank
MMS port: 80
MCC: 310
MNC: 120
Authentication type: <Not Set>
APN type: <Not Set> or Internet + MMS
APN Protocol: iPv4
Bearer: <Not Set>

Boost Mobile APN Settings

Name: Boost_Mobile
APN: Boost_Mobile
Proxy: <Not Set>
Port: <Not Set>
User Name: Boost_Mobile
Password:
Server:
MMSC: http://mm.myboostmobile.com
MMS Proxy: 68.28.31.7
MMS Port: 80
MCC: 311
MNC: 870
Authentication type: <Not Set>
APN type: default,admin,fota,mms,supl,hipri
APN Protocol: <Not Set>
Bearer: <Not Set>

Virgin Mobile APN Settings

Name: Virgin Mobile
APN: Sprint
Proxy: <Not Set>
Port: <Not Set>
Username: <Not Set>
Password: <Not Set>
Server: <Not Set>
MMSC: http://mmsc.vmobl.com:8080/mms?
MMS proxy: 205.239.233.136
MMS port: 81
MCC: 310
MNC: <Not Set>
Authentication type: <Not Set>
APN type: default,supl,mms
APN Protocol: iPv4
Bearer: <Not Set>

Step#1: Go to setting on your device.

Step#2: Tap on More Networks.

Step#3: Tap on Mobile Networks.

Step#4: Now Tap on Access Point Names.

Step#5: Tap on + icon located on top right side.

Step#6: Add the details in the given fields.

All Done !!
Update Xperia S LT26i to Android 5.0.2 Lollipop with CM12 Custom ROM

45
Update Xperia S LT26i to Android 5.0.2 Lollipop with CM12 Custom ROM

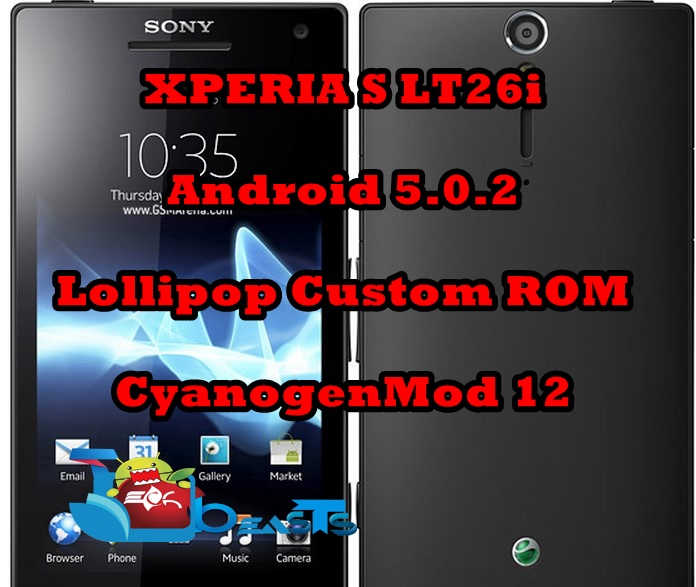
This is an unofficial build of CyanogenMod 12 for Sony Xperia S, model number LT26i. The Android version of this custom ROM is Android 5.0.2 Lollipop. This is the latest version of Android available so far and it is indeed the best of the Android yet. Sony Xperia S has been officially updated to Android Jelly Bean. It is the final official update for this phone. This phone is powered by a Dual Core processor along with 1 GB of RAM. It can easily handle the Lollipop OS. To install Android 5.0.2 on Xperia S, follow the guide given below to install it on your phone. Make sure that you follow all the steps and pre-cautions given below.

Requirements

  • Unlock Bootloader of Xperia S. If you do not know how to do it or you have no idea about what it is, then follow this guide to unlock Bootloader of your phone. How to Unlock Bootloader of Xperia Smartphones
  • Install USB Drivers for Xperia S using the drivers installer from the Flashtool installation folder. Download Flashtool from here. After installing USB Drivers, connect phone to PC using the USB cable so that USB drivers are installed properly and connection is established properly.
  • Install ADB and Fastboot Drivers. | Mac ADB And Fastboot Drivers. To avoid the lengthy installation, use the Minimal ADB and Fastboot tools for your PC to make the installation quick. ADB Drivers work best on Windows 7. ADB and Fastboot Drivers might not work on Windows 8 or Windows 8.1.
  • Charge your phone up to 50%. It is very important because phone should not turn off during flashing process. If the phone turns off during the flashing process, it can damage the device.
  • Make a backup of all Contacts and Messages on phone. – Guide
  • Backup SMS Messages
  • Backup Call Logs
  • Make a Nandroid Backup if any custom Recovery is installed already. If not, you will find a custom recovery later in this guide. – Guide
  • Copy all the media files and anything else stored in the internal memory to a PC before flashing to save this data.

Disclaimer

The methods involved in flashing custom recoveries, ROMs and rooting your phone are highly custom and may result in bricking your device, and has nothing to do with Google or the device manufacturer that is SONY in our case. Also rooting your device will void its warranty and you will be no longer eligible for any kind of free device services by the manufacturers/warranty providers. In case of any mishap we may not be held responsible. Follow these instructions to the letter to avoid any mishap or bricking. Make sure that whatever you do, you are doing it at your own responsibility.

Required Downloads

Steps to Install CM 12 on Xperia S LT26i

  1. Make sure that bootloader is unlocked and phone is charged to 50% at least.
  2. Now turn off phone wait for 5 seconds.
  3. Hold volume up button and connect phone to PC.
  4. The LED should remain blue, which means that phone is in fastboot mode.
  5. Now copy recovery.elf to Fastboot folder or Minimal ADB and Fastboot installation folder.
  6. Open that folder, hold shift button on keyboard and right-click on mouse.
  7. Click on Open Command Window Here.
  8. Type fastboot devices and press Enter.
  9. It should only one fastboot connected device in return. If it showing more that one, then disconnect any other connected device or close any Android Emulator. Also make sure that PC Companion is completely disabled if installed.
  10. Now type fastboot flash boot recovery.elf and press Enter.
  11. It will flash TWRP custom recovery on your phone.
  12. Type fastboot reboot and press Enter.
  13. Now use the guide given above to make the Nandroid backup if not made already.
  14. Extract the downloaded custom ROM zip and copy boot.img to Fastboot folder or Minimal ADB and Fastboot installation folder.
  15. Copy the ROM zip to phone’s internal storage.
  16. Re-enter phone into the fastboot mode.
  17. Type fastboot flash boot boot.img and press Enter.
  18. Flashing will be done in few minutes.
  19. Type fastboot reboot and press Enter.
  20. While phone is booting up, press Volume up/down continuously to enter recovery mode.
  21. In the recovery mode, select Install and navigate to the folder where ROM zip is placed.
  22. Install the ROM zip and reboot the phone.
  23. Performing factory reset and wiping Dalvik cache after installing ROM is highly recommended!
  24. The phone will boot up to home screen in 5 minutes.
  25. To install Google Applications, copy downloaded Gapps zip file to phone and flash it the same way as ROM. Factory reset is not required this time.
  26. That’s all!

Got any question? Ask me in the comments below 🙂

Galaxy S6 & S6 Edge In Pictures So Far

0
Galaxy S6 & S6 Edge In Pictures So Far

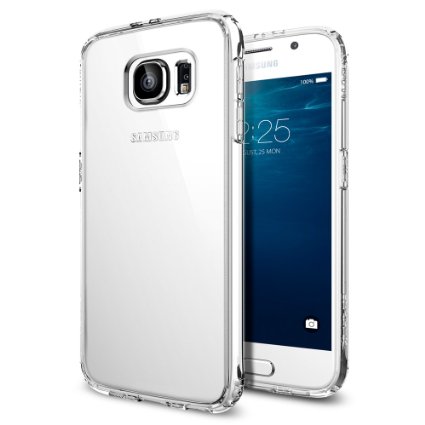
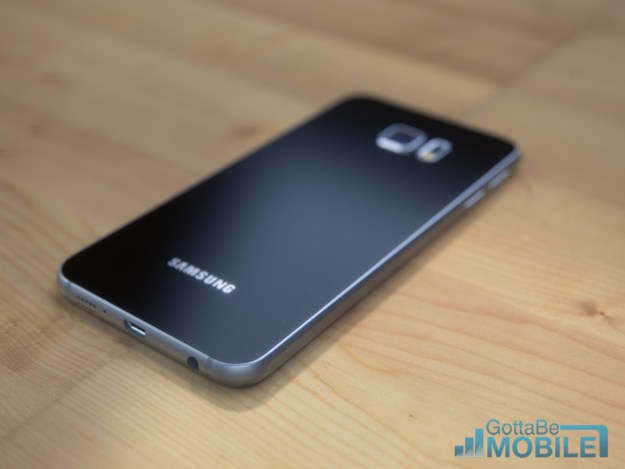
Screenshot_4We are just 4 days away from the official launch of the Galaxy S6 and its sibling, the Galaxy S6 Edge. Its been pretty long since we’ve been coming across a lot of spicy info about both these devices in the form of rumors and leaks. Galaxy S6 and S6 Edge have been making the rounds in leaked images as well. We’re seeing improved pictures coming up and we now have a very clear idea about how the device is going to look like. Since Samsung’s revenues fell because of a drop in sales, Samsung named the Galaxy S6 project as Project Zero in order to revamp their Galaxy Series from scratch. The leaks suggests that Samsung has taken the critics seriously, and has come up with a new cool design, the device also happens to be packed up in a complete metallic body. Let’s go through all the pictures that give us the best idea about the device.

 1424931964690 (1)

S6142493649200061z9BYzltmL._SX425_ 1424936509980 1424936526750 bott galaxy-s6-case-renders-1 galaxy-s6-cases galaxy-s6-cases-1 galaxy-s6-concept-martin-hajek-gottabemobile-3 Galaxy-S6-prototype gsmarena_004 php6fipqo rps20150225_123611 rps20150225_130456 rps20150225_130521 (1) rps20150225_130521  samsung_galaxy_note_edge_display samsung_galaxy_s6_spigen_case Samsung-Galaxy-S6-case-leak-1
screen-size   Volume key-970-80

Galaxy S6 will sport a 5.0 or 5.2 inch Quad HD display with a 5 MP shooter on the front. A 20 MP shooter is expected at the back. The device will be occupying Samsung’s very own Exynos 7420 or Snapdragon 810 chipset and a RAM of 3 GBs. Curved variant of the device, the S6 Edge will probably pack up samse specifications with a curved screen only. The Galaxy S6 & S6 Edge will be launched on March 1, at MWC 2015 in Barcelona.

One Piece Treasure Cruise for PC Download – Windows 8.1,8,7,Xp-Mac

1
One Piece Treasure Cruise for PC Download – Windows 8.1,8,7,Xp-Mac

One Piece Treasure Cruise for PC is available, but not it in Pc game format. One Piece Treasure Cruise is based on the famous cartoon movie One Piece pirate crew. One Piece Treasure Cruise is basically designed for iOS and Android devices, but thanks to third party emulators we can install One Piece Treasure Cruise on PC. In the following guide i’ll tell how to install One Piece Treasure Cruise for PC using BlueStacks and Andy.

About One Piece Treasure Cruise:

#. You have to fight with other players using touch controls, in order to earn more and beat other players. Tap your characters at the right time to form combos and deal massive damage.

#. Help Luffy to complete his quest and become the pirate king.

#. Each character possesses unique special abilities that make battles even more exciting.

One Piece Treasure Cruise for PC


How To Download One Piece Treasure Cruise for Pc Using Andy Emulator: 

Step 1: Download the Andy from here.

Step 2: After downloading is complete, install Andy on PC.

Step 3: Andy installation process will take few minutes, When installation is finished launch Andy on you PC.

Step 4: When Andy is open, you’ll see an Android tablet interface head over to Google Play.

Step 5: Open Google Play->Search->One Piece Treasure Cruise ->Install.

Step 6: when the installation process is complete, go to the home screen there you’ll see One Piece Treasure Cruise.

Step 7: Double click on One Piece Treasure Cruise icon and start playing the game.

Step 8: Now One Piece Treasure Cruise is successfully installed on your PC, Enjoy the the game.

Download and Install Duet for PC ( Windows Xp,8,8.1,7,10 – Mac ):

  1. To download One Piece Treasure Cruise for PC, you will need an Android emulator like Bluestacks. If you do not have it already, you can download it from the website Bluestacks.com.
  2. Open Bluestacks and search for One Piece Treasure Cruise using search tool on the top of the homepage.
  3. Click on install button. The game will automatically download and install.
  4. Once the app has been installed, go to My Apps in Bluestacks homepage.
  5. The icon for the game will appear in My Apps.
  6.  Click on this icon to open One Piece Treasure Cruise.

Duet for PC Download – ( Windows 8,8.1,7,Xp-Mac )

0
Duet for PC Download – ( Windows 8,8.1,7,Xp-Mac )

Duet for PC Download is available, but not in the Pc format game. Duet is basically designed for Android and iOS smartphones. Duet is simple arcade game but very hard to play, there is a simple rule to play Duet you have to control two vessels in sync and pass all the hurdles. In the following guide i’ll tell you how to install Duet for PC using BlueStacks and Andy, but before going any further let me give you an overview on Duet.

About Duet:

* You’ve to play 8 chapters with full of difficulties.

* To avoid everything in your path you can touch either side of the screen to twist.

* Duet give you airtight controls to maintain perfect balance between both vessels.

Duet for PC Download


How To Download Duet for Pc Using Andy Emulator: 

Step 1: Download the Andy from here.

Step 2: After downloading is complete, install Andy on PC.

Step 3: Andy installation process will take few minutes, When installation is finished launch Andy on you PC.

Step 4: When Andy is open, you’ll see an Android tablet interface head over to Google Play.

Step 5: Open Google Play->Search->Duet ->Install.

Step 6: when the installation process is complete, go to the home screen there you’ll see Duet.

Step 7: Double click on Duet icon and start playing the game.

Step 8: Now Duet is successfully installed on your PC, Enjoy the the game.

Download and Install Duet for PC ( Windows Xp,8,8.1,7,10 – Mac ):

  1. To download Duet for PC, you will need an Android emulator like Bluestacks. If you do not have it already, you can download it from the website Bluestacks.com.
  2. Open Bluestacks and search for Duet using search tool on the top of the homepage.
  3. Click on install button. The game will automatically download and install.
  4. Once the app has been installed, go to My Apps in Bluestacks homepage.
  5. The icon for the game will appear in My Apps.
  6.  Click on this icon to open Duet.

Bloons TD Battles for PC Download – Windows 8,8.1,7-Mac

2
Bloons TD Battles for PC Download – Windows 8,8.1,7-Mac

Bloons TD Battles for PC is available, but not in Pc game formats. Bloons TD Battles is basically designed for iOS and Android smartphones. We can install Bloons TD Battles for PC using third party emulators, Bloons TD Battles is a Strategy multiplayer combat game. In the following guide i’ll tell you how to install Bloons TD Battles for PC using BlueStacks and Andy, but before going any further let me give you an overview on Bloons TD Battles.

About Bloons TD Battles:

* Head-to-head two player Bloons TD
* 18 custom Battles tracks
* 20 awesome monkey towers, each with 8 powerful upgrades
* Assault Mode – manage strong defenses and send bloons directly against your opponent
* Defensive Mode – build up your income and outlast your challenger with your superior defenses.

Bloons TD Battles for PC

HOW TO DOWNLOAD Bloons TD Battles FOR PC USING ANDY EMULATOR: 

Step 1: Download the Andy from here.

Step 2: After downloading is complete, install Andy on PC.

Step 3: Andy installation process will take few minutes, When installation is finished launch Andy on you PC.

Step 4: When Andy is open, you’ll see an Android tablet interface head over to Google Play.

Step 5: Open Google Play->Search->Bloons TD Battles ->Install.

Step 6: when the installation process is complete, go to the home screen there you’ll see Bloons TD Battles.

Step 7: Double click on Bloons TD Battles icon and start playing the game.

Step 8: Now Bloons TD Battles is successfully installed on your PC, Enjoy the the game.

DOWNLOAD AND INSTALL BlOONS TD BATTLES FOR PC ( WINDOWS XP,8,8.1,7,10 – MAC ):

  1. To download Bloons TD Battles for PC, you will need an Android emulator like Bluestacks. If you do not have it already, you can download it from the website Bluestacks.com.
  2. Open Bluestacks and search for Bloons TD Battles using search tool on the top of the homepage.
  3. Click on install button. The game will automatically download and install.
  4. Once the app has been installed, go to My Apps in Bluestacks homepage.
  5. The icon for the game will appear in My Apps.
  6.  Click on this icon to open Bloons TD Battles.

Fix iPhone 6/6 Plus Touch Screen Unresponsive Issue

0
Fix iPhone 6/6 Plus Touch Screen Unresponsive Issue

iPhone 6/ iPhone 6 plus both are the best devices ever came, setting a new recored over 74 million sales in just one quarter all over the world. iPhone 6/ 6 Plus comes with high specs and this Apple really did something that we were not expecting, as both the devices are awesome in many ways but not perfect. We have received many mails from our user’s, that they are facing iPhone 6/6 Plus Touch Screen Unresponsive Issue. Here’s how you can fix iPhone 6/6 Plus Touch Screen Unresponsive Issue.

Many users reported that suddenly their iPhone 6/ 6 Plus touch screens become unresponsive, they can not use anything no matter how hard they try to tap or touch they screen. There is no specific reason for this issue, so we have tried few methods in order to fix iPhone 6/6 Plus Touch Screen Unresponsive Issue.

fix iPhone 6/6 Plus Touch Screen Unresponsive Issue

How To Fix iPhone 6/6 Plus Touch Screen Unresponsive Issue:

Step#1: Some times a crashed app and small bug become the reason of iPhone 6/6 Plus Touch Screen Unresponsive Issue, so restarting your device will solve this.

Step#2: If a simple restart didn’t worked for you then you have to reset your iPhone by going in to Settings-> General -> Reset -> Reset All Settings.

Step#3: Now if still there is no success then you have to restore your iPhone using iTunes.

  1. Connect your iPhone with PC/Mac.
  2. Open iTunes on your PC.
  3. Click on your device from the top.
  4. Now Click on Restore iPhone.
  5. Click on Restore and Update.

Step#4: You have to restore your iPhone using manual method. Sometime restoring iPhone using iTunes didn’t fix the issue.

  1. First download the latest iOS 8.1.3 IPSW for your iPhone 6/ 6 Plus.
  2. Turn off your iPhone, now press and hold home + Power button for 10 seconds then release the power button while still holding home button to put your device in DFU Mode.
  3. Now connect your device with PC.
  4. Open iTunes and select your device from the top.
  5. Now hold the Option Key on Mac OR Press Shift Key on Windows and click on Restore iPhone.
  6. Select the downloaded iOS 8.1.3 IPSW file.
  7. Click on Agree when a new pop-up shows up.
  8. Now wait for installation to be completed.

All Done !!

How to Remove Weather and Stocks from the iOS 8 – 7 Notification Center

0
How to Remove Weather and Stocks from the iOS 8 – 7 Notification Center

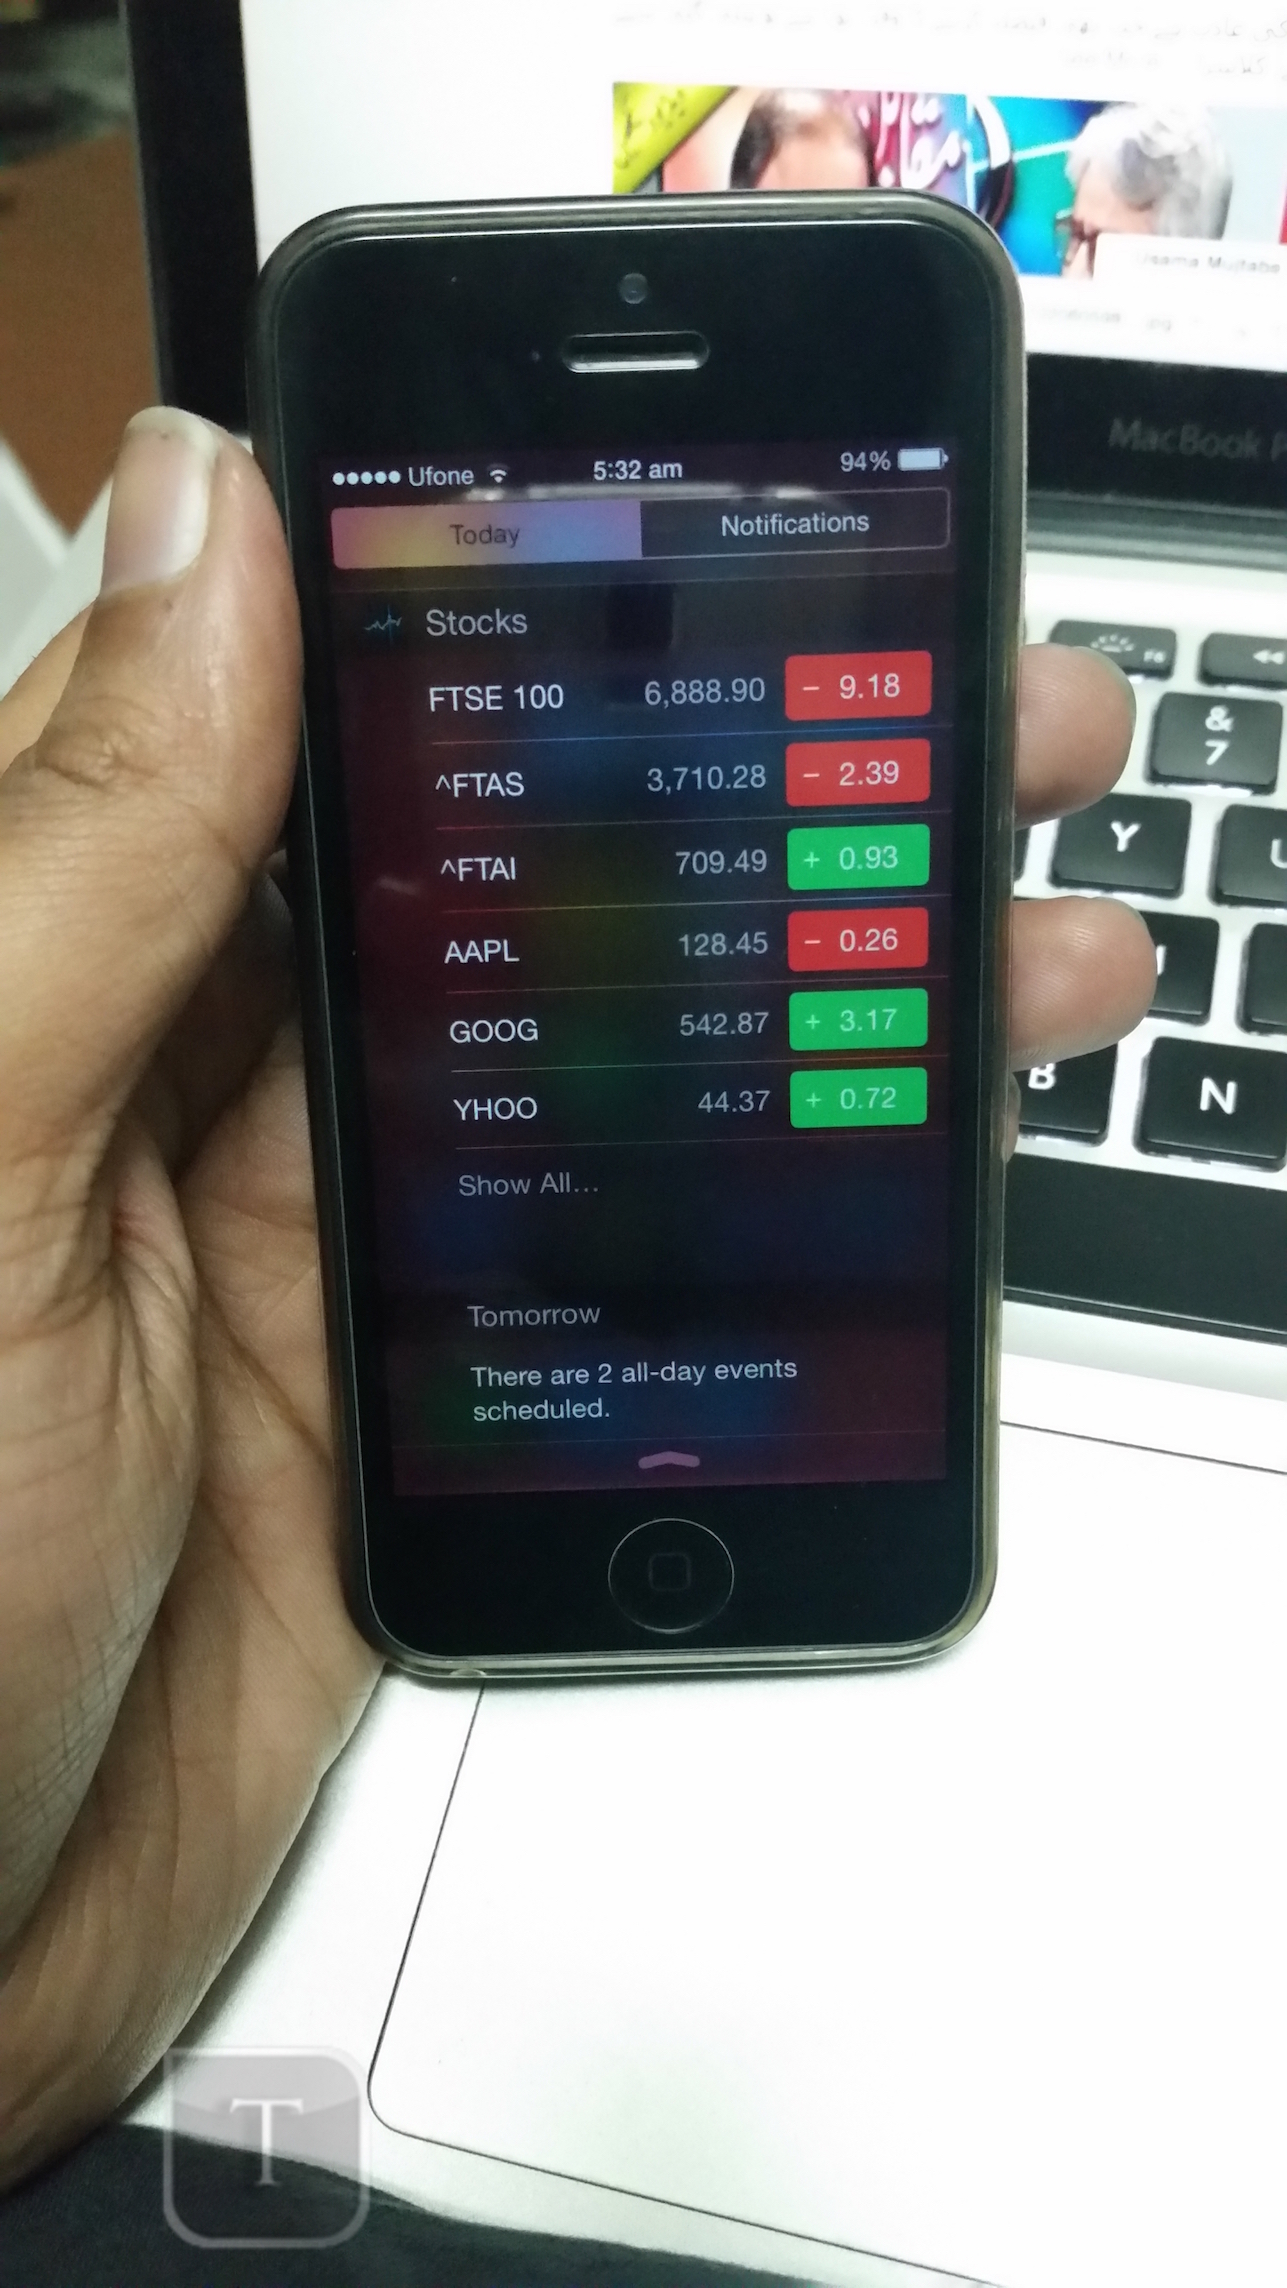
Here’s how you can remove weather and stocks from the iOS 8/7 notification center. Weather and stocks are automatically placed in iOS notification center, not many users found this good. There is no doubt that weather and stocks are there for none reason, it helps us to get the weather reports also people who are in stock business get the latest updates but the position of these apps don’t make a good impression.

In the following guide we’ll tell you how you can remove weather and stocks from notification center in iOS 8 and 7. Though its quite simple but not every one knows how to remove weather and stocks from notification center.

Remove-Weather-and-Stocks-from-the-iOS-Notification-Center

How to Remove Weather and Stocks from the iOS 8 – 7 Notification Center:

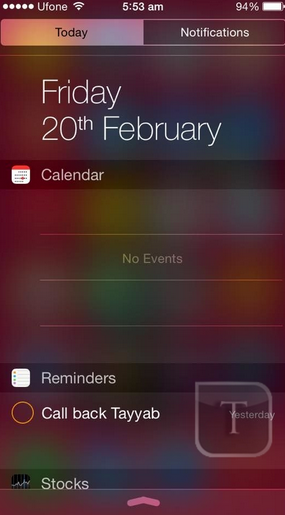
Step#1: Open Notification Center by swipe down from the top of the screen.

Screen Shot 2015-02-20 at 06.04.10

Step#2: Tap on Today.

Screen Shot 2015-02-20 at 06.04.56

Step#3: Now scroll down at the bottom of the page, Tap on Edit.

Screen Shot 2015-02-20 at 06.05.41

Step#4: Remove the widgets by tapping on red button->Tap on remove.

How to Remove Weather and Stocks from the iOS 8 - 7 Notification Center

Step#5: Tap on Done.

Screen Shot 2015-02-20 at 06.06.47

Method #2: iOS 7:

Step#1: Open Settings on your iPhone.

Step#2: Tap on Notification from the list.

Step#3: Now Tap on app to turn off their notifications.

Step#4: Tap on Done..

All Done.

Galaxy Online 3 for Pc Download – ( Windows 8,8.1,7,Mac )

0
Galaxy Online 3 for Pc Download – ( Windows 8,8.1,7,Mac )

Galaxy Online 3 for Pc is not available yet, but we can still download and install Galaxy Online 3 for Pc using third party emulators. Galaxy Online 3 is Strategy based game designed for iOS and Android, you’ve to take charge of colonized planet, build up your army, create a outpost for you colony and hunt down the outlaws to earn points. In the following guide i’ll tell you how to install Galaxy Online 3 for Pc using emulators like BlueStacks and Andy. Before going any further let me give you an overview on Galaxy Online 3.

About Galaxy Online 3:

* Fight with other players around the world, to be the best Captain.

* To build your army recruit the galaxy’s mightiest heroes.

* You’ve have to hunt down the space pirates and get the secret technology designs to build your sheep powerful.

For more info visit: Google Play

Galaxy Online 3 for Pc

How To Download Galaxy Online 3 for Pc Using Andy Emulator: 

Step 1: Download the Andy from here.

Step 2: After downloading is complete, install Andy on PC.

Step 3: Andy installation process will take few minutes, When installation is finished launch Andy on you PC.

Step 4: When Andy is open, you’ll see an Android tablet interface head over to Google Play.

Step 5: Open Google Play->Search->Galaxy Online 3 ->Install.

Step 6: when the installation process is complete, go to the home screen there you’ll see Galaxy Online 3.

Step 7: Double click on Galaxy Online 3 icon and start playing the game.

Step 8: Now Galaxy Online 3 is successfully installed on your PC, Enjoy the the game.

Download and Install Galaxy Online 3 for PC ( Windows Xp,8,8.1,7,10 – Mac ):

  1. To download Galaxy Online 3 for PC, you will need an Android emulator like Bluestacks. If you do not have it already, you can download it from the website Bluestacks.com.
  2. Open Bluestacks and search for Galaxy Online 3 using search tool on the top of the homepage.
  3. Click on install button. The game will automatically download and install.
  4. Once the app has been installed, go to My Apps in Bluestacks homepage.
  5. The icon for the game will appear in My Apps.
  6.  Click on this icon to open Galaxy Online 3.

1010! for Pc Download – ( Windows 8,8.1,7,Xp/Mac )

0
1010! for Pc Download – ( Windows 8,8.1,7,Xp/Mac )

1010 for PC is not available yet, but we can still download and install 1010 on PC using third party emulator. 1010! is basically designed for iOS and Android smartphones, 1010! is unique puzzle game in which you have to drop block and destroy them in lines on the screen both vertically and horizontally. In the following guide i’ll tell you how to install 1010 for Pc using BlueStacks and Andy. Before going any further let me give you an overview on 1010!.

About 1010!:

* A simple and very addictive puzzle game.

* You have to create and destroy blocks in lines, its same as we used to play brick brakers.

* No time limit, no colour match!

for more info visit: Google Play

1010! for Pc Download

How To Download 1010 for Pc Using Andy Emulator: 

Step 1: Download the Andy from here.

Step 2: After downloading is complete, install Andy on PC.

Step 3: Andy installation process will take few minutes, When installation is finished launch Andy on you PC.

Step 4: When Andy is open, you’ll see an Android tablet interface head over to Google Play.

Step 5: Open Google Play->Search->1010! Puzzle ->Install.

Step 6: when the installation process is complete, go to the home screen there you’ll see 1010!.

Step 7: Double click on 1010! icon and start playing the game.

Step 8: Now 1010! is successfully installed on your PC, Enjoy the the game.

Download and Install 1010! for PC ( Windows Xp,8,8.1,7,10 – Mac ):

  1. To download 1010! for PC, you will need an Android emulator like Bluestacks. If you do not have it already, you can download it from the website Bluestacks.com.
  2. Open Bluestacks and search for 1010! using search tool on the top of the homepage.
  3. Click on install button. The game will automatically download and install.
  4. Once the app has been installed, go to My Apps in Bluestacks homepage.
  5. The icon for the game will appear in My Apps.
  6.  Click on this icon to open 1010!.

How to Change Phone Number in WhatsApp on iPhone

0
How to Change Phone Number in WhatsApp on iPhone

Here’s how you can change phone number in Whatsapp on iPhone, Whatsapp is the most popular instant messaging service among all the smartphones. Now a days people use Whatsapp more then text messages, also people have separate numbers for just instant messaging. Suppose you got a new device and now you want change your Whatsapp number, but don’t want to delete your current Whatsapp data and Media.

In the following guide i’ll tell you how you can change your phone number in Whatsapp without losing data. Though it’s quite simple but not every one know’s how to do it, just follow all the steps mentioned below.

How to Change Phone Number in WhatsApp on iPhone

How to Change Phone Number in WhatsApp on iPhone:

Step#1: Open WhatsApp on your iPhone.

Step#2: Tap on Setting icon located at the bottom.

Step#3: Tap on Account from the list.

11015174_10206059884759496_1581922959_n


Step#4: Tap on Change Number.

11005704_10206059884999502_927839338_n

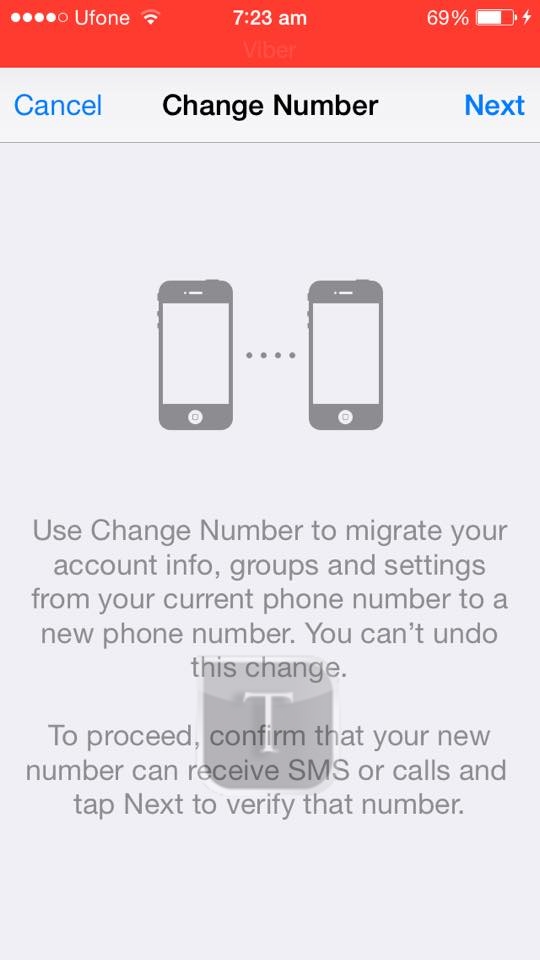
Step#5: Now you’ll see a message on screen with migration info, Tap on Next located on top right corner.

11006061_10206059885119505_870278025_n

Step#6: Enter your Old Phone Number and then enter your New Phone Number.

11015437_10206059885399512_267206016_n

Step#7: Tap on Done to finish the process.

All Done !!!!
Cars: Fast as Lightning for PC Download – ( Windows 8,8.1,7-Mac )

0
Cars: Fast as Lightning for PC Download – ( Windows 8,8.1,7-Mac )

Cars: Fast as Lightning for PC is not available, but we can install Cars: Fast as Lightning for PC using third party emulators. Cars: Fast as Lightning is basically designed for iOS and Android devices. Its a Racing game based on famous movie Cars. In the following guide i’ll tell you how to install Cars: Fast as Lightning for Pc Computer and Mac. Before going any further let me give you an overview on Cars: Fast as Lightning.

About Cars: Fast as Lightning

1#. Drive into a true Cars experience, capturing the fun personality of the characters that kids and fans have come to love, including Mater, Francesco, and more

2#. Play high-quality animated cutscenes with amazing voice acting, including Owen Wilson as the voice of Lightning McQueen!
3#. From the legendary Lightning McQueen to the exuberant Francesco Bernoulli, race as 20 Cars characters that you can upgrade and customize with quirky paint jobs! Race as the Radiator Springs Cars, Tuner Cars, Spy Cars, or International Racers!

More info Visit: Google Play

Cars: Fast as Lightning for PC

How To Download Cars: Fast as Lightning for Pc Using Andy Emulator: 

Step 1: Download the Andy from here.

Step 2: After downloading is complete, install Andy on PC.

Step 3: Andy installation process will take few minutes, When installation is finished launch Andy on you PC.

Step 4: When Andy is open, you’ll see an Android tablet interface head over to Google Play.

Step 5: Open Google Play->Search->Cars: Fast as Lightning ->Install.

Step 6: when the installation process is complete, go to the home screen there you’ll see Cars: Fast as Lightning.

Step 7: Double click on Cars: Fast as Lightning icon and start playing the game.

Step 8: Now Cars: Fast as Lightning is successfully installed on your PC, Enjoy the the game.

Also See: Whatsapp for PC

Download and Install Daytona Rush for PC ( Windows Xp,8,8.1,7,10 – Mac ):

  1. To download Cars: Fast as Lightning for PC, you will need an Android emulator like Bluestacks. If you do not have it already, you can download it from the website Bluestacks.com.
  2. Open Bluestacks and search for Cars: Fast as Lightning using search tool on the top of the homepage.
  3. Click on install button. The game will automatically download and install.
  4. Once the app has been installed, go to My Apps in Bluestacks homepage.
  5. The icon for the game will appear in My Apps.
  6.  Click on this icon to open Cars: Fast as Lightning.