Home Blog Page 364

Download HD Cupcake Wallpapers for your Desktop, iPhone and Android

Download HD Cupcake Wallpapers for your Desktop, iPhone and Android

As you all know, I love to collect a lot HD Wallpapers and I’ve posted around 100’s of free HD Wallpapers on Techbeasts. However, today I think I’ve collected the most beautiful and lovable series of wallpapers for your Desktop, iPhone and Android devices.

You can now Download these HD Love Cupcake Wallpapers for your Desktop, tablets and smartphones.

love_cupcake-wide

HD Love Cupcake Wallpapers for your Desktop, iPhone and Android:

Cupcake-Background

image-of-cupcake-food

love-cupcake-food-wallpaper-1024x576

image-of-cupcake-food-1024x576

chocolate-strawberry-cupcakes

love-cupcakes-with-sweet-cream

love-cupcake-wallpapers

i-love-cupcake-wallpaper

good-cupcakes-253190.

love_cupcake-wide

Fix ‘No Wi-Fi Available on Windows 10’ Issue [ Tutorial ]

0
Fix ‘No Wi-Fi Available on Windows 10’ Issue [ Tutorial ]

After updating to Windows 10, I started testing the new features. In the very beginning, I found very interesting things in the new Windows 10, but with new and improved features, there are always a chances of bugs. Such as the ‘No Wi-Fi available’ issue, and Windows 10 uses Bandwidth to Push Updates to other users. Today, I will tell you how to fix No Wi-Fi Available on Windows 10, and after that I will post a guide on how to turn off  Bandwidth in Windows 10.

Official Statement: “This issue may occur if older VPN software is installed on Windows 8.1 and is present during the upgrade to Windows 10. Older software versions contain a Filter Driver (the Deterministic Network Enhancer) which is not properly upgraded, leading to the issue.”

win10_windows_startscreen-4-2000x1126

Fix No Wi-Fi Available on Windows 10 Issue [ Tutorial ]:

Step #1: Click on start button and run command prompt as admin, select Command Prompt (Admin).

Step #2: Now enter the following command and press enter.

reg delete HKCR\CLSID\{988248f3-a1ad-49bf-9170-676cbbc36ba3} /va /f

Step #3: Copy & Paste the following command and press enter.

netcfg -v -u dni_dne

Step #4: Now close the command prompt and restart your PC.

All Done !.

After restarting your PC click on Wi-Fi icon to whom you want to connect with. Hopefully this time you won’t face any issue. Remember to tell me in comments if this guide helped you, and also share it among friends.

Install Android 5.1.1 Lollipop On At&t Galaxy S2 Skyrocket SGH I727

7
Install Android 5.1.1 Lollipop On At&t Galaxy S2 Skyrocket SGH I727

At&t’s Galaxy S2 Skyrocket is a sibling of Samsung’s all time famous, the Galaxy S2. Galaxy S2 Skyrocket’s specifications vary a little bit from that of the Galaxy S2. This device sports a 4.5 Super AMOLED display on the front. Skyrocket is powered up with Dual Core Scorpian CPU clocked at 1.5 GHz accompanied by Adreno 220 GPU and 1 GB RAM. At the back an 8 MP shooter is fixed and a 2 MP on the front. Internal storage of this device is 16 GB. S2 Skyrocket ran on Android 2.3.5 Gingerbread out of the box, but the device received Android 4.1.2 Jelly Bean update later on. This device may be owned and loved by thousands of users, but sure the can’t get any further version of Android on it now. Its been years since Android 4.1.2 Jelly Bean came, the top-notch devices are enjoying the sweetness of Lollipop which disappoints some loyal S2 Skyrocket users.

Some great developers do not want the users to miss tasting the latest and greatest operating system on their device, so they come up with some alternative method to give a new life to the devices which are forgotten by their manufacturers. Galaxy S2 Skyrocket is one of those devices, and the we are lucky to have developer’s support for this device. If you’ve been willing to get the latest iteration of Android, the Android 5.1.1 Lolllipop on your Skyrocket Galaxy S2, it may be the time for you to check it out now. You can install Android Lollipop on yoru device by means of a custom ROM. Some users are a bit hesitant to install a custom ROM because of their unstable nature, but a little bit search may help you to find a stable custom ROM that may be kept as a daily driver. If you do not want to spend some time searching for a nice custom ROM, this post may be helpful for you. We’ve found a custom ROM based on Android 5.1.1 Lollipop for our beloved Galaxy S2 Skyrocket. The ROM we found is the all time famous Paranoid Android ROM which is an AOSPA ROM. This ROM has seen a lot of improvement in the past and current version may be kept as a daily dose.

Without any further ado, we will head towards our guide and install Android 5.1.1 Lollipop Paranoid Android custom ROM on At&t Galaxy S2 Skyrocket SGH 727.

Precautions:

  1. This guide is only for At&t Galaxy S2 Skyrocket SGH 727. Check your device’s model in settings > about device on your phone.
  2. Charge your phone’s battery up to 50%.
  3. Backup all of your important contacts, sms messages, call logs and copy your media content to your computer.
  4. Your device must be running Android 4.1.2 Jelly Bean.
  5. Install latest TWRP 2.8.7.0 recovery.
  6. Backup your EFS partition.
  7. Create a Nandroid Backup.
  8. Proceed at your own risk. Since this a custom ROM, in case of a mishap we or the device manufacturers may not be held responsible. Follow this guide to the letter to avoid any mishap.

samsung-galaxy-s-ii-skyrocket

How To Install Android 5.1.1 Lollipop On At&t Galaxy S2 Skyrocket SGH I727

Download the following zip files and copy these to your S2 Skyrocket’s sd card.

  1. Now after copying these files, boot your phone in to TWRP recovery. To do so, turn off your device completely.
  2. Now turn it on by pressing and holding Volume Up + Home + Power key. It will boot up in to TWRP recovery now.
  3. Now in TWRP recovery tap the “Wipe” option and swipe your finger to perform a factory reset.
  4. Now go back to the main screen in TWRP and tap the “Install” button.
  5. After tapping the install button, locate and select the ROM.zip file that you downloaded first of all and follow on-screen instructions to flash it.
  6. Once you’ve successfully flashed the ROM, once again tap install and flash SuperSu.zip file.
  7. After flashing SuperSu.zip, flash GApps.zip file.
  8. Once done, go to wipe options and wipe cache and dalvik cache.
  9. Reboot your device. First boot may take up to 10-15 minutes.
  10. As your device boots up, you will have Android Lollipop running on it. That’s all.

If its taking longer then usual, or the newly install firmware has crashed, you may restore Nandroid backup. If you want to go back to your stock firmware, check out our guide on How To Flash Stock Firmware On Samsung Galaxy With Odin.

In case you got any queries, drop em’ in the comment box below.

ROM Credits

How to use alphanumeric characters to set a iPhone passcode

0
How to use alphanumeric characters to set a iPhone passcode

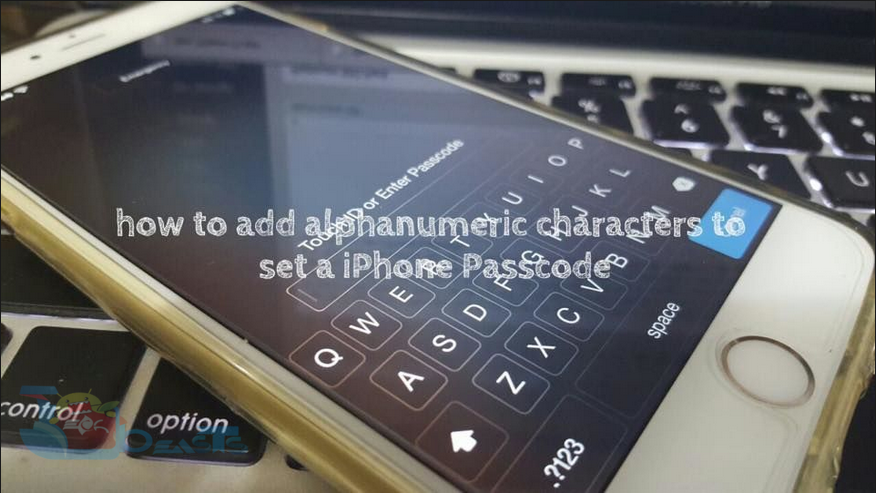
I am not a big fan of iPhone but there is not doubt that iPhone is better in many ways when it comes to compare it with Android. Today i will tell you how to use alphanumeric characters to set a iPhone passcode, most us don’t know that we can do that. Every use simple passcode with 4 numeric combination it seems easy any one can judge it, but when you add alphanumeric characters as passcode it will not as easy as it was. let’s start the tutorial, we are not using any third party app or Jailbreak tweak to add alphanumeric characters to set a iPhone passcode.

How to use alphanumeric characters to set a iPhone passcode

How to use alphanumeric characters to set a iPhone passcode:

Step #1: Open setting apps from your main screen.

1

Step #2: Now tap on ‘Touch ID and Passcode’.

2.2

Step #3: You have to enter your current passcode.

3

Step #4: After that you’ll be in ‘Touch ID and Passcode’ settings.

Step #5: Turn off the simple passcode, enter your current passcode.

4

Step #6: Now enter your new passcode you can use alphanumeric characters. Tap on Done.

5

All Done.

You have successfully changed your default passcode into alphanumeric characters, everytime your device is locked you have to enter not only 4 digits. Please share this with your friends and do tell me how was your experience.

How To Fix Facebook App Connection Lost On Android

How To Fix Facebook App Connection Lost On Android

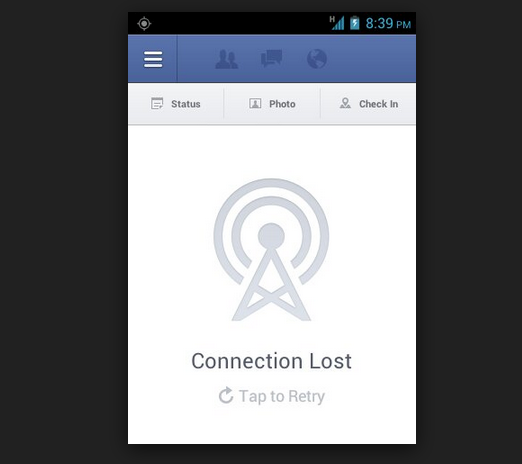
Here’s how you can fix Facebook App Connection Lost On Android, when ever you face such issue you cannot use Facebook app all you see is a message on top saying ” No Connection or Connection lost ” it doesn’t matter how many time you pull down to refresh it. In the following guide i’ll tell you how you can fix Facebook app lost connection on Android.

Fix Facebook app Connection lost

How To Fix Facebook app Connection lost on Android:

Please follow all the steps carefully in order to fix the Facebook App connection lost issue on Android.

Step #1: First update to the latest version goto Google Play and see if there is an update, if there is install it. Also you can visit site like Apkbeast and Apkdash to download the latest version apk.

Step #2: Goto settings-> Manage Applications -> Facebook -> Clear Data. Now open Facebook app and login and again.

Step # 3: Menu>Settings>Applications>Manage Applications>Downloaded>Press Facebook and choose Uninstall. Now install the latest version of Facebook.

Step #4: After trying all these steps you are still facing the same issue, i would suggest you should download the pervious Facebook app version which was working fine before.

Step # 5: If Facebook is still causing issues then i think you should try Facebook lite.

Step # 6: Change the language to English and restart the phone. I hope your Facebook app is working fine now.

Please do tell me in comments that this guide was helpful or not. Also please share it with your friends. !!!

How To Fix Unfortunately Kik Has Stopped On Android

How To Fix Unfortunately Kik Has Stopped On Android

Few days back i’ve posted about how to fix unfortunately Facebook has stopped, today i’ll tell you how to fix unfortunately Kik has stopped. There are many reason which can cause this error “unfortunately Kik has stopped “. Once you start getting this error you cannot use Kik properly so in order to get rid of this annoying situation follow my step by step guide below.

How To Fix Unfortunately Kik Has Stopped on Android

How To Fix Unfortunately Kik Has Stopped on Android:

Step#1: Open Settings on your Android device.

Step#2: Now tap on More tab. [ I am using Galaxy Note 3 ]

Step#3: Tap on Application Manager form the list.

Step#4: Now select All Application by swipe to left.

Step#5: There you’ll see all your installed apps, Tap on Kik.

Step#6: Now all you have to do tap on Clear Cache and Clear data.

Step#7: Now goto home screen and restart your device.

All Done ….

If this method is not working for you then you have to uninstall the Kik app and install the latest updated version from Google Play. If by any means still you are facing the same issue, i think you should try to install the old version of Viber app that will help you to get rid of Unfortunately Kik Has Stopped.

Angry Birds 2 for PC Online Download – Mac / Windows

Angry Birds 2 for PC Online Download – Mac / Windows

Rovio has released their new Angry Birds sequel Angry Birds 2, this new game comes with all new birds, boss pigs stunning graphics and challenging multi-stage levels. The theme of the game is same, but a twist is that now you can choose which you want to throw and you can also challenge other players around the world. As in the past we have posted about how you can install Android games on PC, today i will tell you how to install Angry Birds 2 for Pc running Windows and Mac.

Angry Birds 2 for Pc Online Download

Following are the main features of Angry Birds 2:

CHOOSE YOUR BIRD!
It’s the ultimate slingshot strategy – YOU choose which bird to fling next! “But that makes it easier, right?” WRONG! You’ll need to choose wisely if you’re going to stop those eggs from getting scrambled. Plus, destroy blocks to fill up the Destruct-O-Meter and earn extra birds!

NEW MULTI-STAGE LEVELS!
You’ve never seen Piggy Island like this – jaw-droppingly stunning levels brimming with exotic plants, quirky details and plenty of peril. And because those naughty porkies are building their teetering towers right under your beak, many levels have multiple stages. Uh oh.

SPECTACULAR SPELLS!
Blizzards, Hot Chilis, Golden Ducks and other outrageous spells give you an added advantage against those swindling swine. And when you need some serious help, guess who’s at hand to make a pork-smashing cameo? That’s right, it’s the sardine loving Mighty Eagle. Oh yeah!

CHALLENGE OTHER PLAYERS!
Challenge players from across the world in the Arena to see who’s the most hardcore bird flinger of them all. Play new tournaments every day, earn feathers to level up your birds and face off against the toughest competition on the planet. Game face!

DEFEAT BOSS PIGGIES!
There’s some serious bad guys on Piggy Island, and your slingshot skills are needed to take them down. Foreman Pig, Chef Pig and the infamous King Pig will stop at nothing to keep your eggs. Are you gonna let ‘em get away with that? It’s time to teach the pork a lesson.

Download Angry Birds 2 For Windows PC & MAC

  1. Download Angry Birds 2 APK
  2. Download and install Bluestacks: Bluestacks Offline Installer | Rooted Bluestacks | Bluestacks App Player
  3. Once you’ve installed Bluestacks, double click the downloaded Angry Birds 2 APK.
  4. The APK will be installed using Bluestacks, once installed open Bluestacks and locate the recently installed Angry Birds 2.
  5. Click the Angry Birds 2 icon to open it, follow the on-screen instructions to play it.

You can also use Andy OS to install Angry Birds 2, here’s the tutorial:  How To Run Android Apps On Mac OS X With Andy

4 Steps to Reclaim Disk Space After Windows 10 Free Upgrade [ Tutorial ]

4 Steps to Reclaim Disk Space After Windows 10 Free Upgrade [ Tutorial ]

Windows 10 final version was rolled out yesterday, till now millions of users have upgraded their PC’s to the latest version of Windows. Windows 10 came with alot of new and exciting features and as Microsoft CEO said ” Satya Nadella proclaiming that his company’s latest operating system will usher in a “new era”, But when ever a new update is rolled out we face the same issue, lack of storage on space for all of our data. New operating comes with tons of new features so it consume more space, so today those who are still facing such issues after upgrading to Windows 10, they can reclaim disk space after Windows 10 free upgrade.

win10_windows_startscreen-4-2000x1126

How To Reclaim Disk Space After Windows 10 Free Upgrade:

Step #1: Open run and search for built-in Disk Cleanup utility.

Step #2: Now when a new windows open up click on select the Clean up system files button.

Step #3: In the next windows you’ll see a list click on Previous Windows Installations and Temporary Windows Installation Files.

Step #4: Now click on OK to start the process, after these files are deleted you’ll get enough of space that you can utilize  for other purpose.

All done its a very easy and simple way, do tell me in comments was it ? helpfull for you or not.

OnePlus 2 Is Finally Out! Specs, Features & More

0
OnePlus 2 Is Finally Out! Specs, Features & More

Good news for those of you who had been looking forward to OnePlus2. OnePlus has finally announced the release of OnePlus2 today in San Francisco. Here all the details about OnePlus2 flagship smartphone that you need to know including it’s release date, price, specs and features.

OnePlus-2-main

Release Date:

You will be able to get OnePlus 2 on 11th August. The phone will be on sale in various countries including US, Canada, India, China and EU. Moreover, an invite will be needed to get the phone.

Price:

OnePlus 2 will cost you $329 USD for 16 GB and 64 GB model will be for $389 USD.

Features and Specs:

#1:OnePlus will out with a revamped design with an addition of steel on it’s side. The phone has a 5.5 inch 1080p HD display. The phone also has a fingerprint sensor that will be able to register up to 5 fingerprints.

#2:The front camera is of 5 megapixels whereas the rear camera has F/2.0 lens that captures with 13mega-pixels and laser focus. Also, it has an OIS to shoot videos with 4000 resolution.

#3:OnePlus 2 has introduced an “Alert Slider” that will let you switch between various notifications easily.

#4:OnePlus 2 will come with a 4GB of LPDDR4 RAM powered by Snapdragon 810 processor with Adreno 430 GPU and 64 GB of internal storage.

#5:The phone supports a strong battery with 3,300mAh, dual 4G SIM and USB Type C port and Oxygen OS 2.0, a variant of Android Lollipop.

#6:The phone will carry a Sandstone black back cover with a choice given for replaceable back cover in other colors as well including Bamboo, Kevlar, Rosewood and Black Apricot.

Update Sony Xperia Z2 To Android 5.1.1 23.4.A.0.546 Firmware

4
Update Sony Xperia Z2 To Android 5.1.1 23.4.A.0.546 Firmware

Good day for Xperia Z2 owners. Sony just started seeding the promised Android 5.1.1 Lollipop update to the Z2 today. The update carriers a handful of improvements and enhancements. These improvements include better sound quality, camera app enhancements, new WiFi and Bluetooth buttons in the status bar, a new send animation in the messaging app and a lot more that you may come across upon installing this update. The update is on a rollout through OTA or though Sony PC Companion at the moment. As usual, this update will take some time to hit all regions as these updates are always rolled out in different phases.Screenshot at Jul 28 03-23-19

If you don’t want to wait for the update to reach your device through OTA or through PC Companion and you want to update it using a manual method right now, then you may have spotted the right place. The purpose of succeeding guide is to help you to flash latest FTF file on your Sony Xperia Z2 and update it to the latest and greatest iteration of Android, the Android 5.1.1 Lollipop. The new update carries the build number 23.4.A.0.546. We will be flashing the FTF file on our beloved Sony Xperia Z2 D6503, D6502 & D6543 using Sony’s flashtool. Let’s go ahead and flash the firmware now.

Early Preparations:

1. This is only for Sony Xperia Z2 D6503, D6502 & D6543

This ROM is only for the device mentioned above. Make sure that your model number matches the one listed above. To do so, go to Settings > About Device on your device and see your model number. Flashing this firmware on any other device will result in bricking it so make sure that you meet this requirement first of all.

2. Battery should be charged at least over 60%.

Make sure that your battery is charged enough to complete the flashing process. In case your battery is low and your device goes dead during the flashing process, you may end up soft bricking your device as it won’t complete the flashing process.

3. Backup everything!

Just to be on the safe side, you may consider backing up each and everything from your Android device. This is highly recommended so that in case anything goes wrong, you still have the access to all of your data and you can restore it immediately. You may backup everything as listed below.

4. Enable USB Debugging Mode on your device.

Enable USB debugging mode on your device. To do so, tap settings>developer options>USB debugging. If you can’t find developer options in settings, then tap settings > about device and tap “Build Number” for 7 times and you’ll get em’ activated under settings.

5. Install and setup Sony Flashtool.

You must have installed Sony Flashtool.  Find the full guide here. After installing Sony Flashtool, open the Flashtool folder from the drive where you installed it.Now open Flashtool>Drivers>Flashtool-drivers.exe and install the Flashtool, Fastboot & Xperia Z2 drivers from the list. [Important]

6. Use OEM data cable to establish connection.

Make sure that you use the phone’s original data cable to establish connection between your phone and the PC. Using a different data cable might result in interrupting the firmware installation.

How To Update Sony Xperia Z2 D6503, D6502 & D6543 To 23.4.A.0.546 Android 5.1.1 Firmware

 Before moving forward, please make sure that you’ve read the pre requisites and ensure that you are set to go ahead.

  1. Download the latest firmware Android 5.1.1 Lollipop 23.4.A.0.546 FTF file.
    1. For Xperia Z2 D6503 [Generic/Unbranded] Create your own FTF using this guide
    2. For Xperia Z2 D6543 [Generic/Unbranded] Create your own FTF using this guide.
    3. For Xperia Z2 D6502 [Generic/Unbranded] Create your own FTF using this guide.
  2. Copy the file and paste in Flashtool>Firmwares folder.
  3. Open Flashtool.exe now.
  4. Hit the small lightening button on the top left corner and select Flashmode.
  5. Select the FTF firmware file that you placed in the Firmware folder.
  6. From the right side, select what do you want to wipe. Data, cache and apps log, all wipes are recommended, perhaps you may select if you don’t want.
  7. Click on OK, and it will start preparing the firmware for flashing. This may take a little while to load.
  8. As soon as the firmware is loaded, it will prompt you to attach the phone by turning it off and keeping the back key press.
  9. For Xperia Z2, Volume Down key will do the job of back key, just turn off your phone, keep the Volume Down key pressed and plug in the data cable.
  10. As soon as the phone is detected in Flashmode, the firmware will start flashing, Do not leave the Volume Down key until the process is complete.
  11. As soon as you see “Flashing ended or Finished Flashing” leave the Volume Down key, plug the cable out and reboot.
  12. That’s All! Congrats! You’ve installed latest Android 5.1.1 Lollipop on your Xperia Z2. Enjoy

In case you got any queries or face any problems regarding this guide, please feel free to stop by the comment box below and let us know. We will get back to you as soon as possible. Thanks all!

Root Asus Zenfone 5 Running Android Lollipop

1
Root Asus Zenfone 5 Running Android Lollipop

Asus recently update its last year’s flagship device the Zenfone 5 to Android 5.0 Lollipop. New Lollipop update brings all new Google Material Design and other goodies to this device. Android power users who have resulted in loosing root access on this device after updating to the latest and greatest iteration of Android, they may be looking for a method to get it back now. Good news seems to be out, a new one-click root tool that roots the Zenfone 5 on latest Android 5.0 Lollipop is available now.121201524314PM_635_asus_zenfone_5_a501cg

If you’re new to rooting, you may want to know that root access allows you to modify your device beyond the limitations that are set by the device manufacturers. After having your device rooted, you can install applications which require root access to work on Android. These applications can enhance the performance of your device, battery life and allow you to modify and customize it in several ways. To know more about root access and root applications, check out our top 10 root applications.

The tool roots Asus Zenfone 5 T500F, T500J WW running Android 5.0 Lollipop v3.23.40.60 and v3.23.40.52. It doesn’t require any hard steps to go through, all you need is to follow this guide carefully and get it done within a few seconds. Let’s go ahead now and gain root access on our beloved Asus Zenfone 5 running Android Lollipop.

Precautions:

  1. This guide is only for Asus Zenfone 5 T500F, T500J WW. Do not try this on any other device. Check your device’s model in settings > about device.
  2. Download and install Minimal ADB & Fastboot drivers on your PC.
  3. Your device must be running Android 5.0 Lollipop v3.23.40.52 or v3.23.40.60. If its not already running on Android Lollipop you may have a look at How To Update Asus Zenfone 5 To Android Lollipop v3.23.40.60.
  4. Just to be on a safe side, backup all your important contacts, sms messages, call logs and copy your media content to your PC.
  5. Charge your phone’s battery at least over 50% to avoid and power issues during the  rooting process.
  6. Enable USB debugging mode on your phone. To do so, go to settings > about device > tap the build number for 7 times. This will enable developer options in settings. Now open developer options and enable USB debugging mode.
  7. Rooting the device will void its warranty. Make sure that you’re following this method on your own risk. In case of a mishap Techbeasts or Asus won’t be held responsible.

Root Asus Zenfone 5 Running Android Lollipop

  1. Download Asus Zenfone 5 Lollipop Root Tool.zip file.
  2. Unzip the downloaded .zip file on your computer’s desktop.
  3. Connect your Asus Zenfone 5 to your PC now. A popup will require permission on your phone’s screen. Tick the box “Always allow for this computer” and tap OK.
  4. Now run the Root.bat file that you got after extracting the tool that you downloaded in step 1.
  5. The root tool will now boot your phone in fastboot mode and root it, once done it will reboot automatically.
  6. Once your device boots up, check SuperSu in app drawer or verify root access using root checker.
  7. That’s all.

Pretty easy, wasn’t it? Let us know if you’re stuck with something.

Download Latest Dubsmash 1.6.1 APK

0
Download Latest Dubsmash 1.6.1 APK

Dubsmash is viral for quite a while now. Just in case you don’t know about this application, this viral and crazy app allows you to dub yourself behind a famous tone, voice clip or a song. You can record your video while singing your favorite song, some famous voice clip to make others laugh, wish someone a happy birthday with a happy birthday song and a lot more. Dubsmash offers a vast list of Sounds to pick a clip from. Dubsmash has hit million of downloads and is improving further at the moment. The developers have remained pretty much concerned with the improvements in this application. Dubsmash has received a new update which takes the version number to v 1.6.1 now.  The new update fixes some bugs and brings a new registration flow.

Latest version of Dubsmash is already available in the Google Play Store but just in case you haven’t received this update or if the Google Play Store is inaccessible at your end, you may want to update to the latest version manually or you may want to install Dubsmash manually. This can be done if you have the APK file and we have already pulled the Dubmsash 1.6.1 APK file for all of you. The download link is available below. Just go ahead, download, install, dub a famous sound and share it with your buddies.dubmash-20150417_B52342F74D4640709A752665B9E81E4F