Home Blog Page 365

Download Brain Dots APK

0
Download Brain Dots APK

Brain Dots is one of its-own-kind games to make its way to the Google Play Store. The concept is pretty unique. In brain dots you’ve to draw a path for two different balls to bump each other which are placed at a specific distance from each other. In the first four stages of this game you will earn to draw different shapes through which the two balls will hit each other. Drawing an invalid shape will result in either one or both the balls which won’t let you get to the next level. As the levels move on, you will come across a difficult placement of balls. Drawing the shapes/paths depends on your imagination only. Brain Dots, as the name mentions, it checks out how efficiently you connect the dots in your brain and make them bump each other in the game. If you’re not going to think of the path way properly, you’re not going to succeed for the next level.

Brain Dots has become quite popular among Android users within no time. If you’re willing to play this game, you can install it from the Google Play Store right away. But just in case you can’t find it in the Google Play Store at your end or you don’t have access to the Google Play Store, you may want to install this game using its APK file. We have pulled out the APK file of Brain Dots for all of you. The download link is placed below. Just go ahead, download and play Brain Dots on your Android device.

Screenshot_7

Description:

Let’s draw lines and bump balls!
Drawing brain-training app “Brain Dots”!
◆◇◆◇◆◇◆◇◆◇◆◇◆◇◆◇◆◇◆◇◆◇◆◇◆◇◆◇

The only thing you need to do is to “bump two balls.”
Will you be able to clear these simple-looking but actually difficult stages?
This is a brain-training game that everyone from children to grown-ups will be able to enjoy!

▼ The rules are simple!

◆ Let’s bump the two balls
All you need to do to clear a stage is to
“make the blue and red balls bump”.
Draw lines and shapes freely to move and roll the balls.
Flexible thinking is going to become the key to victory.

◆ Let’s collect pens
Starting off with a simple pencil, moving onto color pencils, crayons and so on.
We have prepared more than 25 varieties of pens of different colors and sizes.
Collect various pens and walk through the stages.

◆ Share the moment of victory
You can review the moment you cleared a stage on video or picture.
Share it on SNS to show off your superior skills to your friends.
Not to mention that watching your friends’ gameplay might also become a hint!?

◆ Your brain abilities will be tested
This game, continuing after Brain Wars, also tests your logical thinking and the flexibility of your mind.
As this game includes the elements of riddle and “Escape the Room” type of games, we would recommend Brain Dots to people who enjoy brain-type puzzles, cards and strategy games.
It might also have an impact on your children’s intellectual growth and preventing brain deterioration?
How To Create Sony Xperia Pre-Rooted Firmware With PRF Creator

25
How To Create Sony Xperia Pre-Rooted Firmware With PRF Creator

Pre-Rooted firmwares are much useful for Android power users who do not like to loose root access specially when upgrading to a new firmware. Having a pre-rooted firmware has several benefits. If your device has a locked bootloader, and you’ve a recovery installed on it and a new update arrives which doesn’t support root access or flashing the recoveries without unlocking the bootloader, you can have a pre-rooted file of the new firmware and flash it in the recovery that you have in the previous firmware on locked bootloader. This mechanism is pretty common among Sony Xperia users. There are tools and glitches that allow Xperia users to root their devices running on a specific firmware without unlocking the bootloader, but the tools do not work with the newer firmwares as Sony patches the glitches. Earlier there were one-click root tools and all time famous Towel Root application which allowed rooting some famous Xperia devices running on the firmwares available at that time, but these tools failed to work when Sony rolled out Android Lollipop. At the moment, there’s no direct method available to root Android Lollipop on Sony Xperia Z Line up, but you sure can root your device on an older firmware and flash the pre-rooted zip file of Android 5.0.2 or 5.1.1 Lollipop in the recovery. You may unlock your device’s bootloader on an older firmware or you may keep it lock if the older firmware’s root method doesn’t require it.

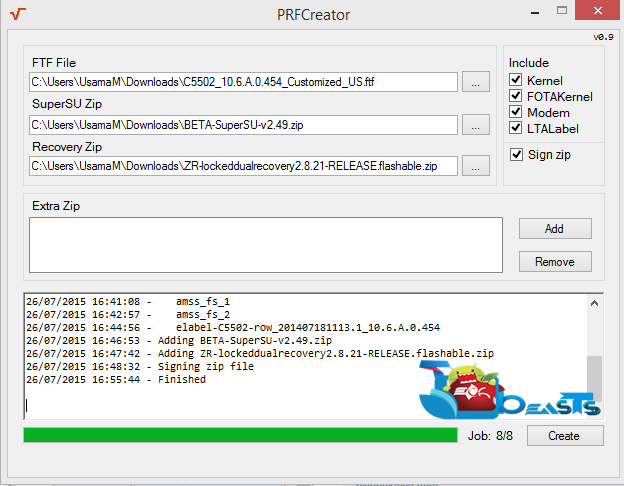
That was was all about the pre-rooted firmware. But how to get one? There are people creating and posting pre-rooted firmwares over different forums, but just in case you can’t find one for your device, you may want to create one for yourself. XDA senior member zxz0O0 has made it a lot easier for Android enthusiasts. Zxz0O0 came up with his tool named as PRF Creator which creates a pre-rooted firmware within a few minutes. All you need is the FTF file of your desired firmware, SuperSu.zip file and your desired recovery’s .zip file. You can simply push these files into the PRF Creator and then sit back and wait for the tool to cook up your desired pre-rooted firmware.

We’ve given this tool a try and found it working perfectly fine. In the following post we are going to show you how you can use it as well and create a pre-rooted firmware for your Sony Xperia device.

Requirements:

How To Create Sony Xperia Pre-Rooted Firmware With PRF Creator

Screenshot_6

  1. Download PRF Creator’s latest version.
  2. Create a new folder on your desktop named as “PRF Creator”.
  3. Unzip the downloaded PRF Creator .zip file in the folder you just created on your desktop.
  4. Now open the folder where you unzipped the PRF Creator, and open “PRFCreator.exe” file which has a square root icon.
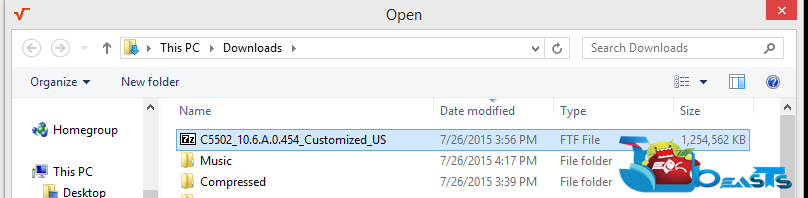
  5. The tool will now open up. Click on the small button next to the “FTF File” bar and select the FTF file.Screenshot_1
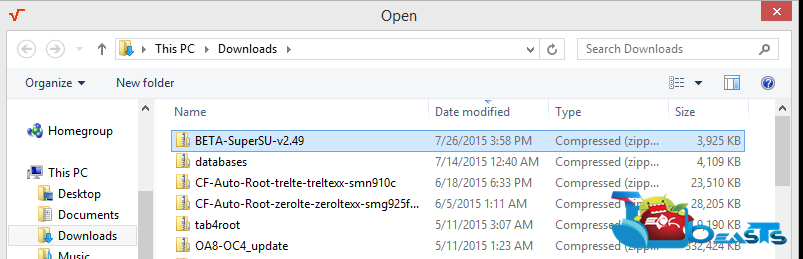
  6. Now click on the button next to “SuperSu Zip” and select the SuperSu.zip file.Screenshot_2
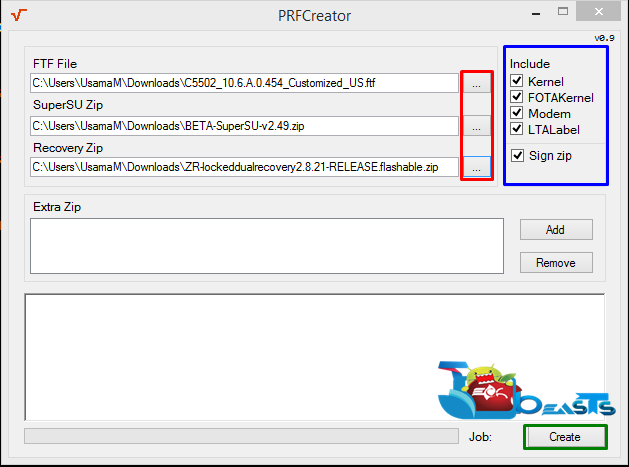
  7. Now click on the button next to “Recovery Zip” and select the downloaded Recovery.zip file.Screenshot_3
  8. Tick all the five options next to the file selection area. These options include “Kernel, FOTAKernal, Modem, LTALabel, Sign zip”.Screenshot_4
  9. Now click the “Create” button and sit back tight.
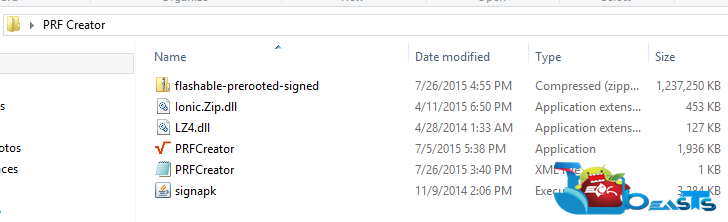
  10. Once the firmware is ready, you will get the Firmware’s zip file in the PRF Creator folder on your desktop.
  11. That’s all.

Screenshot_5  Screenshot_7

Now you can flash this pre-rooted firmware.zip file on your phone and update it without any hiccups.

Update Xperia Z3 Tablet Compact SGP-611, 612, 621 To 23.4.A.0.546 Android 5.1 Firmware

0
Update Xperia Z3 Tablet Compact SGP-611, 612, 621 To 23.4.A.0.546 Android 5.1 Firmware

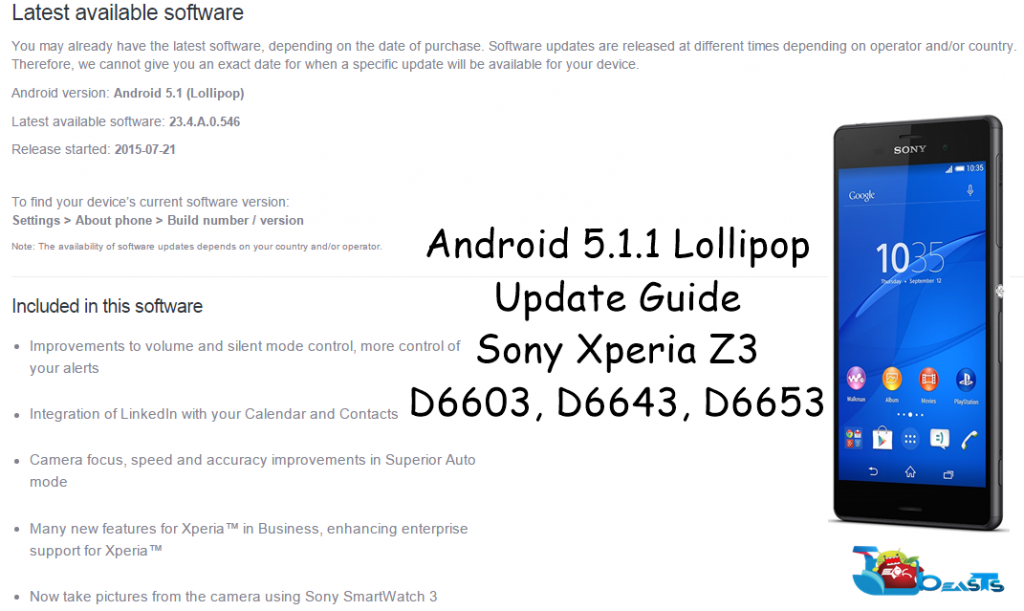
As Sony promised, it started rolling out Android 5.1.1 Lollipop update for the Xperia Z line up. the very first devices to receive this update are Xperia Z3, Xperia Z3 Compact and Xperia Z3 Tablet Compact. The new update brings some minor changes which include enhanced sound, more control over alerts, camera application has received some improvements, a new dialer is there, a new animation while sending a message in messaging application. New WiFi and Bluetooth buttons have been added in the status bar. There are some more changes that you may come across after installing this update on your device.

We’ve already posted the guides to update Xperia Z3 and Z3 Compact to this latest Android 5.1.1 Lollipop firmware and now is the turn for Xperia Z3 Tablet Compact. The firmware carries the build number 23.4.A.0.546 and Android version Android 5.1.1 Lollipop as mentioned. FTF files are already available, just in case OTA update or an update through Sony PC companion hasn’t hit your region yet, you may update your device by means of the FTF files. Wondering how? Well, that’s what we are about to explain.Xperia Z3 Tablet Compact

In the succeeding guide we will flash the latest Android 5.1.1 Lollipop 23.4.A.0.546 FTF on our beloved Sony Xperia Z3  Tablet Compact SGP-611 (LTE), SGP-612 (WiFi) & SGP 621 (LTE). Follow all these steps carefully in order to avoid any mishap. Please keep in mind that this is an official firmware flash guide. Doing this will not void the warranty of your or harm it in any way.

Early Preparations:

1. This is only for Xperia Z3  Tablet Compact SGP-611, SGP-612 & SGP 621

This ROM is only for the device mentioned above. Make sure that your model number matches the one listed above. To do so, go to Settings > About Device on your device and see your model number. Flashing this firmware on any other device will result in bricking it so make sure that you meet this requirement first of all.

2. Battery should be charged at least over 60%.

Make sure that your battery is charged enough to complete the flashing process. In case your battery is low and your device goes dead during the flashing process, you may end up soft bricking your device as it won’t complete the flashing process.

3. Backup everything!

Just to be on the safe side, you may consider backing up each and everything from your Android device. This is highly recommended so that in case anything goes wrong, you still have the access to all of your data and you can restore it immediately. You may backup everything as listed below.

4. Enable USB Debugging Mode on your device.

Enable USB debugging mode on your device. To do so, tap settings>developer options>USB debugging. If you can’t find developer options in settings, then tap settings > about device and tap “Build Number” for 7 times and you’ll get em’ activated under settings.

5. Install and setup Sony Flashtool.

You must have installed Sony Flashtool.  Find the full guide here. After installing Sony Flashtool, open the Flashtool folder from the drive where you installed it.Now open Flashtool>Drivers>Flashtool-drivers.exe and install the Flashtool, Fastboot & Xperia Z3 Tablet Compact drivers from the list. [Important]

6. Use OEM data cable to establish connection.

Make sure that you use the phone’s original data cable to establish connection between your phone and the PC. Using a different data cable might result in interrupting the firmware installation.

How To Update Xperia Z3 Tablet Compact SGP-611, SGP-612 & SGP 621 To 23.4.A.0.546 Android 5.1.1 Firmware

 Before moving forward, please make sure that you’ve read the pre requisites and ensure that you are set to go ahead.

  1. Download the latest firmware Android 5.1.1 Lollipop 23.4.A.0.546 FTF file.
    1. For Xperia Z3 Tablet Compact SGP-611 [Generic/Unbranded] Firmware 1  or Create your own FTF using this guide.
    2. For Xperia Z3 Tablet Compact SGP-612 [Generic/Unbranded] Firmware 1 or Create your own FTF using this guide.
    3. For Xperia Z3 Tablet Compact SGP-621 [Generic/Unbranded] Firmware 1 or Create your own FTF using this guide.
  2. Copy the file and paste in Flashtool>Firmwares folder.
  3. Open Flashtool.exe now.
  4. Hit the small lightening button on the top left corner and select Flashmode.
  5. Select the FTF firmware file that you placed in the Firmware folder.
  6. From the right side, select what do you want to wipe. Data, cache and apps log, all wipes are recommended, perhaps you may select if you don’t want.
  7. Click on OK, and it will start preparing the firmware for flashing. This may take a little while to load.
  8. As soon as the firmware is loaded, it will prompt you to attach the phone by turning it off and keeping the back key press.
  9. For Xperia Z3 Tablet Compact, Volume Down key will do the job of back key, just turn off your phone, keep the Volume Down key pressed and plug in the data cable.
  10. As soon as the phone is detected in Flashmode, the firmware will start flashing, Do not leave the Volume Down key until the process is complete.
  11. As soon as you see “Flashing ended or Finished Flashing” leave the Volume Down key, plug the cable out and reboot.
  12. That’s All! Congrats! You’ve installed latest Android 5.1.1 Lollipop on your Xperia Z3 Tablet Compact. Enjoy

In case you got any queries or face any problems regarding this guide, please feel free to stop by the comment box below and let us know. We will get back to you as soon as possible. Thanks all!

Update Sony Xperia Z3 Compact D5803, D5833 To 23.4.A.0.546 Android 5.1.1 Lollipop

2
Update Sony Xperia Z3 Compact D5803, D5833 To 23.4.A.0.546 Android 5.1.1 Lollipop

Sony Mobile seems to be pretty much generous with its users. With a gap of 3 months to the most recent update, Sony Mobile started rolling out Android 5.1.1 Lollipop update based on the build number 23.4.A.0.546 for its flagship devices Xperia Z3, Xperia Z3 Compact and Xperia Z3 Tablet Compact. The update brings some minor changes. Notable changes include improvements to volume and silent mode control. The update provides more control of your alert now. Sony has integrated LinkedIn with Contacts and Calendar. Camera captures faster now. Sony has changed the dialer of the device which looks pretty cool now. New WiFi and Bluetooth buttons have been introduced in the status bar. There’s a lot more to checkout in this update which you can do so after installing it on your device.

As usual, this update is rolling out through OTA and through Sony PC Companion at the moment. Which means its going to take a while to hit all the regions around the world. If you’re one of the unlucky users with no signs of this update, you may want to flash it using an alternative method. As usual, we have the alternative method right here for you which will help you to force-update your Xperia Z3 Compact to Android 5.1.1 Lollipop.Xperia Z3 Compact .546

As we move forward, we will go through a comprehensive guide which will help you to flash latest Android 5.1.1 Lollipop 23.4.A.0.546 FTF on your Sony Xperia Z3 Compact D5803 and D5833 using Sony’s Flashtool. Let’s learn some precautions and then flash the firmware right away.

Early Preparations:

1. This is only for Sony Xperia Z3 Compact D5803, D5833

This ROM is only for the device mentioned above. Make sure that your model number matches the one listed above. To do so, go to Settings > About Device on your device and see your model number. Flashing this firmware on any other device will result in bricking it so make sure that you meet this requirement first of all.

2. Battery should be charged at least over 60%.

Make sure that your battery is charged enough to complete the flashing process. In case your battery is low and your device goes dead during the flashing process, you may end up soft bricking your device as it won’t complete the flashing process.

3. Backup everything!

Just to be on the safe side, you may consider backing up each and everything from your Android device. This is highly recommended so that in case anything goes wrong, you still have the access to all of your data and you can restore it immediately. You may backup everything as listed below.

4. Enable USB Debugging Mode on your device.

Enable USB debugging mode on your device. To do so, tap settings>developer options>USB debugging. If you can’t find developer options in settings, then tap settings > about device and tap “Build Number” for 7 times and you’ll get em’ activated under settings.

5. Install and setup Sony Flashtool.

You must have installed Sony Flashtool.  Find the full guide here. After installing Sony Flashtool, open the Flashtool folder from the drive where you installed it.Now open Flashtool>Drivers>Flashtool-drivers.exe and install the Flashtool, Fastboot & Xperia Z3 Compact drivers from the list. [Important]

6. Use OEM data cable to establish connection.

Make sure that you use the phone’s original data cable to establish connection between your phone and the PC. Using a different data cable might result in interrupting the firmware installation.

How To Update Sony Xperia Z3 Compact D5803, D5833 To 23.4.A.0.546 Android 5.1.1 Firmware

 Before moving forward, please make sure that you’ve read the pre requisites and ensure that you are set to go ahead.

  1. Download the latest firmware Android 5.1.1 Lollipop 23.4.A.0.546 FTF file.
    1. For Xperia Z3 Compact D5803 [Generic/Unbranded] Firmware 1  or Create your own FTF using this guide.
    2. For Xperia Z3 Compact D5833 [Generic/Unbranded] Firmware 1 or Create your own FTF using this guide.
  2. Copy the file and paste in Flashtool>Firmwares folder.
  3. Open Flashtool.exe now.
  4. Hit the small lightening button on the top left corner and select Flashmode.
  5. Select the FTF firmware file that you placed in the Firmware folder.
  6. From the right side, select what do you want to wipe. Data, cache and apps log, all wipes are recommended, perhaps you may select if you don’t want.
  7. Click on OK, and it will start preparing the firmware for flashing. This may take a little while to load.
  8. As soon as the firmware is loaded, it will prompt you to attach the phone by turning it off and keeping the back key press.
  9. For Xperia Z3 Compact, Volume Down key will do the job of back key, just turn off your phone, keep the Volume Down key pressed and plug in the data cable.
  10. As soon as the phone is detected in Flashmode, the firmware will start flashing, Do not leave the Volume Down key until the process is complete.
  11. As soon as you see “Flashing ended or Finished Flashing” leave the Volume Down key, plug the cable out and reboot.
  12. That’s All! Congrats! You’ve installed latest Android 5.1.1 Lollipop on your Xperia Z3 Compact. Enjoy

In case you got any queries or face any problems regarding this guide, please feel free to stop by the comment box below and let us know. We will get back to you as soon as possible. Thanks all!

Update Sony Xperia Z3 D6603, D6653, D6643 To 23.4.A.0.546 Android 5.1.1 Firmware

2
Update Sony Xperia Z3 D6603, D6653, D6643 To 23.4.A.0.546 Android 5.1.1 Firmware

Sony took a very long time to update its flagship device Xperia Z3 and its siblings to update to Android Lollipop. While Sony was delaying this update, it disappointed a lot of users as it was not the Sony style this time. Sony has always remained pretty much concerned with the software updates. Sony finally broke the silence and started rolling out the Android 5.0.2 Lollipop update for its flagship Xperia Z3 in March, 2016. It looks like Sony has taken a notice of user’s feedback and didn’t want to make them wait longer for the next update. The Android 5.1.1 Lollipop update has started rolling out for our beloved Sony Xperia Z3, Xperia Z3 Compact and Xperia Z3 Compact tablet now. It took a gap  of only 4 months for Sony to cook this update which makes it look like Sony is going to be good to its users once again.

The update carriers some minor changes. These changes include a new message sending animation in the messaging application, a new dialer, new icons in settings application, new launcher settings, numerical keys on keyboard, some icons (WiFi and Bluetooth) in the status bar, sound quality has improved and camera captures the images faster now. This update carries the build number 23.4.A.0.546 and as mentioned it carries the Android version 5.1.1 Lollipop. As of now, this update is on a slow roll out and will take some time to reach out all the regions. If you’re an Android enthusiasts, you may not be able to wait for the OTA or Sony Companion update to hit your device and you may want to find an alternative way to update it right away.Screenshot_14

As usual, we are here with the method to update your device to the latest and greatest version of Android using Sony’s flashtool. As we move forward, we will flash the latest Android 5.1.1 Lollipop 23.4.A.0.546  FTF on our beloved Sony Xperia Z3 D6603, D6643 & D6653. Let’s go through some quick early preparations and then flash this firmware.

Early Preparations:

1. This is only for Sony Xperia Z3 D6603, D6643, D6653

This ROM is only for the device mentioned above. Make sure that your model number matches the one listed above. To do so, go to Settings > About Device on your device and see your model number. Flashing this firmware on any other device will result in bricking it so make sure that you meet this requirement first of all.

2. Battery should be charged at least over 60%.

Make sure that your battery is charged enough to complete the flashing process. In case your battery is low and your device goes dead during the flashing process, you may end up soft bricking your device as it won’t complete the flashing process.

3. Backup everything!

Just to be on the safe side, you may consider backing up each and everything from your Android device. This is highly recommended so that in case anything goes wrong, you still have the access to all of your data and you can restore it immediately. You may backup everything as listed below.

4. Enable USB Debugging Mode on your device.

Enable USB debugging mode on your device. To do so, tap settings>developer options>USB debugging. If you can’t find developer options in settings, then tap settings > about device and tap “Build Number” for 7 times and you’ll get em’ activated under settings.

5. Install and setup Sony Flashtool.

You must have installed Sony Flashtool.  Find the full guide here. After installing Sony Flashtool, open the Flashtool folder from the drive where you installed it.Now open Flashtool>Drivers>Flashtool-drivers.exe and install the Flashtool, Fastboot & Xperia Z3 drivers from the list. [Important]

6. Use OEM data cable to establish connection.

Make sure that you use the phone’s original data cable to establish connection between your phone and the PC. Using a different data cable might result in interrupting the firmware installation.


How To Update Sony Xperia Z3 D6603, D6653, D6643 To 23.4.A.0.546 Android 5.1.1 Firmware

 Before moving forward, please make sure that you’ve read the pre requisites and ensure that you are set to go ahead.

  1. Download the latest firmware Android 5.1.1 Lollipop 23.4.A.0.546 FTF file.
    1. For Xperia Z3 D6603 [Generic/Unbranded] Firmware 1
    2. For Xperia Z3 D6643 [Generic/Unbranded] Create your own FTF using this guide.
    3. For Xperia Z3 D6653 [Generic/Unbranded] Create your own FTF using this guide.
  2. Copy the file and paste in Flashtool>Firmwares folder.
  3. Open Flashtool.exe now.
  4. Hit the small lightening button on the top left corner and select Flashmode.
  5. Select the FTF firmware file that you placed in the Firmware folder.
  6. From the right side, select what do you want to wipe. Data, cache and apps log, all wipes are recommended, perhaps you may select if you don’t want.
  7. Click on OK, and it will start preparing the firmware for flashing. This may take a little while to load.
  8. As soon as the firmware is loaded, it will prompt you to attach the phone by turning it off and keeping the back key press.
  9. For Xperia Z3, Volume Down key will do the job of back key, just turn off your phone, keep the Volume Down key pressed and plug in the data cable.
  10. As soon as the phone is detected in Flashmode, the firmware will start flashing, Do not leave the Volume Down key until the process is complete.
  11. As soon as you see “Flashing ended or Finished Flashing” leave the Volume Down key, plug the cable out and reboot.
  12. That’s All! Congrats! You’ve installed latest Android 5.1.1 Lollipop on your Xperia Z3. Enjoy

In case you got any queries or face any problems regarding this guide, please feel free to stop by the comment box below and let us know. We will get back to you as soon as possible. Thanks all!

How To Update Asus Zenfone 5 To Android Lollipop v3.23.40.60

2
How To Update Asus Zenfone 5 To Android Lollipop v3.23.40.60

Zenfone 5 is Asus’s 2014 flagship device. In a world of tough competition where Samsung, LG, Motorola, HTC, Sony and Google are each other’s strongest rivals, the Zenfone 5 helped Asus to get some spotlight and earn it some users. Asus’s Zenfone flaunts a beautiful 5.0-inch display with 294 ppi. This display has a gorilla glass 3 corning. On board we have an Intel Atom Z2580 dual core CPU clocked at 2 GHz. A 2 GB RAM is placed on the board while the internal storage is 8/16/32 GB. Zenfone 5 has a microSD card slot as well which supports up to 64 GB. On the front there’s a 2 MP shooter and an 8 MP shooter is fixed at the back. Under the hood we have a 2110 mAh battery.

Asus Zenfone 5 ran Android 4.3 JellyBean out of the box. Since Zenfone 5 is Asus’s last year flagship, So Asus didn’t probably want to disappoint the users and promised some greatest versions of Android to roll out for this device. Asus rolled out Android KitKat for the device and now that the Lollipop sweetness has taken all over, its time for Asus Zenfone 5 owners to taste it as well. Asus has rolled out Android 5.0 Lollipop update for the Zenfone 5 T00F, T00J and WW variants. The update build version is v3.23.40.60. In case you’re unaware of the changes this update brings, you may want to know that Android Lollipop carries a completely new UI named as Google’s Material Design. There are new notification cards on the lockscreen. New user and guest modes are there. Battery life and performance enhancements are also a part of this major Android update. There’s a lot more in this firmware that you may come across once you’ve installed the latest Android version on your Zenfone 5.121201524314PM_635_asus_zenfone_5_a501cg

Asus has rolled out this update through OTA, but since these are phased updates, it might take sometime for it to hit your region. In case you haven’t received the update yet, you may want to force-update your Zenfone 5 to Lollipop using a manual method. If that’s the case with you, you may have spotted the right place at the moment. As we move further, we will update our beloved Asus Zenfone 5 T00F, T00J  to Android 5.0 Lollipop official update carrying the version number v3.23.40.60. This update will be done by flashing the update’s zip file through the stock recovery of this phone. Let’s learn some early preparations and the install the firmware.

Precautions:

  1. This guide is only for Asus Zenfone 5 A500CG (T00F) WW, A501CG(T00J) WW. Do not try this on any other device. Check your device’s model number in your phone’s settings > about device.
  2. Your device must be running the firmware v3.23.40.52. Check the firmware under settings > about device.
  3. Backup all of your important data prior to the installation of this firmware. This is highly recommended in case you’ve to go through a factory reset, you will still have your data safe and sound. Backup your contacts, call logs, sms messages and copy your media content to your computer.
  4. Charge your phone up to 50%. This is important in order to avoid any power issue during the flashing process.

Note: This is an official firmware and it will not void the warranty of your phone nor it will harm it in any way. Please follow all the instructions carefully in order to get it done successfully.

If not on .52 firmware already:

If you’re not already on the v3.23.40.52 firmware, then download this v3.23.40.52 from here and flash it using the guide below. After you’ve flashed this, you can flash the v3.23.40.60 firmware using the same guide.

Upgrading form KitKat to Lollipop:

If your device is on Android KitKat yet then you need to make sure that first of all you install the firmware 2.22.40.53.

Just download the 2.22.40.53 firmware and flash it using the same guide below, after this flash the firmware v3.23.40.52 and then finally flash the firmware v3.23.40.60. That’s all.

How To Update Asus Zenfone 5 To Android Lollipop v3.23.40.60

  1. Download Android 5.0 Lollipop update .zip file for Asus Zenfone 5 from here: ASUS_T00F-WW-3.23.40.60-user.zip.
  2. Connect your Zenfone 5 to your PC.
  3. Copy the downloaded .zip file to the internal storage of your device. Do not copy it inside a sub folder, copy it on the root of your internal storage.
  4. Disconnect your Zenfone 5 from your PC.
  5. Now press and hold the power button your phone to get the restart option. Once you get it, restart your device.
  6. As the phone boots up, it will show you a notification pointing towards an available update. Pull down the notification bar and tap the update notification.
  7. Now it  will show you a message “Select Update Package”. Select the file that you just copied and tap “Ok”.
  8. The phone will now enter the recovery mode to install the firmware. Just sit back and wait for it to finish the installation and boot up normally. Once done, you will have Android Lollipop installed on your Zenfone 5. That’s all.


Lollipop Changelog:

  • SuperNote: change to link-downloading version

  • Asuswebstorage: change to link-downloading version

  • Remote Link: change to link-downloading version

  • Lockscreen: remove standalone wallpaper & weather info (only for 1GB RAM device)

  • Quick settings/Recent app layout change (only for 1GB RAM device)

  • Dialer/Contacts: reduce tab count from 5 to 3; remove group tab name/photo; remove foreground service (only for 1GB RAM device)

  • InCall screen: remove inCall animation & cover (only for 1GB RAM device)

  • Fix the problem of losing some files after changing the folder name in File Manager

  • Add KKBOX (link-downloading) (Taiwan only)

  • Add Dr. eye (link-downloading) (Taiwan only)

  • Add Zinio (link-downloading)

  • Add PubuBookBuffet (link-downloading) (Taiwan only)

  • Add eReadingNow (link-downloading) (Taiwan only)

  • Add ASUS Game Center (link-downloading) (Taiwan only)

  • Offer hot and highly qualified games picked by a team of gaming experts

  • Offer event privileges and goodies of virtual treasures

  • Support membership with ASUS, Facebook and Google+ accounts to log in

  • Offer VIP services: 24/7 online customer service

  • Support purchase history to overview for games downloaded from ASUS Game Center

In case you’re stuck with something, reach us out through the comment box below.

How To Remove/Delete WordShark Malware from Windows PC [ Tutorial ]

How To Remove/Delete WordShark Malware from Windows PC [ Tutorial ]

Here’s how to delete WordShark Malware from Windows PC, in the following guide i’ll tell you the methods to remove WordShark Malware from Chrome, IE, FireFox and PC. Follow all the steps as mentioned below in order to delete WordShark Malware.

WordShark

How To Remove/Delete WordShark Malware from Windows PC [ Tutorial ]:

Follow is the step by step guide to delete or remove WordShark malware from your computer, let’s start with browsers.

Internet Explorer:

  • Click the Gear icon.
  • Internet Options.
  • Advanced.
  • Click on Reset button to apply the changes.

Google Chrome:

  • Click on Chrome settings button, > Show Advanced Settings > Reset Browser > click Reset button.

Mozilla Firefox:

  • Click on Settings > Help > Troubleshooting Information > Reset Firefox > Click on Reset when the pop-up shows.

Remove/ Delete WordShark from your PC Computer:

  • First click on start> My Computer > now click on Add or Remove Programs.
  • You’ll see all the list of all programs installed on your PC. Scroll down and search for WordShark 1.10.0.20.
  • Select WordShark and click on uninstall. No need to install any additional software during the process.
  • It’s done now all you have to do is to use adware removal tool to completely remove the WordShark files. I Suggest use AdwCleaner.

Rumor Roundup on the New Google Nexus Smartphone

0
Rumor Roundup on the New Google Nexus Smartphone

There is no doubt that Google with its Nexus brand brings users one of the impressive smartphones of the year. One of the reasons for the success of the Google Nexus line is the company’s focus on quality and not compromising on providing users the best experience with the latest technology available. Every year Google launches one Nexus smartphone in the last quarter and this year is not different. One of the interesting aspects about the Google Nexus lineup is that it is not produced by Google but always in partnership with other smartphone companies. With the company having worked with tech giants like Samsung, Motorola and HTC, which company are they going to work with this time around is under speculation.

google-nexus-5-2015-concept-image-2

Well different rumors swirling around in tech town right now suggest that we may be in for a surprise from Google this time around with the company bringing out two Nexus smartphones in collaboration with two different companies. According to Android Police the company is working on LG for a 5.2-inch smartphone which is code named Bullhead and on a 5.7-inch display smartphone with Huawei code named Angelr. Well it seems as if the company is keeping with the current trends of smartphone sizes by brining a phablet and a sizeable smartphone.

Well nothing definitive about the specifications of the devices is known but let’s have a look at some of the reported specifications. LG Nexus will sport a 5.2-inch display and will be equipped with a 808 Snapdragon processor. Along with this it will have a 2700mAh battery. Not much about the other features is known at the moment but we will update you as soon as more information surfaces. LG can make this smartphone impressive by adding a great camera feature which they are currently using in their own flagships.

nexus-huawei

Google is amping up the game with Huawei Nexus. Huawei’s latest lineup does give an idea as to what can we expect from this collaboration, a sleek and well designed metal body smartphone. The smartphone will sport a 5.7-inch Quad HD display. Along with that it will be equipped with Qualacomm Snapdragon 820 chipset, 3 GB RAM and a 32 or 64 GB internal storage. As far as the camera features go it will sport a 13 MP main camera and 2 MP selfie shooter, which does sound a bit disappointing but these are just rumored specs, the end product may turn out to be totally different than the one speculated. We hope so that’s the case with the camera specs and the companies whip up something really striking.

Both the smartphones will be launched with Google latest OS which is the Android M. As far as the launch date goes, we will be looking at these smartphones somewhere in October or November, wouldn’t that make the holiday season much more sweeter.

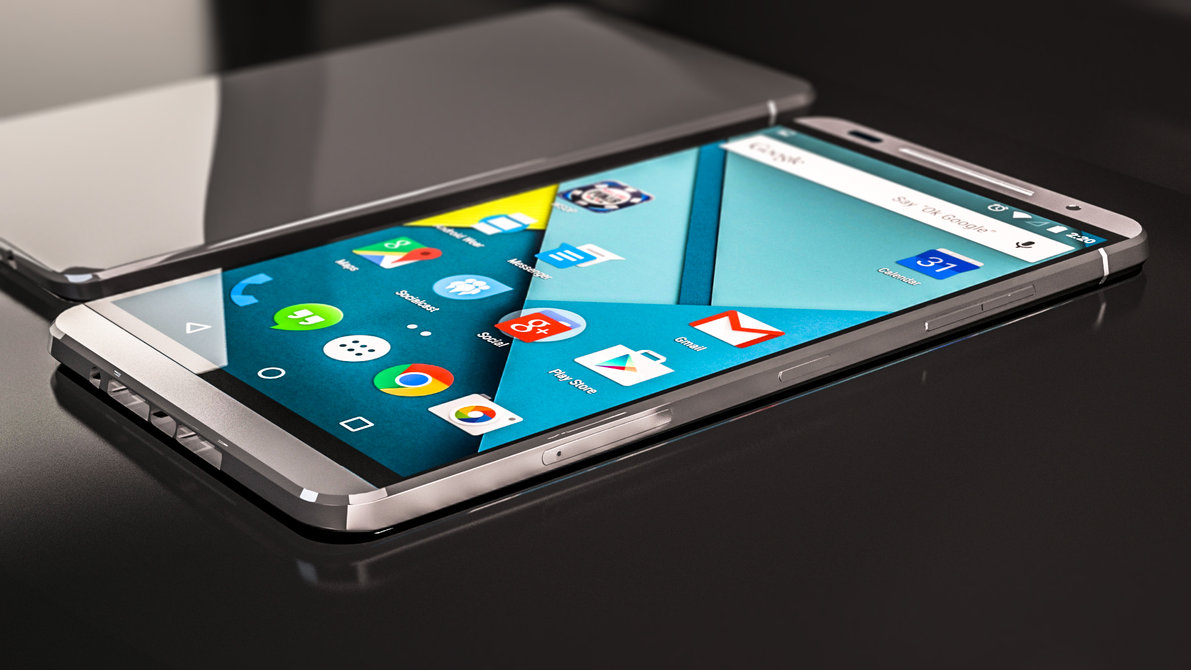
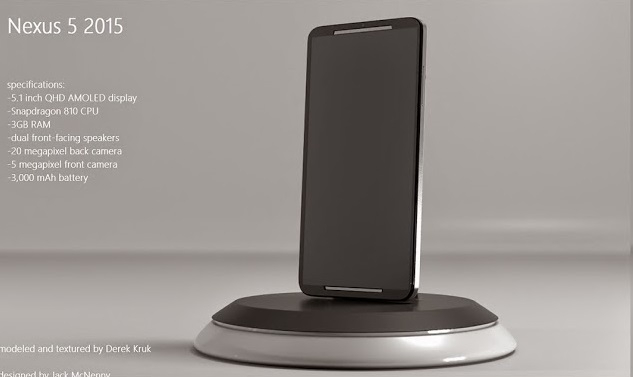
Have a look at some of the concepts and renders for the latest Nexus smartphone.

google-nexus-5-2015-concept-image

Google-Nexus-2015

nexus-5-2015

Source: AA, EG

Download Cooking Fever For PC & Mac

0
Download Cooking Fever For PC & Mac

One of the most addictive Android games I’ve come across in the recent while. Cooking fever is worth playing for hours. The game does justice with its name, the game play is pretty simple and easy to understand. In Cooking Fever you’re basically running your very own bakery, Fast-Food, Chinese, Pizza or some other food chain. Customers visit your food spot and you’ve to cook and server them their desired order. Cooking Fever has over 10 locations where you can cook more then 400 dishes using 150 different ingredients. The customers pay you a relevant amount once you’ve served the order, but in case you’re going to get late while serving the order, the customer ain’t gonna wait which will result in harming your shop’s reputation.This interesting game has been put forward by Nordcurrent. Cooking Fever also sports more then 400 levels to go through. Cooking Fever is all about how well you can manage the time. You can test your time management skills by spending most of your time serving your customers their desired food.Screenshot_11

Cooking Fever is available for free in the Google Play Store, but offers in-app purchases. As long as you play it good enough, you can keep your game running without making any in-app purchases. Cooking Fever is fun to play on a small screen of your Android smartphone or tablet, but the game gets much more interesting if you take the experience to your desktop PC, which is easily possible now. You can now install Cooking Fever for PC. In the succeeding guide we are going to install Cooking Fever on a Windows XP, 7, 8, 8.1 powered PC or a Mac OS X Macbook or iMac.

Download Cooking Fever For Windows PC & MAC

  1. Download Cooking Fever APK
  2. Download and install Bluestacks: Bluestacks Offline Installer | Rooted Bluestacks | Bluestacks App Player
  3. Once you’ve installed Bluestacks, double click the downloaded Cooking Fever APK.
  4. The APK will be installed using Bluestacks, once installed open Bluestacks and locate the recently installed Cooking Fever.
  5. Click the Cooking Fever icon to open it, follow the on-screen instructions to play it.

You can also use Andy OS to install Cooking Fever, here’s the tutorial:  How To Run Android Apps On Mac OS X With Andy

The Andy OS tutorial explains how to play a game on your Mac OSX, but the same guide will also work for a Windows PC.

That’s all. In case you’re stuck with anything, reach us out through the comment box below.

Cooking Fever Description:

Cook delicious meals and desserts from all over the world in this FREE addictive time-management game! With a choice of 10 unique locations, from Desserts and Fast Food to Oyster Bar and Oriental Restaurant, you will be able to practice your skills in a variety of settings and cooking techniques. Use more than a hundred ingredients to cook several hundred tasty dishes. Try all the possible kitchen appliances, from coffee makers and rice cookers to pizza ovens and popcorn makers. Decorate your restaurants to attract more clients. Make your own freebies, such as cookies or cupcakes, to make your customers’ experience more personal and memorable – just like in real life! Upgrade your kitchen and produce an even greater variety of dishes. Oh, and did we say that this game is as addictive and as engrossing as fever? Have fun cooking and don’t forget to share your delicious meals with your friends on Facebook!

Features:
* More than 400 dishes to cook using 150 ingredients
* 10 unique locations: Bakery, Fast-Food, Chinese, Pizza, Seafood, Indian, Breakfast Café, Sushi Bar, Ice Cream Shop and Paradise Cocktail Bar. More locations are on the way!
* More than 400 levels to complete
* Hundreds and hundreds of upgrades for your kitchen appliances and interior

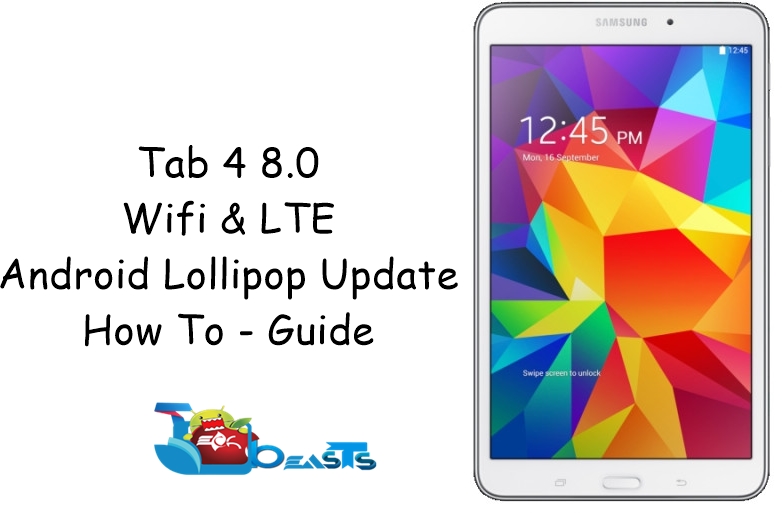
Install Android 5.1.1 Lollipop On Your Galaxy Tab 4 8.0

Install Android 5.1.1 Lollipop On Your Galaxy Tab 4 8.0

Its Lollipop season going on for the Android users. Manufacturers are updating their high end devices to the latest Android version. Following the tradition, Samsung has pulled out the Android 5.1.1 update for our beloved Galaxy Tab 4 8.0 WiFi and LTE variant. Yes, you heard it right. Galaxy Tab 4 8.0 owners have jumped over the Android 4.4.4 KitKat and Android 5.0 Lollipop update, they have got Android 5.1.1 update straight from the Android 4.4.2 KitKat. This has made the Galaxy Tab 4 8.0 users cheer up and eager to get their hands on this latest iteration of Android running on their device as soon as possible. The new update brings a lot of goodies. First of all, a new UI is there for the Tab 4 owners. Samsung’s revamped TouchWiz UI according to Google’s Material Design is there. Battery life and performance enhancements have been made. New notifications on the lock-screen, new user modes and a lot more is there that makes this a worthy update.

The update is rolling out through Samsung Kies or through OTA at the moment. Since these are phased updates, these may take a while to reach out all the users all across the world. If you’re passionate about Android OS and you can’t wait for the phased update to hit your device, you may want to use an alternative way to get this latest Android Lollipop running on your device. This is possible by means of Samsung’s flashtool Odin3. If you have start wondering about the process, you may stop it right now as we are about to explain it right here.SM-T330

In the succeeding guide, we are going to flash latest official Android 5.1.1 Lollipop firmware on Galaxy Tab 4 8.0 WiFi (SM-T330) & LTE (SM-T335). In order to avoid any mishap, follow this guide to the letter. Let’s learn some early preparations and then move ahead.

Here are some early preparations:

  • This guide is only for the Galaxy Tab 4 8.0 WiFi (SM-T330) & LTE (SM-T335). Do not try this on any other device. Make sure that you check your device’s model number in settings > system > about device.
  • Make sure that your batter has 50% of its battery. This is recommended in order to avoid any power issues during the installation process.
  • Enable USB debugging on your device. To do so, you need to enable developer options first by going to settings > system > about device > tap build number for 7 times. Once you’ve the developer options enabled under settings > system > developer options > enable USB debugging.
  • Backup all of your important stuff. This includes contacts, call logs, text messages and your important media content. This is important since you need to wipe your phone to achieve a neat and clean installation.
  • Make sure that you’ve backed up your EFS partition [Strongly recommended].
  • If your device has a custom recovery installed previously, you may create a Nandroid backup. Otherwise, skip this step.
  • Factory reset your phone by booting into recovery mode. To do so, turn off your phone completely. Now turn it on by pressing and holding Volume Up + Home + Power Key. Once you’re in recovery mode, wipe factory data.
  • While using Odin3, turn off Samsung Kies if you’ve installed it. Also turn off your Firewall or any Antivirus software if enabled.
  • Use original data cable to establish connection between your device and your PC.
  • This is official firmware and it won’t void the warranty of your phone. It will not cause any damage to your phone either.
  • Follow these instructions to the letter to make it happen successfully.

Required Downloads

  1. Download & Install Samsung USB drivers. MAC users do not need to install drivers or Samsung Kies.
  2. Download & extract Odin3 v3.10.6. MAC users may use JOdin.
  3. Download & extract firmware for your device.

Install Android 5.1.1 Lollipop On Your Galaxy Tab 4 8.0

  1. Make sure that you’ve carefully prepared according to the instructions listed above. Also make sure that you’ve made the necessary downloads and installs as explained.
  2. Open Odin3 V3.10.6.exe on your PC. MAC users will use JOdin.
  3. Connect your Tab 4 8.0 to your PC or MAC in download mode now. To do so, turn off your phone completely first. Now turn it on by pressing and holding Volume Down + Home + Power Key. Once your phone turns on and shows you warning, press Volume Up to continue. You are in download mode now. Plug in the data-cable now. As soon as Odin3 detects your phone, the ID:COM bar in the top-right corner should turn blue or yellow depending upon your version of Odin.
  4. Load the downloaded and extracted firmware file, which should be in .tar format. To do so, click the “AP” tab and locate the extracted .tar firmware file. If you’re using an older version of Odin, you will use “PDA” tab to load the firmware file. Once you’ve selected the file, it will take a while for Odin to load it. Wait patiently at this point.
  5. If the Auto-reboot option is un-ticked, tick  it. Leave all other options as it is. The picture below can explain you further.Odin 3.10.6 Explained_Techbeasts
  6. Once you’re done with it according to the steps explained above, you’re set to flash the firmware now. Simply click the “Start” button now.
  7. This will start flashing the firmware on your device. It will take a few minutes for Odin to complete installation. Once the installation is finished, Odin will show “Finished” status in the installation box, the ID:COM bar will turn green now. Your device will reboot automatically if you ticked the Auto-reboot option before the installation. Disconnect your device now.
  8. If your device doesn’t reboot automatically, you may reboot it manually now. To do so, disconnect it from your PC and keep the power key pressed for a while and your device will turn off. Now turn it on by pressing power key only.
  9. For the first boot it may take up to 10 minutes, so hold on tighter. Once your device boots up, set it up and enjoy the all new Android 5.1.1 Lollipop on it. That’s all 🙂

If you’re stuck with anything or facing any issues, make sure that you reach us out through the comment box below. We’d love to help you out. Thank you 🙂

The Latest Scoop on Samsung Galaxy S6 Edge Plus: Specs, Features and Rumors

0
The Latest Scoop on Samsung Galaxy S6 Edge Plus: Specs, Features and Rumors

Samsung is planning to launch an Edge smartphone along with the Galaxy Note 5 in the next few weeks. The company started this tradition of launching 2 variants of its flagship last year at the IFA in Berlin when it surprised people by launching the Note Edge along with Note 4. This year is no different, apart from the rumored launch dates; Samsung is all set to launch Galaxy S6 Edge Plus, a dual-edged variant of the Galaxy S6 Edge. Is Samsung introducing any new features in this dual edged variant or is it just going to be a bigger version of S6 Edge, let’s have a look.

Samsung-Galaxy-S6-Edge-Plus-Rendu3D

Galaxy S6 Edge, has a curved screen only on the right side. One of the major differences in the Plus variant is that it has a dual-sided curved display. As far as what features and functions that the curved edges have been given are still unknown. Most probably some of the features like main icons and the contact identification through assigned colors will be there but it would be interesting to see what else do Samsung developers whip up this time around to make their device stand out.

samsung-galaxy-s6-edge

The Galaxy S6 Edge Plus is expected to sport a 5.7-inch QuadHD display. Most of the rumoured specifications of this smartphone are sketchy and contradictory. PhoneArena cited that the Plus version will have a 5.5-inch display; well this aspect will be confirmed on the eve of the smartphone’s launch.

Samsung is currently working on using its home produced Exyons chips since its success with the Galaxy S6 and S6 Edge earlier this year. It is rumoured that they will be using the Exynos 7422 chip in the S6 Edge Plus and also in the Galaxy Note 5 which is produced using the ePoP production method. In the Note 5 the use of this chip allows the manufacturer to use a 4100 mAh battery but in the case of S6 Edge Plus a 3700mAh battery will be used.

galaxy-s6-edge-plus-dummy-02

Following in the steps of the revamped S-series flagship smartphones, the S6 Edge Plus will also have a non-removable battery and no microSD slot for expanded storage. This feature may prove to be disappointing to the users who were looking forward to the newer smartphones to have that option. S6 Edge Plus will have a 3GB RAM with an internal storage option of 32GB, 64GB and 128GB.

As far as the camera feature goes we may not see anything new there. The smartphone will be equipped with a 16-megapixel main camera with optical image stabilization. Well the company could have worked on enhancing this feature in this smartphone and that could have made it more attractive to the users. With Samsung’s competitors offering a 20-megapixel main camera, the company should work on this feature and offer its users something optimized. There are two different specification reports regarding the front camera suggesting that the smartphone will be equipped with a 5-megapixel or an 8-megapixel front camera. Well the 8-megapixel camera with a 16-megapixel main camera does sound a bit dubious but you never know what Samsung may pull by the end of the day.

Galaxy S6 Edge Plus will have a sleek metal design as seen in its predecessors Galaxy S6 and S6 Edge. As far as the launch date goes, we will be looking at the new Edge smartphone in the next few weeks if rumors are something to go by. It is expected that the company is planning to launch Galaxy S6 Edge Plus and Note 5 on August 12th. The company is launching its flagship earlier this year. The reason behind this move is that the company wants to stay ahead of its arch-rival Apple which will be launching iPhone S6 and S6 Plus in September. Samsung wants to tip the balance in their scale and keep the streak of success alive with their new flagships. Samsung if you want to keep up with your market share, work on innovating your products and offer consumers something that the competitors are not doing at the current moment that will improve your chances of success considerably and help you recoup the lost ground in global markets.

galaxy-s6-edge-plus-dummy-01

Galaxy-S6-Edge-Plus-4G-SIM

S6 Edge Concept-2

Sources: NW, PA, TB

Galaxy Note 5 News, Rumors, Specs, Release Date

Galaxy Note 5 News, Rumors, Specs, Release Date

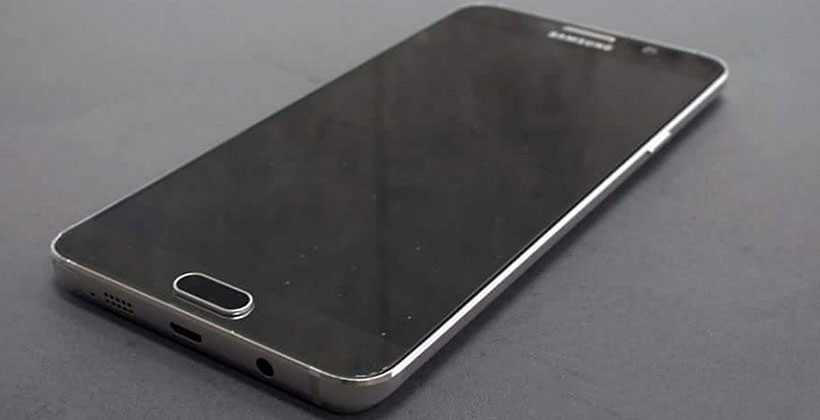
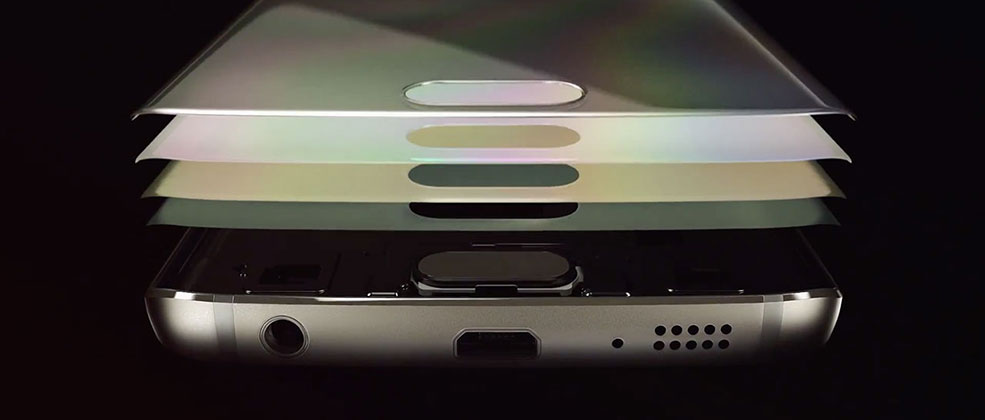
Samsung has no doubt upped its game in 2015 and is focusing on improving its smartphones. With the success of Galaxy S6 and S6 Edge, the company has definitely understood that to stay in the game they have to innovate and work on improving their technology. With its sleek metal glass design and powerful technology Galaxy S6 and S6 Edge are to date considered one of the best smartphones that the company has produced. Keeping that in view, users are definitely looking forward to what Samsung will bring next with their upcoming flagship Galaxy Note 5.layers-1

Samsung’s Galaxy Note 5 is expected to have the best features of the Notes series as well as the latest S series smartphones, this can prove to be an interesting mix with the company going with something borrowed, something blue philosophy. Note 5 is reported to come with a 5.7-inch display and reported dimensions of 153.3x 76.1 x 7.9 mm. The body of the smartphone is expected to sport the same sleek sophisticated metal design as seen in Galaxy S6 and S6 Edge.Samsung-Galaxy-Note5-Schema-06-840x739

With the Note 5, Samsung has worked on improving its processing. The company’s bet with their own Exynos chip in the latest S-series smartphone seems to be paying off and they again in the Note 5 will be making use of their own Exynos chip: the Exynos 7422. The most interesting aspect about this chip is that with this Samsung is combining the elements like CPU, GPU, DRAM and LTE in a single chip. They are able to do this using the ePoP production method and this method allows the manufacturer to use a bigger battery. Well the reported battery specs of Note 5 are quite impressive with the company using a whooping 4100 mAh battery in their latest flagship. If the company goes with the non-removable battery design as seen in S6 than this latest development will be embraced happily by disgruntled users who were not happy with this aspect.

Along with the new Exynos chip, the smartphone will be equipped with a 4GB LPDDR4 RAM and 32 GB of internal storage. Whether or not a micoSD slot option for expandable storage will be available or not is still under speculation. Some industry experts say that the company will forgo this option in leiu of producing a sleek power house.

As far as the display goes, speculations suggest we may be looking at a 4K display in the Note 5. This seems a bit dubious as some manufacturers have still not jumped to the Quad HD display and increasing the display power may eat up a considerable chunk of the battery. It is safe to say that the company will most probably go with a 2k, 1440 x 2560 resolution display. The smartphone is expected to sport a 16MP main camera with optical image stabilization and a 5MP front camera. Well the company could have worked on improving their camera specs and introduced a 20MP main camera when other competitors are making use of this feature, why not push the envelope and give the users even a better experience than the one found in S6 and S6 Edge.

frontback233underside-1280x577

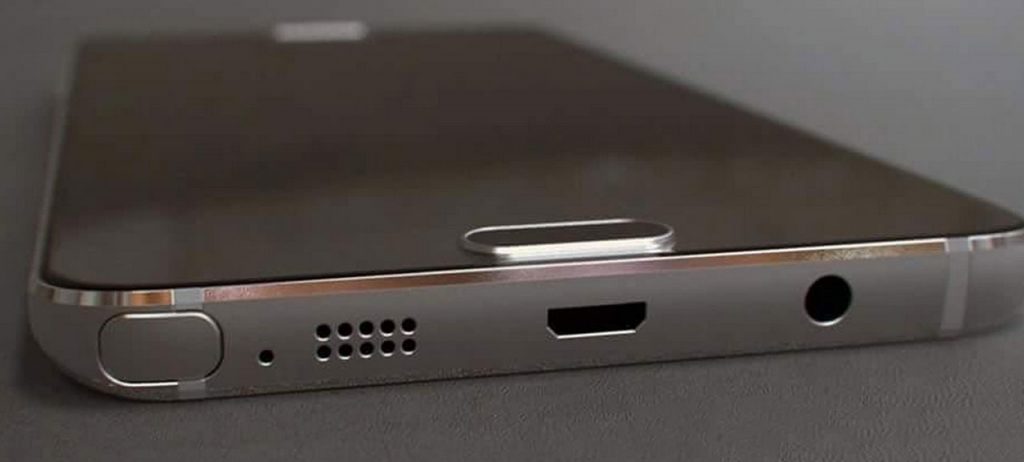
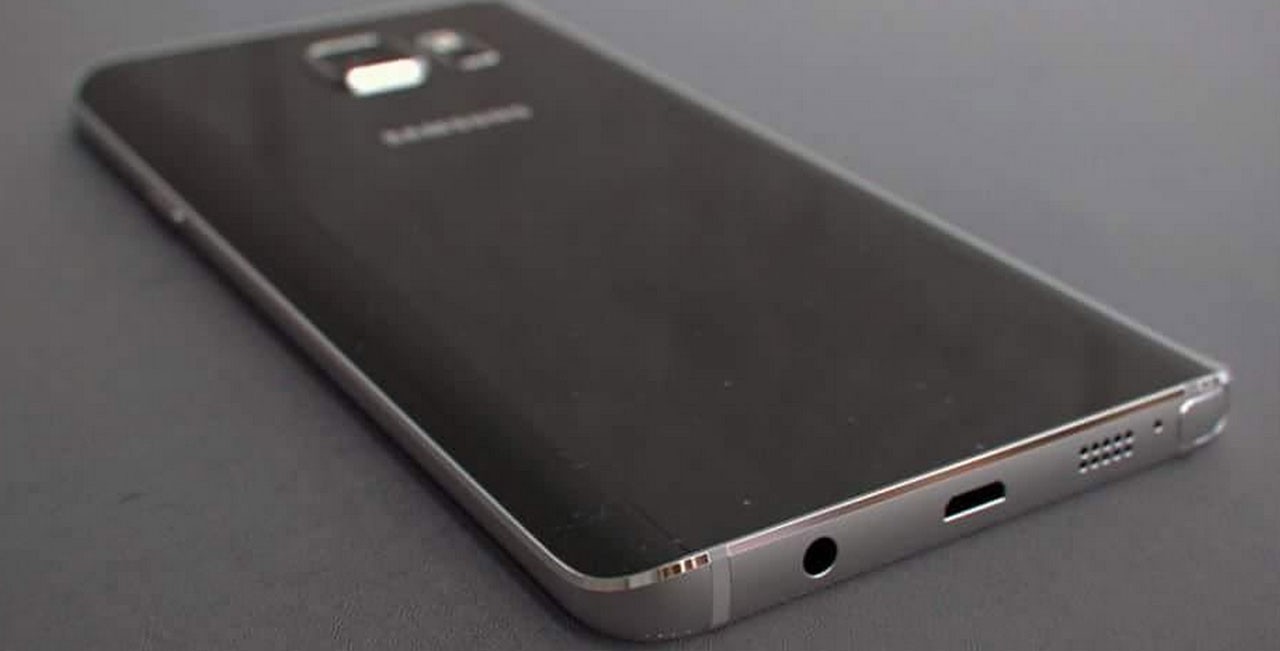
As far as Galaxy Note 5’s release dates go, it is expected to launch on 12th August. This year Samsung is pushing the envelope and bringing its Note flagship in August rather than launch it on the IFA in Berlin as per tradition. The reason behind this decision is that Samsung wants to stay ahead of Apple and continue its streak of success. Apple in September is expected to launch iPhone 6S and 6S Plus. So to stay ahead of the game Samsung is bringing out Note 5 in August. So Samsung fans looking forward to the new phablet, mark your calendars because if the latest speculations swirling around in the tech industry right now are true than you will be looking at the new Samsung Note in just a few weeks.backside-1280x651
galaxynote5 IMG_1140  galaxy-note-5-case-4galaxy-note-5-case-s-penside23Here are some concepts of the Galaxy Note 5 floating around the web.