Home Blog Page 366

Download Cytus For Windows PC & MAC
0
Download Cytus For Windows PC & MAC

Cytus is sitting among the top free games in the Google Play Store at the moment. The reason for this game to gain a lot of popularity is the perfect match of art and music. Cytus by Rayark International Limited has a very unique kind of concept that is good enough to gain your attention for hours. Cytus comprises of different levels, you can select the very basic one to being with. The game comprises 9 difficulty levels, 180 songs and 360 variations from famous music composers all around the world. The name Cytus doesn’t explain the concept of this game itself, we have to look down a little deep to understand it.

Basically in this game, the screen displays different notes, or different spots you may call. The lines scan through these notes and you have to tap the notes exactly when the line is at the center of the note. Tapping the note will wipe it off, wiping off all the notes exactly when the scan line is at the center will get you through that level. Higher levels will bring more notes and the scan lines will pass through the notes from all directions at a higher speed. The faster and more accurately you tap, the faster you will surpass the level which result in making a better score. Tapping rapidly will result in earning you Combos, more combos means higher score.Screenshot_8

Although you can install Cytus from the Google Play Store for free, but just in case you don’t want to play it on your Android device or you do not own an Android device, you may want to have an alternative way of playing Cytus. Another way to play Cytus is to install Cytus for PC. You can now enjoy this interesting game on your Windows XP, 7, 8, 8.1 PC or a Mac OS X computer. Wondering how? Well, that’s possible by means of an Android emulator. The guides attached below will help you to get Cytus for PC.

Download Cytus For Windows PC & MAC

  1. Download Cytus APK
  2. Download and install Bluestacks: Bluestacks Offline Installer | Rooted Bluestacks | Bluestacks App Player
  3. Once you’ve installed Bluestacks, double click the downloaded Cytus APK.
  4. The APK will be installed using Bluestacks, once installed open Bluestacks and locate the recently installed Cytus.
  5. Click the Cytus icon to open it, follow the on-screen instructions to play it.

You can also use Andy OS to install Cytus, here’s the tutorial:  How To Run Android Apps On Mac OS X With Andy

The Andy OS tutorial explains how to play a game on your Mac OSX, but the same guide will also work for a Windows PC.

That’s all. In case you’re stuck with anything, reach us out through the comment box below.

Cytus Description:

❖❖Welcome to the Musical World of Cytus❖❖

LET’S EXPERIENCE MUSIC ’N ART, BEAT ’N REBOUND!

Check the screenshots and you will see the most AWESOME mobile music game ever!
Just PLAY and ENJOY!

❖FEATURES❖

– 180 songs and 360 variations, including many from famous composers around the world

– Beautiful hand-drawn art style (as illustrated in the screenshots)

– Easy, intuitive Active Scan Line system and 3 types of notes

– Different display modes allow player-friendly previewing of notes

– Strong beat and rhythms provide satisfying feedback for taps

– More than 9 difficulty levels for more fun and challenges

– Various music genres: POP, JAZZ, TRANCE, HARDCORE, DRUM ‘N BASS and many more

– Connect to Facebook and show off your Cytus skills

❖HOW TO PLAY❖

– Follow along the Active Scan Line
– Tap each note as the line passes through
– Time your taps as the line is at the center of the note for a higher score!

❖STORY❖

In the distant future, the only sentient beings in the world are robots.

They are the last remnant of the human spirit.

However, mankind is not dead.

Technology exists that is capable of transferring memories to these robots.

But with limited space, new memories will gradually overwrite the old.

To prevent the emotions in human memories from fading away, the robots resorted to converting the emotions to music, and storing them in a place called Cytus.

The robots use these songs to experience human emotion and dream that souls exists in each of them…

Cytus

Download Brain Dots For Windows PC & Mac

0
Download Brain Dots For Windows PC & Mac

Google Play Store is loaded with tons of puzzle games, but everytime we see a developer pushing a new puzzle game into the play store, we come across a new concept that has never been there before. In the past we saw some cool puzzle games like Candy Crush Saga and others, but those games were very simple and straight forward, those did not require the use of your mind actually. A new puzzle game that has made its way to the play store will check how strong your imagination power is. Brain Dots by Translimit, Inc sports a very unique kind of concept. Let’s have a look on what you got to do in this game.

Basically in this game, you are provided by two different balls at a specific distance from each other. You’ve to draw a path for these balls to meet or hit each other. In each stage, there’s a shape that you’ve to draw, once you draw it properly, the balls use that path to hit each other and that’s how you clear a stage. In the very first few stages, a tutorial explains you how to draw the lines or shapes in order to make the balls bump each other, but this doesn’t continue for long. After first 2 or 3 stages, it all depends on the way you create the shapes in your mind making the best use of your imagination. After playing this game, you will be appreciating your imagination power if you manage to surpass a few levels. This game seems to be the best for those who have a stylus with their smartphone or tablet. If you do not have a device with a stylus, then drawing the shapes with fingers may become a little bit tricky. But what if you can use a mouse pointer to draw the shapes accurately? This is not possible on an Android device, but it sure is possible on a desktop PC. And to do this, we are going to take your Brain Dots experience to a Windows 7, 8, 8.1 computer or a Mac OSX powere Macbook or iMac.Screenshot_7

Brain Dots is available for free in the Google Play Store, but the game is real fun to play if you’re playing it on your computer on a bigger screen. Taking brain dots to a computer is pretty easy. You can easily install it using an Android emulator like Bluestacks or Andy OS. You must be wonder how you can do so? Let’s make it quick now. In the following post we are going to install Brain Dots for PC. We will install Brain Dots on a Windows XP,7,8, 8.1 PC or a Mac OSX device. The links attached below will help you to install and play Brain Dots for PC without any hiccups here and there.

Download Brain Dots For Windows PC & Mac

  1. Download Brain Dots APK
  2. Download and install Bluestacks: Bluestacks Offline Installer | Rooted Bluestacks | Bluestacks App Player
  3. Once you’ve installed Bluestacks, double click the downloaded Brain Dots APK.
  4. The APK will be installed using Bluestacks, once installed open Bluestacks and locate the recently installed Brain Dots.
  5. Click the Brain Dots icon to open it, follow the on-screen instructions to play it.

You can also use Andy OS to install Brain Dots, here’s the tutorial:  How To Run Android Apps On Mac OS X With Andy

The Andy OS tutorial explains how to play a game on your Mac OSX, but the same guide will also work for a Windows PC.

That’s all. In case you’re stuck with anything, reach us out through the comment box below.

Download SoundCloud 15.02.02-45 APK [Music Caching]

1
Download SoundCloud 15.02.02-45 APK [Music Caching]

SoundCloud freaks are well aware of the recent  changes in SoundCloud application. Just in case you have no idea about the changes, let us give you a flashback. The biggest online music hub SoundCloud offers  a variety of features to enhance the music experience of its users. One of the greatest features in SoundCloud’s Android application was music caching, which cached the played songs and users were able to listen those songs even without internet later on. The cache size was changeable, so users only had to play a song once in order to listen to it without internet connectivity later. This feature was widely used by SoundCloud users and was appreciated as well.  In the recent updates, in order to improve SoundCloud for Android, SoundCloud developers took this feature off from the application. SoundCloud doesn’t offer music caching anymore. This means you can’t play your favorite tracks on SoundCloud if you have no internet connectivity.

This feature became pretty handy not only when you have no internet, but it also saved storage on devices as users never had to save the songs on their phone’s internet storage. They were always able to play it from the SoundCloud application. After SoundCloud’s removal of music caching features, many loyal SoundClouders moved to migrated to music services like Spotify and others, but not everyone can switch to these platform as these are paid unlike SoundCloud. If you’re now thinking to migrate from SoundCloud, we may have a reason here to stop you and make you stick to SoundCloud for a while.

Even if SoundCloud has removed the music caching feature, you can still get it back right away. Wondering how? Well, that’s what we are here for at the moment. Basically, you can get the feature back by replacing the latest version of SoundCloud application with the older version which had this option. We have embedded SoundCloud’s APK file, the last version [15.02.02-45] that came with the music caching feature. The procedure may sound a little bit complex right now, but as we move ahead, the method explained below to install SoundCloud music caching apk is going to make it a lot easier for you.

How To Get SoundCloud APK With Music Caching Feature Back On Android

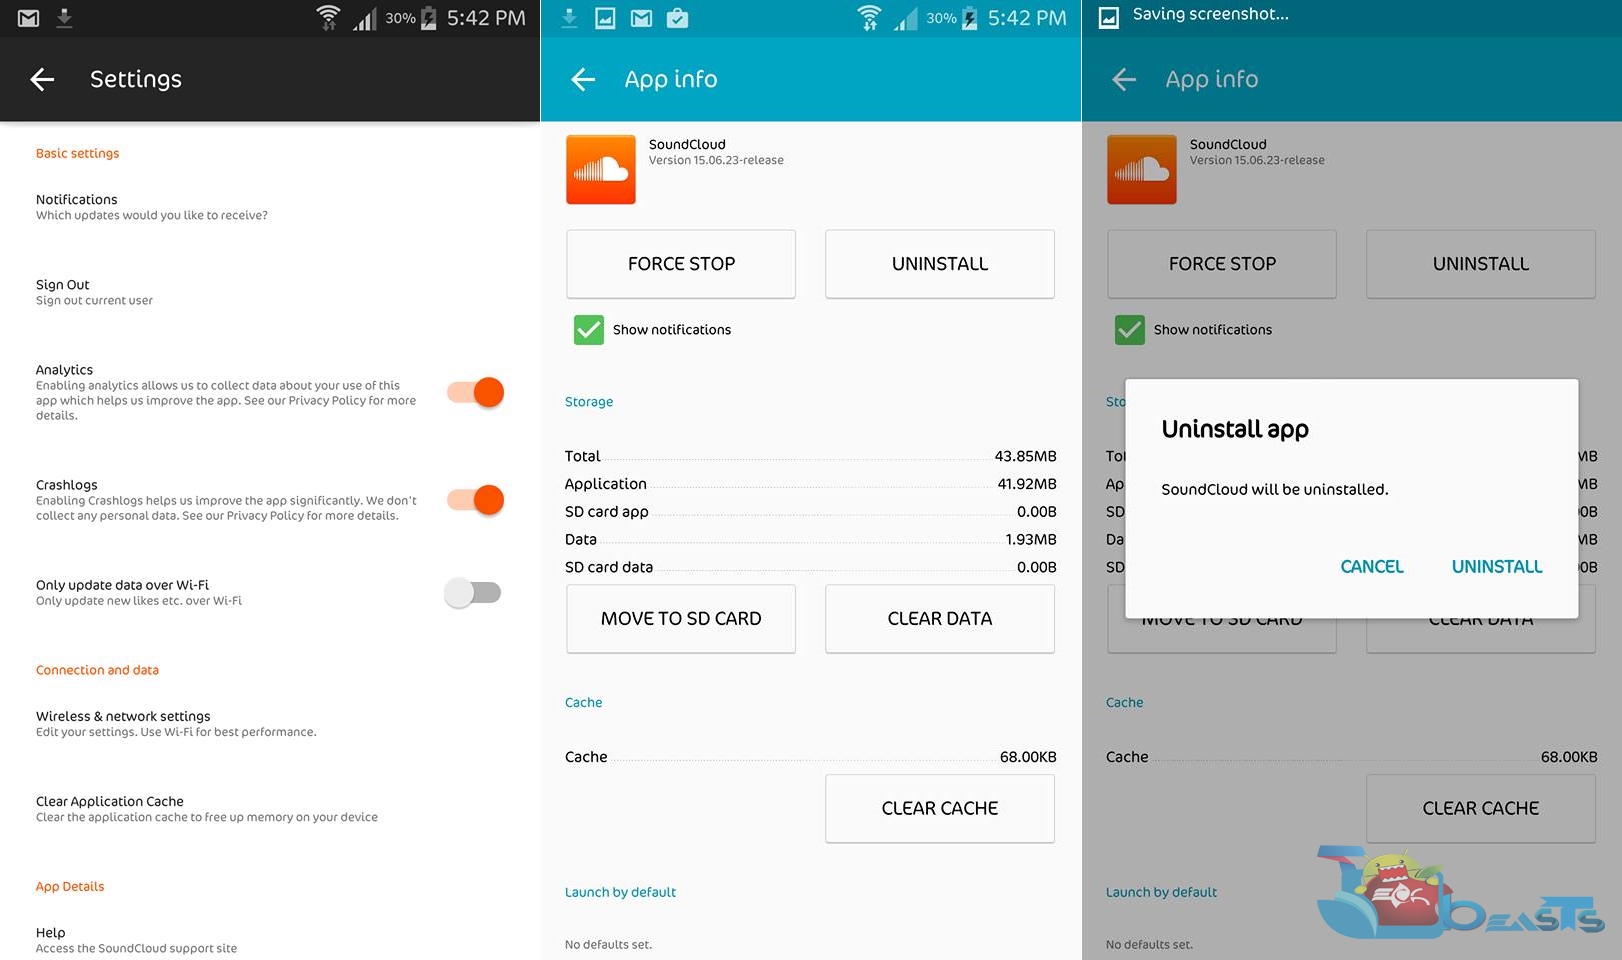
  1. First of all you need to uninstall the current version of SoundCloud application from yourAndroid device. To do so, go to settings.
  2. Now in settings > apps / application manager > all > SoundCloud.
  3. Tap SoundCloud in order to access its settings.
  4. Tap Uninstall in order to completely uninstall SoundCloud’s current latest version from your device.SoundCloud Music Streaming1
  5. Now download SoundCloud 15.02.02-45 apk file.
  6. Copy the downloaded apk file to your phone’s SD card.
  7. Now on your phone, go to settings > security > allow unknown sources.
  8. Now using a file manager, locate the copied SoundCloud apk file and tap it to install it.
  9. Follow on-screen instructions to install the application, once installation is finished open the application.
  10. Go to settings and checkout the music caching feature as they will be back now.soundcloud offline
  11. Play any track online now and then play it offline, it will work flawlessly.
  12. Now open Google Play Store and search for “SoundCloud”.
  13. Open SoundCloud application in Google Play Store and tap the three dots button at the top right corner.
  14. Now turn off “Auto-updates” for SoundCloud. It’s necessary to turn it off in order to make this version of SoundCloud stick in your device. That’s all.

Now Check: How to Download Complete SoundCloud Playlists

Make sure that you drop us a word about our guide!

Jailbreak iOS 8.4 – 8.3 With PP On iPhone 6, 6 Plus, 5s, More

0
Jailbreak iOS 8.4 – 8.3 With PP On iPhone 6, 6 Plus, 5s, More

Yesterday we told you that PP Jailbreak tool for Mac is released and now you don’t have to create a virtual machine on your Mac in order to use PP tool. Today i’ve prepared a guide on how to Jailbreak iOS 8.4 – 8.3 With PP On iPhone 6, 6 Plus, 5s, More. After the Jump you can see the step by step guide on how to use and  Jailbreak iOS 8.4 – iOS 8.3 using PP Jailbreak Tool.

Jailbreak iOS 8.4 - 8.3 With PP On iPhone 6, 6 Plus, 5s, More

Jailbreak iOS 8.4 – 8.3 With PP On iPhone 6, 6 Plus, 5s, More:

Important Things:

  • Backup your device using iTunes.
  • Turn off ” Find My iPhone ” in settings-> iCloud.
  • If your device is updated through OTA then you need to restore the system using iTunes.

Guide:

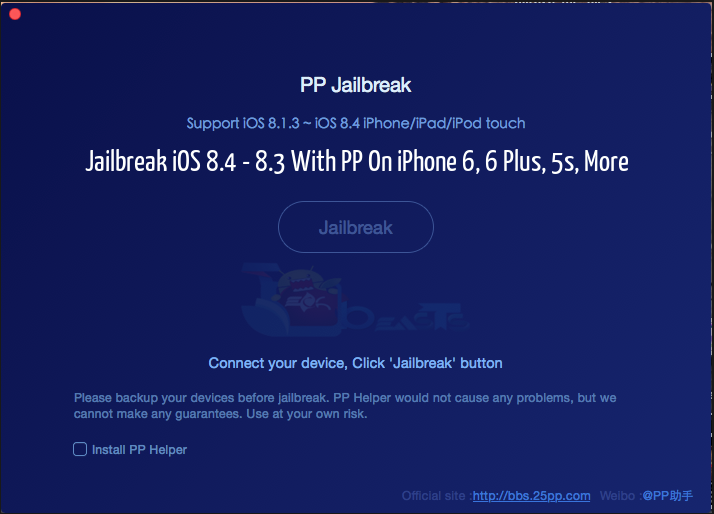
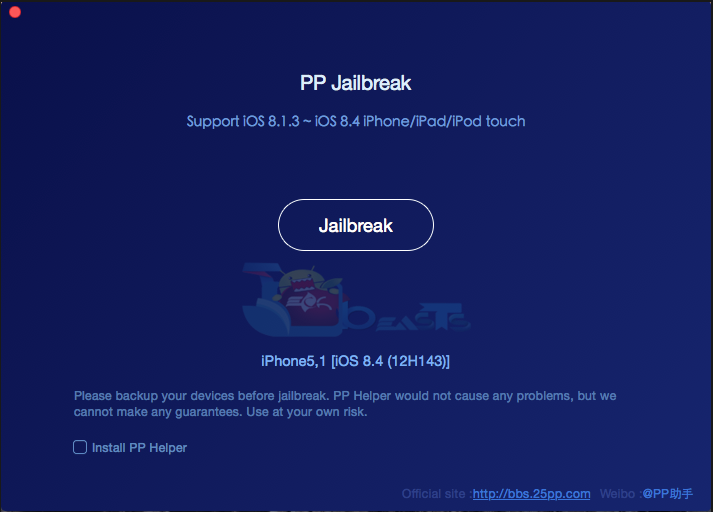
Step #1: Connect your device with Mac/Pc using original cable. Close the iTunes while using PP Jailbreak tool. Once your device is connected click on Jailbreak button.

Screen Shot 2015-07-14 at 16.15.34

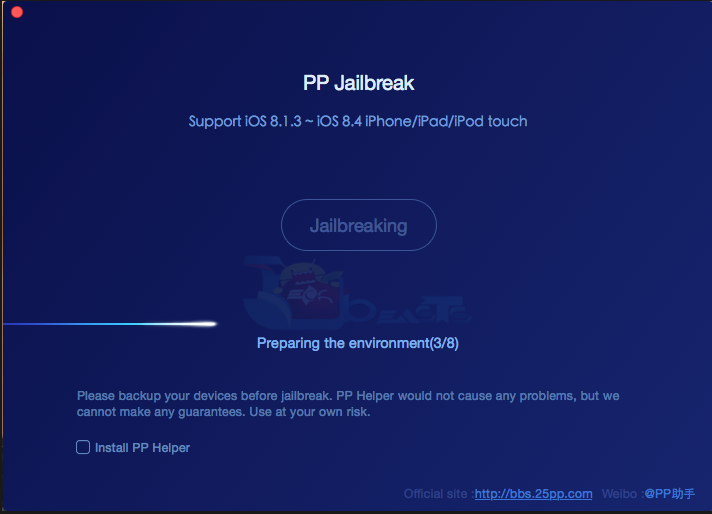
Step #2: After clicking on the Jailbreak button you have to follow the screen instruction, when the process starts you see the process bar running and beneath it ” Preparing Environment “.

Screen Shot 2015-07-14 at 16.16.57


Step #3: Now your device will reboot and then you’ll see a instruction on the screen saying ” if you have enabled password protect please unlock it. Enter the passcode to move on with the process. Now you don’t have to do anything sit back and relax and let PP Jailbreak Tool do the magic. Screen Shot 2015-07-14 at 16.17.43

Step #4: Once the process is done your device will reboot and you’ll see white Apple logo with progress bar. After your device boots up and you’ll see Cydia icon among with other apps. All Done ! You have successfully Jailbroken your device.

Screen Shot 2015-07-14 at 16.18.59

Now Open Cydia and let it update completely so you can easily use it. Here’s how you can use PP Jailbreak tool and Jailbreak iOS 8.4 and 8.3.

PP Jailbreak iOS 8.4

Also See:

  1. How to Jailbreak iOS 8.4 with TaiG 2.2.0 Jailbreak [ Tutorial ]
  2. Jailbreak iOS 8.3, iOS 8.2, iOS 8.1.3 with TaiG 2.0 [ Windows – Mac ]


Download PP Jailbreak Tool for Mac to Jailbreak iOS 8.4

0
Download PP Jailbreak Tool for Mac to Jailbreak iOS 8.4

PP Jailbreak tool was released after few minutes of iOS 8.4, but it was only for Windows you cannot use it on Mac unless you use virtual machine to run Jailbreak tool. Today i’ve a good news for Mac users PP Jailbreak Tool is released for Mac, all you have to do is download the Jailbreak tool for Mac and Jailbreak iOS 8.4.

ios-8-4-pp-jailbreak1

The PP jailbreak tool supports following iOS 8.4 – iOS 8.1.3 devices:

  • iPhone 6, iPhone 6 Plus, iPhone 5s, iPhone 5c, iPhone 5, iPhone 4S
  • iPad Air 2, iPad Air, iPad 4, iPad 3, iPad 2
  • iPad mini 3, iPad mini 2, iPad mini
  • iPod touch 5G

Download the PP Jailbreak Tool for Mac and Windows. Please do tell us how it goes in the comments.

Download TaiG v2.4.2 and Fix Jailbreak Stuck At 30%, 40%

0
Download TaiG v2.4.2 and Fix Jailbreak Stuck At 30%, 40%

TaiG v2.4.2 tool is out and this time is specifically released to fix  Jailbreak Stuck At 30%, 40%, yes if you are facing this issue while Jailbreak your device like process is stuck at 30%, 40% then download the TaiG v2.4.2 for your Windows and Jailbreak your device without any problem. Also TaiG v2.4.2 comes pre-loaded with Cydia 1.1.23 bundled, in the latest version of Cydia developers have added alot of new features like support for downgrading tweaks and the ability to show a categorized list of tweaks against the stock App Store based apps.

Download TaiG


V2.4.2 integrates the latest Cydia 1.1.23, and fixes issues of getting stuck at 30% and 40%.

V2.4.2 is a beta version. If not necessary, you can use the previous version to jailbreak.

At the moment TaiG v2.4.2 is in beta state so if you are not facing any issue with the perivious version, then stick to it. If you already have Jailbroken your device then you don’t need to re-jailbreak your device, this update is for those users who are facing issue while Jailbreaking their devices.

You can download TaiG 2.4.2 beta (TaiGJBreak_EN_2420.zip) from here.

Fix Bluetooth Issues on Samsung Galaxy Note Pro 12.2 After 5.0.2 Update

3
Fix Bluetooth Issues on Samsung Galaxy Note Pro 12.2 After 5.0.2 Update

If you are facing bluetooth issues on Samsung Galaxy Note Pro 12.2 after updating your device to 5.0.2 then follow my guide on how to Fix Bluetooth Issues on Samsung Galaxy Note Pro 12.2 After 5.0.2 Update. I’ve seen on many forums that many users are facing bluetooth connectivity issues on Galaxy Note Pro 12.2, they cannot connect handsfree, Logitech bt keyboard, Logitech mouse and SMouse etc. You can easily fix Bluetooth Issues all you have to do is follow my guide below.


Fix Bluetooth Issues on Samsung Galaxy Note Pro 12.2 After 5.0.2 Update:

Step #1: First of all put your device on Airplane mode, wait for 2-3 mins then connect your logitech Keyboard with bluetooth.

Step #2: Try to connect different manufactures keyboards and mouses.

Step #3: Perform a factory reset using recovery menu, first clear system cache then factory data reset.

Step #4: Try to flash patches to fix bluetooth connectivity.

Step #5: Downgrade your OS if your device is running 5.0.2, flash Android KitKat 4.4 or the pervious one you were using on which there was not bluetooth issues.

If none of this works for you then you have to wait for official solutions from Samsung, either they will roll out a new update or the’ll post a solution on their official forum. In the mean While you can follow these threads so you can track solutions.

How To Get SoundCloud Music Caching Feature Back On Android

9
How To Get SoundCloud Music Caching Feature Back On Android

SoundCloud is the biggest music hub on the internet at the moment and might be the best music streaming application for Android and iOS users as well. SoundCloud’s Android application has over 50 Million downloads in the Google Play Store. This much number of users makes a sense for SoundCloud developer to keep on improving the quality of their application, which is why we saw a new update every few days. One of the cool features on SoundCloud was the music caching, users were able to set a caching size in settings and then play songs which would get cached. The cached songs were saved for offline music, no internet connection was required to play the songs that you played once on the SoundCloud application. But things seem to have changed now.

In the most recent update, SoundCloud tooks this music streaming feature off from their application in order to enhance the technical capabilities of their application and improve the user experience. That means you need to stay connected to the internet whenever you want to play a song, you no longer can play any song in offline mode. This update turns out to be one of the most unexpected and worst updates for the users. At the present time, thousands of users have switched from SoundCloud to apps like Spotify only because of SoundCloud’s decision of dropping this feature from their Android app. But not everyone can pay for a service like Spotify and SoundCloud wins its spot for being free. A part from that, SoundCloud’s flawless playback make the application number one Music and Audio application to the date.

Music Caching feature had several advantages. Users didn’t need to store or download the music on their phone. The application did the job for them instead. All they needed is, just open the SoundCloud application and play their cached music in a few taps. If you’re a SoundCloud freak like me, you must be missing this feature greatly at the moment and you must be willing to get it back somehow. If you’re planning to switch from SoundCloud, we may have a reason to stop you and make you stick with SoundCloud as we already have a method which help you to get the Music Caching feature back on your SoundCloud application and play your favorite tracks offline on SoundCloud whenever you want, wherever you want.soudcloud-youredm

This can be done by replacing the current version of SoundCloud application installed on your Android with an older version which had this feature. Wondering how you can do so? Well, let’s go through this step by step guide to get it done now.

Also See: Download SoundCloud Tracks On Android With SoundCloud Mate [How to – Guide]

How To Get SoundCloud Music Caching Feature Back On Android

  1. First of all you need to uninstall the current version of SoundCloud application from your Android device. To do so, go to settings.
  2. Now in settings > apps / application manager > all > SoundCloud.
  3. Tap SoundCloud in order to access its settings.
  4. Tap Uninstall in order to completely uninstall SoundCloud’s current latest version from your device.SoundCloud Music Streaming1
  5. Now download SoundCloud 15.02.02-45 apk file.
  6. Copy the downloaded APK file to your phone’s SD card.
  7. Now on your phone, go to settings > security > allow unknown sources.
  8. Now using a file manager, locate the copied SoundCloud APK file and tap it to install it.
  9. Follow on-screen instructions to install the application, once installation is finished open the application.
  10. Go to settings and chck out the music caching feature as they will be back now.soundcloud offline
  11. Play any track online now and then play it offline, it will work flawlessly!
  12. Now go to Google Play Store and search for SoundCloud application. Now tap the three dots at the top right corner of the screen, and turn off auto update for SoundCloud. That’s all.

Now Check: How to Download Complete SoundCloud Playlists

Make sure that you drop us a word about our guide!

SHAREit for PC Download – Windows/Computer/Mac

0
SHAREit for PC Download – Windows/Computer/Mac

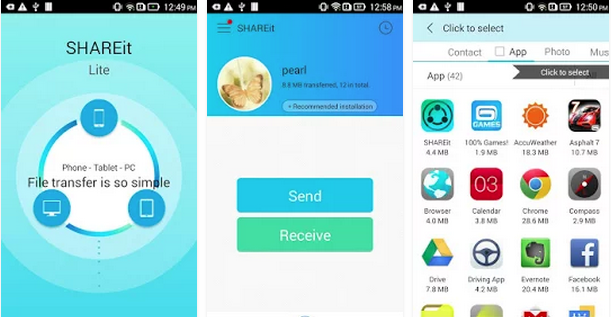
SHAREit for PC is available, you can download it from their official site or you can install SHAREit for PC using third party emulators like BlueStacks and Andy. I’ve heard people saying that after downloading SHAREit for PC it dosen’t work so today i will tell you how to install SHAREit for PC and easily transfer files. Before going any further let me give you an overview on SHAREit.

SHAREit for PC

SHAREit Features:

►No network restriction

Connect friends without external Wi-Fi or cellular data network. Share whenever & wherever!

►Extremely fast transferring speed

The best transferring speed is up to 20M/s, which is 200 times faster than Bluetooth speed. Just forget about NFC, use our super cool SHAREit !

►Cross-platform sharing

Cross-platform sharing for Mobile Phone & Tablet PC(iPad) & PC, Android & iOS & Windows Phone & Windows XP/7/8.

►Transferring anything

Photos, videos, contacts, apps and everything in SD card, share whatever you like with your friends!

►Simple & Easy

Select contents → Connect with friends → Transmission completed!

►CLONEit (Phone replicate)

You can easily transfer and back up Contacts, Call logs, SMS messages, MMS messages, Apps, all types of files in SD card and even System settings from your old phone to new one.

►Connect PC

1. Play To:
With SHAREit, you can connect to PC wirelessly and view mobile photos on computer screen!

2. PPT Control:
SHAREit could control PPT directly. Presentation is not a problem anymore!

3. Remote View:
While connected to PC, you can view any folder and file on PC. Transfer pictures? Play music? Piece of cake! Just click them on your phone.

4. Backup Photos:
Too many photos in your phone? Need to backup them to your PC? SHAREit helps you backup them once and for all.


How To Install SHAREit For PC or MAC Using Blackstacks

Method 1:

  1. Install Bluestacks on your PC or MAC.
  2. Download SHAREit Apk on your PC.
  3. Make sure that you have installed Bluestacks. Double click the downloaded SHAREit Apk to install it.
  4. The APK will be installed through Bluestacks, once the notification pop ups determining the installation completion, open Bluestacks.
  5. Now click on My Apps and then click on SHAREit.
  6. The application will open up. Now follow on-screen instructions to SHAREit.

Method 2:

  1. Install Bluestacks on your PC or MAC.
  2. Open Bluestacks and setup your Google Play Store account.
  3. Now open Google Play Store and search for “SHAREit“.
  4. Once found, install SHAREit.
  5. Now click on My Apps and then click on SHAREit.
  6. The game will open up. Now follow on-screen instructions to Play SHAREit.

How To Install The SHAREit For PC or MAC Using Andy OS

  1. Download and install Andy OS on your Windows PC or MAC.
  2. Once downloaded, open Andy OS.
  3. Setup Google Play Account on it.
  4. Now open Apps > Google Play Store and search for “SHAREit”.
  5. Install SHAREit and wait for it to finish installation.
  6. Once done, open “Uncategorized” portion in Andy and click on SHAREit to play it.
  7. That’s all.

Agar.io for Pc Download – Windows/8/8.1/7/Xp [ Mac ]

4
Agar.io for Pc Download – Windows/8/8.1/7/Xp [ Mac ]

Agar.io is available for PC as well as on Android and iOS. You all have played Agar.io online but today i’ll guide you how to install Agar.io for Pc using third party emulators. Agar.io is developed by the king of the mini online games Miniclip.com, the concept of this game is simple all you have to do is survive with your tiny cell and eat other players to become the big one. Before going any further let me give you an overview on Agar.io features.

Agar.io for pc

About Agar.io:

Play online with players around the world as you try to become the biggest cell of them all!

Control your tiny cell and eat other players to grow larger! But watch out: players bigger than you will be trying to make you their lunch. Survive and eat long enough to become the biggest cell in the game!

With new controls developed especially for touchscreens, agar.io offers the same addictive gameplay that millions have already enjoyed on PC. Play online in free-for-all action and use splitting, shrinking and dodging tactics to catch other players – or avoid them! Use a variety of special secret skins with the right username!

How To Install Agar.io For PC or MAC Using Blackstacks

Method 1:

  1. Install Bluestacks on your PC or MAC.
  2. Download Agar.io Apk on your PC.
  3. Make sure that you have installed Bluestacks. Double click the downloaded Agar.io Apk to install it.
  4. The APK will be installed through Bluestacks, once the notification pop ups determining the installation completion, open Bluestacks.
  5. Now click on My Apps and then click on Agar.io.
  6. The application will open up. Now follow on-screen instructions to Agar.io.

Method 2:

  1. Install Bluestacks on your PC or MAC.
  2. Open Bluestacks and setup your Google Play Store account.
  3. Now open Google Play Store and search for “Agar.io“.
  4. Once found, install Agar.io.
  5. Now click on My Apps and then click on Agar.io.
  6. The game will open up. Now follow on-screen instructions to Play Agar.io.

How To Install Agar.io For PC or MAC Using Andy OS

  1. Download and install Andy OS on your Windows PC or MAC.
  2. Once downloaded, open Andy OS.
  3. Setup Google Play Account on it.
  4. Now open Apps > Google Play Store and search for “Agar.io“.
  5. Install Agar.io and wait for it to finish installation.
  6. Once done, open “Uncategorized” portion in Andy and click on Agar.io to play it.
  7. That’s all.

Download THE KING OF FIGHTERS-A 2012 For PC & MAC

0
Download THE KING OF FIGHTERS-A 2012 For PC & MAC

Hey Folks, how many of your remember the famous King Of Fighters? One of the most popular games, and everyone’s favorite around 10 years back. The King Of Fighters was one of the  most addictive games to spend time on. King Of Fighters now has made a come back, not for PCs, but Android. SNK Playmore, the developers behind King Of Fighters have come up with their several popular titles on the Google Play Store and gained a good reputation in a very short time. One of the old titles, that came back to life is “The King Of Fighters”, for Android it came in variations including King Of Fighters 97, 98, for Android, and A-2012. The free version is King Of Fighters is A-2012, others are paid, so our focus for now will be The King Of Fighters-A 2012.

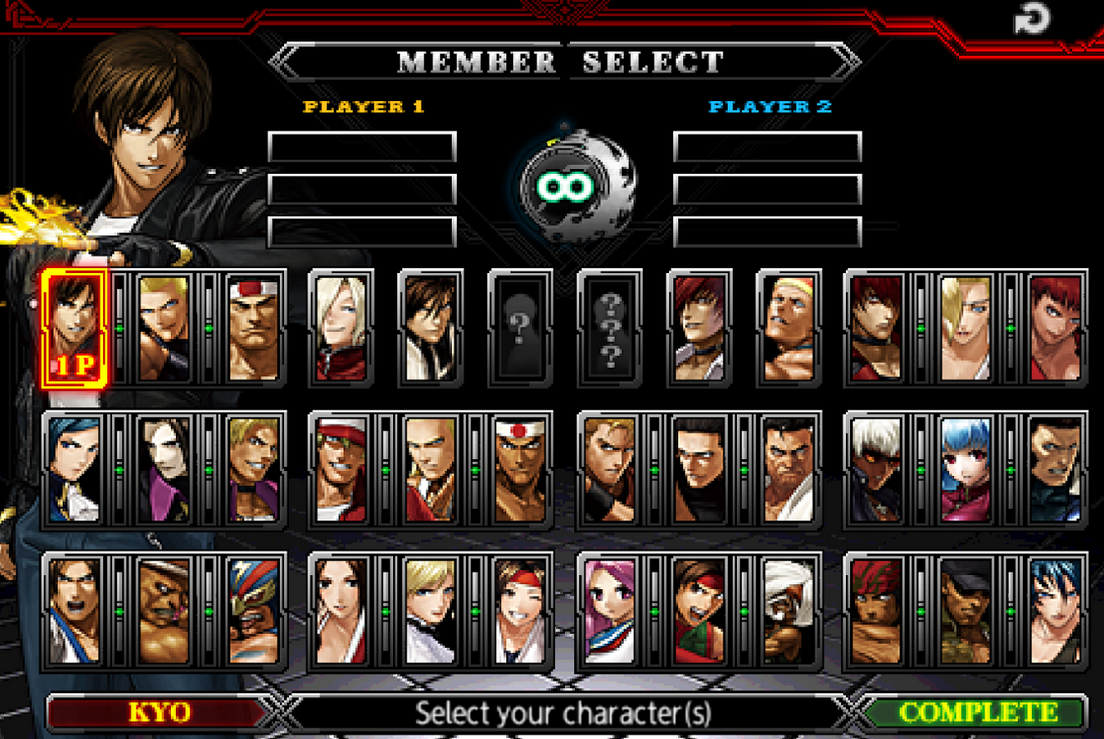
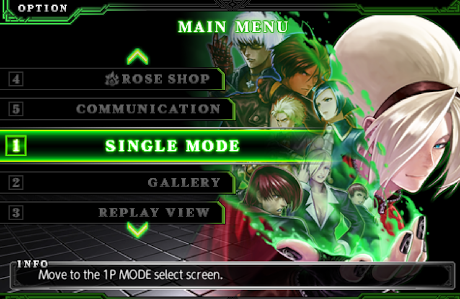
The game supports tons of characters, and multiple playing modes. You can select a character and go on a fight with the opponent. The game is as cool as it was 10 years back. You can perform combos and beat the enemies to death within no time. The game includes almost 34 fighters to choose from. There are 6 playing modes in total. At the moment, this game is in 2D graphics, but it is worth playing. Simple commands in the game help you to stay in the match and defeat your rivals. You can also create teams and play a team battle. Over all, the King Of Fighters-A 2012 is one of its-own-kind and coolest Android game in the recent while. But what if you want to get King Of Fighters back on your PC? The game is available for Android in Google Play Store, SNK Playmore hasn’t brought it up for PCs once again. If you’re willing to get this working on your PC, our guide here is definitely intended for you.Screenshot_1 Screenshot_2 Screenshot_5

You can play The King Of Fighters on your Windows PC or MAC by using an Android emulator. In the following guide we are going to show you how you can install this game on a Windows XP/7/8/8.1 or a MA|C OSX using Andy or Bluestacks. Let’s go ahead now and learn how to install The King Of Fighters for PC.

How To Install The King Of Fighters-A 2012 For PC or MAC Using Blackstacks

Method 1:

  1. Install Bluestacks on your PC or MAC.
  2. Download The King Of Fighters-A 2012 Apk on your PC.
  3. Make sure that you have installed Bluestacks. Double click the downloaded The King Of Fighters-A 2012 Apk to install it.
  4. The APK will be installed through Bluestacks, once the notification pop ups determining the installation completion, open Bluestacks.
  5. Now click on My Apps and then click on The King Of Fighters-A 2012.
  6. The application will open up. Now follow on-screen instructions to Play The King Of Fighters-A 2012.

Method 2:

  1. Install Bluestacks on your PC or MAC.
  2. Open Bluestacks and setup your Google Play Store account.
  3. Now open Google Play Store and search for “The King Of Fighters-A 2012“.
  4. Once found, install The King Of Fighters-A 2012.
  5. Now click on My Apps and then click on The King Of Fighters-A 2012.
  6. The game will open up. Now follow on-screen instructions to Play The King Of Fighters-A 2012.

How To Install The King Of Fighters-A 2012 For PC or MAC Using Andy OS

  1. Download and install Andy OS on your Windows PC or MAC.
  2. Once downloaded, open Andy OS.
  3. Setup Google Play Account on it.
  4. Now open Apps > Google Play Store and search for “The King Of Fighters-A 2012“.
  5. Install The King Of Fighters-A 2012 and wait for it to finish installation.
  6. Once done, open “Uncategorized” portion in Andy and click on The King Of Fighters-A 2012 to play it.
  7. That’s all.

Install Android 5.1.1 Lollipop On Sony Xperia SP With CM 12.1

10
Install Android 5.1.1 Lollipop On Sony Xperia SP With CM 12.1

Sony’s 2013 mid ranger, the Xperia SP is running on Android 4.3 Jelly Bean currently. It doesn’t look like if Sony will provide any further Android update for this device. It will most probably stick Android Jelly Bean and this is where the official software support for Sony Xperia SP comes to an end. Google has now rolled out Android 5.1 Lollipop. Android M, the next version of Android is in works and Sony is busy updating its Xperia Z series to Android 5.0 yet. Xperia SP doesn’t stand in the league of Android KitKat or Android Lollipop at all, this certainly puts Xperia SP owners to a little bit of disappointment. But there’s actually no need to worry about it as long as we have some support from great developers for our beloved Xperia SP.

To give a new life to your Xperia SP, CyanogenMod 12.1 which is the unofficial aftermarket version of Android 5.1.1 Lollipop, has landed on XDA developers for Sony Xperia SP. The ROM is presented by XDA senior member Mrcl1450. Those who do not have an idea about CyanogenMod, they would like to know that CyanogenMod is the aftermarket distribution of Android. The firmware is available for thousands of Android devices now, particularly those which are forgot by the device manufacturers and are not going to receive any further Android update officially. CyanogenMod also happens to be the most popular and most widely used custom ROM for any Android device. If you want to taste the latest and greatest iteration of Android on your Xperia SP, the only way to do so right now is by means of a custom ROM. And the best custom ROM to go with, in our opinion is CM 12.1. This ROM is in development stages yet, so expect some bugs to follow your way. It will take a while for developers to make this ROM stable. We only recommend going ahead with the installation of CM 12.1 on your Xperia SP if you’re familiar with custom ROMs and you know how to handle one while it isn’t a daily driver. Let’s go through some early preparations and flash the custom ROM to upgrade your Xperia SP to Android 5.1.1 Lollipop.sony-xperia-sl-and-sp

Early Preparations:

  1. This custom ROM is only for Sony Xperia SP C5302 and C5303. Do not try this on any other device. Check your device’s model number in settings > about device.
  2. Charge your phone up to 50% in order to prevent any power issues during the flashing process.
  3. Your device’s bootloader must be unlocked. Here’s a guide on how to unlock it.
  4. Your device must have a custom recovery installed on it. You can install custom recovery. A method to install custom recovery is listed below.
  5. Once you’ve installed a custom recovery, don’t forget to create a Nandroid backup of your current system. This is highly recommended so that in case something goes wrong with the new custom ROM, you can still revert everything back and get your old system back.
  6. Backup your important contacts, messages, call logs and all media content as you will have to wipe your phone before flashing latest firmware.
  7. Follow this guide to the letter to avoid any mishap.

Disclaimer: This is a custom ROM. Loading custom stuff on your Android device is highly risky. In case something goes wrong while or after flashing this custom ROM, we or the device manufacturers may not be held responsible. Make sure that whatever you’re going to do, you’re doing at your own risk.

Here’s How To Install Android 5.1.1 Lollipop On Sony Xperia SP With CM 12.1

  1. First of all you need a custom recovery on your device. And to install a custom recovery, you need to root your Xperia SP first of all.
  2. Once you’re rooted, download philz_touch_6.59.0-huashan.img file and copy it to your phone’s SD card.
  3. Now download and install Rashr – Flashtool on your phone.
  4. Now open Rashr from the app drawer.
  5. Tap “Select Recovery From Storage” option and select the copied philz_touch file.
  6. Grant SuperSu right and follow on-screen instructions to flash the recovery.

Here’s how to install the ROM now.

  1. Download cm-12.1-20150706-UNOFFICIAL-huashan.zip  file.
  2. Download GApps.zip for Android 5.1 Lollipop.
  3. Copy both the downloaded .zip files to your phone’s SD card.
  4. Now turn off your phone completely. Now turn on your phone, as soon as Sony logo appears, press the volume up key to boot into recovery mode.
  5. As you’ve booted in to the recovery mode, tap the “Wipe & Format Option” and perform a factory reset.
  6. Go back to the main menu in recovery and tap “Install zip > Choose zip from SD card > locate the cm-12-ROM.zip file that you copied to your SD card.”.
  7. Similarly, flash GApps for Android 5.1.1 Lollipop using the “Install Zip” option.
  8. Once done, reboot your device.
  9. It will now boot up running CyanogenMod 12.1 Android 5.1.1 Lollipop. Thats all. Enjoy!

Stuck with something? Don’t worry. Reach us out through the comment box below. We will help you at our best!