Home Blog Page 367

How To Remove/Disable Bloatware Apps From Android Without Root

0
How To Remove/Disable Bloatware Apps From Android Without Root

Manufacturers are in a race with each other now a days and coming up with their smartphones loaded with tons of new features. Samsung is focusing more on the software and hardware features of the devices. Every time we receive a new flagship device from Samsung, it brings in a new software features that add to the load the device handles at time. HTC is trying its best to improve its Sense UI, while LG is focusing on making its phone’s display more attractive. Same goes for other manufacturers. While focusing on something else, device manufacturers literally forget the burden on the software that the phone can handle at a time. Because of this, many users come across the laggy behaviour of their device. Bloatware is even more common with the carrier branded devices. Carriers incorporate their applications in smartphones to achieve some exclusiveness. Google doesn’t stand under this umbrella as Nexus devices sport the pure stock Android OS, that contains almost no extra or heavy features. Some custom operating system are a point of attention only because they do not contain any un-necessary and heavy applications.

These extra software features in Android devices are known as bloatware apps. Extra feature and applications which are not a daily driver keep on burdening the device and slowing down its performance by running some background process or adding to the cache bucket of the applications. This lag issue is pretty common with Samsung users, as they always have to find a way to get rid of plethora of useless applications residing in their phone and pulling down the performance of their TouchWiz home launcher. The best way to improve device’s performance is the removal of such applications from the device.

Earlier, there were methods to remove bloatware apps from Android smartphones, but those required root access. Such apps included custom tools or applications like root app uninstall, root app delete etc. Now you can disable the unused and unnecessary applications using an in-built feature in your Android device, that’s there from Android 4.0 ICS.

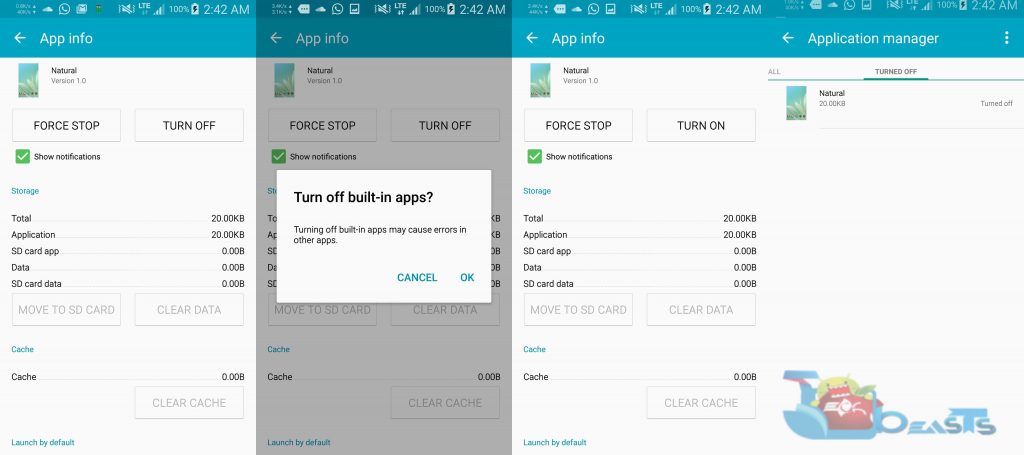
In Android 4.0 ICS, Google integrated a “Disable” option in application settings. Using this option, you can disable all the applications you want to get rid of. Here are the steps explaining this procedure to disable your desired applications.

How To Remove/Disable Bloatware Apps From Android Without Root

  1. Open settings application on your Android smartphone.
  2. Now in settings go to > apps / application manager.
  3. Now in application manager, go to “All” tab.
  4. Now locate the application you want to disable and tap the application name.
  5. It will open settings of that particular application, you will have a disable option here.
  6. Now tap “Disable/Turn Off” to disable the application.
  7. To enable the application, simply open the “Disabled Apps/Turned Off” tab in apps/application manager, and enable the application.11725550_10206401972700797_475318258_o-side
  8. That’s all.

Pretty easy, wasn’t it? But this will not remove the application completely from your device. Just in case you want to remove the application along with all of its traces from your device and also if you want to remove so many applications at once from your device, the manual method may not suite you as it will require a lot of time as well. To get over this, There are many tools to remove bloatware using root access, but those tools are mostly root required. To remove bloatware from any firmware running on any device, a universal tool, that doesn’t require root access is needed and we have one such tool now.

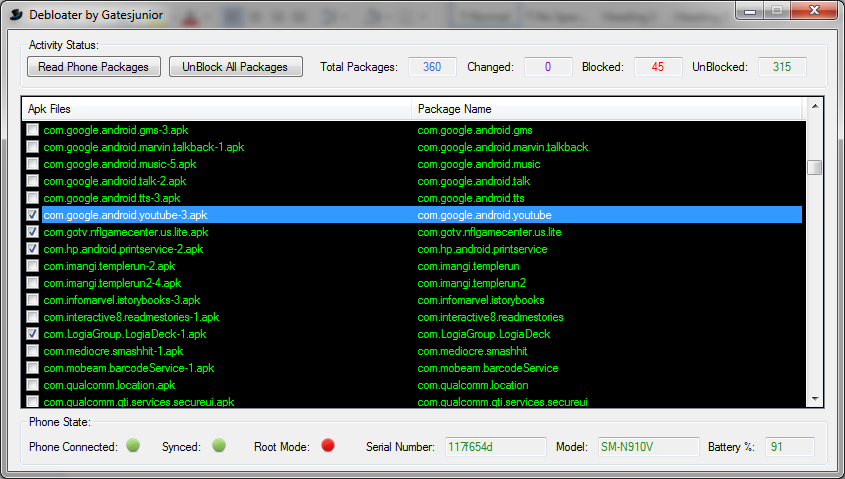
Easy Debloater Tool is the result of hard work of XDA recognised developer gatesjunior. This program has several advantages. At first, it shows you the package names of all the applications installed in your phone. The tool allows you to select applications in bulk and block them or enable again. Easy Debloat Tool also displays information about your device’s battery status, model number and other such data. This tool will remove bloatware from your Android regardless of the root access. Let’s go ahead and learn how you can use Easy Debloater Tool to debloat your Android smartphone.

How To Use Easy Debloater Tool To Remove Bloatware Without Rooting 

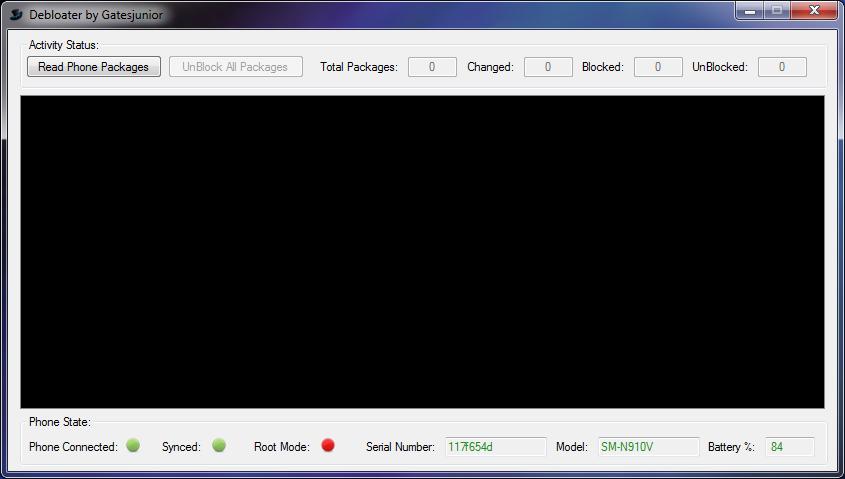
  1. Download Easy Debloater Tool’s latest version on your Windows PC or MAC and install it. Once installed, open the Easy Debloater Tool.
  2. Once you’ve installed the tool. It’s time to connect your device to your PC now. Before you connect your device, you must enable USB debugging mode on it. In order to do so, open settings > about device > tap build number for 7 times to get developer options in settings. Now open developer options and enable USB debugging mode.
  3. Make sure that you’ve installed your Android USB drivers. Now use your original data cable to establish connection between your phone and your Windows PC.
  4. Once debloater tool has detected your device, it will display a warning message telling you about the after effects of disabling a wrong application/package. A message may pop up telling you about some devices on which you cannot block some applications but completely disable instead. If your device becomes unstable after removing an application, you may have to perform a factory reset to recover. Once you’ve read and understood this message, hit OK.WarningRoot
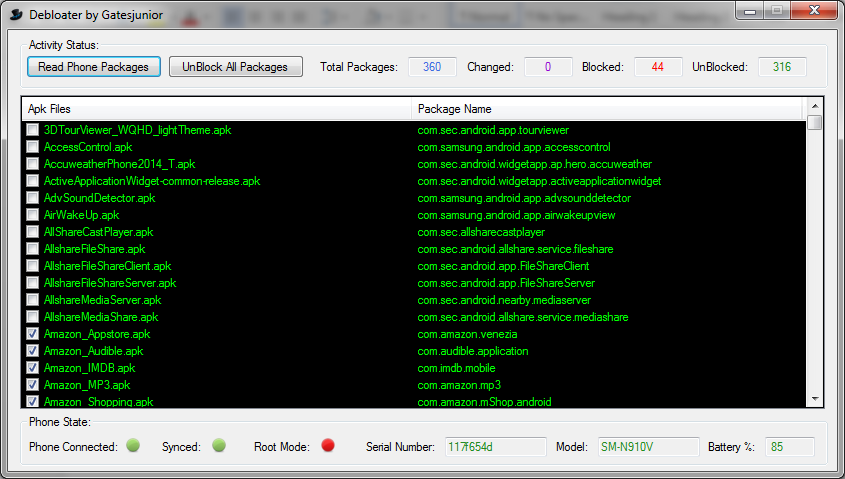
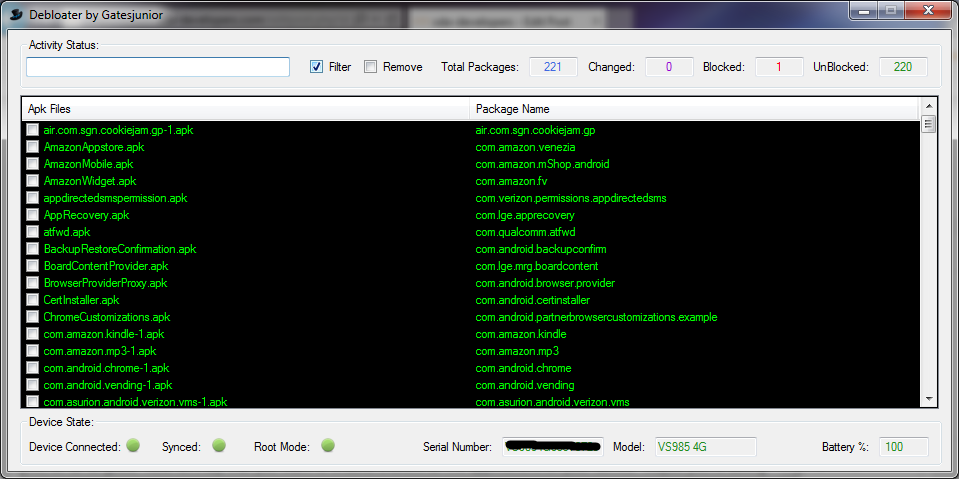
  5. Now the tool will load. Click on “Read Device Packages” on the upper left. It will read all packages on your device and list them.main
  6. Once the packages have been listed, you will find some packages which will be already selected and the sync indicator on the bottom left will be displaying a green signal. This means that this package has already been blocked by the phone and requires no changes.main2main3
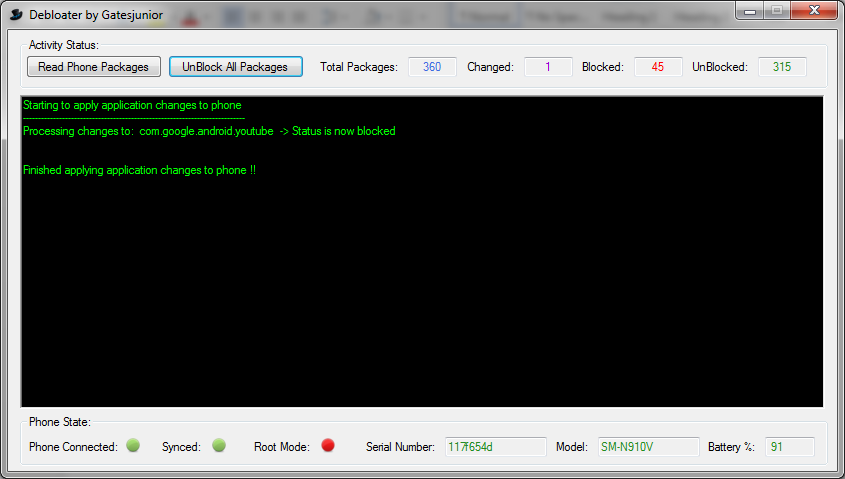
  7. Now select your desired packages that you want to disabled, upon making the selection, the Sync indicator will turn red and an Apply button will appear at the top left. Pressing the Apply button will perform the necessary function and result in making changes, once the changes have been made, the number of changes will appear in changes appearing at top centre.main4 main5
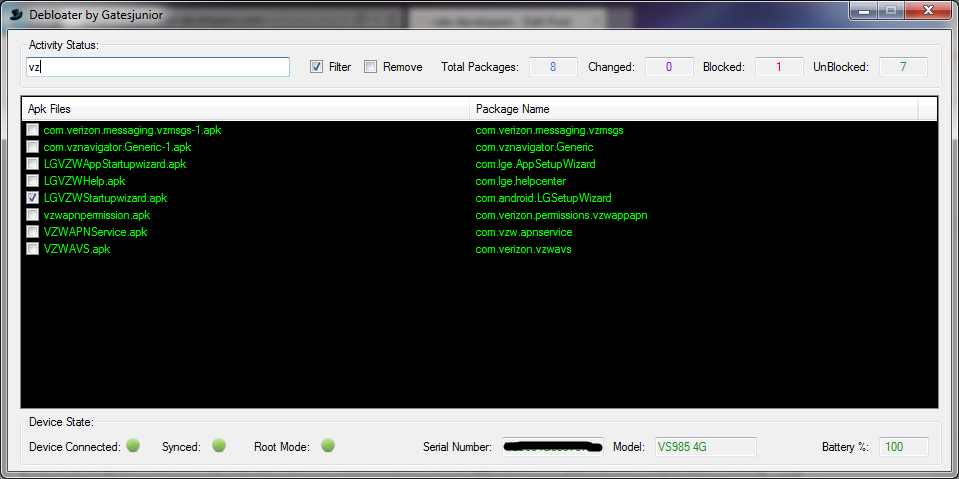
  8. Once you’ve blocked the applications, you can click the Read Phone Packages button again to read packages from your phone. You will find the recently blocked apps already marked/synced now. You can also use filter option to locate specific bloatware apps.filter1filter2
  9. Root users can remove the application and its traces completely from their device using the remove option in this tool.WarningRoot

That’s all with this tool. We hope that you find it easy to follow. In case of any difficulties, reach us out through the comment box below.

How To Fix ” I cannot connect to WhatsApp! ” Issue [ Tutorial ]

0
How To Fix ” I cannot connect to WhatsApp! ” Issue [ Tutorial ]

Now a days i don’t know What’s going with WhatsApp because i’ve seen many users reporting that they are facing different kind of issues while using WhatsApp. Perviously we have covered WhatsApp issues like How To Fix Unfortunately WhatsApp Has Stopped on Android, today i will help you to fix I cannot connect to WhatsApp issue on iPhone for Android user’s i will update the post soon.

Fix " I cannot connect to WhatsApp! " Issue

 How To Fix ” I cannot connect to WhatsApp! ” Issue [ Tutorial ]:

Following are the main steps you have to follow, in order to fix i cannot connect to WhatsApp issue. These solutions are specifically for iPhone user’s.

Step #1: First confirm that you are using the latest WhatsApp version by going to App Store.

fix whatsapp connecting issues

Step #2: Restart your iPhone by holding down the power button until ” Slide to power off Appears.

fix whatsapp connecting issues

Step #3: Goto iPhone Settings, Turn Airplane Mode ON then OFF.

fix whatsapp connecting issues

Step #4: Again in iPhone Settings > General > Reset > tap Reset Network Settings.

fix whatsapp connecting issues

Step #5: Uninstall WhatsApp and then reinstall it. [ Make Sure to backup you WhatsApp chats ].

fix whatsapp connecting issues

Step #6: Upgrade your iPhone to the latest version or restore your iPhone’s iOS.

Further Troubleshooting:

  • If you are connected to Wifi and WhatsApp is not working, turn off the WiFi and connect your device on mobile data.
  • If you are on a campus or corporate Wi-Fi that has firewall restrictions in place, then you should contact your network administrator for help with accessing WhatsApp on your Wi-Fi network.
  • If you use an unlocked iPhone or a pre-paid SIM card, then you may need to adjust your phone’s APN settings for your SIM card. Please contact your wireless carrier for details and instructions about changing the APN settings for your SIM card.

Source: WhatsApp

6 Cool Android Apps Not Available on Google Play Store

6 Cool Android Apps Not Available on Google Play Store

There are billions of Android users active on Google Play Store, the largest hub of apps and games for Android Phones. However, it is quiet surprising that not all impressive apps are directly available at the Play Store for these users due to Google Policies. Following are the 6 Android Apps Not Available on Google Play Store.

 Android Apps Not Available on Google Play Store

Rooted Devices:

Adaway

This brilliant app prevents ad pop-ups within the apps, most probably the reason why it’s not available at Google Play. The app can be simply side loaded and once it has been installed, you can be free from seeing the annoying ad pop-ups.

Market Helper:

Screen Shot 2015-07-03 at 17.48.28

Market Helper let’s you register your device as a tablet or any other device so that you can get the apps available only for that specific device. All you need to do is install the app, select the device and operator. That’s it.

Lucky Patcher:

Screen Shot 2015-07-03 at 17.48.37

Lucky Patcher helps you remove ads, modify permission given to the apps and let’s you go past the Premium license verification. It also let’s you access the reading apps including The Wall Street Journal and NYT. Lucky Patcher is not available at the Play Store as it does all of this and more via a patch.

Unrooted Devices

Popcorn Time:

Screen Shot 2015-07-03 at 17.57.34

Popcorn Time let’s you conveniently watch Videos, Movies and your favorite TV Shows. This fully customizable app comes with a built-in VPN for secure browsing. And runs on Torrents.

MiXplorer:

MiXplorer

MiXplorer is a file browser built with some amazing features and functions. The app is free yet does not support ads and comes with cloud integration. You may require to root your device to use some of it’s features.

QuickLyric:

QuickLyric

Although there are many apps that show lyrics to songs but this one stands out because it scans your entire music library and gives you lyrics to all of your songs. Despite of a brilliantly designed app, it is absolutely free.

Move your Dropbox pictures over to Google Photos [ How To ]

0
Move your Dropbox pictures over to Google Photos [ How To ]

If you are using Dropbox from ages and now want to move on with Google Photos, thinking about how to move Dropbox pictures over to Google Photos, it seems pretty difficult ! but quite frankly its not. In the following guide i will explain you how to Move your Dropbox pictures over to Google Photos in few simple steps. 

Move your Dropbox pictures over to Google Photos

I’ll be using Desktop Applications to move Dropbox pictures over to Google Photos, please follow all the steps carefully in order to successfully move all the pictures.

Easily Move your Dropbox pictures over to Google Photos:

Step #1: Install DropBox App on your Mac or PC.

Step #2: Now enter your login credentials to access your photos.

Step #3: Once your are logged in [ i am using Mac ] goto Dropbox app preferences.

Step #4: Select only sync the files with photos in them.

Step #5: Once you checked this option your photos will start downloading in the background into a new folder.

Once downloading is complete we’ll move to next phase, now we have to setup Google Photos Backup app to automatically upload the photos.

Step #6: First Install the Google Photos Backup desktop app on your Mac or Desktop.

Step #7: Login with your Gmail Id.

Step #8: Now select those Dropbox folder which are syncing.

Step #9: When you see a popup saying which version you want to upload, its totally your choice.

Step #10: Now as soon as new photos are downloading, automatically its uploading  to Google Photos.

All Done ! now you can sit back and relax, let computer do its work. This is how you move your Dropbox pictures to Google photos.


Here’s How To Get Glimpse Of FireFox OS On Your Android

0
Here’s How To Get Glimpse Of FireFox OS On Your Android

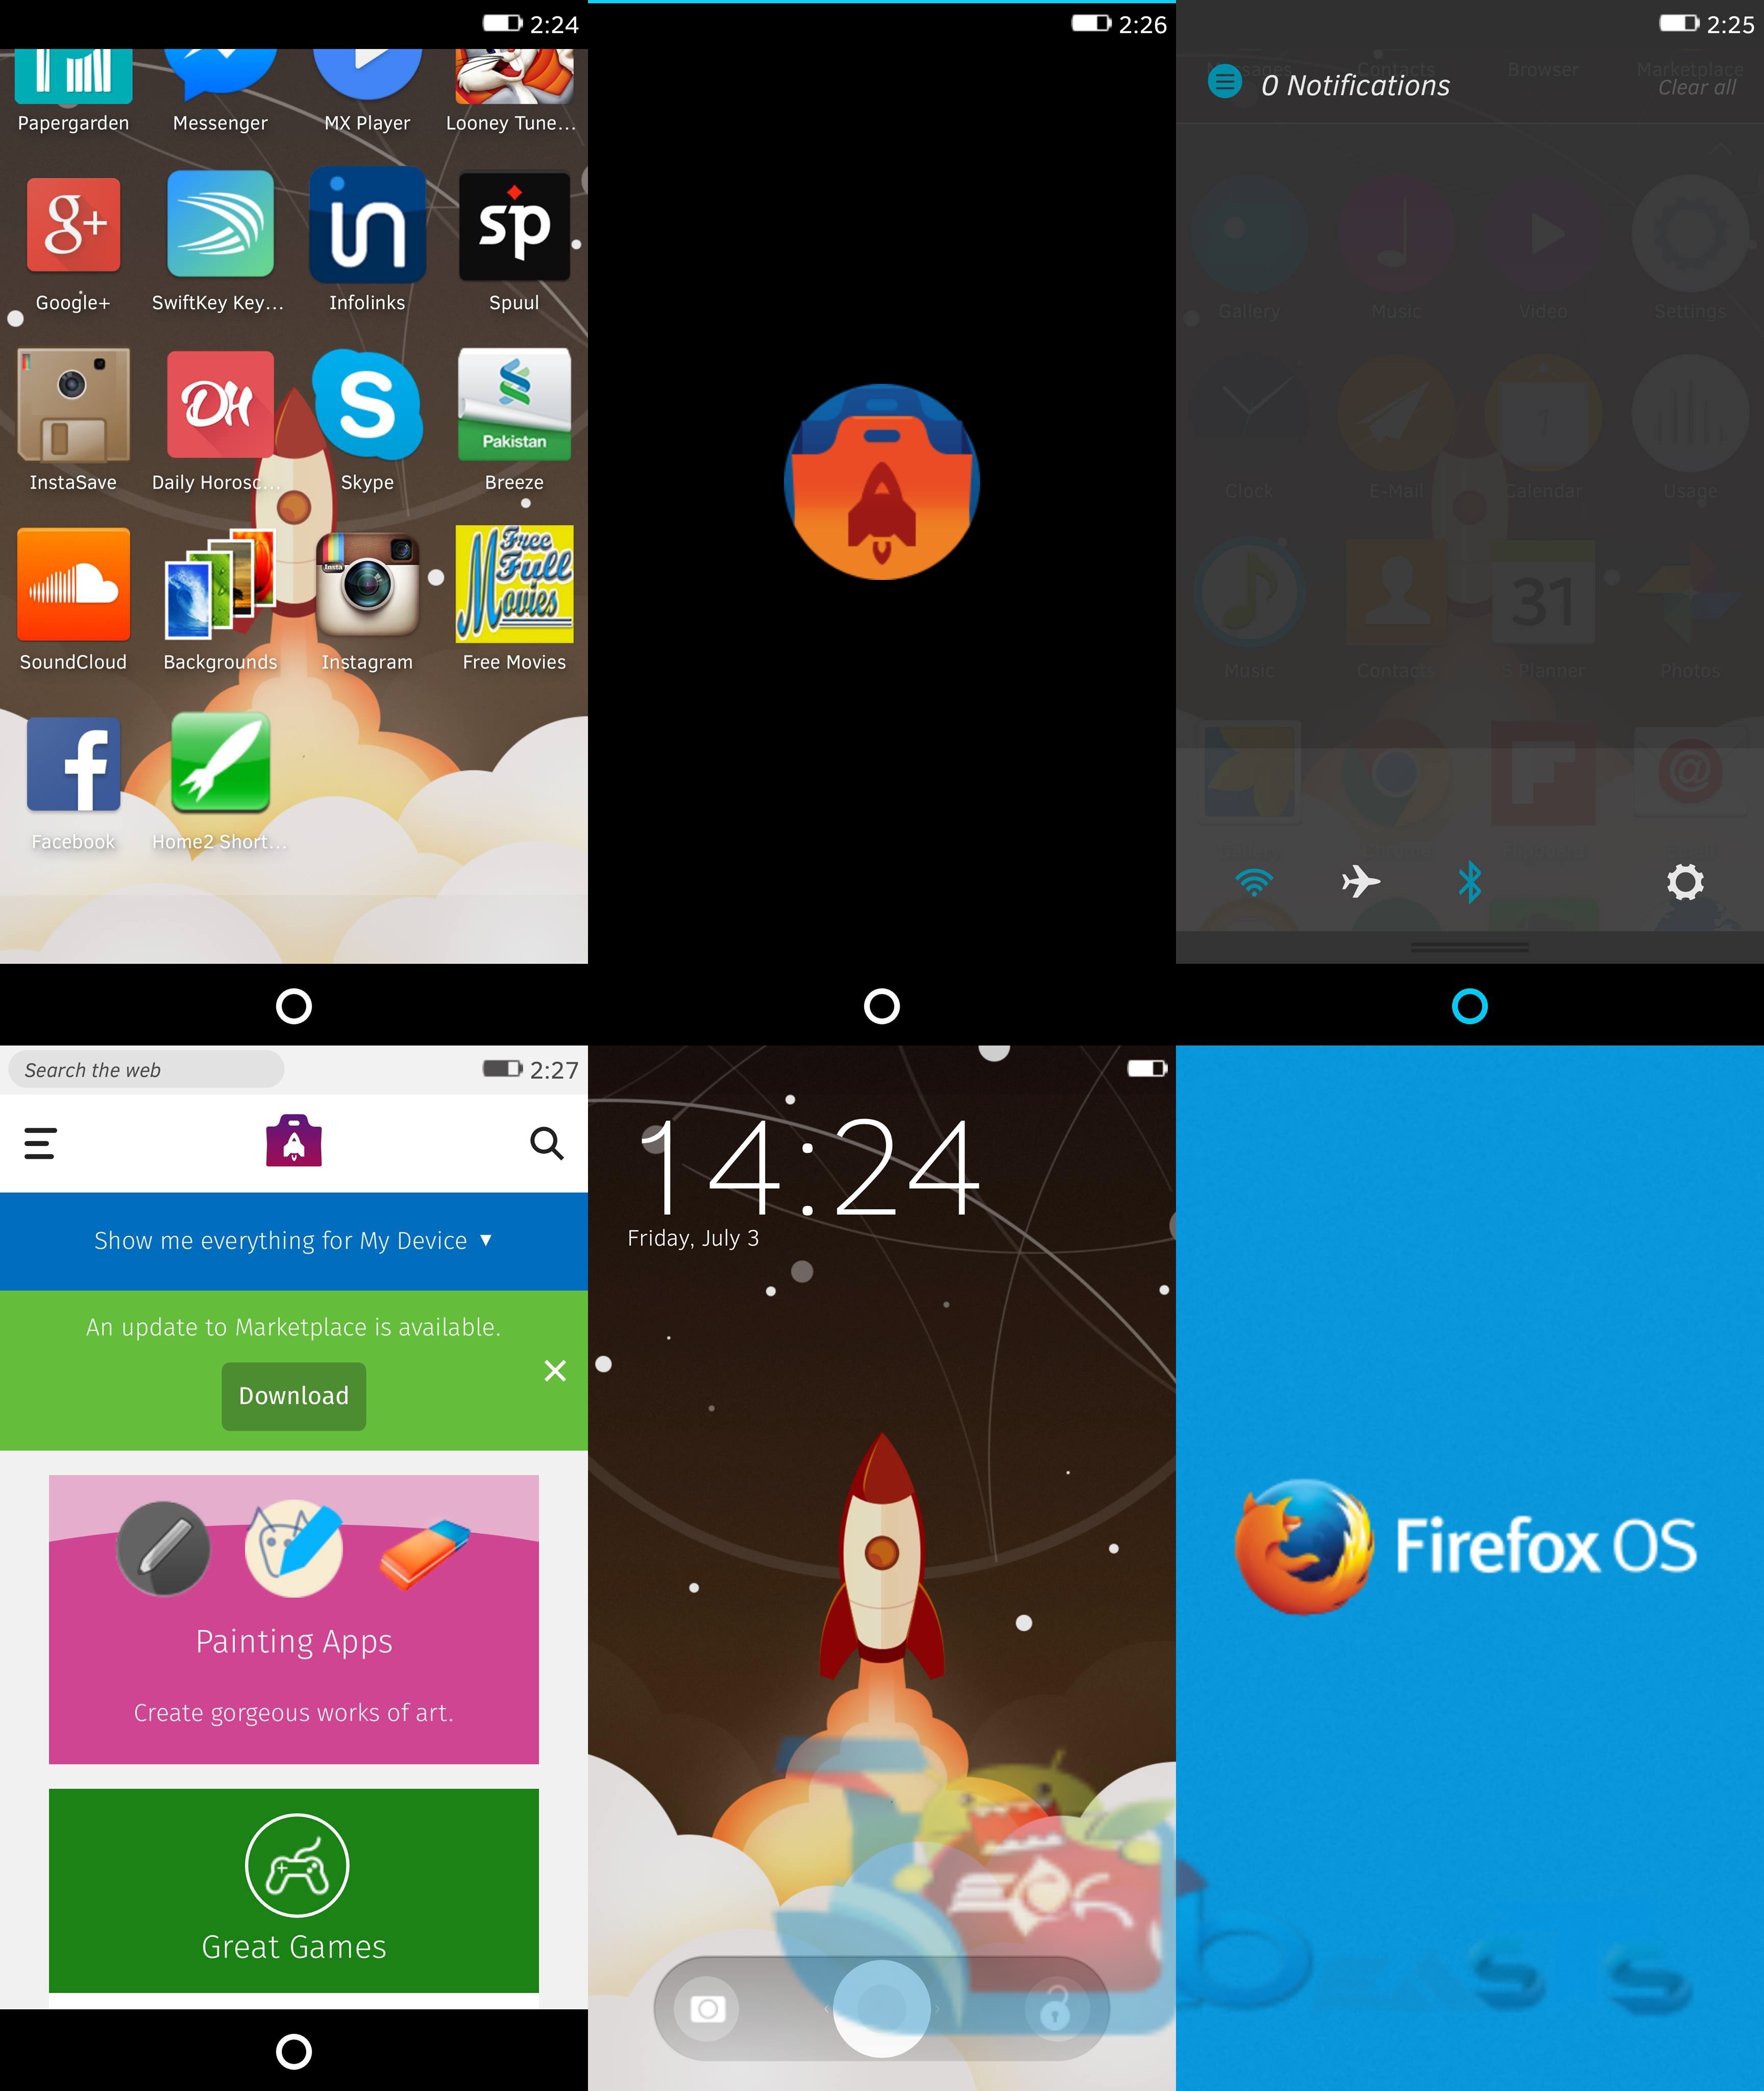
Back in 2012, Mozilla which is well known for its FireFox browser came up with its very own operating system for mobile devices named as FireFox OS. FireFox OS is a linux based open source operating system, which aimed to compete Apple’s iOS, Google’s Android & Microsoft’s Windows Phone. There was a bit of a hype about this OS in the very early days, but later on the OS didn’t do very well. To make this OS work, Mozilla also came up with a smartphone running FireFox OS in collaboration with ZTE. FireFox OS also came for different smartphones in the form of custom ROMs, but the OS didn’t get as popular as desired by Mozilla.gsmarena_000

FireFox OS has its very own app store and its specific applications, this OS could be easily ported to any Android device, but Android users probably didn’t want to switch their OS. But FireFox OS sure has got some cool and eye-catching graphics, which may make some Android users fall for this OS and urge them to check it out. If you still want to get a glimpse of FireFox OS on your Android device without switching your ROM, this maybe a chance for you to do it. FireFox OS is now available for Android users in the form of a launcher. You can simply install this launcher and go through the OS quickly to see what it got. You may need to remember that its just a launcher which will only change the graphics of your Android OS to FireFox OS, nothing more then that. Your applications and everything will be that of the Android OS. This launcher has been built by Mozilla developer Fabrice Desré. The application is named as B2Gdroid, which allows you to test the user interface of Mozilla FireFox OS on your Android device.

The APK file of this launcher is of 64 MB, we will be installing it manually on the device. This application works only on ARM architecture devices. Luckily, most of the smartphones have an ARM chipset, so chances are this application is likely to work with your device.

  1. Download B2GDroid APK file and copy it to your phone.
  2. Now on your phone, go to settings > security > allow unknown sources.
  3. Now using a file manager, locate the copied B2GDroid APK file and tap it to begin installation.
  4. Follow on-screen instructions and install it.
  5. Once installed, press the home key on your device.
  6. A pop up will come up asking you about the launcher you want to continue with, select FireFox OS here.
  7. Now wait for FireFox OS to load, once loaded you can have a glimpse of the OS on your Android device.
  8. That’s all. Just in case you want to uninstall FireFox OS, just g to settings > application manager > All > Find B2GDroid Fabrice and uninstall it. FireFox OS will be removed from your device and you will be reverted back to your stock launcher.

11705987_10206346706999189_1665203116_o-tile 11705987_10206346706999189_1665203116_o-tile11

Please be reminded that this launcher will only give you a test drive of this OS and it definitely isn’t a daily driver. We do not recommend using this as your primary launcher, you can use it as long as you want to check out what FireFox OS has got.

Fix OnePlus One’s Battery Draining Problems [ 5 Ways ]

0
Fix OnePlus One’s Battery Draining Problems [ 5 Ways ]

The One Plus One is the best and awesome device in all the aspects, its affordable in price, performance is awesome, camera is good, battery timings is good and most of all design is also good, but i’ve got many mail about One Plus One battery issues, so today i’ve prepared a guide in which i will tell you 5 ways to Fix OnePlus One’s Battery Draining Problems.

fix one plus one battery issue

Fix OnePlus One’s Battery Draining Problems [ 5 Ways ]:

#1:

  • First Goto your settings and the tap on battery, now check which is consuming the most of it. At my end it was Google Play Services. It was waking up my device with out any reason, so you have to change the settings.
  • Goto Settings -> Privacy -> Privacy Guard. Now Tap on 3 dot for menu.
  • You’ll see a popup, tap on show built-in apps.
  • Now long press the Google Play Services until you see its settings.
  • Change settings of Wake Up, Keep Awake, Auto-Start and select Denied for each.

#2:

  • Use your device with the low brightness, use Auto brightness to control your screen brightness.
  • Turn off Wifi and Bluetooth when not needed.
  • Turn off location services (GPS).
  • Disable All apps running in background.

#3:

  • Use original USB while charging your device, also try using the 2Amp dock charger. If its charging slow you can try other manufactures chargers.
  • If its not charging with charger, use your PC/Laptop to charger your device.
  • Boot your device in recovery and then charge your One Plus One.

#4:

  • Use Black Wallpaper on your home screen.
  • Perform a factory reset using recovery menu.
  • Install the latest OS on your One Plus One.
  • You can use different type battery saver application they might came handy.

#5:

  • Please try to charge your device when its on 30%-40%.
  • Make sure you are using original accessories to charge your device and please check everything is connected properly.
  • After connecting with your charger if your device is not turning on, leave it like this for 20 minutes. After that try to turn on your device.
  • If you’re still facing problems, it might be time to return the phone.

Fix Cydia iOS sub-process / usr / bin / dpkg returned an error code (2)

Fix Cydia iOS sub-process / usr / bin / dpkg returned an error code (2)

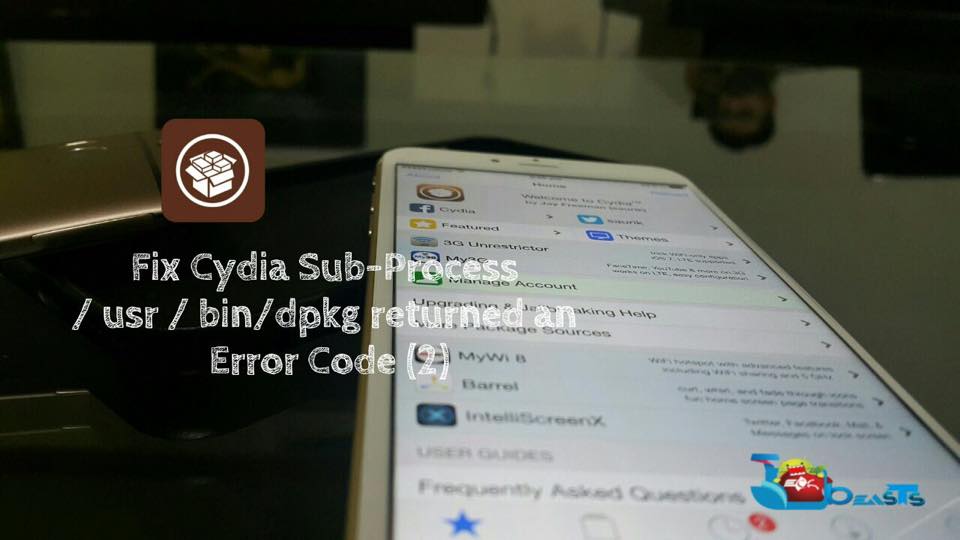
I have seen many users are reporting about issues they are facing after Jailbreak iOS 8.3 and iOS 8.4, we have posted a guide about the main issues that most of users have reported you can check fix App Store updates and Settings app crash after Jailbreaking iOS 8.3 using TaiGBut now i’ve seen reports about another issue ” sub-process / usr / bin / dpkg returned an error code (2) ” that accour when ever you try to install any tweak form Cydia. I’ve prepared a step by step guide to fix Cydia iOS sub-process / usr / bin / dpkg returned an error code (2).

Fix sub-process : usr : bin : dpkg returned an error code (2)

Fix Cydia iOS sub-process / usr / bin / dpkg returned an error code (2):

Step #1: First you have to find the directory structure of your iPhone. (through SSH or iFile ).

Step #2: Now look for the /var/lib/dpkg/ directory.

Step #3: Once you’ll be in the directory you’ll find files: available, availble-old, status, status-old.

Step #4: First “available” to “available-bak”.

Step #5: Second “status” to “status-bak”.

Step #6: Third “available-old” to “available”.

Step #7: Forth “status-old” to “status”.

Step #8: Launch Cydia and make sure that you allow Cydia to load completely first, now try to install the tweaks.

I am sure now you can easily install tweaks from Cydia without facing error like sub-process / usr / bin / dpkg returned an error code (2). If you face any kind of the issue regarding this guide tell me in comments.

Download Best HD Happy 4th Of July 2015 Wallpapers For Your Desktop

1
Download Best HD Happy 4th Of July 2015 Wallpapers For Your Desktop

Independence Day of the United States Of America is on the way. Just 2 more days to go and it will be 4th of July. Before we greet you for the 4th of July, we would love to add some charms to your celebrations by giving a make over to your Desktop PCs, Android devices and your Apple iPhone. While you’re decorating your house, and preparing at your best to celebrate this day of Independence, you may not forget your gadgets and apply some nice wallpaper to show your happiness about the Happy 4th of July, 2015. Let’s go through the wallpapers we collected for you, and download the one you like the most.

Before you download these wallpapers, please be noted that non of these wallpapers are owned by us. These wallpapers are the property of their copyright owners. We have only collected these images and compiled this post to provide you some nice graphics.USA_Independence_Day_wallpaper_3010

Just go ahead, click your favourite wallpaper and save it to your computer or smartphone.


Happy 4th Of July From Techbeasts.com!

First Time iPhone 6s Photos Leaked Online in High Quailty

0
First Time iPhone 6s Photos Leaked Online in High Quailty

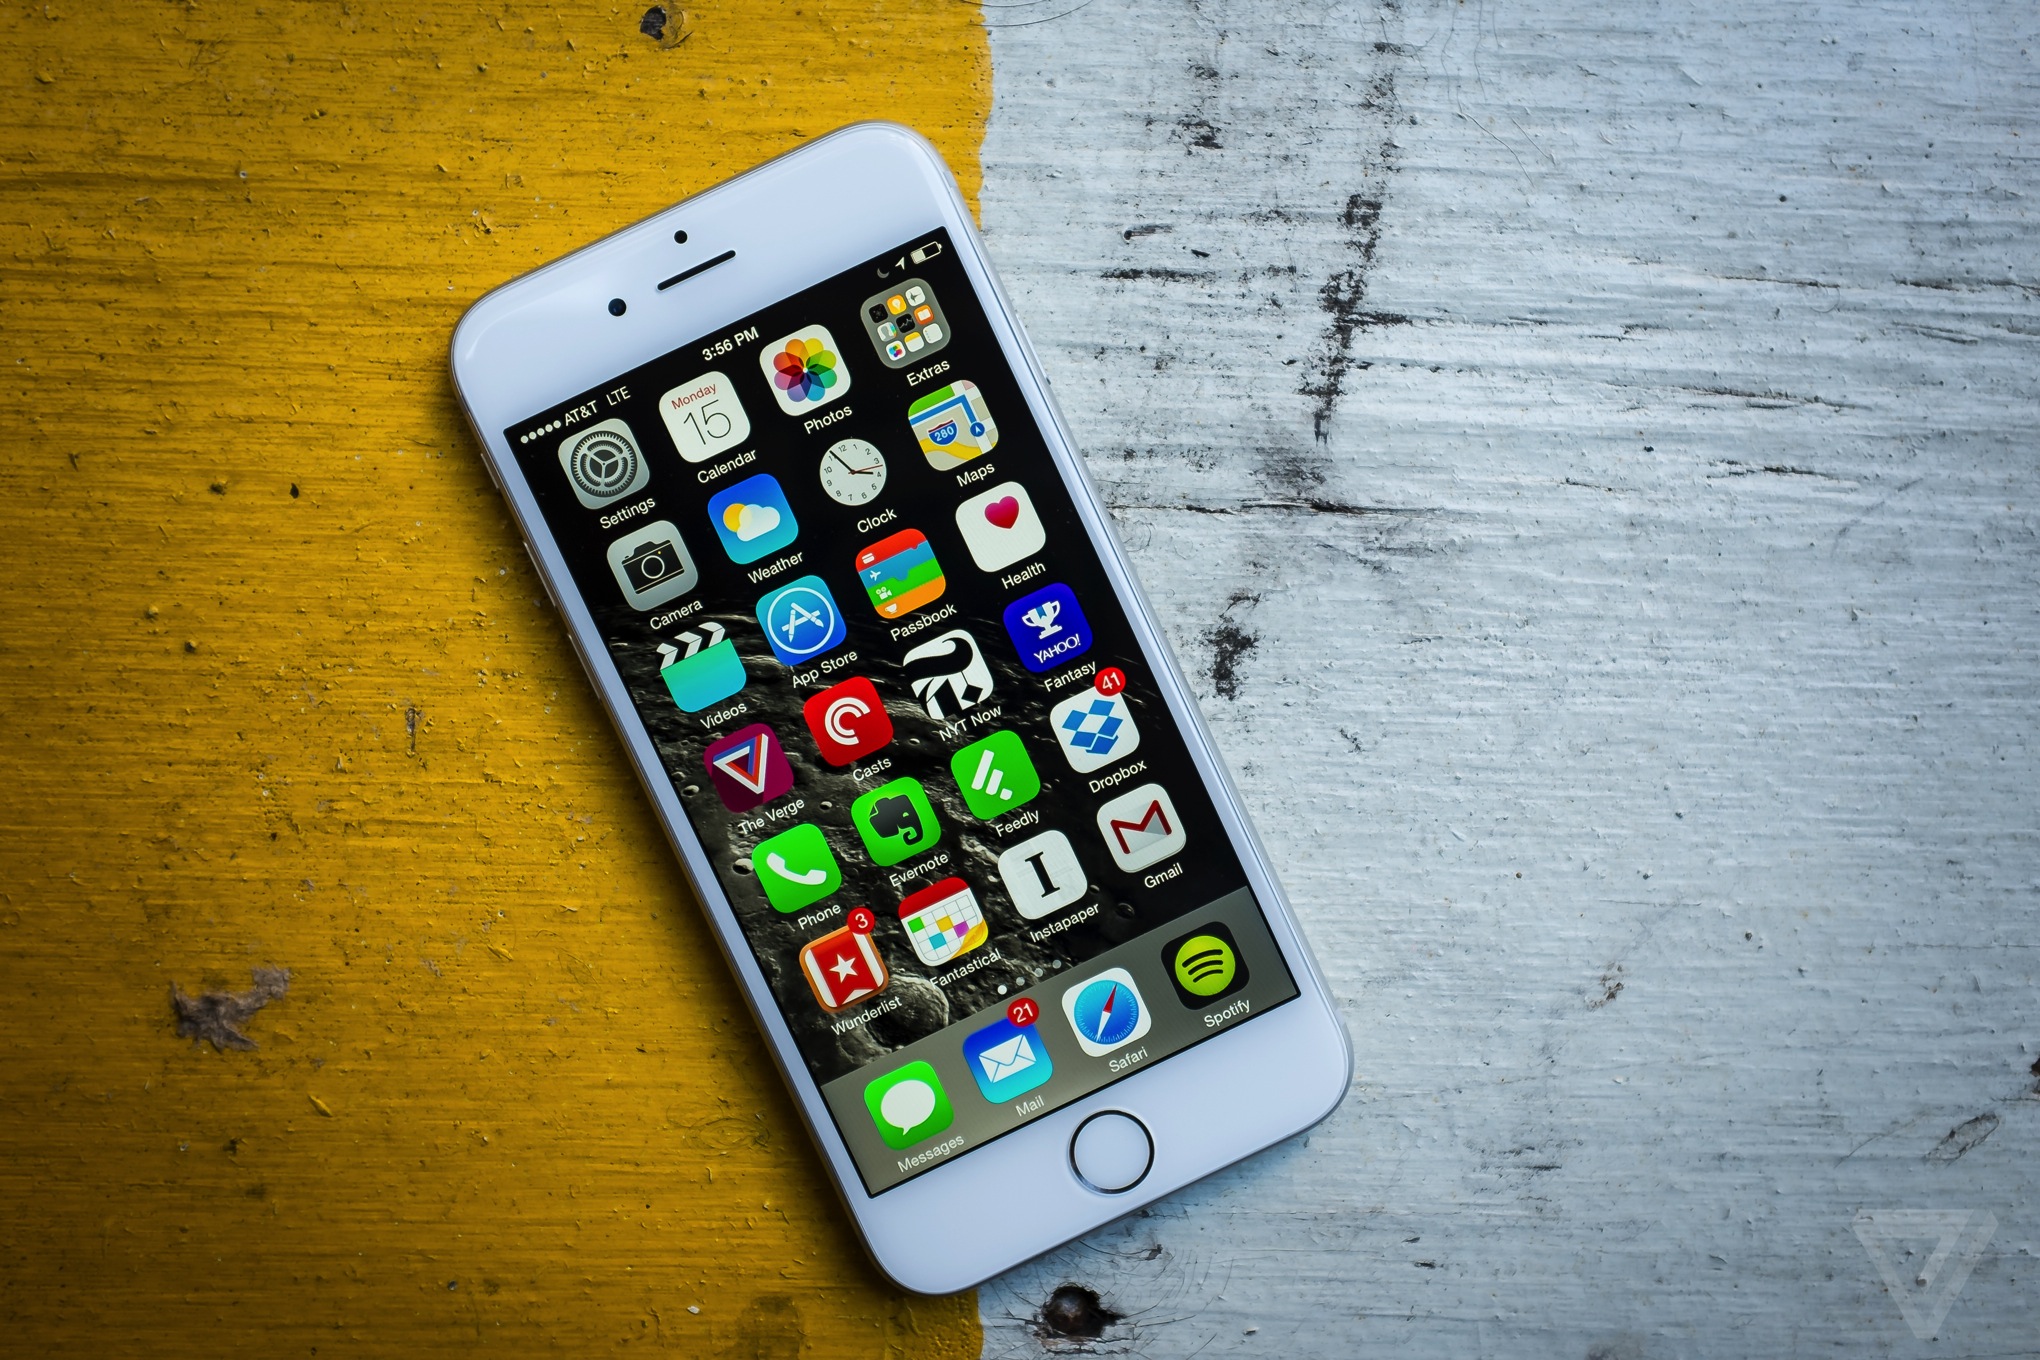
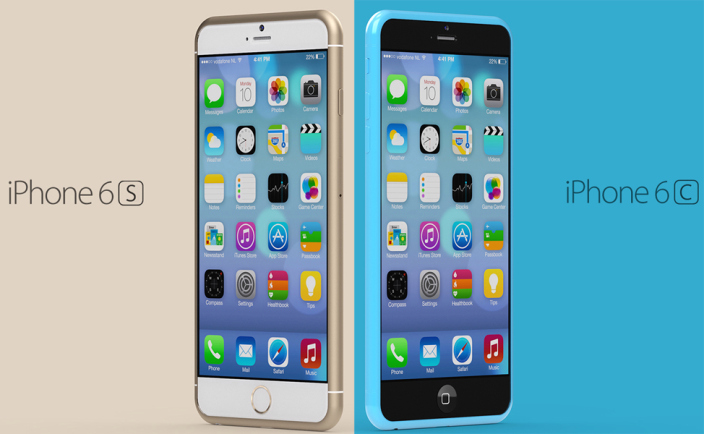
Apple is expected to announce the new upcoming next-generation model of iPhone, iPhone 6s. Some high quality leaked photos of the new model explain a lot about the internal and external aspects of the phone where the external design is not much different from the previous one. However, there has been a lot of prominent changes made to the internal structure.

11


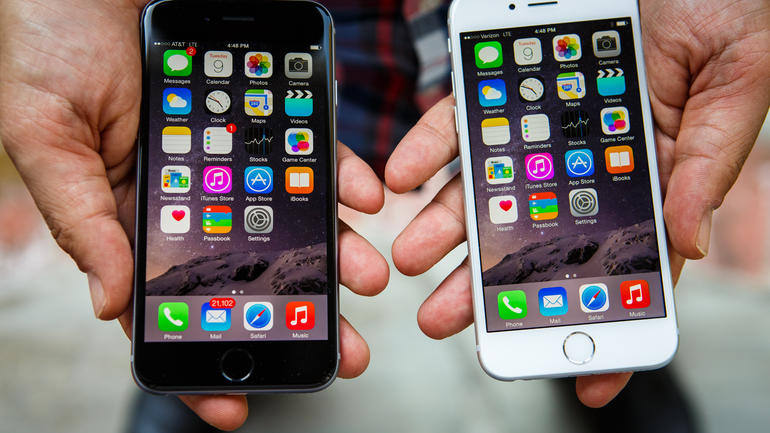
It has been confirmed now the iPhone 6s will be coming with “Force Touch” tech that is already supported by the Apple Watch and MacBooks. Moreover, a “proven source” has provided and in-depth look of what the iPhone 6s is going to be like along with it’s internal Layout. The next generation iPhone has a skin similar to the present iPhone 6 model with more or less the same rear design. The change in the rear design was not much looked forward to as previously it was seen during the launch of iPhone 5s from iPhone 5.

2

It is seen that the device has a lot of similarities with the previous model externally as well as few changes have come into notice internally. The plastic antenna lines are still seen as a prominent part of the design. In addition to the plastic lines, a metal alloy that could support radio signals transmission was also expected to be seen but it seems like they have not included that yet as a part of the new model. Just like a similar rear design structure, the design at the bottom of the phone is also much similar to the current iPhone 6. A part from the addition of a new, powerful processor and Force Touch features, other hardware aspects are yet to be unveiled.

iPhone 6s Leaked Photos and Concepts

iphone-6-3-sizes

iphone-6-side

apple-iphone-6-plus-gold-gallery-img-1-bp3-011215

xerxes-1708-033

iphone6-stock-photo

main

DSCF1913.0

Fix ‘iCloud Music Library can’t be enabled’ error with Apple Music

0
Fix ‘iCloud Music Library can’t be enabled’ error with Apple Music

iOS 8.4 is released and if you have updated it to the latest version, you know that Apple released Apple Music the new online streaming music service. All you have to do is signup for Apple Music and you are good to go, but i’ve seen many users are reporting that they are facing iCloud Music Library can’t be enabled error with Apple Music. If you are one them then follow my guide on how to fix iCloud Music Library can’t be enabled error with Apple Music.

apple-music-logo

How To Fix iCloud Music Library can’t be enabled error with Apple Music:

Step #1: First Go to iCloud in the Settings.

Step #2: Now Tap on your iCloud account.

Step #3:You have to enter your iCloud password, when you see the popup.

Step #4:Just enter the password and tap on done.

Step #5:Go back to the Music panel in settings app.

Step #6:Tap on the toggle to enable iCloud Music library.

Step #7: Now Tap on replace or Merger.

All Done ! It will work this time and you won’t see the error iCloud Music Library can’t be enabled error with Apple Music. Please Share it with your friends and tell me in comments if you face any issue regarding this guide.

Download PP Jailbreak tool for iOS 8.4 [ Direct Link ]

0
Download PP Jailbreak tool for iOS 8.4 [ Direct Link ]

It has only been Two hours since the release of iOS 8.4 and already the PP Jailbreak tool team has provided the jailbreak tool for this version too. The iOS 8.4 has arrived with the Apple Music streaming service, which was quite and highly anticipated form Apple. The hackers being the PP jailbreak tool has released their latest version Jailbreak tool that does the job.

Also See: How to Jailbreak iOS 8.4 with TaiG 2.2.0 Jailbreak [ Tutorial ]

ios-8-4-pp-jailbreak

In past we have seen PP Jailbreak Team releasing their tool for all the iOS 8.x.x series but the TiaG team has accused them for stealing their code, however, here is where the tides have turned for them, cause TiaG Jailbreak tool doesn’t have any potential to Jailbreak the iOS 8.4 while PP have updated their Tool to a newer version. Expectations are with TiaG team to release their newer version too, so if you are not comfortable with the PP jailbreak tool, just wait for the TiaG Tool update. The PP jailbreak supports following iOS 8.3 – iOS 8.1.3 devices:

Also See: Download TaiG 2.2.0 Jailbreak tool for iOS 8.4

Also See: Download and Install iOS 8.4 for iPhone, iPad and iPod touch

  • iPhone 4s, iPhone 5, iPhone 5s, iPhone 5c, iPhone 6, iPhone 6 Plus
  • iPad 2, iPad 3, iPad 4, iPad Air, iPad Air 2
  • iPad mini, iPad mini 2, iPad mini 3
  • iPod touch 5G

This tool is currently available for windows users only, so for all the Mac users, they need to wait a little bit longer for that.

Download the PP Jailbreak Tool

How to Jailbreak iOS 8.4 with TaiG 2.2.0 Jailbreak [ Tutorial ]

0
How to Jailbreak iOS 8.4 with TaiG 2.2.0 Jailbreak [ Tutorial ]

Here’s how you can Jailbreak iOS 8.4, 8.3, iOS 8.2, iOS 8.1.3 with TaiG 2.2.0, finally wait is over for all those who updated their devices to iOS 8.4. At the moment TaiG 2.2.0 is only available for Windows users, Mac users have to wait for the treat.

taig-jailbreak-8-4

The TaiG iOS 8.3 – iOS 8.1.3 jailbreak is compatible with the following devices:

  • iPhone 6, iPhone 6 Plus, iPhone 5s, iPhone 5c, iPhone 5 and iPhone 4s
  • iPad Air 2, iPad mini 3, iPad Air, iPad 4, iPad 3 and iPad 2
  • iPad mini 1 (1st generation iPad mini), iPad mini 2 (Retina iPad mini), iPad mini 3
  • iPod touch 5th generation

Important points:

  • The jailbreak is an untethered jailbreak.
  • Backup your device before proceeding.
  • This tool can jailbreak iOS 8.4, 8.3, iOS 8.2 and iOS 8.1.3.

Also See: Download and Install iOS 8.4 for iPhone, iPad and iPod touch

Also See: Download TaiG 2.2.0 Jailbreak tool for iOS 8.4

How To Jailbreak iOS 8.4, 8.3, iOS 8.2, iOS 8.1.3 with TaiG 2.0:

Step 1: Download the latest version of TaiG jailbreak from here.

Step 2: Backup your device using iTunes.

Step 3: Connect your device with Pc using USB cable.

Step 4: Now Temporarily Disable Passcode and Find my iPhone.

Step 5: Launch TaiG 2.2.0 as administrator from your desktop.

Step 6: TaiG will auto detect your device, it will take few minutes. Once you confirmed that its showing the correct firmware deselect 3K Assistant 2.3.0 (TaiG’s App Store), just below Cydia1.1.16.

Step 7: Now click on the Green button to start the process. Wait for few minutes.

Step 8: Once Jailbreak process is completed your device will reboot automatically.

All Done !!