Home Blog Page 482

How to Root Sony Xperia Z1 14.2.A.1.136 Firmware

13
How to Root Sony Xperia Z1 14.2.A.1.136 Firmware

Sony’s Xperia Z1 has received new Android 4.3 Jelly Bean update based on the build number 14.2.A.1.136. Earlier, we posted methods to root and install CWM recovery on Xperia Z1 running Android 4.3 Jelly Bean, but those methods only worked for the build number 14.2.A.0.290. As request by the users, we’ve found a working method to root the newest firmware on Sony Xperia Z1.

In the following post we’ll be going through the method. Before we begin, many of the users here might be the first timers and want to know about what is root access and why you should root your phone. So, we’ll first go through a brief intro of root access and then head towards the rooting method.

Rooting your phone gives you complete access over all the data which is apparently locked by the manufacturers. This includes removal of the factory restrictions and making changes to the internal system and the operating system. Gaining the root access gives you the privileges to install various applications to enhance the performance of your device, allows you to remove the built-in applications/programs, helps you to upgrade the battery life of your device & install the apps which require the root access for the proper functionality and modify your device in so many other ways e.g using mods and custom roms. By installing custom recovery, you can flash custom roms in the phone easily. Custom recovery also let’s you backup your current rom and restore it in case of any mishap. There is a laundry list of things you can do after having your device rooted and installed the custom recovery, now once you’re rooted and have installed custom recovery, go ahead and enjoy it on your phone. Here’s our collection of 10 Best Root Apps.

Here are installation instructions:

      1. This guide is only for Sony Xperia Z1 C6903/2/6943. Do not try this on any other model, please check yourdevice’s mode in Settings > About Device.
      2. The Root instructions are only for Xperia Z1 C6903/C6902/C6943 running latest Android 4.3 Jelly Bean 14.2.A.1.136 firmware. Check your firmware version in Settings > About Device and make sure that it matches the one mentioned here.
      3. Please make sure that your phone’s battery is charged at least over 60%. This is highly recommended in order to prevent any power issues during the recovery flashing process.
      4. Backup each and everything on your Android phone as follows:
      5. Backup all your important contacts, find the full guide here.
      6. Backup all your important sms messages, find the full guide here.
      7. Backup all your important call logs, find the full guide here.
      8. Backup all your important media content manually. (Copy to your PC.)
      9. Backup all your apps / data. If you’ve rooted your device, use Titanium Backup to do so. Follow the full guide here.
      10. Backup your current system using a custom recovery (CWM or TWRP) if you’ve flashed one. This is recommended in case something goes wrong with rooting your phone, you can use the custom recovery and return to the old working state of your system.
      11. Make sure that you read the instructions carefully and applied all precautionary measures. Let’s go ahead.

Disclaimer: The methods involved in flashing custom roms and rooting your phone is highly custom and may result in bricking your device, and has nothing to do with Google or the device manufacturer that is SONY in our case. Also rooting your device will void its warranty and you will be no longer eligible for any kind of free device services by the manufacturers/warranty providers. In case of any mishap we may not be held responsible. Follow these instructions to the letter to avoid any mishap or bricking. Make sure that whatever you do, you are doing it at your own responsibility.

How to Root Xperia Z1 Running Latest Android 4.3 14.2.A.1.136 Firmware:

      1. You need to install CWM recovery first. Follow our full guide here to install it on your device.
      2. Download Supersu.zip file now.
      3. Place the downloaded Supersu.zip file on your phone’s sd card.
      4. Now boot into CWM recovery on your phone. To do so, turn off your device first. Now turn it on, as soon as you see the Pink LED, press the Volume Up Key rapidly.
      5. You should see the CWM recovery interface shortly.
      6. Once in CWM, select “Install Zip > Choose Zip from SDcard > Select SuperSu.zip > Yes”.
      7. This will flash SuperSu.zip file, once flashing is complete, reboot your device.
      8. Find SuperSu in app drawer now. You can also install Root Checker app from Play Store to check root.
      9. Congrats! You’re rooted now!

That’s All! Let us know if the tutorial worked fine for you. In case you got any queries or face any issues regarding this post, please feel free to stop by the comment box below and drop us your words. We will get back to you as soon as possible. Thanks all.
How To Sync Your Google Contacts On BlackBerry Z10.

0
How To Sync Your Google Contacts On BlackBerry Z10.

A Big problem for all the Android users is when they switch from Android Smartphone to any other, it gets difficult for them to get all the Contacts back that they all synced on their Google Account. They need to find all the contacts again or make a back-up that can be used on any Mobile Platform and frankly it is quite difficult to find. Then the only option remain for anyone is to use third party applications extract the Contacts and put them in their current device. On BlackBerry device, it is even more difficult to Sync Contacts from Google. But there is also a Good news for all those who switched from Android device to BlackBerry Z10.

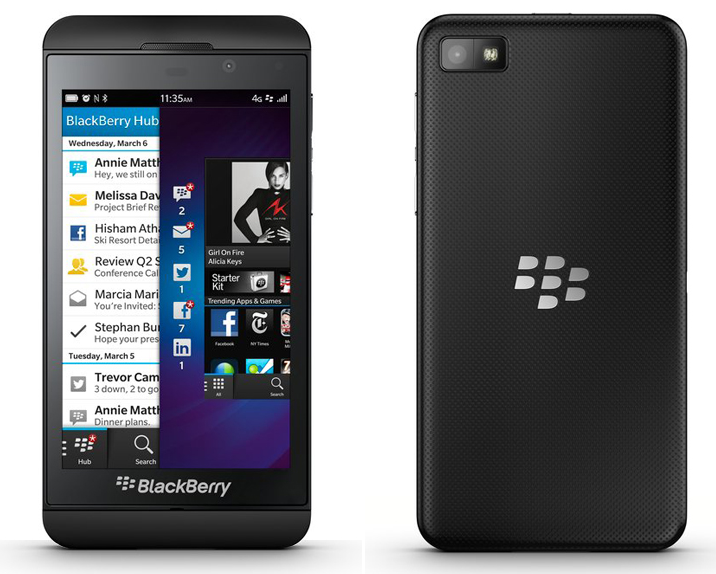
BlackBerry_Z10_front_and_back

If you are using BB Z10, the first thing you must need to do is to get contacts out of Gmail, but how? Fortunately BlackBerry this time brought a little gift for all those users who switched from an Android device to BlackBerry Z10. The method is quite simple, does not include any third party app or software and also not time consuming.

How To Sync Google Contacts On BlackBerry Z10.

  1. Open Settings in BB Z10.
  2. Select Accounts.
  3. Select Add New Account.
  4. Select Email, Calender, Contacts.
  5. Enter your Gmail ID, Press next.
  6. Enter your Password and Hit Next.
  7.  Under the Description, enter the Name you want and then select what you want to Sync.
  8. Wait for it To Sync.

Install CWM 6 on Xperia Z1 Running Latest 14.2.A.1.136 Firmware [How To – Guide]

20
Install CWM 6 on Xperia Z1 Running Latest 14.2.A.1.136 Firmware [How To – Guide]

Sony recently updated it’s flagship device Xperia Z1 to Android 4.3 Jelly Bean as it promised the users to soon take some of it’s devices to higher Android version. Xperia Z1 initially ran on Android 4.2.2 and later received Android 4.3 Jelly Bean update based on build number 14.2.A.0.290. To enchance the performance and fix some minor bugs, Sony rolled out more updates based on Android 4.3 and the latest firmware running on Xperia Z1 is based on build number 14.2.A.1.136 Android 4.3 Jelly Bean.

Earlier we posted a method to root Xperia Z1 on Android 4.3 14.2.A.0.290 firmware and  a number of users is still using that firmware as the newest update 14.2.A.1.136 is on a slow roll out and has not reached all the regions yet. For those of you who have updated their device already, might be look for a way to install a custom recovery now and get root access. In case you are failed to find any working custom recovery, you may be at the right spot to get it done now. We’ve found CWM 6.0.4.6 compatible with Xperia Z1 (All Variants) running Android 4.3 Jelly Bean 14.2.A.1.136 and in the following post we will be installing it on the device. Let’s move forward and go through the important instructions and installation steps one by one after having a brief intro of a custom recovery just in case some of you are not familiar with it.

A custom recovery allows you to install custom roms, mods etc. Along with these, you can make a Nandroid backup, this helps you a lot as you can move back to the previous working state of your phone at any time you want if you have backed up your current system. In some cases, to root the phone you need to flash SuperSu.zip file in the custom recovery, having installed the recovery may help you while in some cases to install the recovery easily, you need to have the phone rooted. You can also wipe cache and dalvik cache of your phone using a custom recovery. There is alot more you can do using a custom recovery, you may install one and experience it yourself for further know-how.

Pre Requisites:

      1. This guide is only for Sony Xperia Z1 C6903/2/6943. Do not try this on any other model, please check yourdevice’s mode in Settings > About Device.
      2. The CWM  recovery is only for Xperia Z1 C6903/C6902/C6943 running latest Android 4.3 Jelly Bean 14.2.A.1.136 firmware. Check your firmware version in Settings > About Device and make sure that it matches the one mentioned here.
      3. You must have installed Android ADB & Fastboot drivers. Follow the quick guide here.
      4. Your device must have an unlocked bootloader. Follow our full guide here in order to unlock.
      5. Please make sure that your phone’s battery is charged at least over 60%. This is highly recommended in order to prevent any power issues during the recovery flashing process.
      6. Backup each and everything on your Android phone as follows:
      7. Backup all your important contacts, find the full guide here.
      8. Backup all your important sms messages, find the full guide here.
      9. Backup all your important call logs, find the full guide here.
      10. Backup all your important media content manually. (Copy to your PC.)
      11. Backup all your apps / data. If you’ve rooted your device, use Titanium Backup to do so. Follow the full guide here.
      12. Backup your current system using a custom recovery (CWM or TWRP) if you’ve flashed one. This is recommended in case something goes wrong with CWM installation, you can use the custom recovery and return to the old working state of your system.
      13. Enable USB debugging mode on your device.  Get it in Settings > Developer Options > USB Debugging mode.
      14. Use only OEM data cable to establish connection between your PC and Phone.
      15. Alright! Follow this guide to the letter now.
Disclaimer: The methods involved in flashing custom roms and rooting your phone is highly custom and may result in bricking your device, and has nothing to do with Google or the device manufacturer that is SONY in our case. Also rooting your device will void its warranty and you will be no longer eligible for any kind of free device services by the manufacturers/warranty providers. In case of any mishap we may not be held responsible. Follow these instructions to the letter to avoid any mishap or bricking. Make sure that whatever you do, you are doing it at your own responsibility.


How to Install CWM 6 Recovery on Xperia Z1:

    1. Download Doomlord’s Advanced Stock Kernel with CWM Recovery
    2. Copy the downloaded.zip file to your phone’s sd card.
    3. Extract the downloaded .zip folder on your PC, you will get a Boot.img file.
    4. Place the extracted Boot.img file in the Minimal ADB & Fastboot folder that you created using our ADB & Fastboot Quick Setup Guide.
    5. If you are using Android ADB & Fastboot full package, you can place the downloaded Recovery.img file in the Fastboot folder or in the Platform-tools folder.
    6. Open the folder where you placed the Boot.img  file. E.g Minimal ADB & Fastbootor Fastboot or Platform Tools.
    7. Press and hold the shift key and right click on an empty area within the folder, and click on “Open Command Window Here”.
    8. Turn off your Xperia Z1 completely.
    9. Now press the Volume Up Key and while keeping it pressed plug in the USB cable.
    10. You should see a blue light in the notification light of your phone, that means your device is now connected in Fastboot mode.
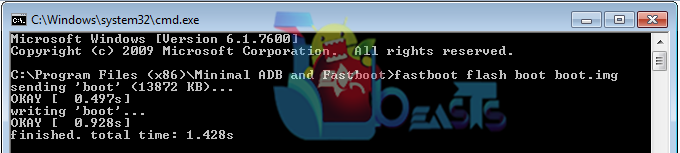
    11. Now type the following command: Fastboot Flash boot Boot.img
    12. Hit Enter and it will quickly flash CWM 6.0.4.6 recovery in your Xperia Z1
    13. Once recovery is flashed, now issue this command “Fastboot Reboot”
    14. Your device will reboot now, as soon as you see the Sony logo,  and the pink LED, press Volume Up key to enter recovery.
    15. Congrats! You should now see the custom recovery.
    16. Once in CWM recovery, flash the zip file you copied to your phone in step 2. To do so,  select “install zip > choose zip from sd card > doomlord advanced stock kernel.zip > yes” and flash it.
    17. Once flashed the zip file, reboot your device.
    18. That’s all.

Screenshot_1


That’s All with the recovery installation. In case you got any queries or face any difficulties regarding this post, please feel free to stop by the comment box below and let us know. We will get back to you as soon as possible. Thanks all.

How to use WiFi Hotspot, Bluetooth Tethering and USB Tethering on your Android

0
How to use WiFi Hotspot, Bluetooth Tethering and USB Tethering on your Android

Android’s offerings have taken the world to a whole new smartphone era and there is something new you find every second to do on your device if you own one. The journey began from cupcake and is going through KitKat right now, during this, a massive number of improvements landed in that helped Android to get more and more popular each and every second and this is the only reason that 90% of the smartphones are powered up with Android today. The very thing that plays an essential role in any Android device is the use of internet that actually adds life to it. Without internet, the device would look like a dark room where you won’t be able to find anything.

Android devices do not allow the users to only use internet on their device, but also let the users to connect other devices to connect to internet using their Android device. Now that’s what we are here for at the moment. There are multiple ways that allow the users to use their Android device to give access over internet to other devices such as any other Android device (smartphone, tablet) or any computer or laptop. This is really helpful actually. Just today when I was done installing new Windows on my laptop, I lost all the drivers that wiped WiFi driver with it too and made my laptop dull and unfortunately I had no way to find the driver over the internet and install it on my laptop. This is where my device helped me, I accessed internet on the same laptop using my Galaxy Note 3 and got the drivers installed. We will be going through all the available methods that can allow this in a few minutes. Before we go any further we will first have to know about what is Tethering..

Tethering:

Tethering helps a device to act as a modem for other devices and connect internet. A very convenient method,  when you’re facing connection issues on your device, it maybe an Android smartphone, tablet or a computer. Specially when you don’t have a WiFi around you or LAN connection and you are unable to go online through any means, in this case your Android device maybe able to save you a life as you can simply use your Mobile data to access internet on the second device. Tethering is also helpful when a device doesn’t have in-built 3G or 4G connection, using USB or Bluetooth tethering will overcome this drawback. Another advantage is when the device’s drivers failed to work or even if there is any other such hardware issue, using tethering will allow accessing the internet on the device with issues.

As said above, there are two methods that allow the use of internet on a device using an Android smartphone / tablet, these include Tethering and Portable WiFi Hotspot. Tethering is further divided into two more parts, Bluetooth Tethering and USB Tethering. We will be going through all these three one by one now. Let’s start with USB Tethering.Wifi (1)

USB Tethering:

The simplest and most convenient when the other device doesn’t have a WiFi capability or doesn’t have a relevant driver installed. As mentioned above, I used USB Tethering to access internet on my laptop with newly installed Windows 8. USB Tethering is underlying in Settings > Connections > Tethering & Portable Hotspot > USB Tethering. This option appears only when you have plugged in a USB data cable and connected it to your computer / laptop. To use USB Tethering, simply connect your phone to your PC and then enable it through the same location. Once enabled, it will connect on your PC through the LAN connection and appear in the taskbar. You can access the internet now! Here’s the method explained step by step as well.

      1. Install your phone’s USB drivers on your PC first of all.
      2. Connect your phone to your PC now.
      3. Now  on your phone, go to Settings.
      4. In Settings > Connections / Networks > Portable WiFi & Tethering > USB Tethering
      5. Check the USB Tethering.
      6. It will connect internet on your PC using the LAN connection.
      7. Access the internet.
      8. That’s All!

Bluetooth Tethering:

Much useful when you don’t have WiFi nor you have a USB cable to use USB Tethering and luckily have a Bluetooth Radio in the other device. Simply and convenient and requires no much hiccups here and there. You simply got to connect your Android device to another device either a PC or another Android device using Bluetooth (Bluetooth Pairing) and then enable Bluetooth tethering on your main device & access the internet. Here’s the method explained in steps.

      1. Pair your Android device to your desired device using Bluetooth. 
      2. Now on your device go to Settings.
      3. In Settings > Connections > Portable Wifi & Tethering > Bluetooth Tethering > Enable.
      4. Once enabled, open Network Connections on your PC. 
      5. Connect using the Bluetooth connection now.
      6. That’s All!

Portable WiFi Hotspot:

The best method among these as there are hardly any devices that come without WiFi support now. All the high end / mid range or even low end Android powered devices or other OS powered devices come with WiFi capability and for PC’s a WiFi card is a must as well. Use of cables is getting less, so in case you don’t have LAN connection around you to access internet on your PC / Laptop and you have a WiFi card in your device, using Portable WiFi Hotspot will do the job here for you. WiFi Hotspot landed in Android devices from Android 2.0 Froyo + and is there now in all the higher Android versions. This makes your device to act as a portable modem, that allows 10 other devices to connect to the internet through it. The most useful method specially when you don’t have a WiFi router around you, using WiFi Hotspot will allow you to use your phone’s Mobile Data (3G or GPRS) and get internet access. Here are the steps explaining how you can setup WiFi Hotspot and use it.

      1. Go to Settings on your phone.
      2. In Settings > Connections / Networks > Portable Hotspot & Tethering > WiFi Hotspot > Turn On.
      3. Tap the WiFi connection that will appear after enabling Portable Hotspot.
      4. Allow Wi-Fi access to All devices.
      5. You will get the information about the WiFi router your device will act as (name and password) or you will be asked to set router password and name.
      6. Setup the connection and then find the WiFi connection on your other device.
      7. Connect to it using the password that you made or you got.
      8. Once connected WiFi on second device, use internet now flawlessly!
      9. That’s All!

That’s all with this post. We hope that you find this “How To” tutorial helpful. In case you got any queries or suggestions, please feel free to stop by the comment box below. We will get back to you as soon as possible. Thanks all!

Install CWM Or TWRP Recovery On Any Device Using RecoverX

4
Install CWM Or TWRP Recovery On Any Device Using RecoverX

The thing about Android that make it different and better than any other Embedded Operating System, it its open source feature.If we try to expand this Open source feature, we will find variety of Custom Development that cannot be compared with any other OS like Windows, iOS, BB OS and others.Any Android device out-of-box state is as equal to any other device. But what make is better than them, is the Root access and a Custom Recovery like CWM, PhilZ or TWRP. If you have a rooted device with Custom Recovery installed on it, you have the ultimate key to install Custom Mods, Tweaks on it, thus enhancing the Looks and performance of it and also you can remove Stock apps from your device.

Screenshot_2014-02-18-20-54-52

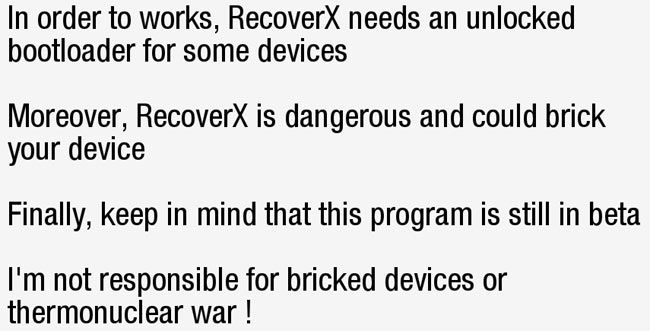
With easy Root Toolkit arrived at Android, rooting an Android device is far more easier than one can imagine. But still you need to flash Recovery separately on your device. Today we will show you how to install Custom Recovery on your device easily with RecoverX. RecoverX is a simple, clean and elegent tool that lets you flash your Favorite Recovery on your device from the device itself. But you must fulfill the following Conditions in order to make this Thing Work.

  1. Your device Bootloader Must Be Unlocked.
  2. Your device must be Rooted.
  3. BusyBox app must be installed.
  4. Your device must be listed among the list of device in RecoverX.

Disclaimer:

Screenshot_2014-02-17-23-45-47

The Supported Device are from the Listed Companies:

  • Acer
  • Advent
  • Asus
  • Casio
  • Commitiva
  • Dell
  • Geeksphone
  • Google
  • HTC
  • Huawei
  • LG
  • Micromax
  • Motorola
  • Nook
  • Oppo
  • Pantech
  • Samsung
  • Sony
  • Sony Ericsson
  • Viewsonic
  • Wiko
  • ZTE

How To Use RecoverX.

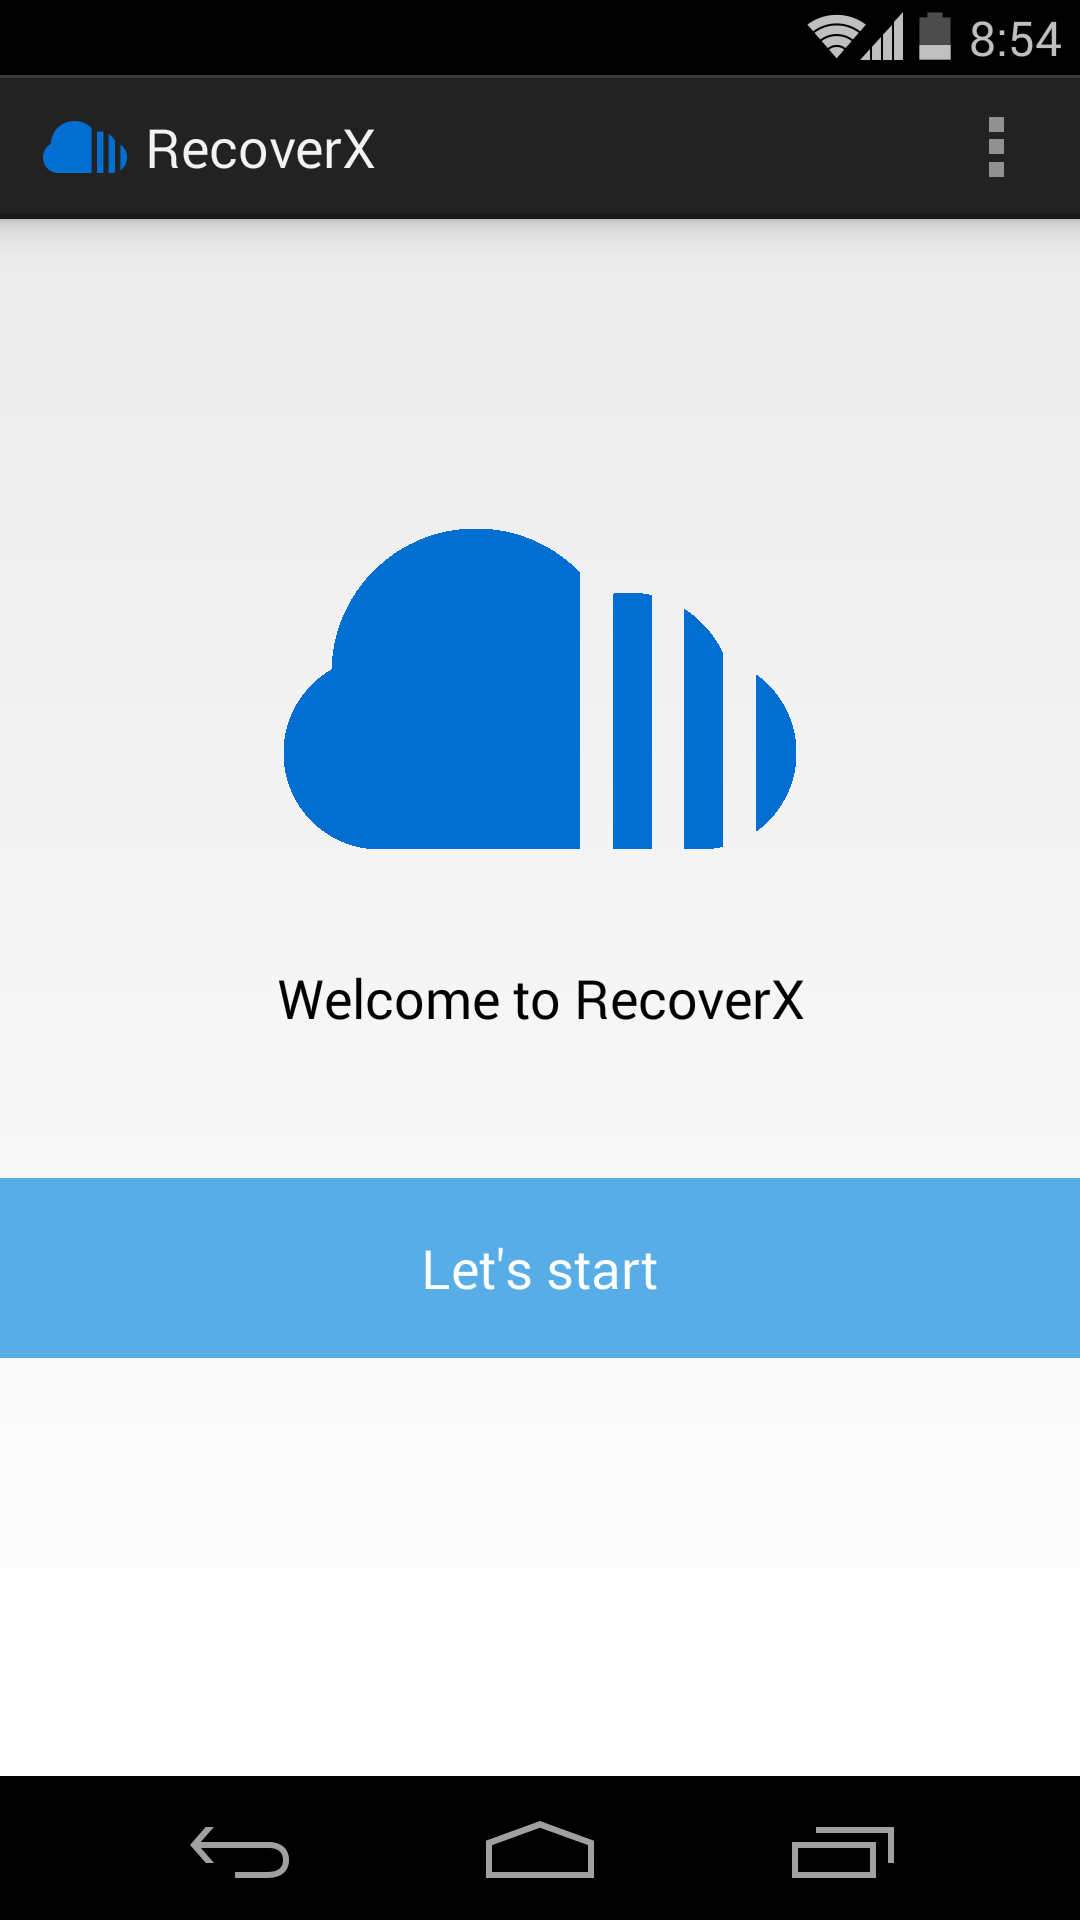
  • First Download RecoverX from Play Store.
  • Once the Installation is over, Open RecoverX.
  • Grant the Super SU Permission.

Untitled-1

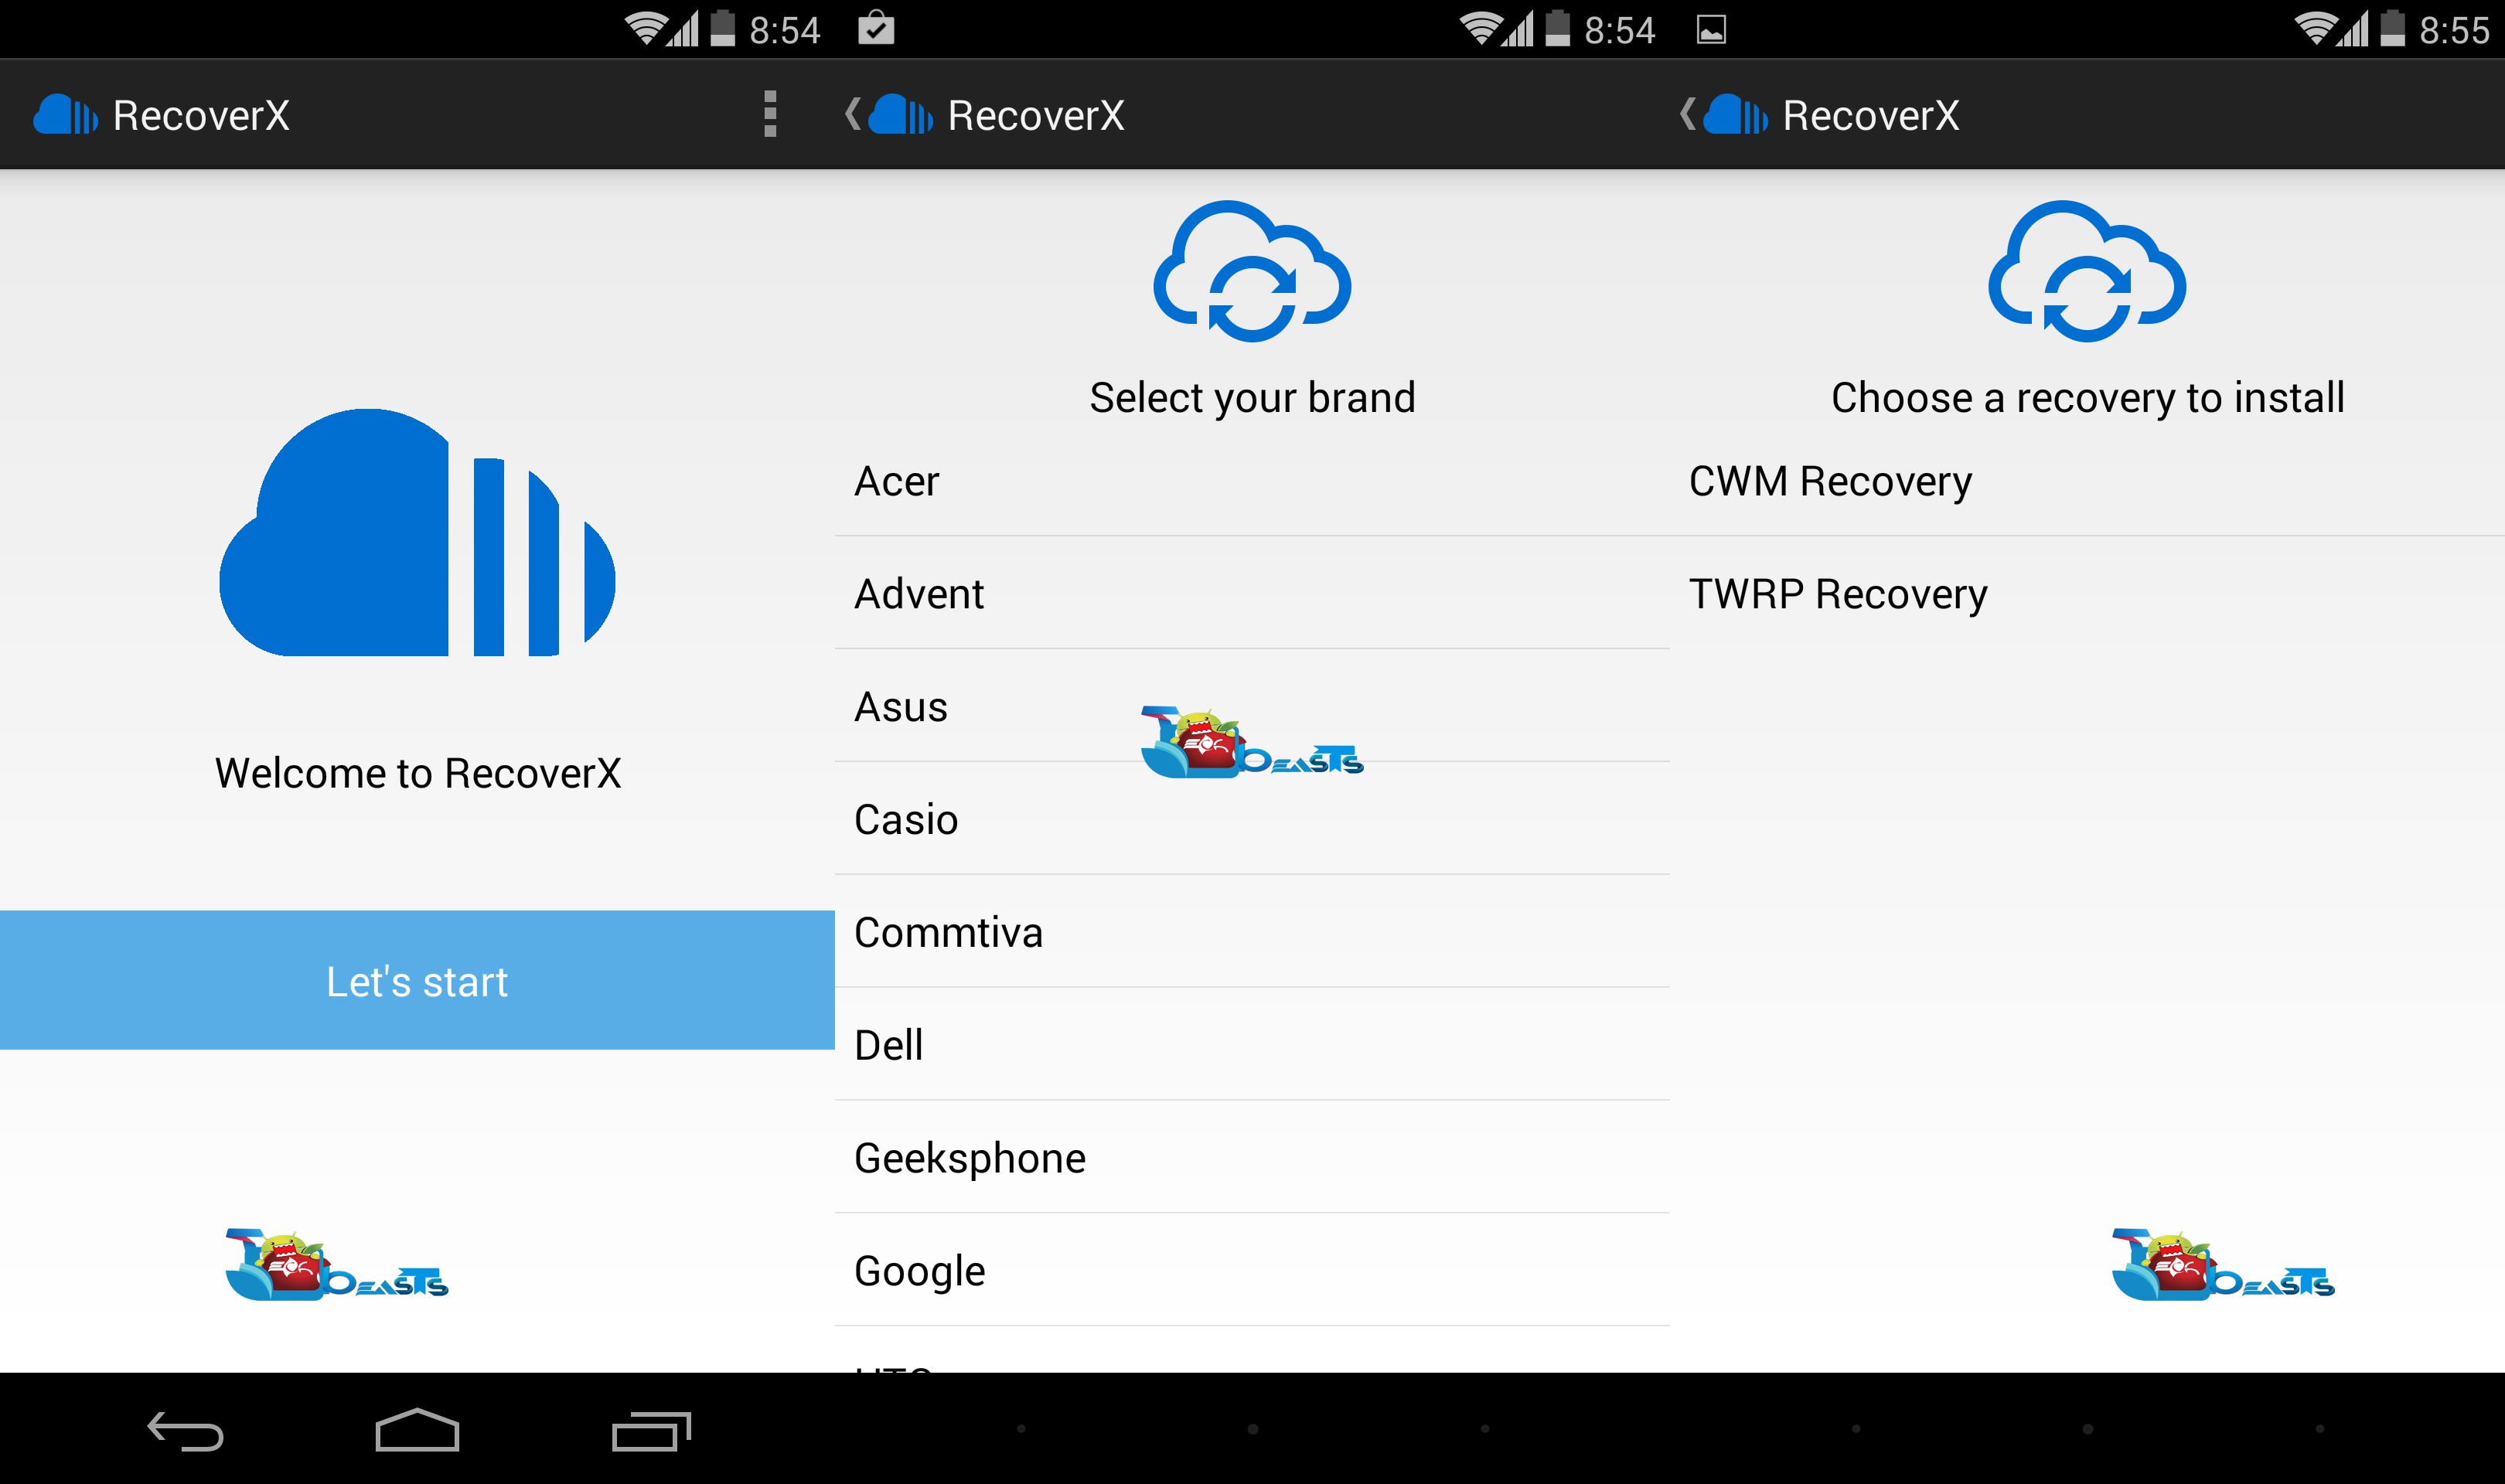
  • Then Tap Get Started.
  • Choose your OEM.
  • Then Select your device.
  • Tap the Favorite Recovery from CWM or TWRP.
  • Let the installation begin and once it is over, go to recovery mode to see whether it works or not.

That is it, if you have any problems feel free to comment below.

How to Change IP Address on Android

1
How to Change IP Address on Android

Internet is growing with every second and is all about openness. Any type of restriction over the internet is not less then a cage and just kills all of it’s taste. Websites like Youtube are banned in some countries, and if seen from a positive point of view, such websites contain great content and are helpful for so many things whether it’s education, it’s cooking, it’s singing, it can be anything. To discover content on these sites and get rid of the restriction put by your ISP, you need to get connected over the internet anonymously and that’s possible by changing the IP address manually or using a proxy application.

Using proxies is the most common and the only method that people know about to access  blocked / banned websites. But some computer freaks might be aware of the very simple and easiest method, changing the IP address (as mentioned) of a computer and accessing the blocked websites anywhere in the world. Changing IP address is quite simple, you just need to find a working IP address and then put it along with it’s port in the internet options > connections > lan settings > proxy settings and it will do the job here, but how about changing the IP address in an Android device and access the internet at fast speed just like you access on a desktop PC or laptop by changing IP address? Well, changing the IP address has multiple advantages. You can save the battery life of your device that a proxy application will most probably eat, you can access the internet at the real speed of your connection, you can access the websites without any extra ads that proxy applications most probably put and a lot more.

In the following post we will go through a method that explains how you can find a working IP address and also how you can change the IP address on your Android device and access the blocked websites easily. Let’s move forward.

How to change the IP Address on your Android device:

      1. First of all you need to find a working IP address along with it’s port.  There are numerous sites that provide IP addresses, a little googling may be of much help here. An IP address is a number having a colon and then followed by a post. For example 172.27.2.100:8080 , here the part before colon is IP address and after is Port. You got to put both in their relevant boxes.
      2. You can determine the working state of the IP address by seeing it’s speed on the provider’s site.
      3. Once you’ve got an IP address, copy it.
      4. Now on your Android device, tap settings.
      5. In settings tap connections > network connections > WiFi.
      6. Now in WiFi you will find the list of WiFi networks available around, tap the one you’re connected with for a few seconds.
      7. After keeping it tapped, you will see two options Forget Network & Modify Network.
      8. Tap  Modify Network Config > Show Advanced Options.
      9. In Advanced Options select Proxy > Manual.
      10. Once you tap Manual, you will find Proxy & Port boxes below.
      11. Paste the IP address in Proxy & Port in the Proxy Port box.
      12. Save now.
      13. In older devices, you need to tap Settings > Network Connections > WiFi Settings > Advanced > Proxy and put the IP address & Port here.
      14. To stop using the Proxy IP Address, simply remove the IP Address from the same location and disable “Advanced Options”.
      15. That’s All!

TB IP TB IP1

We will soon post a video tutorial as it may confuse a lot of users. We hope that the tutorial helps you guys for now, in case you got any queries, please don’t hesitate to stop by the comment box below. Thanks all.

Root Galaxy S4 I9505 On Android 4.4 Kit-Kat XXUFNAD Test Firmware[Guide]

0
Root Galaxy S4 I9505 On Android 4.4 Kit-Kat XXUFNAD Test Firmware[Guide]

Before going any further, Follow the link to update your Galaxy S4 I9505 to XXUFNAD Android 4.4 Kit-Kat:

Update Galaxy S4 I9505 To Android 4.4 Kit-Kat XXUFNAD Test Firmware

Now that you have Updated your device to Android 4.4 Kit-Kat and as per rule of installing Official Firmware, your device will loose its root access. The only way to get it back, is by rooting it again. Rooting allows you to get full control over your device, Stock apps and mods are good, but installing Custom Mods gives you better support and great battery life, you might need to delete some Stock apps from the device, a non-rooted device can’t do that, but a rooted one has the power to remove stock apps too.

SAMSUNG DIGITAL CAMERA

If you are familiar with Odin and it’s working, then this tutorial might not be difficult for you. Otherwise read the whole tutorial first before trying it on your device. In this Article, we will show you How To Root Galaxy S4 I9505 On Android 4.4 XXUFNAD Kit-Kat Official Firmware.But before we begin, Make sure that:

  1. That you have a Well Charged Battery, 60%-80% is better.
  2. Back-Up all your important ContactsCall Logs & Messages.It is highly recommended in case of any mishap or data loss to back up all your important data.
  3. Back-Up your Mobiles EFS DataHow To Restore and Back-Up EFS Data On Samsung Galaxy Devices.
  4. Check your device model, Go To Setting > About and Make sure that it is I9505.
  5. Do-not try it on Galaxy S4 I9500.

Disclaimer: 

The methods involved in flashing custom roms and rooting your phone is highly custom and may result in bricking your device,and has nothing to do with Google or the device manufacturers which is Samsung in our case. In case of any mishap we may not be held responsible. Follow these instructions to the letter to avoid any mishap or bricking. Make sure that whatever you do, you are doing it at your own responsibility.

Warning:

Rooting an Android device Voids Manufacturers Warranty, this Rooting method for Galaxy S4 I9505 is tested and Found Working. If you don’t follow the Procedure as we instructed, You only are responsible for your device. We won’t be liable if any damage occurs to your device and/or its components.

All done and good, let’s head towards the Next page to See, How you can Root Samsung Galaxy S4 I9505.

Pages: Page 1 | Page 2

How to Record Calls on Android Smartphones

0
How to Record Calls on Android Smartphones

At the present time 90% of the smartphones used in the world run on Android. Doesn’t matter what version of Android it is and whether it is a low end or high end smartphone, what matters is only “Android”. Reason being is, Android’s open source nature has paved way for the developers to develop millions and billions of apps that add extra charm to Android’s authority. Android is the only firmware that allows the users to make both, the hardware and the software tweaks and helps itself to keep on the top of the list.

As mentioned, there’s a number of apps available for Android, that means you can do whatever you want and even if you want you can go beyond boundaries on your Android smartphone. Android powered smartphones also offer a lot of in call features, but lack in the very thing that is call recording. By default there is no way to call records in any Android smartphone. Sometimes it’s really important to record each and every single call for some safety measures or some memories and store them on your phone, but you will probably need an application or mod to do the thing for you here.

There’s a number of custom ROMs available for Android that allow call recording along with tons of other awesome features, but as said above this includes going beyond the boundaries of your phone. Not everyone is an expert enough to root an Android device, flash mods or flash custom ROMs just for a call recording feature. To make this thing easier, our great friend Dr. Ketan Hindocha has developed Auto Record app that keeps a recording of all of you incoming and outgoing calls in your device’s memory.

Dr Ketan Hindocha has always preferred  call recording feature in a custom ROM or through a mod and he has been including it in his custom ROMs as well. Earlier he mde this app but it required root access, but to surprise his followers he made a root-free call recording app and it is available for all of us in the Google Play store. Although there is a number of such apps available in the Google Play, but you will hardly find any single working properly. This is where this app takes lead as this app is way too much simple, and requires one tap activation only and works flawlessly without any hiccups here and there. Root free version is available for 1$ in the Google Play Store, while a free version of the app is available on XDA-thread as well but requires root. In the following post we have embed the download link for the application and also explained how you can get it working on your Android device, this app needs Android 4.0+ and has been tested on multiple Android phones and found working and possibility is, it will work on your device flawlessly as well. Let’s go ahead.

aAuto RecordAuto Record 2 

How to Record Calls on Android:

      1. Download Dr. Ketan Auto Record: Trial (No Root) | Donate Version (No Root) | Free Version (Root) 
      2. Copy the downloaded APK file to your phone or download it straight to your phone.
      3. Locate the copied/downloaded APK file on your phone and tap it.
      4. Proceed with the installation instructions now.
      5. Allow unknown sources if asked, select package installer if prompted.
      6. Once the app is installed, find it in the App Drawer.
      7. Tap the app icon.
      8. Select the calls you want to record (incoming / outgoing / both.)
      9. The app will record both incoming & outgoing calls in the background without interruption now.
      10. All the recorded files are saved in phone memory / sd card > sound / voice folder.
      11. You can uninstall the app using app manger anytime if you want.
      12. That’s All!

In case this app doesn’t work for you, let us know through the  comment box below with your device model and we will get it fixed. Thanks all!


Frozen Free Fall For PC – Download Here

0
Frozen Free Fall For PC – Download Here

When it comes to puzzle games now a days Candy Crush Saga is on top and no doubt they have done a great job. But now i think they got a competitor “Frozen Free Fall”. Disney Games have introduced yet another a beautiful game themed with the animated movie Frozen. Get ready for an epic puzzle matching adventure in the Kingdom of Arendelle, inspired by the newest Disney animated film, Frozen! Join Anna, Elsa, and more of your favorite characters on a journey to slide and match 120 icy puzzles for free. UNLOCK MORE CHARACTERS AS YOU GO – Start the journey as young Elsa and Anna, then unlock grown-up versions of the sisters as you progress through the land. Follow the story and play with even more characters like Olaf, Sven, Kristoff, Hans and Pabbie.

Frozen Free Fall for pc

UNIQUE POWER-UPS SPECIALLY DESIGNED FOR EACH CHARACTER – Use Anna’s torch to burn up an entire row of crystals, or Elsa’s glacier power-up to make all of the same color crystals magically disappear! Try Hans’ sword to slash right through the crystals, and explore many more cool power-ups!

Main Features Of Frozen Free Fall For PC:

  • 120 icy puzzles for free
  • EXCITING MATCH-3 GAMEPLAY
  • extra challenging objectives
  • UNIQUE POWER-UPS SPECIALLY DESIGNED FOR EACH CHARACTER

How to Download and Install Frozen Free Fall on PC:

    1. You need an Android emulator to run this game on your Windows PC or MAC. We recommend using Bluestacks. Use our guide to install it on your PC.
    2. After downloading and installing Bluestacks, Download Frozen Free Fall APK file.
    3. Open the downloaded APK file now, and let Bluestacks install it.
    4. Open BlueStacks now > All Apps > Frozen Free Fall
    5. The game will start now, follow the on screen instructions.
    6. Follow the initial screen,  you’ll be able to play it.
    7. Tap the screen by clicking inside the game frame.
    8. Enjoy the most tough game ever!
    9. Don’t forget to let us know about your high score.
    10. That’s All!

How to Root Lenovo IdeaPhone K860/K860i

0
How to Root Lenovo IdeaPhone K860/K860i

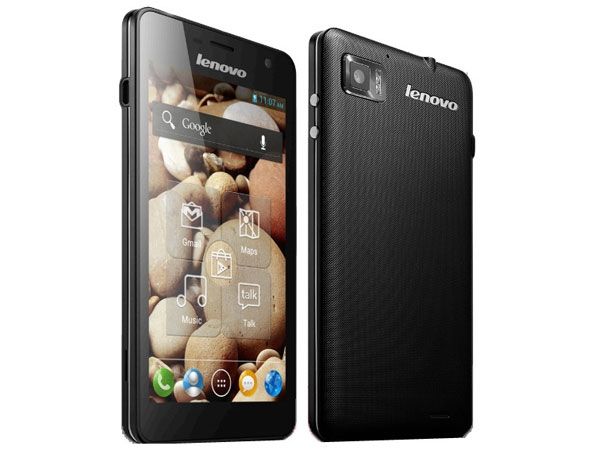
The well known Laptop manufacturer Lenovo has also pulled out some Android devices and IdeaPhone K860 is one of those. A 5 inches display device with 294 ppi powered up with 1.4 GHz Exynos 4412 Quad Core CPU, Mali-400MP GPU and a RAM of 1 GBs. Lenovo IdeaPhone K860 runs on Android 4.0.4 Ice Cream Sandwich out of the box.Lenovo-K860

While the device is not so popular, it may be hard to find development threads for this and go beyond the boundaries. To do anything out of bounds, you definitely need root access. In case you ended up finding no method and came here afterwards, you spotted the right place as in the following post we are going to have a look on a method that will guide you to root your Lenovo IdeaPhone K860/K860i.

Before we head towards the rooting process, let’s have a look over a brief intro of root access and why you should root your Android smartphone.

Rooting your phone gives you complete access over all the data which is apparently locked by the manufacturers. This includes removal of the factory restrictions and making changes to the internal system and the operating system. Gaining the root access gives you the privileges to install various applications to enhance the performance of your device, allows you to remove the built-in applications/programs, helps you to upgrade the battery life of your device & install the apps which require the root access for the proper functionality and modify your device in so many other ways e.g using mods and custom roms. By installing custom recovery, you can flash custom roms in the phone easily. Custom recovery also let’s you backup your current rom and restore it in case of any mishap. There is a laundry list of things you can do after having your device rooted and installed the custom recovery, now once you’re rooted and have installed custom recovery, go ahead and enjoy it on your phone. Here’s our collection of 10 Best Root Apps.

Here are some important instructions to follow before you root your device:

    1. This guide is only for Lenovo IdeaPhone K860/K860i. Do not try this on any other device. Check your device model underSettings > About device first and only then proceed.
    2. Your phone’s battery must be charged over at least 60%. This is highly recommended in order to prevent any power issues during the rooting process.
    3. Make sure that you backup your important media content, ContactsCall Logs & Messages. This is highly recommended just in case something goes wrong and you need to reset your phone.
    4. Proceed at your own risk. Read each and everything carefully.

Disclaimer: The methods involved in flashing custom roms and rooting your phone is highly custom and may result in bricking your device, and has nothing to do with Google or the device manufacturer that is LENOVO in our case. Also rooting your device will void its warranty and you will be no longer eligible for any kind of free device services by the manufacturers/warranty providers. In case of any mishap we may not be held responsible. Follow these instructions to the letter to avoid any mishap or bricking. Make sure that whatever you do, you are doing it at your own responsibility.


How to Root Lenovo IdeaPhone K860/K860i:

Rooting this phone is quiet simple and requires a few taps only. Thanks to XDA-Senior member Alephzain for developing Framaroot that has made it easy to root Lenovo IdeaPhone K860/K860i.

    1. Download: Framaroot APK v1.9.1
    2. Download the APK file and place it on your phone.
    3. Run the APK file, allow unknown sources if asked.
    4. Open Framaroot from App Drawer.
    5. Select Install SuperSu.
    6. Select (Sam, Frodo, Legolas or Aragorn) Exploit.
    7. Follow the onscreen instructions!
    8. Complete the process.
    9. Phewww! You’re rooted now! Enjoy :D
    10. You can also unroot your device using the same application.

This surely is developer’s hardwork and if you’re really happy with such easy rooting method, please consider donating by purchasing his app here.

That’s All!

How to Root Huawei Ascend Mate

5
How to Root Huawei Ascend Mate

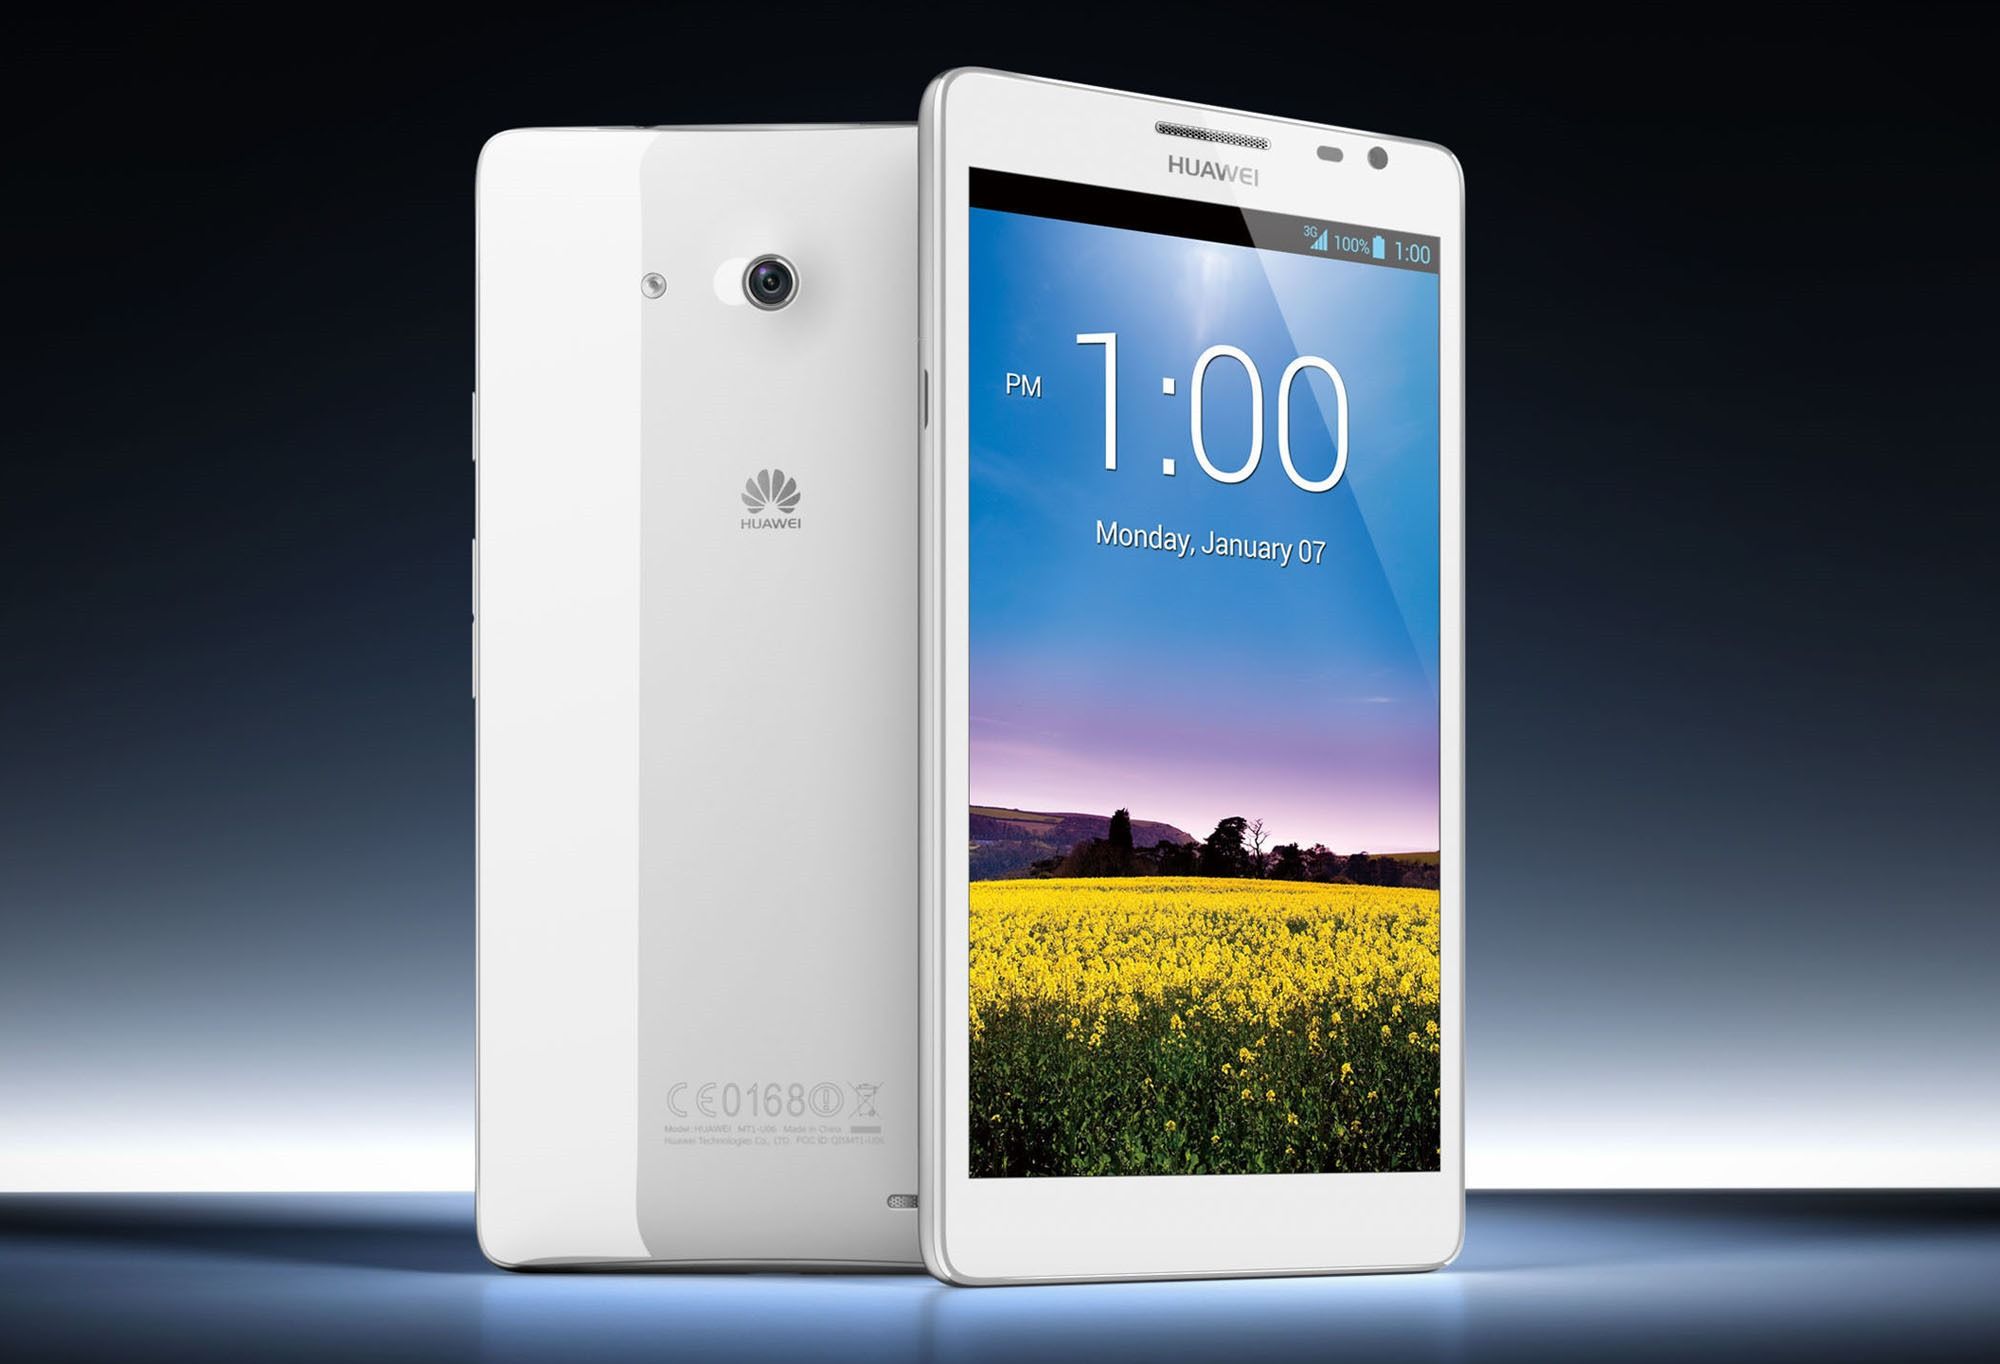
Huawei’s Ascend series has helped it to win a lot of users. Ascend Mate stands significantly between the Tablets and Phablets of Smartphone Giants and sports some really nice hardware specs. Huawei has used a 6.1 inches IPS LCD with 242 ppi on the front and powered up the device with 1.5 GHz quad-core Cortex-A9 accompanied by a RAM of 2 GBs.  An 8 MP camera sensor is installed on the back a 1 MP on the front for video calling. Ascend Mate runs on Android 4.1 Jelly Bean out of the box and the device is also upgradable to Android 4.2 Jelly Bean.Huawei Ascend Mate

What’s good about these smartphone is, since the Chinese manufacturers have started reaching out other regions in the world, the development has also begun for these smartphones and there is quite a lot stuff to play with, but to unleash the true power of any Android device you need to gain the root access first and then go beyond it’s boundaries. Huawei Ascend Mate surely is a popular device now and is owned by many, some of the users may be looking out there to root this device. If you’re one of those and looking for any such method for your device, you’re on the right spot at the moment.

In the following post we’re going to have a look on a method that will guide you to root Huawei Ascend Mate. Before we begin, let’s have a look on a brief intro about what is root access and why you should root your device.

Rooting your phone gives you complete access over all the data which is apparently locked by the manufacturers. This includes removal of the factory restrictions and making changes to the internal system and the operating system. Gaining the root access gives you the privileges to install various applications to enhance the performance of your device, allows you to remove the built-in applications/programs, helps you to upgrade the battery life of your device & install the apps which require the root access for the proper functionality and modify your device in so many other ways e.g using mods and custom roms. By installing custom recovery, you can flash custom roms in the phone easily. Customrecovery also let’s you backup your current rom and restore it in case of any mishap. There is a laundry list of things you can do after having your device rooted and installed the custom recovery, now once you’re rooted and have installed custom recovery, go ahead and enjoy it on your phone. Here’s our collection of 10 Best Root Apps.

Here are some important instructions to follow before you root your device:

    1. This guide is only for Huawei Ascend Mate. Do not try this on any other device. Check your device model underSettings > About device first and only then proceed.
    2. Your phone’s battery must be charged over at least 60%. This is highly recommended in order to prevent any power issues during the rooting process.
    3. Make sure that you backup your important media content, ContactsCall Logs & Messages. This is highly recommended just in case something goes wrong and you need to reset your phone.
    4. Proceed at your own risk. Read each and everything carefully.

Disclaimer: The methods involved in flashing custom roms and rooting your phone is highly custom and may result in bricking your device, and has nothing to do with Google or the device manufacturer that is HUAWEI in our case. Also rooting your device will void its warranty and you will be no longer eligible for any kind of free device services by the manufacturers/warranty providers. In case of any mishap we may not be held responsible. Follow these instructions to the letter to avoid any mishap or bricking. Make sure that whatever you do, you are doing it at your own responsibility.


How to Root Huawei Ascend Mate:

Rooting this phone is quiet simple and requires a few taps only. Thanks to XDA-Senior member Alephzain for developing Framaroot that has made it easy to root Huawei Ascend Mate.

    1. Download: Framaroot APK v1.9.1
    2. Download the APK file and place it on your phone.
    3. Run the APK file, allow unknown sources if asked.
    4. Open Framaroot from App Drawer.
    5. Select Install SuperSu.
    6. Select Pippin Exploit.
    7. Follow the onscreen instructions!
    8. Complete the process.
    9. Phewww! You’re rooted now! Enjoy :D
    10. You can also unroot your device using the same application.

This surely is developer’s hardwork and if you’re really happy with such easy rooting method, please consider donating by purchasing his app here.

That’s All!

How to Root Huawei Ascend G615

0
How to Root Huawei Ascend G615

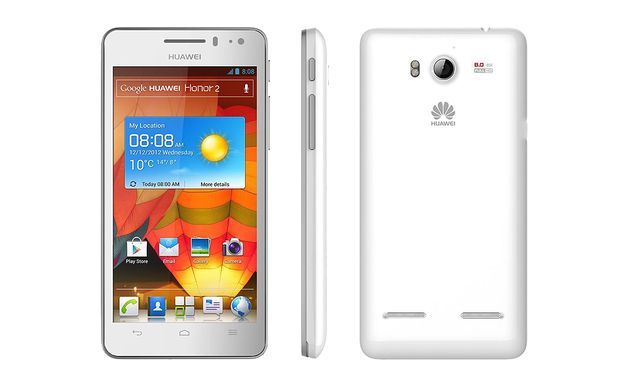
The Chinese Giant Huawei has definitely taken a big ride and started making cool smartphones. Huawei’s Ascend series has really added to it’s pockets and is becoming a choice for the users all around the world. The development has also started for Huawei devices in the active communities and is just increasing every day. What’s good about Huawei is, like other Chinese manufacturers, it is also packing up smartphones with heavy features in a very handsome and affordable price.Huawei-Ascend-G615-1

Huawei Ascend G615 was unveiled back in January, 2013. The device features a very nice 4.5 inches Super IPS display with 326 ppi, 1.4 GHz Quad Core CPU, a RAM of 1 GB accompanied by Vivante GC4000 GPU. Huawei has used an 8 MP camera sensor at the back and 1.3 MP on the front in Ascend G615. Runs on Android 4.0 ICS out of the box and the device is upgradable to Android 4.1 Jelly Bean. Huawei’s build quality is nice as well. Over all these smartphones are just a good choice to go with when you cannot afford a smartphone with the similar features from HTC, Samsung or Sony.

So, if you’re an Ascend G615 owner and you’re looking to break the rules and go beyond the boundaries of your device, you’ll definitely need to root it. Just in case you’re looking for such method, you have spotted the right place. In the following post we’ll be going through a method to root Huawei Ascend G615. Before we begin, let’s first have a look on a brief intro to root access and why you should root your phone.

Rooting your phone gives you complete access over all the data which is apparently locked by the manufacturers. This includes removal of the factory restrictions and making changes to the internal system and the operating system. Gaining the root access gives you the privileges to install various applications to enhance the performance of your device, allows you to remove the built-in applications/programs, helps you to upgrade the battery life of your device & install the apps which require the root access for the proper functionality and modify your device in so many other ways e.g using mods and custom roms. By installing custom recovery, you can flash custom roms in the phone easily. Customrecovery also let’s you backup your current rom and restore it in case of any mishap. There is a laundry list of things you can do after having your device rooted and installed the custom recovery, now once you’re rooted and have installed custom recovery, go ahead and enjoy it on your phone. Here’s our collection of 10 Best Root Apps.

Here are some important instructions to follow before you root your device:

    1. This guide is only for Huawei Ascend G615. Do not try this on any other device. Check your device model underSettings > About device first and only then proceed.
    2. Your phone’s battery must be charged over at least 60%. This is highly recommended in order to prevent any power issues during the rooting process.
    3. Make sure that you backup your important media content, ContactsCall Logs & Messages. This is highly recommended just in case something goes wrong and you need to reset your phone.
    4. Proceed at your own risk. Read each and everything carefully.

Disclaimer: The methods involved in flashing custom roms and rooting your phone is highly custom and may result in bricking your device, and has nothing to do with Google or the device manufacturer that is Huawei in our case. Also rooting your device will void its warranty and you will be no longer eligible for any kind of free device services by the manufacturers/warranty providers. In case of any mishap we may not be held responsible. Follow these instructions to the letter to avoid any mishap or bricking. Make sure that whatever you do, you are doing it at your own responsibility.


How to Root Samsung SGH-i997 Infuse 4G:

Rooting this phone is quiet simple and requires a few taps only. Thanks to XDA-Senior member Alephzain for developing Framaroot that has made it easy to root Huawei Ascend G615.

    1. Download: Framaroot APK v1.9.1
    2. Download the APK file and place it on your phone.
    3. Run the APK file, allow unknown sources if asked.
    4. Open Framaroot from App Drawer.
    5. Select Install SuperSu.
    6. Select Pippin Exploit.
    7. Follow the onscreen instructions!
    8. Complete the process.
    9. Phewww! You’re rooted now! Enjoy :D
    10. You can also unroot your device using the same application.

This surely is developer’s hardwork and if you’re really happy with such easy rooting method, please consider donating by purchasing his app here.

That’s All!