Home Blog Page 480

Super Optimize Allows You To Fully Optimize Your Android Device
0
Super Optimize Allows You To Fully Optimize Your Android Device

Whatever Mobile one is using, or what type of OS it is running, Customization and Optimization are the core to reach development level even if it is beginner level. Now if one has spent thousands on a device, it is his right to get a decent performance out of it. Android is an open source Platform that is topped and edited by many OEMs according to their theme and signature for their devices. As a result you will see different UI, Icons, Modules etc on different Devices. According to their OS, OEMs put some sort of Performance optimizer in every device. But that type of Optimization is not enough to get a good performance from a device.

Super-Optimize-android

Stock Optimizer is only a Battery Saver, it will decrease your Screen Brightness to even less level and Decrease CPU performance a bit, which never works for me, but Custom Performance Optimizers can give you a lot more than battery life. Despite that decreasing the Brightness and CPU performance or setting the time out for Wi-Fi or Mobile Network will give you a lot of Battery life, but if you get more control over your device, like how much RAM you are using right now, how much battery Percentage you are eating right now and how can you change it, that would be awesome and far better than only saving it.

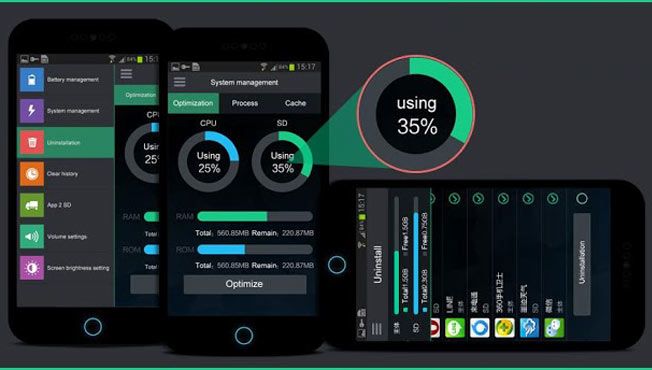
Super Optimize is an application that allows you to do such Acts. It allows you to Manager your System, Battery, Apps, Memory, Volume and Screen Brightness. But not like any other app, it will show you what is happening right now in this Category and what can you do with it. Super Optimizer is a Free app available at Google Play Store, Will work best with a rooted device.

Download Super Optimize

Update Sony Xperia Sola to Android 4.4 KitKat with CM 11 Custom ROM

9
Update Sony Xperia Sola to Android 4.4 KitKat with CM 11 Custom ROM

Xperia Sola’s updates have stopped on Android 4.0.4 Ice Cream Sandwich that means Xperia Sola owners will not be able to any further higher Android version on their device. Since Android is an open source operating system, so anything is possible and specially when we have great developers working over XDA-developers, we may not get worried regarding our Android device. To play a remedy role here for Xperia Sola, CyanogenMod 11 has popped up that is based on Android 4.4 KitKat. Thanks to XDA-developer Munjeni for his hardwork and bringing it up for Xperia Sola owners.xperia-sola-black-464x515

In case you guys don’t know about CyanogenMod, CyanogenMod is a community built and free aftermarket version of Android that enhances the functionality and capabilities of an Android device. Over the past few years, CyanogenMod has given life to a lot of devices getting their updates discontinued. In the following post we’ll be installing Android 4.4 KitKat that is based on CyanogenMod 11 on our beloved Sony Xperia Sola. Let’s go through the installation instructions and then head towards the custom ROM guide.logo-cid

Installation Instructions:

      1. Make sure that your phone is Xperia Sola MT27i. Do not try this on any other phone.
      2. Make sure that your phone’s bootloader is unlocked, if not then unlock it here.
      3. Please make sure that your phone’s battery is charged at least over 60%. This is highly recommended in order to prevent any power issues during the recovery flashing process.
      4. Backup each and everything on your Android phone as follows:
      5. Backup all your important contacts, find the full guide here.
      6. Backup all your important sms messages, find the full guide here.
      7. Backup all your important call logs, find the full guide here.
      8. Backup all your important media content manually. (Copy to your PC.)
      9. Backup all your apps / data. If you’ve rooted your device, use Titanium Backup to do so. Follow the full guidehere.
      10. Backup your current system using a custom recovery (CWM or TWRP) if you’ve flashed one. This is recommended in case something goes wrong with rooting your phone, you can use the custom recovery and return to the old working state of your system.
      11. Keep in mind that this is a custom ROM and may contain bugs. We do not guarantee that everything will be perfect and up to the mark. Flash it only if you’re familiar with custom ROMs and you actually know what you’re going to do.
      12. Make sure that you read the instructions carefully and applied all precautionary measures. Let’s go ahead

How to flash Android 4.4 KitKat CM 11 Custom ROM on Sony Xperia Sola:

    1. Download the ROM’s zip file from Here .
    2. Open the downlaoded .zip folder and extract the boot.img kernel file only.
    3. Download Android ADB and Fastboot drivers, follow our full guide here to make it easy.
    4. Now place the kernal file that is boot.img file that you extracted from the zip folder in the fastboot folder that you downloaded from the guide linked above.
    5. After placing the kernel file in the fastboot folder, open the fastboot folder. Press shift and then Right click on any empty area inside the folder, now select “Open command prompt here“. flash it using the command fastboot flash boot boot.img”. In case you are confused, follow the Android ADB & Fastboot drivers guide carefully.
    6. Download the Google Gapps for Android 4.4 KitKat Custom ROM.
    7. Place the ROM.zip file and Gapps.zip file on your phone’s internal or external sd card.
    8. Boot into CWM recovery. To do so, turn off your device, now turn it on and quickly press volume up and down keys, you will get the CWM interface.
    9. In CWM wipe the cache and dalvik cache.
    10. Now select “Install Zip>Choose Zip from Sd card / external Sd card”.
    11. Select the ROM.zip file that your placed on your phone’s Sd card.
    12. It should take a few mins to flash the ROM, now once again select “Install Zip>Choose Zip from Sd card / external Sd card”.
    13. Choose the Gapps.zip file this time and flash it.
    14. As soon as done flashing, clear cache and dalvik cache again.
    15. Reboot system now, you should see the CM logo on the boot screen now, it may take upto 10 minutes in order to boot into home screen.
    16. Congrats! Enjoy unofficial Android 4.4 KitKat custom ROM on your Sony Xperia Sola now.

That’s all for now. Do tell us about your experience with this ROM. In case you got any queries or you face any difficulties, feel free to stop by the comment box below. We will try our best to help you out. Thanks all!

Install Official Android 4.0.4 ICS 6.1.1.B.1.54 Firmware on Sony Xperia Sola MT27i

2
Install Official Android 4.0.4 ICS 6.1.1.B.1.54 Firmware on Sony Xperia Sola MT27i

Xperia Sola is Sony’s budget Android smartphone that came up back in May, 2012. The device sports a very nice 3.7 inches LED display with 265 ppi. On the core Sony has used a NovaThor U8500 1 GHz Dual Core CPU accompanied by Mali-400 GPU and a RAM of 512 MB is there to boost it up. To take the pictures, there’s a 5 MP shooter at the back while there’s no front cam available on Sony Xperia Sola. Initially Xperia Sola ran on Android 2.3 Gingerbread and Sony updated the device later to Android 4.0.4 Ice Cream Sandwich and the updates are supposed to stop here.

So, coming back to the topic. You may need to install Stock / Official firmware on your device in order to update it or if you’ve unfortunately bricked your device. If so, the following post is going to help you as we’ll be going through a method that will help you to install the latest Android firmware on your Xperia Sola MT27i in a few minutes. The firmware we are going to flash is latest Android 4.0.4 Ice Cream Sandwich based on the build number 6.1.1.B.1.54 and is generic / unbranded. Let’s go through the important installation instructions and then head towards the installation guide.

Installation Instructions & Pre-requisites:

    1. This guide is only for Sony Xperia Sola MT27i. Please check your device model first in Settings > About Device > Model.
    2. You must have installed Sony Flashtool – Get the full guide here. Also Install drivers using Flashtool > Drivers > Flashtool-drivers > Flashmode, Xperia Sola, Fastboot, select all these and install.
    3. Your phone’s battery must be charged at least over 60%. This is highly recommended in order to prevent any power issues during the process.
    4. Flashing this firmware will wipe all your apps, apps data, system data, contacts, call logs & messages. It will not wipe the internal storage (media) data. Proceed after you’ve backed up, in the next step the guides are linked in.
    5. Make sure that you backup your media content,contactscall logs and text messages.  This is important and recommended so that in case you decide to wipe your phone during the flashing process, you can get all of your data back using the backup.
    6. Enable USB debugging mode on your device. To do so, tap settings>developer options>USB debugging. If you can’t find developer options in settings, then tap settings > about device and tap “Build Number” for 7 times and you’ll get em’ activated under settings.
    7. To flash this firmware, you do not need to root your device, you do not need to unlock the bootloader. All you need is, your device must be the one mentioned and must be running on Android 4.2.2 Jelly Bean.
    8. Download the firmware file properly.
    9. Use the OEM data cable to connect your phone to your PC. Using any other data cable might cause connection problems.
    10. You need enough confidence to perform this custom method.
    11. Alright! Follow this guide to the letter in order to prevent any mishap.

How to Install Android 4.0.4 ICS 6.1.1.B.1.54 Official Firmware on Xperia Sola MT27i:

    1. Download Stock Android 4.0.4 ICS 6.1.1.B.1.54 Official Firmware [Unbranded / Generic ]
    2. Copy the file and paste in Flashtool>Firmwares folder.
    3. Open Flashtool.exe now.
    4. Hit the small lightening button on the top left corner and select Flashmode.
    5. Select the FTF firmware file that you placed in the Firmware folder. 
    6. From the right side, select what do you want to wipe. Data, cache and apps log, all wipes are recommended, perhaps you may select if you don’t want.
    7. Click on OK, and it will start preparing the firmware for flashing. This may take a little while to load.
    8. As soon as the firmware is loaded, it will prompt you to attach the phone by turning it off and keeping the back key press.
    9. For Xperia Sola MT27iVolume Down key will do the job of back key, just turn off your phone, keep the Volume Down key pressed and plug in the data cable.
    10. As soon as the phone is detected in Flashmode, the firmware will start flashing, Do not leave the Volume Down key until the process is complete.
    11. As soon as you see “Flashing ended or Finished Flashing” leave the Volume Down key, plug the cable out and reboot.
    12. That’s All! Congrats! You’ve installed latest Android 4.0.4 ICS on your Xperia Sola MT27i Enjoy.

That’s all. We hope that you find this tutorial helpful. In case you got any queries or any difficulties, please feel free to stop by the comment box and drop us your words. We will get back to you immediately. Thanks.

Pou for PC – Free Download

0
Pou for PC – Free Download

Have you played this game? No? If so, then it’s time to play it now. Pou is free, very nice, mini and addictive game that landed in the play store a few months ago. The game requires you to feed your very own Alien Pet. You can clean it, you can give it showers, you can see him growing inside your phone by time and a lot more. Besides that, you can experiment with the potions in the lab, dressing up Pou (the Alien) is an option in the game as well and you can also decorate the environment for your Pou.

Pou is available for Android and once you get your hands on it, you can easily spend much time specially if you’re bored with something. But how about getting this same game on your Windows XP / 7 / 8 or 8.1 powered PC or a MAC? Well, that’s actually possible. In the following post we’ll go through a method that will let you download, install and play Pou on PC. Let’s go through developer’s description first and then head towards the installation instructions.Pou2

Do you have what it takes to take care of your very own alien pet?! Feed it, clean it, play with it and watch it grow up while leveling up and unlocking different wallpapers and outfits to satisfy your unique taste. How will YOU customize your POU?

* Feed and take care of Pou, and watch it grow!
* Play Games in the Game Room and collect Coins!
* Experiment with Potions at the Lab!
* Customize Pou’s appearance!
* Try out new Outfits, Hats and Eyeglasses!
* Customize each room’s Wallpaper!
* Unlock Achievements and Special items!
* Visit and play with your friends!
* Talk to Pou and listen back!

How to Download and Install Pou on PC or MAC:

    1. You need an Android emulator to run this game on your Windows PC or MAC. We recommend using Bluestacks. Use our guide to install it on your PC.
    2. After downloading and installing Bluestacks Download Pou APK
    3. Open the downloaded APK file now, and let Bluestacks install it.
    4. Open BlueStacks now > All Apps >Pou 
    5. The game will start now, follow the on screen instructions.
    6. Follow the initial screen,  you’ll be able to play it.
    7. Tap the screen by clicking inside the game frame..
    8. That’s All!

How To Increase Battery Life In Android Using Greenify

1
How To Increase Battery Life In Android Using Greenify

Android Smartphones are no doubt the best among modern collections of Mobiles, but there is a problem with them that makes ruins their image in front of users eyes and it is battery life. Android Mobile Phones are not good with battery life, due to such reason Developers are creating Custom ROMs to give a better battery life, but not all custom ROMs has such feature and not everyone wants to install Custom ROMs. There are many Battery Saver available on Google Play Store, but non of them have the option to let you add apps manually to stop them.

nexusae0_greenify

Then there is this app, Greenify, it let’s you to set applications to put them into “Hibernation mode”, stopping them from running in Background, thus saving a lot of Battery Life. Unlike any other battery Saver, Greenify won’t let all the Hibernated applications to start running on their own. But you have to make sure that those Applications are not very important for you OS, otherwise your device performance will decrease..

Necessary Requirements:

A Rooted Device

Greenify Normal | Donation Package

How To Use Greenify.

  1. Once you have installed Greenify, Open it from the app drawer.
  2. Tap + on the Bottom Left.
  3. You will see the list of apps there, chosen by Greenify, not a bad place to start.
  4. Choose those apps you want to put in hibernate mode, like Facebook, Gmail, Twitter, Location Services etc.

How To Root and Install CWM Recovery On Huawei Ascend G600

0
How To Root and Install CWM Recovery On Huawei Ascend G600

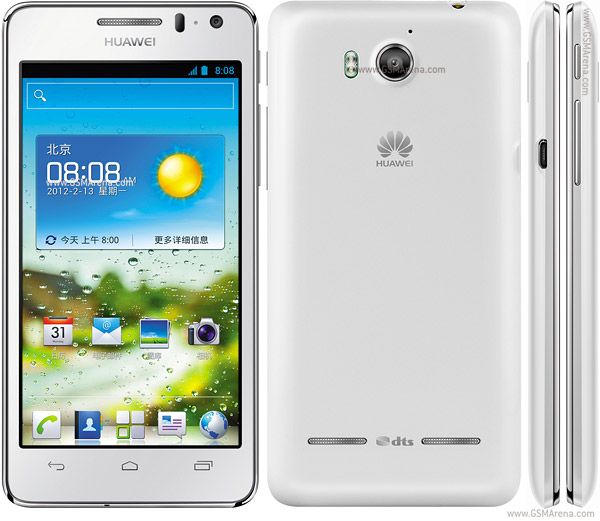
When it comes to rooting some not-so-important and poorly supported devices, the tutorial either is not available at all and if there is one, it is very rare to find. Huawei is one of those OEMs who are not paying much attention to their devices and support provided by them is not so good at all. While on other hand, Samsung is leading everything as they provide the best Firmware, Rooting support ever. But still an Android device can be rooted, even if the straight method is available or not. All it needs is to push Super SU binaries in your device.

huawei-g600

Straight method is that you flash Super SU directly from the Recovery, Other methods are that you can Push Super SU binaries using any Command file. If you are new to rooting process and wants to know what rooting will do, here is a little help.Rooting allows you to get full control over your device, Stock apps and mods are good, but installing Custom Mods gives you better support and great battery life, you might need to delete some Stock apps from the device, a non-rooted device can’t do that, but a rooted one has the power to remove stock apps too.

Disclaimer: 

The methods involved in flashing custom roms and rooting your phone is highly custom and may result in bricking your device,and has nothing to do with Google or the device manufacturers which is Samsung in our case. In case of any mishap we may not be held responsible. Follow these instructions to the letter to avoid any mishap or bricking. Make sure that whatever you do, you are doing it at your own responsibility.

Downloads Required:

How To Install Recovery.

  1. Download Both the Files.
  2. Extract the Recovery File anywhere on your Computer.
  3. Turn Off your Device.
  4. Now Hold Down Volume Down + Power Buttons until you are in fastboot mode.
  5. Connect your device with PC.
  6. Now Run the File flash_RECOVERY.bat from the Recovery Folder.
  7. Let the process be over and it will install Custom recovery on your device.

How To Root Huawei Ascend G600

  1. Copy Root File to the Root of your Sdcard
  2. Turn Off your device.
  3. Press and hold Volume Down + Power Buttons until you are in fastboot mode.
  4. Choose Recovery from Fastboot mode.
  5. From Recovery, Navigate to Install Zip from Sdcard > Choose Zip from Sdcard.
  6. Select the Root File and Confirm the installation.
  7. One the file is flashed reboot your device


How To Take a Screenshot In BlackBerry Z10

0
How To Take a Screenshot In BlackBerry Z10

If you own a Mobile Device and it can’t take a Screenshot, then you are missing one of the most used feature in any Mobile Device. Some OEMs put the default option to take a Screenshot, those who don’t somehow gets the 3rd party application that allows them to take a Screenshot. Usually in any Android device without a Physical Home Button, you can take a Screenshot by Pressing Volume Down + Power Button, in Samsung, where there is a Physical Home Button, you can press Home + Power Button to take a Screenshot. But our concern here is not any Android device, it is BlackBerry Z10.

IMG_00000040

In BlackBerry, most of the devices don’t have the feature to take a screenshot, instead you need to install an application to enable such feature. But In Blackberry Z10 you don’t need any Application to take a Screenshot, BlackBerry has given the default Option to take a Screenshot, not very difficult, same as any Android device. So, if you own a BlackBerry Z10 and trying to find a way to take a Screenshot, you have arrived at the best place. Here we will show you how it is done.

How To Take a Screenshot In BlackBerry Z10

  1. First, go to the screen whose screenshot you want.
  2. The Turn your device to Landscape mode.
  3. Press both Power + Volume Down Button at the same time.
  4. You will hear a Shutter Sound and a processing circle.
  5. Go to Camera Roll your Screenshot is awaiting for you there.
  6. You can View it, Share it, Delete it or whatever you want with it.

G2 TweaksBox and G2 Xposed Modules For LG G2

G2 TweaksBox and G2 Xposed Modules For LG G2

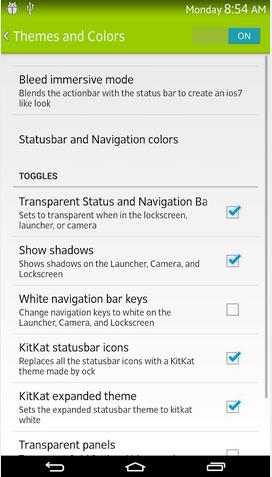
Once upon a time, there was an Android device, without any root access stuck to the boring Android 1.6, full of lag and performance issues. No way of removing stupid apps and installing Custom Modules on it. Even after updating to Android 2.2 there was no hope of Customizing it. But then comes a guy who invented Super SU, giving Android users to get full control of their device. All the Android users are in deep deep debt of ChainFire, because of that. But rooting itself is not enough, then there were Custom ROMs, giving you many beautiful features and speed than Stock ROM, but then again there were a lot of risk in installing Custom ROMs, your device can be damage if you use it wrong.

G2-TweaksBox-xposed

Keeping that in mind, there were many attempts to give users a great way to install Custom Mods without any Custom ROM. The most successful is Xposed Framework. We have shared many Modules that can be used via Xposed Framework. Today we are adding one more to our Collection and this time it is exclusively for LG G2. It can be installed on any LG G2 running Stock or Custom ROM if LG G2 is rooted. Basically there are two Modules, both can be downloaded through Xposed Framework and Google Play Store.

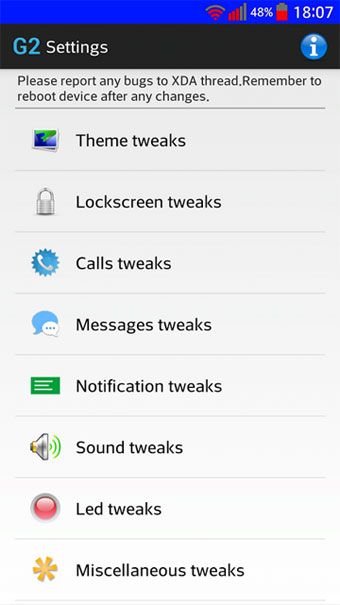
Screenshot_1

G2 TweaksBox is the best among them and it will let to customize and tweak your LG G2 is a complete another way.

Theme Tweaks

  • Real-time theme changer
  • Gradient status Bar
  • Transparent status bar on launcher
  • Status bar icon colors
  • Hide status bar icons
  • Status bar clock settings
  • NavBar Color
  • Transparent navbar on launcher
  • Navigation bar button colors
  • Navigation bar height
  • Ring pad customization
  • Notification panel color
  • Volume slider background color
  • Date Panel background color
  • Divider color
  • QSlide Panel color
  • Panel buttons color
  • Notification row
  • Quick Settings background button and icon colors
  • List Overscroll edge/glow colors
  • Hide label button color
  • Hide Quick Settings
  • Hide Volume slider
  • Hide Brightness slider
  • Control Brightness level by sliding the statusbar

Calls Tweaks

  • Call recording
  • Set Call History as Default Tab
  • Enable Noise Suppression

Messages Tweaks

  • Exclude contacts without phone numbers in messaging app option
  • New Message screen off option

Lockscreen Tweaks

  • Enable QuickUnlock
  • Enable Rotation
  • Disable carrier text and icon
  • Use squared icons
  • Hide swype string
  • Hide statusbar clock
  • Show Remaining Attempts
  • AOSP Lockscreen
  • Knock OFF on AOSP Lockscreen

Notification Tweaks

  • Disable charging plug/unplug notifications
  • Hide full battery notification
  • Hide battery notification
  • Hide verizon notifications
  • Hide Quiet Mode schedule notification
  • Hide Airplane Mode Dialog

Sound Tweaks

  • Enable Shutter Sound OFF
  • Disable Camera Sound
  • Disable Safety HeadSet Volume

LED Tweaks

  • Change default led color for missed, incoming calls and messages

Misc Tweaks

  • Enable all rotations
  • Freeze rotation to the current one
  • Disable NavBar
  • Enable back led for more events.
  • Enable LG Launcher hidden settings
  • Enable Torch with volume up key
  • Skip Tracks with volume keys
  • Show Extended Kernel info

G2 Xposed is just an alternate for G2 TweaksBox, but G2 TweaksBox is preferable as it contains much more tweaks than G2 Xposed, it is all up-to you what you will try.

Downloads Required:

Download Xposed Installer

Download G2 Xposed

Download G2 TweaksBox

To use G2 TweaksBox and G2 Xposed, you need to install Xposed Framework on your device, Follow:

Xposed Framework, A Unique Way To Customize Your Android Device

Root Sony Xperia V LT25i Running 9.2.A.0.295 Firmware [How to – Guide]

35
Root Sony Xperia V LT25i Running 9.2.A.0.295 Firmware [How to – Guide]

Xperia V LT25i is recently updated to Android 4.3 Jelly Bean firmware based on the build number 9.2.A.0.295. The new firmware comes up with a lot of bug fixes, performance enhancements, minor UI changes, new camera modes and battery performance enhancements. Then new firmware is completely different from the previous ones, so those of you who have updated their devices to Android 4.3 Jelly Bean and are looking for a method to root their device on the newest firmware, you’re on the right spot at the moment as we’ve found a working root method for Xperia V running 9.2.A.0.295 firmware.

Many of you might be first timers for rooting any Android devices, so make it more clear and understanding really well, we will first go through a brief intro of the root access and also know why you should root your device.

Rooting your phone gives you complete access over all the data which is apparently locked by the manufacturers. This includes removal of the factory restrictions and making changes to the internal system and the operating system. Gaining the root access gives you the privileges to install various applications to enhance the performance of your device, allows you to remove the built-in applications/programs, helps you to upgrade the battery life of your device & install the apps which require the root access for the proper functionality and modify your device in so many other ways e.g using mods and custom roms. By installing custom recovery, you can flash custom roms in the phone easily. Custom recovery also let’s you backup your current rom and restore it in case of any mishap. There is a laundry list of things you can do after having your device rooted and installed the custom recovery, now once you’re rooted and have installed custom recovery, go ahead and enjoy it on your phone. Here’s our collection of 10 Best Root Apps.

Here are installation instructions:

      1. This guide is only for Sony Xperia V LT25i. Do not try this on any other model, please check your device’s mode in Settings > About Device.
      2. The Root instructions are only for Xperia V LT25i running latest Android 4.3 Jelly Bean 9.2.A.0.295 firmware.
      3. Your device’s bootloader must be unlocked. Follow the full guide here to unlock it.
      4. You must have installed Sony Flashtool – Get the full guide here. Also Install drivers using Flashtool > Drivers > Flashtool-drivers > Flashmode, Xperia V, Fastboot, select all these and install.
      5. Please make sure that your phone’s battery is charged at least over 60%. This is highly recommended in order to prevent any power issues during the recovery flashing process.
      6. Backup each and everything on your Android phone as follows:
      7. Backup all your important contacts, find the full guide here.
      8. Backup all your important sms messages, find the full guide here.
      9. Backup all your important call logs, find the full guide here.
      10. Backup all your important media content manually. (Copy to your PC.)
      11. Backup all your apps / data. If you’ve rooted your device, use Titanium Backup to do so. Follow the full guide here.
      12. Backup your current system using a custom recovery (CWM or TWRP) if you’ve flashed one. This is recommended in case something goes wrong with rooting your phone, you can use the custom recovery and return to the old working state of your system.
      13. Make sure that you read the instructions carefully and applied all precautionary measures. Let’s go ahead.

Disclaimer: The methods involved in flashing custom roms and rooting your phone is highly custom and may result in bricking your device, and has nothing to do with Google or the device manufacturer that is SONY in our case. Also rooting your device will void its warranty and you will be no longer eligible for any kind of free device services by the manufacturers/warranty providers. In case of any mishap we may not be held responsible. Follow these instructions to the letter to avoid any mishap or bricking. Make sure that whatever you do, you are doing it at your own responsibility.

How to Root Xperia V LT25i Running 9.2.A.0.295:

  1. Download this Kernel.elf file.
  2. Download SuperSu.zip and copy it to the SD card of your phone.
  3. Download Stock Android 4.3 Jelly Bean Kernel.sin file for Xperia V.
  4. Open Sony Flashtool now.
  5. Connect your Xperia V to your PC now. Make sure that the connection is up to the mark.
  6. Hit the smart lightening button on the right upper left side and select “Fastboot Mode.”.
  7. On the right side, click on “Reboot Device into Fastboot Mode.”
  8. If this doesn’t work for you, manually put your device into Fastboot Mode and connect it to your PC. To do so, turn off your Xperia device and now connect to your PC while keeping the Volume Up key pressed. As soon your PC detects your device,the blue LED will turn on showing fastboot mode.
  9. Now click on “Select Kernel to flash”.
  10. In the format selection, by default it will be “*.sin”. Change it to *.elf.
  11. Now select the Kernel.elf file that you downloaded first of all and flash it.
  12. This kernel will flash CWM recovery in your device. Disconnect your device now.
  13. Turn it on, as soon as you see the Sony Logo, press Volume – Key 5 to 6 times and you should see the CWM recovery interface now.
  14. Go to Mount/Storage and press Mount System.
  15. As soon as the system is mounted, choose install zip > choose zip from sd card > SuperSu.zip that you placed on your phone in the 2nd step and flash it.
  16. As soon as SuperSu.zip is flashed, turn off your device by keeping the power key pressed for a while or pulling out the battery. Don’t reboot it. [v.important]
  17. Now connect your device in fastboot mode once again. [Use Step 8].
  18. Open Flashtool once again > Click on small lightening button > Fastboot mode > Select Kernel to Flash.
  19. By default it will be *.sin format, so locate the file Kernel.sin [Stock Android 4.3 Jelly Bean Kernel] that you downloaded in step 3 and flash it.
  20. Once kernel flashing is complete, reboot your device.
  21. Phewww! You’re rooted, locate SuperSu in app drawer.
  22. You can also verify root access by installing Root Checker app from Google Play store.
  23. That’s all!

We hope that you find this guide helpful. In case you got any queries or you are facing any difficulties, feel free to stop by the comment box below and drop us your words. We will get back to you as soon as possible. Thanks all!

Credits

Root Galaxy S4 Active I9295 On Android 4.2.2 XXUFNAD Jelly Bean Official Firmware[Guide]

0
Root Galaxy S4 Active I9295 On Android 4.2.2 XXUFNAD Jelly Bean Official Firmware[Guide]

Before going any further, Follow the link to update your Galaxy S4 I9505 to XXUFNAD Android 4.2.2 Jelly Bean:

Update Galaxy S4 Active I9295 To XXUBML3 Android 4.2.2 Jelly Bean Official Firmware

Now that you have Updated your device to Android 4.2.2 Jelly Bean and as per rule of installing Official Firmware, your device will loose its root access. The only way to get it back, is by rooting it again. Rooting allows you to get full control over your device, Stock apps and mods are good, but installing Custom Mods gives you better support and great battery life, you might need to delete some Stock apps from the device, a non-rooted device can’t do that, but a rooted one has the power to remove stock apps too.

samsung-i9295-galaxy-s4-active-ofic

If you are familiar with Odin and it’s working, then this tutorial might not be difficult for you. Otherwise read the whole tutorial first before trying it on your device. In this Article, we will show you How To Root Galaxy S4 Active I9295 On Android 4.2.2 XXUFNAD Jelly Bean Official Firmware.But before we begin, Make sure that:

  1. That you have a Well Charged Battery, 60%-80% is better.
  2. Back-Up all your important ContactsCall Logs & Messages.It is highly recommended in case of any mishap or data loss to back up all your important data.
  3. Back-Up your Mobiles EFS DataHow To Restore and Back-Up EFS Data On Samsung Galaxy Devices.
  4. Check your device model, Go To Setting > About and Make sure that it is I9295.
  5. Do-not try it on any other Galaxy S4. 

Disclaimer: 

The methods involved in flashing custom roms and rooting your phone is highly custom and may result in bricking your device,and has nothing to do with Google or the device manufacturers which is Samsung in our case. In case of any mishap we may not be held responsible. Follow these instructions to the letter to avoid any mishap or bricking. Make sure that whatever you do, you are doing it at your own responsibility.

Warning:

Rooting an Anadroid device Voids Manufacturers Warranty, this Rooting method for Galaxy S4 Active is tested and Found Working. If you don’t follow the Procedure as we instructed, You only are responsible for your device. We won’t be liable if any damage occurs to your device and/or its components.

All done and good, let’s head towards the Next page to See, How you can Root Samsung Galaxy S4 I9295.

Pages: Page 1 | Page 2

How To Disable SELinux On A Rooted Android Device

2
How To Disable SELinux On A Rooted Android Device

To increase the Security of your Android device, all device running 4.3 Jelly Bean and above are ported with SELinux Module, seems like it is fine, but the security it provides is already inside Android Stock Firmware. Not only his, SELinux interferes with a lot of Custom Mods and if your device is rooted, with your root permissions. Therefore, to get full use of Custom Mods and Tweaks, you need to disable SELinux Module in your Android device. The disabling App is available at Google Play Store so, you don’t have to worry about Danger. All you need is a device running Android 4.3 or Android 4.4.2 and device must be rooted too.

unnamed

In this Article,we will show you the exact steps needed to install and apply SELinux Disable Module on your Android Device. Steps are way to easy and since the Application is Official there is no danger in it. Ready your device, Connect it with an Active Internet Connection and make sure that Google Play Store is working.

How To Disable SELinux On a Rooted Android Device

Open Google Play Store.

Screenshot_2014-02-25-22-06-49

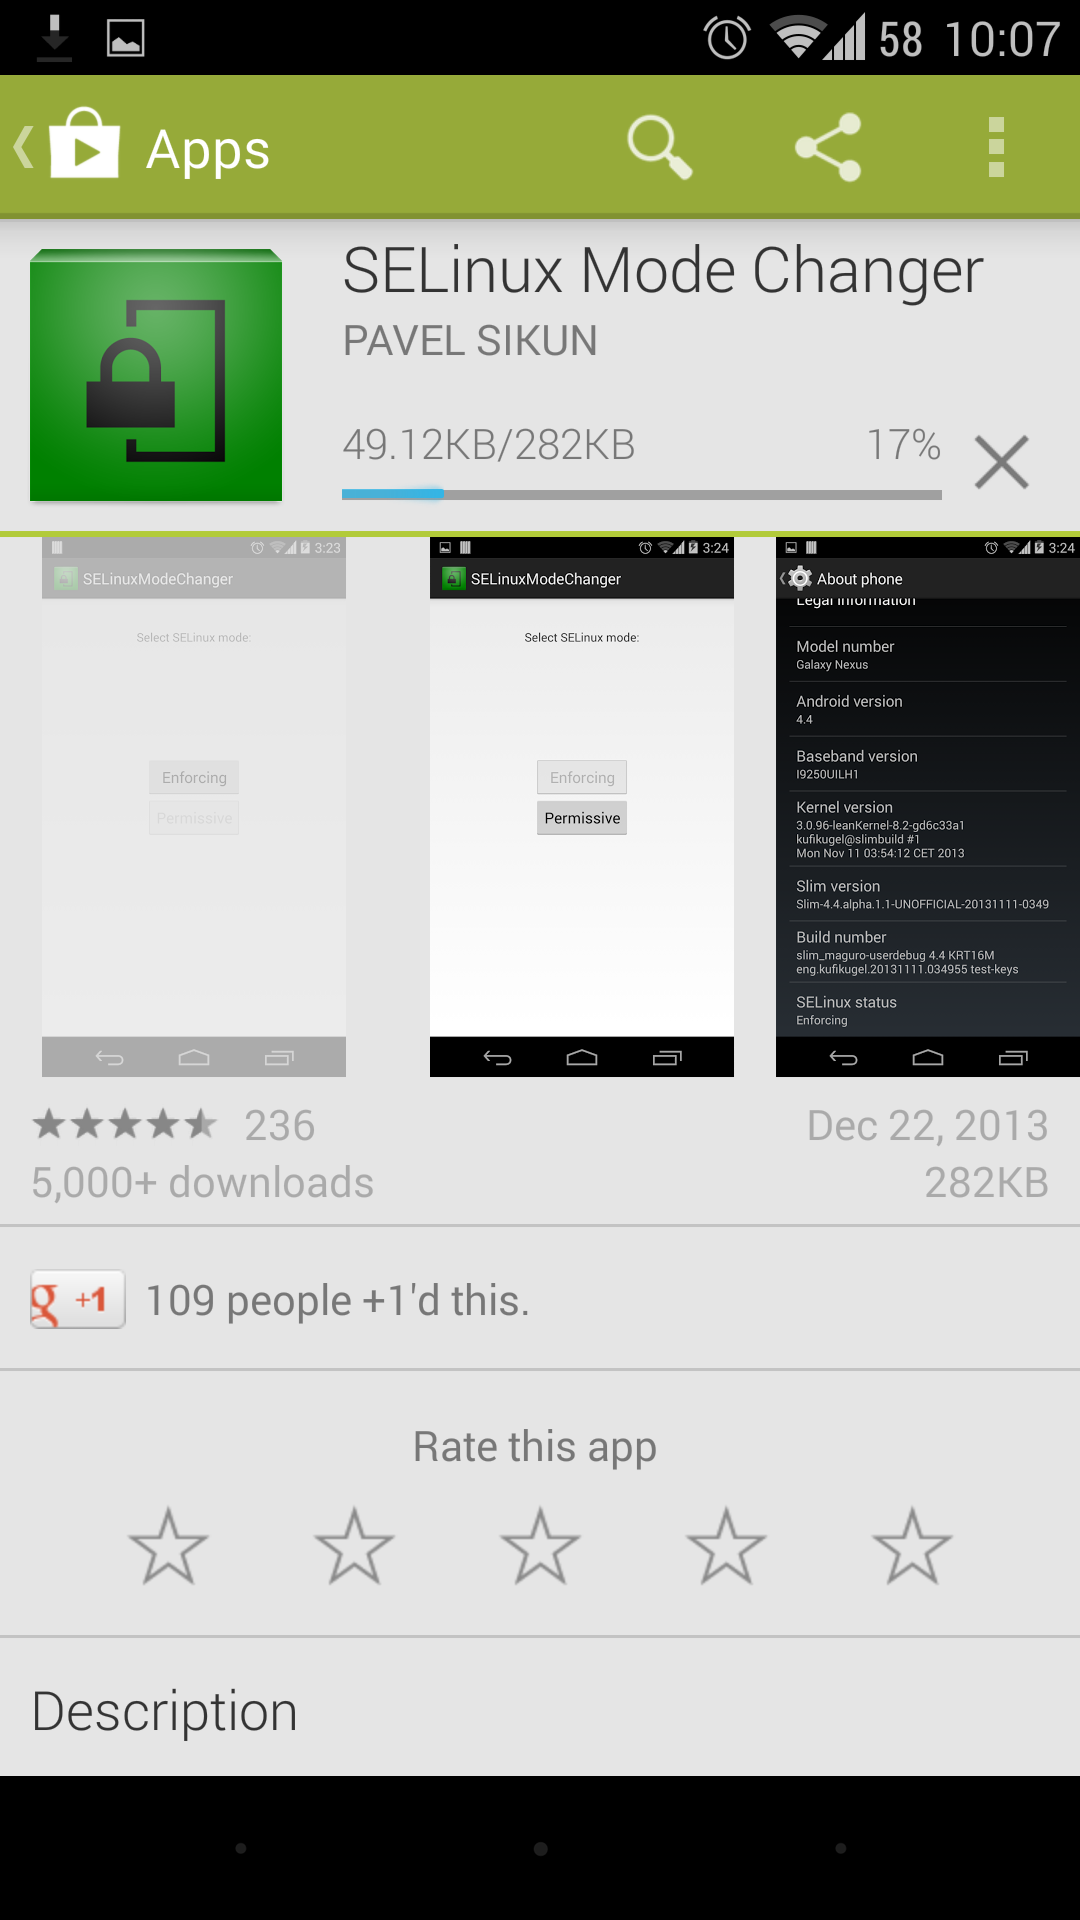
Search For SELinux Mode Changer

Screenshot_2014-02-25-22-07-14

Select SELinux Mode Changer app by Pavel Sikun

Tap Install > Accept.

Screenshot_2014-02-25-22-07-24

Wait for it to download and Install.

Screenshot_2014-02-25-22-07-34

Open the App.

Grant the Super SU Permission.

Screenshot_2014-02-25-22-07-51

Tap Permissive [If your device tell you that SELinux is already disable, you are done, there is nothing to go further for]

Screenshot_2014-02-25-22-07-56

Wanam Xposed Module For Samsung Devices Running Stock Firmware

0
Wanam Xposed Module For Samsung Devices Running Stock Firmware

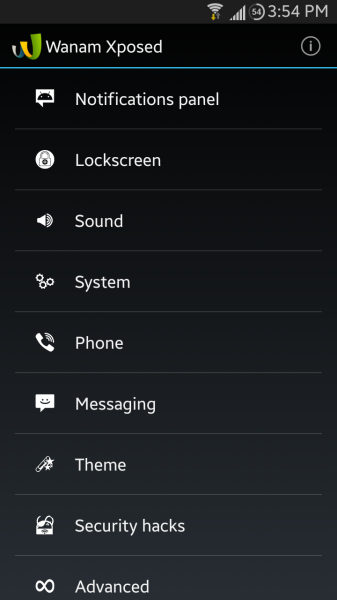
Customizations are not that good when it comes to Stock ROMs, the only good things you will get in Stock ROMs are the Developer Options, but they are not enough either, to get the more out of your Mobile you need to Root it first then install a Custom ROM on it. As far as Rooting is concern, everything is fine as it is not that dangerous, but Custom ROMs can do a lot of damage the worst Bricks your device. So all those who own a Samsung Device and want to do a lot with it without any installation of Custom ROM, Wanam Module can help you in this matter.

Screenshot_2014-02-14-15-54-57-337x600

Since the release of Xposed Framework, users who were afraid of installing Custom ROMs on their device can install Custom Mods without any need of a Custom ROM. Wanam Module of Xposed Framework gives users of Samsung Device to get full control over its features with just Root access.It allows you to change the battery icon and colour, change the carrier label, enable call recording, disable automatic SMS to MMS conversion and a lot more.

Download Required:

XposedFramework Installer: de.robv.android.xposed.installer.apk

To use Wanam Module you need to install Xposed Framework on your device, Follow:

Xposed Framework, A Unique Way To Customize Your Android Device

How To Install Wanam Module On your Device.

  1. Open Xposed Module.
  2. Search for Wanam.
  3. Download It and then Activate it.
  4. Restart your device to take effects.
  5. After the Reboot, Open Wanam Module to start Customizing.