Home Blog Page 475

Customize Messaging App In iOS 7 – How To
0
Customize Messaging App In iOS 7 – How To

While on Android you can add contact picture and the same Picture can be used in Messaging apps as well, you can change the style from Bubble to Square, a Dream Text etc. On the other hand, iOS doesn’t provide such things, you can add Contact photo but the same photo can’t be used for Messaging, you can change the style of receiver messages and sender messages, you can’t if don’t have a Jailbroken device.

Message-Customiser-Bubbles

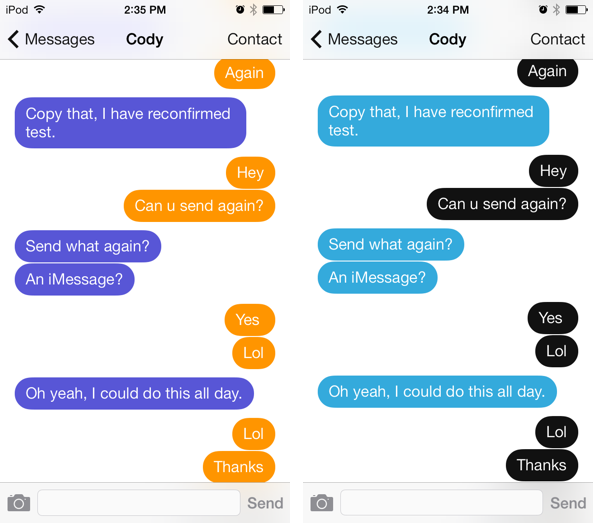
Messages Customiser is an app, that allows you to Customize a lot in messages apps, you can add Contact Picture, add colors to messages, increase the size of Bubble,  add a gradient to older messages, and even remove the tails on each message to get rid of that slightly cartoony look of speech bubbles. Without further ado, let’s find out how.

Jailbreak your iOS Device.

Since the following tutorial needs an iOS device which is Jailbroken, you need to Jailbreak your device. If your device is still in its normal condition. Follow our Jailbreak Section to find out how to Jailbreak your device

Download Messages Customiser:

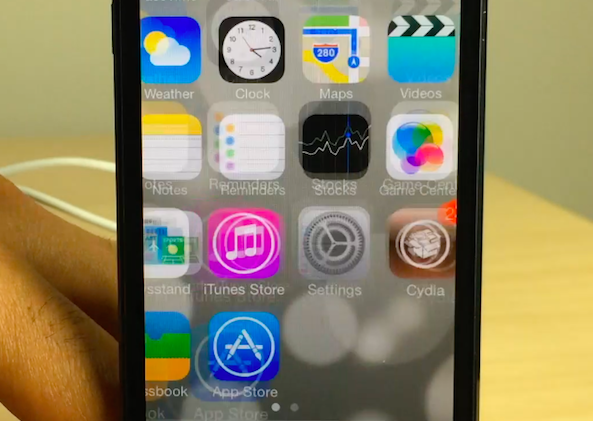
  1. Open Cydia.
  2. Search for Messages Customiser.
  3. Tap Messages Customiser once the search is over.
  4. Tap Install in the top right corner.
  5. Tap Confirm.
  6. Restart your device

How To Use Messages Customiser

  1. Go to Settings.
  2. Open Messages Customiser.
  3. Change the settings you want to change.
  4. Most of them will auto explain themselves.
  5. For the rest here is a list below.
  • App Tint: This is the accent color throughout the Messages app
  • Gradients: This makes more recent messages in conversation view darker and older ones lighter.
  • Show Message Tails: This shows or removes the little tail under each message
  • Show Contact Pictures: This adds the contact’s picture to the conversation .
  • Wide Message Bubbles: This makes the message bubbles able to extend further to the left or right than normal.

Lock Specific Apps Using Finger Scanner In iPhone 5S – How To

0
Lock Specific Apps Using Finger Scanner In iPhone 5S – How To

Last time we showed you how to fill password fields using finger print Scanner using a premium Jailbreak Tweak. Using the same Scanner, you can even Lock Specific apps and then they will only be unlocked Via your Finger Print scan. One thing that a user of iPhone 5S always wanted. The app is not free as usual, since it is providing such useful features and it is Apple Store of-course. Apple should have given this option by default, but there were a lot of problems when they tried it.

BioLockdown

BioLockdown is a Jailbreak Tweak that allows you to Lock only those apps you want using your Finger print. With only $1.99 you can purchase this app and then it is up to you to lock those personal apps of you with style and more security.Here’s how to lock specific settings and apps with your fingerprint on the iPhone 5S.

Jailbreak your iOS Device.

Since the following tutorial needs an iOS device which is Jailbroken, you need to Jailbreak your device. If your device is still in its normal condition. Follow our Jailbreak Section to find out how to Jailbreak your device

Download BioLockdown:

  1. Open Cydia.
  2. Search for BioLockdown.
  3. Tap BioLockdown once the search is over.
  4. Tap Purchase in the top right corner.
  5. Pay and Close it and then Tap install.
  6. Tap Confirm.
  7. Restart your device

How To Use BioLockdown

  1. Go To Settings.
  2. Enable BioLockdown.
  3. Tap New Restrictions.
  4. Select the apps you want to lock.
  5. Once you have selected, Go back and Tap those apps to see whether they give you an option or not

QuizUp for PC ( Windows 7/8/Xp/Vista – Mac )

1
QuizUp for PC ( Windows 7/8/Xp/Vista – Mac )

QuizUp is available for Android that means we can install it on PC. First let me tell you about QuizUp, you have played many quiz games on your Smartphone e.g Logo Quiz etc. QuizUp is different from all of them its has more then 200,000 questions in over 400 topics.ranging from your favorite TV shows and books to sports and music. New topics are added every week so QuizUp will surely test your knowledge while keeping you entertained for hours on end. Today i will tell you how you can download QuizUp for PC and play it on Windows 7/8/8.1/XP/Vista and Mac.

QuizUp for PC

QuizUp for PC ( Windows 7/8/Xp/Vista – Mac ) Features:

Do you think you’ve got what it takes to outsmart players all around the globe and climb the leaderboards?

*POPULAR TOPICS*
– TV Shows: All the top shows, past & present.
– Books: All your favorite bestsellers & authors.
– Movies: Horror, Comedies, Actors, Directors, Famous Quotes & more.
– Sports: Football, Baseball, Soccer, Basketball & more.
– Games: Video Games, Tabletop Games, Classics & more.
– Music: Rock, Pop, Classics, Boy Bands, Hip-Hop & more.

*ADDITIONAL TOPICS*
– General Knowledge
– Art
– Business
– Science
– Geography
– History
– Education
– Lifestyle

*JOIN THE QUIZUP COMMUNITY*
– Chat about your favorite topics in community forums.
– Meet tons of new people with similar interests.

How To Install QuizUp for PC ( Windows 7/8/Xp/Vista – Mac ):

  1. You need an Android emulator to run this game on your Windows PC or MAC. We recommend using Bluestacks. Use our guide to install it on your PC.
  2. After downloading and installing Bluestacks, Download QuizUp Apk File
  3. Open the downloaded APK file now, and let Bluestacks install it.
  4. Open BlueStacks now > All Apps > QuziUp.
  5. The game will start now, follow the on screen instructions.
  6. Follow the initial screen,  you’ll be able to play it.
  7. Tap the screen by clicking inside the game frame.
  8. Enjoy the most tough game ever!
  9. Don’t forget to let us know about your high score.
  10. That’s All!

Speed Up Animations On Your iPhone/iPad – How To

0
Speed Up Animations On Your iPhone/iPad – How To

There are two kinds of people in this world, or should I say three, One who wants only speed in their Electronics, Second those who wants the looks only doesn’t care about speed at all, Third those who care about both, a little looks and speed they want both. In iOS 7 the case is same, Animation is there to give good looks on opening and closing, there is way to stop it too then you will only get performance, but there is not a single way that can make both things happen on one thing, well there is if you have a Jailbroken device.

Speed-up-ios-7

NoSlowAnimations is a Jailbreak tweak, that increases the performance of Animation, giving you both speed and Looks at the same time. The app is totally free, available at Apple Store and can be installed on any iOS 7 device, a Jailbroken iOS 7 device. For an even larger boost in perceived speed, you can also disable Motion afterwards. Below are the steps for how to speed up the animations on your iPhone / iPad running iOS 7.

Jailbreak your iOS Device.

Since the following tutorial needs an iOS device which is Jailbroken, you need to Jailbreak your device. If your deviceis still in its normal condition. Follow our Jailbreak Section to find out how to Jailbreak your device

Download NoSlowAnimations:

  1. Open Cydia.
  2. Search for NoSlowAnimations.
  3. Tap NoSlowAnimations once the search is over.
  4. Tap Install in the top right corner.
  5. Tap Confirm.
  6. Restart your device
  7. After the Restart you will Automatically feel that the Animations are pretty much faster than before.

Alternate Way To Increase Speed

  1. Go To Settings.
  2. Go To Accessibility.
  3. Turn On Reduce Motion.
  4. Bask in the perceived speed

10 Fantasy Wallpapers For Your Desktop – Free Download

0
10 Fantasy Wallpapers For Your Desktop – Free Download

I personally love Fantasy wallpapers for my desktop and even for my smartphone. That’s why today i am sharing 10 Fantasy Wallpapers For Your Desktop. These wallpapers will make your desktop colourful, a world made with mysterious forests, hidden temples. Enjoy fantasy world on your desktop.

Also See More Wallpapers: HD Wallpapers

digital-fantasy-art

fantasy_desktop_background_1440x900_hq_widescreen_wallpapers_for_deskop

fantasy_wallpaper_girls

fantasy-fairy-1240x-1024

Fantasy-Girl-Full-HD-Wallpaper

Fantasy-Pictures-8

Fantasy-Wallpaper-Backgrounds

final-fantasy-digital-64314

garcya.us_fantasy_wallpaper072

HD-Fantasy-Wallpapers-For-Desktop-23

windows-fantasy_275108

Get Free Wifi Tethering On iPhone Running iOS 7 – How To

0
Get Free Wifi Tethering On iPhone Running iOS 7 – How To

If you own one of the Verizon or T-Mobile Variants of iPhone, then you must have been sick of Paying the extra Carriers Charges to use your iPhone Mobile data as a Wi-Fi Hotspot. But what if you just need to pay only once instead of paying monthly to use as your Mobile data as much as you want, You wan to know how, We will show you how. If your device is Jailbroken and you are ready to do such thing, just follow the erst of the guide to find out how.

Free-Wifi-Tethering

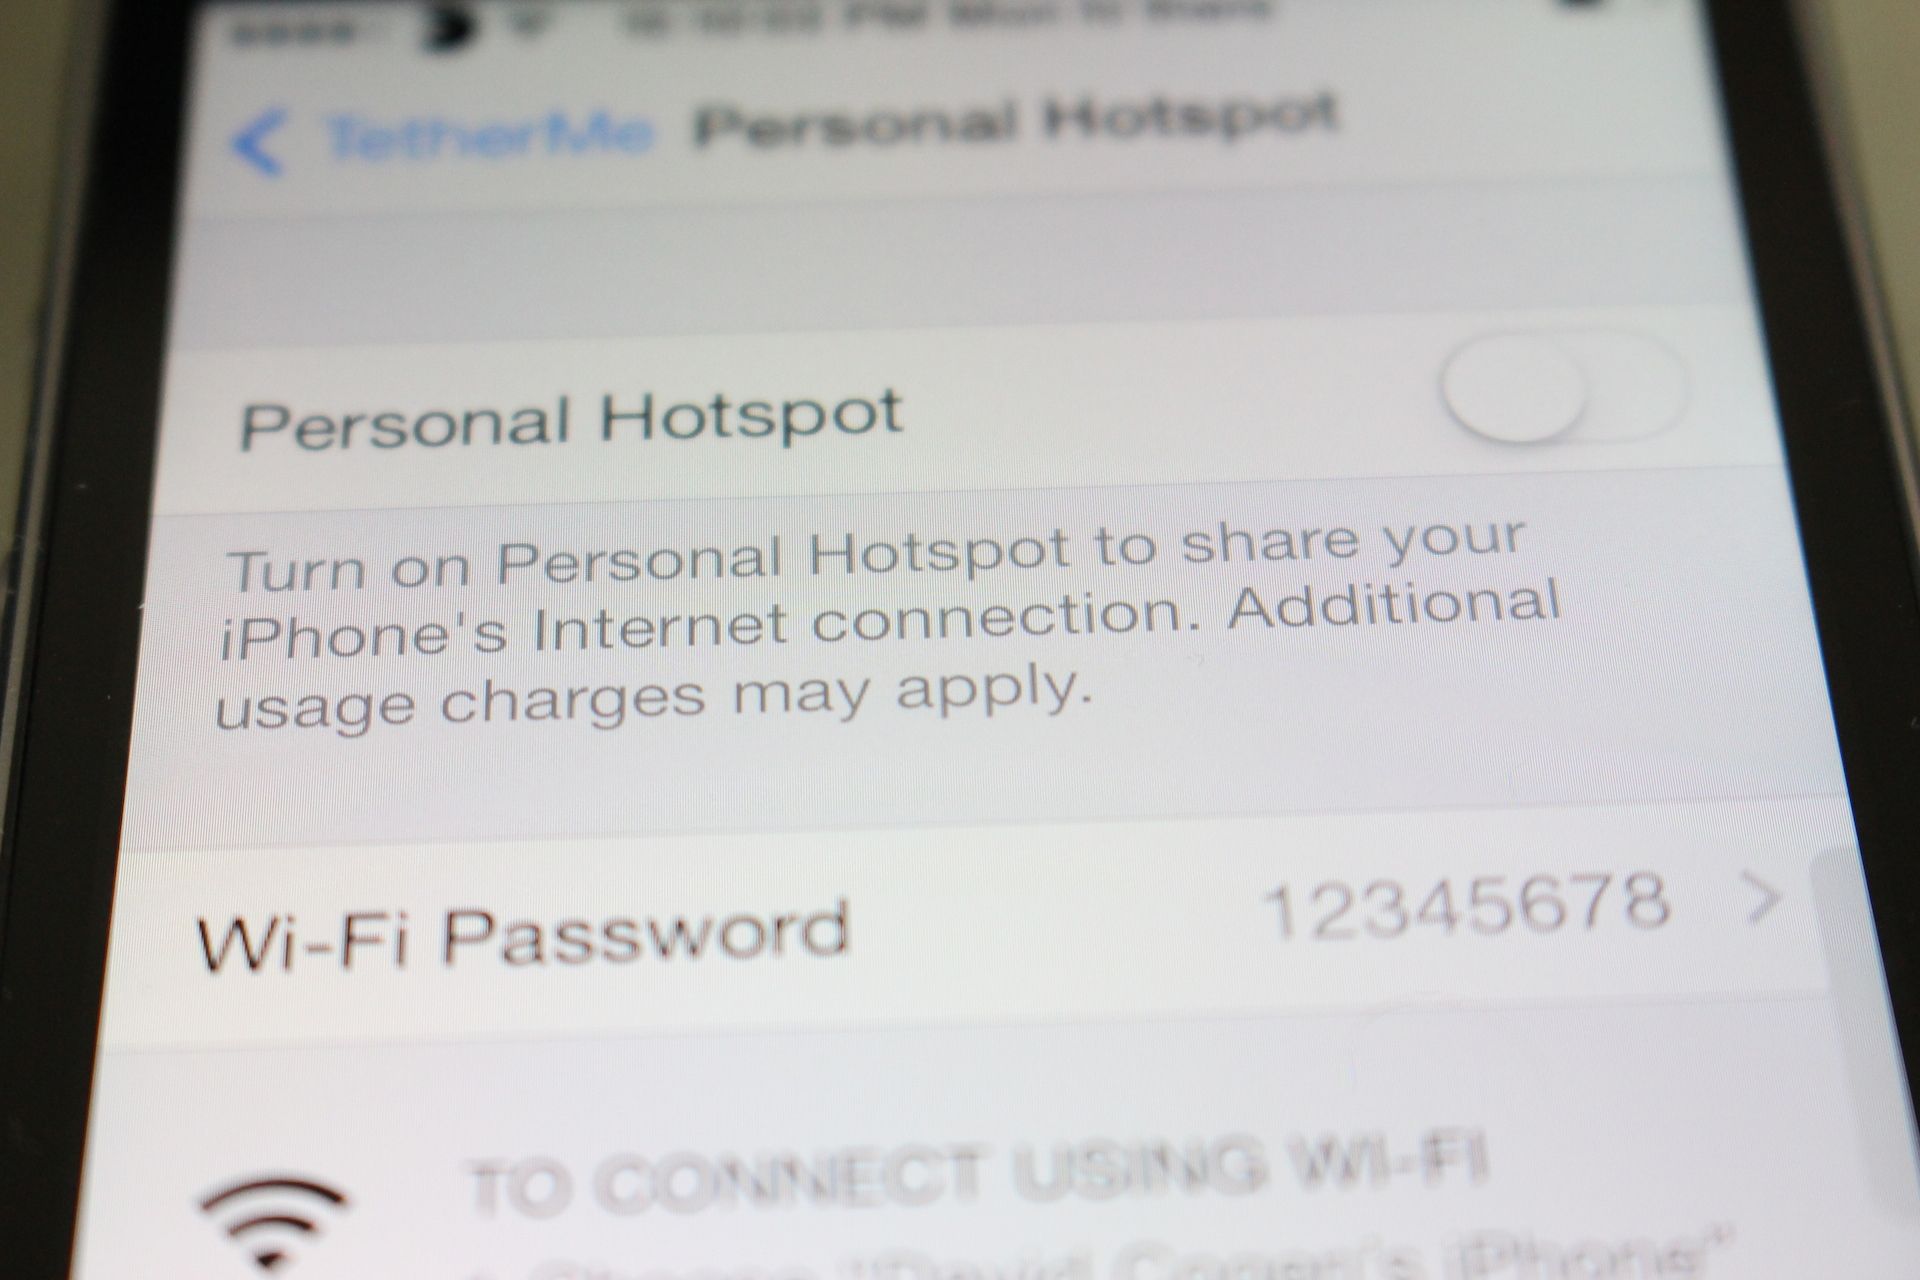
TetherMe is a Jailbreak Tweak that allows you to use your Mobile data as Wi-Fi hotspot, all you need to do is to pay a Sum of $5 only one time and for the rest of your time, you can use your Mobile data as Wi-Fi Hotspot for free, it even has some neat options for VPN users. Here is how you can install and use it on your device.

Jailbreak your iOS Device.

Since the following tutorial needs an iOS device which is Jailbroken, you need to Jailbreak your device. If your device is still in its normal condition. Follow our Jailbreak Section to find out how to Jailbreak your device

Download TetherMe :

  1. Open Cydia.
  2. Search for TetherMe.
  3. Tap TetherMe once the search is over.
  4. Tap Purchase in the top right corner.
  5. Pay and Close it and then Tap install.
  6. Tap Confirm.
  7. Restart your device

How To Use TetherMe

  1. Go To settings.
  2. Tap TetherMe.
  3. Tap on Personal Hotspot.
  4. Turn on Personal Hotspot.
  5. You can put a Password for Hotspot or from where it can get data from etc.

Wake Your iOS 7 Device Using Air Gesture – How To

0
Wake Your iOS 7 Device Using Air Gesture – How To

All the iPhone users must have been jealous of Air Gesture used in Galaxy Devices, it might not be a most functional feature, most doesn’t even used it, but still it is quite a Show Off, which was once Siri when it was released first. Too bad that iPhone doesn’t give such thing, now I didn’t say that iPhone doesn’t support, you can still wake your device with a single Swipe over your device. Like Rooting in Android, Jailbreaking in iOS has opened a lot of opportunities for the people to try new things on their device.

Air-Gestures-for-iPhone

SleekSleep is a Jailbreak Tweak that gives you at-least one of the Air Gesture feature on your iPhone, with SleekSleep you can hover your hand over the proximity sensor and wake your device and also put it to sleep.

Jailbreak your iOS Device.

Since the following tutorial needs an iOS device which is Jailbroken, you need to Jailbreak your device. If your deviceis still in its normal condition. Follow our Jailbreak Section to find out how to Jailbreak your device

Download SleekSleep:

  1. Open Cydia.
  2. Search for SleekSleep.
  3. Tap SleekSleep once the search is over.
  4. Tap Purchase in the top right corner.
  5. Pay and Close it and then Tap install.
  6. Tap Confirm.
  7. Restart your device

How To Use SleekSleep

  1. Go To Settings.
  2. Tap SleekSleep.
  3. You can change Settings here, Adjust the Sensitivity of the Sensor.I recommend immediately changing the Cooldown setting to zero and the swipes to 1 for a better performing tweak

Install CWM 6.0.4.6 Recovery on Samsung Galaxy S4 GT-I9500

Install CWM 6.0.4.6 Recovery on Samsung Galaxy S4 GT-I9500

Samsung’s recent flagships S series smartphone Galaxy S4 got updated to Android 4.4.2 KitKat a few days ago. The new update has boosted up the device’s performance and is way too smooth and stable. There are minor UI changes, some apps have got a new look as well in the KitKat update. New KitKat updates require a proper compatible CWM or TWRP recovery [if you want to use] to work with and the earlier versions of custom recoveries might not be completely working with the latest Android 4.4.2 KitKat update, thus a new version of recovery is required in the case.

ClockworkMod 6.0.4.6 is available for our beloved Samsung Galaxy S4 GT-I9500 on the XDA-developers forum and can be installed easily. While some of you’re wondering about what is this custom recovery and why you should install it on your device, don’t worry, we’ll surely have a look on a brief introduction of a custom recovery first and only then move towards the installation instructions.

A custom recovery allows you to install custom roms, mods etc. Along with these, you can make a Nandroid backup, this helps you a lot as you can move back to the previous working state of your phone at any time you want if you have backed up your current system. In some cases, to root the phone you need to flash SuperSu.zip file in the custom recovery, having installed the recovery may help you while in some cases to install the recovery easily, you need to have the phone rooted. You can also wipe cache and dalvik cache of your phone using a custom recovery. One of the advantages is mounting the sdcards, this option is handy when you want to access your device’s internal memory while you’re in recovery mode.

    1. This guide is only for Samsung Galaxy S4 GT-I9500. Before installing this, make sure that your device is listed below. Check your device’s model number in Settings > More > About Device.
    2. Download the file carefully for your device.
    3. Make sure that your device’s battery is charged over at least 60%. Highly recommended in order to prevent any mishap during the recovery installation process.
    4. Make sure that you backup your important media content, ContactsCall Logs & Messages. This is highly recommended just in case something goes wrong and you need to reset your phone.
    5. Use only OEM data cable to establish connection between your phone and PC. Turn off your Anti Virus and Firewall to prevent any connection issues. Also enable USB debugging mode on your phone if you face connection issues.
    6. Make sure that your laptop has enough battery charged to perform the operations, if you’re using a PC then make sure that it has appropriate power supply.
    7. Recovery works well for Galaxy S4 GT-I9500 running on all Android versions, no need to worry about the Android version.
    8. Follow the installation instructions carefully, proceed only if you’ve read properly.

Disclaimer: The methods involved in flashing custom roms and rooting your phone is highly custom and may result in bricking your device, and has nothing to do with Google or the device manufacturer that is SAMSUNG in our case. Also rooting your device will void its warranty and you will be no longer eligible for any kind of free device services by the manufacturers/warranty providers. In case of any mishap we may not be held responsible. Follow these instructions to the letter to avoid any mishap or bricking. Make sure that whatever you do, you are doing it at your own responsibility.


Files you need to download:

    • Download and Install Samsung USB drivers – Get Here.
    • Download and Extract Odin3 v3.09 – Get Here
    • Enough confidence to flash a recovery :-)!

Download CWM Recovery.tar file for your device

How to Install CWM 6.0.4.6 Recovery on Galaxy S4 GT-I9500:

  1. Download the file for your variant carefully.
  2. Open Odin3.exe.
  3. Put your phone in download mode, to do so, turn it off completely. Now turn it on by pressing and holding Volume Down + Home Button + Power Key, you should see a warning now, press Volume Up to continue.
  4. In case the download mode method doesn’t work for your device, try one of the methods from this guide.
  5. Connect your phone to your PC.
  6. The ID:COM box in Odin should turn blue now, that means your phone is connected properly in download mode.
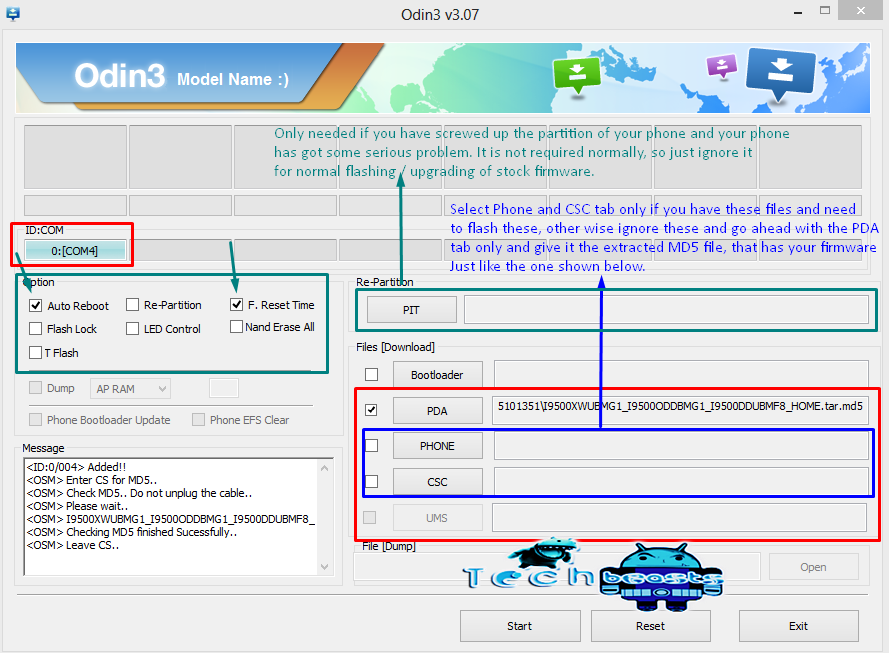
  7. Click the PDA tab in Odin and select the downloaded Recovery.tar file and let it load. Your Odin should look exactly as shown below, make sure that no extra options are selected.odin_explained
  8. Hit start now and sit back, it will take a few seconds to flash the recovery and your device will reboot.
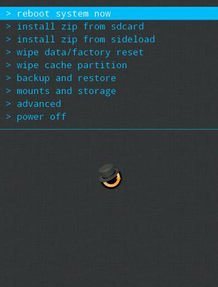
  9. Press and hold Volume Up + Home Button + Power Key to access the CWM 6 Recovery that you just installed.
  10. You can backup your current ROM and do a lot of other things using the options in CWM 6 Recovery.
  11. That’s All.

In case you got any queries or you’re facing any difficulties regarding this post, please feel free to stop by the comment box below and let us know about it. We will surely get back to you as soon as possible. Thanks all.

Credits

Install CWM 6.0.4.7 on Samsung Galaxy Note 3 [How-To Guide]

Install CWM 6.0.4.7 on Samsung Galaxy Note 3 [How-To Guide]

Samsung recently rolled out Android 4.4.2 KitKat for it’s latest flagship Galaxy Note successor device, Galaxy Note 3. The new update packed up tons of performance enhancements, bug fixes, minor UI changes etc. The impact this update left on Android development is, it crashed the previous versions of ClockworkMod recovery and a new version was immediately needed after that. XDA senior member rolled out the new version of CWM recovery versioned as CWM 6.0.4.7 soon after the update, the new version works flawlessly with the KitKat firmware on Galaxy Note 3 variants.

So, you all probably know the worth of having a CWM or TWRP recovery installed and you would like to have to running on your Galaxy Note 3 with Android 4.4.2 KitKat atop, to overcome this need we will be going through the installation guide for the recovery. Before we head towards the installation instructions, we will first have a look on a brief intro of a custom recovery and also know why you should install it.

A custom recovery allows you to install custom roms, mods etc. Along with these, you can make a Nandroid backup, this helps you a lot as you can move back to the previous working state of your phone at any time you want if you have backed up your current system. In some cases, to root the phone you need to flash SuperSu.zip file in the custom recovery, having installed the recovery may help you while in some cases to install the recovery easily, you need to have the phone rooted. You can also wipe cache and dalvik cache of your phone using a custom recovery. One of the advantages is mounting the sdcards, this option is handy when you want to access your device’s internal memory while you’re in recovery mode.

    1. This guide is only for Samsung Galaxy Note 3, for the variants which are listed below. Before installing this, make sure that your device is listed below. Check your device’s model number in Settings > More > About Device.
    2. Download the file carefully for your device.
    3. Make sure that your device’s battery is charged over at least 60%. Highly recommended in order to prevent any mishap during the recovery installation process.
    4. Make sure that you backup your important media content, ContactsCall Logs & Messages. This is highly recommended just in case something goes wrong and you need to reset your phone.
    5. Use only OEM data cable to establish connection between your phone and PC. Turn off your Anti Virus and Firewall to prevent any connection issues. Also enable USB debugging mode on your phone if you face connection issues.
    6. Make sure that your laptop has enough battery charged to perform the operations, if you’re using a PC then make sure that it has appropriate power supply.
    7. Recovery works well for Galaxy Note 3 running on all Android versions, no need to worry about the Android version.
    8. Follow the installation instructions carefully, proceed only if you’ve read properly.

Disclaimer: The methods involved in flashing custom roms and rooting your phone is highly custom and may result in bricking your device, and has nothing to do with Google or the device manufacturer that is SAMSUNG in our case. Also rooting your device will void its warranty and you will be no longer eligible for any kind of free device services by the manufacturers/warranty providers. In case of any mishap we may not be held responsible. Follow these instructions to the letter to avoid any mishap or bricking. Make sure that whatever you do, you are doing it at your own responsibility.

Pre – Requisites:

    • Download and Install Samsung USB drivers – Get Here.
    • Download and Extract Odin3 v3.09 – Get Here
    • Enough confidence to flash a recovery :-)!

Download CWM Recovery for your device:


How to Install CWM 6.0.4.7 Recovery on Galaxy Note 3:

  1. Download the file for your variant carefully.
  2. Open Odin3.exe.
  3. Put your phone in download mode, to do so, turn it off completely. Now turn it on by pressing and holding Volume Down + Home Button + Power Key, you should see a warning now, press Volume Up to continue.
  4. In case the download mode method doesn’t work for your device, try one of the methods from this guide.
  5. Connect your phone to your PC.
  6. The ID:COM box in Odin should turn blue now, that means your phone is connected properly in download mode.
  7. Click the PDA tab in Odin and select the downloaded Recovery.tar file and let it load. Your Odin should look exactly as shown below, make sure that no extra options are selected.odin_explained
  8. Hit start now and sit back, it will take a few seconds to flash the recovery and your device will reboot.
  9. Press and hold Volume Up + Home Button + Power Key to access the CWM 6 Recovery that you just installed.
  10. You can backup your current ROM and do a lot of other things using the options in CWM 6 Recovery.
  11. That’s All.

10 Best Free Mac Apps

0
10 Best Free Mac Apps

Well I am surprised to hear some apps are free in Mac and to do the best thing for you we can provide a good list of all those well not all of them the Top 10 free apps in Mac OS X. Mac users can afford those expensive apps, but the problem is when those Mac Machines are given to those people who can’t afford such Expensive apps, like you know some people Win it in some sort of Lottery type thing. All these apps are not very important but in everyday life they can provide a lot of ease. Lets head towards the list, Scroll Down, Enjoy and Download the ones you like.

Screenshot_19

1. Adium

Adium is a free instant messaging application for Mac OS X that can connect to AIM, MSN, XMPP (Jabber), Yahoo, and more. Adium is a great Chatting app that lets you connect with your friends and other people, whether they are on Facebook or Gchat.

overview

2. Kindle For Mac

Kindle for Mac allows you to sync your reading progress between your Tablet, iPhone, iPad. You can always customize the color of your Kindle .Use the built-in dictionary in the Kindle for Mac app to look up the definition of words without interrupting your reading.  Search inside any book to find a topic, character, or section you want to revisit.

kindleformac

3. Caffeine 

Caffeine is a tiny program that puts an icon in the right side of your menu bar. Click it to prevent your Mac from automatically going to sleep, dimming the screen or starting screen savers. Click it again to go back. Right-click (or ⌘-click) the icon to show the menu.

mzi.nvflrkie

4. CheatSheet

CheatSheet is the best program for Navigation, it grants you the encyclopedia of whatever keys you are using, the only thing that will bug you is the pop-up that appears every-time you press a key.

cheatsheet-view-all-keystrokes

5. CloudApp

The most neat way to share all your media over web is the CloudApp, by web i mean the files you share with your Co-workers, Friends and Family etc. CloudApp also generates a shorten URL to send to people who can’t have direct access to your Cloud Storage.

Screenshot_16

6. Dropbox

Dropbox is now available anywhere, on almost every famous Platform. You can add almost every type of file on Dropbox and view or share if from anywhere via Wi-Fi enabled Device. The device allows you to store 2.5 GB of data at first and then it is 100$ for a year for 100GB of Storage, after all it is for Mac.

Screenshot_17

7. Found

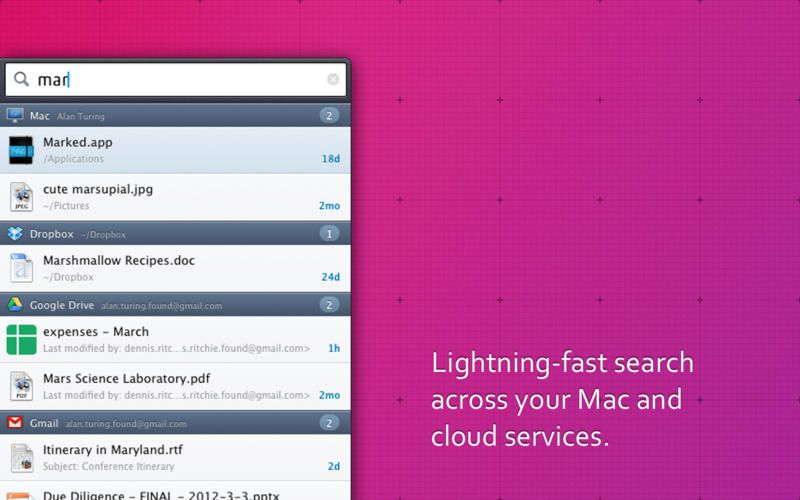
Found provides a lightning-fast, intuitive search experience that finds files across your Mac and personal cloud services, including Dropbox, Evernote, SkyDrive, Google Drive/Docs, and Gmail (attachments). It also lets you to search all the files over your Mac, whether it is over a Cloud Storage or in your Sdd.

screen800x500

8. OnyX

OnyX is an all-in-one system maintenance tool and optimizer. It is a very simple and light application that comes with a variety of maintenance tools that can be run to make sure that you are enjoying your system at its fullest. OnyX keeps your Mac secure and organize it in a way where your Machine works fast and smooth.

onyx

9. SelfControl

If you have no control over yourself and wants to get off Twitter and Facebook and wants to focus over your life goals and other stuff, SelfControl can help you in this matter, it helps you in getting off Facebook and Twitter and reduce its addiction, so you can focus on other things around you.

logo

10. Skitch

Evernote is one of the best app to keep your important notes with you Everytime. The same Team has created Skitch as a way to visualize your documents. You can apply different annotation to PDF documents and it is compatible on both Phone and PC.

Screenshot_18

Use Multiple Profiles In Chrome Like a Ninja – How To

0
Use Multiple Profiles In Chrome Like a Ninja – How To

If you have friends who frequently visits your house and uses your computer especially the same browser that you use and by the popularity of it, I am guessing you also use Google Chrome. Now when a lot of people start using the same profile, the settings gets mixed up and no one knows what they saved before. Now I don’t care about your friends and any other who is using your computer, my only concern here is you, so today I will show you how to use Multiple Profiles in Google Chrome, so even if your friends & Family keeps using the same browser, your settings remains the same.

Screenshot_15

The process was simple before as Chrome shows a whole Tab for the Personal Stuff but because of Security they removed it and now it is not hidden but a put to a little depth. Now if you want to save your Profile, just follow the rest of the Guide and you will be using your own Profile without letting anyone know.

How To Enable Multiple Profiles in Chrome

  • Go To Settings.
  • Scroll Down till you See Users.
  • Click New User.

Screenshot_12

  • Choose an Icon, Choose a Name and Click Create.

Screenshot_13

  • Now on the Top Left side of your Browser, you will see the same icon that you selected.
  • Click the Icon and Choose the Profile you want to use.

Screenshot_14

  • That is all.

10 iOS7 Wallpapers That Look Great On Your iPad/iPhone/iPod Touch

0
10 iOS7 Wallpapers That Look Great On Your iPad/iPhone/iPod Touch

With all new look and new features iOS 7 is no doubt irresistible to ignore. But for 1 thing i don’t like iOS because we can’t customise it the way i want. Well all the things apart Apple is not doubt getting on Top. Today i will give you 10 iOS 7 Wallpapers that will look awesome on your Apple devices. Following are wallpapers with their designers link do check them for more collections.

Blrrr by Blrrr.com

blrrr

iOS Grid Wallpaper by Kal Michael

kal-machael-iphone

Light5 by Wasimagined

light5-wasimagined

LS Climacons by KillingTheEngine

ls-climacons-light-edition

Glow by Nik

nik-glow-iphone

Noir* by Boris P. Borisov

noir-iphone

Parallel by Simon C Page

parallel-wallpapers

Rainbowz by AppleEdge

rainbowz

Trio Hot, Cool and Cold by Marc Edwards

trio-hot-iphone

vector-wallpaper

Vector wallpaper by lambo311

Following are the links for iPad Wallpapers please do check them.

IPad Wallpapers