Home Blog Page 471

Install TWRP Recovery On Sprint HTC One M8 and Root it – How To

0
Install TWRP Recovery On Sprint HTC One M8 and Root it – How To

Last Time we posted How To Root International HTC One M8, today we are about to put another device to its rooting, Sprint variant of HTC One M8. After the release of HTC One M8 all the carriers are lined up to get their logo on HTC One M8. The specs are the same no matter what variant you are using,Snapdragon 801 Quad-core 2.3GHz processor, 5” Full-HD 1080p Corning Gorilla glass display, Ultra pixel Duo camera, Bluetooth 4.0 and latest Android software support with Sense UI 6 based on KitKat 4.4.2. This device was released just a week ago and rooting method if its international version aside even the Carrier versions are getting their rooting methods and Sprint is one of them.Rooting allows you to get full control over your device, Stock apps and mods are good, but installing Custom Mods gives you better support and great battery life, you might need to delete some Stock apps from the device, a non-rooted device can’t do that, but a rooted one has the power to remove stock apps too.

onefeat

In this Article, we will show you How To Root and Install CWM Recovery On Sprint HTC One M8. But before we begin, Make sure that:

  1. That you have a Well Charged Battery, 60%-80% is better.
  2. Back-Up all your important ContactsCall Logs & Messages.It is highly recommended in case of any mishap or data loss to back up all your important data.
  3. Back-Up your Mobiles EFS Data. 
  4. Check your device model, Go To Setting > About and Make sure that it is HTC One M8(Sprint).
  5. Do-not try it on International HTC One M8.
  6. Bootloader Must Be Unlocked:  Follow Unlock Bootloader Of HTC Smartphones.
  7. Make Sure Fastboot Is Configured: How to Install Android Adb & Fastboot Drivers on Your Windows PC [Guide]
  8. Enable USB Debugging Mode
  9. Download USB Driver For HTC Devices: Link

Disclaimer:

The methods involved in flashing custom roms and rooting your phone is highly custom and may result in bricking your device, and has nothing to do with Google or the device manufacturers which is HTC in our case. In case of any mishap we may not be held responsible. Follow these instructions to the letter to avoid any mishap or bricking. Make sure that whatever you do, you are doing it at your own responsibility.

Downloads Required:

Download TWRP ImageLink

Download Super SU: Link (update-Super-SU-v1.94.zip)

How To Install TWRP Recovery On Sprint HTC One M8

  • Copy the TWRP Image in the Fastboot folder.
  • Go To Phone Settings and Disable Fastboot in Power Options.
  • Turn Off the Device.
  • Turn off your phone and open HBOOT mode. How? Press and hold Volume Down + Power button until you see some text on Screen, Select Fastboot in the Menu
  • Connect your Device With PC.
  • Now Open Command prompt in Fastboot Folder, How? Hold Shift Key and Right Click anywhere in the Fastboot folder .
  • Type in the Following Command one after the Other:
  1. fastboot erase cache
  2. fastboot flash recovery twrp-m8.img
  3. fastboot reboot 
  • Your device will Now Reboot and TWRP Will be installed on your device.

How To Sprint Root HTC One M8

  • Copy the Super SU.zip files to the Root of your Device Sdcard.
  • Turn Off your device.
  • Turn off your phone and open HBOOT mode. How? Press and hold Volume Down + Power button until you see some text on Screen, Select Recovery in the Menu
  • Tap On Install and Select the Super SU File and slide the button to start the process.
  • Once done go back to TWRP Recovery and Reboot the Device.

Also See: How To Root HTC One M8(International)

Also See: How To Root Verizon HTC One M8

After a Successful reboot, Download Root Checker app to Verify Root Access.

iOS 7 Push Notifications Not Working [ How To Solve ]

0
iOS 7 Push Notifications  Not Working [ How To Solve ]

Buying an Apple Product is a little difficult as compare to any other device and now even using them is quite expensive if any problem occurs, I mean searching for a solution of a Problem even if it is a Symbian is an easy task, but for Apple Products there aren’t many ways to solve them except the only and the Big one, which is said to be the last an only option for any user. Factory reset a device is the final and last option but it seems like in Apple devices it is a more often experience for users to Factory Reset their device even if it is a simple Problem.

connect-to-itunes-error

Today our Discussion is about Push Notifications, after the release of iOS 7 users have Experience this problem more than any other and there are many solutions available on net but seems like none worked except for a good factory reset. We will share with you What kinds of problem that usually occurs and give the solutions that usually works for the users.

Problem That Usually Occurs:

  1. “Cannot connect to YouTube”
  2. “Connect to iTunes to use Push notifications”

You will even see the Connect To iTunes Screen on Reboot.

TS3305--connect_to_itunes-001-en

Solutions To Solve Such Problems:

Solution No. 1:

  1. Download iTunes Latest Version.
  2. Make Sure that your PC/Mac has an Active Internet Connection.
  3. Connect your device with PC.
  4. After the Sync Completes, you will get your Youtube Access Back along with Push Notifications
  5. If any Message appears about downloading something, just allow it, it will download a Package update and your problem will be sloved

Solution No. 2:

  1. Download RedSn0w latest Version.
  2. Connect your device with PC.
  3. Open RedSn0w.
  4. Click on Extras
  5. Click on Even More.
  6. Click on Deactivate.
  7. Your Device will be deactivated and you will see an Activate Screen.
  8. Open iTunes on your Computer.
  9. iTunes will detect a Deactivated iDevice and tries to Activate it.
  10. Just wait a little and Enjoy your iDevice with Push Notifications Enabled

Solution No. 3 (Easy But Not Recommended)

  1. Back-up all your Data using iTunes or iCloud (recommended)
  2. Do a Factory Reset
  3. Restore Data From iCloud.
  4. Voila! everything is back in Business

Office Mobile apk for Android 15.0.2720.2000 – Free Download

2
Office Mobile apk for Android 15.0.2720.2000 – Free Download

Microsoft Office Mobile is the official Office companion optimized for your Android phone. You can access, view and edit your Microsoft Word, Microsoft Excel and Microsoft PowerPoint documents from virtually anywhere. Documents look like the originals, thanks to support for charts, animations, SmartArt graphics and shapes. When you make quick edits or add comments to a document, the formatting and content remain intact.

Office Mobile apk for Android

Office Mobile apk for Android 15.0.2720.2000 KEY FEATURES:

Access documents from virtually anywhere:
• Cloud – With your phone, you can access Office documents that are stored on OneDrive, OneDrive for Business, or SharePoint.
• Recent Documents – Office Mobile is cloud-connected. The documents you’ve recently viewed on your computer are readily available on your phone in the recent documents panel.
• Email Attachments – You can view and edit Office documents attached to email messages.*

Office documents look stunning:
• Great-Looking Documents – Word, Excel and PowerPoint documents look great on your phone, thanks to support for charts, animations, SmartArt Graphics, and shapes.
• Optimized for phone – Word, Excel and PowerPoint have been optimized for the small screen of your phone.
• Resume Reading – When opening a Word document from OneDrive or OneDrive for Business on your phone, it automatically resumes at the place where you left off reading, even if you last viewed the document on your PC or tablet.
• Presentation Views – The Slide Navigator view in PowerPoint lets you browse slides faster, while speaker notes help you practice your presentation.

Make quick edits and share*:
• Documents Remain Intact – Formatting and content remain intact when you edit Word, Excel, or PowerPoint documents on your phone.
• Create – You can create new Word and Excel documents on your phone.
• Comments – You can review comments that have been made in Word and Excel documents on your phone and add your own comments.

* Sign in with a free Microsoft account to create, edit and save documents for home use. A qualifying Office 365 subscription is required to create, edit and save documents for business use. Qualifying plans include: Office 365 Small Business Premium, Office 365 Midsize Business, Office 365 Enterprise E3 and E4 (Enterprise and Government), Office 365 Education A3 and A4, and Office 365 ProPlus.

Download Office Mobile apk for Android 15.0.2720.2000:

HTC One (M8) vs Samsung Galaxy S5 vs Sony Xperia Z2 – Comparison

2
HTC One (M8) vs Samsung Galaxy S5 vs Sony Xperia Z2 – Comparison

All the Titans have unveiled their flagship devices in the recent few days. Highly anticipated devices Samsung’s Galaxy S5 and Sony’s Xperia Z2 came out at MWC 2014 while HTC was left behind and kept the rumors mills running for a few days and just today it pulled the curtains off from it’s new One named as HTC M8. All these giants will release these devices in the markets starting from the month of April as Samsung told the users that about availability of Samsung Galaxy S5 in 150 countries by April 11 and Sony shown its plans to make the device available by 14th of April, 2014 whereas, HTC announced that the device will available shortly after it’s official unveiling. LG has also unveiled it’s G Pro 2 but that does not really stand in competition because of it’s phablet nature.

Now that the Taiwanese manufacturer has brought up it’s device, a set of thoughts will definitely take birth when you’ll have to decide on what smartphone you’re going to spend your hard earned bucks. The problem actually spreads, when you know all the manufacturers have produced the smartphones equivalent to beasts and none of these is less then each other. But still, there is a number of factors to keep in view when you’re going to buy a smartphone and these factors help you to decide the best product. To overcome this complexity, we’re going through a detailed comparison of the three Giant smartphones including Samsung Galaxy S5, Xperia Z2 and recently launched HTC’s M8. Let’s move forward and pick up the smartphone that suites you the best.

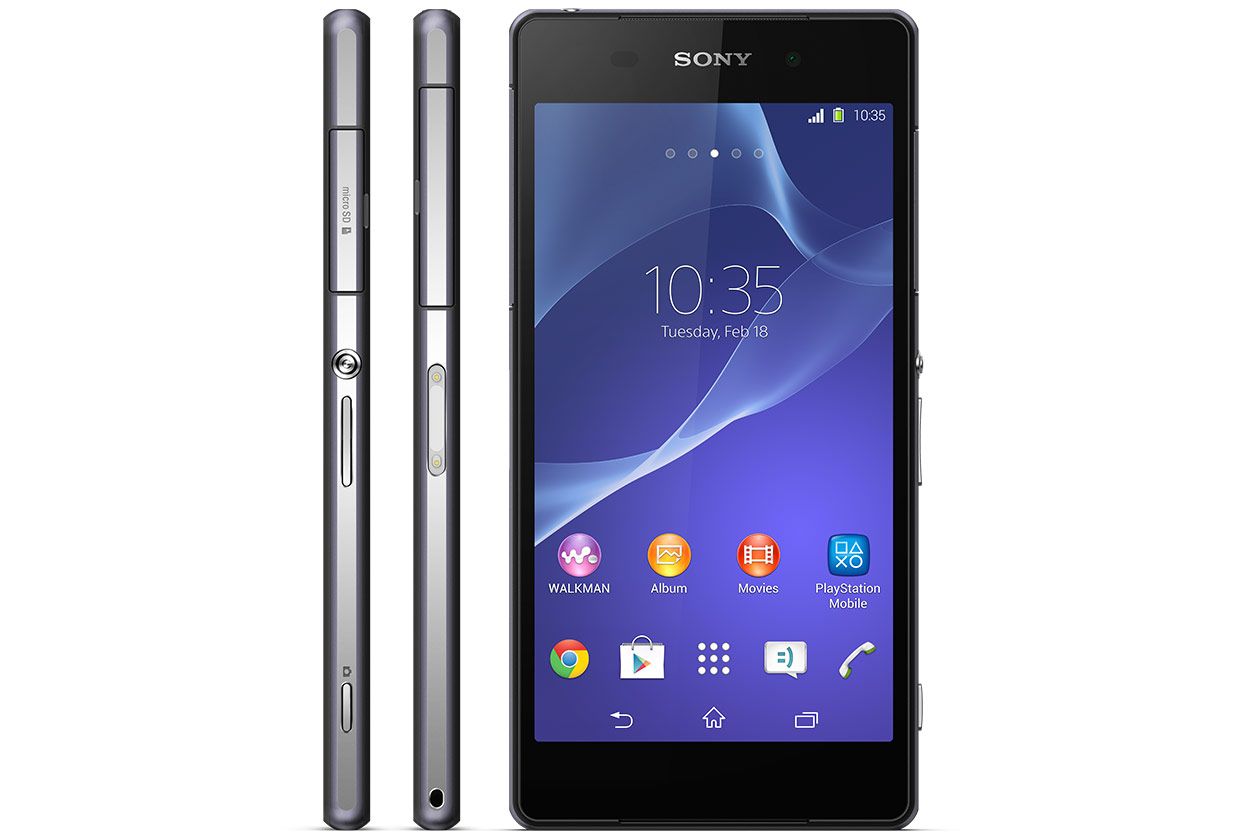
Xperia Z2 – Galaxy S5 – HTC M8 | Body, Design & Build Quality:

Xperia Z2:

xperia-z2-gallery-01-super-slim-1240x840-46ca5c7dd676f8acdeba89fd9a922afd

Sony has adapted a very nice design and build quality for it’s Xperia lineup. Specially, last year when Sony unveiled Xperia Z1, it impressed its users with a flat-design glass body surrounded by a solid and graceful aluminium ring having a power button and volume keys on sides while the ports are covered with flaps in order to keep the phone  a water-proof and dust-proof device. The same design goes for Xperia Z2, it’s quite similar to it’s predecessor in terms of design and build quality. Dimensions of Xperia Z2 are 146.8 x 73.3 x 8.2 mm (5.78 x 2.89 x 0.32 in) while it weighs at 163g.


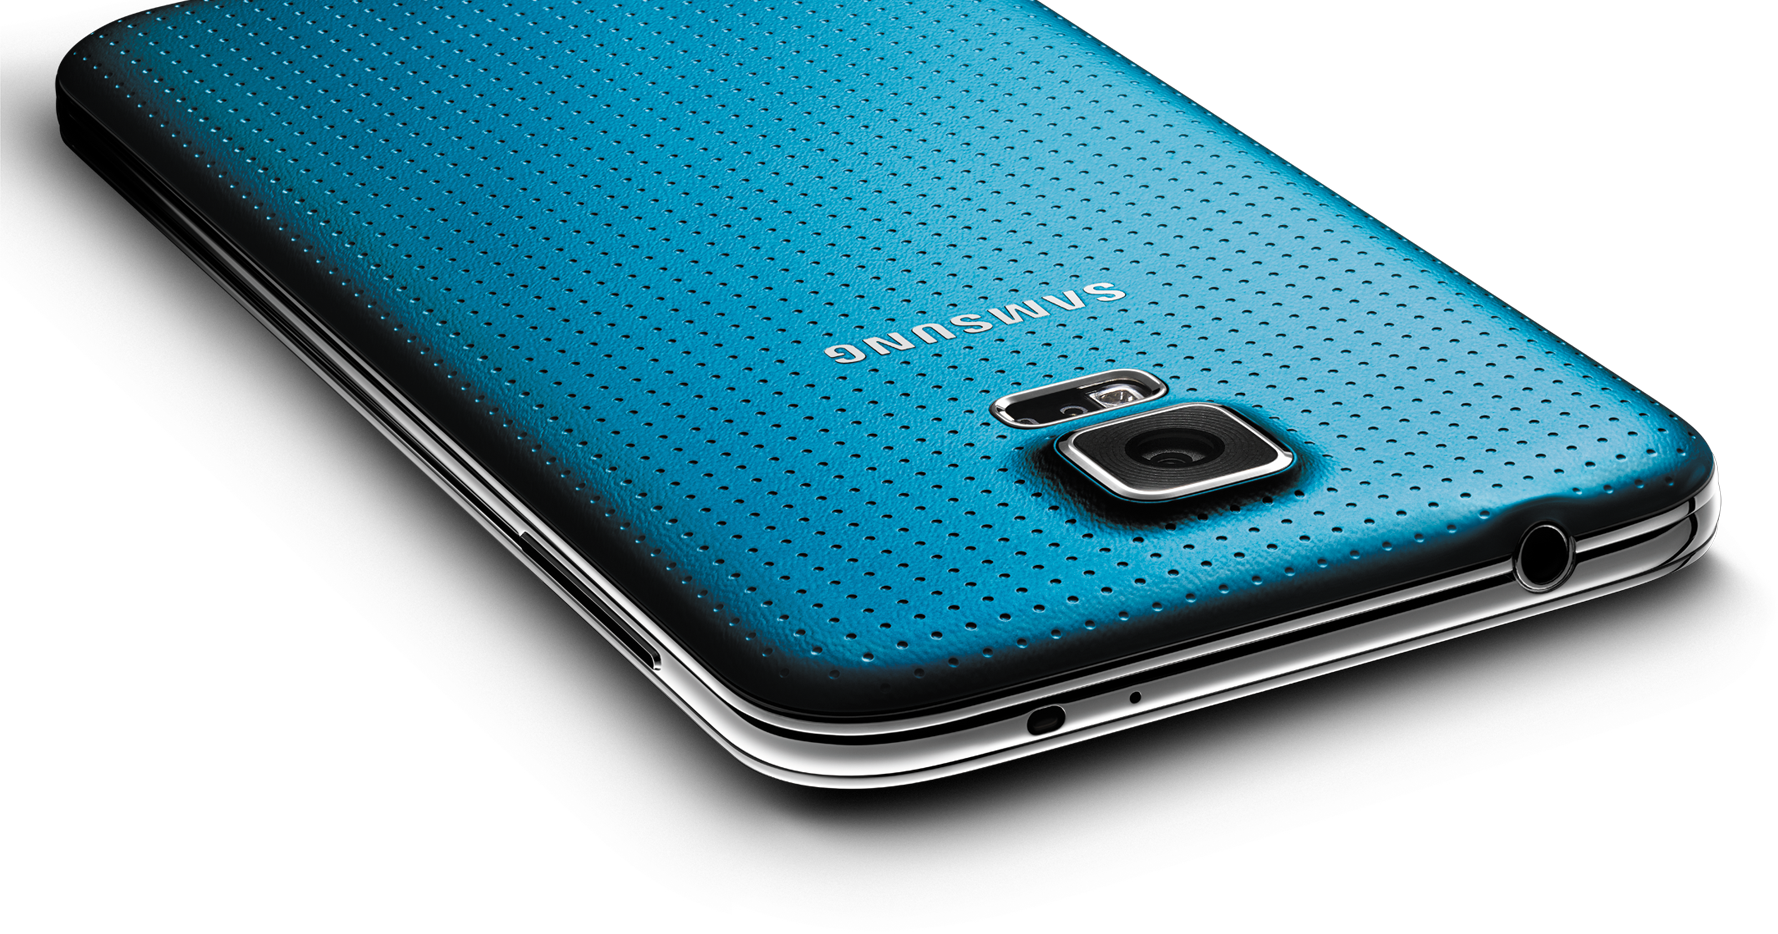
Galaxy S5:section_0_product

It looks like Samsung is not in a mood to change its device’s design, neither the build quality. We can’t say why Samsung is doing so, as it might be the reason for Samsung to keep it’s devices cheap as compared to the other manufacturers. Samsung used the same design for Galaxy S5 as compared to that of it’s predecessor, the Galaxy S4. While the phone once again is built with plastic material and couldn’t catch the users’s eye for that good. In addition to this, Samsung has used a dotted back for the device and it’s a water and dust proof phone as well. Galaxy S4 was able to hit the charts because of it’s features, but Samsung Galaxy S5 might face some problems as it’s upgraded camera, and a few sensors aren’t enough to maintain Samsung’s position. Galaxy S5’s dimensions are 142 x 72.5 x 8.1 mm (5.59 x 2.85 x 0.32 in) and it weighs at 145g, that is a little heaver as compared to the Galaxy S4.


HTC M8:php1h6z46
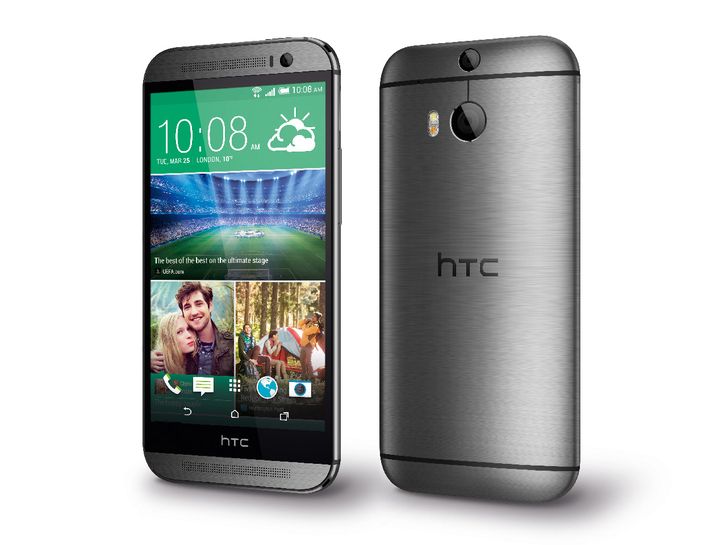
Now this is where HTC wins the ground. Similar to HTC One M7, HTC has used premium design and build quality for HTC One M8. This phone sports a Metal Body, that is a little curved this time, in addition to this, HTC has also used Metal in phone’s sides, which were of plastic for HTC One M7. The dimensions of HTC M8 are 146.4 x 70.6 x 9.4 mm (5.76 x 2.78 x 0.37 in) while the devices weighs at 160g that makes it a little heavier then it’s predecessor.


Xperia Z2 – Galaxy S5 – HTC M8 | Display:

Xperia Z2:xperia-z2-gallery-04-amazing-display-1240x840-1636d70e11527f212bebb67d794a78c1

Xperia Z2 sports a 5.2 inches IPS display with a Full HD resolution having 424 ppi. Sony has been lacking in the display department in it’s past flagship devices, but this time Sony has changed and improved its display to a much good extent. Display viewing angles are much better as compared to the previous Sony devices while the X-Reality feature makes its display even more magnificent.


Galaxy S5:

camera_product_0

There was a number of rumors streaming around before the release of Samsung Galaxy S5 that the device will sport a QHD display. But all the rumors suddenly went dull with the release of the device as it sported a Full HD display with a ppi of 432 and sized at 5.1 inches, that is just an inch bigger then it’s predecessor. Similarly, the display of Samsung Galaxy S5 is Super AMOLED that is quite useful and popular because of it’s viewing angles and colors.


HTC M8:HTC-to-bring-its-sixth-sense-Sense-6.0-update-to-HTC-One-2013-HTC-One-mini-and-HTC-One-max

HTC M8 sports a 5 inches Full HD screen with 441 ppi. HTC has used Super LCD 3 display in it’s devices that is quite efficient and better colors as compared to the above two, but still all the phones have to offer their very own exclusive display features and stand in the competition.


Xperia Z2 – Galaxy S5 – HTC M8 | Hardware

Xperia Z2:

Xperia Z2 is powered up with Qualcomm’s latest and greatest Snapdragon 801 chipset clocked at 2.3 GHz accompanied by Adreno 330 GPU and a DDR3 RAM of  3 GBs is plugged inside the device. Sony has used a 20.7 MP camera sensor at the back of the device while a 2.2 MP on the front. Internal storage is ranged at 16 GB while the device also supports microSD cards of up to 128 GB. Sony hasn’t compromised in the battery department as well and has inserted a massive 3200 mAh battery to give life to the Xperia Z2.

Galaxy S5:

Galaxy S5 also uses the same chipset as that of the Xperia Z2, that is Snapdragon 801 Quad Core, but has a little higher clock speed i.e 2.5 GHz. Samsung hasn’t upgraded the RAM in the new device, it’s still 2 GB and the GPU is Adreno 330. Internal storage is 16 GB with the microSD support up to 128 GB. Samsung has done some homework in the camera department this time and has used a 16 MP sensor at the back while a 2 MP remains on the front. There hasn’t been a big upgrade in the battery department, Samsung has just increased it by 200 mAh and is now 2800 mAh.

HTC M8:

There isn’t a big difference in HTC M8’s specs from the above two. HTC has used the same Snapdragon 801 Quad Core CPU to power up the device clocked at 2.3 GHz accompanied by Adreno 330 GPU and a RAM of 2 GBs. Internal storage is 16 GB with a plus point of external storage in the new M8. Storage can be expanded up to 128 GB with the help of a microSD card. There’s a dual 4MP cam on the back and to take the lead, HTC has also upgraded the secondary cam to 5 MP that is of only 2 MP in the flagships of other manufacturers.

Xperia Z2 – Galaxy S5 – HTC M8 | Software

Xperia Z2:

Xperia Z2 runs on Android 4.4.2 KitKat out of the box. The firmware definitely has Sony’s very own UI that Sony has improved enough. Multi-tasking has been improved in Xperia Z2 as well. Similar to the previous Xperia devices, Xperia Z2 also offers a number of themes to chose from in order to change the look and feel of the phone’s UI.

Samsung Galaxy S5:

This is where Samsung stands at top in the list. Samsung has completely changed the interface and TouchWiz has got a whole new shape for the Galaxy S5. Galaxy S5’s UI has been split into different modes, these modes include Kids Mode and Private Mode. New UI is quite cool and impressive as compared to the old fashioned TouchWiz while the device runs on the same Android 4.4.2 KitKat out of the box. Besides all these, Samsung has kept all of it’s gestures in the device’s UI.

HTC M8:

HTC M8 also runs on Android 4.4.2 KitKat but with the all new Sense 6.0 UI. HTC has also updated some apps for the sense 6.0, the new blinkfeed has just got even better now. HTC has also integrated a few gestures in to the phone’s UI. HTC One M8 will also sport on-screen navigation buttons which were the capacitive keys in the old HTC One M7.

Xperia Z2 – Galaxy S5 – HTC M8 | Camera

Xperia Z2:

xperia-z2-gallery-05-waterproof-super-durable-1240x840-e7a7800851058db44b43a4da0a970888

Xperia Z2’s camera is similar to the Z1. Sony has used a camera sensor of 20.7 MP at the back with a 1/2.3” CMOS sensor with 1.1-micron pixels and Sony G Lens optics. The new camera is also capable of recording 4K quality videos and slow motion videos at 120 fps. Sony has also loaded Z2’s camera with tons of features including Background Defocus and others. Sony has always remained a winner in the camera department, so we can expect the same in Xperia Z2.


Samsung Galaxy S5:

camera_product_1

Samsung has upgraded it’s camera in Galaxy S5. It’s a 16 MP shooter now with super fast auto focus and accompanied by a number of new features including real time preview HDR, selective focus and others. Besides this, the camera is also capable of shooting 4K videos.

HTC M8:
htc_one_m8_1-624x351

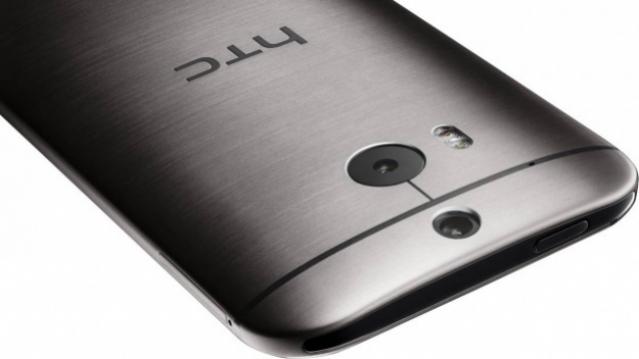
HTC M8 comes with a Duo Camera, that sports two different cameras at the back. A 4MP Ultrapixel shooter with a 1/3.0 sensor and f/2.0 aperture is fixed at the back which pairs up 2 micrometers  pixels with the secondary camera. This secondary camera allows the users to apply different effects to the pictures, i.e determining focus point of an image. Another plus point for the HTC M8 is it’s front facing camera that is of 5 MP loaded with some high definition features. This surely helps the M8 to take lead over the above 2.

Xperia Z2 – Galaxy S5 – HTC M8 | Special Features

 All these smartphones come pre-loaded with their special and exclusive features. These features maybe spread into different parts, including the UI, hardware and the sensors these manufacturers have implemented on their devices. Samsung’s heart rate sensor on the Galaxy S5 surely makes it unique and also helps it to differ from the M8 and Xperia Z2, whereas Z2’s camera offerings are it’s best capabilities and M8’s design makes it stand atop. Stay tuned with us for our detailed special features comparison of these three beasts.

So, what do you think about these devices? Which one of these is the best for you? Let us know through the comment box below.

Talking Baby for PC – Free Download

0
Talking Baby for PC – Free Download

Talking Tom is the only app that each and every Android user is aware of, but we cannot neglect the trend of applications Talking Tom has set. There is a number of applications available in the Google Play Store today that work on the same pattern as compared to that of the Talking Tom. A very similar app has just landed in that also offers funny features similar to that of the Talkin Tom, but the app is getting viral because of it’s features. The new app named as “Talking Baby” is available in the Google Play Store and has already been downloaded for thousands of times, the funny acts of the baby make you addictive to this app and may not let you get your hands off from your Android device.Talking Baby

Besides repeating whatever you say, the baby in the game also capable of playing drums, keyboards, accordion and can also make funny sounds that will just make you laugh. Ok, that’s enough talking about the Talking Baby app, how about getting this app running on a windows PC or a MAC? Well, that’s what we are here to do. In the following post we are going to install Talking Baby on a Windows XP/7/8/8.1 PC or MAC. All you need to do is to move a little ahead and follow this step by step guide to get it successfully installed on your PC.

How to Install & Run Talking Baby on PC:

  1. You need an Android emulator to run this game on your Windows PC or MAC. We recommend using Bluestacks. Use our guide to install it on your PC.
  2. After downloading and installing Bluestacks, Download Talking Baby APK.
  3. Open the downloaded APK file now, and let Bluestacks install it.
  4. Open BlueStacks now > All Apps >Talking Baby.
  5. The game will start now, follow the on screen instructions.
  6. Follow the initial screen,  you’ll be able to play with the Talking Baby.
  7. Enjoy endless fun.

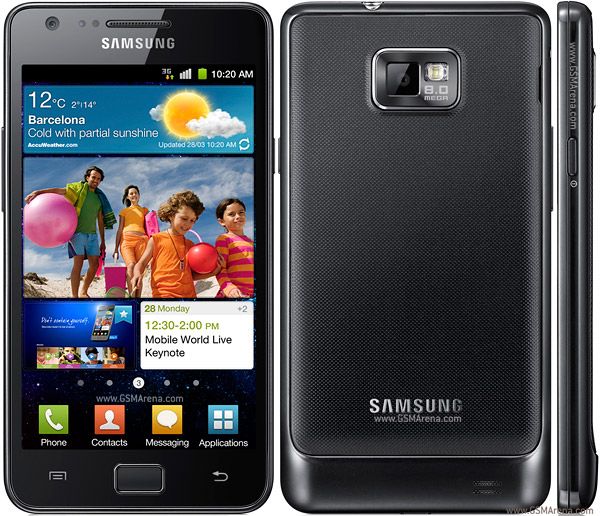
How to Install CWM 6 Recovery on Samsung Galaxy S II GT-I9100

How to Install CWM 6 Recovery on Samsung Galaxy S II GT-I9100

ClockworkMod recovery is by far the best custom recovery available for any Android device around. The latest CWM recovery available for Samsung Galaxy S2 is CWM 6.0.2.9, in case you are in search of  CWM recovery for your GS2, you may stop doing so as you have already spotted the right place. In the following post we are going to install CWM 6 on Samsung Galaxy S2 GT-I9100. All you need to do is to follow this step by step guide carefully and you will successfully get it done.

In case you’re not familiar with a custom recovery that is CWM in our case and you have no idea at all why you should install it, then we will first have a look on a brief intro of the custom recoveries before we head towards the pre-installation and installation instructions.

A custom recovery allows you to install custom roms, mods etc. Along with these, you can make a Nandroid backup, this helps you a lot as you can move back to the previous working state of your phone at any time you want if you have backed up your current system. In some cases, to root the phone you need to flash SuperSu.zip file in the custom recovery, having installed the recovery may help you while in some cases to install the recovery easily, you need to have the phone rooted. You can also wipe cache and dalvik cache of your phone using a custom recovery.

Pre-installation Instructions:

    1. This guide is only for Samsung Galaxy S2 GT-I9100. Check your device’s model number in Settings > More > About Device.
    2. Download the file carefully for your device.
    3. Make sure that your device’s battery is charged over at least 60%. Highly recommended in order to prevent any mishap during the recovery installation process.
    4. Make sure that you backup your important media content, ContactsCall Logs Messages. This is highly recommended just in case something goes wrong and you need to reset your phone.
    5. Use only OEM data cable to establish connection between your phone and PC. Turn off your Anti Virus and Firewall to prevent any connection issues. Also enable USB debugging mode on your phone if you face connection issues.
    6. Recovery works well for Galaxy S2 running on all Android 4.0.4 ICS or Android 4.1.2 Jelly Bean. Do not try this on any other firmware.

Disclaimer: The methods involved in flashing custom roms and rooting your phone are highly custom and may result in bricking your device, and has nothing to do with Google or the device manufacturer that is SAMSUNG in our case. Also rooting your device will void its warranty and you will be no longer eligible for any kind of free device services by the manufacturers/warranty providers. In case of any mishap we may not be held responsible. Follow these instructions to the letter to avoid any mishap or bricking. Make sure that whatever you do, you are doing it at your own responsibility.

Pre – Requisites:

    • Download and Install Samsung USB drivers – Get Here.
    • Download and Extract Odin3 v3.09 – Get Here
    • Download ClockworkMod 6.0.2.9 Recovery for GS2 I9100 .tar file
    • Enough confidence to flash a recovery :-)!

How to Install CWM 6 Recovery on Samsung Galaxy S2 GT-I9100:

      1. Download the .tar file carefully.
      2. Open Odin3.09.exe.
      3. Put your phone in download mode, to do so, turn it off completely. Now turn it on by pressing and holding Volume Down + Home Button + Power Key, you should see a warning now, press Volume Up to continue.
      4. In case the download mode method doesn’t work for your device, try one of the methods from this guide.
      5. Connect your phone to your PC.
      6. The ID:COM box in Odin should turn blue now, that means your phone is connected properly in download mode.
      7. Click the PDA or AP tab in Odin and select the downloaded Recovery.tar file and let it load. Hit start now and sit back, it will take a few seconds to flash the recovery and your device will reboot.
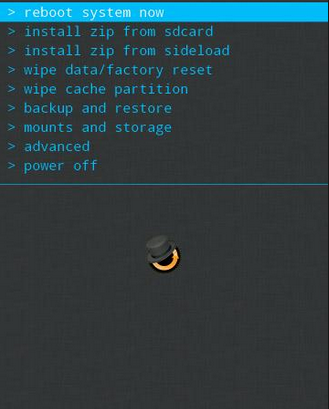
      8. Press and hold Volume Up + Home Button + Power Key to access the CWM 6 Recovery that you just installed.
      9. You can backup your current ROM and do a lot of other things using the options in CWM Recovery.
      10. That’s All.

CWM 6That’s all. In case you got any queries or you face any difficulties regarding this post, please feel free to stop by the comment box below and drop us your words. We will get back to you as soon as possible. Thanks all.


Install Android 4.4.2 KitKat on Sony Xperia M with CyanogenMod 11

41
Install Android 4.4.2 KitKat on Sony Xperia M with CyanogenMod 11

Sony’s Xperia M, that it brought up in August, 2013, is currently running on Android 4.3 Jelly Bean. Sony hasn’t unveiled any plans to update this device to any further version of Android however if you’re an Xperia M owner and you’re looking to get your Xperia M a KitKat, then you’re at right place at the moment. In the following post we are going to update Sony Xperia M to Android 4.4.2 KitKat using CyaongenMod 11 custom ROM.

CyanogenMod 11 is based on Android 4.4.2 KitKat and is a custom ROM available for a lot of Android devices. It’s quite useful, specially when the updates for the devices have been discontinued by the manufacturers, CM may play a role of life savior in the case. Before we head towards the installation instructions, the only thing you may keep in mind is, this is a custom ROM and may contain bugs and also may not be kept for every day use. Also, you should proceed only if you’re well-aware of custom ROMs and you know their functionality and how to handle em’.

Here’s the official description of Cyanogenmod in case you’re not familiar with it:logo-cid

CyanogenMod is a free, community built, aftermarket firmware distribution of Android, which is designed to increase performance and reliability over stock Android for your device.

Pre-requisites and important pre-installation instructions:

    1. Make sure that your phone is Xperia M C1904/5. Do not try this on any other phone.
    2. Make sure that your phone’s bootloader is unlocked, if not then unlock it here.
    3. Please make sure that your phone’s battery is charged at least over 60%. This is highly recommended in order to prevent any power issues during the recovery flashing process.
    4. Backup each and everything on your Android phone as follows:
    5. Backup all your important contacts, find the full guide here.
    6. Backup all your important sms messages, find the full guide here.
    7. Backup all your important call logs, find the full guide here.
    8. Backup all your important media content manually. (Copy to your PC.)
    9. Backup all your apps / data. If you’ve rooted your device, use Titanium Backup to do so. Follow the full guide here.
    10. Backup your current system using a custom recovery (CWM or TWRP) if you’ve flashed one. This is recommended in case something goes wrong with rooting your phone, you can use the custom recovery and return to the old working state of your system.
    11. Make sure that you read the instructions carefully and applied all precautionary measures. Let’s go ahead.
Disclaimer: The methods involved in flashing custom roms and rooting your phone is highly custom and may result in bricking your device, and has nothing to do with Google or the device manufacturer that is SONY in our case. Also rooting your device will void its warranty and you will be no longer eligible for any kind of free device services by the manufacturers/warranty providers. In case of any mishap we may not be held responsible. Follow these instructions to the letter to avoid any mishap or bricking. Make sure that whatever you do, you are doing it at your own responsibility.

How to Install Android 4.4.2 KitKat on Sony Xperia M:

      1. Download CyanogenMod 11 Android 4.4.2  KitKat ROM .zip file.
      2. Download Google Gapps.zip file for Android 4.4.2 KitKat.
      3. Extract the ROM.zip file on your PC you will get a boot.img file.
      4. Download Android ADB and Fastboot drivers, follow our full guide here to make it easy.
      5. Now place the kernal file that is boot.img file that you extracted from the zip folder in the fastboot folder that you downloaded form the guide linked above.
      6. After placing the kernel file in the fastboot folder, open the fastboot folder. Press shift and then Right click on any empty area inside the folder, now select “Open command prompt here“. flash it using the command “Fastboot flash boot boot.img”. In case you are confused, follow the Android ADB & Fastboot drivers guide carefully.
      7. Now, Place the ROM.zip file and Gapps.zip file on your phone’s internal or external sd card.
      8. Boot into CWM recovery. To do so, turn off your device, now turn it on and quickly press volume up and down keys, you will get the CWM interface.
      9. In CWM wipe the cache and dalvik cache.
      10. Now select “Install Zip>Choose Zip from Sd card / external Sd card”.
      11. Select the ROM.zip file that your placed on your phone’s Sd card.
      12. It should take a few mins to flash the ROM, now once again select “Install Zip>Choose Zip from Sd card / external Sd card”.
      13. Choose the Gapps.zip file this time and flash it.
      14. As soon as done flashing, clear cache and dalvik cache again.
      15. Reboot system now, you should see the CM logo on the boot screen now, it may take upto 10 minutes in order to boot into home screen.
      16. Congrats! Enjoy unofficial Android 4.4 KitKat custom ROM on your Sony Xperia M now.

Xperia M2Xperia M1Xperia M3Xperia M4 Xperia M5

That’s all for now. Do tell us about your experience about this ROM. In case you got any queries or you face any difficulties, feel free to stop by the comment box below. We will try our best to help you out. Thanks All!

Root and Install TWRP Recovery On HTC One M8 – How To

0
Root and Install TWRP Recovery On HTC One M8 – How To

HTC One M8 is the latest Flagship released by HTC and unlike Samsung Galaxy S5 the rooting method of HTC One M8 is already on the Web. The method is separate for both TWRP Recovery and Rooting HTC One M8, this is not an all in one Root toolkit of Auto-Root method. Thanks to XDA member mike1986, we are providing you the rooting tutorial of HTC One M8, mike has ported the latest TWRP from M7 and made a Flashable zip file of Super SU apk and Binaries.Rooting allows you to get full control over your device, Stock apps and mods are good, but installing Custom Mods gives you better support and great battery life, you might need to delete some Stock apps from the device, a non-rooted device can’t do that, but a rooted one has the power to remove stock apps too.

HTC2-STILL-01

In this Article, we will show you How To Root and Install CWM Recovery On HTC One M8. But before we begin, Make sure that:

Disclaimer:

The methods involved in flashing custom roms and rooting your phone is highly custom and may result in bricking your device, and has nothing to do with Google or the device manufacturers which is HTC in our case. In case of any mishap we may not be held responsible. Follow these instructions to the letter to avoid any mishap or bricking. Make sure that whatever you do, you are doing it at your own responsibility.

Downloads Required:

Download TWRP Image: Link

Download Super SU: Link (Android_Revolution_HD_Root_and_BusyBox.zip)

How To Install TWRP Recovery On HTC One M8

  • Copy the TWRP Image in the Fastboot folder.
  • Go To Phone Settings and Disable Fastboot in Power Options.
  • Turn Off the Device.
  • Turn off your phone and open HBOOT mode. How? Press and hold Volume Down + Power button until you see some text on Screen, Select Fastboot in the Menu
  • Connect your Device With PC.
  • Now Open Command prompt in Fastboot Folder, How? Hold Shift Key and Right Click anywhere in the Fastboot folder .
  • Type in the Following Command one after the Other:
  1. fastboot erase cache
  2. fastboot flash recovery twrp-m8.img
  3. fastboot reboot 
  • Your device will Now Reboot and TWRP Will be installed on your device.

How To Root HTC One M8

  • Copy the Super SU.zip files to the Root of your Device Sdcard.
  • Turn Off your device.
  • Turn off your phone and open HBOOT mode. How? Press and hold Volume Down + Power button until you see some text on Screen, Select Recovery in the Menu
  • Tap On Install and Select the Super SU File and slide the button to start the process.
  • Once done go back to TWRP Recovery and Reboot the Device.

Also See: Install TWRP Recovery On Sprint HTC One M8 and Root it – How To

Also See: How To Root Verizon HTC One M8

After a Successful reboot, Download Root Checker app to Verify Root Access.

How To Bypass Apple ID On iPhone Running iOS 7.1

10
How To Bypass Apple ID On iPhone Running iOS 7.1

Few hours back we have posted ” How to Bypass Apple ID on iPhone 4 running iOS 7.0.4 ” and its working. Now good news for those who are running iOS 7.1 on iPhone 4 they can also Bypass Apple ID or iCloud id by using our step by step guide. This guide is also working perfect but don’t try this on iPhone 5 , 5c and 5s because right now we don’t have working guide for them, but not to worry we are working on it as soon as we get it i will post it.

How To Bypass iOS 7.1 Apple ID

How To Bypass Apple ID On iPhone Running iOS 7.1:

Follow all the steps carefully in order to get bypass through Apple id on your iPhone 4 running iOS 7.1. Before starting the process you’ll need to do some steps on your system. Note: This guide is for window user’s not for Mac. You have to disable your Antivirus for 15mins or more because if your Antivirus is running then you cannot run iOS soft dev pack.

  1. First Download and Install Java JDK x86 Tool
  2. Download Evasi0n 7
  3. Download and Install iOS soft dev pack
  4. Open it.
  5. Put your iPhone 4 into DFU Mode.
  6. Click 1 to run the ssh_rd tool.
  7. Now wait till it is done, until you get the Successful in Green letters.
  8. Click number 2 to mount your Filesystem, if not mounted for the first time then close the window, open it again and Click number 2 again.
  9. Now Click number 3 to Copy the required files to Bypass the iCloud Account.
  10. Your device will reboot and into restore mode
  11. Click 4 to Exit Recovery.

Update: How To Use DoulCi To Bypass iCloud Activation on iPhone 5s, 5c and 5 running iOS 7

How To Root Galaxy S5 SM-G900F On Android 4.4.2 Kit-Kat With CF-Auto Root

0
How To Root Galaxy S5 SM-G900F On Android 4.4.2 Kit-Kat With CF-Auto Root

Samsung Galaxy S5 was the latest Flagship from Samsung, was released Tow months ago with Android 4.4.2 Kit-Kat. Made an exceptional entrance in the Mobile Market, introduced with some new features, admired by many Android users out there, but personally I don’t like it, it took quite a long time to find a rooting method for Galaxy S5 and here we are about to present it to you.Rooting allows you to get full control over your device, Stock apps and mods are good, but installing Custom Mods gives you better support and great battery life, you might need to delete some Stock apps from the device, a non-rooted device can’t do that, but a rooted one has the power to remove stock apps too.

galaxy-s5-front-2

If you are familiar with Odin and it’s working, then this tutorial might not be difficult for you. Otherwise read the whole tutorial first before trying it on your device. In this Article, we will show you How To Root Galaxy S5 SM-G900F On Android 4.4.2 Kit-Kat With CF-Auto Root.But before we begin, Make sure that:

  1. That you have a Well Charged Battery, 60%-80% is better.
  2. Back-Up all your important ContactsCall Logs & Messages.It is highly recommended in case of any mishap or data loss to back up all your important data.
  3. Back-Up your Mobiles EFS DataHow To Restore and Back-Up EFS Data On Samsung Galaxy Devices.
  4. Check your device model, Go To Setting > About and Make sure that it is SM-G900F.
  5. Do-not try it on SM-G900I, G900M , G900A , G900T and G900V 

Disclaimer: 

The methods involved in flashing custom roms and rooting your phone is highly custom and may result in bricking your device,and has nothing to do with Google or the device manufacturers which is Samsung in our case. In case of any mishap we may not be held responsible. Follow these instructions to the letter to avoid any mishap or bricking. Make sure that whatever you do, you are doing it at your own responsibility.

Warning:

Rooting an Android device Voids Manufacturers Warranty, this Rooting method for Galaxy S5 SM-G900F is tested and Found Working. If you don’t follow the Procedure as we instructed, You only are responsible for your device. We won’t be liable if any damage occurs to your device and/or its components.

All done and good, let’s head towards the Tutorial to See, How you can Root Samsung Galaxy S5 SM-G900F.

Here you will find the Step-by-Step Guide On How To Root Galaxy S5 SM-G900F. Before proceeding further, Let me Warn you that if you Gets stuck in bootloop, after the installation(Possibilities are almost Zero), Here is the Process to get out of it.

If you stuck Into bootloop After the Installation Process.

  • Go to Recovery, Turn off your Phone and Turn it On While Pressing, Power + Volume Up + Home buttonuntil you see some text on-screen.
  • Navigate to Advance and Select Wipe Devlik Cache.

Screenshot_5

  • Go Back and Select Wipe Cache.

Screenshot_18

  • Select Reboot System Now.

How To Root It.

odin_explained6

  1. Download CF-Auto-Root Android 4.4.2 Package for Galaxy S5 to your computer and extract the zip file.
  2. Download Odin.
  3. Turn off your Phone and Turn it On While Pressing, Power + Volume Down + Home button until you see some text on-screen, Press Volume Up to continue.
  4. Make Sure that the USB drivers are installed.
  5. Open Odin in Computer and connect your device to PC, while it is in the Download mode.
  6. If your Phone is successfully connected to PC, the Odin port will turn Yellow with COM port number.
  7. Now Click on PDA and select the File CF-Auto-Root-klte-kltexx-smg900f.tar.md5 or the one who has the biggest size.
  8. In Odin, Check Auto reboot  Option.
  9. Now Click the start button and wait for the process to complete.
  10. After the installation is complete you device will restart and once you see the Home Screen and get the “Pass” Message on Odin, unplug the cable.

If You See “Fail” Instead Of “Pass”.

By Any Chance if you see Fail Message instead of Pass, Odin haven’t Rooted your device but Recovery has been installed. Go to Recovery HOW? Take out the Battery, Put it back after 3-4 seconds, Press and Hole Power + Volume Up + Home button until you are in Recovery mode. The rest of the process will automatically start there and Super SU will install on your device.

That’s it your Samsung Galaxy S5 SM-G900F has been Rooted On Android 4.4.2 Kit-Kat. Download any Root Checker app or See Super SU in app Drawer to Verify root access.

Update Galaxy Ace 3 LTE S7275R To Android 4.2.2 XXUANC1 Jelly Bean Official Firmware[Guide]

0
Update Galaxy Ace 3 LTE S7275R To Android 4.2.2 XXUANC1 Jelly Bean Official Firmware[Guide]

The rollout of Android 4.4 Kit-Kat for several devices is going good but only the Flagship devices will receive the update of Android 4.4 and not to mention only those who received the update of Android 4.3 Jelly Bean, all those devices whose last update was Android 4.2.2 will end on Android 4.2.2 Jelly Bean and that proves that Galaxy Ace 3 does not have even the slightest chance of receiving the update of Android 4.4 Kit-Kat.

Till then the Android 4.2.2 Jelly Bean roll-out is about to end as every mentioned region has received the update of Android 4.2.2 Jelly Bean, only a couple left to receive. XXUANA2 Android 4.2.2 Jelly Bean is available for Galaxy Ace 3,  you can install it via OTA update or Using Samsung Kies it can be installed.

But those who haven’t received it by any case they can install it manually by following our tutorial below. We all know that Samsung is working on  Kit-Kat mode and the time is not long when they will release it for everyone, till then keep enjoying Android 4.3.

Thanks to SamMobile, for providing us the firmware File that we will use in our tutorial below. This Firmware is totally Un-branded, which means it can be installed on any region unlocked device.For those who don’t want a single issue while installing this Firmware, follow the tutorial very carefully. As this is an official Firmware, you won’t be needing any Custom Recovery or rooted device to install this Firmware on your Device.

galaxy-ace-3-1024x837

If you are familiar with Odin and it’s working, then this tutorial might not be difficult for you. Otherwise read the whole tutorial first before trying it on your device. In this Article, we will show you How To Update Galaxy Ace 3 LTE S7275R To Android 4.2.2 XXUANC1 Jelly Bean Official Firmware.But before we begin, Make sure:

  1. That you have a Well Charged Battery.
  2. Back-Up all your important ContactsCall Logs & Messages.It is highly recommended in case of any mishap or data loss to back up all your important data.
  3. Back-Up your Mobiles EFS DataHow To Restore and Back-Up EFS Data On Samsung Galaxy Devices.

Disclaimer: The methods involved in flashing custom roms and rooting your phone is highly custom and may result in bricking your device,and has nothing to do with Google or the device manufacturers which is Samsung in our case. In case of any mishap we may not be held responsible. Follow these instructions to the letter to avoid any mishap or bricking. Make sure that whatever you do, you are doing it at your own responsibility

Important things:.

  • Enable USB debugging mode.
  • Make sure that battery level is at 85% or more.
  • This Tutorial is Only For Galaxy Ace 3 S7270.

Root Warning:

Since Android 4.2.2 XXUANC1 is an official Release from Samsung and it doesn’t require Root or Custom Recovery. But if your Device is rooted, Installing this Firmware will most likely to erase the Root of your device. You need to root your device again to gain root access and start installing Custom Tweaks on it

All done and good, let’s head towards the Installation Tutorial to See, How you can install Android 4.2.2 XXUANA2 Jelly Bean Official Firmware on on your device, Galaxy Ace 3 S7275R.

Here you will find the Step-by-Step Guide On How To Update Galaxy Ace 3 LTE To Android 4.2.2 XXUANA2 JellyBean Official Firmware. Before proceeding further, Let me Warn you that if you are currently running Custom ROM and you upgrade to this ROM, all your app data will be deleted. And do not try to Factory Reset using Stock Recovery if will delete everything even Photos, Music, Videos etc.

How To Install It.

odin_explained6

  1. Download Android 4.2.2 S7275RXXUANC1 for Galaxy Ace 3 to your computer and extract the zip file.
  2. Download Odin.
  3. Turn off your Phone and Turn it On While Pressing, Power + Volume Down + Home button until you see some text on-screen, Press Volume Up to continue.
  4. Make Sure that the USB drivers are installed.
  5. Open Odin in Computer and connect your device to PC, while it is in the Download mode.
  6. If your Phone is successfully connected to PC, the Odin port will turn Yellow with COM port number.
  7. Now Click on PDA and select the File S7275RXXUANA2_S7275RXXUANA2.md5 , or the one who has the biggest size.
  8. In Odin, Check Auto reboot and F.Reset Options.
  9. Now Click the Start button and wait for the process to complete.
  10. After the installation is complete you device will restart and once you see the Home Screen, unplug the cable.

That;s it your Galaxy Ace 3 LTE has been updated to Android 4.2.2 XXUANC1 Jelly Bean Official FirmwareGo to Settings > About To verify.

If You’r Upgrading from a Custom ROM:

If you are upgrading from a Custom ROM, you will most likely to stuck into bootloop. If this situation occurs. do the following:

  • Flash Custom Recovery like you did before and Go to Recovery. Turn off your Phone and Turn it On While Pressing, Power + Volume Up + Home button until you see some text on-screen,
  • Navigate to Advance and Select Wipe Devlik Cache.

Screenshot_5

  • Go Back and Select Wipe Cache.

Screenshot_18

  • Select Reboot System Now.

How To Bypass iCloud/Apple ID On iPhone 4 Running iOS 7.0.4

0
How To Bypass iCloud/Apple ID On iPhone 4 Running iOS 7.0.4

One of the worst situation that can arrive for an iOS user is the Appearance of iCloud ID screen at the very start after a Restore. It can only be bypassed after putting the ID and Password but still users are looking for an alternate way to bypass it and it looks like we have found a way to Bypass it, but it is only for iPhone 4 running iOS 7.0.4 any other iOS device or iOS version will not support this thing and after the process do not restore your device again ever in your life.

maxresdefault

After the Process you won’t be able to Degrade your device to iOS 6 or below, so if you ever hate iOS 7 or above in your life, then you have to change the device only to try the lower or may be an updated version of iOS. Before downloading this Tool, Disable your Antivirus, otherwise it will delete all of your downloaded files.

Bypass iCloud/Apple ID And Jailbreak Untethered

  1. First Download and Install Java JDK x86 Tool
  2. Download Evasi0n 7
  3. Download and Install iOS soft dev pack
  4. Open it.
  5. Put your iPhone 4 into DFU Mode.
  6. Click 1 to run the ssh_rd tool.
  7. Now wait till it is done, until you get the Successful in Green letters.
  8. Click number 2 to mount your Filesystem, if not mounted for the first time then close the window, open it again and Click number 2 again.
  9. Now Click number 3 to Copy the required files to Bypass the iCloud Account.
  10. Your device will reboot and into restore mode
  11. Click 4 to Exit Recovery.

Don’t Try this process on iPhone 4 running iOS 7.1 you will stuck on Apple logon on boot screen. I am adding iOS 7.1 tutorial soon.