Home Blog Page 468

How To Install vShare On iOS 7(iPhone & iPad)

0
How To Install vShare On iOS 7(iPhone & iPad)

If you are a one of those who install Cydia Tweaks every day and can’t live a single day without a Jailbroken device, then you must be familiar with Installous, but the bad new is that Installous is gone and there isn’t seems to be any chances for Installous to come back as the Hackulo.us has shutdown. In such crises, the best option is to either give up or start looking for alternative and it looks like Installous has an alternate names vShare and the recent update brought support of iOS 7.

With vShare things are a little different than Installous, but this is the only Cydia Tweak that is closer to Installous and in several terms it can be interesting and exciting, but still not as good as Installous. In terms of Downloads, it is far better than Installous because it lets you download IPA files directly, no more waiting for downloader, time limits and Captcha Bypass.

vShare-Best-Installous-Alternatives

Jailbreak your iOS Device.

Since the following tutorial needs an iOS device which is Jailbroken, you need to Jailbreak your device. If your device is still in its normal condition. Follow our Jailbreak Section to find out how to Jailbreak your device

Add vShare Repo To Cydia

  1. Open Cydia.
  2. Tap Manage at the Bottom.
  3. Open Sources.
  4. Navigate to Edit at bottom.
  5. Tap on Add on the Left.
  6. Enter the Following in the Text Field,‘repo.appvv.com, and hit Add Source.
  7. Now Search For AppSync 7.0 (IPA Crack), install it, you are done
  8. Return to Cydia

Download vShare:

  1. Open Cydia.
  2. Search for vShare.
  3. Tap vShare once the search is over.
  4. Tap Install on the top right corner.
  5. Tap Confirm.
  6. Restart your device

How To Use vShare:

  1. Open vShare.
  2. Look for the App you want.
  3. Open the App and Tap Download.
  4. Once the app is Download, Install the App and Enjoy!
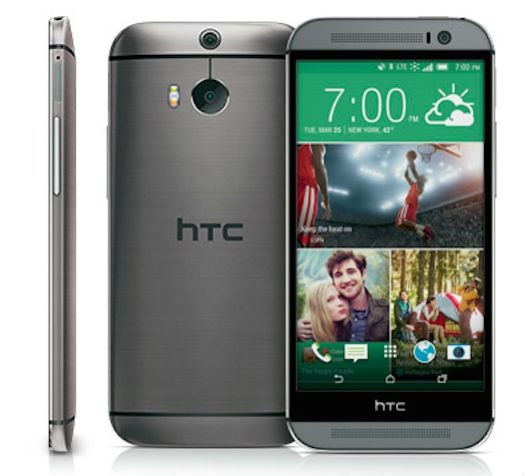
Root AT&T HTC One M8 And Install TWRP Recovery On It – How To

0
Root AT&T HTC One M8 And Install TWRP Recovery On It – How To

We have successfully been sharing the Tutorials on Rooting HTC One M8, in Past we shared Rooting tutorial of Verizon, Sprint and International HTC One M8 and today we would like to increase our collection by adding AT&T HTC One M8 in it. No matter which HTC One M8 you have they all have same specs.Snapdragon 801 Quad-core 2.3GHz processor, 5” Full-HD 1080p Corning Gorilla glass display, Ultra pixel Duo camera, Bluetooth 4.0 and latest Androidsoftware support with Sense UI 6 based on KitKat 4.4.2. The carrier may be bounded but the developers at XDA are not and they have found the perfect Rooting tutorial for it which also install TWRP Recovery on it.

Rooting allows you to get full control over your device, Stock apps and mods are good, but installing Custom Mods gives you better support and great battery life, you might need to delete some Stock apps from the device, a non-rooted device can’t do that, but a rooted one has the power to remove stock apps too.

htc-one-m8

In this Article, we will show you How To Root and Install TWRP Recovery On AT&T HTC One M8. But before we begin, Make sure that:

  1. That you have a Well Charged Battery, 60%-80% is better.
  2. Back-Up all your important ContactsCall Logs & Messages.It is highly recommended in case of any mishap or data loss to back up all your important data.
  3. Back-Up your Mobiles EFS Data. 
  4. Check your device model, Go To Setting > About and Make sure that it is HTC One M8(Sprint).
  5. Do-not try it on International HTC One M8.
  6. Bootloader Must Be Unlocked:  Follow Unlock Bootloader Of HTC Smartphones.
  7. Make Sure Fastboot Is Configured: How to Install Android Adb & Fastboot Drivers on Your Windows PC [Guide]
  8. Enable USB Debugging Mode
  9. Download USB Driver For HTC Devices: Link

Disclaimer:

The methods involved in flashing custom roms and rooting your phone is highly custom and may result in bricking your device, and has nothing to do with Google or the device manufacturers which is HTC in our case. In case of any mishap we may not be held responsible. Follow these instructions to the letter to avoid any mishap or bricking. Make sure that whatever you do, you are doing it at your own responsibility.

Downloads Required:

Download TWRP ImageLink (openrecovery-twrp-2.7.0.3-m8_ul_ca.img#sthash.z2FHroCk.dpuf)

Download Super SU: Link (update-Super-SU-v1.94.zip)

How To Install TWRP Recovery On AT&T HTC One M8

  • Copy the TWRP Image in the Fastboot folder.
  • Go To Phone Settings and Disable Fastboot in Power Options.
  • Turn Off the Device.
  • Turn off your phone and open HBOOT mode. How? Press and hold Volume Down + Power button until you see some text on Screen, Select Fastboot in the Menu
  • Connect your Device With PC.
  • Now Open Command prompt in Fastboot Folder, How? Hold Shift Key and Right Click anywhere in the Fastboot folder .
  • Type in the Following Command one after the Other:
  1. fastboot erase cache
  2. fastboot flash recovery openrecovery-twrp-2.7.0.3-m8_ul_ca.img
  3. fastboot reboot 
  • Your device will Now Reboot and TWRP Will be installed on your device.

How To Root AT&T HTC One M8

  • Copy the Super SU.zip files to the Root of your Device Sdcard.
  • Turn Off your device.
  • Turn off your phone and open HBOOT mode. How? Press and hold Volume Down + Power button until you see some text on Screen, Select Recovery in the Menu
  • Tap On Install and Select the Super SU File and slide the button to start the process.
  • Once done go back to TWRP Recovery and Reboot the Device.

Also See: How To Root HTC One M8(International)

Also See: How To Root Verizon HTC One M8

Also See: How To Root Sprint HTC One M8

After a Successful reboot, Download Root Checker app to Verify Root Access.

How To Install Android Kit-Kat On PC

0
How To Install Android Kit-Kat On PC

We have shared a lot of Android apps and method to install them on PC and usually when someone says anything about installing Android, users mostly think of a Smartphone or a Tablet. However, Android is an open source platform or should I say way too open and it offers more flexibility in terms of hardware it is running on and guess what Android can easily run on x86 architecture as well and the best part it is  the whole Android OS not the Blustacks app or not even on nay Virtual Machine.

Before we go any further, let’s look at what Android on a PC is all about. Dubbed Android x86 is an unofficial build from Google, specifically designed to run on Intel x86 hardware architecture. However that is something that Android on Intel Project gives anyway, which is to be seen on Dell XPS12. However, Android x86 takes it to another level by extending the support for other hardware and it supports the latest Android 4.4 Kit-Kat too.

Android-on-PC

Further,you will find How To Install Android on PC, but you are on your own if you follow it, anything happens to your device during or after the process is not our fault, chances are less but still it is our job to remind you.

Necessary Preparations:


Installation Process:

  1. Download the IOS File and Create a Bootable USB Drive either follow our guide or use UNetbootin.
  2. Now Reboot your System and Choose USB as the Default Boot Drive, all the latest BIOS have that option.
  3. In the Menu choose Install x86 To Hard Drive.
  4. Choose the Partition to install Android x86 on, if you are using a new partition better format it first.
  5. If there is anything related with GRUB Bootloader appears, Allow it.
  6. Now another prompt will appear asking you to make System /r/w. Hit Yes.
  7. Reboot your PC.

That is all there is to it, after the reboot you will be given the option to choose the OS you want to run, either Windows or Android.

Source : XDA

Get iOS 7.1 Touch ID & Passcode Option in iOS 7.0 – 7.0.6 – How To

0
Get iOS 7.1 Touch ID & Passcode Option in iOS 7.0 – 7.0.6 – How To

Jailbreaking an iOS device is not a huge task but releasing the Jailbreaking process for the newest version of iOS is quite a different thing. Those who can’t live without a Jailbroken device are stuck on iOS 7.0.x until the exploit released for iOS 7.1, which includes some new features that are demandable. If it would have been an Android device than rooting process would already have been released for the device and the OS or a Custom ROM based on the latest version would have been released for all the previous devices, but since it is Apple Waiting is quite the thing used do the most and in the end they embrace the Anger and disappointment too.

Touch-ID-scan-fingerprint

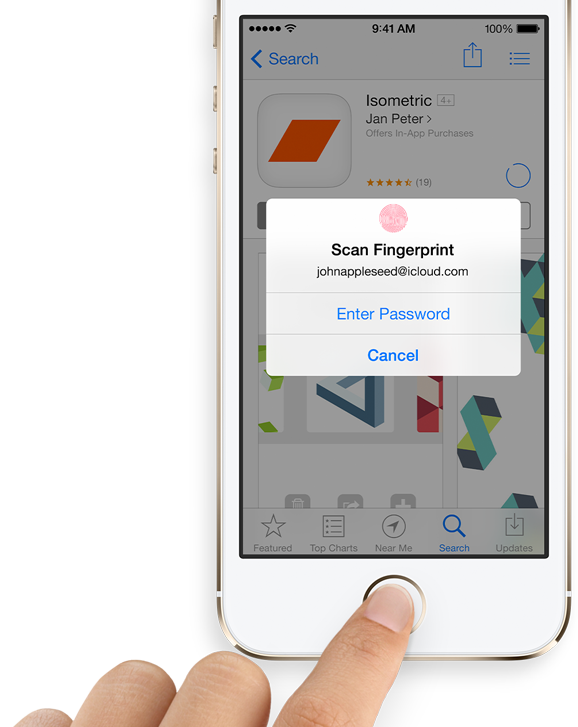
iOS 7.1 has arrived with the default Touch ID & Passcode Option, something that was under discussion after the released of iPhone 5s. Apple is clearly of the opinion that accessing and controlling these vital security options is the best option if given by the authority itself and, therefore, moved the option to the native app settings.

To Install this Touch ID & Passcode on your iOS 7.0.x device, following are the Requirements:

  • A Jailbroken Device, Visit our Jailbreak Section To Find out how.
  • A File manger to access iOS files System, like iFile, CyberDuck, iFunBox etc.
  • The effect will not be much, because it will be more suitable on the Original OS version

tchidcntrl1

  1. Before messing with Files System, it is always a good practice to create some important Back-ups. Using iFile, just copy the Files which are to be changed to any other directory or to your PC. In our case just copy the Settings.plist and[email protected] files found in the following location: /Applications/Preferences.app
  2. After making back-up of these files, Download the Customize Files and unzip them.
  3. Now using iFiles once again, copy the unzipped files to the following directory: /Applications/Preferences.app
  4. It might not be the most amazing and excited customization that you have ever done, but it is a good thing for all those who feels like that they are being left behind by iOS 7.1

Download WWDC 2014 wallpapers here

0
Download WWDC 2014 wallpapers here

As we all know that Apple announced WWDC date June 2 at San Francisco’s Moscone West. Every time Apple introduces new artwork and main thing upcoming version of iOS 8. After the announcement designer’s have created different type of  WWDC 2014 Wallpapers and we have collected all of them.

Download WWDC 2014 wallpapers for iPhone, iPad, iPod Touch, iMac and Macbook.

Surenix for iPhone 5/s/cGreen BlueBlue RedRed Orange

wwdc2014_blue-surenix


iPad: Retina

WWDC-Surenix-GreenOrange-iPad-1024x1024

Stijn

Stijn-WWDC-iPhone-no-brand-preview


Eddy Younan

WWDC-Eddy-Younan-preview


CCARD3DEV

wwdc_2014_wallpaper_for_iphone__ipad__and_mac_ccard3dev-d7cvvua


Source: Image Credit 

How To Root Sony Xperia Z2

0
How To Root Sony Xperia Z2

You might be one of those waiting to get their hands on Sony’s latest flagships, the Xperia  Z2 that it brought up recently at MWC, 2014. Some of the Android enthusiasts, who can’t just wait enough for the device, would like to root it as soon as they get it, but before you even start looking for a method after getting your Xperia Z2, you will be a little surprised to know that XDA Recognized Developer Doomlord has developed a CWM recovery for the Xperia Z2 and has also got it rooted. So rather than wasting some time, we’ll just get straight and head towards the root instructions for the Xperia Z2.

Before we move forward, I’m assuming that some of you are new here and have no idea at all about what is root access and why you should root your device. In order to make it clear, we will first have a look on a brief introductions of the root access and then head towards the pre installation and installation instructions.

Rooting your phone gives you complete access over all the data which is apparently locked by the manufacturers. This includes removal of the factory restrictions and making changes to the internal system and the operating system. Gaining the root access gives you the privileges to install various applications to enhance the performance of your device, allows you to remove the built-in applications/programs, helps you to upgrade the battery life of your device & install the apps which require the root access for the proper functionality and modify your device in so many other ways e.g using mods and custom roms. By installing custom recovery, you can flash custom roms in the phone easily. Custom recovery also let’s you backup your current rom and restore it in case of any mishap. There is a laundry list of things you can do after having your device rooted and installed the custom recovery, now once you’re rooted and have installed custom recovery, go ahead and enjoy it on your phone. Here’s our collection of 10 Best Root Apps. 

Pre-requisits / Pre-installation Instructions:

  1. The Root instructions are only for Xperia Z1 D6502/D6503/D6543 running latest Android 4.4.2 KitKat 17.1.A.2.55 or 17.1.A.2.36 firmware. Check your firmware version in Settings > About Device and make sure that it matches the one mentioned here.
  2. Please make sure that your phone’s battery is charged at least over 60%. This is highly recommended in order to prevent any power issues during the recovery flashing process.
  3. Backup each and everything on your Android phone as follows:
  4. Backup all your important contacts, find the full guide here.
  5. Backup all your important sms messages, find the full guide here.
  6. Backup all your important call logs, find the full guide here.
  7. Backup all your important media content manually. (Copy to your PC.)
  8. Backup your current system using a custom recovery (CWM or TWRP) if you’ve flashed one. This is recommended in case something goes wrong with rooting your phone, you can use the custom recovery and return to the old working state of your system.
  9. Make sure that you read the instructions carefully and applied all precautionary measures. Let’s go ahead.
Disclaimer: The methods involved in flashing custom roms and rooting your phone is highly custom and may result in bricking your device, and has nothing to do with Google or the device manufacturer that is SONY in our case. Also rooting your device will void its warranty and you will be no longer eligible for any kind of free device services by the manufacturers/warranty providers. In case of any mishap we may not be held responsible. Follow these instructions to the letter to avoid any mishap or bricking. Make sure that whatever you do, you are doing it at your own responsibility.

How to Root Xperia Z2 Running Latest Android KitKat 4.4.2 17.1.A.2.55 or 17.1.A.2.36 Firmware:

      1. You need to install CWM recovery first. Follow our full guide here to install it on your device.
      2. Download Supersu.zip file now.
      3. Place the downloaded Supersu.zip file on your phone’s sd card.
      4. Now boot into CWM recovery on your phone. To do so, turn off your device first. Now turn it on, as soon as you see the Pink LED, press the Volume Up Key rapidly.
      5. You should see the CWM recovery interface shortly.
      6. Once in CWM, select “Install Zip > Choose Zip from SDcard > Select SuperSu.zip > Yes”.
      7. This will flash SuperSu.zip file, once flashing is complete, reboot your device.
      8. Find SuperSu in app drawer now. You can also install Root Checker app from Play Store to check root.
      9. Congrats! You’re rooted now!
    1. SuperSu

That’s All! Let us know if the tutorial worked fine for you. In case you got any queries or face any issues regarding this post, please feel free to stop by the comment box below and drop us your words. We will get back to you as soon as possible. Thanks all.

Add A Sweet Spot To Your Photos With Creative Focus Lens

0
Add A Sweet Spot To Your Photos With Creative Focus Lens

Smartphone Cameras are gaining more and more popularity than any other casual cam, why? Because they are easy to use and you can take them anywhere you want without any tension at all. You do not need a Neck Strap or Hand Bag to carry the Camera and with the power to Internet Connectivity, you can share them instantly on your Favorite Social Media Site and now with the introduction of Mobile Cam lenses, people start to love the Mobile cams even more.

1169caa72b7d64c8b74d054a254266a4_large

If you consider the fact that users are adopting Mobile based Photography more and more and mix it with the accessories to give their cam a particular boost, the Creative Focus Lens by Lensbaby Inc. is such a product that is attempting to break into the world. The Creative Focus Lens is all about taking creative photos that beat the ordinary iPhone Photo by containing a “Sweet Spot.” The Sweet Spot as Lensbaby likes to call it, got its name because it focuses a particular part giving it more clarity by blurring the surrounding section being blurred out in a unique way.

The company behind it is building products for Professional Photographers for quite a time and this amazing mobile accessory is their first attempt in marking their name in Mobile Photography. The Creative lens is all about giving a push to iPhone users to enhance their skills in Photography without any Professional or Semi-Professional Camera. The casual blur effect can be blended in real time allow users to get a complete understanding of the Blurring effect.

With the application for this app, you can adjust where to focus and where the blur effect must be applied, thus giving you the power to apply the Sweet Spot to the exact right spot. The lens itself is an appeal to fans of its hobby and you can get it $20 less than retail through Kickstarter is some bonus. However, there are some questions arising about how to attach the lens and how efficient it is.

Other accessories of this nature can be attached with some extra parts given with it or they act as a stand while acting as a lens too. The Creative Focus Lens comes with an Extra strong magnet to remove this issue once and for all, but still those who wants to use this Lens, need to attach a Steel Ring to the Rear Camera of their device in order for that magnet to work. That would rule out everyone who likes to keep their device clean and spotless, but all the Photography fans will surely try it.

Here are some Sample Photos demonstrating What the lens can do:

How to Install CWM 6 Recovery on Sony Xperia Z2

How to Install CWM 6 Recovery on Sony Xperia Z2

Sony recently unveiled it’s latest flagship device Xperia Z2, the device was much anticipated and speculations were coming all the way telling us something new about it every minute but it all suddenly came to an end when Sony pulled the curtains off from it’s device at MWC, 2014. Some lucky users have already got their hands on Sony’s this new beast while most parts of the world are still in que to receive Xperia Z2 units. While most of the people are eager for the device, XDA Recognized Developer Doomlord has developed the CWM 6.0.4.6 recovery for the device and rooted it.  If you’re an Android enthusiast and you either have this device or you’re soon going to get your hands on it, you may want to install a custom recovery, most probably CWM recovery on your Z2.

We’ll be installing the ClockworMod 6.0.4.6 recovery on Xperia Z2 in a few minutes, before we head towards the pre-installation and installation instructions, I’m assuming that many of you are newbies here and don’t know about what is a custom recovery and why you should install it on your device. To make it more clear, we will first have a look on a brief introduction of the custom recovery and then proceed with the installation guide.

A custom recovery allows you to install custom roms, mods etc. Along with these, you can make a Nandroid backup, this helps you a lot as you can move back to the previous working state of your phone at any time you want if you have backed up your current system. In some cases, to root the phone you need to flash SuperSu.zip file in the custom recovery, having installed the recovery may help you while in some casesto install the recovery easily, you need to have the phone rooted. You can also wipe cache and dalvik cache of your phone using a custom recovery.

Pre Requisites:

      1. The CWM recovery is only for Xperia Z2  D6502, D6503, D6543 running latest Android 4.4.2 KitKat 17.1.A.2.55 or 17.1.A.2.36 firmware. Check your firmware version in Settings > About Device and make sure that it matches the one mentioned here.
      2. You must have installed Android ADB & Fastboot drivers. Follow the quick guide here.
      3. Your device must have an unlocked bootloader. Follow our full guide here in order to unlock.
      4. Please make sure that your phone’s battery is charged at least over 60%. This is highly recommended in order to prevent any power issues during the recovery flashing process.
      5. Backup each and everything on your Android phone as follows:
      6. Backup all your important contacts, find the full guide here.
      7. Backup all your important sms messages, find the full guide here.
      8. Backup all your important call logs, find the full guide here.
      9. Backup all your important media content manually. (Copy to your PC.)
      10. Backup all your apps / data. If you’ve rooted your device, use Titanium Backup to do so. Follow the full guide here.
      11. Backup your current system using a custom recovery (CWM or TWRP) if you’ve flashed one. This is recommended in case something goes wrong with CWM installation, you can use the custom recovery and return to the old working state of your system.
      12. Enable USB debugging mode on your device.  Get it in Settings > Developer Options > USB Debugging mode.
      13. Use only OEM data cable to establish connection between your PC and Phone.
      14. Alright! Follow this guide to the letter now.

Disclaimer: The methods involved in flashing custom roms and rooting your phone ar highly custom and may result in bricking your device, and has nothing to do with Google or the device manufacturer that is SONY in our case. Also rooting your device will void its warranty and you will be no longer eligible for any kind of free device services by the manufacturers/warranty providers. In case of any mishap we may not be held responsible. Follow these instructions to the letter to avoid any mishap or bricking. Make sure that whatever you do, you are doing it at your own responsibility.


How to Install CWM 6 Recovery on Xperia Z2 Running 17.1.A.2.55  or 17.1.A.2.36 Firmware:

  1. Download Doomlord’s Advanced Stock Kernel with CWM Recovery according to your firmware version.
      1. Advanced Stock Kernel with CWM Recovery for .55 Firmware
      2. Advanced Stock Kernel with CWM Recovery for .36 Firmware
  2. Rename the downloaded .img file to boot.img
  3. Place the downloaded boot.img file in the Minimal ADB & Fastboot folder that you created using our ADB & Fastboot Quick Setup Guide.
  4. If you are using Android ADB & Fastboot full package, you can place the downloaded and renamed boot.img file in the Fastboot folder or in the Platform-tools folder.
  5. Open the folder where you placed the boot.img  file. E.g Minimal ADB & Fastbootor Fastboot or Platform Tools.
  6. Press and hold the shift key and right click on an empty area within the folder, and click on “Open Command Window Here”.
  7. Turn off your Xperia Z2 completely.
  8. Now press the Volume Up Key and while keeping it pressed plug in the USB cable.
  9. You should see a blue light in the notification light of your phone, that means your device is now connected in Fastboot mode.
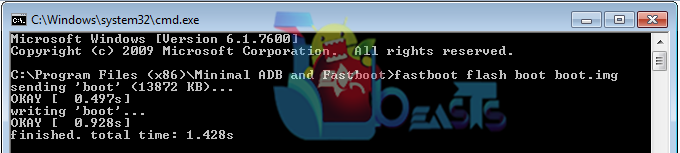
  10. Now type the following command: fastboot flash boot boot.img
  11. Hit Enter and it will quickly flash CWM 6.0.4.6 recovery in your Xperia Z2.
  12. Once recovery is flashed, now issue this command “fastboot reboot”
  13. In case this doesn’t work, you may reboot the device manually.
  14. Your device will reboot now, as soon as you see the Sony logo,  and the pink LED, press Volume Up key to enter recovery.
  15. Congrats! You should now see the custom recovery.
  16. That’s all.

Screenshot_1

That’s all with the recovery installation. In case you have any queries or you’re facing any issues regarding this post, please feel free to stop by the comment box below and drop us your words. We will definitely get back to you as soon as possible. Thanks all.

Power Off/Lock Down iPhone With A Broken Lock Button

0
Power Off/Lock Down iPhone With A Broken Lock Button

Apple makes sure to give its fans the best build quality than any other OEM out there, but there is no way that a device can be released and then remain the same way after a long time of use. What we mostly used in a device is the Lock Button/Power Off Button and because of its exessive use lead to its breaking, sticking or just stop functioning. For Samsung devices, if you ever encountered this problem, you can unlock it using this Physical Button, but not every device offers such feature, especially Apple devices.

 Screenshot_1

The best option available for such device is to take it to any Repair shop and pay a reasonable amount to fix it. If you want to go on with a broken button, not only you loose the power to turn off your device, but also you can’t put it to Sleep mode, which puts more stress in battery and by any chance, it goes to sleep then, charging is the only way to awake it, thus the power button keep its important in the Phone, son if you don’t want to repair it, finding an alternate solution is the a really necessary thing.

Upon little Google Search, We have found a solution that can help anyone owning iOS 7 devices, It works Fine on iOS 7, I don’t know about other iOS versions. The feature is hidden in Accessibility > Assistive Touch, it brings the sleep button’s functionality to the main touch Display. Without Further ado, let’s see how it is done.

  • Navigate to Settings, Open General.
  • Open Accessibilty.
  • Scroll Down until you see Assistive Touch and Toggle it On.

Untitled-2

  • Now you will see a circular button at the bottom, Tap it and you will get the Assistive Touch Menu, Tap Device.
  • You will see a lot of options now, Tap Lock Screen option and then you have the power to Sleep and Awake Your device via Assistive touch

Untitled 2

Facebook New Messenger Brings Free Wi-Fi Call, Download Now

0
Facebook New Messenger Brings Free Wi-Fi Call, Download Now

In the Past, we have seen an unquestionable commitment from Facebook towards Smartphones. With the Purchase of Instagram and recently WhatsApp, it looks like Mark Zuckerberg’s Social Network sees native Mobile experience as a huge importance to company’s immediate future. However, their main concern is either the Facebook app or Facebook Messenger and they are giving their best to keep the app to its top. However, users are still not satisfied with the Facebook app and everyday there is a new problem occurs and,though, every update brings new things yet it is still not in perfect shape.

Facebook-Messenger-calling

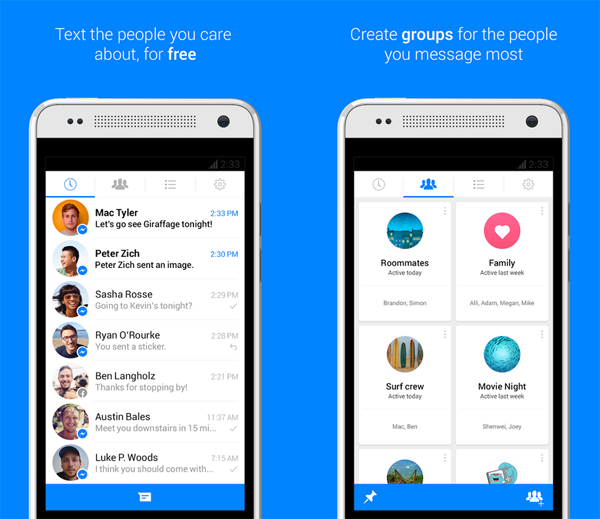
Let’s Talk about Facebook Messenger now, in the very beginning, Facebook Messenger only able to send and receive messages. After many updates, it finally come to show you the Active/Online people on Facebook and give you the power to send a direct Text message to them and then comes the update where you can create groups and all the Chat groups you made on Facebook were already added in the Facebook Messenger.

The latest update of Facebook Messenger brought the feature which was first seen in Viber then in many other Social Chatting applications, yes! I am talking about Free Wi-Fi calls. In my opinion, this is by far the best thing Facebook has done till now, well you can Video call your facebook friends from your PC with Facebook video Chat option, but in Mobile it is far better. The free unlimited calls can be made using any internet connectivity, Wi-Fi, 3G or 4G, you choice.

Facebook-Messenger

The best part is, people are more active on Facebook than on any other Social networking media, they are on Skype but they do not remain active much, the same case is with Viber and WhatsApp, thus making the conversation even more entertaining. Now one can easily contact the international friends without any charges at all. This initial Rollout is likely to be the first voice based integration we have seen from Facebook team and since WhatsApp is under the power of the same authority, it has been confirmed that small Voip features will be added to WhatsApp in very near future.

Learn How To Install Facebook Messenger Latest Version on your Android Device, right after this short break.

Download Require:

Facebook Messenger Apk: Link

How To Install Facebook Messenger Apk:

  1. Download the Above file.
  2. Connect your Device with PC.
  3. Copy the Apk file to your device.
  4. Disconnect the Device.
  5. Install the Apk like normal and Run the app Online the First Time.
  6. While installing, if ask for any Installation Process, Choose “Package Installer and if there is a Pop-Up Choose Decline”

If you Have any problems, Feel free to comment in the comment section below

7 Steps To Do When Your iPhone is Stolen [ Guide ]

0
7 Steps To Do When Your iPhone is Stolen [ Guide ]

Most of people know what to do when your device got stolen report to carrier or block through IMEI. Everybody knows that but there are steps that you should do before reporting it. I have faced this kind of situation. Well before starting few things i like to tell you that you must do if you are using iPhone.

Important Things To Do:

  1. Set Passcode.
  2. Make Your you are using iCloud.
  3. Activate Find My iPhone.
  4. All always backup your device.

Okay Now lets start with steps to do when your iPhone is stolen. I have researched around web and found many solutions so i do like to share with you that might help you to.

7 Steps To Do When Your iPhone is Stolen:

Make Sure your device is always updated because that will help you with all the new features. E.g Like if you are running iOS 6 then your device can easily be upgraded to iOS 7. Its easy only iOS 7 supports Apple id lock. Keep your device updated.

If you have sign-in with your Apple id on iCloud, then open iCloud at your system-> select Find My iPhone-> give your password. [ Method 1 ]

Screen Shot 2014-04-04 at 02.01.06

  • After taking few seconds it will show you a map with your device location. If the person who stole your device and use wifi or mobile data. That Green dot is pointing your device location.

Screen Shot 2014-04-04 at 02.04.10

  • This might be helpful select your device from all devices you will get three options ( Play Sound , Lost Mode , Erase iPhone ). Butt you will get these options when your device is connected with iCloud.

Screen Shot 2014-04-04 at 02.17.16

  • A dfu restore would mean it wipes the lock and they have a working phone. I recommend you report the device as lost / stolen to your operator or apple to prevent them using as a phone…… They can still use it as an iPod though after that. (Jailbreakqa) [ Method 2 ]
  • Go one better next time. Invest in iCaughtU Pro, bloody good tool and you have a lot of tools to help pinpoint the location of your phone. ( vilopjdwebreg ). [ Method 3 ]

Using Other Software:

You can use other software that provide services to prevent and help you find your device when it is lost / Stolen.

  1. If Found.[ Method 4 ]
  2. Use iHound. [ Method 5 ]
  3. Use iLocalis. [ [ Method 6 ]

If none of this work then the best method is that you contact with authorities report your device is stolen. Contact with carrier service block your device with IMEI. [ Method 7 ]

Auto Pilot Mode, Best Android Battery Saver

0
Auto Pilot Mode, Best Android Battery Saver

Now days, users are engaged in an Epic battle of Smartphones, everyone wants to prove his or her choice is better than the other, some say that HTC is better, some say Samsung is better, some thought Nexus devices are the best. However, there is one thing that unites us is the Poor battery timing of all the Android devices. Wi-Fi usually took the most battery of the device, while 4G connectivity is even a bigger battery consumer. Putting the device into Air-Plane mode disconnect us from the world, so it is out of the question to use it. However in the world of Android, developers are doing everything they can to give users such app who can save the battery life as much as possible.

Screenshot_7

You might have tried a lot of different battery saving apps and didn’t get the result as you expect from them. Why not give one more try, this time not a battery defender but an Auto Pilot Mode App. As Mentioned above that going to Air-Plane mode won’t let you use anything related with Network Connectivity. Auto Pilot Mode takes advantage of this situation by forcibly throwing your device under the radar, which in turns, save precious droplets of device.

Whenever your signals drops below a certain threshold, the Auto Pilot Mode runs for a set of duration and when the time is up, it will check once again, whether it can source a decent signal. You can manually modify the Auto-Pilot Mode as well, whether you want Wi-Fi to shut down completely or go according to the app, or you want to stop all the connections completely.

Screenshot_8

However,like every other, there is a little drawback in it too, it is running fine on a device running Android 4.2.2 or higher and especially on a rooted device. Those who are running Android 2.3.3 till Android 4.1.2 have no need to root their device to run this app. So, if you own a device running Android 4.2.2 or above, better root it now from our Root Section and try this amazing app for yourself. We have also provided an Apk below for you to download and also we have posted how to install it.

Download:

Auto Pilot Mode Apk: Link

How To Install Auto Pilot Mode Apk

  1. Allows your device to Install from Unknown Sources. Go to Settings > Security and Tap Unknown Source
  2. Download the Above file.
  3. Connect your Device with PC.
  4. Copy the Apk file to your device.
  5. Disconnect the Device.
  6. Install the Apk like normal and Run the app Online the First Time.
  7. While installing, if ask for any Installation Process, Choose “Package Installer and if there is a Pop-Up Choose Decline”

If you Have any problems, Feel free to comment in the comment section below