Home Blog Page 459

Update Sony Xperia P to Android 4.1.2 JB with Enigma v6.4 Custom ROM

Update Sony Xperia P to Android 4.1.2 JB with Enigma v6.4 Custom ROM

Enigma is also one of the popular custom ROMs for Sony Xperia P. The ROM focuses on improving the performance of the device, enhancing the battery life, much responsive and is loaded with tons of features to add charm to your device’s working and functionality. Enigma’s current available version is v6.4 and is based on stock Android 4.1.2 Jelly Bean firmware for Xperia P. The stock-based nature of this ROM helps it to reduce the bugs and work at its best.

sony xperia p manual

Those of the Android enthusiasts looking out to play with their Xperia P may want to install this custom ROM on their device. If you’ve been looking for it, you’ve spotted the right place at the moment. We are going to install Enigma v6.4 Android 4.1.2 JB Custom ROM on Sony Xperia P in a few minutes. All you need is, follow this guide carefully and get it done successfully.

Pre-Installation Instrcutions for Enigma v6.4 ROM:

  1. Make sure that your phone is Xperia P Lt22i. Do not try this on any other phone.
  2. Your device must have a working CWM recovery or kernel installed. Follow our CWM 6  installation guide.
  3. Please make sure that your phone’s battery is charged at least over 60%. This is highly recommended in order to prevent any power issues during the recovery flashing process.
  4. Backup each and everything on your Android phone as follows:
  5. Backup all your important contacts, find the full guide here.
  6. Backup all your important sms messages, find the full guide here.
  7. Backup all your important call logs, find the full guide here.
  8. Backup all your important media content manually. (Copy to your PC.)
  9. Backup all your apps / data. If you’ve rooted your device, use Titanium Backup to do so. Follow the full guide here.
  10. Backup your current system using a custom recovery (CWM or TWRP) if you’ve flashed one. This is recommended in case something goes wrong with rooting your phone, you can use the custom recovery and return to the old working state of your system.
  11. Make sure that you read the instructions carefully and applied all precautionary measures. Let’s go ahead.
Disclaimer: The methods involved in flashing custom roms and rooting your phone are highly custom and may result in bricking your device, and has nothing to do with Google or the device manufacturer that is SONY in our case. Also rooting your device will void its warranty and you will be no longer eligible for any kind of free device services by the manufacturers/warranty providers. In case of any mishap we may not be held responsible. Follow these instructions to the letter to avoid any mishap or bricking. Make sure that whatever you do, you are doing it at your own responsibility.

How To Install Andorid 4.1.2 Enigma v6.4 on Xperia P:

  1. Make sure that you’ve installed CWM Recovery using the guide we linked above.
  2. Download Enigma v6.3 Revision XP.zip  file and save it to your phone’s SDcard.
  3. Now boot into CWM recovery on your phone. To do so, turn off your device completely first.
  4. Now turn it on, as soon as you see the Pink LED, press Volume Up key and it should take you to recovery.
  5. In CWM recovery, mount system and data if it’s not mounted. Ignore if it’s mounted already.
  6. Now select “Install > Chose Zip from SDcard > Engima_v6.3_Revision_XP.zip > Yes”.
  7. Proceed and complete the ROM installation.
  8. Once installation is done, reboot your device and setup the mods and addons you want.
  9. Now download Enigma v6.4 update.zip file and copy it to your phone’s sd card.
  10. Boot into CWM recovery using the method in step 3 and 4.
  11. Now in CWM recovery select “Install > Chose Zip from SDcard > Enigma Update.zip > Yes”.
  12. Proceed and complete the installation and reboot.
  13. You’ve the v6.4 installed now.
  14. That’s all.

If the ROM has impressed you, don’t forget to buy the developer a beer in order to support his hardwork. Thanks all!

Install ClockworkMod 6 Recovery On Sony Xperia P LT22i

Install ClockworkMod 6 Recovery On Sony Xperia P LT22i

Sony’s mid range device Xperia P sports some nice specs and features and definitely is a good choice to go with. In case you’re planning to get your hands on this device or you already own this device, you would surely like to play with it as there is a lot of stuff available.

A custom recovery is what actually paves a way for your device to go beyond the boundaries in most of the cases, it’s also important to keep a custom recovery in an Android smartphone as it can be handy in so many cases. Earlier in 2013, Sony updated Xperia P to Android 4.1.2 Jelly Bean, and there hasn’t been any official update after that. But there surely is a huge number of custom ROMs that can give your device a new life whenever you want. New ROMs most likely require a latest custom recovery, so we have found the latest available ClockwrokMod Recovery [CWM 6.0.2.8] for Xperia P. The recovery is packed inside Phantom Kernel, based on latest stock firmware 6.2.A.1.100’s source code and is also one of the best kernels  for this device. The kernel also roots the device and is also overclock-able to 1.5 GHz. Before you head towards the installation instructions, I’m assuming that not all of you are familiar with a custom recovery as yet. To remove any confusion and to make it clear, we will go through a brief introduction of the custom recovery first.

xperia-p-silver-486x489

A custom recovery allows you to install custom roms, mods etc. Along with these, you can make a Nandroid backup, this helps you a lot as you can move back to the previous working state of your phone at any time you want if you have backed up your current system. In some cases, to root the phone you need to flash SuperSu.zip file in the custom recovery, having installed the recovery may help you while in some cases to install the recovery easily, you need to have the phone rooted. You can also wipe cache and dalvik cache of your phone using a custom recovery.

Here are the pre-installation instructions that you must follow:

  1. The CWM recovery / phantom kernel is only for Xperia P LT22i running Android 4.1.2 Jelly Bean 6.2.A.1.100 firmware. Check your firmware version in Settings > About Device and make sure that it matches the one mentioned here.
  2. You must have installed Android ADB & Fastboot drivers. Follow the quick guide here.
  3. Your device must have an unlocked bootloader. Follow our full guide here in order to unlock. While you unlock your phone’s bootloader, make sure that you read the guide and all the precautions carefully.
  4. Please make sure that your phone’s battery is charged at least over 60%. This is highly recommended in order to prevent any power issues during the recovery flashing process.
  5. Backup each and everything on your Android phone as follows:
  6. Backup all your important contacts, find the full guide here.
  7. Backup all your important sms messages, find the full guide here.
  8. Backup all your important call logs, find the full guide here.
  9. Backup all your important media content manually. (Copy to your PC.)
  10. Enable USB debugging mode on your device.  Get it in Settings > Developer Options > USB Debugging mode.
  11. Use only OEM data cable to establish connection between your PC and Phone.
  12. Alright! Follow this guide to the letter now.
Disclaimer: The methods involved in flashing custom roms and rooting your phone is highly custom and may result in bricking your device, and has nothing to do with Google or the device manufacturer that is SONY in our case. Also rooting your device will void its warranty and you will be no longer eligible for any kind of free device services by the manufacturers/warranty providers. In case of any mishap we may not be held responsible. Follow these instructions to the letter to avoid any mishap or bricking. Make sure that whatever you do, you are doing it at your own responsibility.


How to Install CWM 6 Recovery on Sony Xperia P LT22i:

  1. Download Phantom Stock JB Kernel.zip  file and extract it to get Kernel.elf file.
  2. Place the extracted kernel.elf file in the Minimal ADB & Fastboot folder that you created using our ADB & Fastboot Quick Setup Guide.
  3. If you are using Android ADB & Fastboot full package, you can place the downloaded and extracted kernel.elf file in the Fastboot folder or in the Platform-tools folder.
  4. Open the folder where you placed the kernel.elf  file. E.g Minimal ADB & Fastboot or Fastboot or Platform Tools.
  5. Press and hold the shift key and right click on an empty area within the folder, and click on “Open Command Window Here”.
  6. Turn off your Xperia P completely.
  7. Now press the Volume Up Key and while keeping it pressed plug in the USB cable.
  8. You should see a blue light in the notification light of your phone, that means your device is now connected in Fastboot mode.
  9. Now type the following command:

     fastboot flash boot kernel.elf

  10. Hit Enter and it will quickly flash CWM 6 recovery in your Xperia P.
  11. Once recovery is flashed, now issue this command

    “fastboot reboot”

  12. In case this doesn’t work, you may reboot the device manually.
  13. Your device will reboot now, as soon as you see the Sony logo,  and the pink LED, press Volume Up key to enter recovery.
  14. Congrats! You should now see the custom recovery.
  15. Once in the CWM recovery, wipe cache and dalvik cache.
  16. That’s all.


That’s all with the recovery and kernel installation. In case you got any queries or you face any difficulties regarding this post, feel free to reach us through the comment box below. Thanks all.

Credits: Pwng3

How To Fix Problems With Galaxy Note 3 On Android 4.4.2 Kit-Kat

0
How To Fix Problems With Galaxy Note 3 On Android 4.4.2 Kit-Kat

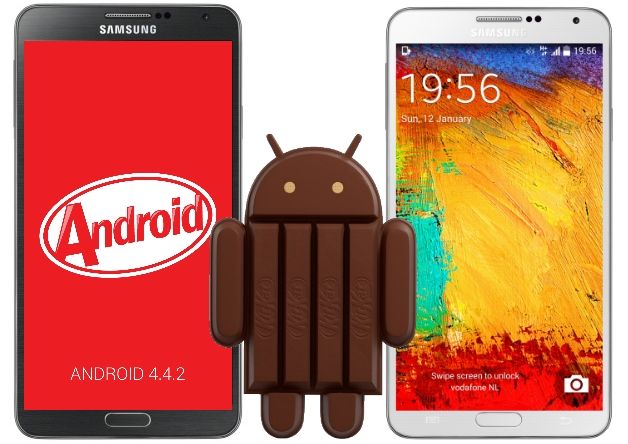
Galaxy Note 3 is without any doubt Samsung’s best release in terms of Mobile tech, even better than their latest flagship Galaxy S5. Despite its huge size, the only let down I saw in the start but as the time progressed, I found a lot of problems in its Stock Android 4.4.2 Firmware. Some of them were fast battery consumption, which something I believed the work of bloatware, but then there were a little problem with syncing too and the worst of all is  that I have experienced in most of the Galaxy Devices, is the Wi-Fi connectivity issue. In my experience, if I had left the Wi-Fi turned on and got out of the range, and then again if I am in range. it won’t connect automatically even worst it won’t even see the Wi-Fi connection, however after some seconds it does connect but in the meantime, at first I did panic.

Here you will find the solutions of most of those problems, but keep in mind that Samsung hasn’t officially released any words about those problems, there are chances that they release a Patch in the next update,which might solve all these problems. Till then, here are the solutions as well as the problems.

android-kitkat-galaxy-note-3

No Option To Save To SD Card:

In Galaxy Note 3 there is no option to save the apps to the Sdcard, in other devices, this feature is still available. Most of the Applications whose basic purpose is to back-up data, like Titanium Back-up won’t work until there is an option available to save data to SDcard. But there are some solutions available to get rid of this problem. We have posted a full guide on it, here is the link:

How to Fix save to the SD card with Android 4.4.2 on the Galaxy Note 3

Keep in mind, that this method requires Root access, if your device is not rooted, then don’t bother following it. You can also go for FolderMount from Play Store, but it also requires Root access.

Quick Battery Drain:

Well I have witnessed a real fast battery consumption while using Galaxy Note 3. Battery life was superb till Android 4.3, I am talking about all the Android devices, most of the users remain at Android 4.3 Jelly Bean just because if this main reason. But there are solutions available, not the perfect one, but it will work and you will feel some difference. Follow the Guide to see whether it works for your or not.

How To Save Battery Life On Android

If you want to use some 3rd party applications to save battery, Juice defender is the best one available yet. I have tried it on Sky Vega LTE, Galaxy S2, HTC Sensation XE and Dell Streak 5, others didn’t required any battery assistant, but for all these devices, Juice Defender worked for sure.

note3-kitkat-442

Problem With Wi-Fi:

There were a some problems with Wi-Fi as I’ve mentioned above, where the Wi-Fi connection showed week signals, but refuse to connect with it, here are some solutions:

  1. Go To Wi-Fi settings.
  2. Select the particular Wi-Fi and Forget it.
  3. Deactivate your Wi-Fi and after a little time, reactivate it.
  4. Connect to the Wi-Fi again and it will work.
  5. Just make sure to deactivate your Wi-Fi, when you are not using it.

E-Mail Syncing Problem:

Well this is one of the biggest problems, thank goodness it never happened to me. Whenever you tried to update your E-Mail, it never happens, this can be solved like this:

  1. Go To Settings > Accounts and Google Accounts.
  2. Check if the Automatic Sync is On and all of the Boxes are ticked, if not then do so.
  3. Now go back and choose Google + and change it to Automatic Save.

Some Of The Apps Are not Working:

Some of the Apps were working in the start and all of a sudden they have stopped working, here is what you need to do:

  1. The App might not be compatible with Android 4.4.2, you can wait for the update, which might bring Android 4.4.2 Comaptibility.
  2. Syncing between Data and apps might help.
  3. Empty the Cache of the particular app, go to Settings > Application Manager > Scroll and look for the app, empty the Cache and Data, just in case and see if that works or not.

If you have come across any other problem, do share with us, who knows we might be able to help you.

How to Hide Secret Files on Your Galaxy S5 Using Built-In Private Mode

0
How to Hide Secret Files on Your Galaxy S5 Using Built-In Private Mode

Everybody wants privacy on their smartphones, tablets and even on computers. When we are talking about smartphones there are many third party apps like Applock, Gallery Plus – Hide PicturesSectos – Photo & Video VaultTimeLockHi App Lock and many more, but first thought came into my mind that our personal things can get hacked if app server got hacked. Well today I’ve a good news for Samsung Galaxy S5 user’s, you don’t have to download and install any third party app Samsung has added a new feature in Galaxy s5 ” Private Mode ” that lets you hide pictures, music, videos, and other files. Today, I will tell you how you can Hide Secret Files on Your Galaxy S5 Using Built-In Private Mode.

hide-secret-files-your-galaxy-s5-using-samsungs-built-private-mode.w654


To get starting with Private Mode, Swipe down the status bar with your two fingers so that you get all the option as shown in the upper screenshot. Tap on Private mode you’ll see four option to set the unlock method PatternPINFingerprint, orPassword.

Selecting Pictures,Videos, Music and Files You Want to Hide

  • After activating Private Mode go to your Gallery app and select the photos and video you want hide, after select all the pictures and video tap on the menu and select move to private.
  • Now goto Music app select all the files that you want to hide after selecting tap on menu select move to private.
  • Now if you want to hide Files go to ” My Files ” choose files you want to hide tap on menu and select move to private.
  • After you choose your files, Pictures, Video and music. You’ll be asked where you want to place your files. Select private storage instead of device. Create a folder in your private memory and select ok. All your files will be moved to the selected folder.

hide-secret-files-your-galaxy-s5-using-samsungs-built-private-mode.w654y

  • After moving your files to Private Storage now go back to home screen. Swipe down the status bar with two fingers so that you can see all the options. Tap on Private Mode you’ll be promoted to Pin, Password, Swipe or Pattern that you have select in first step. Enter what ever you have selected to disable the Private Mode.

Accessing All of Your Hidden Files:

Now you were thinking how to retrieve the hidden files. It’s easy follow all the following steps and you get all your files back.

  • Open Private Mode , Enter code or what ever you have enabled for security.
  • Goto My Files and you will see private storage option tap on it.
  • You’ll get your Folder that you have created in above guide.

hide-secret-files-your-galaxy-s5-using-samsungs-built-private-mode.w654ty

Add WhatsApp Widget to the Lock-Screen – How To Guide

0
Add WhatsApp Widget to the Lock-Screen – How To Guide

WhatsApp is one of the most famous Social Chatting Platform available on almost all the Famous OS, like Android, iOS, Symbian, Windows, BB OS etc. not only does it provides an amazing Online Chatting experience, but unlike any other Social Chatting app, WhatsApp doesn’t sell ads instead they ask you to pay $0.99 per year and keep enjoying the service, in my opinion paying such amount is nothing, if you get to enjoy an ad free and uninterrupted Chating experience. But if you don’t want to pay this amount, then after a year just change your number and all is well to be used, totally free again.

We all use of WhatsApp, every day sometimes even more than the usual messaging app and every time you have to unlock the screen to open the app for replying to the message.  Now this is something not only time consuming, but also teasing, good thing WhatsApp has it own Widget that can be set to the Lock-Screen from where you can not only see the message but also reply it without opening the app, you know like a Quick composer. For that all you need is to follow these steps and all is well.

AndroidPIT-S4-WhatsApp

Activate WhatsApp Pop-Up:

  1. Open WhatsApp.
  2. Go to settings.
  3. Tap Notifications.
  4. Tap Popup Notifications.
  5. And Choose Always Show popup 

Untitled-1

Now there is one thing, that every Android has its own way of showing WhatsApp widget, On Stock Android, by that means, the one installed in Nexus devices, has its own way of Showing the Widget and it can be expanded to full screen. While on a Galaxy Device things are different, you can only set a WhatsApp shortcut on the Lock Screen, with some other shortcuts to open these apps without unlocking the screen again and again. Here is how you can set shortcuts on a Galaxy Device.

Shortcut On Lock-Screen:

  1. Go To Settings.
  2. Navigate to Lock Screen.
  3. Tap Shortcuts and set it to custom.
  4. Tap Edit Shortucts and remove anyone you don’t want.
  5. Tap the + Icon and scroll down.
  6. Tap WhatsApp once you see it and a Shortcut of WhatsApp will be added to your Lock-Screen.

Untitled-2

Having Problems?

Now if you still have Problems with the methods mentioned above, that means your device is running an Android version that doesn’t support Lock-Screen Widgets, anything below Android 4.2.2 doesn’t support Lock-Screen widgets if you want such facility then you need to update your device to Android 4.3 or above or at-least Android 4.2.2 Jelly Bean.

4-Must Theme Apps For Your Android Device

4-Must Theme Apps For Your Android Device

There is no doubt that the Custom ROMs are the best options when it comes to customizing and changing your device looks, speed and performance. But on the other hand, there are those who don’t want to install Custom ROMs on their device, because they think that Custom ROMs will destroy their device, or they are just too afraid to install these ROMs. What they want is a Simple solution to give their device amazing looks without rooting or installing Custom ROMs. For such people, 3rd party Launchers are available to give their device not only looks but Speed as well. But for those who are using Nexus devices, why would they be going after Speed in the First place, what they want are the looks from the beginning, well I was a Nexus user and myself tried every sort of Custom ROM on it, but still there was no ROM who gave me the looks I Desired.

Afterwards, I looked for some 3rd Party apps, I never liked Launchers from the start, so there were a lot of Good apps which provided my Nexus 5 some great looks, and since it was Nexus 5 there wasn’t any need to worry about Speed and Performance. I have compiled a List of Theme apps that you should try on your device, especially when it is running pure Android. You won’t be needing any Rooted device for such purpose, just an Android device which should be compatible with these Apps.

Screenshot_2014-02-24-19-31-45

Zooper Widgets:

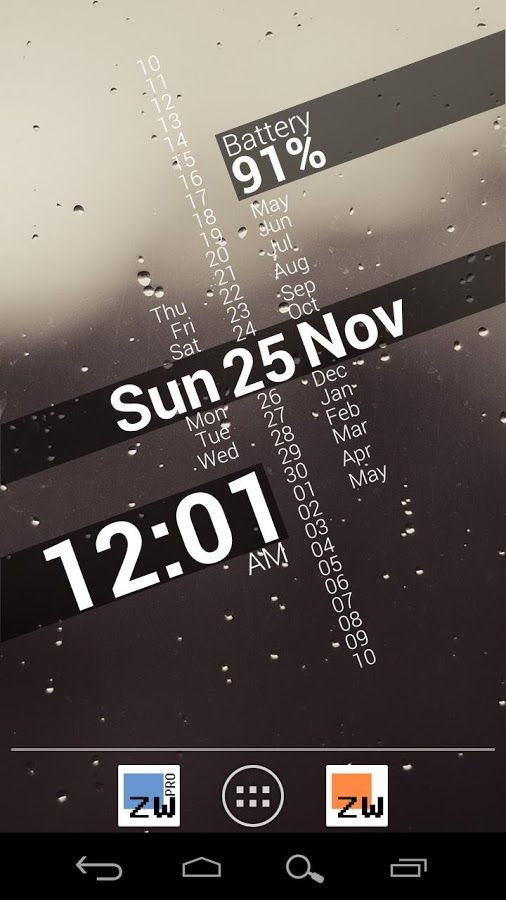
If you are a fan of Widgets or you just like widgets more than any normal theme or look, then Zooper Widget is available on Google Play Store to give you the best widgets experience. In normal circumstances, your default widgets will work only on your Home-Screens, or if there is an option, your device might have the ability to let you use widgets on your Lock-Screen. Zooper Widgets can provide you the best Clock Widgets on your Lock-Screen as well as your Home-Screen. This app is also available in its Pro Verison, with only $1 and you will have the power to customize your device like never before.

unnamed

Paper icon pack:

Icons is the best way to give your device the best Icons packs available yet, you can apply themes to work with Icons pack, thus giving your device the best look anyone can offer. To use the Icons pack, you might need to apply some custom launchers, each launcher is different but all of them have the option to apply themes and apply Icons pack. Papar Icon pack is, well not the best one available, but still it is a real beauty to be the part of any Droid device.

Screenshot_11

Behang Wallpapers:

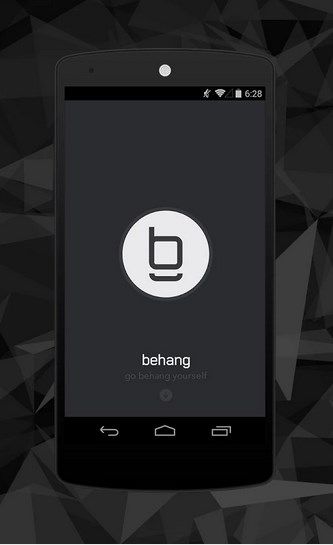
Behang wallpaper app has hit the Play Store last week, and it has become one of the popular apps to hit the Play Store. Wallpapers can be used to give your device some unique looks that can’t be given by any other way possible. These wallpapers set can be found on Play Store for only $1.10.

Screenshot_10

Themer Beta:

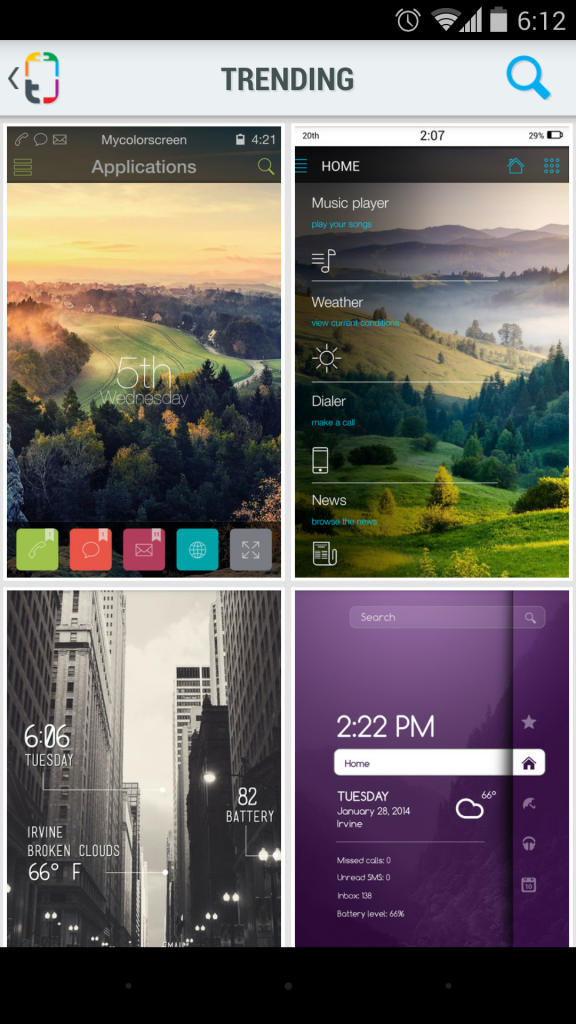
We posted an article on Themer Beta Before, giving you almost all the information about Themer beta, Themer Beta is specially designed to give your device a Beautiful look and there are variety of themes available on it. You don’t need to go through a lot of steps to Configure the themes but only some simple steps will let you Configure everything. To let you know how good it is, Themer Beta was Featured in The New York Times, Wired, Lifehacker, and CNET. But there is something you need to know, that once you apple Themer beta, you shouldn’t change the Wallpaper. Wallpaper in the Theme should’t be changed, otherwise your theme will suck and all of them icons become transparent and you won’t see a thing.

Screenshot_2014-02-24-18-12-44-576x1024

How to Fix save to the SD card with Android 4.4.2 on the Galaxy Note 3

How to Fix save to the SD card with Android 4.4.2 on the Galaxy Note 3

Android 4.4 KitKat brings a lot of new features for Galaxy Note 3, but along with it we have gotten an issue and now we cannot save to the SD card, meaning that in previous Android versions whenever we installed a new application we always had the option to move it to external microSD card but with the Android 4.4 update its gone. The problem seems to occur with some specific application not with all. Anyway, lets fix this issue.

Write to SD card on Android 4.4.2 KitKat

Disclaimer: The methods involved in rooting your phone is highly custom and may result in bricking your device, and has nothing to do with Google or the device manufacturer that is SAMSUNG in our case. Also rooting your device will void its warranty and you will be no longer eligible for any kind of free device services by the manufacturers/warranty providers. In case of any mishap we may not be held responsible. Follow these instructions to the letter to avoid any mishap or bricking. Make sure that whatever you do, you are doing it at your own responsibility.

Before Starting:

  1. Your phone’s battery must be charged at least over 60%. This is highly recommended in order to prevent any power issues during the flashing process.
  2. Make sure that you backup your important media content, ContactsCall Logs & Messages. This is highly recommended just in case something goes wrong and you need to reset your phone.
  3. Use only OEM data cable to establish connection between your phone and PC. Turn off your Anti Virus and Firewall to prevent any connection issues. Also enable USB debugging mode on your phone if you face connection issues.
  4. Your device must be running Android 4.4.2 KitKat.

How to Fix save to the SD card with Android 4.4.2 on the Galaxy Note 3 Guide:

  • Download  and unzip it.
  • Connect your device with PC and copy the file in to your external microSD card. 
  • Disconnect your device and turn off your Galaxy Note 3 and reboot into the recovery mode ( (home + volume down + power ).
  • Use volume button to move up and down, select install Zip and press power button to select it.
  • Now Select ” choose the zip from sdcard ” goto file that you’ve copied in 2nd step.
  • Use power button to select it and then select yes and confirm.
  • Return to main menu and reboot your device.

All Done ! Now you can Write to SD card on Android 4.4.2 KitKat.

Source: XDA Developers

How to set a mobile data limit on the Galaxy S3, S4, S5 and Note 3

0
How to set a mobile data limit on the Galaxy S3, S4, S5 and Note 3

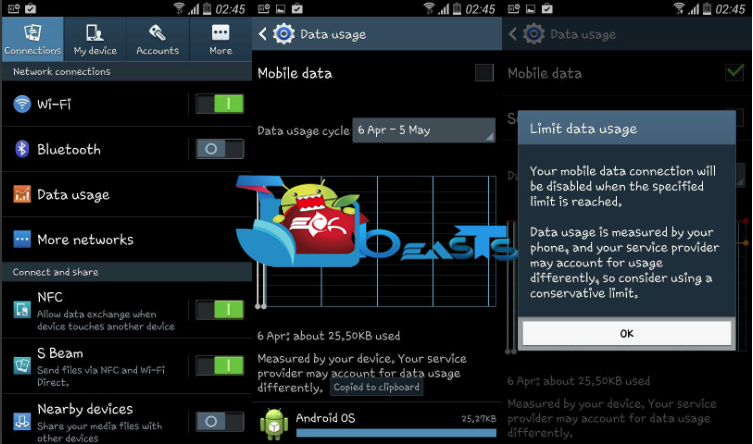
Whenever we purchase a new device, most of us don’t know how to disable mobile data, and same is the case when we don’t know about data plan being outdated. Because of this when we need our mobile data the most, our limit is up due to reason that we don’t know when the limit is up and how much was consumed in a day.  So, today I will tell how you can set a specific mobile data limit on your Galaxy devices. When ever you’ll reach to the specific limit of mobile data you’ll be notified. That will help to track your mobile data plans limit.

How to set a mobile data limit on the Galaxy Devices:

set a mobile data limit on the Galaxy

On Galaxy Note 3: Setting -> Connection Tab ->Date Usage -> Check Mobile Data -> Check Set Mobile data Limit. Add any Specific Mobile Data Limit, when you cross that limit you’ll get a warning message.

On Galaxy S5:  Samsung Galaxy S5 setting will be a little bit different due to TouchWiz but its also so easy. Goto Settings -> Quick Settings -> Data Usage -> Set Mobile Data Limit.

set a mobile data limit on the Galaxy

On Galaxy S4: I am running 4.4 KitKat on Galaxy S4 setting are same follow the steps. Goto Settings -> Connections tab -> Data Usage -> Set Mobile Data Limit.

On Galaxy S3: Setting menu depends on your OS version, if your are using Android 4.3 on S3 then setting tabs will be different. It totally depend on your Android version. To Set mobile data limit on S3 Goto Settings -> Connections tab -> Data Usage -> Set Mobile Data.

Personally I love this option because it helps us to know how much we have used mobile data in day, also we will know when we  to update our package.

Download Videos On Your Android Device With Viz Video Downloader

0
Download Videos On Your Android Device With Viz Video Downloader

Downloading videos on Android device may become a hitch, specially when there is a number of applications available in the Google Play Store and you have no idea at all which one actually works, also there isn’t a chance to find a working app when you want to download videos from multiple sites. To make this task easy, we’ve found something for you.

Yesterday, I had to download some videos from DailyMotion and while searching for an application that can do this job, I came across Viz Video Downloader in the Google Play Store. Viz is available for free and offers some in-app purchases, the app is capable of downloading videos from different video hosting sites like Vimeo, DailyMotion (as mentioned), GoGoAnime and so many other similar sites.

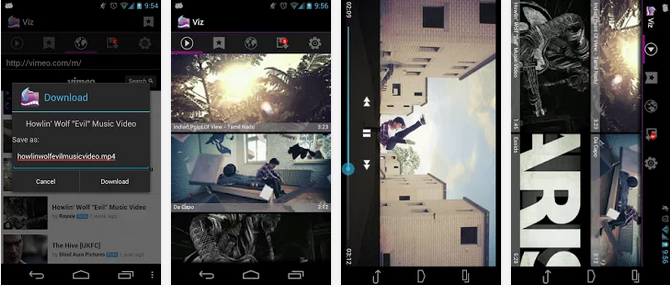
Viz sports a simple and user-friendly interface. Consisting of different tabs, the first tab shows you the opened / played video sharing/hosting site, the 2nd tab shows you the added/bookmarked video sites, 3rd tab is for browsing the video sites, the 4th tab shows the download progress of the videos while the 5th one is for settings. Downloading videos is way too easy, just search for your desired video and tap it, Viz will quickly show a popup with the download option. Viz doesn’t support Youtube because of Youtube’s Terms of Service, but it works for most of the other similar and popular sites. You can also watch the videos in the Play  tab in Viz Video Downloader.Viz Video Downloader

Here’s the official description of the app:

Viz is a video downloader that enables you to download videos from some of the web’s most popular sites so you can watch the videos without a reliable internet connection.

Find videos you would like to watch through the built in web browser, download them by selecting the video in the browser, and watch them directly within the app by selecting the video from the Play tab.

Viz supports content playback and content management in an easy to use interface.  The current version supports the download of mp4, 3gp and mov. Downloads fail? No worries, resume them where they left off with Viz!

Supports vimeo, Gogoanime, bing videos, funnyordie, metacafe, blinkx, liveleak, videobash, veoh and more!

Unfortunately youtube cannot be supported as their licensing agreement specifically forbids downloading.

How to Use Viz Video Downloader:

  1. Downlaod and install Viz Video Download: Google Play Link | APK
  2. Access the installed app from the app drawer.
  3. Tap the browser tab in Viz (the third tab).
  4. Enter your desired site’s URL and proceed.
  5. Search for your desired videos.
  6. Tap the video you want to download.
  7. Once the download is started, it will be shown under the download tab (the 4th tab).
  8. Enjoy downloading videos from your favorite sites.
  9. That’s all.

Update Huawei Ascend P6 to Android 4.4.2 KitKat with Omni ROM

3
Update Huawei Ascend P6 to Android 4.4.2 KitKat with Omni ROM

Huawei Ascend P6’s development is in run, and the Custom ROMs for no doubts are a best way to drive your device crazily. Omni ROM, one of the well-known and best custom operating systems is now available for Huawei Ascend P6. Although the device is upgradable to Android 4.4.2 KitKat officially, but Omni ROM still may be a choice for so many of the P6 owners. The ROM sports a number of features that you may love, and what’s even better is, this ROM unlike other custom ROMs is stable and may be kept for day-to-day use.

ascend-model2

Those of you, who’ve been looking for a guide to install Omni ROM Android 4.4.2 KitKat on Huawei Ascend P6, have spotted the right place at the moment. In a few minutes, we will be going through a detailed and comprehensive method that will help you to get this ROM installed successfully. The only thing to be kept in mind here is, although this is a stable build, but you should only flash it if you’ve enough knowledge of the custom ROMs and you’re able to handle any mishap that may happen later on. It is highly recommended that newbies stay away from this ROM if they are not familiar. Let’s go through the features of Omni ROM and then head towards the installation guide.

Features:

  • * Builded from the last source code OmniRom Android 4.4.2 !

  • * Status bar tweaks

  • * Quick Settings Panel tweaks

  • * Notification Drawer tweaks

  • * Active Display

  • * Appbar

  • * Button Volume Wake

  • * OmniSwitch

  • * Init.d scripts

  • * Recents RAM Bar

  • * SuperSu

  • * Performance menu

Pre-Installation Instructions:

  1. This guide is only for  Huawei Ascend P6. Do not try this on any other device, please check your device’s model number in Settings > General > About Device.
  2. Your phone’s battery must be charged at least over 60%. This is highly recommended in order to prevent any power issues during the flashing process.
  3. Make sure that you backup your important media content, ContactsCall Logs & Messages. This is highly recommended just in case something goes wrong and you need to reset your phone.
  4. Create a Nandorid Backup of your current ROM before you begin. This is highly recommended in case you want to revert back to the previous working state of your phone in case of any mishap.
  5. If your device is rooted, use Titanium Backup to backup all of your important apps with data.
  6. Alright! Go ahead, follow this guide to the letter.

How to Install Omni ROM Android 4.4.2 KitKat on Huawei Ascend P6:

  1. Your device must have KitKat based TWRP 2.7 Recovery installed.
  2. Once installed TWRP Recovery, download Omni ROM.zip file.
  3. Download Gapps.zip for Omni ROM.
  4. Copy both the downloaded .zip files to your phone’s SD card.
  5. Now boot into TWRP Recovery on your phone. To do so, turn off your device completely. Now turn it on, as soon as you see the Red LED, press Volume Up or Down key a few times  and it should take you to the TWRP Recovery interface.
  6. In TWRP, tap “Install > locate the Omni ROM.zip file > Install it”.
  7. Once the installation is completed, once again tap “Install > locate the Gapps.zip file > Install it”.
  8. After installing both the .zip files, reboot your device.
  9. You should see the Omni ROM on your device’s screen now.
  10. First boot may take up to 10 minutes, if it’s taking long, boot into TWRP and wipe cache and dalvik cache using the wipe option in recovery and reboot.
  11. That’s all. Enjoy Omni ROM Android 4.4.2 KitKat on your Huawei Ascend P6.

Omni ROM Ascend P6

Install Android 4.4.2 KitKat On Huawei Ascend P6 With CM 11 Custom ROM

5
Install Android 4.4.2 KitKat On Huawei Ascend P6 With CM 11 Custom ROM

Huawei Ascend P6 is upgradable to Android 4.4.2 KitKat officially, but some of the Android enthusiasts might not be ok with the Official version of Android running on their device and may want to cross the barbed wires by installing a custom operating system on the aforementioned device. When it comes to the custom operating systems, it may cause a lot of confusion as there is a ponderous list of cool and greatly modified versions of Android, but what sits atop is CyanogenMod, that has actually paved way for all the other custom Android operating systems. CyanogenMod 11 based Android 4.4.2 KitKat is available for Huawei Ascend P6 now, users may install it and taste the KitKat unofficially. Although the firmware is in pre-alpha development stage, but still it’s a good chance to checkout the CM 11 running on Huawei Ascend P6.ascend-model2

Cyanogen_Mod_11In the following post we are going to install this CM 11 based KitKat firmware on Huawei Ascend P6. Before going ahead, make sure that you are familiar with the custom ROMs and you actually know what you are going to do on your device. As mentioned, this is a pre-alpha release, the firmware may not be tested by newbies and noobs. It is highly recommended that only Android experts try this out on their device. Also, there is a high chance of a number of bugs in this firmware, we may not be held responsible later on in case of any mishap.


Pre-Installation Instructions:

  1. This guide is only for  Huawei Ascend P6. Do not try this on any other device, please check your device’s model number in Settings > General > About Device.
  2. Your phone’s battery must be charged at least over 60%. This is highly recommended in order to prevent any power issues during the flashing process.
  3. Make sure that you backup your important media content, Contacts, Call Logs Messages. This is highly recommended just in case something goes wrong and you need to reset your phone.
  4. This is a custom ROM and is in pre-alpha stage as mentioned above. It may not be kept for everday use, only Android power users may install this ROM.
  5. Create a Nandorid Backup of your current ROM before you begin. This is highly recommended in case you want to revert back to the previous working state of your phone in case of any mishap.
  6. If your device is rooted, use Titanium Backup to backup all of your important apps with data.
  7. Alright! Go ahead, follow this guide to the letter.

How to Install CM 11 Android 4.4.2 KitKat on Huawei Ascend P6:

  1. Your device must have KitKat based TWRP 2.7 Recovery installed.
  2. Once installed TWRP Recovery, download CyanogenMod 11.zip file.
  3. Download Gapps.zip for CM 11 ROM.
  4. Copy both the downloaded .zip files to your phone’s SD card.
  5. Now boot into TWRP Recovery on your phone. To do so, turn off your device completely. Now turn it on, as soon as you see the Red LED, press Volume Up or Down key a few times  and it should take you to the TWRP Recovery interface.
  6. In TWRP, tap “Install > locate the CyanogenMod 11.zip file > Install it”.
  7. Once the installation is completed, once again tap “Install > locate the Gapps.zip file > Install it”.
  8. After installing both the .zip files, reboot your device.
  9. You should see the CyanogenMod 11 logo on your device’s screen now.
  10. First boot may take up to 10 minutes, if it’s taking long, boot into TWRP and wipe cache and dalvik cache using the wipe option in recovery and reboot.
  11. That’s all. Enjoy CyanogenMod 11 on your Huawei Ascend P6.


Install ClockworkMod 6.0.3.7 or TWRP 2.7 Recovery On Huawei Ascend P6

14
Install ClockworkMod 6.0.3.7 or TWRP 2.7 Recovery On Huawei Ascend P6

Huawei’s flagship device Ascend P6 is one of the widely used Android devices around the world now, The device won the Chinese manufacturer enough respect with it’s extremly slim and beautiful design. The device surely needed some attention from the developers and finally Huawei Ascend P6’s development is moving ahead day by day and there is a number of custom ROMs, Tweaks and Mods that you may install and test the limiations of your Android device. Earlier, we posted the Root and CWM recovery guide for the Ascend P6, but for the latest Mods, Tweaks and Custom ROMs you may need a latest custom recovery running on your device.

TWRP 2.7 CWM 6.0.3.7 Huawei Ascend P6

While going through the XDA-Developers forum I came across TWRP 2.7 and CWM 6.0.3.7 recoveries for the Huawei Ascend P6. Both the recoviers are in development stages, but should be able to perform all of your desired tasks that usually want in a custom recovery.

In the following post we are going to install both these recoveris on this device, In case you’ve been looking for it, your search may come to and end and follow the procedure being very careful. Before we proceed with the recovery installation, I’m assuming that not al of you are familiar with a custom recovery and have no idea what you’re going to do. To make it clear and remove any confusion, we will first go through a brief introduction of the custom recoveries, that are TWRP and ClockworkMod in our case.

A custom recovery allows you to install custom roms, mods etc. Along with these, you can make a Nandroid backup, this helps you a lot as you can move back to the previous working state of your phone at any time you want if you have backed up your current system. In some cases, to root the phone you need to flash SuperSu.zip file in the custom recovery, having installed the recovery may help you while in some cases to install the recovery easily, you need to have the phone rooted. You can also wipe cache and dalvik cache of your phone using a custom recovery.

Here are the pre-installation instructions:

  1. This guide is only for  Huawei Ascend P6. Do not try this on any other device, please check your device’s model number in Settings > General > About Device.
  2. Your phone’s battery must be charged at least over 60%. This is highly recommended in order to prevent any power issues during the flashing process.
  3. Make sure that you backup your important media content, ContactsCall Logs & Messages. This is highly recommended just in case something goes wrong and you need to reset your phone.
  4. Use only OEM data cable to establish connection between your phone and PC. Turn off your Anti Virus and Firewall to prevent any connection issues. Also enable USB debugging mode on your phone if you face connection issues.
  5. Alright! Go ahead, follow this guide to the letter.

Disclaimer: The methods involved in flashing custom ROMs, recoveries and rooting your phone are highly custom and may result in bricking your device, and has nothing to do with Google or the device manufacturer that is Huawei in our case. Also rooting your device will void its warranty and you will be no longer eligible for any kind of free device services by the manufacturers/warranty providers. In case of any mishap we may not be held responsible. Follow these instructions to the letter to avoid any mishap or bricking. Make sure that whatever you do, you are doing it at your own responsibility. 

How to Install CWM 6.0.3.7 Recovery:

  1. Your device must have CWM 6.0.3.6 already installed in order to install this recovery.
  2. Downoad CWM 6.0.3.7 update.zip file and copy it to your phone’s sd card.
  3. Boot into CWM Recovery on your phone now, to do so, turn off your device completely. Now turn it on, as soon as you see the Red LED, press Volume Up or Down key a few times  and it should take you to the CWM interface.
  4. Once in CWM, select “Install > Choose Zip from SDcard > CWM 6.0.3.7 Update.zip > Yes”.
  5. Proceed with the installation and complete it.
  6. Once done, reboot your device.
  7. Boot into the CWM 6.0.3.7 using the method in step 3.
  8. That’s all with CWM 6.0.3.7 installation.

How to Install TWRP 2.7 Recovery:

  1. TWRP 2.7 works only with the Android 4.4.2 KitKat powered Huawei Ascend P6.
  2. You must have installed Android ADB & Fastboot drivers on your PC. Get the Fastboot folder using the guide.
  3. Once done with the ADB and Fastboot installation, download TWRP 2.7 Recovery.img file.
  4. Rename the downloaded file to boot.img.
  5. Enable USB debugging mode on your Huawei Ascend P6 and connect it to your PC.
  6. Now open the Fastboot folder that you created using our ADB & Fastboot guide.
  7. Press and hold the shift key and then right click on an empty area inside the Fastboot folder, now click on “Open Command Window Here”.
  8. Now in command prompt type “adb reboot bootloader”.

  9. It should reboot your phone into the bootloader mode, now push this command in command window

    “fastboot flash boot boot.img”

  10. This will quickly flash the TWRP 2.7 recovery in your device.
  11. Once done, reboot your device.
  12. Boot into recovery by pressing Volume Up or Down Key as soon as you see the Red LED while booting up your phone.
  13. You should see the TWRP recovery interface now.

That’s all with the recovery installation on the Huawei Ascend P6. In case you got any queries or your facing any problems regarding this post, feel free to stop by the comment box below and reach us. Thanks all.

Credits: surdu_petru