Home Blog Page 456

How To Fix Google Play Store Errors

0
How To Fix Google Play Store Errors

Google Play Store might be the only reason, why Android OS is on the Top of every other OS in the market. More than 83 Companies are using Android as the Primary OS  in their devices. But like any other app, Google Play Store has some errors, that occurs rarely but once occurred they cause panic among the users. There is no reason to fret at the moment, but not all of the errors are that serious, you know some are because of recent activity of the app, which can be solved by a little patience. Today we will Tell you some of the Main errors of Google Play Store, what is the reason, Problems and how you can solve them.

Error 491

Google Play – Error 491:

The main Problem you will experience after this error is that you can’t Download or Update anything using Google Play Store, you’ll need to download and install these apps Manualy, using Apk files.

Here Is How You Can Solve It:

  1. Go To Settings > Accounts.
  2. Remove your Google Account.
  3. Restart the Device and Add the same account again.
  4. Once again go to Settings > Apps.
  5. Go to All Apps Tab and Locate Google Play Services.
  6. Tap it and Clear Data and then Force Stop.

Google Play – Error 919:

The main Problem you will experience after this error is that you will be able to download apps, but they won’t work after the Downlaod.

Here Is How You Can Solve It:

Clear some space on your device, that is all.

Google Play – Error 498:

The main Problem you will experience after this error is that your downloads will be interrupted.

Here Is How You Can Solve It:

  1. Go To Recovery Mode of your Device. (Volume Up + Home + Power For Samsung devices, For all others Volume Down + Power Button)
  2. Highlight the Wipe Cache Option and use Power Button to Select it.
  3. Confirm the Operation on the Next screen and Reboot the device.

Google Play – Error 413:

The main Problem you will experience after this error is that you can’t Download or Update anything using Google Play Store.

Here Is How You Can Solve It:

  1. Go to Settings > Apps.
  2. Go to All Apps Tab and Locate Google Play Services.
  3. Tap it and Clear Data and then Force Stop.
  4. Do the Same with Google Play Store
  5. Clear the Cache and From your Internet Browser too.

Google Play – Error 921:

The main Problem you will experience after this error is that you can’t Download any app at all.

Here Is How You Can Solve It:

  1. Try deleting the Cache of Google Play Store application.
  2. If that doesn’t work, delete the Play Store Application Data.
  3. If still nothing, Remove your Google Account, restart the device and Add it again.

Google Play – Error 403:

The Downloading will be Impossible, this usually happens because Two Google Accounts are used to Purchase Appliactions.

Here Is How You Can Solve It:

  1. Open Google Play Store using the correct account.
  2. Uninstall the Application in Question.
  3. Again try to download the app from Google Play store.

Google Play – Error 492

Devlik Cache is the Main problem here, you can’t install an Application because if that.

Here Is How You Can Solve It:

  1. Go to Settings > Apps.
  2. Go to All Apps Tab and Locate Google Play Services.
  3. Tap it and Clear Data and then Force Stop.
  4. Do the Same with Google Play Store
  5. If still the problem occurs, Clear the Devlik Cache using Recovery Mode

Google Play – Error 927:

You won’t be able to download any App, because the Update of Google Play Store is in Progress.

Here Is How You Can Solve It:

  1. Wait for some Minutes, to see whether the update is over or not.
  2. If the problem still occurs, Clear the Data of Google Services and Force stop them.
  3. Do the Same with Google Play Store application

So, here they are folks, if you encountered any other Error do share with us, we might be able to provide you the solution.

Source: AndroidPit

How To Unroot & Flash Stock Firmware On Samsung Galaxy S5 [All Variants]

9
How To Unroot & Flash Stock Firmware On Samsung Galaxy S5 [All Variants]

Galaxy S5 with all of its variants is available all across the world now. More the device is getting popular, more is its development moving forward. Just in case you don’t know, all the variants of Galaxy S5 have already been rooted by the famous and well-known XDA Elite Recognized Developer Chainfire. The device is rooted using Chainfire’s CF-AutoRoot, that can be easily flashed using a custom recovery or using a .tar.md5 file with Odin3 flash tool.

Usually, Android enthusiasts keep their devices rooted in order to unleash the true power of their device, and specially when you have a device like Samsung Galaxy S5, you won’t be able to keep yourself on the factory limitations of the device. There merely are the chances that the users want to unroot their device, this may be the case when they want to restrict the root privileges or just in case they want to bring their device back to the factory state. A number of users has been confused about unrooting an Android device, that they usually think, restoring factory settings or wiping the factory data will wipe the root access, but it actually does nothing except wiping the settings made by the users, and wiping the phone’s internal storage.

Well there’s nothing to worry about as there’s nothing complex that will help you to unroot your Galaxy S5. We have a complete comprehensive guide right here that will help you to unroot your Samsung Galaxy S5 [all the variants, listed below] easily. We’ll be doing so by flashing a stock firmware,  simple flashing will result in unrooting your Galaxy S5 while wiping the data will also bring your device back in its factory state. All you need is, just follow this guide carefully and get it done successfully.Unroot-GalaxyS5-StockFirmwrae

Following are the pre-installation instructions for unrooting:

  • This guide is only for Samsung Galaxy S5, the variants which are listed below. Do not try this on any other device.
  • Make sure that your phone’s battery is charged at least over 60%.
  • Use the original data cable for establishing the connection between your PC and phone.
  • Backup all your important contacts, find the full guide here.
  • Backup all your important sms messages, find the full guide here.
  • Backup all your important call logs, find the full guide here.
  • Backup all your important media content manually. (Copy to your PC.)
  • If you’ve flashed a custom recovery, it is suggested that you create a Nandroid Backup. [Important]
  • Don’t forget to make EFS backup before flashing this firmware. [Important]
  • If your device is rooted, you may use Titanium Backup to backup each and everything on your phone.
  • Although it is not necessary to wipe your phone before flashing this firmware, but to achieve the best performance, it is recommended that you perform a factory reset before flashing this firmware.
  • A clean install is always preferred for the best results from the new firmware. It is recommended that you wipe your phone from the recovery using “Factory Data Reset” option and then install this firmware.
  • Turn off /disable Samsung Kies while using Odin3.
  • Turn of any Anti Virus softwares while using Odin3.
  • Alright. Follow the instructions carefully.

Things you need to download:

    1. Download and extract Odin3 v3.09 – Get it HERE.
    2. Download and Install Samsung USB drivers – Get HERE.

Download and extract latest stock firmware for your device:

How to Unroot Samsung Galaxy S5 by Flashing Stock Firmware:

  1. Open Odin3.exe.
  2. Put your phone in download mode. To do so, turn it off and wait for 10 seconds. Turn it on by pressing and holding Volume Down + Home Button + Power Key simultaneously, You should see a warning, press Volume Up to continue. In case this method doesn’t work for you, try one from this guide.
  3. Connect your phone to your PC.
  4. As soon as Odin detects your phone, the ID:COM box should turn blue.  Make sure that you’ve installed Samsung USB drivers before connecting.
  5. For Odin 3.09 hit the AP tab. Select the extracted firmware file, that should be in .tar.md5 format.
  6. If you’re using Odin 3.07, you will select “PDA” tab instead of the AP tab, rest of the options remain untouched.
  7. Make sure that the options selected in your Odin are exactly as shown in the pic.
  8. Odin 3.09 explained. (2)
  9. Hit start and wait till the firmware flashing is complete, as soon as your device restarts, remove it from PC.
  10. Congrats! your device is unrooted now and is back to its factory state.

Note:

Please keep in mind that Samsung Galaxy S5 comes with Knox implementation. Unrooting the device will not result in gaining the warranty back, nor it will erase the knox counter. It will simply wipe the root access. Just in case your device is gone into bootloop, boot into stock recovery and perform a factory data reset.

Do not forget to checkout: CWM Recovery for Samsung Galaxy S5.

Checkout our custom ROMs section in order to find great custom ROMs for your Galaxy S5.


That’s all. In case you got any queries or you’re facing any difficulties, don’t hesitate to reach us through the comment box below. Thanks all.

Add app shortcuts in your notification bar on Android Devices

0
Add app shortcuts in your notification bar on Android Devices

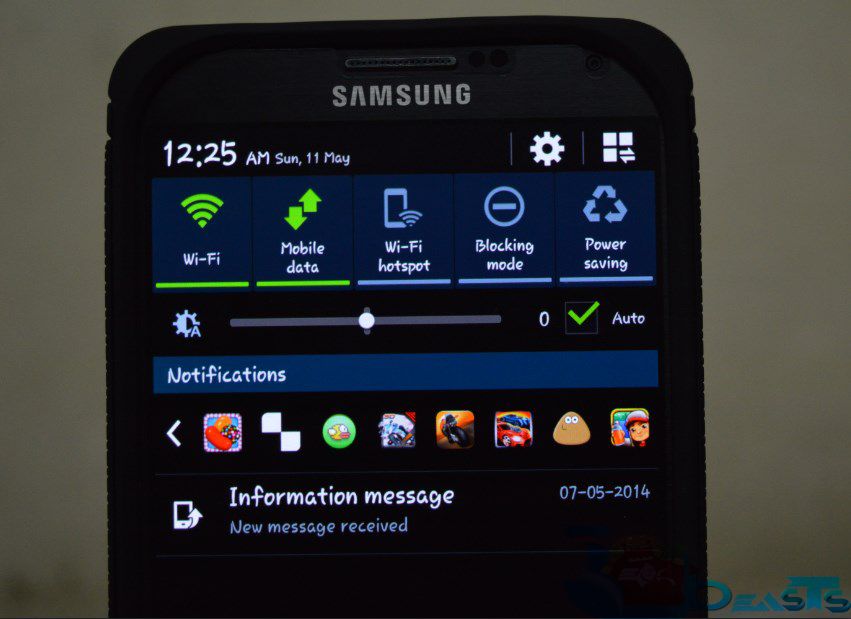
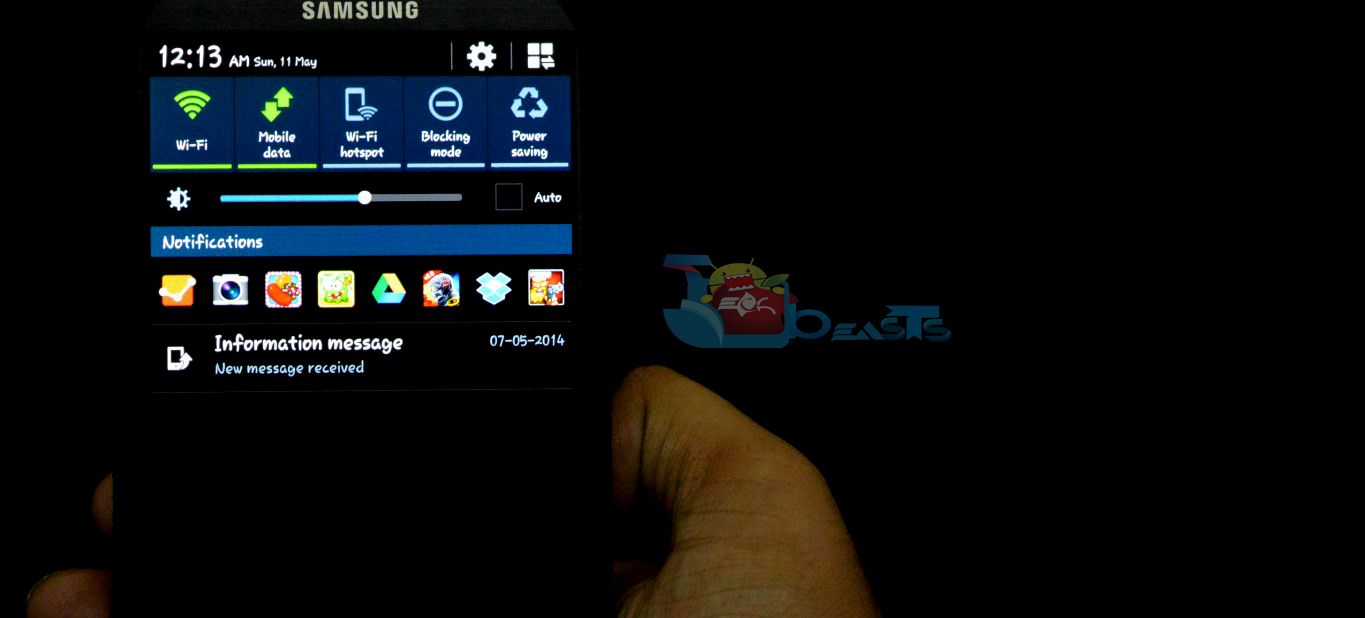
This is what I love about Android, adding what ever you want and controlling your device, as in you are a developer. Today I’ll tell you how you can add app shortcuts in your notification bar, so you can easily access your favorite apps. No need to go to main menu and swipe you finger here and there to find the apps. Just drag down your notification bar and all the favorite apps are there.

app shortcuts in your notification bar on Android


Before Starting:

How To Add app shortcuts in your notification bar on Android Devices:

  • Download the the Bar Launcher form the given link.
  • After downloading Bar Launcher install it.
  • After the installation is done. Open the Bar Launcher app and start adding the app you use most frequently.

add app shortcuts in your notification bar on Android


  • Tap on blue + icon to add apps. When you tap on the + icon you’ll get the list off all the available apps. Tap on apps icons to add in the bar.

add app shortcuts in your notification bar on Android


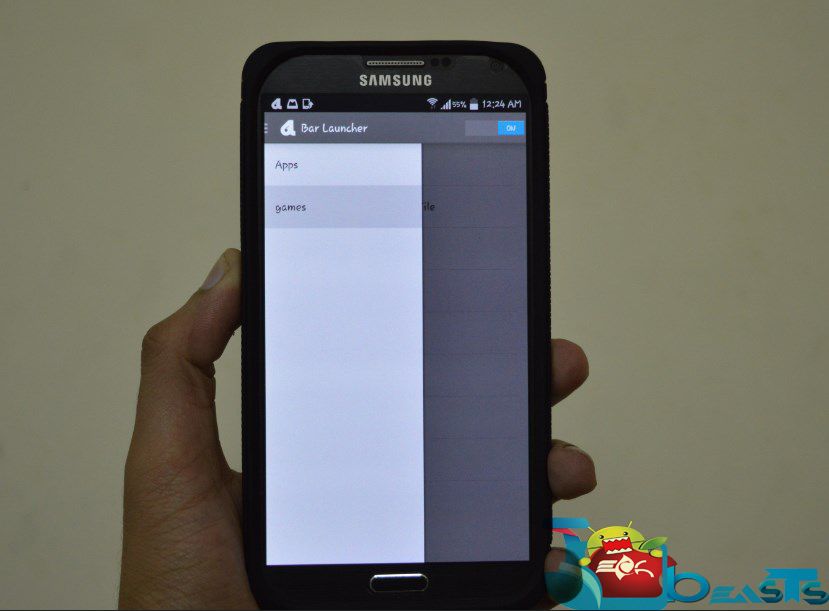
  • You can add multiple rows for different apps e.g you can create rows for social apps, games and photography. Tap on setting button on your device you’ll get two options Add Row and Settings. Select add row.

add app shortcuts in your notification bar on Android


  • After creating another row you can add app by taping on + icon. Now you can easily separate your games and apps etc.
  • All Done your apps are added in notification menu.

add app shortcuts in your notification bar on Android


Real Cricket 14, The Best Cricket Game For Android Ever

0
Real Cricket 14, The Best Cricket Game For Android Ever

I’m a big fan of Cricket, and to keep this alive, I play cricket games on PC  by EA Sports. But there hasn’t been any cool cricket game available for Android for quite a long time. The ones available do not offer good game play, neither the graphics are worth playing the game, also the ads are annoying. After a long time, some nice developers have taken a notice of this very thing and brought us up a cool, addictive and amazing cricket game titled as Real Cricket 14.Real Cricket 14

Just as the name suggests, Real Cricket 14 by Nautilus Mobile wins the ground because of its graphics, game play is much realistic, moreover, the game is based on the latest real-time cricket of the present time. The game offers 16 nations and 8 master teams, and the players can be selected for each team when you’re going to select yours. Consisting of different sets of overs, you can pick up the package for yourself and compete your opponent. Difficulty levels are easy, normal and hard.

Real Cricket 14 also sports different game modes e.g Exhibition Match, Tournaments (World T20, Master Cups, Knockout Cups). To help the players learn the tactics, developers have added net practice in the game as well. In total there are 27 different shots available that are pretty much unique. As we talked about the graphics above, this is the department where the developers have worked more than harder. Once you’re playing the game, it just feels like a real ground having cricket freaks all around holding Sixes and Fours boards to celebrate.  Another nice feature in the game is the shop, where you can purchase the accessories (Bats, Balls, Shoes) to upgrade your players and make them perform even better.Real Cricket 14 2

All of these great features in a game, that came into the Google Play Store for the first time make it quite interesting. That actually leaves the impact that even if the game lags somewhere, there surely is a great room for improvement that will make this game tremendous. Been days now since I’m playing this game, and I couldn’t really get my hands off and stop beating the opponents whenever I get time. So, what are you waiting for now? It’s time to play Real Cricket 14 and put some great scores on the board. Real Cricket 14 is available for free in the Google Play Store and the game offers in-app purchases to unlock to the tournaments and some other features.

We’ve also linked in the APK file here and explained how you can install it manually, just go ahead, install it and start playing.

  1. Download Real Cricket 14 APK file.
  2. Download the APK file and transfer it to your phone or download it directly to your phone.
  3. Now locate the APK file on your phone and tap it.
  4. Proceed with the installation now, select “Package Installer” if prompted.
  5. Allow “Unknown Sources” if required.
  6. Complete the installation.
  7. Access the installed game from the App Drawer.
  8. Enjoy Real Cricket 14!

Don’t forget to let us know about your experience with the Real Cricket 14.

Update Galaxy Note 10.1 GT-N8000 To Leaked Android 4.4.2 Kit-Kat Official Firmware

1
Update Galaxy Note 10.1 GT-N8000 To Leaked Android 4.4.2 Kit-Kat Official Firmware

Galaxy Note 10.1 was the very first 10-inch tablet released by an OEM, way back in August 2012 and because of its S-Pen and huge Size it was a big hit, still many loves this specific Tablet and prefer it over a lot of other devices. The Tablet series was, afterwards relaunched by Samsung with New Software and many new features the next year. The device arrived with Android 4.0.4 ICS out of the Box and its been a really long time since this device received a Major Update and for some reasons, no one knows why, Samsung didn’t release Android 4.2.2-4.3  Jelly Bean for this device and as the Owner of such costly device many users lost the hope of receiving any big update for this device.

Well it looks like these people are lucky as the Android 4.4.2 Leaked firmware arises on the Web for Galaxy Note 10.1 GT-N8000 and thus caught and shared by XDA. This leaked Firmware is enough to make sure that the official one is not far behind. izap from XDA Developer has shared the Leaked Android 4.4.2 with build version N8000OXADND5 for GT-N8000. If you own variants like N8010 or N8020, then you’ll have to wait for their own released of Android 4.4.2 Kit-Kat and like any other Samsung Firmware, Odin will be used to install this one too. The firmware is meant for Open Europe and it means that it can be installed on any carrier unbranded Note 10.1 N8000.

Official-Samsung-Galaxy-Note-10-1-2014-Edition-and-More-Getting-Android-4-4-2-Update-427705-2

If you are familiar with Odin and it’s working, then this tutorial might not be difficult for you. Otherwise read the whole tutorial first before trying it on your device. In this Article, we will show you How To Update Galaxy Note 10.1 GT-N8000 To Leak Android 4.4.2 Kit-Kat Official Firmware. But before we begin, Make sure:

  1. Back-Up all your important ContactsCall Logs & Messages.It is highly recommended in case of any mishap or data loss to back up all your important data.
  2. Back-Up your Mobiles EFS Data. How To Restore and Back-Up EFS Data On Samsung Galaxy Devices
  3. Check your device model, Go To Setting > About and Make sure that it is GT-N8000.
  4. Do-not try it on GT-N8010 or N8020
  5. Enable USB Debugging Mode
  6. Download USB Driver For Samsung Devices: Link

Disclaimer:

The methods involved in flashing custom ROMs and rooting your phone is highly custom and may result in bricking your device,and has nothing to do with Google or the device manufacturers which is SAMSUNG in our case. In a case of any mishap we may not be held responsible. Follow these instructions to the letter to avoid any mishap or bricking. Make sure that whatever you do, you are doing it at your own responsibility.

Firmware Details:

  • Model: Galaxy Note 10.1 GT-N8000
  • OS Version: Android 4.4.2 KitKat
  • Build date: April 2014
  • Product Code: OXA (Open Europe)
  • PDA: N8000XXUDND5
  • CSC: N8000OXADND5
  • MODEM: N8000XXUDND2

How To Install It.

odin_explained6

  1. Download Leaked Android 4.4.2 Kit-Kat | Mirror | Mirror | Mirror for Galaxy Note 10.1 to your computer and extract the zip file.
  2. Download Odin.
  3. Turn off your Phone and Turn it On While Pressing, Power + Volume Down + Home button until you see some text on-screen, Press Volume Up to continue.
  4. Make Sure that the USB drivers are installed.
  5. Open Odin in Computer and connect your device to PC, while it is in the Download mode.
  6. If your Phone is successfully connected to PC, the Odin port will turn Yellow with COM port number.
  7. Now Click on PDA and select the File N8000XXUDND5_N8000OXADND5_N8000XXUDND2_OXA.md5 , or the one who has the biggest size.
  8. In Odin, Check Auto reboot and F.Reset Options.
  9. Now Click the Start button and wait for the process to complete.
  10. After the installation is complete you device will restart and once you see the Home Screen, unplug the cable.

That’s it your Galaxy Note 10.1 has been updated to Android 4.4.2 Kit-Kat Leaked FirmwareGo to Settings > About To verify.

Source: XDA

Install CWM Recovery on T-Mobile Samsung Galaxy S5 SM-G900T [How to – Guide]

Install CWM Recovery on T-Mobile Samsung Galaxy S5 SM-G900T [How to – Guide]

T-Mobile Galaxy S5 came out modeled as SM-G900T. Galaxy S5 surely is a beast, and it really doesn’t matter which variant are you going to get your hands on, all are almost same. T-Mobile’s Galaxy S5 development is in the runs and there will be enough stuff to mess with on the device soon around.

In case T-Mobile’s Galaxy S5 is going to fix in your pockets, you may want to test your Galaxy S5’s limitations and to do so, you will need a custom recovery. In case you’ve been looking for a custom recovery and a method to install it, you’re on tSamsung-Galaxy-S5-Front-and-Backhe right place at the moment. Famous XDA developer Philz3759 has developed his Advanced Touch Recovery based on ClockworkMod 6 recovery for some variants of the S5, and T-Mobile’s variant is one of the lucky devices. In the following post we are going to install CWM 6 Recovery on T-Mobile Samsung Galaxy S5 SM-G900T using Philz Advanced Touch Recovery. Let’s go through the introduction of a custom recovery and then proceed with the installation instructions.

A custom recovery allows you to install custom roms, mods etc. Along with these, you can make a Nandroid backup, this helps you a lot as you can move back to the previous working state of your phone at any time you want if you have backed up your current system. In some cases, to root the phone you need to flash SuperSu.zip file in the custom recovery, having installed the recovery may help you while in some cases to install the recovery easily, you need to have the phone rooted. You can also wipe cache and dalvik cache of your phone using a custom recovery.

Here are the pre-installation instructions:

  1. This guide is only for T-Mobile Samsung Galaxy S5 SM-G900T. Before installing this, make sure that your device is listed below. Check your device’s model number in Settings > More > About Device.
  2. Download the file carefully for your device.
  3. Make sure that your device’s battery is charged over at least 60%. Highly recommended in order to prevent any mishap during the recovery installation process.
  4. Make sure that you backup your important media content, ContactsCall Logs & Messages. This is highly recommended just in case something goes wrong and you need to reset your phone.
  5. Use only OEM data cable to establish connection between your phone and PC. Turn off your Anti Virus and Firewall to prevent any connection issues. Also enable USB debugging mode on your phone if you face connection issues.
  6. Follow the instructions being very careful.

Disclaimer: The methods involved in flashing custom roms and rooting your phone is highly custom and may result in bricking your device, and has nothing to do with Google or the device manufacturer that is SAMSUNG in our case. Also rooting your device will void its warranty and you will be no longer eligible for any kind of free device services by the manufacturers/warranty providers. In case of any mishap we may not be held responsible. Follow these instructions to the letter to avoid any mishap or bricking. Make sure that whatever you do, you are doing it at your own responsibility.

Pre – Requisites:

  • Download and Install Samsung USB drivers – Get Here.
  • Download and Extract Odin3 v3.09 – Get Here
  • Enough confidence to flash a recovery :-)!

Download the CWM Recovery for Your Device:


How to Install Philz Advanced CWM Recovery on your T-Mobile Galaxy S5 :

  1. Download the file for your variant carefully.
  2. Open Odin3.exe.
  3. Put your phone in download mode, to do so, turn it off completely. Now turn it on by pressing and holding Volume Down + Home Button + Power Key, you should see a warning now, press Volume Up to continue.
  4. In case the download mode method doesn’t work for your device, try one of the methods from this guide.
  5. Connect your phone to your PC.
  6. The ID:COM box in Odin should turn blue now, that means your phone is connected properly in download mode.
  7. Now click on the “AP” tab and select the Recovery.tar.md5 file that you downloaded above.
  8. Odin 3.09 explained. (2)
  9. If you’re using Odin v3.07, you will select PDA tab instead of the AP tab to select the recovery.tar.md5 file.
  10. Hit start now and sit back, it will take a few seconds to flash the recovery and your device will reboot.
  11. Press and hold Volume Up + Home Button + Power Key to access the Philz Advanced CWM Touch Recovery that you just installed.
  12. You can backup your current ROM and do a lot of other things using the options in Philz Advanced CWM Recovery.
  13. Make sure that you make an EFS backup and save it on your PC as well.
  14. That’s All.

How to Root [Optional] :

  1. If you want to root your device now, you can download the SuperSu.zip file.
  2. Place the downloaded file on your phone’s sd card.
  3. Open Philz Advanced CWM Recovery and select Install > SuperSu.zip and flash it.
  4. Reboot your device and find SuperSu in app drawer.
  5. Congrats! You’re now rooted as well.

That’s all. In case you got any queries or you face any difficulties regarding this post, please feel free to reach us through the comment box below. We will get back to you as soon as possible.

Install CWM 6 Recovery on Canadian Samsung Galaxy S5 SM-G900W8 [How to – Guide]

Install CWM 6 Recovery on Canadian Samsung Galaxy S5 SM-G900W8 [How to – Guide]

Canadian variant of the Galaxy S5 is set on the shelves now. In case you are planning to get your hands on one, you may want to test the limitations of your device. To do so, you definitely will flash custom ROMs, mods, tweaks etc and all tCWM 6 Recovery_Canadian Galaxy S5his can be done using a custom recovery only. Galaxy S5’s development is speeding up as the device is getting caught by more and more developers and there’s quite a lot stuff to mess with for now.

Famous XDA developer Philz3759 has developed his Advanced Touch Recovery for some variants of the Galaxy S5, the recovery is based on CWM 6. In case you’ve been looking for a method to install this recovery on your Canadian Galaxy S5 SM-G900W8, you’ve spotted the right place. In the following post we are going to install ClockworkMod [CWM 6] Recovery on Canadian Samsung Galaxy S5 SM-G900W8 using Philz Advanced Touch Recovery. Before we head towards the installation instructions, let’s go through a brief introduction of a custom recovery and also know that why you should install a custom recovery on your device.

A custom recovery allows you to install custom roms, mods etc. Along with these, you can make a Nandroid backup, this helps you a lot as you can move back to the previous working state of your phone at any time you want if you have backed up your current system. In some cases, to root the phone you need to flash SuperSu.zip file in the custom recovery, having installed the recovery may help you while in some cases to install the recovery easily, you need to have the phone rooted. You can also wipe cache and dalvik cache of your phone using a custom recovery.

Here are the pre-installation instructions:

  1. This guide is only for Canadian Samsung Galaxy S5 SM-G900W8. Before installing this, make sure that your device is listed below. Check your device’s model number in Settings > More > About Device.
  2. Download the file carefully for your device.
  3. Make sure that your device’s battery is charged over at least 60%. Highly recommended in order to prevent any mishap during the recovery installation process.
  4. Make sure that you backup your important media content, ContactsCall Logs & Messages. This is highly recommended just in case something goes wrong and you need to reset your phone.
  5. Use only OEM data cable to establish connection between your phone and PC. Turn off your Anti Virus and Firewall to prevent any connection issues. Also enable USB debugging mode on your phone if you face connection issues.
  6. Follow the instructions being very careful.

Disclaimer: The methods involved in flashing custom roms and rooting your phone is highly custom and may result in bricking your device, and has nothing to do with Google or the device manufacturer that is SAMSUNG in our case. Also rooting your device will void its warranty and you will be no longer eligible for any kind of free device services by the manufacturers/warranty providers. In case of any mishap we may not be held responsible. Follow these instructions to the letter to avoid any mishap or bricking. Make sure that whatever you do, you are doing it at your own responsibility.

Pre – Requisites:

  • Download and Install Samsung USB drivers – Get Here.
  • Download and Extract Odin3 v3.09 – Get Here
  • Enough confidence to flash a recovery :-)!

Download the CWM Recovery for Your Device:


How to Install Philz Advanced CWM Recovery on your Canadian Galaxy S5 :

  1. Download the file for your variant carefully.
  2. Open Odin3.exe.
  3. Put your phone in download mode, to do so, turn it off completely. Now turn it on by pressing and holding Volume Down + Home Button + Power Key, you should see a warning now, press Volume Up to continue.
  4. In case the download mode method doesn’t work for your device, try one of the methods from this guide.
  5. Connect your phone to your PC.
  6. The ID:COM box in Odin should turn blue now, that means your phone is connected properly in download mode.
  7. Now click on the “AP” tab and select the Recovery.tar.md5 file that you downloaded above.
  8. Odin 3.09 explained. (2)
  9. If you’re using Odin v3.07, you will select PDA tab instead of the AP tab to select the recovery.tar.md5 file.
  10. Hit start now and sit back, it will take a few seconds to flash the recovery and your device will reboot.
  11. Press and hold Volume Up + Home Button + Power Key to access the Philz Advanced CWM Touch Recovery that you just installed.
  12. You can backup your current ROM and do a lot of other things using the options in Philz Advanced CWM Recovery.
  13. Make sure that you make an EFS backup and save it on your PC as well.
  14. That’s All.

How to Root [Optional] :

  1. If you want to root your device now, you can download the SuperSu.zip file.
  2. Place the downloaded file on your phone’s sd card.
  3. Open Philz Advanced CWM Recovery and select Install > SuperSu.zip and flash it.
  4. Reboot your device and find SuperSu in app drawer.
  5. Congrats! You’re now rooted as well.

That’s all. In case you got any queries or you face any difficulties regarding this post, please feel free to reach us through the comment box below. We will get back to you as soon as possible.

Install CWM 6 Recovery on Sprint Samsung Galaxy S5 SM-G900P [How to – Guide]

Install CWM 6 Recovery on Sprint Samsung Galaxy S5 SM-G900P [How to – Guide]

Sprint’s Samsung Galaxy S5 is already out and if you’ve got your hands on this device or going to do so, you may want to break the jails and cross it’s boundaries and the very thing that will play a vital role here is a custom recovery, either a CWM or a Twrp.

Galaxy S5’s development has been started and is moving forward day by day. The famous developer Philz3759 has developed his advanced touch recovery for some variants of the Galaxy S5 and Sprint’s S5 is one of the lucky devices. If you’ve been looking for a guide to install a recovery, you’re on the right spot at the moment. In the following post we are going to install CWM 6 Recovery with Philz Advanced CWM Touch Recovery on Sprint Samsung Galaxy S5 SM-G900P. Before we head towards the installation instructions, it is important to remove any confusions for the newbies. To do so, we will first go through a brief introduction of the custom recovery, that is CWM in our case for now.CWM-Samsung-Galaxy-S5-Sprint

A custom recovery allows you to install custom roms, mods etc. Along with these, you can make a Nandroid backup, this helps you a lot as you can move back to the previous working state of your phone at any time you want if you have backed up your current system. In some cases, to root the phone you need to flash SuperSu.zip file in the custom recovery, having installed the recovery may help you while in some cases to install the recovery easily, you need to have the phone rooted. You can also wipe cache and dalvik cache of your phone using a custom recovery.

Here are the pre-installation instructions:

  1. This guide is only for Sprint Samsung Galaxy S5 SM-G900P. Before installing this, make sure that your device is listed below. Check your device’s model number in Settings > More > About Device.
  2. Download the file carefully for your device.
  3. Make sure that your device’s battery is charged over at least 60%. Highly recommended in order to prevent any mishap during the recovery installation process.
  4. Make sure that you backup your important media content, ContactsCall Logs & Messages. This is highly recommended just in case something goes wrong and you need to reset your phone.
  5. Use only OEM data cable to establish connection between your phone and PC. Turn off your Anti Virus and Firewall to prevent any connection issues. Also enable USB debugging mode on your phone if you face connection issues.
  6. Follow the instructions being very careful.

Disclaimer: The methods involved in flashing custom roms and rooting your phone is highly custom and may result in bricking your device, and has nothing to do with Google or the device manufacturer that is SAMSUNG in our case. Also rooting your device will void its warranty and you will be no longer eligible for any kind of free device services by the manufacturers/warranty providers. In case of any mishap we may not be held responsible. Follow these instructions to the letter to avoid any mishap or bricking. Make sure that whatever you do, you are doing it at your own responsibility.

Pre – Requisites:

  • Download and Install Samsung USB drivers – Get Here.
  • Download and Extract Odin3 v3.09 – Get Here
  • Enough confidence to flash a recovery :-)!

Download the CWM Recovery for Your Device:


How to Install Philz Advanced CWM Recovery on your Sprint Galaxy S5 :

  1. Download the file for your variant carefully.
  2. Open Odin3.exe.
  3. Put your phone in download mode, to do so, turn it off completely. Now turn it on by pressing and holding Volume Down + Home Button + Power Key, you should see a warning now, press Volume Up to continue.
  4. In case the download mode method doesn’t work for your device, try one of the methods from this guide.
  5. Connect your phone to your PC.
  6. The ID:COM box in Odin should turn blue now, that means your phone is connected properly in download mode.
  7. Now click on the “AP” tab and select the Recovery.tar.md5 file that you downloaded above.
  8. Odin 3.09 explained. (2)
  9. If you’re using Odin v3.07, you will select PDA tab instead of the AP tab to select the recovery.tar.md5 file.
  10. Hit start now and sit back, it will take a few seconds to flash the recovery and your device will reboot.
  11. Press and hold Volume Up + Home Button + Power Key to access the Philz Advanced CWM Touch Recovery that you just installed.
  12. You can backup your current ROM and do a lot of other things using the options in Philz Advanced CWM Recovery.
  13. Make sure that you make an EFS backup and save it on your PC as well.
  14. That’s All.

How to Root [Optional] :

  1. If you want to root your device now, you can download the SuperSu.zip file.
  2. Place the downloaded file on your phone’s sd card.
  3. Open Philz Advanced CWM Recovery and select Install > SuperSu.zip and flash it.
  4. Reboot your device and find SuperSu in app drawer.
  5. Congrats! You’re now rooted as well.

That’s all. In case you got any queries or you face any difficulties regarding this post, please feel free to reach us through the comment box below. We will get back to you as soon as possible.

Install Philz Advanced CWM Recovery on Samsung Galaxy S5 SM-G900H and G900F [How to – Guide]

Install Philz Advanced CWM Recovery on Samsung Galaxy S5 SM-G900H and G900F [How to – Guide]

Samsung Galaxy S5 is being sold out throughout the world and the device’s development threads are getting filled with something new everyday as the developers are getting their hands on Samsung’s new beast.  There’s enough stop to play with on the Galaxy S5 for now, and a custom recovery should be there to do the job.

Unofficial CWM and TWRP recoveries have already landed for the device, but something more cool is available that may forbade you to go with these recoveries. What we are talking about is, the heavily modified and feature rich version of the CWM Recovery by Philz3759 (XDA-developer) well known as – Philz Advanced CWM Touch Recovery is up for some variants of the Galaxy S5. If you’ve been looking for the aforementioned recovery, you may follow this comprehensive guide to install Philz Advanced CWM Touch Recovery on Samsung Galaxy S5 SM-G900F and SM-G900H. Before we head towards the installation instructions, it is important to remove any confusions for the newbies. To do so, we will first go through a brief introduction of a custom recovery.

Galaxy-S5-Copper-Gold-Close-Top

A custom recovery allows you to install custom roms, mods etc. Along with these, you can make a Nandroid backup, this helps you a lot as you can move back to the previous working state of your phone at any time you want if you have backed up your current system. In some cases, to root the phone you need to flash SuperSu.zip file in the custom recovery, having installed the recovery may help you while in some cases to install the recovery easily, you need to have the phone rooted. You can also wipe cache and dalvik cache of your phone using a custom recovery.

Here are the pre-installation instructions:

  1. This guide is only for Samsung Galaxy S5 SM-G900H and G900F. Before installing this, make sure that your device is listed below. Check your device’s model number in Settings > More > About Device.
  2. Download the file carefully for your device.
  3. Make sure that your device’s battery is charged over at least 60%. Highly recommended in order to prevent any mishap during the recovery installation process.
  4. Make sure that you backup your important media content, ContactsCall Logs & Messages. This is highly recommended just in case something goes wrong and you need to reset your phone.
  5. Use only OEM data cable to establish connection between your phone and PC. Turn off your Anti Virus and Firewall to prevent any connection issues. Also enable USB debugging mode on your phone if you face connection issues.
  6. Follow the instructions being very careful.

Disclaimer: The methods involved in flashing custom roms and rooting your phone is highly custom and may result in bricking your device, and has nothing to do with Google or the device manufacturer that is SAMSUNG in our case. Also rooting your device will void its warranty and you will be no longer eligible for any kind of free device services by the manufacturers/warranty providers. In case of any mishap we may not be held responsible. Follow these instructions to the letter to avoid any mishap or bricking. Make sure that whatever you do, you are doing it at your own responsibility.

Pre – Requisites:

  • Download and Install Samsung USB drivers – Get Here.
  • Download and Extract Odin3 v3.09 – Get Here
  • Enough confidence to flash a recovery :-)!

Download the Philz Advanced CWM Recovery for Your Device:


How to Install Philz Advanced CWM Recovery on your Galaxy S5 :

  1. Download the file for your variant carefully.
  2. Open Odin3.exe.
  3. Put your phone in download mode, to do so, turn it off completely. Now turn it on by pressing and holding Volume Down + Home Button + Power Key, you should see a warning now, press Volume Up to continue.
  4. In case the download mode method doesn’t work for your device, try one of the methods from this guide.
  5. Connect your phone to your PC.
  6. The ID:COM box in Odin should turn blue now, that means your phone is connected properly in download mode.
  7. Now click on the “AP” tab and select the Recovery.tar.md5 file that you downloaded above.
  8. Odin 3.09 explained. (2)
  9. If you’re using Odin v3.07, you will select PDA tab instead of the AP tab to select the recovery.tar.md5 file.
  10. Hit start now and sit back, it will take a few seconds to flash the recovery and your device will reboot.
  11. Press and hold Volume Up + Home Button + Power Key to access the Philz Advanced CWM Touch Recovery that you just installed.
  12. You can backup your current ROM and do a lot of other things using the options in Philz Advanced CWM Recovery.
  13. Make sure that you make an EFS backup and save it on your PC as well.
  14. That’s All.

How to Root [Optional] :

  1. If you want to root your device now, you can download the SuperSu.zip file.
  2. Place the downloaded file on your phone’s sd card.
  3. Open Philz Advanced CWM Recovery and select Install > SuperSu.zip and flash it.
  4. Reboot your device and find SuperSu in app drawer.
  5. Congrats! You’re now rooted as well.

That’s all. In case you got any queries or you face any difficulties regarding this post, please feel free to reach us through the comment box below. We will get back to you as soon as possible.

Download & Play Nintendo DS Games on Your iPad or iPhone

0
Download & Play Nintendo DS Games on Your iPad or iPhone

I have got a good news for Nintendo fans, especially those who have iPhone or iPad. Today I’ll tell how you can play Nintendo DS games on your iPhone and iPod. the thing is that you don’t need Jailbreak your devices to play Nintendo games. All you have to do is install nds4ios on your iPhone. You can even play play Game Boy Advance and Game Boy Color games. Ok now lets start the guide on Download & Play Nintendo DS Games on Your iPad or iPhone. 

Download & Install the Emulator

  • Open safari on your iPhone and go to nds4ios’s download page. Now choose the OTA version installation. Tap on the stable one you’ll get a pop-up regarding your nds4ios installation press ok. Wait for installation to be completed.

play Nintendo games on iphone

  • Now before opening the Emulator app you have to change you date back to 2012. You can do it by going to Settings -> General -> Date & Time. Now just to remind you uncheck the automatically option.
  • Now open the Emulator on home screen.
  • There will be no game added when you open the Emulator first time so you have to add few by Tapping on + icon located on top right corner.

Play Nintendo DS Games on Your iPad or iPhone

  • When you tap on the + icon you’ll be promoted on webpage where you can download the game you want.

Play Nintendo DS Games on Your iPad or iPhone

After downloading ROM you can go into settings and change control setting. You can save ROMs to your DropBox account and link your DropBox account with nds4ios. So your iPhone or iPod Space will remain free.

For Jailbreak user’s you can also add nds4ios on your iPhone and iPad.

  • Open cydia and go to Manage.
  • Tap on Sources.
  • Now tap on edit and then enter this url ” http://cydia.angelxwind.net/.
  • Now go to search and write “nds4ios” enter.
  • Select the stable version build and install it.

All Done.

Siri Issue on iOS 7.1.1: Bypass the iPhone’s Lock Screen to Access Contacts, Make Calls, Send Emails and Texts

0
Siri Issue on iOS 7.1.1: Bypass the iPhone’s Lock Screen to Access Contacts, Make Calls, Send Emails and Texts

Apple is facing a lot of issues after they released of iOS 7 and are trying to patch up all the issues. because of all this, Apple has lost many of its customers but still Apple developers are working hard to get rid of all the bugs. Today, I have found out a new issue on the Apple latest iOS 7.1.1. A new bug discovered by Sherif Hashim, allows anyone to easily bypass your iPhone Pass-code and access all the contacts on your device.

In following video you can how easily you can Bypass the iPhone’s Lock Screen to Browse Contacts, Make Calls, Send Emails, & Texts.

On your iPhone lock screen press home button to enable Siri and say ” View Contacts”. You’ll get a message ” I Can’t Show All Of Your Contacts” and below you’ll see ” open the contacts app ” when you tap on it you’ll promoted to lock screen. This is how it should be.

2014-05-09 05.58.402014-05-09 05.58.03

Exploiting the Security Flaw on iOS 7.1.1:

Okay now press home button to enable Siri on your home screen without entering the pass-code. Now rather then, saying view contacts, just say ” Call”. Now you will see that you were not promoted to the pass-code and commands comes up ” With Whom you would like to speak”. Tap on edit and enter a the name you want to call or just enter 1 or 2 words. Now if you have enter a specific name then Siri will make the call and if you’ have multiple numbers against that name then you have to select one.

2014-05-09 06.20.24 2014-05-09 06.22.13

Now if you want to access the contact list its easy as you tap on edit enter a single character you will get a list of the contacts against that alphabet and in the end you’ll see other’s tap on it you will be promoted to contacts App.

2014-05-09 06.22.28 2014-05-09 06.22.36

Fix Siri Exploited Issue on iOS 7.1.1:

You can fix the security flaw by going to settings Settings -> Passcode and toggling off Siri. This bug will be fixed soon but till then this is what you can do. Do tell us in comments if you find more information about this security flaw.

How to change settings on your iPhone with Siri on iOS 7

0
How to change settings on your iPhone with Siri on iOS 7

There is a lot to tell about Siri on iOS 7. What do you do with Siri on you iPhone running iOS 7. Today, I’ll tell you how you can change setting  like Bluetooth, WiFi, and Airplane mode through Siri. Not only this your Siri can help you with much more things, it can read you new messages , can do a quick search for you and open apps for you.

DSC_0073


How to change settings on your iPhone with Siri on iOS 7:

  • First of all Press the home button on your iPhone to open Siri on iOS 7 or higher.

2014-05-09 05.17.46


  • Now say something like Enable Wi-Fi, Turn off Bluetooth or Enable Airplane mode. As I have said Turn off Bluetooth.
  • Now Wait for Siri to understand what you’ve said. Please Keep in mind always speak clearly when you want to ask or do something with the help of Siri.

As you can see in following picture I have told Siri to turn off Bluetooth and after few seconds, Siri has disabled the Bluetooth. No need to go to home screen then settings to turn off Bluetooth or WiFi. Just open Siri and speak what you want to do.

2014-05-09 05.18.13

Keep visiting Techbeasts for more iOS 7 and iPhone tutorials. You can also check our iPhone How To collection in which you’ll find Jailbreak Tweaks, Apps, Fix Problems and General Guides.