Home Blog Page 447

Vault-Hide SMS, Pics & Videos [ App Review ]

0
Vault-Hide SMS, Pics & Videos [ App Review ]

In today’s world, our phones are a hub of our data. It acts like our very own briefcase where we can store all our data because we keep it with us all the time and so we can access our data whenever and wherever we want. All the official mails, social sites, pictures, videos, messages and much more is there and we won’t feel good at all if someone irrelevant reaches out for our phone and violates our privacy by getting hands on our private data.

Vault-Hide SMS, Pics & Videos

Vault is an app designed to save your privacy from being violated. It provides full control over your privacy and keeping things safe. If you are worried about your private content falling into the wrong hands, this is the app you must have.

Vault is able to protect all types of data in your phone. It has following features.

Vault Gallery

If you want to share a photo with your circle but do not want it to be saved in other devices, vault gallery offers you to share your pictures safely. Using Vault gallery you can share the photo for others to view for a limited time of 10 seconds and after that it will be permanently removed and no one will be able to access it anymore.

Vault-Hide SMS, Pics & Videos 1

App Lock

Vault is able to secure the social apps you use like Email, Facebook, Instagram, Tango, Skype, etc and also other apps like candy crush, amazon, etc. In order to protect your apps, you need assign password for them and they will be locked for no one else to access.
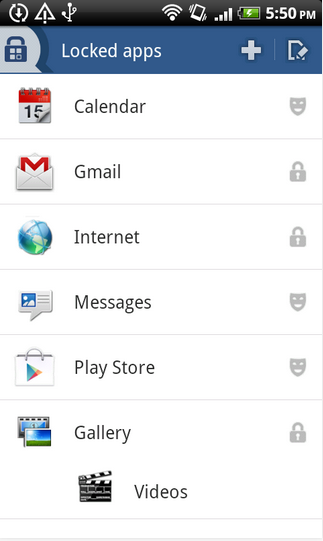
App Lock

Photos and Video protection

All of your photos and videos in your phone will be hidden and you can access them through vault only by entering the set password. This way no one will be able to sneak through your private stuff.

Vault-Hide SMS, Pics & Videos 1

Contact, Sms and calls security

By the help of vault, you can secure your messages, call logs and contacts which is a very useful feature that everyone wants to have their phones.

Vault-Hide SMS, Pics & Videos 2

Facebook privacy

Vault protects your facebook messages if you want to keep them to yourself you can use vault and chat privately without the fear of having someone else read them.

Premium

If you get vault premium you will be able enjoy some other amazing features of the app. The premium users can lock unlimited apps. Moreover they have the option to camouflage the lock so that when someone tries to access an app it will show the lock but it will make the app being accessed crashed. You can make a fake vault so that the real can not be accessed and is remained secured. The sharp sneakers will only get to see the fake vault and won’t even know. You can set Stealth mode which will completely disappear the vault icon from your phone. If you turn the stealth mode on, it can only be accessed again by entering the password from the phone’s dialer.

Vault Premium

Vault Online creates a backup of the vault files to a private cloud space where the data is secure and can accessed by only you. All the above features have proved vault to be one of the most reliable privacy protection apps with no chance of failure. The app is absolutely free and available for download in Playstore.


Install Dr.Ketan Custom ROM On Galaxy Note 2 And Get Features From Galaxy Note 3 And Galaxy S5

0
Install Dr.Ketan Custom ROM On Galaxy Note 2 And Get Features From Galaxy Note 3 And Galaxy S5

Galaxy Note 2 is still loved by millions of users all around the globe, and this is the only reason that the device’s development is not seeing any breaks anytime soon, or its development might never see an end. A laundry list of custom ROMs is available over the XDA-developers forum that can make your Galaxy Note 2 fly high, but something unique is definitely required in order to add extra charm to the working and functionality of your Android device. The great developers are working all the time in order to make your device compete with Samsung’s latest flagships and help your devices  feel young even if it’s years old. Dr. Ketan’s work is something similar. With Samsung’s new devices like Galaxy Note 3 and Galaxy S5, the users may feel that their devices are getting old and the features are outdated, while the new devices come with really cool and eye catching options on board. Dr. Ketan has tried his best to finish this harsh feeling of the users and brought us his great Custom ROM.

Current version of Dr.Ketan Custom ROM is V7.3, based on stock Android 4.4.2 KitKat for the Galaxy Note 2. The ROM contains UI features from the Galaxy S5, some apps are ported from the latest flagship, while features like Air Command are ported from the Galaxy Note 3. This makes the Galaxy Note 2 even more cool running features of 2 latest flagship devices. Dr. Ketan’s custom ROM installation is fully user controlled, each and every single option has to be selected by users while flashing the ROM through AROMA installer. The ROM is full of MODs, tweaks that you may select during installation, there is a number of themes available as well. Apart from this, Dr. Ketan has also inserted an option to remove bloatware during the installation, which simply fastens the performance of your Galaxy Note 2. The ROM also packs up EFS Backup and Password Cleaner which helps the users to take maximum advantage while installing this ROM and make the installation secure.

As we move forward, we will be installing Dr. Ketan’s Custom ROM V7.3 on our beloved Samsung Galaxy Note 2 GT-N7100 and get the Galaxy Note 3 and Galaxy S5 features. All you need is, follow this guide being very careful and do not miss a step. Before we head towards the installation instructions, let’s go through the features of this cool custom ROM.Dr Ketan Custom ROM


Dr.Ketan Custom ROM V7.3
    • [B]Pre rooted , Zip aligned
    • 30 battery Mod (inbuilt 30 battery MOD including stock, you can change battery icon on the fly (without reboot) To change icon tap battery icon three times from status bar. Don’t select show battery option in setting. tap battery icon 3 times on status bar, you will get option for battery percent, select from there.
    • Hidden power menu – Tapping on clock will turn off screen (Lock), long pressing clock will bring power menu. This feature will not allowed to move clock to center. If you want center clock mod then you have to select stock battery option in aroma and don’t use any other mods under systemUI section.
  • Busybox
  • 300 fonts enabled
  • Default language english
  • All Language enabled
  • Ad Free
  • Call Recording – Auto call record included On/Off from setting-dr,ketan ROM extra-utility
  • 4 Way Reboot mod
  • 4 PullUp mod : User can select own selectable application instead of stock. 1.Launcher bottom 2.Launcher Lt pull 3.sFinder of Air command menu 4.Long Press menu
  • MysFinder – Ability to select sFinder from pullUp
  • Multiwindow hack – Quad view – you can open upto four app from MW
  • Sec Launcher MOD – Hide application option with dual pullup mod
  • Camera Hack – Use camera with Flash at low battery

NOTE 3 Features :

  • Air command
  • PEN Window (PEN window manager and Multiwindow manager available in Mod section of aroma to select desired app in MW/PW.)
  • Action Memo
  • Scrap booker
  • ScreenShot
  • S Finder
  • S note with attachment option like chart, map, video, YouTube,scrap book
  • S suggest
  • S finder
  • ScrapBook
  • Gallery
  • Sketch Book
  • Magazine
  • Smart Scroll
  • Smart Pause
  • Story Album
  • One Hand for All screen
  • Writing buddy (direct Input)

S5 App :

  • Ultra power saving mod – Power saving +, UPSM,Emergency mod
  • Toolbox – 10 application can be edit
  • Phone app with popup notification and status information option.
  • Lockscreen Unlock effect – Particle/Stone skipping/water color/Ripple/Light effect/Oil paint/Blind
  • Launcher
  • Accuweather Widget
  • Browser
  • SecMMS
  • Kids Mod

Dr.Ketan Utilities

  • You can access this by Setting-device-DrKetan ROM Extra OR from App drawer. This utility requires plug in called Secure setting. It should auto install while flashing ROM. you should check in app drawer, if it is missing then you should download from play store.
  • This application is built-in Dr.Ketan’s Custom ROM. This application divided in four menu. Also note that you needs to install plug-in to work this app. On opening of app it will direct to play store to install plug in if your device lacking it.
  • 1.Toggles – As name suggest here in this menu you will have many Toggles which you can use to activate/Deactivate services.
  • Single tap on icon to activate, Long click on icon to deactivate
  • Incoming Call Record – This will record all incoming calls. File will be saved in IntSD/Sounds/ folder. (If you dont have this folder then manually create it.)
  • Outgoing Call Record – This will record all Outgoing calls. File will be saved in IntSD/Sounds/ folder. (If you dont have this folder then manually create it.)
  • Auto GPS – Will Auto On/Off GPS with some commonly GPS using app
  • Auto Wifi – Auto switch off wifi if no active connection more than 10min
  • Auto Bluetooth – Auto switch off bluetooth if not actively paired more than 10min
  • Smart Network – Switch off data connection with 30sec of screen off, Auto ON with screen ON
  • Media scanner – To turn On/Off media scanner
  • Torch – Activate flash light with shaking of device with screen (home/Lock) ON
  • LogIn security – silently capture image is multiple failed attempt to unlock device,pic stored in IntSD/DCIM/DrKetan_utilities/
  • Tasks
  • Long press icon to apply.
  • EFS backup – Backup your EFS
  • EFS Restore – To restore EFS, Needs to keep efs.img file on intSD card root directory.
  • Data Fix – Just like Tb restore fix. Probably you won’t require this on this ROM but still you can use if you have FCs after restoring app with titanium
  • IntSD fix – SOmetime you can’t read/write on SD card (int/Ext) you can use this utility to fix issue
  • Flash Recovery
  • Flash Kernel
  • Flash Modem
  • You needs to put raw file on intSD root directory. like if you want to flash any modem, just extract modem.bin and keep in root directory of InntSD and long press Flash Modem icon and reboot. same way for recovery use recovery.img and for kernel use boot.img
  • Auto Scan: This will Auto scan only while your device connected to AC charge. and disable when you remove from AC wall charger.
  • This is helpful to reduce battery consumption
  • Heating issue FIX – This will disable scanning and indexing which sometimes causing too much heating with bad file. Though it’s not idle so;ution. you should find culprit causing issue and should remove it. But you can use this temporarily till you find solution.

ROM extra settings

  • PullUp Chooser
  • You can choose choose default application for each pullup mod
  • Launcher bootom
  • Launcher Side (only available in S5 launcher)
  • S Finder in Air command
  • S finder in Long pressing menu
  • Note that if you want to select default S Finder then you have to choose My Sfinder application.
  • Meet Here/Car Parking
  • This is application very handy to find your car/ share location/Find location.
  • This is complimentary for all this ROM user. Find more details here.
  • Power save plus – Power saving + Gray theme
  • Ultra power saving mod of S5
  • Emergency Mod

Help

  • Short guid lines and link to this post and develiper info.
  • EFS Backup/Restore
  • Data restore Fix
  • Flash recovery/Kernel/Modem from intSD
  • Advanced function SecMMs
  • Group messeging
  • Schedule msg
  • Backup/Restore SMS to SD card
  • Recipient limit 999
  • Original time stamps
  • Disable SMS-MMS
  • Raise SMS/hr limit
  • Split view toggle in setting menu
  • Increased MMS max size
  • Increased size of image
  • No SMS to MMS with Emoji

Optional Features Mod section

  • 1.SystemUI Mod,
  • Restore 30 battery mod,
  • Restore Stock battery, compatible to wanam battery module
  • Rt speed meter , Internet meter on Rt side opp to clock,
  • Lt speed meter , Internet meter on Lt side,
  • 8 Extra toogle on notification area, Hard Button savior,
  • Quick Launch in Notification,
  • 8 Extra toogle & Quick Launch on notification area,
  • 2.Extra Mods,
  • Toggle 2G, control 3G
  • FullScreen caller ID, with manual call record option,
  • Camera sound Hack,
  • Stock Launcher (No pull up or hide app option)
  • White Keyboard, S5 Keyboard
  • Remove Ad Free,
  • Transparent Genie widget, Google news and weather Transparent widget,
  • No SMS log,
  • Hidden cerberus, You needs to have purchased from play store,
  • Story Album
  • MultiWindow PenWindow manager
  • Kid Mod
  • No increasing ring tone
  • S5 Lockscreen unlock effects
  • -Aroma Optional CSC features with Backup/Restore option (some features not tested)
  • Enable camera during call
  • Enable Popup Notification
  • Shutter sound Menu
  • Enable Sub Menu Symbol KB
  • Raise name lenth limit
  • Max speed dial 100
  • Enable call button
  • Enable export to SD
  • Message
  • Raise recepient limit 999
  • SMS to MMS threshold 999
  • Enable folder view
  • Enable font features
  • Enable schedule msg
  • Disable phone nu formatting
  • Phonebook digit matching
  • Launcher Rotation
  • Web exit option
  • Wifi client 10 for MobAP
  • MultiWindow addOn App
  • Calender export
  • Email White BG
  • Clock enable Auto on off menu
  • Voice call waitingtone 60
  • National Roaming Icon enable
  • Web default desktop site
  • -Optional Build.prop Tweak ROM according your choice
  • 3G data speed improvement
  • Battery saving
  • Wifi connect disconnect speed
  • Deep Sleep
  • Higner image quality
  • Improve Inetrnet speed
  • Increase touch responsiveness
  • Fast Boot
  • Faster scrolling
  • Theme Section
  • Air Command menu
  • Pearl1
  • Pearl2
  • S5 Air command
  • Toggle Theme
  • Grey 3D
  • Silver 3D
  • Imaged Round (same like S5 but without changing build.prop)
  • Stock Toggle
  • S5 Quick Settings and Recent panel type1
  • S5 Quick Settings and Recent panel type2
  • Remove S5 theme
  • S5 bootanimation

-Select your own region GPS fixer

  • – ROM flashing is Optional, you can use this as Utility tool too.
  • – wanam Xposed compitible
  • -Some other utilities may I forget

Multi DPI

  • -Option to select 240 and stock DPI

Pre-Installation Instructions:


  1. This ROM is only for Samsung Galaxy Note 2 GT-N7100. Do not try this on any other device, please check your device’s model in Settings > About Device > Model.
  2. Your device must be running on Android 4.3 Jelly Bean or higher. Do not use any older firmware to flash this ROM.
  3. Your device must have a custom recovery installed, in case you’re missing it you may Follow our full guide here to install TWRP.
  4. Your device’s battery should be charged at least over 60%. This is highly recommended in order to prevent any power issues during the flashing process.
  5. Make sure that you backup your important media content, ContactsCall Logs & Messages. This is highly recommended just in case something goes wrong and you need to reset your phone.
  6. If you already have rooted your device, use Titanium Backup to back up all your important apps + system data. Also if you are using a custom recovery, it is recommended that you backup your current system using that first. [Just for the sake of safety]. Here’s our full Nandroid Backup guide.
  7. You will have to go through Data Wipes during installation of this ROM, so make sure that you have backed up all the mentioned data.
  8. Make an EFS backup of your phone before you flash this ROM.
  9. You need enough confidence to flash this ROM.
  10. Alright! Go ahead and flash the custom firmware, follow this guide to the letter.

Disclaimer: The methods involved in flashing custom roms and rooting your phone are highly custom and may result in bricking your device, and has nothing to do with Google or the device manufacturer that is SAMSUNG in our case. Also rooting your device will void its warranty and you will be no longer eligible for any kind of free device services by the manufacturers/warranty providers. In case of any mishap we may not be held responsible. Follow these instructions to the letter to avoid any mishap or bricking. Make sure that whatever you do, you are doing it at your own responsibility.

How to Install Dr.Ketan Custom ROM V7.3 On Galaxy Note 2 And Get Galaxy S5 And Galaxy Note 3 Features:

  • Make sure that TWRP recovery is flashed on your device.
  • Download latest Dr.Ketan Custom ROM V7.3 .zip file.
  • Connect your phone to your PC now.
  • Copy the .zip files to the storage of your phone.
  • Now disconnect your phone and turn it off complete.
  • Boot into TWRP recovery now, in order to do so, turn it on by pressing and holding Volume Up + Home Button + Power Key. You should see the recovery mode in a while.
  • Now in TWRP  recovery, wipe cache, factory data reset and advanced options > dalvik cache. [Important]
  • After wiping all these three, select “Install” option.
  • Now select “Install > Choose Zip from SD card > Select Dr.Ketan Custom ROM V7.3 .zip file > Yes”.
  • This will start flashing the ROM in your phone.
  • Once entered in AROMA installer, go through the options, select the MODs, tweaks, themes and other tasks you want to perform.
  • Flash the ROM.
  • Reboot your device.
  • You should see the Dr.Ketan Custom ROM V7.3 Android 4.4.2 KitKat ROM running on your device in a while.
  • That’s all!

First boot may take up to 10 minutes, you may not worry if it’s taking that much long. In case it’s taking too long, you may boot into TWRP recovery and wipe cache and dalvik cache and reboot your device as it may fix the issue. In case your device is having issues, you may return to your old system using the Nandroid backup or follow our guide here to install stock firmware.

If the ROM is great enough to impress you, do not forget to donate to the original developers.

In case you got any issues or you face any difficulties regarding this post, please feel free to stop by the comment box below and let us know. We will get back to you as soon as possible. Thank you all.

Top 6 best free apps to boost up performance of Android phones

0
Top 6 best free apps to boost up performance of Android phones

Everybody needs performance boost up for their Android phones, there are many third party apps that will help you to boost up the performance. But to choose best out of them it’s really difficult cause every one of them seems workings. So to install whats is best, for that i’ve collected Top 6 best free apps to boost up performance of Android phones.

Top-6-Android-performance-apps-and-tips-that-will-speed-up-your-device

Top 6 best free apps to boost up performance

Android Booster

Android booster

Android booster free is a top rated app designed to boost up the phone’s speed. The app has millions of users. The app helps in saving smartphone’s memory and battery and also helps to uninstall unwanted apps. The app’s battery manager comes with four battery saving modes and updates you about the apps using more battery.The app also includes App manager, network manager, task manager, phone optimization and virus scanner. All these features make it an all in one app.

Android Assistant

Android Assistant

As suggested by the name, the app assists you with performing different tasks for you and comes with 18 must have features. The app monitors SD card, RAM, ROM and battery. The Cache cleaner and System cleaner assists with empty files and folders, temporary files, cache, browser, market, mail, Google earth and Google map’s history,etc.It helps make more storage space with App 2 SD card and backup options. The app also has built-in power saver. All the features work quite efficiently and comprehensively to improve device’s performance.

Juice defender battery saver

JuiceDefender

Juice defender is a strong battery saving and power managing app that works under the hood and gives you the most out of your battery than it normally does. The app offers complete customization, works on it’s own and boosts up battery life. It also helps you easily manage CPU, Wi-Fi, Mobile data so that you can keep power consumption under control. With these and other features, the app helps a lot in boosting the device’s performance.

Volume Boost

Volume Boost

The app is used to boost up the volume of smartphone and increase it by 30 to 40 percent. The app helps you control your android’s sound for music player, multimedia and apps to improve the overall sound quality. You can also adjust the in-call volume, notification and system volume, alarm and ringer volume. The app creates a shortcut on the homescreen that easily accessible and this makes controlling sound more efficient.

AnTuTu Benchmark

AnTuTu Benchmark

AnTuTu is the most popular android benchmarking app with millions of users. The app is able to measure User Experience with detailed scores on device’s performance, CPU’s performance, the real processing ability of RAM. It can also measure graphics processing, 3D effects, games performance and much more. The app gives you accurate and detailed device performance scores  and is used as an industry standard for most of the technology related companies.

Launcher Pro


Launcher pro is comprehensive and allows you to add extra functionality to your device. It has the ability to increase the homescreen usage by adding upto 7 homescreens yet it will not totally alter the look of your device and you will still be able to see the icons as they were. Moreover space and management is hardly an issue. You will have the option to pinch zoom for having an overview of your homescreens. The app brings in-depth customization with animated screens and much more and still manages to run smoother and faster than any of the other launcher apps.

Transform Your Galaxy Note 2 Into Galaxy S5 And Galaxy Note 3 With DN3 V5+ ROM

Transform Your Galaxy Note 2 Into Galaxy S5 And Galaxy Note 3 With DN3 V5+ ROM

Few months ago when Samsung rolled out Android 4.3 Jelly Bean for the Galaxy Note 2, and the next flagship phablet, the Galaxy Note 3 was also there, a group of Android developers named as Electron Team dominated the development by bringing up a custom ROM based on stock Android 4.3 Jelly Bean having most of the features from Samsung’s new phablet, the Galaxy Note 3. The ROM, named as Ditto Note 3 became viral and installed by a number of users, and was also appreciated to the extent it deserved. Team Electron has been improving it’s DN3 ROM day by day since then,  and recently they’ve brought up the ROM with some more interesting features.

Ditto Note 3 ROM is now capable of transforming your Galaxy Note 2 into Samsung Galaxy S5, having the touch and feel of Samsung Galaxy Note 3. The developers have ported some applications from Galaxy S5 into the stock Android 4.4.2 KitKat of the Galaxy Note 2, while the features of Galaxy Note 3 remain there. Galaxy S5’s UI is completely different, and is definitely liked by the users all across the world as Samsung has finally changed it’s old style. The current version of Ditto Note 3 ROM is V5+ based. With every upgrade, this ROM is getting better, stable, the performance is getting smoother and is being liked by more and more people. Unlike other custom ROMs, this ROM maybe kept for everyday’s use without any hiccups here and there.

So, in the following post, we are going to install DN3 V5+ ROM on the Galaxy Note 2 GT-N7100 and transform this device into Samsung Galaxy S5 and Galaxy Note 3. All you need is, follow this guide being very careful. Let’s go through the features of this ROM and then head towards the installation instructions.DN 3 V5.2


Ditto Note 3 V5+ ROM

– Galaxy S5 Contacts app
– Galaxy S5 Phone app Feature S5 in coming call popup notification style
– Call Recording button during calls
– Galaxy S5 Messaging app Feature S5 in coming message notification style (Thanks to VN Team for SecMms mod)
– Galaxy S5 Drive Link
– Galaxy S5 Sbrowser
– Galaxy S5 Music Player
– Galaxy S5 Gallery New lockscreen effect – Blind Effect
– Air Command
– Smart Scroll
– Smart Pause
– Signature Lock
– Note 3 Multiwindow Style
– Writting Buddy (Direct Pen Input)
– One Hand Operation in All Screens
– Note 3 Icons
– Note 3 Launcher
– Note 3 MyFiles
– Note 3 SNote
– Note 3 S FInder
– Note 3 ScrapBook
– Note 3 SketchBook
– Note 3 Story Album
– Note 3 Quick Glance
– Galaxy S5 Toolbox feature
– Galaxy S5 Power Saving Mode
– Galaxy S5 Ultra Power Saving Mode
– Galaxy S5 Launcher and Magazine app
– Galaxy S5 theme chooser
– Galaxy S5 Wallpapers
– Note 3 incoming call notification pop-up
– Note 3 Popup menu in many note 3 apps.
– Other note 3 apps like contacts,msg etc.
– Pen Window Manager from @xperiacle
– Possible to use the same app in both multiwindows
– New unlock effects from S5 (we also were the first ones to port it 🙂 )
– Note 3 and Galaxy S5 Settings with search feature. You can choose between both of them


Pre-Installation Instructions:


  1. This ROM is only for Samsung Galaxy Note 2 GT-N7100. Do not try this on any other device, please check your device’s model in Settings > About Device > Model.
  2. Your device must be running on Android 4.3 Jelly Bean or higher. Do not use any older firmware to flash this ROM.
  3. Your device must have a custom recovery installed, in case you’re missing it you may Follow our full guide here to install TWRP.
  4. Your device’s battery should be charged at least over 60%. This is highly recommended in order to prevent any power issues during the flashing process.
  5. Make sure that you backup your important media content, ContactsCall Logs & Messages. This is highly recommended just in case something goes wrong and you need to reset your phone.
  6. If you already have rooted your device, use Titanium Backup to back up all your important apps + system data. Also if you are using a custom recovery, it is recommended that you backup your current system using that first. [Just for the sake of safety]. Here’s our full Nandroid Backup guide.
  7. You will have to go through Data Wipes during installation of this ROM, so make sure that you have backed up all the mentioned data.
  8. Make an EFS backup of your phone before you flash this ROM.
  9. You need enough confidence to flash this ROM.
  10. Alright! Go ahead and flash the custom firmware, follow this guide to the letter.

Disclaimer: The methods involved in flashing custom roms and rooting your phone are highly custom and may result in bricking your device, and has nothing to do with Google or the device manufacturer that is SAMSUNG in our case. Also rooting your device will void its warranty and you will be no longer eligible for any kind of free device services by the manufacturers/warranty providers. In case of any mishap we may not be held responsible. Follow these instructions to the letter to avoid any mishap or bricking. Make sure that whatever you do, you are doing it at your own responsibility.

How to Install DN3 V5+ ROM On Galaxy Note 2 And Transform It Into Galaxy S5 and Galaxy Note 2:

In case you  don’t have a new bootloader and you don’t have the knox counter on your device’s bootloader and you wish to avoid it in this installation as well, do this, otherwise skip this part if you’re already on a newer bootloader.

  1. Download Odin 3 v3.09
  2. Download MJ5 Bootloader.
  3. Boot your device into the Download Mode now. To do so, turn off your device completely, now turn it on by pressing and holding Volume Down + Power Key + Home Key, as soon as you see the warning, Volume Up to continue.
  4. Connect your phone to your PC now.
  5. Now select the click on the “CP” tab now and select the modem you downloaded.
  6. Hit start and site back.
  7. This will flash the MJ5 Bootloader in your phone.
  8. Disconnect your device once done.

Installing the ROM:

  • Make sure that TWRP recovery is flashed on your device.
  • Download latest DN3 V5+ ROM .zip file.
  • Connect your phone to your PC now.
  • Copy the .zip files to the storage of your phone.
  • Now disconnect your phone and turn it off complete.
  • Boot into TWRP recovery now, in order to do so, turn it on by pressing and holding Volume Up + Home Button + Power Key. You should see the recovery mode in a while.
  • Now in TWRP  recovery, wipe cache, factory data reset and advanced options > dalvik cache. [Important]
  • After wiping all these three, select “Install” option.
  • Now select “Install > Choose Zip from SD card > Select DN3 V5+ .zip file > Yes”.
  • This will flash the ROM in your phone.
  • Reboot your device.
  • You should see the DN3 V5+ Android 4.4.2 KitKat ROM running on your device in a while.
  • That’s all!

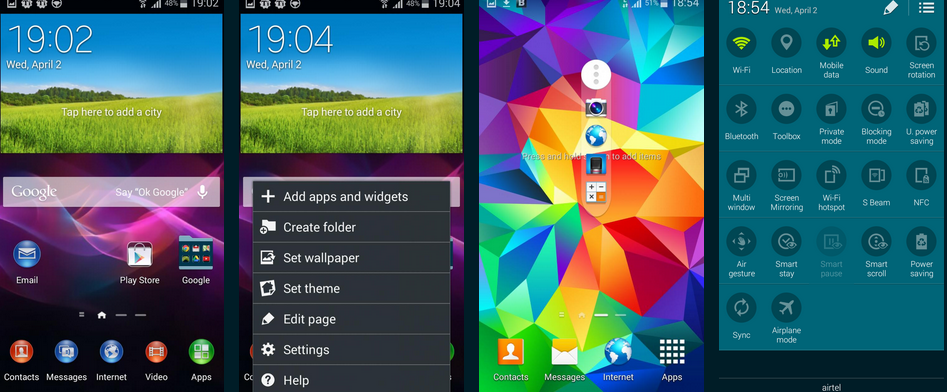
Here are some screenshots:

DN3 V5+


First boot may take up to 10 minutes, you may not worry if it’s taking that much long. In case it’s taking too long, you may boot into TWRP recovery and wipe cache and dalvik cache and reboot your device as it may fix the issue. In case your device is having issues, you may return to your old system using the Nandroid backup or follow our guide here to install stock firmware.

If the ROM is great enough to impress you, do not forget to donate to the original developers.

In case you got any issues or you face any difficulties regarding this post, please feel free to stop by the comment box below and let us know. We will get back to you as soon as possible. Thank you all.

Remove Bloatware From Any Android Device With NoBloat [How To – Guide]

0
Remove Bloatware From Any Android Device With NoBloat [How To – Guide]

You must have heard of this word “Bloatware” while flashing new custom ROM, some are bloatware free, and sometimes you come across some bloatware removers. Basically, Bloatware is the bundle of stock applications installed by the manufacturers, that is region specific or installed by different carriers like At&t, T-Mobile, Verizon and others in order to add an exclusive touch of their company to the carrier branded phones.

These applications are called bloatware because they eat up a lot of memory, that may be consumed by something important on the smartphone, or that memory may be availed by some data to be stored on the device. Bloatware applications can sometimes slow down the performance and speed of your Android smartphone.

The reason why some people prefer using custom ROMs is, custom ROMs do not contain any useless application or any bloatware. But custom ROMs, at times, are not the choice to go with, especially when you’re not an Android freak and you’ve no good idea of using a custom ROM and also, custom ROMs have a maximum chance of bugs and may not be kept for everyday’s use.

In this case, the only solution left around is, removing bloatware applications from the stock firmware of your device. There has been a number of methods available over different forums to remove bloatware, but all these methods were either device specific or manufacturer specific. A universal method is what everyone will comfortable with, and something similar has landed in the Google Play Store.

Wallpaper-Funny-Android-vs-Apple-HD-FreeNoBloat by TVK Development is a very nice application, that gives the users an option to delete the default/stock installed applications from any Android smartphone. The app requires root access, once granted, it allows the users to select and delete bloatware. The option that appears to be cool in this application is, it creates a backup of the pre-installed apps on your phone’s SDcard and then deletes it.

Now, this is quite helpful, sometimes if you delete some system apps, it may cause problems with the proper functioning of your device and you may get force close errors after specific intervals of time. In this case, restoring the application from backup can be proven of real help, otherwise, if you don’t have the backup, you may have to flash a new stock firmware in your device.

Another option in the application is simply disabling the bloatware applications, you may just refrain the applications from working instead of deleting the applications straight away. This can definitely free up a lot of storage occupied by unused data on your Android device and boost up your device’s performance. NoBloat’s free version comes with limited options, but there’s a paid version as well that enhances the functionality of the device at its best. Let’s move forward now.

Remove Bloatware From Any Android Device With NoBloat [How To – Guide]

  1. Make sure that your device is rooted.
  2. Install NoBloat Free from Google Play Store.
  3. Identify bloatware apps on your device first.
  4. Now open NoBloat from the app drawer.
  5. Select the bloatware applications that you want to get rid off from.
  6. Make sure that you do not select any such application that’s being used by the system. For example, launcher, camera, gallery or any other system application.
  7. Backup the applications.
  8. Delete or disable the applications.
  9. Your device should be working perfectly great now.
  10. That’s All!

NoBloat1

Top 5 Smartphone Apps to Manage your Diabetes

0
Top 5 Smartphone Apps to Manage your Diabetes

Every one wants to take care of his/her health and with the technology is gaining on everything in our daily life, it would be very easy to manage your Diabetes. Today i’ve collected Top 5 Smartphone Apps to Manage your Diabetes. 

best Diabetes apps for smartphones

Top 5 Smartphone Apps to Manage your Diabetes.

Glooko 

Glooko

Glooko assists you with keeping a record of your blood glucose levels. You can record your BG readings from your meter to your device within seconds. The app lets you enter readings from multiple meters and lets you keep a log. It keeps you informed of your carbs (food) habits and lets you have perspective on what is affecting your glucose level. It shows you weekly and monthly statistics in the form of a graph and you are able to share your recorded data with your physician as well which comes very handy. The app is compatible with 22 FDA-cleared meters and 15 Android devices.

Mysugr Companion

Mysugr Companion

The app is designed to manage your diabetes in a fun way. It is considered number 1 diabetes app in six countries and comes with many useful features yet not so hard to interpret. The app comes with a customizable diabetes monster that you can name. You can conveniently analyze data through neat graphs, create a backup of your data and share it with your social circle. The app can help you with reminders to check your blood glucose and can prove to be a motivation for people with diabetes.

GSK Diabetes Healthmate

GSK Diabetes Healthmate

Diabetes healthmate is an app that helps you keep a record of your blood sugar in the form of graphs. The graphs help you relate sugar levels with other life activities like moods, habits and diet to have a better view of your health and adopt positive lifestyle changes. The app comes up with daily questions regarding your medicine, exercise and much more and educates you on different topics to make you aware of risk factors, checking sugar levels, etc. You can also set reminders to make sure you remember to take your medicines and tests in time. The app is very helpful and easy to use.

MyFitnessPal

my fitness pal

The app mainly focuses on keeping a track of your fitness by maintaining log of your diet, Nutrition, walk routine and calories.
It is the easiest and accurate calorie counter app for over 3,000,000 foods. The app comes with a scanner to scan barcode on food items to match with it’s huge database. The best thing is that you can add multiple items at once. To set your exercise routine the app has around 350 exercises for cardio and strength training. You can add custom exercises as well.The app is rated best with over 10 million users.

Glucose Buddy

Glucose Buddy

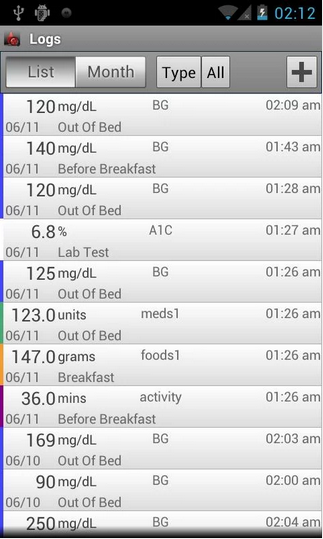
Glucose buddy has been assigned number one and appreciated by Manny Hernandez (Founder of TUDiabetes.com), Nytimes and many more. The best rated app helps you keep a log of people with diabetes for their Blood Glucose, blood pressure, Insulin levels, Food, weight, etc so that they can have a better overlook at their health. The logs can be maintained for out of bed, before and after breakfast. Another useful feature is the reminders you are able to set so that you don’t forget to take your tests. It is a very useful app and truly a buddy.

Fix Samsung Galaxy Not Registered On Network [ Solved ]

0
Fix Samsung Galaxy Not Registered On Network [ Solved ]

I just bought Samsung Galaxy S3 and updated it to latest official firmware but after the updating process, i tried to make a call and i got a message ” Not Registered On Network “. This is the first time i faced such kind of problem on Samsung device, well i’ve heard about it many times but never faced such kind of problem. No doubt it’s headache and most of us don’t know what to do so this is the main reason i’ve prepared a guide on how to fix Samsung Galaxy Not Registered On Network.

Fix Samsung Fix Galaxy Not Registered On Network

This method will not work on locked Samsung Galaxy devices. Your device must be unlocked in order to remove “Not Registered On Network“.

REASON WHY YOU ARE EXPERIENCING NOT REGISTERED ON NETWORK ERROR:

Main reason you face Not Registered on Network error because you’ve flash wrong baseband on your device. So before applying any official update through Odin kindly confirm your Build number and baseband version.

FIX SAMSUNG GALAXY  NOT REGISTERED ON NETWORK Guide:

To properly fix the Samsung Galaxy Not Registered On Network kindly follow all the steps carefully in order to get rid of this problem.

  • Connect your device with Wifi.
  • Turn off your device and remove the sim and wait for 2 mins. Now insert your sim and turn on your device.
  • Goto setting of your device.
  • Now scroll down and tap on About device. ( These option are for device running 4.1.2/Device running 4.3 they’ve to goto general tab in settings.)
  • Select Software Update.
  • Now wait for update to be completed.
  • All Done.

Just to tell you that if you don’t find any update kindly connect your device with Samsung KIES and update it from there.

Top Best Custom ROMs for Samsung Galaxy Ace S5830i [2014]

1
Top Best Custom ROMs for Samsung Galaxy Ace S5830i [2014]

Samsung have introduced so many cheap price smartphones in the market and response is awesome. Samsung Galaxy Ace S5830i is one of them low budget device with 3.5 inch 320 x 480 pixel display, 800 MHz processor, 5.0 MP 2592 x 1944 Camera with auto-focus and LED flash. Samsung Galaxy Ace came with Android 2.3.6 Gingerbread. This device is capable of running Jellybean and ICS roms, so today i have collected top best custom roms for Samsung Galaxy Ace S5380i.

Samsung_Galaxy_Ace_review_05-580-100

Following are the Top Best Custom ROMs for Samsung Galaxy Ace S5830i:

1. Jelly Blast JB 4.1.1 Galaxy Ace S5830i:

Download [ Source ]

2. Simplicity V3 ROM Final Ace S5830i + Themes:

Download [ Source ]

3. MindCr SGS3 Styled Rom for Galaxy Ace S5830i

Download [ Source ]

4. Ace-i-Sure ROM

Download [ Source ]

Check How you can root and install Recovery on Samsung Galaxy Ace S5830i.

How To Install Stock Android 4.4.2 KitKat Ported From Galaxy Note 2 On Galaxy S3

How To Install Stock Android 4.4.2 KitKat Ported From Galaxy Note 2 On Galaxy S3

Samsung won’t be updating the international variant of the Galaxy S3 GT-I9300 to Android 4.4.2 KitKat. Samsung’s excuse for not rolling out this update to the international users is the RAM optimization for the KitKat. The great work done by XDA recognized contributor JustArchi and few others is good enough to show Samsung that Galaxy S3 is capable of running Android 4.4.2 KitKat without any hiccups here and there.

These guys have ported the stock Android 4.4.2 KitKat from the Galaxy Note 2 to the Galaxy S3. The firmware is in “Work In Progress” state at the moment and still is under testing, however those Android enthusiasts who can’t just site idle with their devices may want to give it a try and checkout how Galaxy S3 treats the stock KitKat. In the following post  we are going to install this stock Android 4.4.2 KitKat ported from Samsung Galaxy Note 2 to Galaxy S3 GT-I9300. Before we head towards the installation instructions, the only thing you need to keep in mind is, as mentioned, this firmware is in development stages and there are high chances of bugs and it isn’t said to be stable, nor it should be kept for everyday’s use. Make sure that you only install this firmware if you’re good with modifying and tweaking your Android device and you’re well familiar with custom ROMs. SAMSUNG-GALAXY-S3-4

Pre-Installation Instructions:

  1. This ROM is only for Samsung Galaxy S III GT-I9300. Do not try this on any other device, please check your device’s model in Settings > About Device > Model.
  2. Your device must have a custom recovery installed, in case you’re missing it you may Follow our full guide here to install TWRP.
  3. Your device’s battery should be charged at least over 60%. This is highly recommended in order to prevent any power issues during the flashing process.
  4. Make sure that you backup your important media content, ContactsCall Logs Messages. This is highly recommended just in case something goes wrong and you need to reset your phone.
  5. If you already have rooted your device, use Titanium Backup to back up all your important apps + system data. Also if you are using a custom recovery, it is recommended that you backup your current system using that first. [Just for the sake of safety]. Here’s our full Nandroid Backup guide.
  6. You will have to go through Data Wipes during installation of this ROM, so make sure that you have backed up all the mentioned data.
  7. Make an EFS backup of your phone before you flash this ROM.
  8. You need enough confidence to flash this ROM.
  9. Alright! Go ahead and flash the custom firmware, follow this guide to the letter.

Disclaimer: The methods involved in flashing custom roms and rooting your phone are highly custom and may result in bricking your device, and has nothing to do with Google or the device manufacturer that is SAMSUNG in our case. Also rooting your device will void its warranty and you will be no longer eligible for any kind of free device services by the manufacturers/warranty providers. In case of any mishap we may not be held responsible. Follow these instructions to the letter to avoid any mishap or bricking. Make sure that whatever you do, you are doing it at your own responsibility.

How to Install Stock Android 4.4.2 KitKat on  Samsung Galaxy S3:

  • Download latest Stock Android 4.4.2 KitKat Preview .zip file.
  • Connect your phone to your PC now.
  • Copy the .zip files to the storage of your phone.
  • Now disconnect your phone and turn it off complete.
  • Boot into TWRP recovery now, in order to do so, turn it on by pressing and holding Volume Up + Home Button + Power Key. You should see the recovery mode in a while.
  • Now in TWRP  recovery, wipe cache, factory data reset and advanced options > dalvik cache.
  • After wiping all these three, select “Install” option.
  • Now select “Install > Choose Zip from SD card > Select Android 4.4.2 KitKat.zip file > Yes”.
  • This will flash the ROM in your phone.
  • Reboot your device.
  • You should see the Android 4.4.2 KitKat ROM running on your device in a while.
  • That’s all!

First boot may take up to 10 minutes, you may not worry if it’s taking that much long. In case it’s taking too long, you may boot into TWRP recovery and wipe cache and dalvik cache and reboot your device as it may fix the issue. In case your device is having issues, you may return to your old system using the Nandroid backup or follow our guide here to install stock firmware.

In case you got any issues or you face any difficulties regarding this post, please feel free to stop by the comment box below and let us know. We will get back to you as soon as possible. Thank you all.

Give Your Galaxy S3 I9300 A Look Of Galaxy S5 with S5 Sensation ROM

2
Give Your Galaxy S3 I9300 A Look Of Galaxy S5 with S5 Sensation ROM

With the Galaxy S5, Samsung gave its TouchWiz UI a new look. The new interface is much colorful, much smooth and most of all, it’s even more user friendly. The stock Samsung applications have got a new and cool UI design as well. Besides this, there is a number of features that are exclusive to the Galaxy S5, that may make the other Galaxy owners a little jealous as they won’t be able to get this UI on their device, at least not anytime soon. While you’re thinking if you will get it or not, the good news for the Galaxy S3 GT-I9300 users has arrived as XDA senior member sunajkram23 has brought up a great ROM with the features and UI of the Galaxy S5.

The ROM is based on Galaxy Note 2’s StockAndroid 4.4.2 KitKat ported by XDA developers JustArchi and Kryten2K35 and is deodexed. Just in case you’re looking out to try something new on your Galaxy S3, this might be a good chance. In the following post we are going to install this S5 Sensation ROM on the Samsung Galaxy S3 GT-I9300 and give it a look and feel of Samsung’s latest flagship Galaxy S5. All you need is, move forward with us and follow the guide carefully.

Let’s first go through the features of this ROM:

S5 Sensation ROM
  • S5 Experience & Sensation
  • S5 User Interface
  •  S5 Settings
  • S5 Touchwiz Launcher w/ My App features
  • S5 My Magazine
  •  S5 Easy Luncher and Easy Settings
  •  S5 Lockscreen w/ all effects
  •  S5 Popping colors,Light,Blind,Stone skipping,Watercolor & Ripple Effects
  •  S5 System UI
  •  S5 Mms
  •  S5 Phone & Contacts
  •  S5 Pop-Up caller & Messages
  • S5 Keyboard
  •  S5 SBrowser
  •  S5 Music Player with working Popping color effect
  •  S5 Video Player
  •  S5 Radio
  •  S5 Gallery
  •  S5 Backup App
  •  S5 Multi Window
  • S5 Ultra Power Saving Mode w/ UPSM Manager
  •  S5 Toolbox
  •  S5 Calculator
  •  S5 My File
  •  S5 Kids Mode
  •  S5 Calendar & Widget
  •  S5 Baby Crying Detector
  •  S5 Group Play & Group Camcorder
  • S5 S Finder
  •  S5 S Health w/ Sleep monitor
  •  S5 S Note
  •  S5 S Memo
  •  S5 S Voice
  •  S5 S Baro
  •  S5 S Studio
  •  S5 Story album
  •  S5 Accuweather Widget
  •  S5 Voice Recorder
  •  S5 Optical Reader
  •  S5 Wallpaper
  •  S5 E-Mail
  •  S5 Firewall
  •  S5 Quick connect
  •  4way Reboot Menu
  •  One hand operation in all screen

Pre-Installation Instructions:

  1. This ROM is only for Samsung Galaxy S III GT-I9300. Do not try this on any other device, please check your device’s model in Settings > About Device > Model.
  2. Your device must have a custom recovery installed, in case you’re missing it you may Follow our full guide here to install TWRP.
  3. Your device’s battery should be charged at least over 60%. This is highly recommended in order to prevent any power issues during the flashing process.
  4. Make sure that you backup your important media content, ContactsCall Logs & Messages. This is highly recommended just in case something goes wrong and you need to reset your phone.
  5. If you already have rooted your device, use Titanium Backup to back up all your important apps + system data. Also if you are using a custom recovery, it is recommended that you backup your current system using that first. [Just for the sake of safety]. Here’s our full Nandroid Backup guide.
  6. You will have to go through Data Wipes during installation of this ROM, so make sure that you have backed up all the mentioned data.
  7. Make an EFS backup of your phone before you flash this ROM.
  8. You need enough confidence to flash this ROM.
  9. Alright! Go ahead and flash the custom firmware, follow this guide to the letter.

Disclaimer: The methods involved in flashing custom roms and rooting your phone are highly custom and may result in bricking your device, and has nothing to do with Google or the device manufacturer that is SAMSUNG in our case. Also rooting your device will void its warranty and you will be no longer eligible for any kind of free device services by the manufacturers/warranty providers. In case of any mishap we may not be held responsible. Follow these instructions to the letter to avoid any mishap or bricking. Make sure that whatever you do, you are doing it at your own responsibility.

How to Install S5 Sensation ROM on  Samsung Galaxy S3:

  • Download latest S5 Sensation ROM  5.0 .zip file.
  • Connect your phone to your PC now.
  • Copy the .zip files to the storage of your phone.
  • Now disconnect your phone and turn it off complete.
  • Boot into TWRP recovery now, in order to do so, turn it on by pressing and holding Volume Up + Home Button + Power Key. You should see the recovery mode in a while.
  • Now in TWRP  recovery, wipe cache, factory data reset and advanced options > dalvik cache.
  • After wiping all these three, select “Install” option.
  • Now select “Install > Choose Zip from SD card > Select S5 Sensation ROM.zip file > Yes”.
  • This will flash the ROM in your phone.
  • Reboot your device.
  • You should see the S5 Sensation ROM running on your device in a while.
  • That’s all!

Here are some screenshots from this ROM:


S5 Sensation

First boot may take up to 10 minutes, you may not worry if it’s taking that much long. In case it’s taking too long, you may boot into TWRP recovery and wipe cache and dalvik cache and reboot your device as it may fix the issue. In case your device is having issues, you may return to your old system using the Nandroid backup or follow our guide here to install stock firmware.

In case you got any issues or you face any difficulties regarding this post, please feel free to stop by the comment box below and let us know. We will get back to you as soon as possible. Thank you all.

Root Nexus 7 2012 Running Android 4.4.3 KTU84L Kit-Kat Official Firmware

0
Root Nexus 7 2012 Running Android 4.4.3 KTU84L Kit-Kat Official Firmware

Android 4.4.3 Kit-Kat has been released and most of the devices are already being upgraded to the latest version. As obvious, no matter which OEM release the official update, it will remove the root access of your device and those who are addicted to a rooted device, can never go back to an un-rooted device. In the world of Android devices, rooting methods are quite much the same for the Android versions even if they have been updated, the process must be same for the device. Nexus 7 however,  will be rooted through the old method, first Install Custom Recovery and then Flash Super SU for rooting. Since CF-Auto root will take a little time to be released for this version, till then Old is Gold.

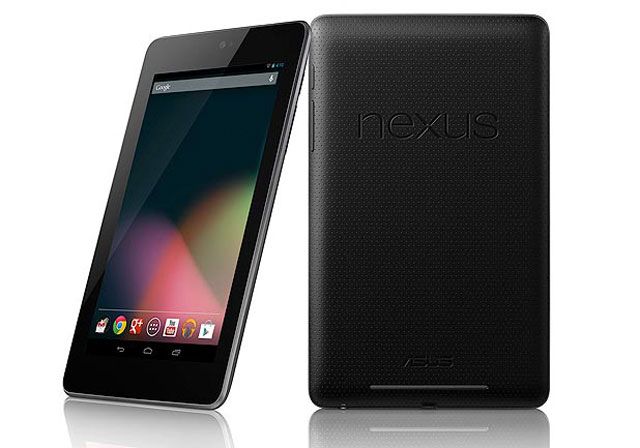
nexus-7

Here are a little something to consider before rooting:

  1. Your Device must be running Android 4.4.3 Kit-Kat, How Follow: Link
  2. Back-Up all your important ContactsCall Logs & Messages. It is highly recommended in case of any mishap or data loss to back up all your important data.
  3. Back-Up your Mobiles EFS Data. 
  4. Check your device model, Go To Setting > About and Make sure that it is Nexus 7 2012
  5. Do-not try it on Nexus 5 or Nexus 4 or Nexus 7 2013.
  6. Bootloader Must Be Unlocked.
  7. Enable USB Debugging Mode
  8. Download USB Driver For Nexus Devices: Link

Disclaimer:

The methods involved in flashing custom ROMs and rooting your phone is highly custom which may result in bricking of your device, and has nothing to do with Google or the device manufacturers . In case of any mishap we may not be held responsible. Follow these instructions to the letter to avoid any mishap or bricking. Make sure that whatever you do, you are doing it at your own responsibility

Downloads Required:

CWM Recovery + Super SU

Installation Process:

1. CWM Recovery:

  1. Download Super SU to the root of your SDcard.
  2. Download the CWM Recovery Image and paste it in the Fastboot folder
  3. Turn Off your Device
  4. Now go to Bootloader/Fastboot mode, Press and hold Power + Volume Down Buttons till you see some text on-screen
  5. Now Open Command prompt in Fastboot Folder.  How? Hold Shift Key and Right Click anywhere in the Fastboot folder.
  6. Connect your Device with PC.
  7. Now Type fastboot flash recovery recovery.img to flash the CWM Recovery on your device
  8. Type fastboot reboot, to reboot your device
  9. After a proper reboot, your device will be running CWM Recovery

2. Installing Super SU:

  1. Turn Off your Device again
  2. Now go to Bootloader/Fastboot mode, Press and hold Power + Volume Down Buttons till you see some text on-screen
  3. Choose Recovery From Bootloader
  4. Navigate to ‘Install zip from SDcard’ another windows will open in front of you.
  5. Select ‘choose zip from sd card’ from the Options.
  6. Select the Super SU.zip file and confirm the installation on next screen.
  7. Once the Installation is Over, Select +++++Go Back+++++.
  8. Select “Reboot System Now“,
  9. After the Reboot, check Super SU app in drawer or use any root checker app to verify root access.

Root Samsung Galaxy Gear SM-V700 Tizen [How To – Guide]

0
Root Samsung Galaxy Gear SM-V700 Tizen [How To – Guide]

Although the first Galaxy Gear wasn’t warmly welcomed by the users, but it doesn’t matter for the Android enthusiasts who always love to try out something new. Samsung loaded the Galaxy Gear SM-V700 with the maximum features it can at that time, and the device was pretty much acceptable to some extent. With a 2 MP camera on the strap, and a very nice Super AMOLED display, that shows up all the notifications and is also capable of running some cool apps, the Galaxy Gear won so many pockets while getting buried under criticism. Galaxy Gear’s Android powered nature actually helped it to keep its little charm alive as the device was expected to receive some nice development, which later on emerged on the XDA-developers forum. There are custom ROMs, custom Recoveries, flashable mods and other tweaks available.

Android’s open nature is ready to accept anything, and if the Android powered device gets rooted, you can definitely break the walls and go beyond em. Same is the case with Galaxy Gear, the root paved way for other applications that were apparently locked to the Galaxy Gear. If you happen to be the Galaxy Gear owner, you might haven noticed that in the recent software update, Samsung has changed the OS of the first Gear from Android to Tizen. This may be a bad news for so many users, but we do understand that Samsung wants to keep its wearable line on the same OS and wants its new OS to get some hands on it. Arrival of Tizen on the Gear 1 is not really a problem and won’t bother you since its root is already available, that means you will still be able to go beyond the boundaries and add a new life to this little great gadget.Samsung_Galaxy_Gear_review_01-580-90

As we move forward in the following post, we will root Samsung Galaxy Gear running SM-V700 latest Tizen firmware. All you need is, you need to follow this guide carefully in order to get successful with this procedure.

Here are the pre-installation instructions:

  1. This guide is only for Samsung Galaxy Gear SM-V700. Do not try this on any other device, check your device model number in settings > about device.
  2. Download the file carefully for your device.
  3. Make sure that your device’s battery is charged over at least 60%. Highly recommended in order to prevent any mishap during the recovery installation process.
  4. Use only OEM data cable to establish connection between your phone and PC. Turn off your Anti Virus and Firewall to prevent any connection issues. Also enable USB debugging mode on your phone if you face connection issues.

Disclaimer: The methods involved in flashing custom roms and rooting your phone are highly custom and may result in bricking your device, and has nothing to do with Google or the device manufacturer that is SAMSUNG in our case. Also rooting your device will void its warranty and you will be no longer eligible for any kind of free device services by the manufacturers/warranty providers. If your device has knox counter on the bootloader, flashing recovery will trip the knox counter and you won’t be able to reset the counter. In case of any mishap we may not be held responsible. Follow these instructions to the letter to avoid any mishap or bricking. Make sure that whatever you do, you are doing it at your own responsibility.

Pre – Requisites:

How to Root Galaxy Gear Running Tizen:

  1. Download the file for your variant carefully.
  2. Open Odin3 v3.09.exe.
  3. Put your phone in download mode, to do so, turn it off completely. Now turn it on, as soon as yous see the Galaxy Gear logo, press the power key 5 to 6 times quickly in order to get into download mode.
  4. In case the download mode method doesn’t work for your device, try one of the methods from this guide.
  5. Connect your Galaxy Gear to your PC.
  6. The ID:COM box in Odin should turn blue now, that means your phone is connected properly in download mode.
  7. Click on the “AP” tab in Odin 3.09 and select the downloaded v700_rootfs.img.tar file.
  8. Make sure that the only options selected in Odin are Auto Reboot and F.Reset Time. All other options should be unticked.
  9. Hit start now and sit back, it will take a few seconds to flash the root file and your device will reboot.
  10. You’re rooted now.
  11. That’s All.

Discover more about the Galaxy Gear in our Gear Garage.

In case you got any queries or you face any problems with this guide, feel free to write us in the comment box below. We will try our best to get your query resolved asap. Thanks all.