Home Blog Page 438

5 Best Android Keyboard Apps for Faster Typing
0
5 Best Android Keyboard Apps for Faster Typing

Typing is easier and convenient on the computer’s keyboard with bigger and distinctive keys. We can prove to type fast and composing essays. But when it comes down to type a small message on our smart phones, we spend so much time and hit the backspace more than the number of words we actually type, if you have a smaller screen and bigger fingers.

Although we have the auto correct feature but it is not always accurate. Here are some of the apps which can help in more convenient and faster typing.

Swype:

Swype Keyboard

Tapping and typing might not be easy, but swiping and typing can be definitely helpful, you can respond to a text message faster and accurately.

Swype is a famous keyboard app designed for Android users. The app suggests to swipe across the letters to make words on your keyboard. To type the word “type” for example, you will start swiping from T and go along touching y, p and e and as soon as you let go, the word “type” will appear on the screen. The app is intelligent enough to memorize your typing habits and adds new words to its dictionary for your convenience.

Flesky
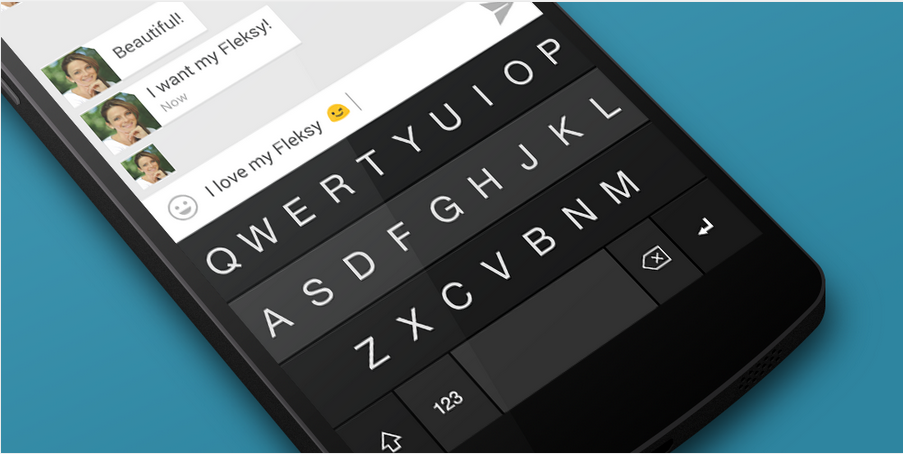
Fleksy Keyboard 

Flesky does not use the swiping method for convenient typing. It rather focuses on faster and accurate typing by giving larger keys and brilliant auto correct. The app intelligently recognizes what word you are about to type even if you don’t tap the keys accurately. The app claims a powerful typing method with which you can type without even looking at the phone’s screen. It supports 10 different languages and QWERT, AZERTY, QWERTZ and DVORAK keyboard types.

Minuum

Minuum

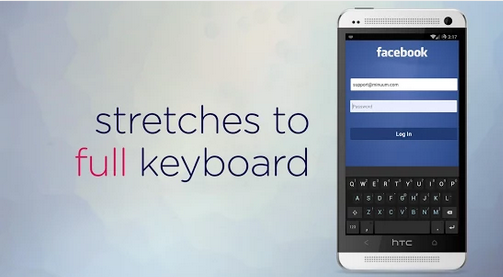
Minuum is another app that can be used for faster typing. The app gives you a smarter and smaller keyboard. This does not mean that people with big fingers can not use it. It has the tendency to shrink the keyboard and make the alphabets appear in a single line instead. This makes the keyboard to consume lesser screen space than standard keyboard. Plus, it has a high prediction sense so you have very less chances to type a word wrong. It has some additional features as well like monitoring your typing speed and many fun emoticons.

Swiftkey

SwiftKey Keyboard

Another intelligent typing assistance app is SwiftKey. It has amazing prediction sense as compared to other apps. Based on the previous messages you typed, the app is able to predict what you want to type next. It has the ability to help you complete your sentence by giving predictions of the next two or more words making sense with the previously typed word. The app supports prediction in over 60 languages. The app has other features as well including almost 800 different emoticons, 30 interesting themes and layouts for all screen sizes.

Adaptxt

Adaptxt

Adaptxt has been designed with a great user interface and customization options. Like Swype, it uses the swipe input method for typing accurately and conveniently. Moreover, it gives you the option to post directly on social media sites like Facebook and Twitter once you are done typing a message. An interesting and unique feature is the option to enable or disable the private mode. When the private is enabled, the app will not add any of the words you use to its dictionary which no other apps has come up with yet. The app learns from your writing style that you use in different applications and gives you suggestions based on them. Moreover it can also use GPS to give location based suggestions and much more.

All these apps are worth downloading if you face problems while typing. You can look and choose which apps suits you the best, whether you are convenient with the swipe input method, shrunk keyboard, bigger keys, accurate prediction or private mode.

How To Get Twitter, Instagram and Facebook In One App In iOS

0
How To Get Twitter, Instagram and Facebook In One App In iOS

Facebook, Instagram and Twitter, all three of them are the default social network sites of Millennials, you might use all of them and also prefer them on each other because of their features and what they offer, how much limits are there, how fast they work when it comes to the uploading media and more. The only problem is that they are not perfect, what I mean to say is that all of them are different in every aspect and from each other. Most of the times, users keeps switching to other Platforms for different tasks, thus loosing time and efforts, almost getting pissed off again and again. Wouldn’t it be an awesome thing if all of these three platforms, comes under a Single app, so you won’t have to face any problem using all three of them at once.

Screenshot-219

No need to worry, as Hashtack is a free iPhone app that does the job of bringing together all these three apps. It allows you to scroll photos from all three of these Platforms with a Single scroll. You can even add your own stream and all the public posts will be filtered, from all three of the Networks. Without furter ado, let’s how we can set-up to Hashtack.

Set-Up and Use HaskTack:

  • First of all Sign-up using your E-Mail or your Facebook, Twitter Account.
  • If you logged into the app using Facebook account, HaskTack will use iOS 7 integerated Sharing accounts to link your Twitter and Facebook profile there.
  • Log-in to Instagram and let grant Permission for Hasktack to link Instagram with other two platforms.
  • Once you are all set-up, you’ll start seeing the Feeds Populate.

Why Use HaskTack For Streaming Photos?

Hashtack provides superior experience when it comes to browsing photos, just browsing photos. The stock apps has a lot of ads, where Hashtack doesn’t even has single while scrolling, and Twitter app doesn’t have much customization in the feed of Images. Hashtack UI looks like Instagram, so using Instagram on Hashtack won’t do any good, you won’t have any added benefits in it. The option of Commenting is not there for Instagram and Twitter, however, everything will be presented in Facebook, hope to see this functionality in the next update.

How To Share:

The app has a dedicated button called Retack, which is basically the Share button branded for the app. You have the option to share any photo from any Social Network to any other Social Network or E-Mail. Choosing anyone of them will bring the iOS 7 default Sharing Pop-up.

Create a customized Hastag Stream:

Now, if you want to create your own customization feed of Photos, which you can create one Via hastags, the Posts will be Public and the hash in the Hasktack stands for this very purpose. Just bring the Side bar from the left, Create System and Input any Text, Tap Save and you are done.

How to fix invalid IMEI on Samsung Galaxy S4 [ Video Tutorial ]

1
How to fix invalid IMEI on Samsung Galaxy S4 [ Video Tutorial ]

Samsung Galaxy S4, the perfect smartphone from Samsung, in size and in specs as well. I’ve used Samsung Galaxy S4 for 1 year and never faced any sort of problem but after updating to Kit Kat 4.4, many user’s have reported that they are facing so many issues. I know it’s a bit disturbing but they all can be fixed by time, there is another issue on Samsung Galaxy S4 ” invalid IMEI “, which you have to fix ASAP. As Samsung Galaxy S4 is a high end device so it’s natural that you get worried, but not anymore because we’ve found an easy and working solution. Lets start ! How to fix invalid IMEI on Samsung Galaxy S4.

sg_GT-I9505ZKAXSP_042_Front_white

HOW TO FIX INVALID IMEI ON SAMSUNG GALAXY S4:

Step 1: Download Odin for your Windows.

Step 2: Then download Samsung Galaxy S4 IEMI null fix zip on your PC and extract it anywhere you want.

Step 3: After extracting the downloaded file open odin on your PC.

Step 4: When Odin windows is appeared on your desktop then click on PDA and select the file that you have extracted in 2nd step.

Step 5: Now put your Samsung Galaxy S4 in download or odin mode by pressing HOME+POWER+VOLUME DOWN.

Step 6: Connect your device with PC using original USB Cable.

Step 7: After your device is successfully connected with Odin, you’ll see one of the port will go light blue and in progress bar you’ll see ” Added “.

  • If your device is not connected with system means you don’t have Samsung Galaxy S4 USB drivers. [ Download Here ].

Step 8: Now click on start button on Odin home screen. Un-Check the re-partition option in Odin.

Step 9: When you click on start Odin will flash the Samsung Galaxy S4 null Fix file.

Step 10: Now wait for Odin to complete the process don’t unplug your device until you see complete message on Odin.

Please do tell us in comments whether or not your issue has been resolved!

Samsung Galaxy S4 Tmobile IMEI repair

Install SafeStrap v3.75 Recovery On AT&T Galaxy Note 3

2
Install SafeStrap v3.75 Recovery On AT&T Galaxy Note 3

Custom Recoveries sure have a lot of demands when comes down to install them, well after all they are awesome and there is no doubt about that. If Custom recoveries didn’t exist, who knows how much difficulty would have been faced for installing Custom tweaks and Mods. However, as these recoveries are here, we really don’t have to worry about a thing. Well, as we all know that this is the world of  Android, where developers are breaking a lot of impossibilities and trying to bring such things into this world, which everyone considered impossible. Like only a year ago, you wouldn’t be able to Root your device without unlocking bootloader first, but now you can. The same is the case with AT&T Galaxy Note 3, at the time of its release users believed that they have to unlock the bootloader to install the recovery, however, this wasn’t the case at all when it comes to the Safestrap Recovery.

attnote3rear

SafeStrap Recovery allows us to do all the stuff a custom recovery can do but without interfering with the System, letting it act as a complete stock. You don’t need to unlock the bootloader of your device to install this Recovery and even you don’t need to do much to install it either, no need to use Odin or via fastboot commands, but a simple Apk file will be able to install it and then the rest of the process will be on the screens for you, yet still we will show you how to download and install this recovery, so get ready.

Requirements:

  1. Your Device Must Be Rooted: Link
  2. Install BusyBox From Play Store.
  3. Use an External Card for this Recovery.
  4. Un-install Xposed Framework, you can install it again after installing the Recovery
  5. Go to Settings > Security and Check “Install From Unknown Sources”
  6. Install any File Manager app that lets you install the Apk files

Downloads:

Installation Process:

post-20101-0-95629400-1380956638

  1. Download the Apk to your device or Copy it from PC.
  2. Tap on the Apk and select Install, and choose Open.
  3. It will ask you for Super SU permission, Grant it.
  4. A Pop-up will appear, Tap Agree.
  5. Now Tap on Recovery, and watch the Installation of SafeStarp Recovery on your Galaxy S5.
  6. Now boot into recovery and you will find there the SafeStrap recovery, it completely looks like TWRP.

Install CWM 6 Recovery on Sony Xperia TX LT29i Running 9.2.A.1.215 Firmware [Locked Bootloader]

Install CWM 6 Recovery on Sony Xperia TX LT29i Running 9.2.A.1.215 Firmware [Locked Bootloader]

Sony rolled out a secret update to for its Xperia TX LT29i, based on the build number 9.2.A.1.295 while the OS remains the same as Android 4.3 Jelly Bean. We’ve called this update secret as Sony hasn’t mentioned it on its site yet, and the update has been received by a few users in Hongkong only, but we believe that Sony will soon roll out this update globally. So, in case you’re the lucky user to receive the latest and enhanced version of Android for your device or you’ve manually updated your device to this latest firmware and now you’re looking for a compatible custom recovery with your Xperia TX, you may have spotted the right place.

While looking going through XDA developers forum, I came across CWM 6 recovery for Sony Xperia TX, compatible with the latest firmware 9.2.A.1.295, and what’s cool about this recovery is, you can install it keeping your phone’s bootloader safe and secure. You do not need to unlock it and follow any traditional recovery installation guide. I’ve compiled the guide and explained it right here. All you need to do for now is to follow this carefully and get it done successfully.thiet-ke-cua-sony-xperia-tx

Here are the early preparations:

  1. This guide is only for Sony Xperia TX LT29i running latest Android 4.3 Jelly Bean 9.2.A.1.215 firmware.
  2. Your device must be rooted, root Xperia TX LT29i running 9.2.A.1.215 Firmware.
  3. This guide will work for Sony Xperia TX LT29i having locked bootlader, you don’t need to follow and complex methods.
  4. Make sure that your phone’s battery is charged at least over 60%. This is highly recommended in order to prevent any power issues during the rooting process.
  5. USB debugging mode must be enabled on your device. To do so, go to Settings > Developer Options > USB debugging mode > Enable. In case you can’t find the developer options, then go to Settings > About Device > Tap Build Number for 7 Times to enable the developer options.
  6. Use only on OEM data cable to establish connection between your PC and your Phone.
  7. Allow “Unknown Sources” on your phone. To do so,  go to Settings > Security > Unknown Sources > Tick.

How To Install CWM 6 Recovery on Sony Xperia TX LT29i Running 9.2.A.1.215  Firmware – Locked Bootloader:

      1. Download Flash Gordon Applicatoin APK file
      2. Download Philz CWM 6.0.4.7.zip file.
      3. Connect your Sony Xperia TX LT29i to your PC now.
      4. Copy the Flash Gordon APK file  and CWM Recovery.zip file to your phone.
      5. Now disconnect your phone and locate the Flash Gordon App APK file on your phone.
      6. Tap the APK and proceed/complete the installation.
      7. Once installed, locate the Flash Gordon App from the app drawer and tap it to launch.
      8. Allow root access to Flash Gordon Application.
      9. Once Flash Gordon opens up, tap “Select Zip > Locate the Recovery.zip file and flash it.”
      10. Do not reboot your device using the Flash Gordon application, once the installation is done, reboot your device manually.
      11. You can now boot into the CWM recovery that you just installed. To do so, turn off your device completely first. Now turn it on, as soon as you see the Sony logo, press volume up key in order to get into the recovery mode.
      12. That’s all with the recovery installation on Sony Xperia TX LT29i keeping the Bootloader Locked.

That’s all. In case you have any queries, stop by the comment box below and let us know. We will catch you up immediately. Thank you all.

Credits

Top 5 features of Amazon Fire Phone

0
Top 5 features of Amazon Fire Phone

Fire phone is the first smart phone designed by Amazon, the widely used site for online shopping all around the world. Amazon Fire phone has been introduced with dynamic features all in one phone, this fast and powerful phone has made its position in the best sellers of the year already. I have discussed the top 5 features introduced in this smartphone that makes it distinctive.

Fire-phone-sides-640x401

Firefly

Firefly is a very interesting feature that is linked directly with Amazon and is recognized by it. Firefly can identify things such as books, albums, movies, music, food, television shows, games and the list goes on. It can scan the barcode, identify the products, show its Amazon ratings, etc.

The fire phone comes with a dedicated firefly button on the side which can be used to buy stuff anytime, anywhere and within 2 to 3 seconds.

Point and Shoot and Buy

You see something interesting and want to purchase it, you can instantly point at it whether its an album cover, a book cover, a television show or anything else of your interest, the phone will give you access to the information of that product including its name even if its not known. You can then buy it through Amazon.

3D Everywhere

The device has been introduced with four cameras on the front to give a dynamic perspective. The device will move along with your head’s movement which is actually very impressive when experienced in person.  The phone knows where your head resides and adjusts accordingly, giving real time changes to see different aspects of the same image. This feature is very useful during activities such as map reading.

Mayday, Mayday!

You do not have to get lost or confused at any point now. By the help of Mayday, you will have complete assistance all the time and a customer support representative will appear on the screen to guide you in 15 seconds or less over Wi-Fi and 3G or 4G.

SDK

SDK is also included in the Fire phone which is helpful as it allows the third party apps to take advantage of the four cameras on the front. You can enjoy the games, movies and videos from 3rd party developers that support the 3D feature on your device. This is cool and good news for 3D gamers.

These are only the top 5 features of the Amazon fire phone and it still has alot more interesting features rolled up the sleeve. The device is currently available for pre-orders only.

Install CWM 6 Recovery on Sony Xperia V LT25i Running 9.2.A.2.5 Firmware [Locked Bootloader]

Install CWM 6 Recovery on Sony Xperia V LT25i Running 9.2.A.2.5 Firmware [Locked Bootloader]

Xperia V has received a new software update with the build number 9.2.A.2.5. If you’ve already updated your device to this latest firmware and now you’re looking out to tweak your device, you probably will need a custom recovery. Before you start looking for it, we’ve found it and explained the method to install in the following post. Scroll down and learn how you can install CWM 6 recovery on your Sony Xperia V LT25i running latest Android 4.3 Jelly Bean based on the build number 9.2.A.2.5 keeping the bootloader locked.. You just need to make sure that you follow this guide being careful in order to get it done successfully.\

sony-xperia-v_1

Here are the early preparations:

      1. This guide is only for SonyXperia V LT25i running latest Android 4.3 Jelly Bean 9.2.A.2.5 firmware.
      2. Your device must be rooted, root Xperia V LT25i running 9.2.A.2.5 Firmware.
      3. This guide will work for Sony Xperia V LT25i having locked bootlader, you don’t need to follow and complex methods.
      4. Make sure that your phone’s battery is charged at least over 60%. This is highly recommended in order to prevent any power issues during the rooting process.
      5. USB debugging mode must be enabled on your device. To do so, go to Settings > Developer Options > USB debugging mode > Enable. In case you can’t find the developer options, then go to Settings > About Device > Tap Build Number for 7 Times to enable the developer options.
      6. Use only on OEM data cable to establish connection between your PC and your Phone.
      7. Allow “Unknown Sources” on your phone. To do so,  go to Settings > Security > Unknown Sources > Tick.

How To Install CWM 6 Recovery on Xperia V LT25i Running 9.2.A.2.5 Firmware – Locked Bootloader:

      1. Download Flash Gordon Applicatoin APK file
      2. Download Philz CWM 6.0.4.7.zip file.
      3. Connect your Xperia V LT25i to your PC now.
      4. Copy the Flash Gordon APK file and CWM Recovery.zip file to your phone.
      5. Now disconnect your phone and locate the Flash Gordon App APK file on your phone.
      6. Tap the APK and proceed/complete the installation.
      7. Once installed, locate the Flash Gordon App from the app drawer and tap it to launch.
      8. Allow root access to Flash Gordon Application.
      9. Once Flash Gordon opens up, tap “Select Zip > Locate the Recovery.zip file and flash it.”
      10. Do not reboot your device using the Flash Gordon application, once the installation is done, reboot your device manually.
      11. You can now boot into the CWM recovery that you just installed. To do so, turn off your device completely first. Now turn it on, as soon as you see the Sony logo, press volume up key in order to get into the recovery mode.
      12. That’s all with the recovery installation on Sony Xperia V LT25i running 9.2.A.2.5 Firmware keeping the Bootloader Locked.

That’s all. In case you have any queries, stop by the comment box below and let us know. We will catch you up immediately. Thank you all.

Credits

How To Root Android L Developer Preview On Nexus 5 and Nexus 7 2013 Wi-Fi

0
How To Root Android L Developer Preview On Nexus 5 and Nexus 7 2013 Wi-Fi

The upcoming release of Android version from Google as mentioned in the Google I/O is Android L. Well, to gain and increase the popularity, even to get some suggestions to improve this OS, Google released the Android L Developer Preview to install on your devices and tried it before the world. However, that preview was complete stock and installing that will automatically remove the root access of your device, bringing everything back to stock but giving you the latest Android version, the Android L. And we all know that the only way to get the root access back, is by rooting the device again and since CF-Auto root won’t work within this case, the old and gold method is the best one and we will show you how to do that.

Screen-Shot-2014-06-25-at-9.21.19-AM

Here are a little something to consider before rooting:

  1. Your Device must be running Android L Developer Preview, How Follow: Link
  2. Back-Up all your important ContactsCall Logs & Messages. It is highly recommended in case of any mishap or data loss to back up all your important data.
  3. Back-Up your Mobiles EFS Data. 
  4. Check your device model, Go To Setting > About and Make sure that it is Nexus 7 (flo) Nexus 5 (hammerhead)
  5. Do not try it on any other device
  6. Bootloader Must Be Unlocked.
  7. Enable USB Debugging Mode
  8. Download USB Driver For Nexus Devices: Link
  9. Set-Up Fastboot and Android SDK: Link

Also See: Install Android 4.4.4 Kit-Kat On Nexus 5

Also See: Root Nexus 5 Running Android 4.4.4 Kit-Kat

Also See: Install Android 4.4.4 Kit-Kat On Nexus 7 2013

Also See: Root Nexus 7 2013 Running Android 4.4.4 Kit-Kat

Disclaimer:

The methods involved in flashing custom ROMs and rooting your phone is highly custom which may result in bricking of your device, and has nothing to do with Google or the device manufacturers . In case of any mishap we may not be held responsible. Follow these instructions to the letter to avoid any mishap or bricking. Make sure that whatever you do, you are doing it at your own responsibility.

Downloads Required:

Nexus 5:

Nexus 7 2013:

Modified Super SU: Link

Installation Process:

  1. Download Super SU and Boot.zip to the root of your SDcard.
  2. Download the CWM Recovery Image and paste it in the Fastboot folder.
  3. Turn Off your Device.
  4. Now go to Bootloader/Fastboot mode, Press and hold Power + Volume Down Buttons till you see some text on-screen.
  5. Now Open Command prompt in Fastboot Folder.  How? Hold Shift Key and Right Click anywhere in the Fastboot folder.
  6. Connect your Device with PC.
  7. Now Type fastboot flash recovery recovery.img to flash the CWM Recovery on your device.
  8. Type fastboot reboot, to reboot your device.
  9. After a proper reboot, your device will be running CWM Recovery.
  10. Turn Off your Device again.
  11. Now go to Bootloader/Fastboot mode, Press and hold Power + Volume Down Buttons till you see some text on-screen.
  12. Choose Recovery From Bootloader.
  13. Navigate to ‘Install zip from SDcard’ another window will open in front of you.
  14. Select ‘choose zip from sd card’ from the Options.
  15. Select the Super SU.zip file and confirm the installation on next screen.
  16. Go Back and Flash Boot.zip the same way
  17. Once the Installation is Over, Select +++++Go Back+++++.
  18. Select “Reboot System Now“,
  19. After the Reboot, check Super SU app in drawer or use any root checker app to verify root access.


True Skate For PC (Windows 7, 8, XP, Vista and Mac)

True Skate For PC (Windows 7, 8, XP, Vista and Mac)

True Skate is the best game available on both Android and iOS Platforms, and the users’ reviews are enough to call it as the best game of all time, despite the fact that the game is not free and sometimes you have to pay for the Maps too, but everything that is purchased in the game is worth buying. The game contains nothing but a Park and a Skateboard, additional content has to be purchased within the game but as said earlier the game is so good, you won’t resist paying a single Dollar. The game controls are the best, everything will happen exactly the way you want it to be, even the default Skate Park is so awesome and beautiful, you’ll be definitely lost in the game while playing it. Since it is available for both iOS and Android, you can also play this on PC too.

Screenshot_1


Features Of True Skates:

  • Realistic touch based physics.

  • Flick the board to make it react exactly how you would expect.

  • Drag your finger on the ground to push.

  • A beautiful skate park to get lost in including ledges, stairs, grind rails plus a bowl, half pipe and quarter pipes. (Additional skate parks are now available as an In-App Purchase)

  • Smooth graphics.

  • Slow motion.

  • User challenges

  • Replay viewer

  • Global leaderboards.

Also See: Retrcia for PC

How to Download and Install True Skate On PC:

  1. Running Android apps on PC is possible through an App Player / Android Emulator only. To do this, we recommend BlueStacks. Follow the full guide here and install it on your PC.
  2. Seach for Skater Boy On the Emulator file to your PC or you can download the Apk.
  3. Once downloaded the Apk, go to the downloaded file location.
  4. Double click the downloaded APK file now.
  5. Wait for the installation to get complete with BlueStacks.
  6. Once it complete, open BlueStacks now.
  7. Click on “All Apps” in the BlueStacks now and click on the app that you just installed.
  8. Use the app by following the on-screen instructions.
  9. That’s All! Enjoy!

Root Galaxy TabPro 10.1 T520 Running Android 4.4.2 XXUANE1 Kit-Kat Official Firmware

Root Galaxy TabPro 10.1 T520 Running Android 4.4.2 XXUANE1 Kit-Kat Official Firmware

Let’s assume that many people have updated their Galaxy TabPRO 10.1 to Android 4.4.2 Kit-Kat and as per rule of Flashing the Stock/Official Firmware, you are sure to lose the Root access of your device, thus making it completely Stock and forbidding you to make any changes in the system. The only option left right now, is to root your device again, if you want to use your device with the same things you had before the update. It doesn’t matter if the update was really small in size or a huge one, if you have made amendments in the Stock system, you won’t be able to receive the OTA update and files are too big to leave any sort of root access or Stock recovery, you might be able to flee if only you receive the OTA file, nonetheless, let’s proceed and see how we can root the device again.

Samsung-Galaxy-Tab-Pro-10-1-Specs-Leak-Features-Exynos-CPU

Rooting allows you to get full control over your device, Stock apps and mods are good, but installing Custom Mods gives you better support and great battery life, you might need to delete some Stock apps from the device, a non-rooted device can’t do that, but a rooted one has the power to remove stock apps too.If you are familiar with Odin and it’s working, then this tutorial might not be difficult for you. Otherwise read the whole tutorial first before trying it on your device. In this Article, we will show you How To Root Galaxy TabPro 10.1 T520 Running Android 4.4.2 XXUANE1 Kit-Kat Official Firmware But before we begin, Make sure that:

  1. Update Your Device To Android 4.4.2 Kit-Kat:Link
  2. That you have a Well Charged Battery, 60%-80% is better.
  3. Back-Up all your important ContactsCall Logs & Messages.It is highly recommended in case of any mishap or data loss to back up all your important data.
  4. Back-Up your Mobiles EFS DataHow To Restore and Back-Up EFS Data On Samsung Galaxy Devices.
  5. Check your device model, Go To Setting > About and Make sure that it is T520 .
  6. Do-not try this tutorial on any other device

Disclaimer:

The methods involved in flashing custom roms and rooting your phone is highly custom and may result in bricking your device,and has nothing to do with Google or the device manufacturers which is Samsung in our case. In case of any mishap we may not be held responsible. Follow these instructions to the letter to avoid any mishap or bricking. Make sure that whatever you do, you are doing it at your own responsibility.

How To Root The Device.

odin_explained6

  1. Download CF-Auto Root For your Galaxy TabPRO to your computer and extract the zip file.
  2. Download Odin.
  3. Turn off your Phone and Turn it On While Pressing, Power + Volume Down + Home button until you see some text on-screen, Press Volume Up to continue.
  4. Make Sure that the USB drivers are installed.
  5. Open Odin in Computer and connect your device to PC, while it is in the Download mode.
  6. If your Phone is successfully connected to PC, the Odin port will turn Yellow with COM port number.
  7. Now Click on PDA and select the File ‘CF-Auto-Root-picassowifi-picassowifixx-smt520.zip
  8. In Odin, Check Auto reboot  Option.
  9. Now Click the start button and wait for the process to complete.
  10. After the installation is complete you device will restart and once you see the Home Screen and get the “Pass” Message on Odin, unplug the cable.

How to Fix Insert SIM card to access network services, fix ‘Not register on Network’

3
How to Fix Insert SIM card to access network services, fix ‘Not register on Network’

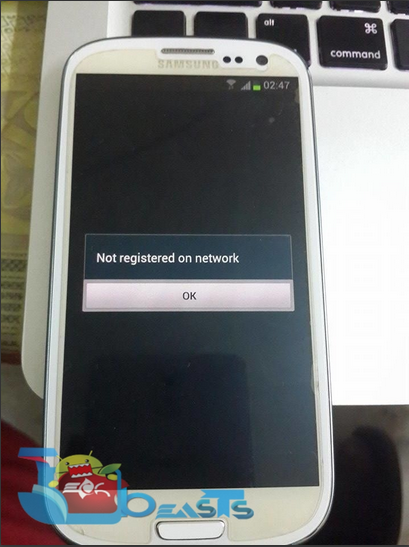
If you are using Samsung Galaxy device, then we are pretty sure that you must have faced ” Not register on Network ” issue. Well, it’s a common issue on Galaxy devices, and you really need not to worry about, just follow the guide ” Fix not register on Network “. Many of our user’s have successfully fix this issue and I am glad that we were there to help you all out. But few days back one of my friend told me that he is facing ” Not register on network and Insert SIM card to access network services “.  Whenever he goes to the setting -> More > Mobile networks this pop-up appeared. So, today I will tell you, How to Fix Insert SIM card to access network services and fix not register on network.

Fix Samsung Fix Galaxy Not Registered On Network

Before starting the process let me clear you one thing if you are thinking to update your device to latest model that won’t help you, if you are thinking to install a custom ROM that won’t work either. After trying every possible method, finally a solution for this issue worked out and it’s working for most.

How To Fix Insert SIM card to access network services:

Step 1: Open Setting on your Galaxy device.

Step 2: Tap on Wireless and Networks.

Step 3: Now Tap on Mobile Networks.

Step 4: Now your are in Mobile Networks tab. ( Follow all the remaining steps carefully ).

Step 5: While in Mobile Networks first press the home button for 2 seconds and then while pressing home button press power button for 15 seconds.

Step 6: Your device screen will blink several times no need to worry. After few seconds your device will reboot.

Step 7: All Done now you can see there will be no issue ” insert SIM card to access network service “.

You can try this method for ” Not register no Network “.

Fix Samsung Galaxy Not Registered On Network [ Solved ]

Tip:

If you are facing null IMEI and Not register on network issue on Samsung Galaxy S3 then you must try this method. First your device will be running Android 4.3 XXUGMK6. Now all you have to do is flash only 2 files through recovery. I’ve tried this and it has worked. Download 

  1. XXUGMK6 Modem.zip (Click here)
  2. XXUGMK6 Kernel.zip (Click here)

Also See:

  • samsung galaxy s3 insert sim card to access network services
  • samsung galaxy s2 insert sim card to access network services
  • samsung galaxy 4g blaze insert sim card to access network services
  • samsung galaxy s4 insert sim card to access network services

Best Ways to fix a phone that won’t charge properly

0
Best Ways to fix a phone that won’t charge properly

Whenever we buy a new cellphone, the main thing that we always care about is the battery timings and its life, because everything we use requires WiFi or Mobile data, so battery time is the real deal. So, today we thought of finding the best ways to fix a phone that won’t charge properly. When it come to charging many factors matter not only the charger, damaged wires or charging port. Well, the main thing is that we have found a very good solution for your phone, if it is not charging properly.

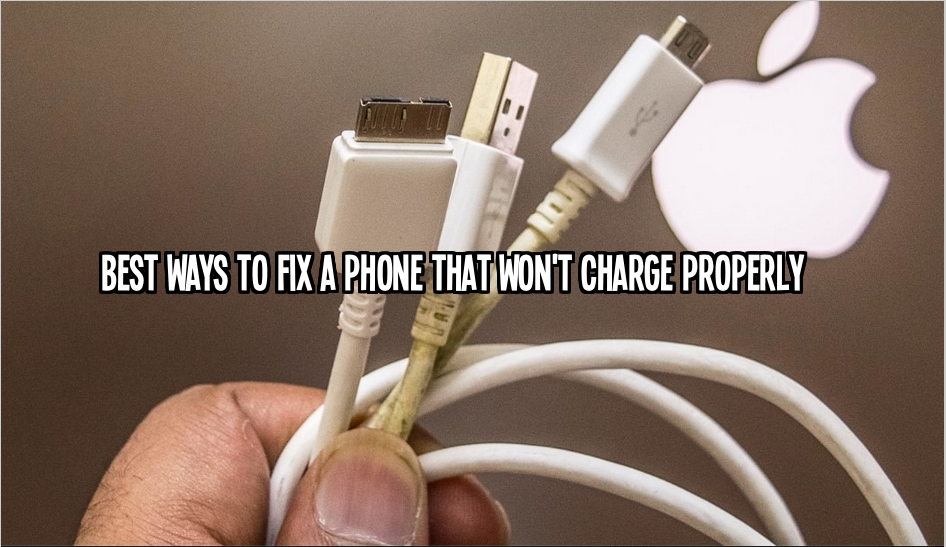
Best Ways to fix a phone that won't charge properly

Following are possible ways to fix a phone that won’t charge properly. We are pretty sure after applying these steps, you will get rid of all those charging issue on Android and iPhones.

FIx USB Port:

How to fix a phone that won't charge properly


This is most common issue in our phone’s charging port which is at times all messed up and whenever we try to connect charger, we have to move micro USB cable in different direction to make it work. Why you face such kind of problem? Because this kind of issue arises when the metallic surface of the USB port and microUSB charger are not making good contact. You can solve this by yourself, all you have to do is switch off your device, get a small and thin thing like a Toothpick or pin. Now gently lever up the black tab inside the USB port and now turn on your device.

Replace Charging Cables:

Best ways to fix a phone that won't charge properly

This is second best option that you should replace your charging cables because we use cables daily to charge our phones, so there is chance that may be our charging cable is broken from inside or damaged because we bend it so much. So, replacing your charging cables might help you. But before changing do check it properly then go for a replacement.

Clean Up Ports:

Before you put your device on charging, kindly do check your USB charging port. Why? Because we put our phone in our pockets and sometimes a piece of thread or tissue may get stuck in the USB Charging port, and when you put your device on charging, neither will it show the signs of charging nor it will get charged. This is not good for your phone, sometimes it can lead to battery exploding or bad consequences as well.

Replace The Battery:


fix a phone that won't charge properly

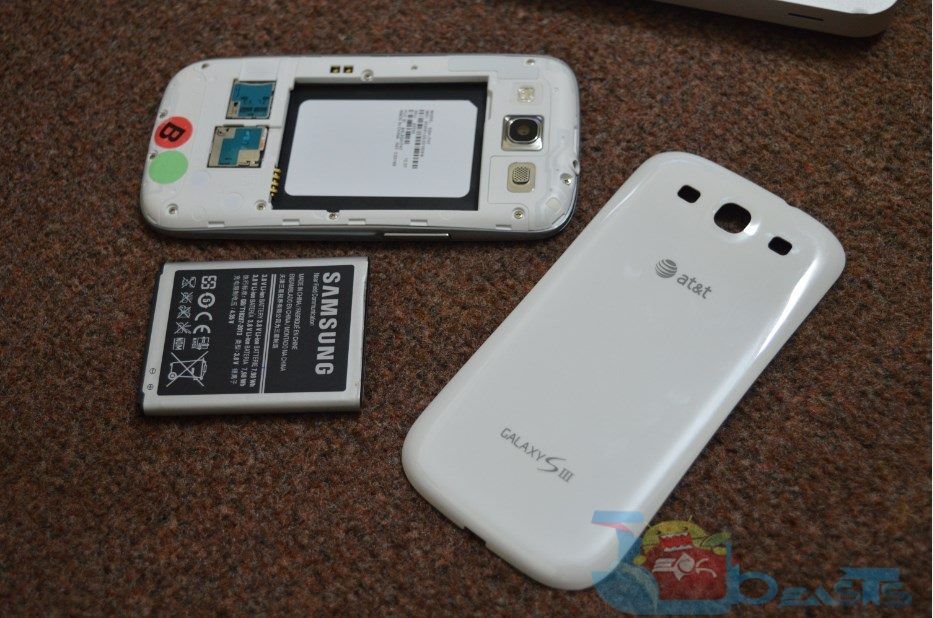
Replacing battery is also a good option but before doing this, you must try and check everything. Before replacing battery you can try the latest firmware, disable motions, set brightness low or automatic, turn off Bluetooth, turn of WiFi, don’t use mobile data  and most of the time, we use battery saving apps and mods, try custom ROMs and try clearing your browser cache. After doing all these steps, you must go for battery replacing. First try another battery see if it’s the actual problem, if you have removable battery then check carefully the battery, it might be deformed or leaking. If you have non removable battery phone then place your device on flat surface and spin it, if your device spins then your battery is bulging.

Don’t Charge with System:

fix a phone that won't charge properly

If you charge your phones through PC, System, Desktop or Laptops, we would suggest you to stop doing this, because charging from a wall socket is always fast and it lasts longer then PC charging.