Home Blog Page 437

How to Restore Galaxy Null IMEI # & Fix Not Registered on Network

15
How to Restore Galaxy Null IMEI # & Fix Not Registered on Network

I have posted 2 methods on how to Fix Not Registered on Network and Fix insert Sim card to access services, if you haven’t checked them please do check. Today i’ve prepared a another guide on How to Restore Galaxy Null IMEI # & Fix Not Registered on Network. If you are facing Null IMEI issue after upgrading your device on wrong baseband, most of the time you see null IMEI because we manually update our device with out confirming the baseband. This is the main reason you face not registered on network issue because your unique identity number is null. So lets start working on Restore Galaxy Null IMEI # & Fix Not Registered on Network.

Fix Samsung Fix Galaxy Not Registered On Network

HOW TO RESTORE GALAXY NULL IMEI # & FIX NOT REGISTERED ON NETWORK:

Following are main steps that you have to do in order to restore Samsung Galaxy null IMEI and fix not registered on network. If by chance this guide is no good for you. Try one of these from the following.

Step 1: First dail *#06# on your phone. This is for to check your IMEI number after dialling *#06# you see a number then its ok but if you see null/null then you have to reconfigure your device.

Step 2: Now again go into dialer and type *#197328640#    or *#*#197328640#*#*.

Step 3: After adding dailing the code you’ll be promoted to command mode ( developer mode ).

Step 4: Now select option number 6.

Step 5: Select option number 1 ( FTM ).

Step 6: If FTM status is on then turn it off by pressing FTM off.

Step 7: Now after selecting FTM off your null IMEI will be restored.

Step 8: Press menu key and enter option 2. ( This will turn off FTM ).

Step 9: Now wait for few seconds, remove your battery and sim. Just wait more for 2 mins then insert the battery but not the sim. Turn on your device.

Step 10: After your device is turned on completely dail *#197328640#.

Step 11: Select Debug Screen.

Step 12: Select phone control.

Step 13: After phone control select nas control.

Step 14: Now “RRC(HSDPA) ,option 5.

Step 15: After that Select click RRC revision  , option 2.

Step 16: After selecting option number 2 now choose option 5 (HSDPA only).

Restart your device now and insert sim card, turn on your Samsung Galaxy and now dail *#06#  to check that your IMEI is restored.If you have carefully follow all the steps then i am sure your IMEI is restored and Not registered on network is fixed.

How To Extract System Dump Of Android Devices On Windows

1
How To Extract System Dump Of Android Devices On Windows

Don’t mislead yourself with the .img as some sort of an Image file, the files with .img as extension have no concern with those graphical image files, but they contains the Raw data of an Optical disk, getting into details will not only waste your time, but as well as mine. In simple words, I can say that these .img file are just like zip or rar files and can be extracted using any Archiving tool and they are a Basic part of Android system and if you are more than a Basic Android user, than you must have noticed that every Android OS whether stock or Custom, must have a .img file, just extract the zip files you download or .tar.md5 files for Samsung devices, all contains .img files.

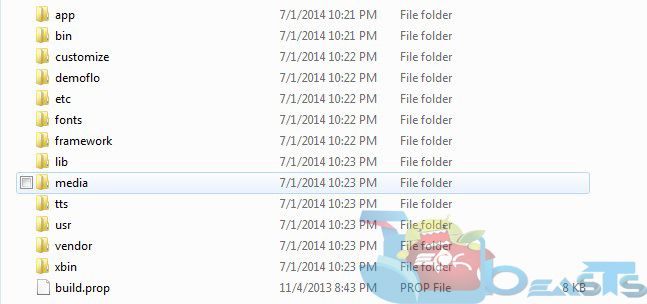
androiddump

If you pay daily visit to XDA then you must have noticed that many time a Thread with Some devices System Dump is being uploaded there and most of the times users don’t visit such thread because they don’t know what it is, and others keep thinking how they extract the System dump of a Specific file, System Dump is derived by Extracting the System.img files found inside the Firmware files and Today we will show you exactly how it is done.

Requirements:

  1. A Computer with Windows 7/8 installed.
  2. A System.img file from any Android Firmware.
  3. A Zip Archive Utility Installed.
  4. Download the Following files:

How To Extract System Dump:

Screenshot_9

  1. Extract both the zip files you downloaded from above.
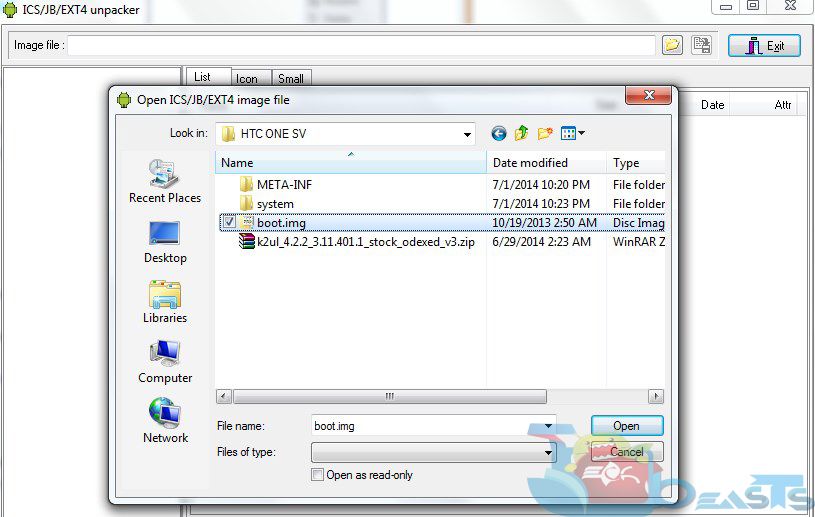
  2. Now launch the ext4_unpacker_exe and click the open folder icon.
  3. Now navigate to System.img file you saved on your computer, highlight it and click Open.
  4. Hit the Save as ext4 button.
  5. Now select the Folder where you want to save the file, don’t forget to add .ext4 extension at the end of the file
  6. Click the Save button.
  7. You will see the Progress bar unpacking the image, once it is done, run ext2explore-2.2.71
  8. Navigate to File > Open Image Option.
  9. Select the .ext4 file you unpacked and Click Open.
  10. Now Highlight the .ext4 file and Click Save.
  11. Select the Folder where you want to save the files and click OK.
  12. Wait till all the system dump Files are extracted in your desired Folder.
  13. Now open that folder to see all the System Dump Files.
  14. That is it, now you have your System dump.

Screenshot_3


100 Ballz V1.35 APK

0
100 Ballz V1.35 APK

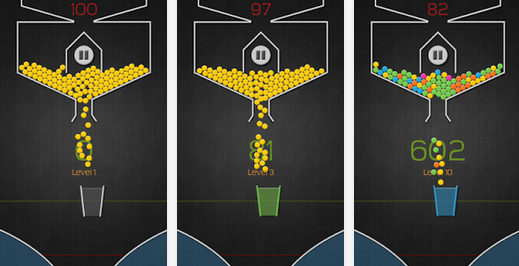
While going through the applications in the Google Play Store, I came across 100 Ballz, and after playing this game for a while I fell in love with this. The game is simple enough to make you addictive and can make you spend hours while playing it. The goal is to drop the 100 balls that you’re given, in to the glass. For each ball landing the glass safely, you’re given the points according to its color and if the ball misses the glass, it will disappear and the game will come to an end if you keep on missing. The level of difficulty increases as you make progress in the game. That’s all you got to to do in this simply amazing game. 100 Ballz

100 Ballz is available for free in the Google Play Store, but just in case you’re unable to find it at your end you may need a manual method to install this game on your Android device. In order to get it done for you, we’ve pulled out its APK file and embedded the download link right here. Just go ahead and follow the instructions to download and install 100 Ballz on your Android device.

How to Download and Install 100 Ballz on your Android device:

      1. Download 100 Ballz v1.35 APK
      2. Copy the downloaded APK file to your phone or download it directly to your phone.
      3. Locate the APK file on your phone now, tap to start installation.
      4. Select “Package Installer” if prompted.
      5. Allow Unknown Sources from Settings > Security if required.
      6. Proceed with the installation and complete it.
      7. As soon as the installation is completed, locate the installed application from the app drawer.
      8. Enjoy dropping the balls into the glass now!
      9. That’s All!

Metal Slug Defense v 1.3.0 APK

0
Metal Slug Defense v 1.3.0 APK

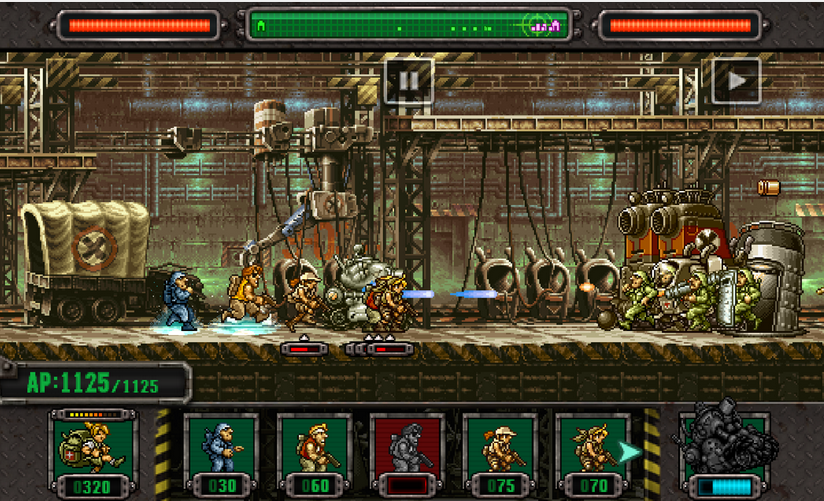
Did you ever play this addictive game on your PC in the good old days? Well, Metal Slug surely was one of the coolest, full of action and one of the best the games to spend the time on. The game has now made its way to the Android OS named as Metal Slug Defense. Having packed up 100+ stages, the game urges the soldiers to fight against the enemies, use the weapons accurately and kill them off. Metal Slug Defense also packs up some potential features like 60 + characters and units, you can also upgrade your units for the better attacks and you can also use the Metal Slug attack in order to take over the bases of your enemies.

Metal Slug Defense is available for free in the Google Play Store, and runs on Android device running Android 4.0.3 or higher. If you are unable to find the game in Google Play Store at your end and you’re willing to play it right now, we’ve pulled out its application package file in order to help you to calm down. The APK file is untouched and is completely stock, just go ahead and follow the instructions to download and install Metal Slug Defense v 1.3.0 on your Android device.Metal Slug Defense


How to Download and Install Metal Slug Defense on your Android device:

      1. Download Metal Slug Defense v1.3.0 APK
      2. Copy the downloaded APK file to your phone or download it directly to your phone.
      3. Locate the APK file on your phone now, tap to start installation.
      4. Select “Package Installer” if prompted.
      5. Allow Unknown Sources from Settings > Security if required.
      6. Proceed with the installation and complete it.
      7. As soon as the installation is completed, locate the installed application from the app drawer.
      8. Enjoy killing the enemies in Metal Slug Defense!
      9. That’s All!

Transform your LG G2 into LG G3 with OptimusG3 ROM [How To – Guide]

1
Transform your LG G2 into LG G3 with OptimusG3 ROM [How To – Guide]

LG’s former flagship device is quite old now, but still liked by a number of users. The device won LG some respect because of its great hardware specifications, and helped LG to stay in competition with the rivals as well and the device still stands among one of the best Android devices. LG has already introduced its latest flagship, the G3, which actually brought the attention of all the users towards LG because of some potential features LG introduced in the device e.g Laser Auto Focus, QHD screen etc. This surely makes the G2 owners a little sad because they can’t get the latest hardware features on their G2, but the software features surely can be transferred to the G2 and this may help the LG G2 owners to give their devices a new life.

This nice job has been done by XDA senior member OptimusRs, who ported in the LG G3 firmware to the LG G2 named as OptimusG3 ROM. This firmware is based on LG G2 D802’s 20d firmware , is pre rooted and contains a number of features that are eye-catching. From the LG G3, the 4K feature from its camera and 120 FPS recording with Magic Focus has been ported while the UI of this firmware is completely as same as that of the G3, and actually transforms your LG G2 into LG G3. Besides this, OptimusG3 ROM is bloatware free, and is expected to treat your device quite nicely.G2

As you scroll down, you will find the guide to install the OptimusG3 firmware on your LG G2 and learn how you can transform it into the LG G3. Let’s go through the ROM features and then head towards the installation guide.


OptimusG3 ROM features
  • Ported From Official G3 Firmware
  • * Base On New LG D802 20d Firmware
  • * Aroma Installer
  • * Stock KK kernels
  • * Rooted With SuperSu
  • * BusyBox
  • * Odexed
  • * Zipaligned
  • * Split View
  • * Hide NavBar
  • * Buttons Combination
  • * Brightness And Volume Toggle
  • * New Lockscreen With 13 Unlock Effects
  • * Knock Code Support For D802/5/6 – F320x
  • * LG G3 Camera 4K And 120FPS With Working Magic Focus + xdabbeb Camera
  • * Remove Bloatware
  • * Remove Alot Korean Apps
  • * Remove Alot Of Useless Apps And Files
  • * New Ringtones And Notifications Sounds
  • * New Boot Animation
  • * New Shutdown Animation
  • * New Boot Sound

Early Preparations:

      1. This guide is only on for LG G2 – All Variants. Do not try this on any other device or else you will end up bricking it. You may check your device’s model by going to Settings > About Device.
      2. Your device must be rooted and have a custom recovery installed. Check out our TWRP Installation and Root guide for the LG G2.
      3. Please make sure that your phone’s battery is charged at least over 60%. This is highly recommended in order to prevent any power issues during the recovery flashing process.
      4. Backup each and everything on your Android phone as follows:
      5. Backup all your important contacts, find the full guide here.
      6. Backup all your important sms messages, find the full guide here.
      7. Backup all your important call logs, find the full guide here.
      8. Backup all your important media content manually. (Copy to your PC.)
      9. Backup all your apps / data. If you’ve rooted your device, use Titanium Backup to do so. Follow the full guide here.
      10. Backup your current system using a custom recovery (CWM or TWRP) if you’ve flashed one. This is recommended in case something goes wrong with rooting your phone, you can use the custom recovery and return to the old working state of your system.
      11. This is a stock based custom ROM, and maybe kept for everyday’s use. You do not need to worry about the bugs and flaws in the ROM.
      12. Alright, let’s flash this ROM now.


Disclaimer: The methods involved in flashing custom roms and rooting your phone is highly custom and may result in bricking your device, and has nothing to do with Google or the device manufacturer that is LG in our case. Also rooting your device will void its warranty and you will be no longer eligible for any kind of free device services by the manufacturers/warranty providers. In case of any mishap we may not be held responsible. Follow these instructions to the letter to avoid any mishap or bricking. Make sure that whatever you do, you are doing it at your own responsibility.

How to Install OptimusG3 ROM and Transform your LG G2 into LG G3:

      1. Download KK Baseband.zip file for your LG G2, download it carefully for your device’s model. [Skip step 1 to 4 if you are already on KitKat baseband]
      2. Copy the downloaded Baseband.zip file to your phone’s SD card now.
      3. Now boot into custom recovery on your LG G2, that you installed using the above steps.
      4. Once in TWRP recovery, select Install > Locate the KK baseband.zip file and flash it.
      5. Now download OptimusG3 v1.1 ROM.zip file.
      6. Copy the downloaded ROM.zip file to your phone’s SD card now.
      7. Now boot into custom recovery on your LG G2 once again.
      8. Once in TWRP recovery, select Install > Locate the OptimusG3 ROM.zip file and flash it.
      9. If the ROM prompts you for wiping the data, wipe everything otherwise wipe using the steps below after installation.
      10. Wait for the installation to get finished, once done, get back to the main menu in CWM recovery.
      11. Now wipe Factory/Data Reset. Also wipe cache and dalvik cache from advanced options.
      12. Once done, reboot your device.
      13. First boot may take up to 10 minutes just hold on tight.
      14. Once booted up, you can enjoy Optimus G3 ROM on your LG G2 with G3 features.
      15. That’s all. Enjoy!

Here’s the ROM screenshot by the developer:

LG G2 to LG G3

Let us know how does this ROM treats you. In case its good enough, don’t forget to donate to the original developer. In case of any queries, feel free to stop by the comment box below and let us know. We will get back to you asap.

Top 5 Best Launchers for Android [ Forever Green ]

1
Top 5 Best Launchers for Android [ Forever Green ]

Third party app launcher are the best thing in Android, you can use launcher to enjoy and feel the latest Android OS. Launcher are like theme but they change everything and you still have the option to go back to stock interface. Today i’ve collected the Top 5 Best Launchers for Android devices.

Google Now Launcher:

Google Now Launcher

Google now was included in the kitkat devices previously but has now been made available for everyone in the Playstore. The launcher includes Google Now right on your home screen to search anything at anytime. The app gives you button-free access to Google voice so you can search simply by calling out ‘Ok Google’ when you are on your home screen and look for anything you want to., get directions from Google maps, listen to a song, get updates of scores and much more.

Launcher Pro:

Launcher Pro

Launcher Pro is for the people who want to use ice cream sandwich like launcher on their smart phones. This app works fast and quiet with features like splitting home screen into 7 different home screens, smooth scrolling between the home screens, amazing widgets and icons and much more.

Everything Me:

EverythingMe Launcher

Everything Me is the best app for people who want an automated experience with their phones. The app responds to voice based commands including response to anything you need to search or update Facebook status. The app brilliantly goes along from morning till evening and adopts changes progressively. It will update you with news and weather updates in the morning to begin your day and give you updates for your day’s schedule, meetings in line and other important events throughout the day.

Nova Launcher:

Nova Launcher

Nova launcher is one of the oldest and most customizable launchers in the Android Playstore. You can choose various themes, icons and widgets and grid sizes and multiple docks for your phone. The app also supports features like ‘Ok Google’ for convenient searches. The launcher is efficient and highly optimised.

Yahoo Aviate Launcher:

Yahoo Aviate Launcher

Aviate stays with you and adapts to changes as you proceed with your day showing you only the apps you need at that particular time of the day. The app has a simple interface; it divides the home screen into four different panels, organizes your apps into categories based on their functions, lets you create shortcuts, widgets and icons and much more. The app will wake you up in the morning, will guide you on the road, give you suggestions for what you are looking for anywhere and so on throughout the day.

Best HD 4th of July Wallpapers

0
Best HD 4th of July Wallpapers

Hey everyone! Happy 4th of July, it’s time to celebrate the Independence day for the American nation. As the day has begun, to give your gadgets a touch/look of 4th of July celebrations, I’ve gathered some high definition wallpapers. Just go ahead, pick your favorite one and use it as a wallpaper on your desktop PC, Android device or any Apple device.

New York City 4th-of-july-wallpaper-2014-2 4th-of-july-wallpaper-2014-3 4th-of-july-wallpaper-2014-5 4th-of-july-wallpapers-2014-41 Happy-4th-of-July-Free-HD-Wallpapers-Pictures-Images-3 indendence-of-America-4th-July-desktop-Wallpaper-HD

All these wallpapers are collected from different sources. We do not own any of these images, we’ve just compiled up for this post. These images are the property of the rightful owners.

Install 4EXT Recovery Touch v1.0.0.6 RC2 On HTC Sensation/ Sensation XE

0
Install 4EXT Recovery Touch v1.0.0.6 RC2 On HTC Sensation/ Sensation XE

Hahaa! they said that PhilZ touch Recovery is the most advance touch-based recovery available yet, well I can easily say that they haven’t seen this amazing recovery yet. 4EXT Recovery Touch is, I can say, the most advance form of any Recovery available, however, not much devices support this recovery yet, the developer is doing his best to bring it for every device, for the least the Flagship devices. It offers Smart Flash for all the S-On devices, by that means all the S-On supported devices. It detects your local time zone, the best Built-in Screenshot  Option, something no other recovery offers, however, a little extra CPU is required for this recovery, but there is nothing to worry about.

This Recovery will detect any change to the Boot and flash your boot partition only if it is really changed, however, it will always back-up your boot partition to your SDcard before updating it, so in case of any mishap, you can restore it and in most cases it restores it itself and many more features, for more info, visit the XDA Thread. Without further ado, let’s see how we can install this recovery.

Note:

This recovery will work for all the Supported devices, if you have any other device than HTC Sensation/ XE, you can download the Apk and give it a try, who knows your device might be supported.

3

In this Article,  we will show you How To Install 4EXT Recovery Touch v1.0.0.6 RC2 On HTC Sensation/Sensation XE. But before we begin, Make sure:

  1. That you have a Well Charged Battery, 60%-80% is better.
  2. Back-Up all your important ContactsCall Logs & Messages.It is highly recommended in case of any mishap or data loss to back up all your important data.
  3. Back-Up your Mobiles EFS Data.
  4. Check your device model, Go To Setting > About and Make sure that it is HTC Sensation/XE
  5. Do not try it on any other device.
  6. Enable USB Debugging Mode
  7. Download USB Driver For HTC Devices: Link
  8. Bootloader Must Be Unlocked: How To Unlock Bootloader of HTC Devices
  9. Root Your Device: Root HTC Sensation XE

Disclaimer:

The methods involved in flashing custom ROMs and rooting your phone is highly custom which may result in bricking of your device,and it has nothing to do with Google or the device manufacturers which is HTC in our case. In case of any mishap we may not be held responsible. Follow these instructions to the letter to avoid any mishap or bricking. Make sure that whatever you do, you are doing it at your own responsibility.

Download Required:

4EXT Recovery Touch v1.0.0.6 RC2: Link

How To Install This Recovery:

1

  1. Open your device Settings and Go to Security and Tick the Unknown Sources
  2. Download the Apk file from their Official Site.
  3. Install the Apk on your device, using any File Explorer
  4. Once the Apk is installed, Open the app from Drawer.
  5. Hit Install.
  6. It will ask you about the version, choose the v1.0.0.6 RC2.
  7. Tap Download and let it do the job.
  8. Once downloaded you are good to go.

Top 5 Downloader Apps for Android [ Forever Green ]

0
Top 5 Downloader Apps for Android [ Forever Green ]

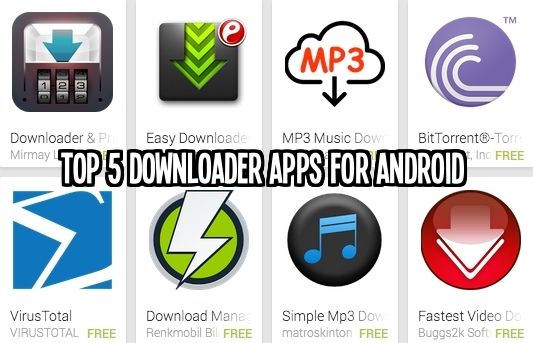
Usually our smartphone’s downloader does not do the best job, as we face a lot of problems during the downloading process. The speed is slow and even the download gets interrupted due to various reasons which are very annoying. In order to download files, documents, photos, videos or music from the internet to your smart phone, you need to have a downloader app to boost and manage downloading. Here is the list of top 5 android downloader apps that assist you in a great way.

Top 5 Downloader Apps for Android

Turbo Downloader:

Turbo Downloader

Turbo downloader has the ability to boost the download speed up to five times. In order to download something faster you need to simply long press on the link and choose share to Turbo Downloader or you can copy paste the link to turbo downloader as well. The app can maximize the download speed and is used by millions of people for quick download.

Download All Files:

Download All Files

Download all files does it exactly what the name suggests. You can download everything and all type of files from the internet by the help of this app. It also has the pause and resume feature, so you can pause the download if the internet connection is down and download it later. You do not have to see the ‘Content not supported’ message ever again on your phone’s screen if you have this app.

IDM:

IDM Plus Download Manager

You can download everything with ease with this smart downloader app. The app is very popular with over 10 million users and has the ability to boost the download speed upto 3 times. The app supports all types of files for download including MP3, DOC, ZIP, APK and RAR. It supports the pause and resume feature and shows progress as well. The app also acts as a file manager by providing options like delete file, etc.

aDownloader:

aDownloader

This app is a torrent downloader and all you have to do is long press on the link and choose share to a Download. The app will download everything and also supports the pause resume feature to pause the download anytime.

Download Blazer:

Download Blazer

The app has a brilliant and easy to use user interface, It helps to manage downloads from Google and ensure minimal download failures with maximum download speed. Other features of the app includes pause and resume feature, organizing your downloads in queue and downloading all types files form the internet. The app supports six different browsers including chrome, Firefox, Dolphin, etc.

How To Solve Low Notification Sound Issue Sony Xperia Z

0
How To Solve Low Notification Sound Issue Sony Xperia Z

Now, it is a real annoying thing that you can hear a song and the voice of your friend on phone very clearly but when it comes to getting the Notification, the sound is so low that you’ll barely be able to hear the Notification. This problem with such a high end device is quite a shame and users have complained that they have witnessed this problem on the Stock firmware and only some of them have experienced this problem in the custom ROMs. First of all, you have to choose a suitable tone for your Calls and Notifications, the default sounds are not very loud, you need to convert the audio to 320kbps and try to use this audio as the Ringing tone, do the same with Notification sound too.

xz-speakers

Recently, we have covered the sound Mod for Xperia Z2, but we are not talking about Xperia Z2 here. Today, we will cover the issue of Low Sound of Sony Xperia Z, however, if none of them works for you, better switch to a Custom ROM just to test whether the speaker is fine or not. If not, then take it to a near service center to get it repaired. Let’s begin.

How To Solve This Error:

  1. First Try to change the Ringtone to a custom one instead of a Default one, if that doesn’t work, the proceed below.
  2. Open Settings.
  3. Navigate to Sounds.
  4. Open Sound Effects.
  5. Then Open Sound Enhancements.
  6. Enable Xloud in it and then tell your friend to call you.
  7. You’ll definitely feel a difference


How To Solve Wi-Fi Signal Dropping Issue In Sony Xperia Z

0
How To Solve Wi-Fi Signal Dropping Issue In Sony Xperia Z

Sony Xperia Z is considered to be a revolutionary Smartphone from Sony, not in terms of Specs or design, but because it can take a bath with you without even getting destroyed. We have seen such feature in Sony Ericsson Xperia Active, but the design difference is huge, putting such thing in a device of a 5-inch size is not an easy task and along with that, you have to make sure that the RAM and processor should remain dry as well. Sony Xperia Z has 1.5GHz Quad-Core Processor, 2GB of RAM and 1080p display, with a lot of other features.

Xperia Z water tank

However, every device has its own faults and problems, despite its popularity and amazing support provided by Sony, yet there are some problem that can’t be solved by updating the software or unlocking the bootloader and rooting the device, sometimes you have to go into a little depth to look for the solutions. Today, we will discuss the problem of Wi-Fi Signal drop in Sony Xperia Z, if anyone of you are experiencing this problem, be sure to follow the rest of the guide.

How To Solve This Problem:

Most of the times users turn on both Bluetooth and Wi-Fi, thus facing this problem, you can see if both the Wi-Fi and Bluetooth is turned On, then turning Off the Bluetooth will solve this problem.

Or, if you have turned On the Stamina Mode, then turning it Off can solve this problem too, if you still experience this problem after doing both the above steps, then follow below.

  • After Doing the above two steps, Restart your phone and your Router.
  • Double Check the Password you put for the Wi-Fi connection.
  • Makes sure that you have the latest Firmware, even if there is a smallest update, take it.
  • Try to change the Channel of your router and check whether DCHP is no or not.
  • Now Go to your modem bac koffice and type the following URL:
  1. Linksys – http://192.168.1.1
  2. 3Com – http://192.168.1.1
  3. D-Link – http://192.168.0.1
  4. Belkin – http://192.168.2.1
  5. Netgear – http://192.168.0.1
  • Turn Off the Mac Filter on your Router and Add your Phone’s Mac Address Manually.
  • Try Sony PC Software once installed. Open it and Navigate to Support Zone > Start > Phone Sofware Update > Start

How to Use Two Numbers on WhatsApp at the Same Time [ Guide ]

0
How to Use Two Numbers on WhatsApp at the Same Time [ Guide ]

WhatsApp is a very famous social networking app where we can easily interact with our friends and family. To register with the app, all we have to do is to provide the app with our phone number. It is known that the app allows only one number to register with it at one time, but interestingly we can use two numbers at once as well. This is good news for people who have dual SIM phones and who wish to register another number as well with WhatsApp. Here is a guideline to how to use two numbers simultaneously on WhatsApp at the same time.

 it_teaser_whatsapp

A new modified version of this popular social app is available in the market by the name of OGWhatsApp. Besides allowing users to use two numbers at the same time, it comes up with other interesting features as well.

 How to Use Two Numbers on WhatsApp at the Same Time:

  1. First of all, you need to take a back up of your WhatsApp messages. You can find the backup option in your WhatsApp’s settings menu.
  2. After taking the backup, change the name of the folder from sdcard/WhatsApp to sdcard/OGWhatsApp.
  3. Next, go to the XDA developers website and download OGWhatsApp on your device. Having done that, uninstall the original WhatsApp and then re-install it.
  4. If you do not want to opt for this, you can simply clear data by going to phone’s settings ( Settings> Apps> WhatsApp> Clear Data).
  5. To avoid any confusion you can rename WhatsApp to OldWhatsApp. Finally, you need to re-register with the OGWhatsApp with the same number you were previously using on WhatsApp and add a new account registering with your other number on the original WhatsApp.
  6. Now re-name WhatsApp folder to OGWhatsApp and re-name OldwhatsApp to WhatsApp in settings.

Time for magic.. You can now see two shortcuts on your phone’s home screen which are icons for WhatsApp and OGWhatsApp. Now you can enjoy WhatsApp through both of your numbers on the dual SIM phone and no need to worry anymore about buying another phone to use WhatsApp with another number.