Home Blog Page 429

Install CWM Recovery And Root Galaxy Mega 6.3 I9205 LTE Running Android 4.4.2 KitKat

Install CWM Recovery And Root Galaxy Mega 6.3 I9205 LTE Running Android 4.4.2 KitKat

Have you updated your Galaxy Mega 6.3 LTE to Android 4.4.2 KitKat official firmware? Well, the update is available now and you may update your device as soon as possible in order to give your device a new and a great life. After you’ve updated your device, you may want to break the barriers on your Galaxy Mega 6.3 LTE. That’s all possible if you have installed a custom recovery and you have got root privileges as well and that’s what we are going a while later.

The ClockworkMod 6 recovery we are going to install on the Galaxy Mega 6.3 LTE is Philz Advanced CWM recovery, that is enhanced version of the original CWM and is presented by famous XDA recognized developer Phil3759. The recovery by philz contains a number of features that you may not find on the ordinary CWM recovery, and most of all, Philz Advanced CWM is a touch recovery. Once installed CWM, we will be flashing SuperSu by Chainfire in order to attain root access on the device. Before we head towards the instructions, let’s have a look on a brief intro to a custom recovery and root access in order to wipe confusions that the newbies / first timers may have.

Introduction to Custom Recovery and Root:

A custom recovery allows you to install custom roms, mods etc. Along with these, you can make a Nandroid backup, this helps you a lot as you can move back to the previous working state of your phone at any time you want if you have backed up your current system. In some cases, to root the phone you need to flash SuperSu.zip file in the custom recovery, having installed the recovery may help you while in some cases to install the recovery easily, you need to have the phone rooted. You can also wipe cache and dalvik cache of your phone using a custom recovery.

Rooting your phone gives you complete access over all the data which is apparently locked by the manufacturers. This includes removal of the factory restrictions and making changes to the internal system and the operating system. Gaining the root access gives you the privileges to install various applications to enhance the performance of your device, allows you to remove the built-in applications/programs, helps you to upgrade the battery life of your device & install the apps which require the root access for the proper functionality and modify your device in so many other ways e.g using mods and flashing custom recoveries and custom ROMs. Here’s our collection of 10 Best Root Apps.

Early Preps:

1. This guide is only for Samsung Galaxy Mega LTE I9205!

Make sure that your device is exactly as mentioned above. To check out what device you have, go to Settings > More/General > About Device or Settings > About Device and match the model number. Be careful about the device model number, flashing a file on a device not listed here might result in bricking it up. In that case, we may not be held responsible. Also make sure that your device is running Android 4.4.2 KitKat, although the title says that this is only for Android 4.4.2 KitKat, but this method will work fine on Galaxy Mega 6.3 running any earlier version of Android as well.

2. Battery should be charged at least 60%!

Your device’s battery shouldn’t be weak. In case your device goes dead during the flashing process, your device may get soft bricked and you might be in need of flashing stock firmware and that will ultimately result in wiping up your data as well. So, make sure that you charge your device before you start the flashing process.

3. Use the OEM datacable to establish connection!

Always use the original data cable to establish connection between your Android device and your computer / laptop. Using ordinary data cables might interrupt the flashing process, so to avoid any mishap, you need to meet this requirement as well.

4. Backup everything!

Just to be on the safe side, you may consider backing up each and everything from your Android device. This is highly recommended so that in case anything goes wrong, you still have the access to all of your data and you can restore it immediately. You may backup everything as listed below.

5. Turn off Samsung Kies and other softwares while using Odin3!

Make sure that you turn off Samsung Kies while using Odin3 flashtool. Samsung Kies will interrupt Odin3 and will result in causing errors and may not let you flash your desired recovery or root file. Also, make sure that you turn off any antivirus software you’ve installed and also disable firewall to avoid any connection and flashing issues.

6. Disclaimer

The methods involved in flashing custom recoveries, roms and rooting your phone are highly custom and may result in bricking your device, and has nothing to do with Google or the device manufacturer that is SAMSUNG in our case. Also rooting your device will void its warranty and you will be no longer eligible for any kind of free device services by the manufacturers/warranty providers. In case of any mishap we may not be held responsible. Follow these instructions to the letter to avoid any mishap or bricking. Make sure that whatever you do, you are doing it at your own responsibility.

galaxy-mega-6.3-i9205-lte

Downloads Required:

How to Install CWM Recovery And Root Galaxy Mega 6.3 I9205 LTE Running Android 4.4.2 KitKat:

  1. Download recovery.tar.md5 file for your device.
  2. Open Odin3.exe.
  3. Put your Galaxy Mega  in download mode. To do so, turn it off and wait for 10 seconds. Turn it on by pressing and holding Volume Down + Home Button + Power Key simultaneously, You should see a warning, press Volume Up to continue. In case this method doesn’t work for you, try one from this guide.
  4. Connect your device to your PC.
  5. As soon as Odin detects your phone, the ID:COM box should turn blue.  Make sure that you’ve installed Samsung USB drivers before connecting.
  6. For Odin 3.09 hit the AP tab. Select the recovery.tar.md5 or recovery.tar, that you downloaded above.
  7. If you’re using Odin 3.07, you will select “PDA” tab instead of the AP tab, rest of the options remain untouched.
  8. Make sure that the options selected in your Odin are exactly as shown in the pic.
  9. Odin 3.09 explained. (2)
  10. Hit start and wait till the recovery flashing is complete, as soon as your device restarts, remove it from PC.
  11. You can now boot into recovery mode by turning off your device, and then turning it on by pressing and holding Volume Up + Home + Power Key.
  12. That’s all!

How to Root Galaxy Mega I9205 Running Android 4.4.2 KitKat:

      1. Download the Root Package.zip file [ UPDATE-SuperSU-v2.02.zip ]
      2. Copy the downloaded Root Package.zip file to your Galaxy Mega’s SD card.
      3. Boot into recovery mode on your Galaxy Mega 6.3, use step 11 in the recovery installation guide.
      4. Now Select “Install > Choose Zip from SD card > Root Package.zip > Yes / Confirm”.
      5. This will flash the Root Package and quickly gain the root access on your Galaxy Mega.
      6. Reboot your device now.
      7. Find SuperSu in the App Drawer.
      8. That’s All!

How to check if the device is properly rooted or not?

      1. To do so, go to Google Play Store on your Galaxy Mega.
      2. Find “Root Checker” and install it.
      3. Open Root Checker.
      4. Tap “Verify Root”.
      5. It will ask you for SuperSu rights, tap “Grant”.
      6. It should show you Root Access Verified Now!
      7. That’s All!

1560688_10202529514651766_2061540064_n

If you’re facing any difficulties regarding this post, feel free to stop by the comment box and drop us your words. We will get back to you ASAP!


Download Daddy Was a Thief for PC ( Windows 8,8.1,XP,7 – Mac )

0
Download Daddy Was a Thief for PC ( Windows 8,8.1,XP,7 – Mac )

Today I found a very unique and addictive game ” Daddy was a thief ” with awesome graphics and better performance this game is no doubt worth playing. In this game you have to rob a bank and then run away because everyone tries to catch you, grab as much money as you can, you have to find shortcuts to run, Find combo speed boosts and grab power-ups to survive. This makes this game more interesting so I was thinking why not play it on PC, so in the following guide I’ll tell how to play and download Daddy Was a Thief for PC.

Also See: flappy birds family apk for Android

Daddy Was a Thief for PC

Daddy Was a Thief Features:

Smashable obstacles: walls, furnitures and more! Gain as much destructions as you can! Crash through walls, floors and watch the pieces fly all over!
– Playable thieves and crazy power-ups to unlock
– Different every time you play!
– Just one finger control! (swipe up and down) Quick pick-up-and-play
– Many achievements to earn

How To Download Daddy Was a Thief for PC ( Windows 8,8.1,XP,7 – Mac ):

  1. You need an Android emulator to run this game on your Windows PC or MAC. We recommend using BluestacksUse our guide to install it on your PC.
  2. After downloading and installing BluestacksDownload Daddy  Was a Thief apk.
  3. Open the downloaded APK file now, and let Bluestacks install it.
  4. Open BlueStacks now > All Apps > Daddy  Was a Thief.
  5. Now click on Install Button to start the downloading.
  6. Follow the initial screen instruction after installation is done.
  7. Goto My Apps after all installation is completed.
  8. There you’ll see Daddy Was a Thief icon. Double click on it to open.
  9. Enjoy the most addictive game ever!
  10. Don’t forget to let us know about your high score.
  11. That’s All!

Also See: Kim Kardashian hollywood for pc 

Guide to set up Apps Corner on Windows Phone 8.1 GDR1 [How-to]

0
Guide to set up Apps Corner on Windows Phone 8.1 GDR1 [How-to]

Now I can say that Windows Phones are not that bad with every single update they add new and exciting features. Today I’ve selected a new feature that recently came with the Windows Phone 8.1 GDR1 ” Apps Corner “. This is an amazing feature that can help us to share only those apps whom we want for other to only use on our phone, you can say limited access on apps. That will help us in our daily routine for e.g in our office many times your friends use your phone and

set up Apps Corner on Windows Phone 8.1 GDR1

Set up Apps Corner on Windows Phone 8.1 GDR1 Guide:

  • First goto your phone home screen now use your finger swipe down from the screen’s top and now tap on all settings.
  • Now in the settings menu scroll down and tap on the App corner.
  • Tap on Apps and now choose the apps you want for your friends to use. When all the apps are selected tap done. This will hide the apps the ones you haven’t selected.

Using Apps corner you can hide more things and you can select what you want to show other peoples.

  • You need to set up a lock screen for your mobile so that your friends cannot go to the start screen while using the corner of the app.
  • You can turn on or off the action center through the corner of the app, depending on what you want.
  • Go into advance settings and you can select the settings options for others whatever you want. Settings like the Camera button, Search button, Start button, Back button, and Modify Tiles.
  • Now launch button at the bottom of the page to run the Apps corner.

Update Samsung Galaxy Grand 2 G7102 to Android 4.4.2 KitKat XXUBNG4 Official Firmware

0
Update Samsung Galaxy Grand 2 G7102 to Android 4.4.2 KitKat XXUBNG4 Official Firmware

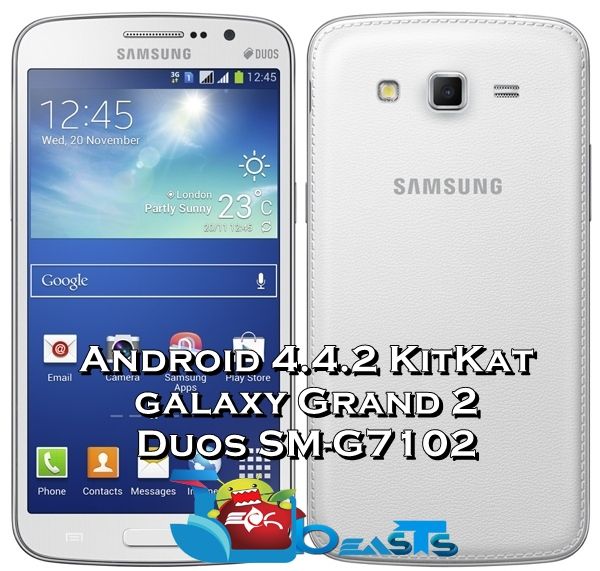
Galaxy Grand 2 landed in November, 2013. The device is a great choice to go with as it sports some nice specifications in a very affordable price that won’t hurt your pocket. To give you an idea of the device, let’s have a look at what it has got. Galaxy Grand Duos sports a whopping 5.25 inches IPS display with 280 ppi. There’s a powerful Qualcomm Snapdragon Quad Core CPU clocked at 1.2 GHz accompanied by Adreno 305 GPU. Galaxy Grand Duos 2 has a 1.5 GB RAM that adds to the plus points of this device as well.

Initially Samsung rolled out the device running Android 4.3 Jelly Bean atop of these nice hardware specs, but recently Samsung started rolling out Android 4.4.2 KitKat to the Indian Galaxy Grand Duos 2 users. To note it down, the Android 4.4.2 KitKat comes with some appetizing enhancements. These include white icons atop of the transparent notification bar, some of the applications including Settings app have got a new UI, music on the lockscreen has a new look and there are a lot of performance enhancements and bug fixes. Galaxy Grand Duos 2 is Samsung’s one of the most widely used Android devices, so it is obvious that so many users will be willing to get this update on their device and the Indian users who have got this update on their device will be loving it more.

Updating your device isn’t only possible through OTA updates or through Samsung Kies and it doesn’t matter if the update is rolling out to a specific region, you can still update your device manually using Samsung’s official flashing tool, well known as Odin3. To calm down the Android enthusiasts who are getting impatient to update their Galaxy Grand Duos 2, we are going to flash Android 4.4.2 KitKAt XXUBNG4 Official firmware on the Galaxy Grand 2 Duos SM-G7102. Let’s go through the guide and update the device now.

Here are the firmware details:

      • Device: Samsung Galaxy Grand 2 SM-G7102
      • Firmware: Android 4.4.2 KitKat
      • Build: G7102XXUBNG4
      • Region: INU
      • Build Date: 9/7/2014
      • Changelist: 2176103

Here are the pre-installation instructions:

1. This guide is only for Samsung Galaxy Grand 2 SM-G7102!

Make sure that your device is exactly as mentioned above. To check out what device you have, go to Settings > More/General > About Device or Settings > About Device and match the model number. Be careful about the device model number, flashing a file on a device not listed here might result in bricking it up. In that case, we may not be held responsible.

2. Battery should be charged at least 60%!

Your device’s battery shouldn’t be weak. In case your device goes dead during the flashing process, your device may get soft bricked and you might be in need of flashing stock firmware and that will ultimately result in wiping up your data as well. So, make sure that you charge your device before you start the flashing process.

3. Use the OEM datacable to establish connection!

Always use the original data cable to establish connection between your Android device and your computer / laptop. Using ordinary data cables might interrupt the flashing process, so to avoid any mishap, you need to meet this requirement as well.

4. Backup everything!

Just to be on the safe side, you may consider backing up each and everything from your Android device. This is highly recommended so that in case anything goes wrong, you still have the access to all of your data and you can restore it immediately. Also, clean install is always recommended, that means you will probably have to wipe your device to install the new firmware. So, you may backup everything as listed below.

5. Turn off Samsung Kies and other softwares while using Odin3!

Make sure that you turn off Samsung Kies while using Odin3 flashtool. Samsung Kies will interrupt Odin3 and will result in causing errors and may not let you flash your desired firwmrae. Also, make sure that you turn off any antivirus software you’ve installed and also disable firewall to avoid any connection and flashing issues.

galaxy-grand-2

Downloads Required:

How To Update Samsung Galaxy Grand 2 G7102 to Android 4.4.2 KitKat XXUBNG4 Official Firmware:

  1. Wipe your device complete in order to attain a neat installation.
  2. Open Odin3.exe.
  3. Put your Galaxy Grand 2 in download mode. To do so, turn it off and wait for 10 seconds. Turn it on by pressing and holding Volume Down + Home Button + Power Key simultaneously, You should see a warning, press Volume Up to continue. In case this method doesn’t work for you, try one from this guide.
  4. Connect your device to your PC.
  5. As soon as Odin detects your phone, the ID:COM box should turn blue.  Make sure that you’ve installed Samsung USB drivers before connecting.
  6. For Odin 3.09 hit the AP tab. Select the firmware.tar.md5 or firmware.tar, that you downloaded and extracted above.
  7. If you’re using Odin 3.07, you will select “PDA” tab instead of the AP tab, rest of the options remain untouched.
  8. Make sure that the options selected in your Odin are exactly as shown in the pic.
  9. Odin 3.09 explained. (2)
  10. Hit start and wait till the firmware  flashing is complete, as soon as your device restarts, remove it from PC.
  11. Wait for your device to reboot, as soon as it reboots check out the new firmware!
  12. That’s all!

You may now Install CWM/TWRP Recovery on Samsung Galaxy Grand 2 SM-G7102.

We hope that this guide worked perfectly for you. In case you are stuck with something or you are facing any issues regarding this post, make sure that you leave the comments below. We will get back to you immediately. Thank you.

Update Samsung Galaxy Mega 6.3 LTE To Android KitKat Official Firmware

4
Update Samsung Galaxy Mega 6.3 LTE To Android KitKat Official Firmware

Android 4.4.2 KitKat is now officially out Samsung Galaxy Mega 6.3 GT-I9205 LTE. Samsung rolled out Android 4.4.2 KitKat for its mainstream devices being pretty much lazy which paved the way for Sony, LG, and other manufacturers to take lead as they updated their devices to the latest and greatest versions of Android without any delay. But the users may not feel disappointed anymore as newer firmware version is already there.

This Android 4.4.2 KitKat update for Galaxy Mega 6.3 LTE sports white icons in the transparent notification bar, the Music player on the lock screen has a new UI, some of the applications have been enhanced. The performance of the device has been enhanced and several bugs have been fixed as well. The update is currently on a slow rollout and is reaching different regions through OTA or Samsung Kies.

While the OTA updates or updates via Samsung Kies take a long time to reach the regions, some of the Android freaks might not be able to get their Galaxy Mega 6.3 new version of the Android OS that much soon and might result in causing impatience. If you happen to be one of those Android freaks, you need to calm yourself as the following post will help you to update your Samsung Galaxy Mega 6.3 LTE I905 to Android 4.4.2 KitKat XXUDNF2 Official firmware using Samsung’s flash tool Odin3. Let’s go through the method and update the device now.

Here are the firmware details:

      • Device: Samsung Galaxy Mega LTE 6.3 GT-I9205
      • Firmware: Android 4.4.2 KitKat
      • Build: I9205XXUDNF2
      • Region: ETL
      • Build Date: 11/6/2014
      • Changelist: 1907000

Here are the pre-installation instructions:

1. This guide is only for Samsung Galaxy Mega LTE I9205!

Make sure that your device is exactly as mentioned above. To check out what device you have, go to Settings > More/General > About Device or Settings > About Device and match the model number. Be careful about the device model number, flashing a file on a device not listed here might result in bricking it up. In that case, we may not be held responsible.

2. Battery should be charged at least 60%!

Your device’s battery shouldn’t be weak. In case your device goes dead during the flashing process, your device may get soft bricked and you might be in need of flashing stock firmware and that will ultimately result in wiping up your data as well. So, make sure that you charge your device before you start the flashing process.

3. Use the OEM data cable to establish a connection!

Always use the original data cable to establish connection between your Android device and your computer / laptop. Using ordinary data cables might interrupt the flashing process, so to avoid any mishap, you need to meet this requirement as well.

4. Backup everything!

Just to be on the safe side, you may consider backing up each and everything from your Android device. This is highly recommended so that in case anything goes wrong, you still have the access to all of your data and you can restore it immediately. Also, clean install is always recommended, that means you will probably have to wipe your device to install the new firmware. So, you may backup everything as listed below.

5. Turn off Samsung Kies and other software while using Odin3!

Make sure that you turn off Samsung Kies while using Odin3 flashtool. Samsung Kies will interrupt Odin3 and will result in causing errors and may not let you flash your desired firwmrae. Also, make sure that you turn off any antivirus software you’ve installed and also disable firewall to avoid any connection and flashing issues.

I9205_KitKat Official

Downloads Required:

How To Update Samsung Galaxy Mega 6.3 I9205 LTE To Android 4.4.2 KitKat XXUDNF2 Official Firmware:

  1. Wipe your device completely to attain a neat installation.
  2. Open Odin3.exe.
  3. Put your Galaxy Mega 6.3 LTE in download mode. To do so, turn it off and wait for 10 seconds. Turn it on by pressing and holding Volume Down + Home Button + Power Key simultaneously, You should see a warning, press Volume Up to continue. In case this method doesn’t work for you, try one from this guide.
  4. Connect your device to your PC.
  5. As soon as Odin detects your phone, the ID: COM box should turn blue.  Make sure that you’ve installed Samsung USB drivers before connecting.
  6. For Odin 3.09 hit the AP tab. Select the firmware.tar.md5 or firmware.tar, that you downloaded and extracted above.
  7. If you’re using Odin 3.07, you will select the “PDA” tab instead of the AP tab, the rest of the options remain untouched.
  8. Make sure that the options selected in your Odin are exactly as shown in the pic.
  9. Odin 3.09 explained. (2)
  10. Hit start and wait till the firmware flashing is complete, as soon as your device restarts, remove it from PC.
  11. Wait for your device to reboot, as soon as it reboots check out the new firmware!
  12. That’s all!

We hope that this guide worked perfectly for you. In case you are stuck with something or you are facing any issues regarding this post, make sure that you leave the comments below. We will get back to you immediately. Thank you.

Download 11 Brand New Themes For Windows 8 And 8.1

0
Download 11 Brand New Themes For Windows 8 And 8.1

A few months back we got a new update of Microsoft Windows 8.1 and in this update we got many errors fixed. Windows 8.1 is far far better from the Windows 8 as compared to speed, performance and display. Today Microsoft released 11 brand new themes for both Windows 8 and 8.1. You can download all new themes form the given links below and do tell me in comments which one you like the most.

Windows 8 and 8.1 themes

Download 11 Brand New Themes For Windows 8 And 8.1:

Panoramas of Europe theme

Panoramas of Europe

Aurora Borealis theme

Aurora Borealis

Bing Maps- Europe theme

Bing Maps: Europe theme

Following is the list of all the other themes for Windows 8 and 8.1.

How to use speed dial on Windows Phone 8.1[ Tutorial ]

How to use speed dial on Windows Phone 8.1[ Tutorial ]

Windows Phone from Nokia are know getting popular because they are adding many tones of new features with every new update and i’ve used it Windows Phone battery timing is much better then other smartphones. Well most us find Windows Phone a bit difficult to use but nothing is impossible, today i’ll tell how to Speed dial on Windows Phone easily.

Also See:How to merge contact on windows phone 8.1

Speed_Dial_SCreenshot


Speed dial make dialing easy how ? look normally when we have to call some one we goto contacts and then search for his/her number then we tap on it to make a call, but if you’ve added a contact in speed dial then you have to only press the number on which you’ve saved the person’s contact simple and easy. Now lets go back to tutorial how to speed dial on Windows Phone 8.1.

How to use speed dial on Windows Phone 8.1[ Tutorial ]:

  1. First goto contacts on your Windows Phone 8.1.
  2. Now goto Phone application on windows phone 8.1.
  3. Now Swipe to left side and goto Speed dial tab.
  4. You’ll be in Speed dial tab now click on + icon at the end of the screen.
  5. When you tab on + icon you’ll be in your contact list.
  6. Now select the contact that you want to add in Speed dial on your Windows Phone.

Cheers all done!.

Image Credit: Wpcentral

Sony Xperia Z3 Leaked Photos, Concepts, Released Date, Specs and More

0
Sony Xperia Z3 Leaked Photos, Concepts, Released Date, Specs and More

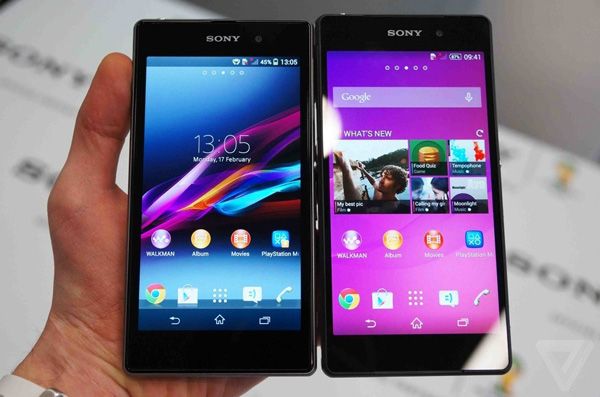
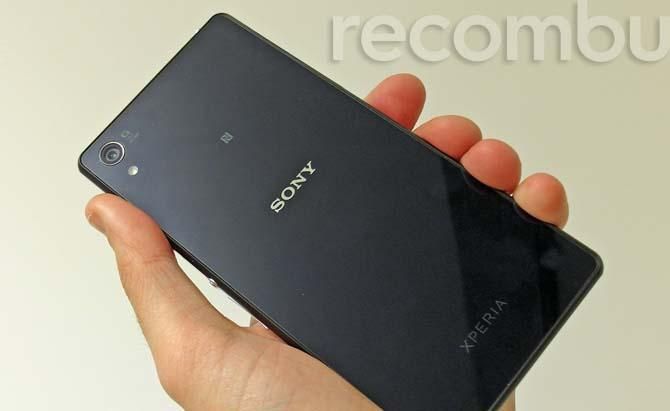
Sony Xperia Z2 was no doubt, a huge hit in Mobile market and Sony proclaimed it as their best smartphone yet, but that is the only problem when you start calling your device the best, is that you have to either finish the series or you shouldn’t release its successor. The same happens with Samsung Galaxy S2, it was given the best smartphone ever award and yet Samsung released its successor, however, Galaxy S3 was a huge disappointment and now Sony is about to release Xperia Z3, the successor of Xperia Z2 and who knows what it will do, let’s just hope that the same tragedy won’t happen again. There aren’t much specs available in Market about Xperia Z3, but it is said to have a 5.15″ Full HD True IPS Display, 3GB of RAM with internal Storage of 16GB and SD card support, again with 20.7 MP rear camera but with updated software and many more features, Qualcomm Snapdragon 801 2.4GHz Quad-Core Krait Processor with Android 4.4.4 Kit-Kat, out of the box, Adreno 330 for immense gaming and design will be pretty much as the old Xperia Z2.

Sony Xperia Z3

The release date of this device is not yet spoken by the officials, however, anticipations are that it will be available in Q4 of 2014, and who knows it might be September. Shutter proof glass will once again be seen in this device as we saw it in Xperia Z3 and since it will be the next Flagship device of Sony, how can they not make it Water proof, what are your thoughts about the up-coming Xperia Z2, let us know in the comments.

Sony Xperia Z3 Leaked Photos and Concepts:

Sony Xperia Z3

Sony Xperia Z3

Sony Xperia Z3

Sony Xperia Z3

Sony Xperia Z3

Sony Xperia Z3

Sony Xperia Z3

Sony Xperia Z3

Sony Xperia Z3

Sony Xperia Z3


For More Specs: gsmarena

iPhone 6 Coming on September 9, See What We Have Till Now [ Photos ]

0
iPhone 6 Coming on September 9, See What We Have Till Now [ Photos ]
iphone 6 release date

iPhone 6 the most talked about device to be released on September 9 as per reports from web. Well i’ve been seeing many concepts, photos, leaks and prototypes surfacing over the web. A good thing is that they all are pointing to 1 main thing Screen Size. Now every want a big size in iPhone because all other companies have introduced big screens in their high end smartphones but Apple is still there nothing is changed in iPhone 5s as every one was expecting. We all know that iPhone 6 is coming with iOS 8 and in their event they’ll push iOS 8 update to all devices. Yesterday we got the news that Samsung is releasing Samsung Galaxy Note 4 on September 3 so Apple will not wait much longer if he want to capture the market again. Following are the iPhone 6 Photos, Leaked Photos, Concepts, Prototypes and everything else.

Also See:Alleged images of iPhone 6 Touch ID sensor leaked

iphone 6
iphone 6

This How iPhone 6 looks like:

Mikey Shorts apk for Android, Run, Jump and Slide

Mikey Shorts apk for Android, Run, Jump and Slide

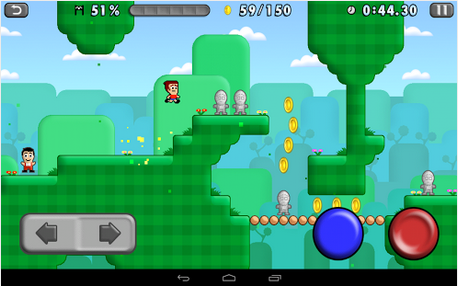
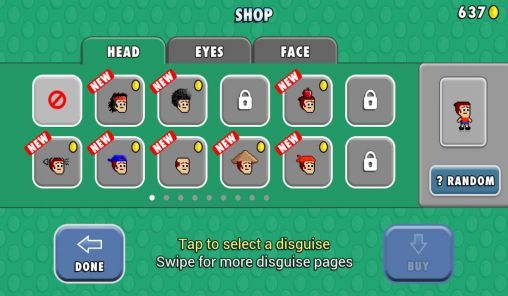
There are many running games for Android in Play Store but today i’ll tell you about a new 2D running game called Mikey Shorts. Mikey Shorts is developed by the very famous developer who once were enemies ( Mike Meade and Mike Gaughen ). This is a very simple running game where you have to help Mikey Shorts to rescue people by run, jump and slide through the land. While running and jumping you have to collect coins in order to unlock and buy the disguises along.

mikey shorts apk


Mikey Shorts Main Features:

• 84 different levels across 2 game modes
• 6 unique environments
• Choose from over 170 disguises to wear
• Finish a level fast to earn up to 3 stars
• Golden Shorts are hidden in all Story levels
• Race against a ghost of your best score
• Split times at gates show +/- your best score
• Earn achievements both online and offline
• Quick retry button for restarting a level
• Ability to customize controls
• Adjust transparency of the control buttons
• View various game stats

For More Info Please Visit Google Play.

Mikey Shorts apk for Android Download links:

Mikey Shorts Screen Shots:


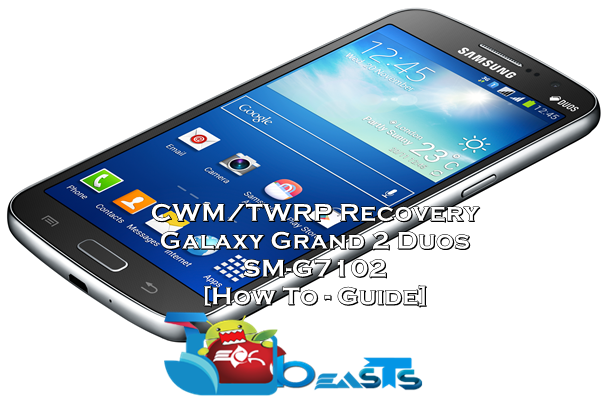
Install CWM/TWRP Recovery on Samsung Galaxy Grand 2 SM-G7102

Install CWM/TWRP Recovery on Samsung Galaxy Grand 2 SM-G7102

CWM and TWRP, both recoveries are available for the Samsung Galaxy Grand 2 SM-G7102, the successor of Samsung’s Galaxy Grand. Installing any of these recoveries is quite useful as it will allow you to perform a number of tasks that the manufacturers apparently do not allow. CWM recovery for the Galaxy Grand 2 is presented by the XDA developer shabbypenguine while TWRP is presented by XDA Senior member baliboxerIf you’ve been looking for a custom recovery for your Galaxy Grand 2, and looking for a way to install a custom recovery, you may have spotted right place at the moment. We are going to install ClockworkMod (CWM) and TWRP recovery on our beloved Galaxy Grand 2 Duos SM-G7102 in the following post.

Before we head towards the installation guide, let’s have a recap at the Galaxy Grand 2 to give you a better idea of this device. Galaxy Grand 2 Duos was brought up by Samsung in November, 2013. The device sports a beautiful 5.25 inches TFT display with 280 ppi. There’s a 1.5 GB RAM packed inside. Powered up with 1.2 GHz Quad Core CPU accompanied by Adreno 305 GPU this device is becomes a good choice. At the back, Samsung has installed an 8 MP shooter while a 1.9 MP shooter is available to take selfies and shoot out secondary videos. The upper paragraph gives you an idea about what we are going to do right now, let’s have a look on how you can unleash the power of your device using a custom recovery.

Why you should install a custom recovery? 

A custom recovery allows you to install custom roms, mods etc. Along with these, you can make a Nandroid backup, this helps you a lot as you can move back to the previous working state of your phone at any time you want if you have backed up your current system. In some cases, to root the phone you need to flash SuperSu.zip file in the custom recovery, having installed the recovery may help you while in some cases to install the recovery easily, you need to have the phone rooted. You can also wipe cache and dalvik cache of your phone using a custom recovery.

Here are the pre-installation instructions:

1. This guide is only for Samsung Galaxy Grand Duos SM-G7102!

Make sure that your device is exactly as mentioned above. To check out what device you have, go to Settings > More/General > About Device or Settings > About Device and match the model number. Be careful about the device model number, flashing a file on a device not listed here might result in bricking it up. In that case, we may not be held responsible.

2. Battery should be charged at least 60%!

Your device’s battery shouldn’t be weak. In case your device goes dead during the flashing process, your device may get soft bricked and you might be in need of flashing stock firmware and that will ultimately result in wiping up your data as well. So, make sure that you charge your device before you start the flashing process.

3. Use the OEM datacable to establish connection!

Always use the original data cable to establish connection between your Android device and your computer / laptop. Using ordinary data cables might interrupt the flashing process, so to avoid any mishap, you need to meet this requirement as well.

4. Backup everything!

Just to be on the safe side, you may consider backing up each and everything from your Android device. This is highly recommended so that in case anything goes wrong, you still have the access to all of your data and you can restore it immediately. You may backup everything as listed below.

5. Turn off Samsung Kies and other softwares while using Odin3!

Make sure that you turn off Samsung Kies while using Odin3 flashtool. Samsung Kies will interrupt Odin3 and will result in causing errors and may not let you flash your desired recovery or root file. Also, make sure that you turn off any antivirus software you’ve installed and also disable firewall to avoid any connection and flashing issues.

6. Disclaimer

The methods involved in flashing custom recoveries, roms and rooting your phone are highly custom and may result in bricking your device, and has nothing to do with Google or the device manufacturer that is SAMSUNG in our case. Also rooting your device will void its warranty and you will be no longer eligible for any kind of free device services by the manufacturers/warranty providers. In case of any mishap we may not be held responsible. Follow these instructions to the letter to avoid any mishap or bricking. Make sure that whatever you do, you are doing it at your own responsibility.

Galaxy Grand 2 CWM-TWRP

Downloads Required:

How to Install CWM/TWRP Recovery on Samsung Galaxy Grand Duos SM-G7102:

  1. Download CWM or TWRP Recovery.tar.md5 file [According to your choice and your device].
  2. Open Odin3.exe.
  3. Put your Galaxy Grand 2 Duos in download mode. To do so, turn it off and wait for 10 seconds. Turn it on by pressing and holding Volume Down + Home Button + Power Key simultaneously, You should see a warning, press Volume Up to continue. In case this method doesn’t work for you, try one from this guide.
  4. Connect your device to your PC.
  5. As soon as Odin detects your phone, the ID:COM box should turn blue.  Make sure that you’ve installed Samsung USB drivers before connecting.
  6. For Odin 3.09 hit the AP tab. Select the recovery.tar.md5 or recovery.tar, that you downloaded above.
  7. If you’re using Odin 3.07, you will select “PDA” tab instead of the AP tab, rest of the options remain untouched.
  8. Make sure that the options selected in your Odin are exactly as shown in the pic.
  9. Odin 3.09 explained. (2)
  10. Hit start and wait till the recovery flashing is complete, as soon as your device restarts, remove it from PC.
  11. You can now boot into recovery mode by turning off your device, and then turning it on by pressing and holding Volume Up + Home + Power Key.
  12. That’s all!

How to Root Galaxy Grand 2 Duos:

    1. Download the Root Package.zip file [ UPDATE-SuperSU-v2.02.zip ]
    2. Copy the downloaded Root Package.zip file to your Galaxy Grand 2 Duos’s SD card.
    3. Boot into recovery mode on your Galaxy Grand 2 Duos, use step 11 in the recovery installation guide.
    4. Now Select “Install > Choose Zip from SD card > Root Package.zip > Yes / Confirm”.
    5. This will flash the Root Package and quickly gain the root access on your Galaxy Grand 2.
    6. Reboot your device.
    7. Find SuperSu or SuperUser in the App Drawer.
    8. That’s All!

How to check if the device is properly rooted or not?

    1. To do so, go to Google Play Store on your Galaxy Grand 2 Duos.
    2. Find “Root Checker” and install it.
    3. Open Root Checker.
    4. Tap “Verify Root”.
    5. It will ask you for SuperSu rights, tap “Grant”.
    6. It should show you Root Access Verified Now!
    7. That’s All!

1560688_10202529514651766_2061540064_n

If you’re facing any difficulties regarding this post, feel free to stop by the comment box and drop us your words. We will get back to you ASAP!


XperiFirm a New firmware downloader tool for Sony Xperia devices

0
XperiFirm a New firmware downloader tool for Sony Xperia devices

Downloading official firmware for Samsung, HTC and iOS devices is very simple there are many forums, sites, portal, and their own servers but today I have a good news for Sony users now they can also download firmware using a new tool named as XperiFirm.

This tool lets you download the firmware from the Sony servers and you have the option to download any region firmware for your particular Xperia Smartphones. This will help us a lot now we can get the official build firmware easily from XperiaFirm and flash it on our device.

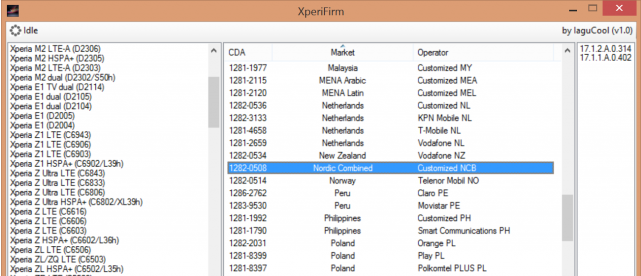
XperiFirm


How XperiFirm works?

When you select a device XperiaFirm connects with Sony’s serves and fetch all the latest firmware for the device you have selected. XperiaFirm will only show you the firmware which exists on Sony’s servers. After you have selected the CDA according to your device it will start downloading the official FILE_* format, Flash tool easily decrypt and bundle these type of files to create FTF firmware file.

Download XpeiaFirm Credit: XDA