Home Blog Page 425

How to install Android ADB and Fastboot drivers on a MAC [Guide]

8
How to install Android ADB and Fastboot drivers on a MAC [Guide]

If you own and Android device and you also happen to be a power user of Android you must have heard of this term “Android ADB and Fastboot”.

ADB stands for Android debug bridge that acts as a bridge between your phone and your computer whenever you are going to establish a connection while Fastboot is the term used to perform operations in your phone’s bootloader and load custom recoveries, custom kernels and flash other similar things.  The device is booted up in “Fastboot” mode and then it gets connected with the PC to perform the Fastboot operations.

Alright, I guess that was enough to start with. Setting up Android ADB and Fastboot on a windows pc is pretty much easy, but you may get confused when you own an Android smartphone and your computer is a MAC. While there’s a serious conflict between Apple and it’s greatest rival Google because of the mainstream products iOS and Android, it may seem impossible for a while, but wait. That’s actually possible and easy as well.

I just got a chance to setup Android ADB and Fastboot on my MAC recently and I’m going to cook up the detailed guidance provided by the screenshots in the following post. In case you’ve been looking for ADB and Fastboot for MAC, you may have spotted the right place. Let’s go ahead and install the drivers now.182081-androidandapple

How to install Android ADB and Fastboot drivers on a MAC

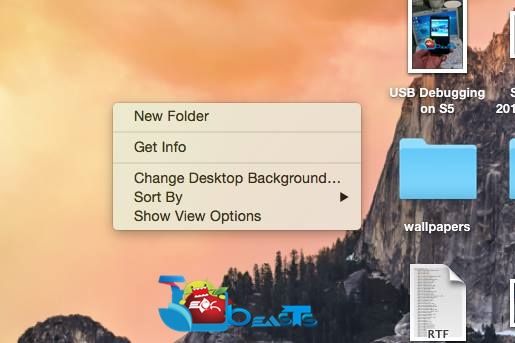
  1. First of all, make a new folder on your MAC’s desktop or anywhere else where you can easily locate it and name it as “Android”.ADB And Fastboot_MAC_OSX (14)
  2. Download Android SDK tools for MAC or ADB_Fastboot.zip (if you don’t want complete tools).ADB And Fastboot_MAC_OSX (4)
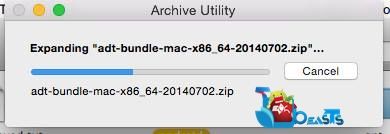
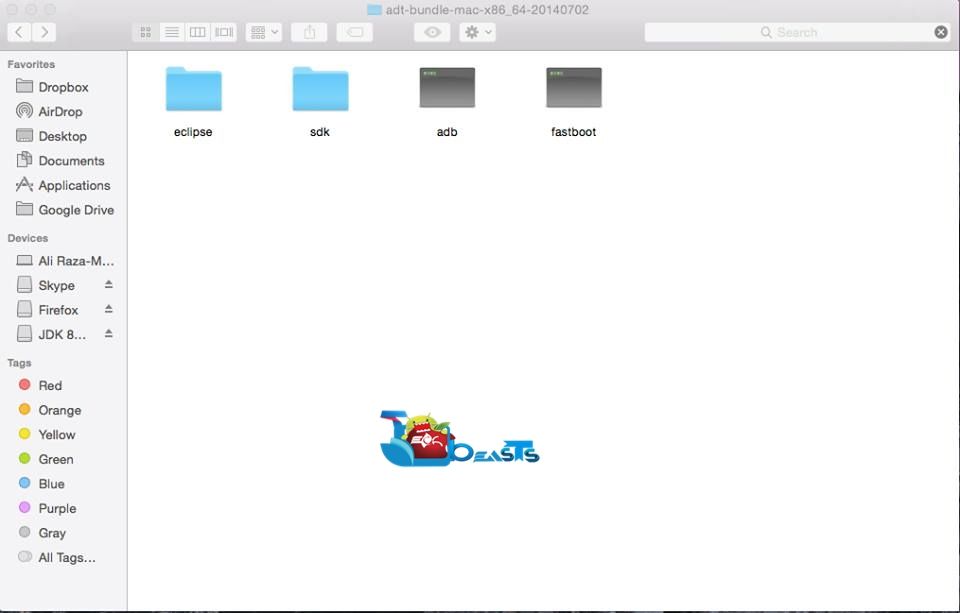
  3. As soon as the SDK download ends, extract the data from adt-bundle-mac-x86 to the “Android” folder you created on your desktop.ADB And Fastboot_MAC_OSX (6)
  4. Once the  folder is extracted, find a file named as “Android”, it should be a Unix executable file.ADB And Fastboot_MAC_OSX (12)ADB And Fastboot_MAC_OSX (5)
  5. When the Android file opens up, you need to check that Android SDK and Android SDK Platform-Tools are selected.
  6. Click on the install package now and wait for the download to finish.ADB And Fastboot_MAC_OSX (16)
  7. Once the download is finished, go to the “Android” folder on your desktop and open the platform-tools folder within it.
  8. Now in platform-tools select “adb” and “fastboot”, copy both these and paste into the root of your “Android” folder.ADB And Fastboot_MAC_OSX (1)ADB And Fastboot_MAC_OSX (10)
  9. That’s all with the ADB and Fastboot installation. We are going to test the drivers now if they are working properly or not.
  10. To do so, enable USB debugging mode on your device. You can do so by going to settings > developer options > USB debugging. In case you don’t see the developer options, you will have to enable these. To do so, go to settings > about device > tap the build number for 7 times and find the developer options in settings then.
  11. Now connect your Android device to your MAC. Make sure that you’re using original data cable.
  12. Now open Terminal Window on your MAC form Applications > Utilities.
  13. Type cd and then the path where you saved your Android folder, as shown below

    .cd/Users/<yourusername>/Desktop/Android

  14. Press enter key now so that it access the “Android” folder.
  15. Now you need to enter the “adb” or a “fastboot” command to verify the proper functionality of your newly installed drivers. You may type the following command:

    ./adb devices 

  16. This will list the devices connected with the MAC. To perform the Fastboot commands you will first boot your device into Fastboot mode and perform your desired function.
  17. As soon as you press enter after typing the above command, you will some logs running in the command terminal. If it states as “daemon not working, starting it now on port 5037 / daemon start successfully”, that means the drivers are working perfectly.ADB And Fastboot_MAC_OSX (13)
  18. It will also show your device’s serial number in the command terminal.
  19. Although the ADB and Fastboot drivers are completely functional now, but using “cd” and putting a “./” before every fastboot and adb command may seem annoying at times. We’ll add it to the path so that we don’t have to type both these before the adb and fastboot commands.
  20. Open the Terminal Window once again and issue this command now

     .nano ~/. bash_profile

  21. Issuing this command will open a nano editor window.
  22. Now you need to add a line containing the path to your Android folder in the Terminal Window. That should be like this

    export PATH=${PATH}:/Users/<yourusername>/Desktop/AndroidADB And Fastboot_MAC_OSX (8)

  23. Once added, press CTRL + X on your keyboard to close the nano editor now, and then press Y to confirm the editing.
  24. Once closed nano editor, you may close the terminal window now.
  25. To verify that the path is successfully added or not, open the terminal window again now and issue the following command
  26. adb devices
  27. You will find that it will list the connected devices while you didn’t type any cd or ./ before the command.ADB And Fastboot_MAC_OSX (15)
  28. Boom!  That’s all. You’ve successfully installed Android ADB and Fastboot drivers on your MAC.
  29. You may get your desired .img files, that you will flash in the fastboot mode. The commands will be followed by “fastboot” instead of adb, and the .img files will be placed in the root folder or in the platform-tools folder, it depends on what directory your terminal is accessing for the fastboot commands.

You may check out the useful ADB and Fastboot commands on our site as well now.

Conclusion

That was all. In case you’re confused with something or you’re having some difficulties regarding this post, make sure that you drop your words in the comment box below. We will get back to you as soon as possible.

Fix Duplicate Songs Issue On Windows Phone 8/8.1

0
Fix Duplicate Songs Issue On Windows Phone 8/8.1

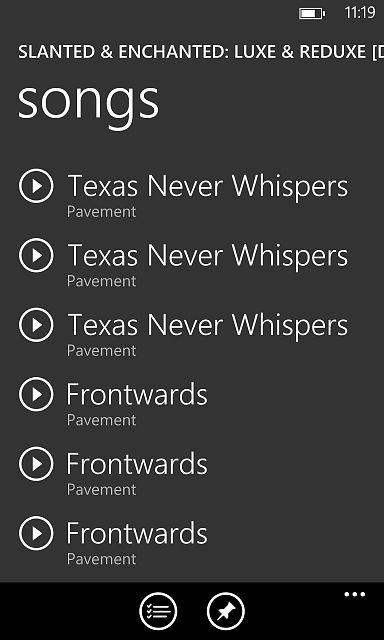
Windows Phone are getting huge attention now days because of their feature and affordable price. But many people find Windows phone a bit difficult to use, this is why they face issues. Recently i found out that many people are facing duplicate songs issue on their Windows phone. Following is the complete guide to Fix Duplicate Songs Issue On Windows Phone 8/8.1.

Duplicate Songs Issue On Windows-Phone-8

Basically what you face is you see a single song twice or three times in your music app. But when you open your music folder on device there is only one song. To fix this you have to follow few simple steps.

How To Fix Duplicate Songs Issue On Windows Phone 8/8.1:

  1. First of all turn off Xbox music cloud collection. To do this Start> Music + Videos > More > Settings > and then turn off Xbox Music Cloud Collection.
  2. Create a backup of your music collection.
  3. Delete all the music form device.
  4. Now backup all your device data and perform a factory reset. Settings > About > and then Reset Your Phone.
  5. Format your SD card by attaching it with your computer. Perform a quick format.
  6. After the formatting is done create a new folder ” Music ” on your sdcard and drag all the mp3 files into the folder.
  7. Insert back the SD card into your Windows Phone.
  8. Now open the music app wait few seconds for the library to get updated.

Do tell me in comments if you face any issue regarding this guide. !!

Swing Copters For PC – Windows & MAC

0
Swing Copters For PC – Windows & MAC

It looks like Flappy Bird wasn’t enough to frustrate the people and the developer, Dong Ngyuyen has decided to add a little bit to that. Just yesterday, Dong has come up with a new game named as Swing Copters, and believe me it does what the name says. Swing Copters swings the mind of the person playing this game. Flappy Bird was hard, but Swing Copters is damn hard.

The game gives us a sense that the developer knows how to make the best use of 2D graphics and on the same time he knows how to addict the people to something new and how to mess up their minds as well. It’s a little copter having a small character sitting inside it that the players are supposed to swing it and avoid the dumbbells like obstacles. Quite simple, right? No way! It’s not that easy to swing it as it’s just like flying a plane in a storm and you can’t just control it and it crashes. The moment you make one wrong tap, you’re done. It’s actually hard to explain the difficulty of this game. The highest score I was able to make is 2 and I gave up.Swing Copters screenshot

Although Swing Copters is available in the Play Store for free, but you may like playing this game on your PC as well and that’s what we are here for. Installing Swing Copters on a desktop PC whether it’s a Windows PC or a MAC, is possible through an Android emulator. As you move forward in the following post you will find a complete guide explaining that. Let’s go through the game description and the install and play Swing Copters on a Windows PC or a MAC.

Description

Flying with a propeller hat is not as easy as it looks.

[HOW TO PLAY] • Tap to change direction.
• Get 4 medals to unlock more characters.

Enjoy the game.

How to get Swing Copters for Windows PC or MAC and play it:

  1. You need an Android emulator to run this game on your Windows PC or MAC. We recommend using BluestacksUse our guide to install it on your PC.
  2. After downloading and installing Bluestacks, download Swing Copters APK.
  3. Open the downloaded APK file now, and let Bluestacks install it.
  4. Open BlueStacks now > All Apps > Swing Copters
  5. The game will start now, follow the on screen instructions.
  6. Follow the initial screen,  you’ll be able to access Swing Copters.
  7. Use space key or your mouse’s right click  to play the game.
  8. Enjoy the toughest game of Android yet.
  9. That’s all.

Alternatively, you can use the Play Store within Bluestacks to install Swing Copters instead of using the APK file method.

How To Use Snapchat: A Complete Common Questions Answered [ Guide ]

0
How To Use Snapchat: A Complete Common Questions Answered [ Guide ]

Social media is the biggest entertainment now a days there are more then 600 social media platform, but not all get the fame like snapchat, KIK, Instagram and We Chat. Today i’ll be discussing How To Use Snapchat common questions that  every body wants to know, Snapchat is the conversation portal and unique thing is about Snapchat is that you can chat with pictures and videos. ” Snap a photo or a video, add a caption, and send it to a friend. They’ll view it, laugh, and then the Snap disappears from the screen – unless they take a screenshot! “

Use Snapchat

Snapchat Common Questions/ Answers:

Q: How to delete someone on “Snapchatters who added me” list?

A: Goto Friends->Select name-> Swipe left to delete from the list.

Q: How To delete a best friend in Snapchat?

A: There is not a usual method to delete the  a best friend in Snapchat, but there is simple trick to delete a best friend. All you have to do is start snap with a other friend as much as you can, by doing this new friend will on the top of the list and also your new best friend. Now you can delete the EX. best friend.

Q: How do you add a friend in Snapchat?

A: Snapchat->click on the setting icon->Find Friends ( last tab )->Type in name to add.

Q: How do you add a  best friend in Snapchat?

A: There is no such settings for this, best friend is added automatically.

Q: Is Snapchat available on Android?

A: Yes Snapchat is on Android,

Q: How to add text to Snapchat photo?

A: Take a Snap, tap on and  text window will pop.

Q: How to set Snapchat seconds displayed?

A: Take a photo->tap on circle icon->menu->Choose anywhere from 1 to 10 seconds.

Q: Can you check your Snapchat online?

A: There is no official site for it, but you can use Snapchat on pc by using bluestacks.

Q: Can Android and iPhone Snapchat videos?

A: Yes you can, Just tap and hold on the circle Button for 9 seconds.

Q: How to search a username on Snapchat?

A: Snapchat->Settings->Friends->My Friends-> Scroll up->menu.

Q: How to accept friends on Snapchat?

A: Tap on Notification->Tap on friends request->accept.

Q: Can Android Snapchat with an iPhone?

A: Yes you can Android snapchat with an iPhone. The Snapchat app is same for both devices.

Q: How to view Snapchat profile?

A: Open Snapchat->My Friends->Tap on Friends Name->Friends Profile.

Q: Can you view sent Snapchats?

A: No there is no such method, unless you have taken screen shots.

Q: App similar to Snapchat?

A: Wink and Slingshot are similar apps.

Q: How to delete your Snapchat username or profile?

A: Yes you can open Snapchat delete profile page. log into your account and delete your profile.

Q: Can you upload photos to Snapchat?

A: No uploading photos from gallery and other apps are supported.


Update Galaxy Note 3 Neo N750 To Android 4.4.2 KitKat Official Firmware

0
Update Galaxy Note 3 Neo N750 To Android 4.4.2 KitKat Official Firmware

International variant of the Galaxy Note 3 Neo SM-N750 is finally being updated to Android 4.4.2 KitKat. Samsung made this move much late as it updated the Korean variant of the same device to the latest and greatest version of Android 4 months ago. The new Android 4.4.2 KitKat packs up the same enhancements as it did for other Samsung devices. Performance has been enhanced, battery life of the device is improved, a lot of bugs have been fixed. Noticeable changes include white icons in the transparent notification bar, new music player widget on the lock screen, some of the applications have a got a new UI and some more that you may come across upon updating your Galaxy Note 3 Neo.

As always, the update is on a slow roll out through OTA or through Samsung and at the moment it’s available for Indian users only. Since the things aren’t hard to break a bond with, you can update your device to this latest firmware regardless of it’s Indian region. If it’s getting hard for you to wait and get this update, we won’t waste much time and make a quick move in order to update the Galaxy Note 3 Neo SM-N750 to latest Android 4.4.2 KitKat XXUCNG6 firmware using Odin3, Samsung’s flashtool. Let’s go through the firmware details and then flash this firmware.Samsung-Galaxy-Note-3-Neo

Firmware Details:

    • Device: Galaxy Note 3 Neo SM-N750
    • OS: Android 4.4.2 KitKat
    • Region: INS/INU
    • Build: N750XXUCNG6
    • Date:  24/7/2014
    • Changelist: 2311980

Early Preparations:

1. This guide is only for Samsung Galaxy Note 3 Neo SM-N750!

Make sure that your device is exactly as mentioned above. To check out what device you have, go to Settings > More/General > About Device or Settings > About Device and match the model number. Be careful about the device model number, flashing a file on a device not listed here might result in bricking it up. In that case, we may not be held responsible.

2. Battery should be charged at least 60%!

Your device’s battery shouldn’t be weak. In case your device goes dead during the flashing process, your device may get soft bricked and you might be in need of flashing stock firmware and that will ultimately result in wiping up your data as well. So, make sure that you charge your device before you start the flashing process.

3. Use the OEM datacable to establish connection!

Always use the original data cable to establish connection between your Android device and your computer / laptop. Using ordinary data cables might interrupt the flashing process, so to avoid any mishap, you need to meet this requirement as well.

4. Backup everything!

Just to be on the safe side, you may consider backing up each and everything from your Android device. This is highly recommended so that in case anything goes wrong, you still have the access to all of your data and you can restore it immediately. Also, clean install is always recommended, that means you will probably have to wipe your device to install the new firmware. So, you may backup everything as listed below.

5. Turn off Samsung Kies and other softwares while using Odin3!

Make sure that you turn off Samsung Kies while using Odin3 flashtool. Samsung Kies will interrupt Odin3 and will result in causing errors and may not let you flash your desired firwmrae. Also, make sure that you turn off any antivirus software you’ve installed and also disable firewall to avoid any connection and flashing issues.

How To Update Galaxy Note 3 Neo N750 To Android 4.4.2 KitKat Official Firmware:

Downloads Required:

Method:

  1. Wipe your device complete in order to attain a neat installation.
  2. Open Odin3.exe.
  3. Put your Galaxy Note 3 Neo in download mode. To do so, turn it off and wait for 10 seconds. Turn it on by pressing and holding Volume Down + Home Button + Power Key simultaneously, You should see a warning, press Volume Up to continue. In case this method doesn’t work for you, try one from this guide.
  4. Connect your device to your PC.
  5. As soon as Odin detects your phone, the ID:COM box should turn blue.  Make sure that you’ve installed Samsung USB drivers before connecting.
  6. For Odin 3.09 hit the AP tab. Select the firmware.tar.md5 or firmware.tar, that you downloaded and extracted above.
  7. If you’re using Odin 3.07, you will select “PDA” tab instead of the AP tab, rest of the options remain untouched.
  8. Make sure that the options selected in your Odin are exactly as shown in the pic.
  9. Odin 3.09 explained. (2)
  10. Hit start and wait till the firmware  flashing is complete, as soon as your device restarts, remove it from PC.
  11. Wait for your device to reboot, as soon as it reboots check out the new firmware!
  12. That’s all!

We hope that this guide worked perfectly for you. In case you are stuck with something or you are facing any issues regarding this post, make sure that you leave the comments below. We will get back to you immediately. Thank you.

Samsung Galaxy Alpha Stands Inline With The Alleged iPhone 6

0
Samsung Galaxy Alpha Stands Inline With The Alleged iPhone 6

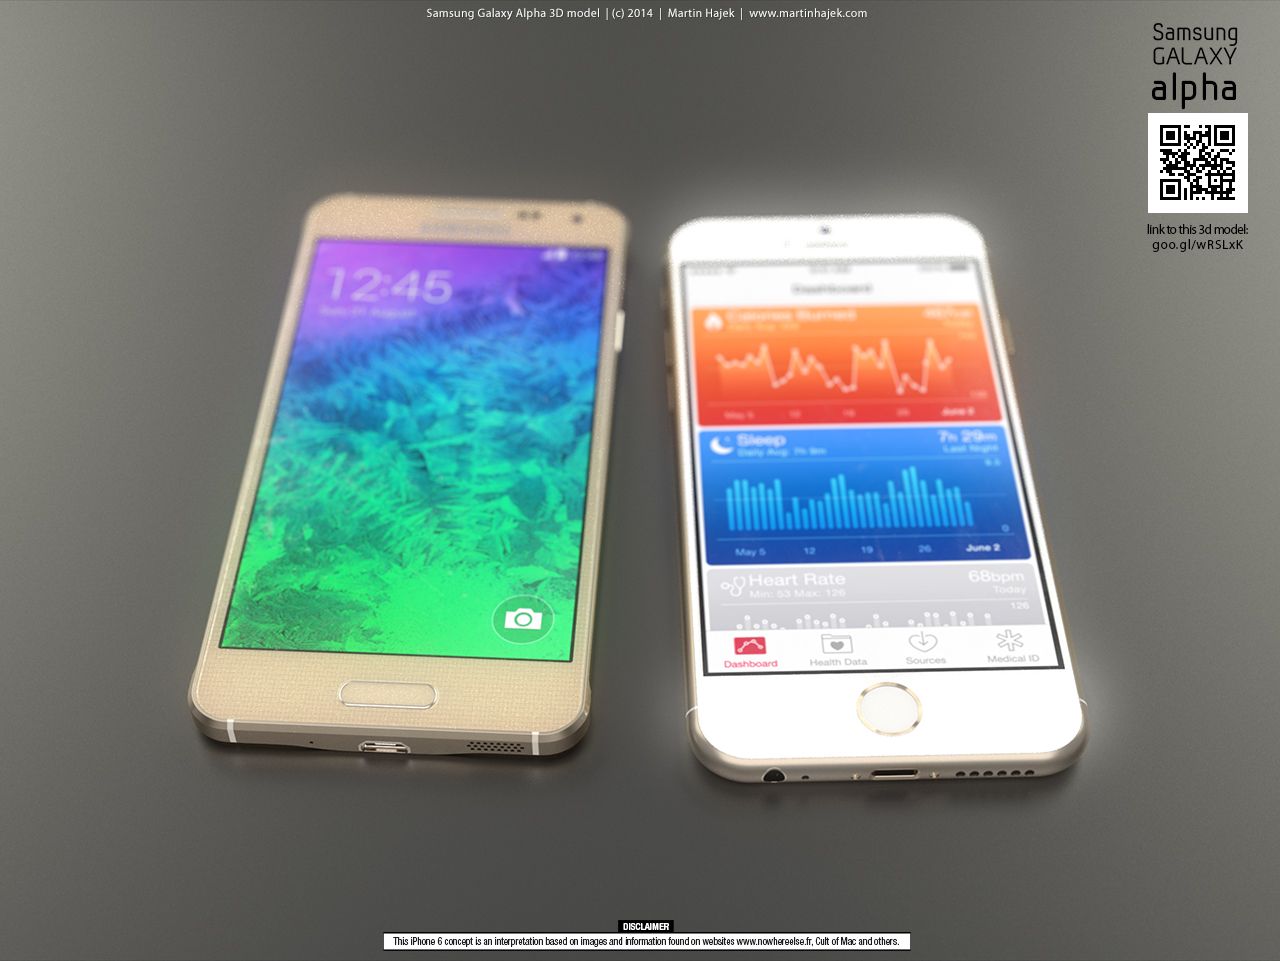
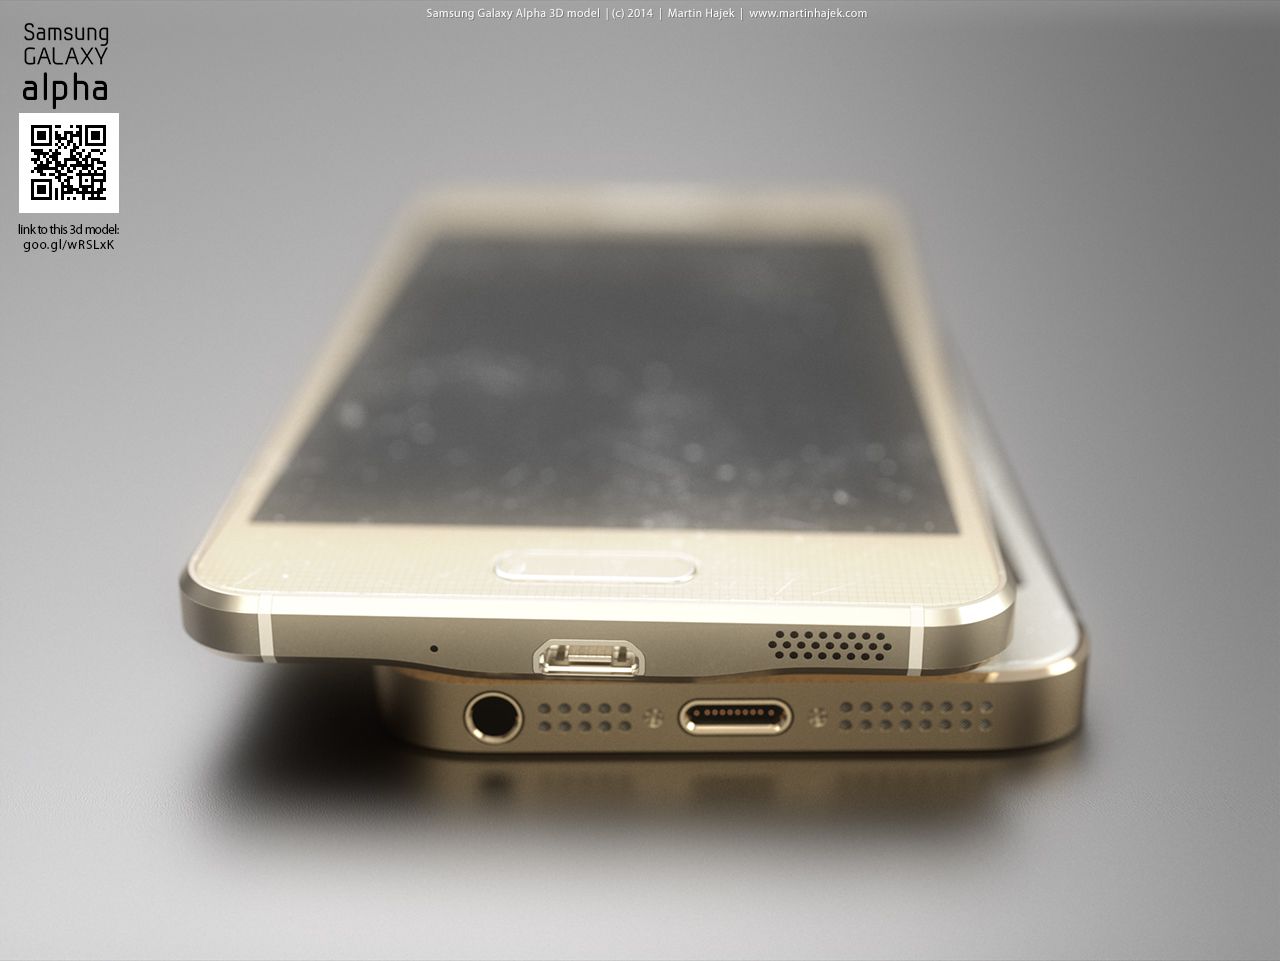
Hype about the Samsung Galaxy Alpha was created at a vast level and the rumor mills kept running for quite a long time. It all ended up last Wednesday when Samsung finally came up with the official announcement of its very first metallic Galaxy smartphone, and the device actually is an iPhone Killer. Just when the iPhone 6 announcement is nearing, this seems to be a very clever move by Samsung and it looks like Samsung has decided to take Apple seriously and target Apple’s selling point, that’s definitely the iPhone’s build quality and design pocketing in a lot of users for Apple. Samsung has done a great job by coming up a new build quality, a new design and something different right when the users were disappointed and they so wanted Samsung to come up with something that’s worth spending a hefty amount of money at.

To have a start, the Galaxy Alpha sports 4.7 inches Super AMOLED screen with a resolution of 720 x 1280 pixels and 312 ppi. Under the hood is a Exynos 5 Octa Core 5430 CPU that is a combination of 1.8 GHz Cortex A-15 Quad Core and 1.3 GHz Cortex-A7 Quad Core CPU.  GPU is Mali-T628 MP6 while the RAM is kept at 2 GB. At the back is a 12 MP shooter and a 2.1 MP is fixed on the front for selfies and video calls. The Galaxy Alpha has an 1860 mAh battery to get a life. These specifications fixed in a very nice body, that’s way catchy and looks splendeferous, is a good choice to go with at least a lot better then the iPhone.iPhone 6 vs Galaxy Alpha (2)

iPhone 6’s launch is expected on September 9, 2014. It is being rumored since the launch of iPhone 5S that Apple will produce bigger iPhone(s) for the next generations and the alleged images, information suggests us the same. Apple is expected to bring up a 4.7 inches and a 5.5 inches variant of the iPhone 6 to stay in competition in the smartphone world where the trend is set for the bigger screens now. The 3D models that emerged on the web suggest that the iPhone 6 will have round edges, unlike the squared iPhone 5 and 5S.

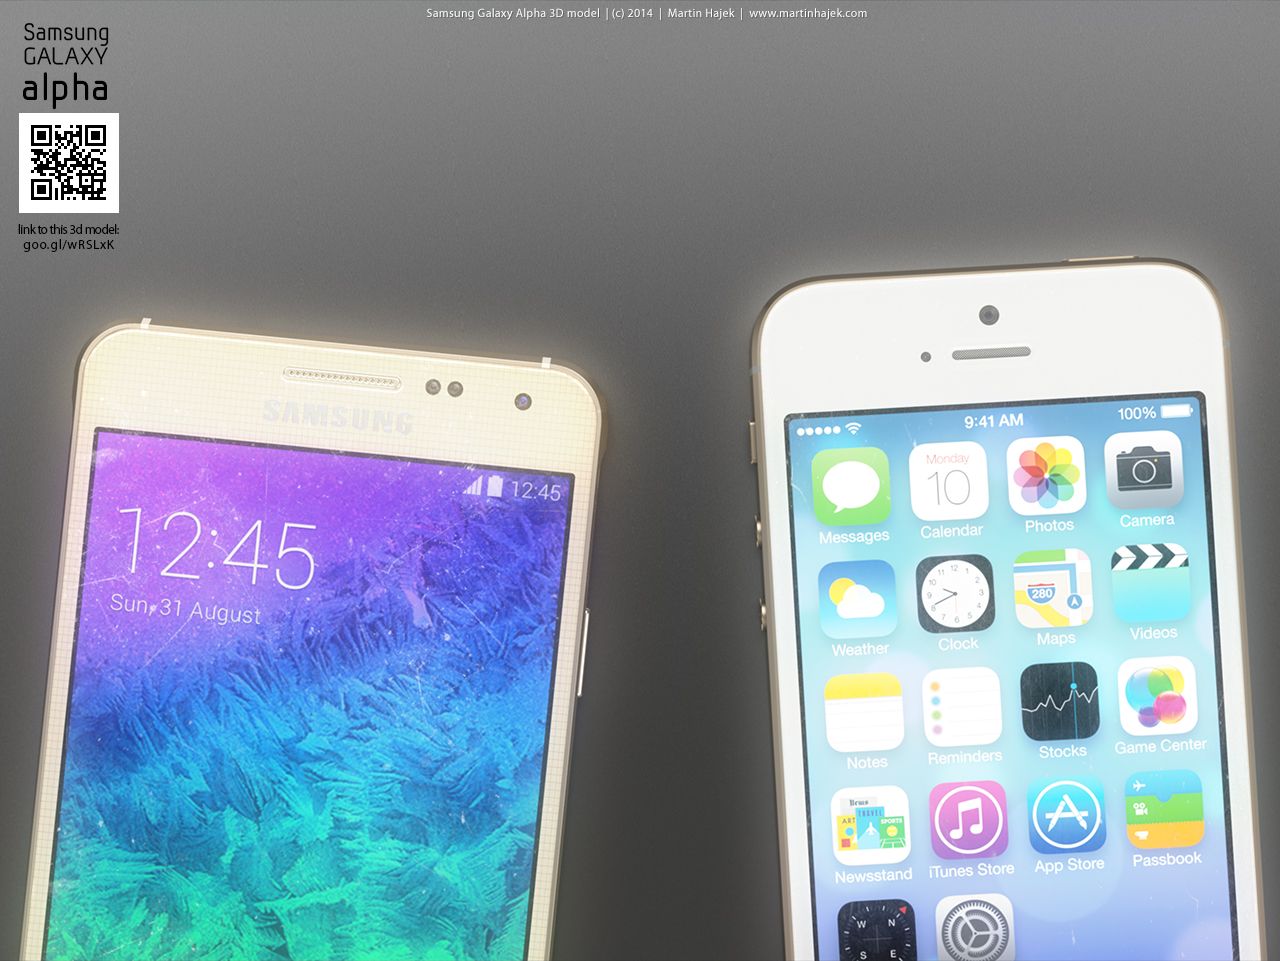
The 3D models of iPhone 6 have been presented by Martin Hajek. Hajek has been producing the 3D models earlier as well based on the rumors and reports, and the models are good enough to give us a sense of what to expect from Apple’s release event on September 9. Recently, Hajek has brought us up a head to head comparison of the Galaxy Alpha and the iPhone 6. Both, the Galaxy Alpha and iPhone 6 look great posing against each other and helps to differentiate where, how and which smartphone out of these two takes the lead. It may be kept in mind that Apple’s iPhone 6 doesn’t have a removable back, as suggested from the leaks so far while Samsung’s Galaxy Alpha has a removable back that adds a huge plus point to this device. Let’s go through the pictures Hajek has uploaded on his site.

iPhone 6 vs Galaxy Alpha (1)  iPhone 6 vs Galaxy Alpha (3) iPhone 6 vs Galaxy Alpha (4) iPhone 6 vs Galaxy Alpha (5) iPhone 6 vs Galaxy Alpha (6) iPhone 6 vs Galaxy Alpha (7) iPhone 6 vs Galaxy Alpha (8) iPhone 6 vs Galaxy Alpha (9)

Source

Eternity Warrior 3 for PC – Windows 8,7,XP,8.1/Mac

0
Eternity Warrior 3 for PC – Windows 8,7,XP,8.1/Mac

The action warrior game Eternity Warrior 3 can now be played on your PC. Most of you must have played this game on your smart phones. The game has been very popular among Android and iOS users standing next in line with Dungeon Hunter. If you wish to play the game on your PC, follow this simple guide to download the game. Let’s first have a look at what the game is about.

Eternity Warrior 3 for PC

About the Eternity Warrior 3:

The game falls in the action/RPG game category in the App store. Mawzok kahl, the lord of Hell, has set up his evil eye to the kingdom of Udar. Being the hero of the kingdom, you are supposed to fight him and his army to protect the kingdom.

  • You will have a number of weapons to carry. Each battle has various stages.
  • You can earn different gems on your way and iron, silver and gold god titles to unlock various powers.
  • The game is designed beautiful 3d graphics and amazing sound effects.

Let’s move to the guide to download this game on PC. Follow the simple steps mentioned below.

Download Eternity Warrior 3 on PC

  1. To download Eternity Warrior 3 on your PC, you will need an Android emulator like Bluestacks. If you do not have it already, you can download it from the website Bluestacks.com.
  2. Open Bluestacks and search for Eternity Warrior 3 using search tool on the top of the homepage.
  3. Click on install button. The game will automatically download and install.
  4. Once the app has been installed, go to My Apps in Bluestacks homepage.
  5. The icon for the game will appear in My Apps.
  6.  Click on this icon to open Eternity Warrior 3.

Now, you can start playing Eternity Warrior 3 on your PC any time you want by opening it from My Apps.

Hopefully, you will be able to install the game easily on your PC through this guide. If you still have any issues, please let us know and we will help you solve them. Enjoy !

Jurassic Park Builders for PC – Windows 8,7,XP,8.1/Mac

1
Jurassic Park Builders for PC – Windows 8,7,XP,8.1/Mac

We have all seen the movie Jurassic park and many have been inspired and amazed by the huge dinosaur world. Based on the same concept is the game Jurassic park builders for Android and iOS users. The game now be played on PC as well through some easy steps. Let’s first have a look at what the game is about.

 Jurassic Park Builders for PC

About the Jurassic Park Builders:

The concept of the game is basically about building a park for extinct animals including Jurassic park for dinosaurs, Aquatic Park for extinct aquatic animals and Glacier park. You will be given a vast empty land where you can build anything you want to.

  • You will have limited amount of food; grass and meat to feed the animals and other supplies for the park. You can also build roads for the visitors.
  • You will have 34 various dinosaur species to keep and 30 sea creatures.
  • You will earn coins and level up as you proceed.
  • The game has amazing graphics and simple controls. This is a social game where you have the option to challenge other players for battle arena and win prizes.

Now, let’s move to the method to download and play this game on PC.

Download Jurassic Park Builders on PC: 

  1. To download Jurassic Park Builders on your PC, you will need an Android emulator like Bluestacks. If you do not have it already, you can download it from the website Bluestacks.com.
  2. Open Bluestacks and search for Jurassic Park Builders using search tool on the top of the homepage.
  3. Click on install button. The game will automatically download and install.
  4. Once the app has been installed, go to My Apps in Bluestacks homepage.
  5. The icon for the game will appear in My Apps.
  6.  Click on this icon to open Jurassic Park Builders.

Now, you can start playing Jurassic Park Builders on your PC any time you want by opening it from My Apps.

Hopefully, you will be able to install the game easily on your PC through this guide. If you still have any issues, please let us know and we will help you solve them. Enjoy !

Update Sony Xperia M2 D2303, D2306 To Official Android 4.4.2 KitKat 18.3.C.0.37 Firmware

31
Update Sony Xperia M2 D2303, D2306 To Official Android 4.4.2 KitKat 18.3.C.0.37 Firmware

Xperia M2 LTE  and LTE A with the model number D2303 and D2306 has started receiving a new Android update. Surprisingly this update is based on Google’s all new Android 4.4.2 KitKat and the build number is 18.3.C.0.37. Xperia M2 initially ran on Android 4.3 Jelly Bean and despite being busy with Sony’s next flagship, the Xperia Z3, Sony is still managing to bring all the latest updates for its existing devices on time.

The new update is rolling out to different users through OTA or through Sony PC companion and as usual, these updates will hit different regions with some variations in the time. For Android enthusiasts, who can’t wait for the update to reach through OTA or through Sony PC companion, the only way to install the latest firmware in this case it flash the ftf file through Sony Flashtool.

We’ve found and compiled up the generic/unbranded firmware ftf files, the Android 4.4.2 KitKat with the build number 18.3.C.0.37 and compiled up a complete guide in the succeeding post that will help you to get your device running this official firmware. Let’s go through the firmware details and then head towards the installation guide.

Xperia M2 Software Update


Early Preparations:

1. This is only for Sony Xperia M2 Dual D2303 & D2306!

This ROM is only for the device mentioned above. Make sure that your model number matches the one listed above. To do so, go to Settings > About Device on your device and see your model number. Flashing this firmware on any other device will result in bricking it so make sure that you meet this requirement first of all.

2. Battery should be charged at least over 60%.

Make sure that your battery is charged enough to complete the flashing process. In case your battery is low and your device goes dead during the flashing process, you may end up soft bricking your device as it won’t complete the flashing process.

3. Backup everything!

Just to be on the safe side, you may consider backing up each and everything from your Android device. This is highly recommended so that in case anything goes wrong, you still have the access to all of your data and you can restore it immediately. You may backup everything as listed below.

4. Enable USB Debugging Mode on your device.

Enable USB debugging mode on your device. To do so, tap settings>developer options>USB debugging. If you can’t find developer options in settings, then tap settings > about device and tap “Build Number” for 7 times and you’ll get em’ activated under settings.

5. Install and setup Sony Flashtool.

You must have installed Sony Flashtool. Find the full guide here.After installing Sony Flashtool, open the Flashtool folder from the drive where you installed it.Now open Flashtool>Drivers>Flashtool-drivers.exe and install the Flashtool, Fastboot & Xperia M2 drivers from the list. [Important]

6. Use OEM data cable to establish connection.

Make sure that you use the phone’s original data cable to establish connection between your phone and the PC. Using a different data cable might result in interrupting the firmware installation.

Xperia M2 D2303 D2306 Android KitKat

How To Install Android 4.4.2 KitKat 18.3.C.0.37 Official Firmware On Sony Xperia M2 D2303/D2306:

    1. Before moving forward, please make sure that you’ve read the pre requisites and ensure that you are set to go ahead.
    2. Download the latest firmware Android 4.4.2 KitKat 18.3.C.0.37 FTF file.
      1. For Xperia M2 D2303 [Customized SG | Generic/Unbranded]
      2. For Xperia M2 D2306 [Customized US | Generic/Unbranded]
    3. Copy the file and paste in Flashtool>Firmwares folder.
    4. Open Flashtool.exe now.
    5. Hit the small lightening button on the top left corner and select Flashmode.
    6. Select the FTF firmware file that you placed in the Firmware folder.
    7. From the right side, select what do you want to wipe. Data, cache and apps log, all wipes are recommended, perhaps you may select if you don’t want.
    8. Click on OK, and it will start preparing the firmware for flashing. This may take a little while to load.
    9. As soon as the firmware is loaded, it will prompt you to attach the phone by turning it off and keeping the back key press.
    10. For Xperia M2, Volume Down key will do the job of back key, just turn off your phone, keep the Volume Down key pressed and plug in the data cable.
    11. As soon as the phone is detected in Flashmode, the firmware will start flashing, Do not leave the Volume Down key until the process is complete.
    12. As soon as you see “Flashing ended or Finished Flashing” leave the Volume Down key, plug the cable out and reboot.
    13. That’s All! Congrats! You’ve installed latest Android 4.4.2 kitkat on your Xperia M2. Enjoy

In case you got any queries or face any problems regarding this guide, please feel free to stop by the comment box below and let us know. We will get back to you as soon as possible. Thanks all!

Update Sony Xperia M2 Dual D2302 To Android 4.4.2 KitKat 18.3.B.0.31 Official Firmware

13
Update Sony Xperia M2 Dual D2302 To Android 4.4.2 KitKat 18.3.B.0.31 Official Firmware

Sony has started updating its mid range device, the Xperia M2 Dual to Android 4.4.2 KitKat, the new update  is based on the build number 18.3.B.0.31. While there’s a number of rumors and news getting us closer to the launch of Sony’s next flagship, the Xperia Z3, Sony is trying its best and showing its users that despite being busy with the next flagship, it still is treating its existing users in a great way by providing them the latest software in time.

Just to have a recap, the Xperia M2 Dual landed in June, 2014. The device sports a 4.8 inches with 229 ppi. The device is powered up with Qualcomm Snapdragon 400 Quad Core CPU clocked at 1.2 GHz accompanied by Adreno 305 GPU and a RAM of 1 GB is there. Initially, the Xperia M2 Dual ran on Android 4.3 Jelly Bean and the device just started receiving the KitKat update just now. Xperia M2 Dual’s specifications are a great package in the price Sony is selling it at.Xperia M2 Dual

The new update, first of all is based on Google’s latest Android 4.4 KitKat and then are the enhancements. Sony has improved the camera application, battery and performance have been improved and there are bug fixes. Besides this, the new firmware aims at making the device even more stable. The software updates are on a slow roll out and will hit the different regions accordingly as usual.Xperia M2 Dual KitKat Details

Since its a little hard for the Android enthusiasts to calm down and wait for the updates patiently, the only way in this situation is to get the update manually instead of relying on the OTA update or through Sony PC companion. If you’re one of them, we’ve something here for you. In the succeeding post we are going to update Sony Xperia M2 Dual D2302 to Android 4.4.2 KitKat based on the build number 18.3.B.0.31 official firmware using the ftf file and flashing it through Sony Flashtool. Let’s go through the early preparations and then flash this firmware.

Early Preparations:

1. This is only for Sony Xperia M2 Dual D2302/S50h!

This ROM is only for the device mentioned above. Make sure that your model number matches the one listed above. To do so, go to Settings > About Device on your device and see your model number. Flashing this firmware on any other device will result in bricking it so make sure that you meet this requirement first of all.

2. Battery should be charged at least over 60%.

Make sure that your battery is charged enough to complete the flashing process. In case your battery is low and your device goes dead during the flashing process, you may end up soft bricking your device as it won’t complete the flashing process.

3. Backup everything!

Just to be on the safe side, you may consider backing up each and everything from your Android device. This is highly recommended so that in case anything goes wrong, you still have the access to all of your data and you can restore it immediately. You may backup everything as listed below.

4. Enable USB Debugging Mode on your device.

Enable USB debugging mode on your device. To do so, tap settings>developer options>USB debugging. If you can’t find developer options in settings, then tap settings > about device and tap “Build Number” for 7 times and you’ll get em’ activated under settings.

5. Install and setup Sony Flashtool.

You must have installed Sony Flashtool. Find the full guide here.After installing Sony Flashtool, open the Flashtool folder from the drive where you installed it.Now open Flashtool>Drivers>Flashtool-drivers.exe and install the Flashtool, Fastboot & Xperia Z2 drivers from the list. [Important]

6. Use OEM data cable to establish connection.

Make sure that you use the phone’s original data cable to establish connection between your phone and the PC. Using a different data cable might result in interrupting the firmware installation.

How To Install Android 4.4.2 KitKat 18.3.B.0.31 Official Firmware On Sony Xperia M2 Dual D2302:

  1. Before moving forward, please make sure that you’ve read the pre requisites and ensure that you are set to go ahead.
  2. Download the latest firmware Android 4.4.2 KitKat 18.3.B.0.31 FTF file.
    1. For Xperia M2 Dual D2302/S50h [Customized IN | Generic/Unbranded]
  3. Copy the file and paste in Flashtool>Firmwares folder.
  4. Open Flashtool.exe now.
  5. Hit the small lightening button on the top left corner and select Flashmode.
  6. Select the FTF firmware file that you placed in the Firmware folder.
  7. From the right side, select what do you want to wipe. Data, cache and apps log, all wipes are recommended, perhaps you may select if you don’t want.
  8. Click on OK, and it will start preparing the firmware for flashing. This may take a little while to load.
  9. As soon as the firmware is loaded, it will prompt you to attach the phone by turning it off and keeping the back key press.
  10. For Xperia M2 Dual, Volume Down key will do the job of back key, just turn off your phone, keep the Volume Down key pressed and plug in the data cable.
  11. As soon as the phone is detected in Flashmode, the firmware will start flashing, Do not leave the Volume Down key until the process is complete.
  12. As soon as you see “Flashing ended or Finished Flashing” leave the Volume Down key, plug the cable out and reboot.
  13. That’s All! Congrats! You’ve installed latest Android 4.4.2 kitkat on your Xperia M2 Dual. Enjoy

In case you got any queries or face any problems regarding this guide, please feel free to stop by the comment box below and let us know. We will get back to you as soon as possible. Thanks all!

How to take a screenshot on the LG G3

0
How to take a screenshot on the LG G3

Capturing the screenshots on the new LG G3 is pretty much simple. If you’ve just got your hands on this device and you’re wondering how you can do so and its taking some time to figure it out, you may read this guide as it explains how you can easily take screenshots on your LG G3. Taking screenshots on the LG G3 is similar to other smartphones, using a button combo or by swiping your hand or fingers across the screen.

Let’s learn both the methods that allow you to take screenshots on your all new LG G3.

Method 1: Using the physical keys

    1. Open the screen on your LG G3 that you want to capture.
    2. Now hold down the volume down and power key at the same time (the middle button and the bottom button on your LG G3’s back). As soon as you press these buttons, you will see the screenshot effect on your G3’s screen.
    3. The screenshot will now appear in your notification bar, you may share it using different applications.
    4. The screenshot is also stored in the “Screenshots” folder in your phone’s gallery.
    5. That’s all.
    6. LG G3 Screenshot

Method 2: Using QMemo

    1. Open the screen that you want to capture on your LG G3.
    2. Now press and hold the home key of your phone (the center key out of the three keys on the bottom of your LG G3) and swipe it into the QMemo+ application, the Q icon.
    3. The QMemo will capture the screen and let you edit it immediately.
    4. Once you’re done, you can save the screenshot.
    5. That’s all.
    6. LG G3 Screenshot2

The G3 comes with a QHD screen, so an image may take up to 4 MBs.

That’s all. We hope that you find this tutorial helpful. Thank you.

How To Root LG G3 [Sprint, Verizon, AT&T And T-Mobile]

0
How To Root LG G3 [Sprint, Verizon, AT&T And T-Mobile]

LG G3 landed in June, 2014. The device won LG some respect having some immense specifications. LG G3 happens to be LG’s very first phone with a QHD display that outdated Oppo’s Find 7. It’s a 5.5 inches True HD IPS display with 534 ppi. LG has used Qulcomm’s Snapdragon 801 CPU accompanied by Adreno 330 GPU and a RAM of 3 GB in the G3. What makes this device even more unique is its 13 MP camera with a laser Auto-Focus whereas the front cam is 2.1 MP. Out of the box, you will find LG G3 running on Android 4.4.2 KitKat.

That was all about the device, let’s get back to our topic now. Some variants of the G3 were rooted when it came out, while some career branded (Verizon, Sprint) devices were left unrooted. Recently, famous XDA Recognized developer JCase, accompanied by some other developers (PlayfulGod , IOMonster, Autoprime, PlayfulGod and Team Codefire) managed to get root access on the LG G3.

The application presented by these developers is named as “StumpRoot“. It’s actually more than easy to root the device as it will hardly take 1 or 2 taps. Let’s go through a little how to guide and learn how you can root your Verizon, Sprint, AT&T or T-Mobile LG G3 using StumpRoot.

527201482115PM_635_lg_g3

In case you’re new to rooting stuff, here’s what you need to know:

Rooting your phone gives you complete access over all the data which is apparently locked by the manufacturers. This includes removal of the factory restrictions and making changes to the internal system and the operating system. Gaining the root access gives you the privileges to install various applications to enhance the performance of your device, allows you to remove the built-in applications/programs, helps you to upgrade the battery life of your device & install the apps which require the root access for the proper functionality and modify your device in so many other ways e.g using mods and flashing custom recoveries and custom ROMs. Here’s our collection of 10 Best Root Apps.

Before you root:

The methods involved in flashing custom recoveries, roms and rooting your phone are highly custom and may result in bricking your device, and has nothing to do with Google or the device manufacturer that is LG in our case. Also rooting your device will void its warranty and you will be no longer eligible for any kind of free device services by the manufacturers/warranty providers. In case of any mishap we may not be held responsible. Follow these instructions to the letter to avoid any mishap or bricking. Make sure that whatever you do, you are doing it at your own responsibility.

How To Root Sprint, Verizon, AT&T or T-Mobile LG G3:

  1. Download StumpRoot APK file.
  2. You may download this file directly to your phone, or copy it to your phone after downloading on your PC.
  3. Now locate the APK file on your LG G3 and tap to install it.
  4. Allow Unknown Sources from Settings > Security if required.
  5. Proceed with the StumpRoot installation and complete it.
  6. Now open the installed application from the app drawer.
  7. Run the application and reboot your LG G3 after it tells you.
  8. Once rebooted, install SuperSu from the Google Play Store.
  9. That’s all! You’re rooted now!

To root other variants of the LG G3, checkout this post.

If you find this application useful, please make sure that you buy the developers some bears. They work hard for the users all the time. If you’re stuck with anything regarding this post, make sure that you drop your words in the comment box below.