Home Blog Page 398

Club Penguin for Pc Download ( Windows and Mac )

0
Club Penguin for Pc Download ( Windows and Mac )

Club Penguin for PC is available but not in .exe or dmg format, you can download the Club Penguin for Pc using third party emulator like BlueStacks and andy. Club Penguin is massive  online multiplayer community in which you can play games, join the latest party, meet and chat with friends, play games, adopt and care for pet puffles. If you are looking for a complete package than Club Penguin is the game your are looking for. Before proceeding to Club Penguin for Pc guide let me give you an overview on Club Penguin.

About Club Penguin:

  • You can join latest parties every month.
  • Every day meet new friends from the world.
  • Explorer the island to see new stuff.
  • Play as many games as you want to earn virtual coins.
  • Unlimited access to all the latest parties & features.
  • Collect rare treasures that puffles find.

Club Penguin for PC

How To Download Club Penguin for Pc Using Andy Emulator

Step 1: Download the Andy from here.

Step 2: After downloading is complete, install Andy on PC.

Step 3: Andy installation process will take few minutes, When installation is finished launch Andy on you PC.

Step 4: When Andy is open, you’ll see an Android tablet interface head over to Google Play.

Step 5: Open Google Play->Search->Club Penguin->Install.

Step 6: when the installation process is complete, go to the home screen there you’ll see Club Penguin.

Step 7: Double click on Club Penguin icon and start playing the game.

Step 8: Now Club Penguin is successfully installed on your PC, Enjoy the the game.

Also See: Download Club Penguin 1.6.1 APK

Download and Install Club Penguin for PC ( Windows Xp,8,8.1,7 – Mac ):

  1. To download Club Penguin  for PC, you will need an Android emulator like Bluestacks. If you do not have it already, you can download it from the website Bluestacks.com.
  2. Open Bluestacks and search for Club Penguin  using search tool on the top of the homepage.
  3. Click on install button. The game will automatically download and install.
  4. Once the app has been installed, go to My Apps in Bluestacks homepage.
  5. The icon for the game will appear in My Apps.
  6.  Click on this icon to open Club Penguin.
MiXplorer, the Best Android File Manager

0
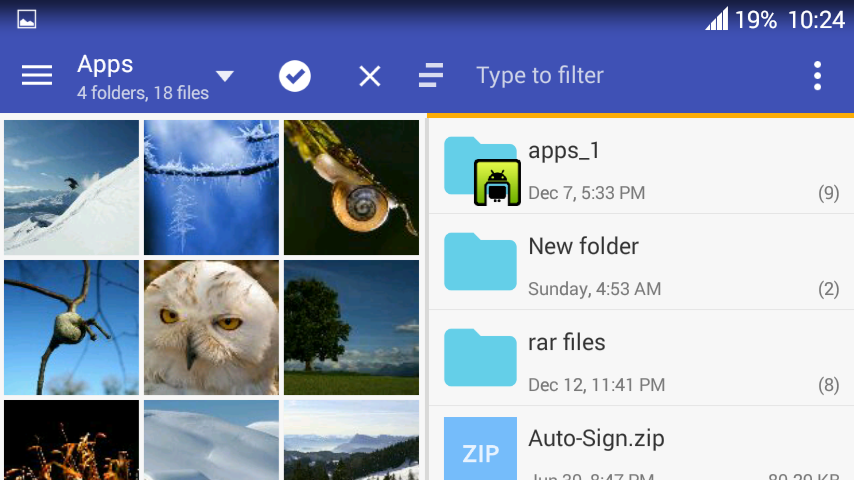
MiXplorer, the Best Android File Manager

Despite the fact that every OEM is providing a pre-installed File Manager of their own, but that Manger is sometimes not enough. However, a typical Android user doesn’t want to live with such simple things, they need more and more in everything. I was a huge fan of ES File Explorer, and I still am. The best part about it is the connection with the PC, where one can easily transfer files from Shared Folders without any problem at all. However, one should always try new things to learn what is better in them and besides if your Android device is not full of apps, that won’t do any good at all.

We just cam across MiXplorer, gave it a try and loved it! One of the best things we loved in this manager is the Easy interface for the beginners. It allows you to do a lot more than any regular manger. 17 of Cloud services can be accessed with this one App. You don’t need any other Root explorer to make amendments in any rooted device. After installing this, its text editor is more thnn enough to make such changes. MiXplorer is not available on Play Store, and most of the users don’t follow Play Store much. We have an Apk file, along with the Installation tutorial, for you. Scroll Down and find out yourself.

MiXplorer, the Best Android File Manager

Download and Install MiXplorer Apk:

    1. Download MiXplorer
    2. Connect your phone to your laptop or PC now.
    3. Copy the APK file to your phone’s SD card.
    4. Disconnect your phone.
    5. Locate the MiXplorer file on your phone now and tap to install it.
    6. If prompted to select installer, then select “Package Installer”.
    7. Allow “Unknown Sources” from Settings > Security if prompted.
    8. Proceed with the installation and complete it.
    9. That’s all!

Never Loose Track of Your Friends with GPS to SMS App

Never Loose Track of Your Friends with GPS to SMS App

Well, I don’t know about others, but in this Country we need something that can instantly share the location with another person and since not everyone uses the internet connectivity all the times, there is a need for such an application that can send the location to another person, but with the help of an SMS. There are certain places and conditions that leave us with nothing but the SMS and if we have something that can let us share our Location with other person, or opposite, with the help of a single SMS, then there is nothing better.

GPS to SMS is an app that does the job and it does it with much smoothness. Instead of you taking a snapshot and then uploading it to any Messenger and then typing the message, with this app you can just tap the send button and use any third-party messaging app like WhatsApp, Messenger, Viber or any other messaging service to send the location. The best part is that you can save the location to SD Card for further use, and this app even works offline. It doesn’t run in Background. It supports Multi-Language. So many of us will understand what is written. The theme is set to Material Design, so it will look good no matter which Android version you are using. We will provide you the Apk file, so you won’t go through much searching to download it.

Never Loose Track of Your Friends with GPS to SMS App

Download and Install GPS to SMS:

    1. Download GPS to SMS
    2. Connect your phone to your laptop or PC now.
    3. Copy the APK file to your phone’s SD card.
    4. Disconnect your phone.
    5. Locate the GPS to SMS file on your phone now and tap to install it.
    6. If prompted to select installer, then select “Package Installer”.
    7. Allow “Unknown Sources” from Settings > Security if prompted.
    8. Proceed with the installation and complete it.
    9. That’s all!

Have a Limit on WhatsApp File Size? Here is How to Increase it

0
Have a Limit on WhatsApp File Size? Here is How to Increase it

WhatsApp is one of the most famous Social Chatting Platform available on almost all the Famous OS, like Android, iOS, Symbian, Windows, BB OS etc. not only does it provides an amazing Online Chatting experience, but unlike any other Social Chatting app, WhatsApp doesn’t sell ads instead they ask you to pay $0.99 per year and keep enjoying the service, in my opinion paying such amount is nothing, if you get to enjoy an ad free and uninterrupted Chatting experience. But if you don’t want to pay this amount, then after a year just change your number and all is well to be used, totally free again.

However, there is one thing that makes this app a little out of class, and that is the limit on the File sending, usually the Stock value is 16MB, that you can’t share a file with size more than 16MB, but with this little editing, you can send a file up-to 2GB in size, although you’ll need a very fast Internet connection to send such thing to other person and that other Person, will sure to die when he first sees that huge file size. Without further ado, let us continue.

Have a Limit on WhatsApp File Size Here is How to Increase it

Requirements:

  • A Rooted device, if you are still not rooted, follow the link to do so: Link
  • Download and Install Root Browser: Link

Increase WhatsApp File Size:

  1. Once the Root Browse is installed, open it.
  2. Grant the Super SU Permission.
  3. Make Sure that you already have the WhatsApp installed and Logged-in.

  4. Navigate to Data> Data.
  5. Browse and Locate the com.whatsapp, open it.
  6. Open the Shared_prefs folder.
  7. Locate the com.whatsapp_preferences.xml file.
  8. Long press and Open the file in RB Text Editor.
  9. Now Search for this line : <int name=”media_limit_mb” value=”16″ />
  10. Now all you need to do is to change the Value from 0-2048, since the memory is measured in MBs, so technically 2048MB is 2GB.
  11. Save and Exit the file.
  12. Exit the Root Browser.
  13. Now try to send a file larger than 16MB and if it works, that means you have succeeded.
  14. Enjoy! but if this does anythign to your WhatsApp profile and media,we are not liable to pay any damage.

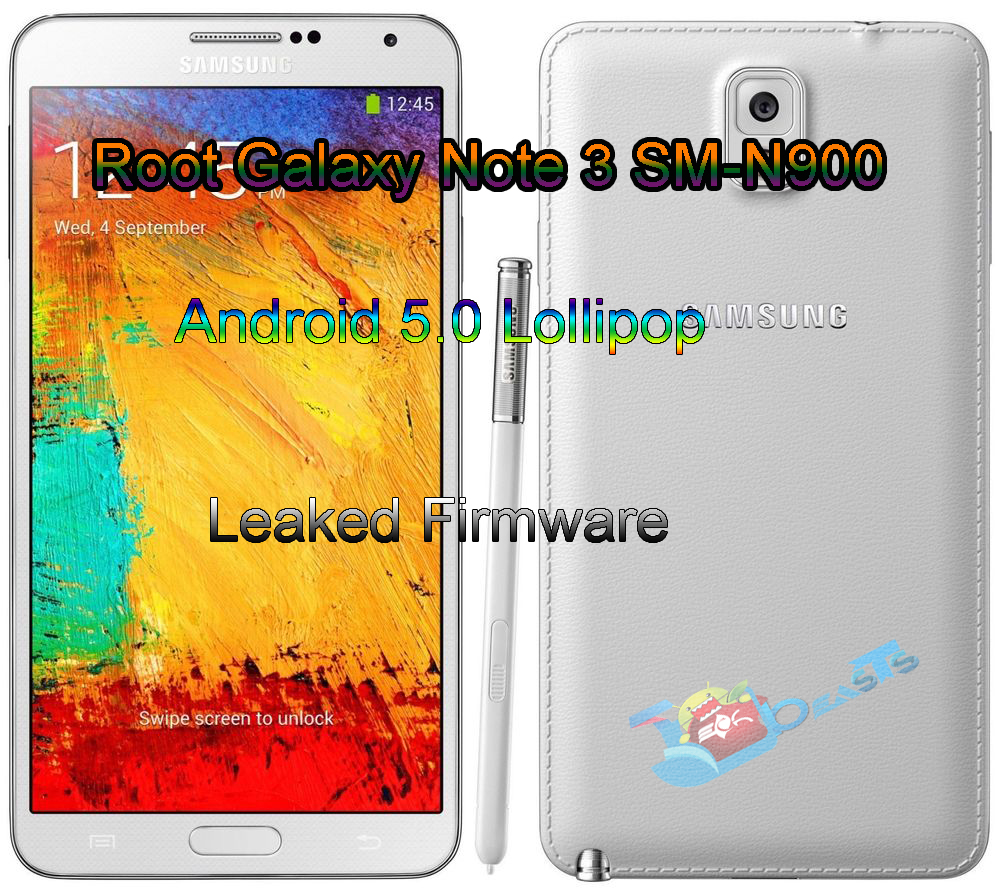
Root Galaxy Note 3 SM-N900 on Android 5.0 Lollipop Leaked Firmware

Root Galaxy Note 3 SM-N900 on Android 5.0 Lollipop Leaked Firmware

We have just posted the Android 5.0 Lollipop for SM-N900or if you visit the XDA Forum on daily basis, then you might have updated your Note 3 Exynos Variant to this leaked Lollipop firmware. Now the next thing that every Android users wants is the rooting method for that version and luckily, we have a solution for that too, thanks to the same person who shared the Lollipop Leaked firmware has also shared the link to CWM recovery and Super SU, that can be used to root the device. Odin will once again be used to Flash the CWM Recovery and then Super SU will be flash using that CWM Recovery.

In this article, we will show you How to Root Galaxy Note 3 SM-N900 on Android 5.0 Lollipop Leaked Firmware, you’ll need the Custom Recovery to back-up all your data and other stuff and flashing the Official ROM also takes that away too. Usually it takes several weeks to bring such stuff for a device, but in this case everything is almost already here.Rooting allows you to get full control over your device. Stock apps and mods are good, but installing Custom Mods give you better support and great battery life.

Root Galaxy Note 3 SM-N900 to Android 5.0 Lollipop Leaked Firmware

Downloads Required:

How to Install CWM Recovery:

  1. Download the Recovery file to your PC.
  2. Open Odin3.exe.
  3. Put your Galaxy Note 3 in download mode. To do so, turn it off and wait for 10 seconds. Turn it on by pressing and holding Volume Down + Home Button + Power Key simultaneously, You should see a warning, press Volume Up to continue. In case this method doesn’t work for you, try one from this guide.
  4. Connect your device to your PC.
  5. As soon as Odin detects your phone, the ID:COM box should turn blue.  Make sure that you’ve installed Samsung USB drivers before connecting.
  6. For Odin 3.09 hit the AP tab. Select the Recovery.tar.md5 that you downloaded and extracted above.
  7. Hit start and wait till the Recovery flashing is complete, as soon as your device restarts, remove it from PC.
  8. Wait for your device to reboot.
  9. That’s all!

How to Root the Device:

  1. Download the Super Su to your device.
  2. Put your Galaxy Note 3 into Recovery mode.
  3. To do so, turn it off and wait for 10 seconds. Turn it on by pressing and holding Volume Down + Home Button + Power Key simultaneously, Quickly release the Power button when you see the Galaxy Logo Blink 3 times.
  4. Navigate to Install Zip > Choose Zip.
  5. Flash the Super SU.zip
  6. Once done, Reboot the device.
  7. Use any root checker app to Verify the root access.

Download Clash of Clans for Pc with YouWave (Officially)

2
Download Clash of Clans for Pc with YouWave (Officially)

In this guide we’ll guide you how to install and play Clash of Clans for Pc, Clash of Clans is top Strategy game for both Android and iOS but unfortunately there is no pc version of clash of clans. But with the help of third party emulator we can install and play Clash of Clans for Pc. There are many guides on how to install Clash of Clans for Pc, but not are working. This guide on Clash of Clans for Pc is working 100% i have tired it before posting.

Also See: SimCity BuildIt for PC Download

About Clash of Clans:

# 1. You have to Build your own village into an unbeatable fortress.

# 2. You’ll get a chance to raise your own army of Barbarians, Archers, Hog Riders, Wizards, Dragons.

# 3. Clash of Clans comes with online support means you can fight with other clans world wide.

# 4. You can Build 18 unique units with multiple levels of upgrades.

# 5. Fight against the Goblin King in a campaign through the realm.

Also See: Fun Run 2 for Pc Download

Download Clash of Clans for Pc


Download and Install Clash of Clans for Pc ( Windows Xp,8,8.1,7 – Mac ):

Step 1: Download and install YouWave on your computer or laptop from here.

YouWave

Step 2: After the installation is completed, double click on YouWave icon.

Step 3: Click on ‘Continue with Trial version’ and if you want to buy it you can purchase it.

YouWave-1

Step 4: Now click on menu and launch Browser application.

YouWave-2

Step 5: Type the url ( https://play.google.com/store ) in browser and press enter.

Step 6: Now type Clash of Clans in Play store search bar.

YouWave-3

Step 7: After you find the Clash Of Clans, click on install to begin the process.

YouWave-4

Step 8: Now wait for installation to be completed, when its done Clash of Clash will be installed on your PC.

You Might Like: Candy Crush Soda Saga for Pc Download

SimCity BuildIt for PC Download ( Windows Xp,7,8,8.1 – Mac )

6
SimCity BuildIt for PC Download ( Windows Xp,7,8,8.1 – Mac )

In this guide we’ll tell you how to download and install SimCity BuildIt for PC, there is no such Pc version of SimCity BuildIt but we can install and play SimCity BuildIt for PC using third party emulator. SimCity BuildIt is basically designed for Android and iOS, but playing SimCity BuildIt on PC would give us a whole new experience.

Also See: Trivia Crack for PC Download

About SimCity BuildIt:

# 1. You have to create your own gorgeous, unique city that has citizens vying to move in.

# 2. SimCity BuildIt has 3D graphics which make building look so real.

# 3. Strategically place buildings to keep the taxes flowing and your city growing. Pinch, zoom, and rotate 360 degrees as you manage your city.

# 4. You can trade resources with your friends online running others cities.

# 5. You have to Solve real city challenges like traffic, fires, and pollution. That makes it more interesting.

Also See: Android Apps for PC

SimCity BuildIt for PC Download

Download and Install SimCity BuildIt for PC ( Windows Xp,8,8.1,7 – Mac ):

  1. To download SimCity BuildIt for PC, you will need an Android emulator like Bluestacks. If you do not have it already, you can download it from the website Bluestacks.com.
  2. Open Bluestacks and search for SimCity BuildIt using search tool on the top of the homepage.
  3. Click on install button. The game will automatically download and install.
  4. Once the app has been installed, go to My Apps in Bluestacks homepage.
  5. The icon for the game will appear in My Apps.
  6.  Click on this icon to open SimCity BuildIt.

You Might Like: Candy Crush Soda Saga for Pc Download

Download Happy New Year 2015 Images , Photos and Wallpapers

Download Happy New Year 2015 Images , Photos and Wallpapers
Happy New Year 2015

Only 2 days to go for the biggest celebration of year to arrive, Christmas is passed all what left is Happy New Year 2015. New year eve is celebrated by all over the world we get to see beautiful fireworks from China, UAE, Australia, NewYork and many more. To add a little spice in celebration of New Year we have collected Happy New Year 2015 Images , Photos and Wallpapers. You can download Happy New Year 2015 Images , Photos and Wallpapers on your smartphone, tablets, Desktops, Laptops and i Mac. Enjoy the Happy New Year 2015 Images.

Happy New Year 2015
Happy New Year 2015
Happy New Year 2015
Happy New Year 2015
Happy New Year 2015
Happy New Year 2015
Free happy new year 2015 photos
Happy New Year 2015
Happy New Year 2015
Happy New Year hd wallpaper 2015
happy new year sms messages 2015

Blue Happy New Year 2015 Greeting Card images

new year wallpapers
new year wallpapers

Best 3D Happy New Year Wallpapers – Download Here

0
Best 3D Happy New Year Wallpapers – Download Here

New year is getting close and like all of you people, we are also waiting to see how this year will be for us, as 2014 was quite an awesome year for me, and the last 3 months were absolute awesome for me, I hope that this 2014 was quite a good year for all of you and the coming year will also be merciful for all of us. As always the first thing that everything search for when it comes to new year of Christmas or even the Halloween, along with the wishes, users also look for the ways to decorate their gadgets and wallpapers are the best way to do so.

Previously we have posted alot of articles about HD Wallpapers, New Year Wallpapers, however, today we have changed the topic a little bit, instead of giving users the typical and simple Wallpapers, instead this time we are sharing a collection of 3D Happy New Year Wallpapers, not quite something that can be seen on daily basis. You’ll be able to see the Collection, right after this short break.

new-year-wallpapers

How to Download 3D Happy New Year Wallpapers:

  1. Choose your Favorite wallpaper.
  2. Click On it to enlarge it.
  3. Once the image is fully loaded, Right click on it
  4. Choose Save Image as.
  5. Choose the Saving destination.
  6. Click Save.
  7. Enjoy

Install CWM 6.0.4.9/TWRP 2.8 Recovery On Samsung Galaxy S Plus I9001 [How To]

0
Install CWM 6.0.4.9/TWRP 2.8 Recovery On Samsung Galaxy S Plus I9001 [How To]

The Galaxy Plus falls in the legacy devices now and Samsung may have forgotten it, but the great developer community is still active and we are seeing a lot of cool stuff coming up every day for this device. Even the Android 5.0 Lollipop CyanogenMod 12 custom ROM has landed in for the Galaxy S Plus, and there’s a hefty list of other custom ROMs, MODs and tweaks available for this device. To begin with the modification of your device, the very first thing you would require is a latest working custom recovery. While going through the XDA developers forum, I came across a thread by DevConnection_Team, the guys are pretty much active with the custom ROMs and recoveries for the Galaxy S Plus and their latest work is the TWRP 2.8 and CWM 6.0.4.9 recover for our beloved Galaxy S Plus.

While you move ahead, you will come across a comprehensive guide that will explain you the procedure to install this TWRP 2.8.0.0 or CWM 6.0.4.9 custom recovery on your Galaxy S Plus I9001. You only need to follow the instructions being very careful. Let’s go through the early preps and then head towards the installation guide.

GAlaxy S Plus


Install CWM 6.0.4.9/TWRP 2.8 Recovery On Samsung Galaxy S Plus I9001

Early Preparations:

  1. This guide is only for the Galaxy S Plus I9001. Do not try this on any other device, flashing these files on another device will result in bricking it. To verify your device’s model number, go to settings > about device > model number.
  2. Your battery should be charged over 60% at the least. Having a low battery might result in turning the device off while the flashing process, this too will result in soft-bricking your device.
  3. Make sure that you’ve already backed up all of your important data. This is highly recommended so that just in case something goes wrong, you still have your data safe and secure. You can use the following guides to backup your important data.

Disclaimer: The methods involved in flashing custom recoveries, ROMs and rooting your phone are highly custom and may result in bricking your device, and has nothing to do with Google or the device manufacturer that is SAMSUNG in our case. Also rooting your device will void its warranty and you will be no longer eligible for any kind of free device services by the manufacturers/warranty providers. The Galaxy Note 4 comes with Knox, so rooting will also trip the Knox counter and you won’t be eligible to claim the warranty anyway. In case of any mishap we may not be held responsible. Follow these instructions to the letter to avoid any mishap or bricking. Make sure that whatever you do, you are doing it at your own responsibility.

Downloads Required

How To Install CWM/TWRP Recovery On Samsung Galaxy S Plus I9001

  1. Copy your desired recovery to your Galaxy S Plus’s internal or external SD card.
  2. Boot your device into the recovery mode. To do so, turn off your device completely. Now turn it on while pressing and holding Volume Up + Home + Power Key. As soon as your device is turned on, leave the keys. You should be able to see the recovery mode in a bit. In case this method doesn’t work, try a method from our guide here. [the stock recovery will work for flashing this recovery as well].
  3. Once in the recovery mode, select “apply update from external SD[if you’re using stock recovery]” or select “Install zip > choose zip [if you’re using a custom recovery]”.
  4. Select the downloaded and copied TWRP 2.8 or CWM 6.0.4.9 recovery.zip file and flash it.
  5. Once flashed wipe cache and reboot your device.
  6. That’s all. You’ve successfully installed the custom recovery on your Galaxy S Plus I9001. To boot into the custom recovery mode, use the method explained in step 2.

That’s all. In case you’re stuck with anything regarding this guide, make sure that you reach us using the comment box below. We will get back to you immediately.

Recovery Credits

How to Mirror Android Screen on PC

0
How to Mirror Android Screen on PC

If we Calculate a time of daily use of an Android device, it is like a 24 hours a day, cause not matter where you are, it will be there with you the whole time. However, it won’t try to cross the path, but when it comes to texting, woah! that is the part where most people gets frustrated and most of the times, the words gets mixed and usually fights starts on conversations just because of that. Let us take an Example of WhatsApp, since it is one of the most active Chatting Platform, some even use it more than the default Messaging app.

Using a Mouse and Keyboard is already a huge ease over the Keypad, so if somehow, that whole conversation is transferred to the Laptop or the Desktop you are using, things get a little bit easy for all and thanks to Google Play Store and developers, who provided us the AirDroid 3 app that allows us to Mirror the Android screen on your PC, so while working you can Reply to your friends without any problem and Unlike previous versions of AirDriod, AirDriod 3 requires you to make a Free account to use the Screen Mirroring feature, along with the Desktop Client that is mandatory for this process.

How to Mirror Android Screen on PC

Downloads Required:

AirDroid 3 For Mobile: Link

AirDroid 3 Desktop Client: Link

How to Mirror Android Screen:

  1. Download the App on Mobile.
  2. Download the App on PC.
  3. Create an Account on AirDriod, if you are using for the first time.
  4. Open the App in Mobile and Tap Enable.
  5. Now whenever you’ll receive a message or a call, you’ll receive the Notification on your PC.
  6. Just Tap the Notification and App will pop-up, Tap the Message bar and start using your Keyboard.
  7. AirDroid 3 also features a Sleep Mode, so if your device is in Sleep Mode, you’ll see a Dim light on the WhatsApp Window too.
  8. While if you are using your Headphones, you can also receive call on your PC, instead of your Mobile