Home Blog Page 374

How To Install Android Lollipop 5.1.1 On Galaxy Mega 5.8 I9152
56
How To Install Android Lollipop 5.1.1 On Galaxy Mega 5.8 I9152

Google has rolled out Android 5.1 Lollipop for its recent flagship devices. Samsung and other manufacturers are still struggling to roll out Android 5.0 Lollipop for some of their devices. Samsung has rolled out the update for its top of the line smartphones, but a huge audience that owns mid-range and budget Galaxy devices may be still waiting for a good news from Samsung, which is unlikely to come out. Galaxy Mega, one of its-own-kind device introduced by Samsung a few years ago ran on Android Jelly Bean out of the box and received KitKat later on. The device does have some nice hardware specifications, but the users may be a bit disappointed after coming to know that this device won’t be receiving Android Lollipop.

If you’re a Galaxy Mega 5.8 owner and you still want to update your device to the latest iteration of Android, a custom ROM maybe a choice for you. By means of a custom ROM, you can have the taste and feel of pure Android Lollipop firmware. The one we have found for you is the most popular, CyanogenMod. CyanogenMod 12.1’s unofficial builds have started landing on development forums, and Galaxy Mega 5.8 happens to be one of the lucky devices to get this ROM very early. All basic features of the phone are found to be working in this ROM, there maybe minor bugs as we can’t guarantee the complete functionality of this ROM. Apart form the CyanogenMod 12.1 ROM, we have also mentioned the well known Resurrection Remix ROM , which is also quite stable and offers unofficial Android 5.1.1 Lollipop for the Galaxy Mega I9152. Let’s go ahead and pick up your desired custom ROM and install unofficial Android 5.1.1 Lollipop on your beloved Galaxy Mega 5.8 GT-I9152.Samsung-Galaxy-Mega-5.8-front

Early Preparations

  1. This ROM is only for Samsung Galaxy Mega Dual GT-I9152. Do not try this on any other device, please check your device’s model in Settings > About Device > Model.
  2. Your device must have a custom recovery installed, in case you’re missing it you may Follow our full guide here to install TWRP 2.8 recovery on your Galaxy Mega 5.8.
  3. Your device’s battery should be charged at least over 60%. This is highly recommended in order to prevent any power issues during the flashing process.
  4. Make sure that you backup your important media content, ContactsCall Logs Messages. This is highly recommended just in case something goes wrong and you need to reset your phone.
  5. If you already have rooted your device, use Titanium Backup to back up all your important apps + system data.
  6. Also if you are using a custom recovery, it is recommended that you backup your current system using that first. [Just for the sake of safety]. Here’s our full Nandroid Backup guide.
  7. You will have to go through Data Wipes during installation of this ROM, so make sure that you have backed up all the mentioned data.
  8. Make an EFS backup of your phone before you flash this ROM.
  9. You need enough confidence to flash this ROM.
  10. Alright! Go ahead and flash the custom firmware, follow this guide to the letter.

Disclaimer: The methods involved in flashing custom roms and rooting your phone are highly custom and may result in bricking your device, and has nothing to do with Google or the device manufacturer that is SAMSUNG in our case. Also rooting your device will void its warranty and you will be no longer eligible for any kind of free device services by the manufacturers/warranty providers. In case of any mishap we may not be held responsible. Follow these instructions to the letter to avoid any mishap or bricking. Make sure that whatever you do, you are doing it at your own responsibility.

How To Install Android 5.1.1 Lollipop On Samsung Galaxy Mega I9152 Using A Custom ROM

  1. Download custom ROM according to your choice.
    1. cm-12.1-20150510-UNOFFICIAL-i9152.zip  [CyanogenMod 12.1]
    2. Resurrection_Remix_LP_v5.4.5-20150518-i9152.zip
  2. Download Gapps.zip file for Android Lollipop.
  3. Connect your phone to your PC now.
  4. Copy the both the .zip files to the storage of your phone.
  5. Now disconnect your phone and turn it off complete.
  6. Boot into TWRP recovery now, in order to do so, turn it on by pressing and holding Volume Up + Home Button + Power Key. You should see the recovery mode in a while.
  7. Now in TWRP  recovery, wipe cache, factory data reset and advanced options > dalvik cache.
  8. After wiping all these three, select “Install” option.
  9. Now select “Install > Choose Zip from SD card > Select custom rom.zip file > Yes”.
  10. This will flash the ROM in your phone, once done get back to the main menu in recovery.
  11. Now once again select “Install > Choose Zip from SD card > Select Gapps.zip file > Yes”
  12. This will flash the Gapps in your phone.
  13. Reboot your device.
  14. You should see the Android 5.1.1 Lollipop running on your device in a while.
  15. That’s all!

First boot may take up to 10 minutes, you may not worry if it’s taking that much long. In case it’s taking too long, you may boot into TWRP recovery and wipe cache and dalvik cache and reboot your device as it may fix the issue. In case your device is having issues, you may return to your old system using the Nandroid backup or follow our guide here to install stock firmware.

Got any queries? Reach us out through the comment box below.

Credits: GHsR | Kiborg_Man

How to Turn on Screen Mirroring on Samsung Galaxy S6 Edge and Connect With SmartTV

How to Turn on Screen Mirroring on Samsung Galaxy S6 Edge and Connect With SmartTV

When Samsung Galaxy S5 was released i posted about How to Turn on Screen Mirroring on Samsung Galaxy S5 and Connect With SmartTV. Now Samsung Galaxy S6 Edge is out so today i’ll tell you how to Turn on Screen Mirroring on Samsung Galaxy S6 Edge. The method totally same because Samsung didn’t changed anything related to screen Mirroring. I’ll be using AllShare Cast Wireless Hub, HomeSync and HDMI Cable.

galaxy-s6-edge-black

How To Enable screen mirroring on Samsung Galaxy S6 Edge:

  • Goto quick setting.
  • Tap on Screen mirroring icon and enable it.

Now in the following steps you’ll find out how you can enable screen mirroring with AllShare Cast Wireless Hub, HomeSync, Miracast and HDMI Cable.

How to screen mirror from Samsung Galaxy S6 Edge to a TV using AllShare Cast:

  • Turn on your television.
  • Power on your AllShare Cast though charger.
  • Connect your TV with AllShare Cast with HDMI Cable.
  • Kindly properly put HDMI Cable in the right port.
  • Now wait for the light to get blue from red on your AllShare Cast device.
  • Your TV is connected with AllShare Cast.
  • Now go to Samsung Galaxy S6 Edge quick setting and tap on screen mirroring and first turn off then turn on it again.
  • After turning on Screen mirroring you will get a list of available devices. Select AllShare Cast’s dongle and enter the PIN as showed on TV.
  • Your Samsung Galaxy S6 Edge is connected with your TV through AllShare Cast.

How to screen mirror from Samsung Galaxy S6 Edge to a Samsung Smart TV:

  1. Press Input from your Samsung SmartTV remote.
  2. Select Screen Mirroring from your Smart Tv screen.
  3. Now go to your Galaxy S6 Edge quick setting tap on Screen Mirroring.
  4. Your Phone will list all the available device available for Screen Mirroring.
  5. Select Samsung Smart TV. That’s all.

How to turn off the Galaxy S6 and S6 Edge camera shutter sound

How to turn off the Galaxy S6 and S6 Edge camera shutter sound

Smartphones servers many purpose according to our need but sometimes few things like sounds and other things become annoying. Just like Shutter sound on smartphones, although its a good thing when you take a pic from your smartphone it gives a shutter sound to protect privacy. Manufactures like HTC and Sony gave this option to turn off shutter sound on camera but samsung is not yet in the line. Today i will tell you how to turn off the Galaxy S6 and S6 Edge camera shutter sound. In the following guide i’ll explain you two methods to turn off the Galaxy S6 and S6 Edge camera shutter sound.

galaxy-s6-edge-black

How to turn off the Galaxy S6 and S6 Edge camera shutter sound:

Follow all the steps carefully in order to turn off camera shutter sound on Galaxy S6 and S6 Edge. In method number one i will use third party app and in method two you have to root your device in order to turn off Galaxy S6 and S6 edge camera shutter sound.

Step#1: Download SilentCam S6 from Google Play on your Galaxy S6.

Step#2: Now after the application is installed, accept the terms and conditions.

Step#3: You’ll see a pop-up asking permission to access the device data usage. Tap on OK.

Step#4: Now if your Galaxy S6 camera shutter sound is on this app will automatically turn it off.

Step#5: If you want to use the camera shutter sounds again simply uninstall the app.

All Done.

Method#2:

Step#1: First you have to root your Galaxy S6, if you haven’t try our guides click here.

Step#2: Now that you have gain the root access on your Galaxy S6, install Xposed framework.

Step#3: After Xposed framework is installed you have to install any tweak which disable camera shutter sound from XDA Developer Forum.

All Done !

G.I. Joe Strike for PC Download ( Windows 8,7,Xp,Vista – Mac )

G.I. Joe Strike for PC Download ( Windows 8,7,Xp,Vista – Mac )

G.I. Joe Strike is the latest top grossing game in Google Play store created by famous Backflip Studios developers, G.I. Joe Strike is basically designed for iOS and Android devices, but we can also play this action pack game on PC. If you haven’t played it on Pc then following our guide below in how to install G.I. Joe Strike for PC using third party emulators. There is no such G.I. Joe Strike PC version but we can download and install Android apps on PC using famous emulators like BlueStacks and Andy. Before moving on to the guide on how to download G.I. Joe Strike for PC, let me tell you about the main features of G.I. Joe Strike.

G.I. Joe Strike for PC Download

– Easy to use, responsive touch controls are quick to learn, but challenging to master.

– Dynamic, engaging combat featuring a mix of martial arts, swords, and modern weaponry.

– Collect and upgrade 100+ ability cards to strengthen Snake Eyes.

– Venture through several iconic G.I. Joe locations to wipe out the ninja threat.

– Find your rhythm in combat to become the ultimate ninja commando!

for more visit Google Play.

How To Install G.I.Joe Strike For PC or MAC Using Blackstacks

Method 1:

  1. Install Bluestacks on your PC or MAC.
  2. Download G.I. Joe Strike Apk on your PC.
  3. Make sure that you have installed Bluestacks. Double click the downloaded G.I. Joe Strike APK to install it.
  4. The APK will be installed through Bluestacks, once the notification pop ups determining the installation completion, open Bluestacks.
  5. Now click on My Apps and then click on Dubsmash.
  6. The application will open up. Now follow on-screen instructions to use Dubsmash.

Method 2:

  1. Install Bluestacks on your PC or MAC.
  2. Open Bluestacks and setup your Google Play Store account.
  3. Now open Google Play Store and search for “G.I. Joe Strike“.
  4. Once found, install G.I. Joe Strikeh.
  5. Now click on My Apps and then click on G.I. Joe Strike.
  6. The game will open up. Now follow on-screen instructions to use Dubsmash.

How To Install G.I. Joe Strike For PC or MAC Using Andy OS

  1. Download and install Andy OS on your Windows PC or MAC.
  2. Once downloaded, open Andy OS.
  3. Setup Google Play Account on it.
  4. Now open Apps > Google Play Store and search for “G.I. Joe Strike“.
  5. Install Dubsmash and wait for it to finish installation.
  6. Once done, open “Uncategorized” portion in Andy and click on G.I. Joe Strike to play it.
  7. That’s all.

Install TWRP 2.8.6.0 Recovery & Root Galaxy Mega 6.3 & 5.8

Install TWRP 2.8.6.0 Recovery & Root Galaxy Mega 6.3 & 5.8

Samsung’s Galaxy Mega received a good amount of development. Many custom ROMs and MODs are available for the Mega series. Users have some interesting stuff to play with. Galaxy Mega is pretty old now, and the device ain’t receiving any further updates of Android. So, even if you want to load a greatest version of Android on your device, a custom ROM might be the choice for you to go with. To pave a way for all the cool stuff, up to dated ROMs, you need the latest version of custom recovery running on your device. TWRP’s latest version, 2.8.6.0 is now available for Galaxy Mega 6.3 & Galaxy Mega 5.8. You can insatll TWRP by following the steps here.

The latest version of TWRP works with Galaxy Mega 6.3 & 5.8 running Android KitKat, the recovery also works with all previous versions of Android running on these devices. As this is the latest version of TWRP, it can be used for flashing custom Android 5.0 Lollipop ROMs. You need to have a latest recovery for flashing some files at times, so if you have old version of TWRP, you may want to update it now. In the on-going guide we are going to flash this latest TWRP 2.8.6.0 recovery on our beloved Galaxy Mega 6.3 & Galaxy Mega 5.8. Once we are done installing the recovery, we will also root the device by flashing SuperSu.zip file. Let’s have a look on some pre-installation instructions and then flash the recovery.1391067720-galaxy-mega

Early preparations & instructions

  1. After following this guide, you will be done with
    1. TWRP Recovery & Root For Galaxy Mega 6.3 I9200, I9205 LTE
    2. TWRP Recovery & Root For Galaxy Mega 5.8 I9150, I9152
  2. Do not try this guide on any other device. Check your device’s model number under settings > general / more > about device. Trying this method on any other device will result in bricking it.
  3. Make sure that your phone’s battery is charged at least over 50%. This is recommended in order to avoid power issues during the installation process.
  4. Enable USB debugging mode on your device. To do so, you need to enable developer options first. Go to settings > system > about device > tap build number for 7 times. You will have developer options enabled under settings > system > developer options. Open developer options now and enable USB debugging mode.
  5. Use original data cable to establish connection between your PC and your phone.
  6. While using Odin3, disable Samsung Kies, Windows Firewall or any Anti-Virus if you’ve enabled.
  7. To be on the safe side, backup your contacts, call logs, text messages and copy the important media content to your PC.
  8. Download the files properly for your device and follow the instructions to the letter to avoid mishap.

Disclaimer: The methods involved in flashing custom recoveries, roms and rooting your phone are highly custom and may result in bricking your device, and has nothing to do with Google or the device manufacturer that is SAMSUNG in our case. Also rooting your device will void its warranty and you will be no longer eligible for any kind of free device services by the manufacturers/warranty providers. In case of any mishap we may not be held responsible. Follow these instructions to the letter to avoid any mishap or bricking. Make sure that whatever you do, you are doing it at your risk.


Required Downloads & Installations

How To Install TWRP Recovery & Root Galaxy Mega

  1. Copy SuperSu.zip file to your phone’s internal or external storage.
  2. Open Odin3 V3.10.6.exe that you extracted on your PC.
  3. Put your Mega in download mode now. To do so, turn it off completely. Now turn it on by pressing and holding Volume Down + Home + Power Key. Once your phone boots up, press the Volume Up key to continue.
  4. Connect your phone to your PC now. The ID:COM box in the top-left corner of Odin3 should  turn blue. This indicates that your phone is connected properly.
  5. Now click the “AP” tab in Odin and select the twrp-2.8..6.0.xxxxx.tar/TWRP for Android 7.0 Nougat.tar file. It will take a second or two for Odin3 to load this file.
  6. If the Auto-reboot option is unticked, tick it. Leave all other options in Odin3 as they are.Odin 3.10.6 Explained_Techbeasts
  7. Now you’re all set to flash the recovery. Just click the start button in Odin3 and sit back.
  8. Once the process box above ID:COM box shows green light and flashing process is finished, disconnect your device. Let it reboot
  9. Now turn off your device properly as we are going to boot into recovery mode.
  10. Now turn it on by pressing and holding Volume Up + Home + Power Key. This will boot your device in recovery mode. It should be TWRP recovery that you just installed.
  11. Now in TWRP recovery, select Install > locate the SuperSu.zip file and flash it.
  12. Once flashed, reboot your device.
  13. Checkout the SuperSu in application drawer. Also install BusyBox from Play Store.
  14. Verify root access using Root Checker.
  15. That’s all. You’re now set to unleash the open source nature of Android.

Transform Any Screen in Android device into a Floating One

0
Transform Any Screen in Android device into a Floating One

We all love to use a Mobile with a bigger, I must say it is fun to see such small things on such a huge set, not to mention if the dpi of that Screen is high, you’ll see some classic and awesome detail in every video, photo and whatever else you are watching on your device. However, there is one thing that everyone, I myself included, hates and it is the reach of your hand and if you have a device bigger than 5.5-inch, it will be quite difficult to use, especially while reaching the Notification and status bar with one hand.

However, the world of Android apps, Mods and Tweaks is so huge, that you have solution to almost all of your problems related to your device and in case of a large screen making it difficult for you to operate the whole device with one hand, can also be solved with the help of some Xposed Modules. However, you must have a rooted device to install the Xposed Framework, then install Xposed Modules in it.

move-any-screen-freely-for-easier-one-handed-use-android.w654

Downloads Required:

Niwatori – One-Handed Mode: Link

Gravity Box: Link

How to Enable Floating Device:

Transform Any Screen in Android device into a Floating One

  1. Install the Xposed Framework first.
  2. Download and Install both of the Modules mentioned above.
  3. Choose Gravity Box based on your Android version.
  4. Activate them both and reboot the device.
  5. Now Open Gravity Box and Navigate to Navigation Bar Tweaks > Master Switch.
  6. Also Enable the Navigation Bar.
  7. Go back and Tap Navigation Key Actions, Here either choose the Menu Key or Back Key, for the Long press action, depends on your Hands.
  8. Now While assigning, Choose Shortcuts instead of Applications and Choose the One Handed Mode Moveable Screen.
  9. Reboot the Device to Confirm the Effect.
  10. Now Long Press the Chosen key and you’ll see the list of applications.
  11. Move freely as you like and Once done, Long Press the Key again to go back.
  12. Enjoy!

How To Run Android Apps On Mac OS X With Andy

2
How To Run Android Apps On Mac OS X With Andy

Android is the most widely used Mobile operating system all around the world at the moment. Android has outgrown Apple’s iOS in many aspects. The reason for being Android so cool is its open source nature that allows developers from all around the world to come up with their ideas and enhance the operating system by means of their very own customization.

Like Apple’s iOS, Android doesn’t restrict the users from going out of boundaries and tweak the OS to a maximum extent. Google’s Play Store, that is the primary source of applications for Android reached a milestone of 1 Million applications recently, that surpassed Apple’s App Store which has around 0.9 Million applications at the moment.

If you happen to get your hands on an Android device, chances are you’re going to stick with some cool games, applications or tools to modify your phone’s performance. You might even get confused picking up the best applications for yourself after coming across the plethora of applications in the Play Store.

There might be 100 applications for one same purpose and there might be 100 games based on one same concept, that you would actually love playing and finding out the best one out of them.

Many users want to enjoy the Android applications while they do not have an Android device and many users run out of memory while loading tons of applications in their phone.

In the aforementioned situation, a solution is required that will help the users to enjoy the avid Android applications without a phone or even when they run out of memory. Some users want to take their Android experience to a bigger screen. All this can be done by means of an Android Emulator on a computer.

That will not only allow non-Android owners to have a taste of Android OS, but it will also sort out storage issues for users who can’t install all of their desired applications on their smartphones.

slide03_x861

Taking Android experience to a PC is pretty easy. We have already explained how you can run Android OS and install Android applications on Windows PC, but a method was required to take Android experience to Mac OS X as well. So, we are here for this purpose right now. We will install Android OS on Mac OS X using Andy Emulator.

After installing this, you will be able to run a virtual device powered with Android on your MacBook or iMAC. You can install all Android applications using Google Play Store within the Andy OS. Playing your favorite Android games on a bigger screen on Mac is worth it. Let’s go ahead and learn how you can do this.

In case you want to have a little bit of an idea about Andy, Andy is the free Android emulator available for Windows & Mac. Andy turned out to be a great rival for Bluestacks, which is the most widely used Android emulator. Unlike other Android emulators, Andy provides a very smooth experience and a much more user friendly UI as compared to Bluestacks.

Using Andy, you can also sync between your Android device and desktop computer or Mac, With this feature you will be able to use your mobile’s application on your computer as well. Other than that, Andy provides the best possible latest version of Android. Andy also provides push notifications.

How To Run Android Apps On Mac OS X With Andy    

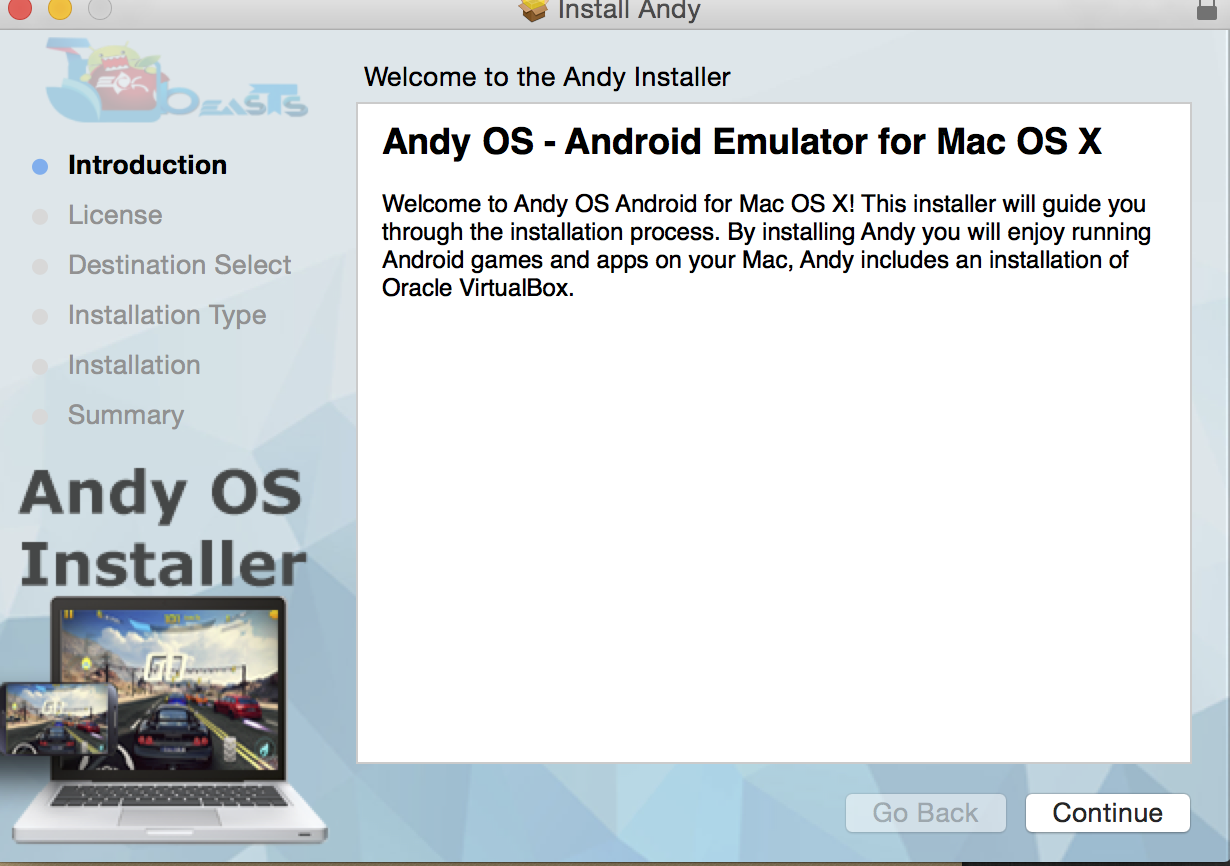
  1. Download Andy OS installer for Mac: Link 1
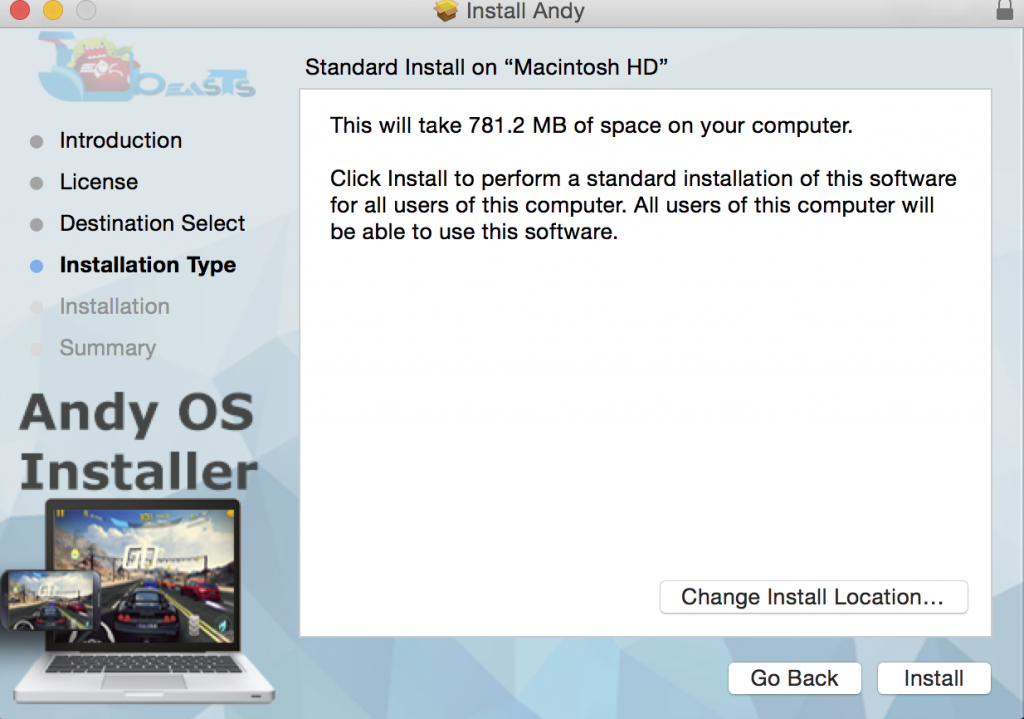
  2. Run the Andy_OSX_vXX.dmg file and install Andy OS on your Mac.
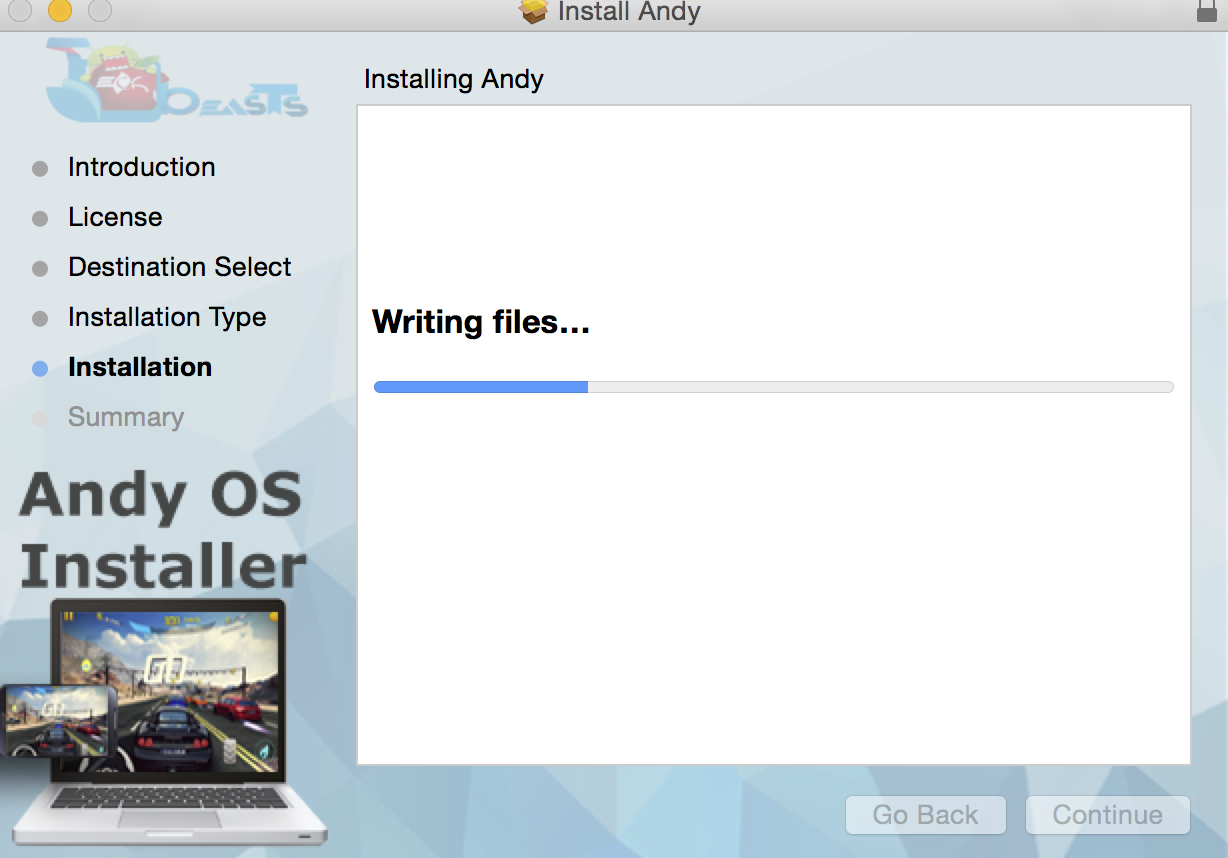
  3. Follow on-screen instructions and finish Andy OS installation. It will take 5 – 10 minutes for the whole process to complete.
  4. Once installation is done, launch Andy from the Launchpad.batch_Screenshot at Apr 29 16-31-32  batch_Andy batch_Screenshot at Apr 29 16-32-04batch_Screenshot at Apr 29 16-32-28
  5. Now you’re in the Android operating system and you need to setup your new Android device.
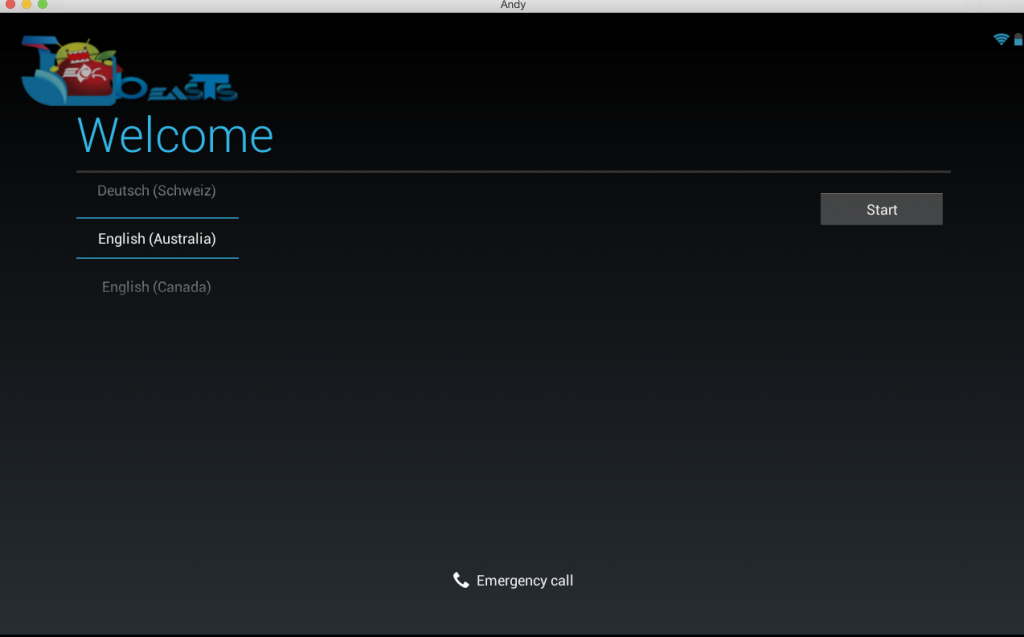
  6. Select your desired language and click on Start.batch_Screenshot at Apr 29 16-34-09
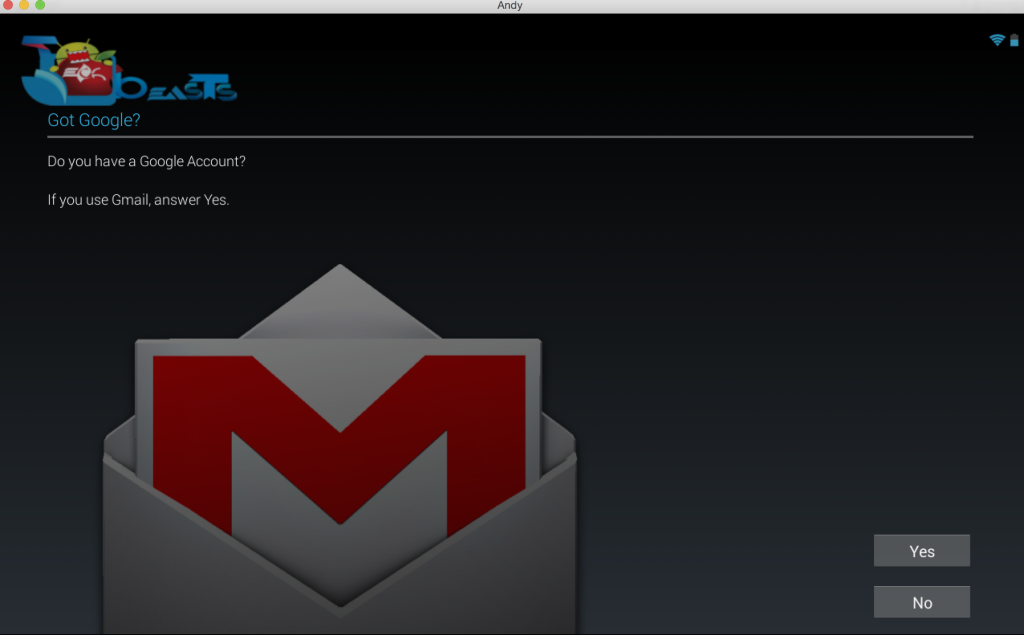
  7. If you have an existing Gmail account, use that to sign in, otherwise click on no and create a new Gmail account to setup Google Play in Andy.batch_Screenshot at Apr 29 16-34-26
  8. Once you have signed-in using your Gmail account, Andy will setup the device for you and display you the homescreen in a few minutes.
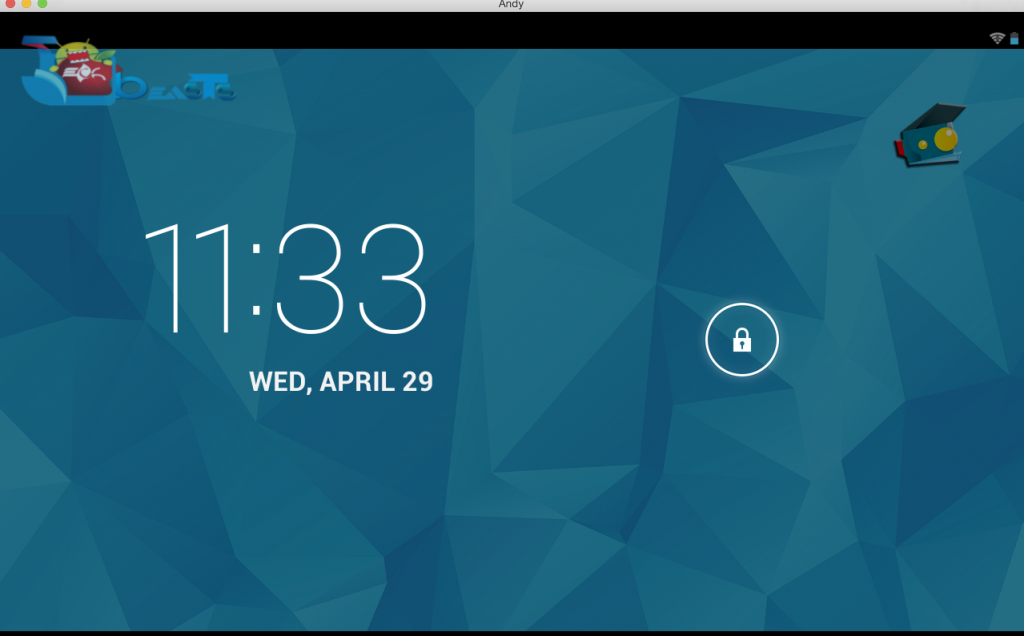
  9. Once you’re in homescreen, unlock your virtual device and click on Google Play Store’s icon in the task bar at the bottom.batch_Screenshot at Apr 29 16-33-44batch_Screenshot at May 16 02-21-02
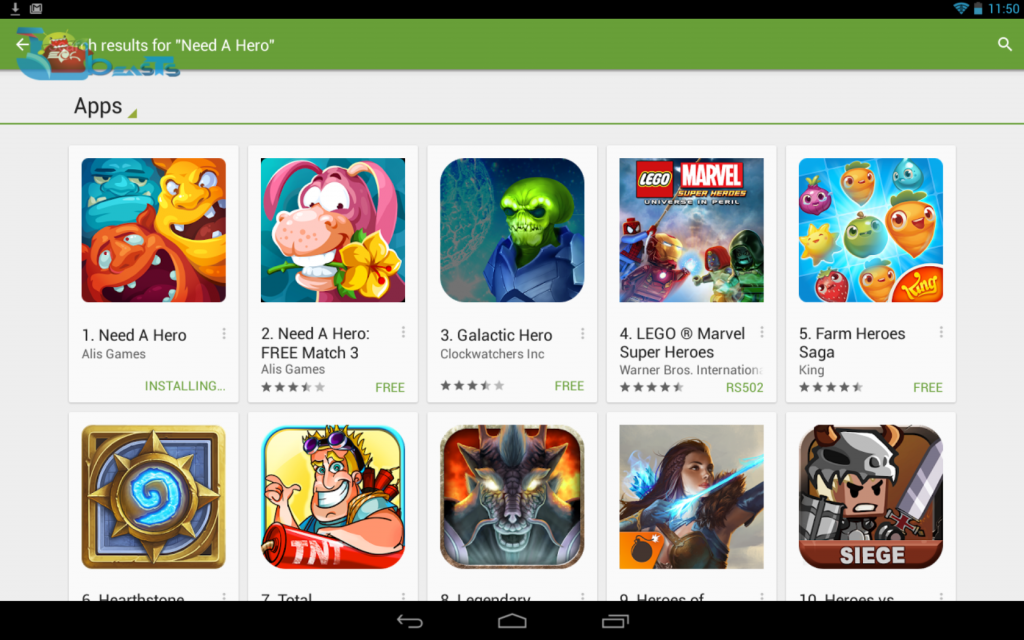
  10. Find your favorite application and install it using the install button in Google Play Store.batch_Screenshot at Apr 29 16-50-57batch_Screenshot at Apr 29 16-50-22batch_Screenshot at Apr 29 16-50-38
  11. Once installed, open application drawer in Andy and find your installed application. If you can’t see your installed application on the main application screen, it is probably in the “Uncategorized” tab. You may find it there.
  12. Open your installed application and follow on-screen instructions to play or use it.batch_Screenshot at Apr 29 16-53-09
  13. That’s all with the Andy OS installation and use on a Mac with OS X.

Got any issues? Don’t hesitate to reach us out through the comment box below!

How To Install Android 5.1.1 Lollipop On Galaxy S3 Mini

51
How To Install Android 5.1.1 Lollipop On Galaxy S3 Mini

Google is rolling out Android 5.1 Lollipop for its new and past flagship devices at the moment and Samsung is lazy enough to give its old devices a look.Galaxy S3 Mini’s life will be stuck with Android 4.1.2 Jelly Bean forever. After Android 4.1.2 Jelly Bean, Android has seen almost 6 iterations. Samsung has left the Mini S3 users in a bit of disappointment making the device’s low-level hardware an excuse for incompatibility with any further Android version. Galaxy S3 brought a lot of business to Samsung’s pocket, and happens to be device chosen by thousands of users. If you also happen to be an S3 Mini owner and you want to give your device a new life by means of a higher Android version, a custom ROM may be a life saviour for you.

New Maclaw studios have been doing this job of bringing some happiness on the faces of S3 Mini owners. We have seen Android 4.3 Jelly Bean, Android 4.4 KitKat and even Android 5.0 Lollipop based on CyangenMod custom ROM coming up for our beloved Galaxy S3 Mini. Maclaw Studios has been managing to come up with stable builds of custom ROMs, that can be kept as daily drivers in the device. The good news is, New Maclaw has done it once again. This time we have the latest and greatest version of Android available for our beloved Mini S3. The new version is Android 5.1.1 Lollipop which is based on CyanogenMod 12.1. The current build is stable and all the major features of the device are found to be working flawlessly.samsung-galaxy-s3-mini-ve-gt-i8200l-

Android 5.1.1 Lollipop contains all the latest features that Google introduced in the very first Lollipop build. The software includes some enhancements over the Android 5.0. Google’s all new Material Design is there. Notifications on lock-screen are there and multi-user, guest modes are included in this OS as well. Running the latest most version of Android is what most of the users want and if you want to do that on your S3 Mini right now, the following guide is going to help you.

We are going to install Android 5.1.1 Lollipop CyanogenMod 12.1 stable custom ROM on Galaxy S3 Mini I8190, I8190N, & I8190L. To be on the safe side, you must follow all these instructions to the letter. If you’re a novice user, you may only proceed if you’re confident about flashing custom ROMs and you know how to handle a mishap occurring with a custom ROM.

Here is what’s working in this ROM

Features

  • RIL (phone/SMS/3G)
  • audio (both speakers/headphones/microphone)
  • Wi-fi
  • Bluetooth 4.0 with LE support A2DP
  • GPS/Glonass/A-GPS
  • sensors
  • compass
  • camera (taking photos and videos)
  • video playing
  • 2D/3D HW Acceleration
  • all native tethers (Wifi/BT/USB)
  • Google Play
  • CPU sleep mode
  • MTP
  • ADB
  • no tearing
  • tripple buffering
  • external storage
  • f2fs filesystem support
  • offline charging

Issues

  • video taken by stock camera app is green, but some apps like Camu taking correct videos without any issues

  • less than 2% of users are reporting issues with mobile data – just add new APN manually with settings proper for your provider and apply it to make 3G working

Early Preparations

  1. This ROM is only for Samsung Galaxy S3 Mini GT-I8190/N/L. Do not try this on any other device, please check your device’s model in Settings > About Device > Model.
  2. Your device must have a custom recovery installed, in case you’re missing it you may Follow our full guide here to install TWRP 2.8 recovery on your Mini S3.
  3. Your device’s battery should be charged at least over 60%. This is highly recommended in order to prevent any power issues during the flashing process.
  4. Make sure that you backup your important media content, ContactsCall Logs Messages. This is highly recommended just in case something goes wrong and you need to reset your phone.
  5. If you already have rooted your device, use Titanium Backup to back up all your important apps + system data.
  6. Also if you are using a custom recovery, it is recommended that you backup your current system using that first. [Just for the sake of safety]. Here’s our full Nandroid Backup guide.
  7. You will have to go through Data Wipes during installation of this ROM, so make sure that you have backed up all the mentioned data.
  8. Make an EFS backup of your phone before you flash this ROM.
  9. You need enough confidence to flash this ROM.
  10. Alright! Go ahead and flash the custom firmware, follow this guide to the letter.

Disclaimer: The methods involved in flashing custom roms and rooting your phone are highly custom and may result in bricking your device, and has nothing to do with Google or the device manufacturer that is SAMSUNG in our case. Also rooting your device will void its warranty and you will be no longer eligible for any kind of free device services by the manufacturers/warranty providers. In case of any mishap we may not be held responsible. Follow these instructions to the letter to avoid any mishap or bricking. Make sure that whatever you do, you are doing it at your own responsibility.

How To Install Android 5.1.1 Lollipop On Samsung Galaxy S3 Mini Using CM 12.1 Custom ROM

  1. Download cm12.1_golden.nova.20150514.zip file.
  2. Download Gapps.zip file for CM 12.
  3. Connect your phone to your PC now.
  4. Copy the both the .zip files to the storage of your phone.
  5. Now disconnect your phone and turn it off complete.
  6. Boot into TWRP recovery now, in order to do so, turn it on by pressing and holding Volume Up + Home Button + Power Key. You should see the recovery mode in a while.
  7. Now in TWRP  recovery, wipe cache, factory data reset and advanced options > dalvik cache.
  8. After wiping all these three, select “Install” option.
  9. Now select “Install > Choose Zip from SD card > Select cm12.1…….50514.zip file > Yes”.
  10. This will flash the ROM in your phone, once done get back to the main menu in recovery.
  11. Now once again select “Install > Choose Zip from SD card > Select Gapps.zip file > Yes”
  12. This will flash the Gapps in your phone.
  13. Reboot your device.
  14. You should see the Android 5.1.1 Lollipop running on your device in a while.
  15. That’s all!

First boot may take up to 10 minutes, you may not worry if it’s taking that much long. In case it’s taking too long, you may boot into TWRP recovery and wipe cache and dalvik cache and reboot your device as it may fix the issue. In case your device is having issues, you may return to your old system using the Nandroid backup or follow our guide here to install stock firmware.

Got any queries? Reach us out through the comment box below.

Credits: Novafusion.pl

Fix Delayed Notifications in Android Devices

0
Fix Delayed Notifications in Android Devices

Although, I never liked the iOS, especially when it comes to updates and their stupid restrictions over every-other thing, however, one thing that I liked in iOS devices from the start is the Quick notifications about the apps and other stuff, something that is not there in Android, however, not with everyone, only  a handful of users have complained that they are having delays while receiving the notifications about updates and messages and other stuff. But that is not permanent, I mean it can be fixed, since it is related with apps only, there are things that can be fixed with doing a little bit if extra caution.

The thing about these delay is that their time vary, sometime it is a matter of seconds and sometimes they take over 15-20 minutes to update you about something. Such time can cause a lot of trouble, especially if you are engage in a epic war of comments with someone, or waiting for a reply. So here we are to tell you How you can fix this Delayed Notification problem, the solutions are simple and easy, so just follow the guide and all is well.

Fix Delayed Notifications in Android Devices

1. Make sure that Power Saving Mode is not doing this.

Most of the times, users turn on the Battery Saving mode, simple cause they want their device to last longer in terms of battery timing, but one thing that Battery Saver does,is that it doesn’t pay attention to every app ,so those who are not included in the List of Battery saver, they are sure to not give you any notifications about it.

2. Let the Background Apps Running.

Now that is something we all do, after a little use we have a tendency to kill all the apps running in the Background. This simply clear the App and it will have to start from the Scratch, doing so will stop the app working and everything that is related with it, including the notifications.

3. Control the Android Heartbeat Interval.

Android Heartbeat Interval simply means the time taken to reach the Google Messaging servers to start the Push Notifications of several apps. By default that time is 15 minutes on Wi-Fi and 28 minutes on 3G/4G. This might work for most of us, but some are not comfortable for such long time. Push Notifications Fixer is an app for rooted devices, that helps you in changing this Heartbeat interval to lesser or more time. Download, Install it and do however you like.

Change App Icons and Apk File Names in Android

0
Change App Icons and Apk File Names in Android

If it is Android and you don’t mess with it, it simply means that you are not happy, we can easily say that whoever brought Android in this world was a genius, but those who took the whole thing to another level are even bigger geniuses. From customization in the root of your OS to the looks of your OS, is not something that you can find easily. Looks can still be managed but changing in the root of your OS is not something that every OEM support. While themes allows you to change the look-out of your Interface, there are fewer applications that lets you change the looks individually, I mean lets say you want to change the Icon of your Facebook application, but individually no app lets you do that.

Then we have app cloning, where we have the app of same name and might be the same icon, then it becomes difficult to know which app you want to launch. Therefore, to make things easier we have to make sure that either the names of apps should be different or the icon must be different. Apk Editor allows you to do a lot of stuff like this, however, if you are not familiar with it, then pay more attention towards what we are doing. In this article we will show you how to Change App Icons and Apk File Names in Android, without further ado let us continue.

Change App Icons and Apk File Names in Android

Downloads Required:

Apk Editor: Link

Java Runtime Environment: Link

How to Use Apk Editor:

Change Apk Name:

  1. Download and Install the Editor.
  2. Open and Drag the Apk file to it.
  3. Once the app is read Successfully, Click the Properties tab.
  4. Click the name and Change it, Change the Mode to Apktool instead of QuaZIP.
  5. Click Pack APK to remake the Apk with new name.

Change Apk Icon:

  1. After the apk is read successfully, you’ll see different dimensions of the icon.
  2. Dimension size depends on which Mobile it will be installed.
  3. Right-Click and choose the image you want to use as icon.
  4. The size will be automatically changed.
  5. Finally Re-Pack the apk and install it on your device to see whether it has changed or not.

Install TWRP Recovery & Root Galaxy Tab 4 T230/T235

Install TWRP Recovery & Root Galaxy Tab 4 T230/T235

Samsung Galaxy Tab 4 is one of the best Android-powered tablets of the day.  Tab 4’s 7.0 variant has got a 7.0-inch display with 800 x 1280 pixels on its front. Samsung has added its Exynos 3 3470 Quad Core CPU clocked at 1.2 GHz to power up this device. A RAM of 1.5 GB is plugged inside. Internal storage is either 8 GB or 16 GB, there’s a microSD card slot onboard. under the hood, a massive 4000 mAh battery is placed. These specifications are what a usual user would love to see in an Android phone, but Samsung has provided these in a Tablet to make it a great choice. Galaxy Tab 4’s Android 4.4.2 KitKat with Samsung’s new TouchWiz UI gives the software a smooth feel.

If you are a Tab 4 7.0 owner and you are not happy with its current software, you may want to tweak it a little bit by means of a custom ROM, by applying a MOD or by installing root specific applications. For installing anything custom on your Galaxy Tab 4 7.0, you will have to go out of boundaries and to break the barriers, you will need a custom recovery running on your device along with root access. If you have no idea about both these things, then the following guide is definitely for you. We are about to install TWRP 2.8 on our beloved Galaxy Tab 4 7.0 SM-T230 & its LTE variant SM-T235. Once installed TWRP recovery, we will gain the root access as well. Let’s go through some pre-installation instructions and then do the process.Samsung-Galaxy-Tab-4

Early preparations & instructions

  1. After following this guide, you will be done with
    1. TWRP Recovery & Root For Galaxy Tab 4 7.0 SM-T230 & SM-T235
  2. Do not try this guide on any other device. Check your device’s model number under settings > general / more > about the device. Trying this method on any other device will result in bricking it.
  3. Make sure that your phone’s battery is charged at least over 50%. This is recommended in order to avoid power issues during the installation process.
  4. Enable USB debugging mode on your device. To do so, you need to enable developer options first. Go to settings > system > about device > tap build number for 7 times. You will have developer options enabled under settings > system > developer options. Open developer options now and enable USB debugging mode.
  5. Use original data cable to establish a connection between your PC and your phone.
  6. While using Odin3, disable Samsung Kies, Windows Firewall or any Anti-Virus if you’ve enabled.
  7. To be on the safe side, backup your contacts, call logs, text messages and copy the important media content to your PC.
  8. Download the files properly for your device and follow the instructions to the letter to avoid a mishap.

Disclaimer: The methods involved in flashing custom recoveries, roms and rooting your phone are highly custom and may result in bricking your device, and has nothing to do with Google or the device manufacturer that is SAMSUNG in our case. Also rooting your device will void its warranty and you will be no longer eligible for any kind of free device services by the manufacturers/warranty providers. In case of any mishap we may not be held responsible. Follow these instructions to the letter to avoid any mishap or bricking. Make sure that whatever you do, you are doing it at your risk.


Required Downloads & Installations

How To Install TWRP Recovery & Root Galaxy Tab 4 7.0

  1. Copy SuperSu.zip file to your phone’s internal or external storage.
  2. Open Odin3 V3.10.6.exe that you extracted on your PC.
  3. Put your tab in download mode now. To do so, turn it off completely. Now turn it on by pressing and holding Volume Down + Home + Power Key. Once your phone boots up, press the Volume Up key to continue.
  4. Connect your phone to your PC now. The ID:COM box in the top-left corner of Odin3 should  turn blue. This indicates that your phone is connected properly.
  5. Now click the “AP” tab in Odin and select the twrp-2.8.0.1-degas.tar file. It will take a second or two for Odin3 to load this file.
  6. If the Auto-reboot option is unticked, tick it. Leave all other options in Odin3 as they are.Odin 3.10.6 Explained_Techbeasts
  7. Now you’re all set to flash the recovery. Just click the start button in Odin3 and sit back.
  8. Once the process box above ID:COM box shows green light and flashing process is finished, disconnect your device. Let it reboot
  9. Now turn off your device properly as we are going to boot into recovery mode.
  10. Now turn it on by pressing and holding Volume Up + Home + Power Key. This will boot your device in recovery mode. It should be TWRP recovery that you just installed.
  11. Now in TWRP recovery, select Install > locate the SuperSu.zip file and flash it.
  12. Once flashed, reboot your device.
  13. Checkout the SuperSu in application drawer. Also install BusyBox from Play Store.
  14. Verify root access using Root Checker.
  15. That’s all. You’re now set to unleash the open source nature of Android.

Update Galaxy Core Prime G360F To Official Android Lollipop 5.0.2

0
Update Galaxy Core Prime G360F To Official Android Lollipop 5.0.2

Galaxy Core Prime, also known as Galaxy Win 2 Duos has started receiving Android 5.0.2 Lollipop. This is quite a surprise from Samsung as the Galaxy Core Prime is the very first low-bugdet Galaxy to get the sweetness of Android Lollipop. As usual, this update also rolled out in Poland first of all and is yet to make its way to other regions. The update carries all the changes which Google introduced in the 5th iteration of Android. A new UI in accordance with the Material Design is there. On-lockscreen notifications, multi-user and guest modes and core enhancements have been made. Android 5.0.2 Lollipop is worth having on a device like Galaxy Core Prime as it will completely give the device a new life.Samsung-Galaxy-Core-Prime

This update is available through Samsung KIES or through OTA and that too in Poland only. If you’re living in another region and you want to update your device, you may have to wait for a while. But if you can’t keep patience and you want to get this update right away, then you can  update your device manually. Installing Android 5.0.2 Lollipop on your Galaxy Core Prime is pretty easy using Odin3, which is Samsung’s flashtool for installing stock fimrware. If you are wondering about the method, you may scroll down and get the comprehensive guide to install latest Android 5.0.2 Lollipop G360FXXU1BOD9 official firmware on your Galaxy Core Prime G360F. Before you proceed, please keep in mind that this firmware is official and it will not result in damaging your device in anyway.

Early Preparations & Precautions

  • This guide is only for the Galaxy Core Prime G360F . Do not try this on any other device. Make sure that you check your device’s model number in settings > system > about device.
  • Make sure that your batter has 50% of its battery. This is recommended in order to avoid any power issues during the installation process.
  • Enable USB debugging on your device. To do so, you need to enable developer options first by going to settings > system > about device > tap build number for 7 times. Once you’ve the developer options enabled under settings > system > developer options > enable USB debugging.
  • Backup all of your important stuff. This includes contacts, call logs, text messages and your important media content. This is important since you need to wipe your phone to achieve a neat and clean installation.
  • Make sure that you’ve backed up your EFS partition [Strongly recommended].
  • If your device has a custom recovery installed previously, you may create a Nandroid backup. Otherwise, skip this step.
  • Factory reset your phone by booting into recovery mode. To do so, turn off your phone completely. Now turn it on by pressing and holding Volume Up + Home + Power Key. Once you’re in recovery mode, wipe factory data.
  • While using Odin3, turn off Samsung Kies if you’ve installed it. Also turn off your Firewall or any Antivirus software if enabled.
  • Use original data cable to establish connection between your device and your PC.
  • This is official firmware and it won’t void the warranty of your phone. It will not cause any damage to your phone either.
  • Follow these instructions to the letter to make it happen successfully.

Required Downloads

  1. Download & Install Samsung USB drivers. MAC users do not need to install drivers or Samsung Kies.
  2. Download & extract Odin3 v3.10.6. MAC users may use JOdin.
  3. Download & extract firmware for your device.

How To Update Galaxy Core Prime G360F To Android 5.0.2 Lollipop Official Firmware

  1. Make sure that you’ve carefully prepared according to the instructions listed above. Also make sure that you’ve made the necessary downloads and installs as explained.
  2. Open Odin3 V3.10.6.exe on your PC. MAC users will use JOdin.
  3. Connect your phone to your PC or MAC in download mode now. To do so, turn off your phone completely first. Now turn it on by pressing and holding Volume Down + Home + Power Key. Once your phone turns on and shows you warning, press Volume Up to continue. You are in download mode now. Plug in the data-cable now. As soon as Odin3 detects your phone, the ID:COM bar in the top-right corner should turn blue or yellow depending upon your version of Odin.
  4. Load the downloaded and extracted firmware file, which should be in .tar format. To do so, click the “AP” tab and locate the extracted .tar firmware file. If you’re using an older version of Odin, you will use “PDA” tab to load the firmware file. Once you’ve selected the file, it will take a while for Odin to load it. Wait patiently at this point.
  5. If the Auto-reboot option is un-ticked, tick  it. Leave all other options as it is. The picture below can explain you further.Odin 3.10.6 Explained_Techbeasts
  6. Once you’re done with it according to the steps explained above, you’re set to flash the firmware now. Simply click the “Start” button now.
  7. This will start flashing the firmware on your device. It will take a few minutes for Odin to complete installation. Once the installation is finished, Odin will show “Finished” status in the installation box, the ID:COM bar will turn green now. Your device will reboot automatically if you ticked the Auto-reboot option before the installation. Disconnect your device now.
  8. If your device doesn’t reboot automatically, you may reboot it manually now. To do so, disconnect it from your PC and keep the power key pressed for a while and your device will turn off. Now turn it on by pressing power key only.
  9. For the first boot it may take up to 10 minutes, so hold on tighter. Once your device boots up, set it up and enjoy the all new Android 5.0.2 Lollipop on it. That’s all 🙂

If you’re stuck with anything or facing any issues, make sure that you reach us out through the comment box below. We’d love to help you out. Thank you 🙂