Home Blog Page 361

How To Use Whatsapp Web Client For iPhone

0
How To Use Whatsapp Web Client For iPhone

Good news for iPhone users; Whatsapp Web Client is now officially available for IPhone and has started to roll out today. So now, you no longer need to use jailbreak in order to access Whatsapp Web Client.

whatsapp web for iPhone

Whatsapp Web Client basically makes it convenient for you to chat with your friends from your desktop. The services provides completes features as for the mobile devices with the ability to share photos and videos, audio files and more. Also, it sends you instant notifications for new messages just like on the phone.

How To Use Whatsapp Web Client For iPhone:

#1:To begin with, You need to go to the settings menu for Whatsapp and tap on the ‘Whatsapp Web’ option.

whatsapp web for iPhone

#2:Having done that, you will be required to head to the webpage that is ‘web.whatsapp.com’. 

#3:Scan the QR code that you see on the webpage.

Screen Shot 2015-08-21 at 17.01.35

#4:The developer has also made the option available to the user to enable or disable the tweak as they wish. The Tweak also includes some minor bug fixes.

#5: All Done enjoy the WhatsApp Web Client on iPhone.

The update for iPhone has started rolling out today and is still in the process. For the people who are not able to see the Whatsapp web option yet, you need to remain patient and wait for the roll out to reach your device.

How To Install Android 6.0 Marshmallow On Nexus 5, 6, 9 or Nexus Player [Preview 3]

1
How To Install Android 6.0 Marshmallow On Nexus 5, 6, 9 or Nexus Player [Preview 3]

Google has officially announced the name and version number of next iteration of Android. The announcement came from Google’s developer blog officially yesterday, Google also unwrapped the new Android Marshmallow Android statue at its HQ. The highly anticipated Android M stands for Android Marshmallow and the version number is going to be Android 6.0. Android M 6.0 focuses on core Android system enhancements. It brings better security, better battery life and better performance. Back in May, when Google announced Android M, it allowed its Nexus users to taste the under development developer previews. Google soon rolled out the 2nd developer preview images and now with the name and version number announcement, Google pulled out the 3rd preview of Android Marshmallow. The 3rd Android M preview contains fixes to the bugs found in previous preview builds, and is much secure to flash as compared to preview 1 and 2.

It’s obvious that whenever Google will release the very first full Android M images, the Nexus devices will be the first ones to get it, but if you still can’t wait for the update to roll out officially, you can get your hands on the upcoming Android M by flashing the Android M 3rd preview images via ADB tools. The images are safe to flash, you can easily revert back your system in case something goes wrong. In case you’re wondering how you will flash the images or if you’re new to the term ADB, you may not worry at all as we are going to show you the complete process in the following tutorial.Android M

We are going to show you how you can install Android 6.0 Marshmallow Preview 3 on your Google Nexus 5, Google Nexus 6, Google Nexus 9 and Google Nexus Player. Let’s go ahead without any further ado and get it done now.

Here are some pre-requisites in order to make this installation safe and secure

  1. This guide is only for Google Nexus 5, 6, 9 and Nexus Player. Do not try this tutorial on any other device. It may result in bricking it.
  2. Your phone’s battery should be charged at least over 50%. This is recommended in order to avoid power issues during the flashing process.
  3. Enable USB debugging mode on your device. You have to enable developer options first. You can do so by going in to settings > tap build number for 7 times. Now you will have developer options in settings. Open developer options > Enable USB debugging.
  4. Backup all your important contacts, text messages and call logs. Also copy your media content to your PC. Backup is recommended as your device will be wiped during the flashing process.
  5. Download and install latest Google USB drivers. Installation of these drivers will be a little different. Download the file from the attached link and unzip it. Now connect your phone to your PC. Right click “Computer or This PC > Click on Manage > Device Manager > Find your device i.e. Nexus 5 or Nexus 6 > Right click Update driver > Browse My Computer For Driver Software > Locate and select the Google USB folder that you got after unzipping > select install now”.
  6. Once the installation has been completed, your device will be shown as Android  Composite ADB Interface.
  7. Download and install Minimal Android ADB & Fastboot drivers on your computer.

Download Android M Developer Preview image file according to your phone.

Extract the downloaded image file to get the following files:

  • flash-base.sh
  • flash-all.sh
  • flash-all.bat
  • bootloader
  • radio

How To Install Android M Developer Preview Now:

  1. Copy all the .img files from the extracted folder to Minimal ADB & Fastboot Folder in C>Program Files > Minimal ADB & Fastboot folder.
  2. Now connect your Nexus device to your PC. Make sure that you’ve followed all the pre-requisites prior to this step.
  3. Now open Minimal ADB & Fastboot.exe file from the shortcut on your desktop or from the Minimal ADB & Fastboot folder under program files in your Windows drive.
  4. To verify your device’s connection with your PC issue this command:

    adb devices

  5. It should show you the list of attached devices followed by a code.
  6. Once you’ve verified the connection, issue the following command and press enter: adb reboot-bootloader
  7. Your Nexus will now reboot into bootloader mode.
  8. Once done, navigate to the folder where you extracted the contents of downloaded zip file.
  9. From the extracted files, run the script “flash-all.bat”.
  10. Follow on-screen instructions and sit back while it flashes Android M Preview 3 on your Nexus.
  11. That’s all. Your Nexus will now boot into the newly installed Android M Developer Preview.

Download Don’t Get Fired! for PC [ Windows 7, 8 , 8.1,10 and Mac ]

0
Download Don’t Get Fired! for PC [ Windows 7, 8 , 8.1,10 and Mac ]

In the following guide, I’ll tell you how to download and install Don’t Get Fired! for PC [ Windows 7, 8 ,8.1 ,10 and Mac ]. Don’t Get Fired! is a role playing game where you have to play a character who has nothing, and he has work it up to be the boss. Don’t Get Fired! is based on the reality of the world, what you have to face in order to be a successful business man. Before going any further let get give you an overview on Don’t Get Fired! features.

Don’t Get Fired! On Your PC

Download Don’t Get Fired! On Your PC [ Windows 8,8.1,10,7 and Mac ]:

  • Download Don’t Get Fired Apk
  • Follow this guide on Remix OS Player to play Don’t Get Fired for PC now.

Don’t Get Fired Info:

‘Don’t get fired!’ has finally arrived!

For all job seekers!!
‘Don’t get fired!’, is a survival game where you get to play a character who has no money, no connections whatsoever. You need to make him climb up the company ladder from an ‘intern’ to the ‘president’.

You can play ‘Don’t get fired!’ for free! Experience the extremely harsh working conditions in Korea with simple control!
How many companies will you have to go through to become the president?

To all tired, and frustrated job seekers and contract workers!
Make your dream come true in this game!
Until you get to the top of the ladder…
Don’t. get. fired!


Disable automatic app updates in Windows 10 [ How To ]

0
Disable automatic app updates in Windows 10 [ How To ]

In the following guide, I will tell you how to disable automatic app updates in Windows 10, automatic updates come handy in many ways but also it can be harmful. Main reason to disable automatic updates on Windows 10 is that they slow up our PC, every time our PC boots up it will install the updates first then you can proceed on.

disbale windows 10 automatic app updates

Disable automatic app updates in Windows 10:

All you have to do is follow all the steps as mentioned in the order, this method is specifically for Windows Store app.

disbale windows 10 automatic updates

Step #1: Login in to your PC and launch the Windows Store app.

Step #2: Now look in the top right corner and click on your profile icon.

Step #3: Click on Settings form the menu.

Step #4: Now scroll down and click on ‘App Updates’.

Step #5: You’ll be in App Updates page, Toggle off the ‘Update Apps Automatically’ settings.

All Done! You have successfully disabled the Windows 10 Automatic app updates. If you face any issue regarding this guide do tell me in comments.

Android M is Android 6.0, M Stands For Marshmallow – Official Now

0
Android M is Android 6.0, M Stands For Marshmallow – Official Now

Another set of rumors, anticipations and speculations finally comes to an end. Google finally broke the silence and announced the name of its next Android version. Just last Friday, Google teased a video in which it asked its users about What M is going to be?. The expectations regarding the unveiling of Android M’s name and version number were getting high around this time, and it’s finally here. The announcements comes officially from Google’s blog, Android M’s name has been revealed and M stands for Marshmallow. Google pulled the covers off from its new Google Statue at its HQ. The new statue a big white Marshmallow.android-marshmallow-002

Google continues its love for candies and sweets, so Marshmallow is going to spread sweetness among Android users now putting Lollipop behind. Another big announcement regarding Android M is that, it is going to be the 6th iteration of Android. That means Android Marshmallow is going to be Android 6.0. Just in case you’re considering Android Lollipop 5.1.1 the greatest version of Android, it may be the time to change your mind.

Final Android 6.0 SDK is now available for download. Developers can now download this API in Android studio and make their applications compatible with the latest version of Android. At the moment, the developer preview images of Android M (updated versions) are available for Google Nexus devices. The official release date of Android M is unknown yet, but we expecting Google to push Android M after a month or two. Android M might be coming out of the box along with the next Nexus device.

Android M is going to focus on core system enhancements. You may read about what’s new Android M in our previous post here. Here’s a list of Google’s love for candies and sweets, and a flashback of previous Android versions.

  • Cupcake (1.5)
  • Donut (1.6)
  • Eclair (2.0–2.1)
  • Froyo (2.2–2.2.3)
  • Gingerbread (2.3–2.3.7)
  • Honeycomb (3.0–3.2.6)
  • Ice Cream Sandwich (4.0–4.0.4)
  • Jelly Bean (4.1–4.3.1)
  • KitKat (4.4.2 – 4.4.4)
  • Lollipop (5.0 – 5.1.1)
  • Marshmallow (6.0 – ^^)

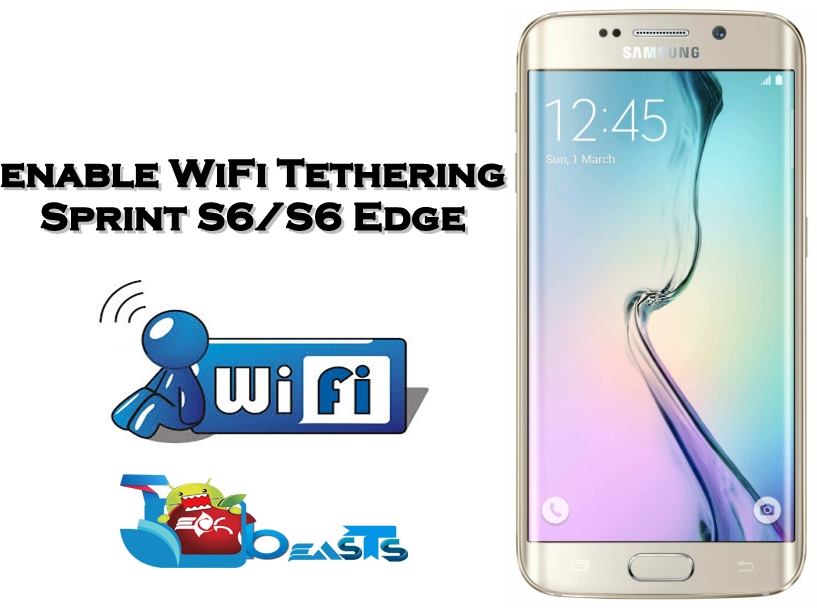
How To Enable WiFi Tethering On Sprint Galaxy S6, S6 Edge

2
How To Enable WiFi Tethering On Sprint Galaxy S6, S6 Edge

Samsung’s Galaxy S6 and S6 Edge are Samsung’s most powerful and most beautiful flagship devices so far. Both these devices may be Samsung’s very first devices to have a premium build and design. Galaxy S6 & S6 Edge come under a hefty price tag, but you can get any of these devices on-contract from any carrier like At&t, Sprint, Verizon, T-Mobile or any other.

Carriers allow you to own an expensive device on-contract by paying a very little amount initially, but you’ve to face some limits as well. These are the days of internet, and LTE, 4G and 3G are almost used by everyone, that’s why carriers provide unlimited or heavy data buckets. But carriers do not allow you to use your device’s data plan on any other device. This may kill one of the main utilities of a smartphone like S6 or S6 Edge. Owning a carrier branded device won’t let you use WiFi Tethering, so you will be restricted to use all of your data plan on your smartphone only. Even if some emergency arrives and you got to use your smartphone’s internet on any other smartphone or computer, you won’t be able to make your device act as a WiFi hotspot due to this restriction set by carriers. At times, you’re not able to finish the complete bucket while you’ve paid for it, the best way to consume it to use the internet on a computer by making your smartphone act as a WiFi router.samsung_galaxy_s6_s6_edge

This may disappoint some users, but there’s a good news for Sprint Galaxy S6 or S6 Edge owners. By making a small tweak, they can easily enable WiFi Tethering/Hotspot on their smartphone. Wondering how? Well, you will learn it in the following guide. Let’s go ahead now and learn how you can enable WiFi Tethering / Hotspot on your Sprint Galaxy S6 or S6 Edge and rip this limit off.

How To Enable WiFi Tethering On Sprint Galaxy S6, S6 Edge – No Root

Step#1: First of all, you need to acquire your MSL code. You can get this code by calling sprint customer support and ask them to give you your MSL code giving an excuse of slow internet connectivity. You can also use MSL Utility application to get this code.

Step#1: Now open dialer on your Sprint Galaxy S6, S6 Edge.

Step#2: Dial this code: ##3282# (##Data#)

Step#3: You will come across some configuration. Change the APN type of APNEHRPD internetand APN2LTE internet from default,mms to default mms,dun.

Step#4: Once done, reboot your device.

Step#5: Now open settings > connections > you will now see Tethering and Mobile hotspot here. Use this option to make your Android smartphone a WiFi hotspot.

That’s all.

Let us know if this method worked for your Sprint Note 4 and Note Edge or not.

How To Enable WiFi Tethering On Sprint Galaxy Note 4, Note Edge

4
How To Enable WiFi Tethering On Sprint Galaxy Note 4, Note Edge

Smartphones are meant to be smart as long as there’s internet connectivity on it that would help the person to connect to the world. Smartphones are meant to serve almost all computing needs, that a person would do primarily using a laptop. This may include emails, surfing social media websites, watching videos etc. These days, a smartphone is not only used to connect to the internet on it, but a smartphone can also help you to connect your other devices to the internet. Different carriers in different countries offer nice LTE, 3G plans, which are much more faster then an ordinary internet connection. If you have an LTE or 3G enabled smartphone, you can most likely use your data plan to connect your other devices to the internet, this is possible by making your smartphone a WiFi router.

Most of the latest smartphones this capability named as WiFi tethering. Activating WiFi tethering helps your smartphone to act as a WiFi hotspot. You can connect to your carrier’s internet through your laptop or any other smartphone by means of this WiFi hotspot. A high end device like Galaxy Note 4, or Note Edge sure has this feature, but only if you acquire an unlocked one.

Carriers offer Note 4 and Note Edge at a much cheaper on-contract price, but there’s a down-side. Getting your hands on a carrier branded Note or Note Edge will also have certain limitations. While an unlocked handset costs a hefty amount, most of the users go with on-contract carrier branded smartphones. One of the most irritating limit you’re going to face is, carriers lock this WiFi tethering feature in their smartphones, and users’s are not able to use the internet of their smartphone on any other device. This is done by carriers to restrict their users from avoiding the full-swing use of 4G LTE or 3G data plan. Most of the users are not able to finish their data plan because of a very less usage on the smartphone, they can finish their data buckets by consuming this internet on a computer or any other device. This restriction is put by carriers like At&t, Sprint, T-Mobile, Verizon and others.20140928T043934

If you’re going to get your hands on a Sprint Galaxy Note 4 or Note Edge, you’re probably going to be happy laying off this restriction right away. Wondering how? Well, we have the method right here for you. In the following guide we are going to show you how you can enable WiFi Tethering/Hotspot on your Sprint Galaxy Note 4 or Galaxy Note Edge.

How To Enable WiFi Tethering On Sprint Galaxy Note 4, Note Edge – No Root

Step#1: First of all, you need to acquire your MSL code. You can get this code by calling sprint customer support and ask them to give you your MSL code giving an excuse of slow internet connectivity. You can also use MSL Utility application to get this code.

Step#1: Now open dialer on your Sprint Note 4 or Note Edge.

Step#2: Dial this code: ##3282# (##Data#)

Step#3: You will come across some configuration. Change the APN type of APNEHRPD internet and APN2LTE internet from default,mms to default mms,dun.

Step#4: Once done, reboot your device.

Step#5: Now open settings > connections > you will now see Tethering and Mobile hotspot here. Use this option to make your Android smartphone a WiFi hotspot.

That’s all.

Let us know if this method worked for your Sprint Note 4 and Note Edge or not.


Install TWRP & Root Sprint Galaxy Tab S 10.5 T807P On Android Lollipop

Install TWRP & Root Sprint Galaxy Tab S 10.5 T807P On Android Lollipop

Galaxy Tab S 10.5 under Sprint’s umbrella comes as SM-T807P. Sprint also updated its Tab S 10.5 to latest Android 5.0.2 Lollipop few months back. The new firmware brings new UI and some core enhancements. Google’s changes in the Android Lollipop made it a bit difficult to root. Previous Android versions were much easier to root.

When Android 5.0.2 rolled out for Sprint Galaxy Tab S, at that time there was no method to root this device which caused some a little inconvenience for Android power users. If you’re one of the power users who has been willing to root the Tab S 10.5 by Sprint running Android 5.0.2 Lollipop, you may avail this chance now.

TWRP recovery is now available for the Tab S 10.5 SM-T807P. Now that the custom recovery is there, that means you can flash files using this custom recovery. You can easily flash SuperSu.zip file on your Tab S 10.5 using TWRP recovery and root it right away. Just in case you’re going to root your device for the first time, you may want to know a little bit about the advantages of root access.

Rooting your Tab S 10.5 will help you to remove bloatware, create an EFS and Nandroid Backup, install root specific applications to bring new features to your Tab and enhance performance, the battery life of your device. There’s a lot more you can do with your device after rooting it. The custom recovery has its advantages is well, it will not only allow you to flash custom files, but it will also allow you to create Nandroid backup, wipe cache an dalvik cache, mount your phone as a USB drive while you’re in recovery mode and a lot more.

Install TWRP & Root Sprint Galaxy Tab S 10.5 T807P On Android Lollipop

We’ve already posted a method to root other variants of Tab S 10.5 running Android Lollipop. In the following post, we are going to teach how you can install TWRP recovery and root your Sprint Galaxy Tab S 10.5 SM-T807P. Let’s go ahead without any further ado and root the device now.

Preparations

  • This guide is only for Sprint Galaxy Tab S 10.5 T807P. Do not try this on any other device.
  • Charge your device up to 50%.
  • Use original data cable to establish a connection between your PC and your phone.
  • Backup your important data as a safety measure.
  • Follow this guide to the letter to avoid any mishap.

Disclaimer: Flashing custom recovery and rooting the device void its warranty. In case of a mishap, TechBeasts or Samsung may not be held responsible. Make sure that you’re doing everything at your own risk and with your full understanding.

Required Downloads:

Install TWRP & Root Sprint Galaxy Tab S 10.5 T807P On Android Lollipop

  1. Open Odin3 V3.10.6.exe that you extracted on your PC.
  2. Put your Tab S 10.5 in download mode now. To do so, turn it off completely. Now turn it on by pressing and holding Volume Down + Home + Power Key. Once your phone boots up, press the Volume Up key to continue.
  3. Connect your phone to your PC now. The ID:COM box in the top-left corner of Odin3 should turn blue. This indicates that your phone is connected properly.
  4. Now click the “AP” tab in Odin and select the TWRP Recovery.tar file that you downloaded. It will take a second or two for Odin3 to load this file.
  5. If the Auto-reboot option is unticked, tick it. Leave all other options in Odin3 as they are.Odin 3.10.6 Explained_Techbeasts
  6. Now you’re all set to flash the recovery. Just click the start button in Odin3 and sit back.
  7. Once the process box above ID:COM box shows a green light and flashing process is finished, disconnect your device.
  8. Now turn off your device properly as we are going to boot into recovery mode.
  9. Now turn it on by pressing and holding Volume Up + Home + Power Key. This will boot your device in recovery mode. It should be the TWRP recovery that you just installed.
  10. Now in TWRP recovery, select Install > locate the SuperSu.zip file and flash it.
  11. Once flashed, reboot your device.
  12. Check out the SuperSu in the application drawer. Also, install BusyBox from Play Store.
  13. Verify root access using Root Checker.
  14. That’s all. You’re now set to unleash the open source nature of Android.

Stuck with anything? Reach us out through the comment box below!

Credits: ashyx

Download Beautiful MIUI 7 Stock Wallpapers

Download Beautiful MIUI 7 Stock Wallpapers

MIUI is one the reasons that makes Xiaomi a lot respectable. The beautiful UI adds a lot of charm to Xiamoi’s smartphones. Just a few days back, Xiaomi announced its cheap feature-rich Redmi Note 2 which featured Xiaomi’s new UI, the MIUI 7 atop of the list. MIUI is based on Android 5.1.1 Lollipop. New UI offers plethora of new themes, graphic elements and visualizations. In this new UI, Xiamoi added a number of cool wallpapers which take the beauty of new interface to a whole new level. After seeing the MIUI 7 stock wallpapers, I wasn’t able to resist and wanted to get all those wallpapers for my smartphone right away. And now is the time to share all those wallpapers with our loyal users.

We’ve collected all Xiaomi MIUI 7 stock wallpapers and listed here. All these wallpapers are in high resolution. You can go ahead, choose your favorite wallpaper, click to open it and then right click > save image as. You can also download all wallpapers from the all-in-one link attached at the bottom. Don’t forget to check our wallpapers repository to grab more cool wallpapers.

Download All MIUI 7 Stock Wallpapers

Aslo Check: Download Galaxy Note 5, S6 Edge Plus Stock Wallpapers


Download Galaxy Note 5, S6 Edge Plus Stock Wallpapers

Download Galaxy Note 5, S6 Edge Plus Stock Wallpapers

Samsung pulled its latest beasts, the Galaxy Note 5 and Galaxy S6 Edge Plus out of the curtains just 2 days ago. Both these devices sport top-notch specifications of the present time and leave no competitor to stand in line. Samsung has equipped both these devices with a beautiful 5.7 inch QHD display with a resolution of 2560 x 1440 pixels and 518 ppi. These devices occupy Super AMOLED screens. The display is way beautiful, crispy and eye-soothing. Galaxy Note 5 and S6 Edge’s screens develop beautiful colors. Samsung used 6 different wallpapers to add some more charm to the display of these devices. It’s going to take a while for Samsung to push the Galaxy Note 5 and S6 Edge Plus to all the regions this time, so you may want to get your hands on some components of the device and enjoy for a while.

What we have for you here are all the stock wallpapers from the Galaxy note 5 and Galaxy S6 Edge. These wallpapers are in 2560 x 2560 resolution. You can use these wallpapers on your Android smartphone or tablet, or any other device. Go ahead and right click on your favorite wallpaper > select save image as. You can also grab all wallpapers from the all-in-one link attached below.

Techbeasts_Note5_S6Edge (3) Techbeasts_Note5_S6Edge (4) Techbeasts_Note5_S6Edge (5) Techbeasts_Note5_S6Edge (6)Screenshot_2Screenshot_3


Download All Galaxy Note 5 & S6 Edge Stock Wallpapers

Root Samsung Galaxy Tab A T550/T555, P550/P555 On Android Lollipop

1
Root Samsung Galaxy Tab A T550/T555, P550/P555 On Android Lollipop

Samsung’s new addition in its Tab line up is the Galaxy Tab A series. The very first bullets the Tab A series seem quite interesting. Samsung released the Tab A devices in 8.0 and 9.7 inch sizes. Samsung adapted a little different strategy this time. It released the Tab devices with some hefty hardware variation. The Galaxy Tab A doesn’t only come in 3G, LTE variants, but variants of this series also come with an S-Pen that is a primary feature of Samsung’s Galaxy Note line up. As we will be targeting Galaxy Tab A 9.7 in the on-going post, so we will keep our focus on this device for now.

The Tab A 9.7 sports a beautiful 9.7 inch display with 1024 x 768 pixels and 132 ppi. Under the hood we have a 1.2 GHz Quad Core CPU accompanied by Adreno 306 GPU. On the front we have a 2 MP selfie shooter and at the back we have a 5 MP primary shooter. Samsung powered this device up with a massive 6000 mAh battery. Galaxy Tab A 9.7 runs on Android 5.0.2 Lollipop out of the box. Tab A is being highlighted in some reviews because of its software features, that are pretty unique as compared to the past Galaxy Tab devices. Tab A 9.7 without S-Pen is labeled as SM-T550 and T555. With S-Pen this device is labeled as P550 and P555.

Galaxy Tab A 9.7 comes in an affordable price. Chances are, the device is going to be caught up by thousands of users in a short time span. In case you’re planning to be one lucky Galaxy Tab A owner or if you’re already one, you may want to checkout the real potential of your Galaxy Tab A. If you don’t want to feel disappointed by the low-end specifications of your 9.7 inch Tab A, the only way might be to gain root access and make it fly high. Rooting your Galaxy Tab A 9.7 has several advantages. Top of the list are the performance and battery enhancements that you can make using apps like System Tuner and Greenify. You can also use application like Titanium Backup to backup each and every single software component of your device. Using an application like Falshfiy, you can flash image files on your Tab A. This is not where the perks of root access end, but you can do a lot more once you’re rooted and you’ve made as strong entry to the open source world of Android.samsung-galaxy-tab-a-97-2

The purpose of this succeeding guide is to actually help you to gain root access on your 9.7 Tab A. Without any further ado, we will go ahead and show you how you can root your Tab A 9.7 SM-T550(WiFi). SM-T555(3G/LTE), SM-P550(WiFi – S-Pen) & SM-P555(3G/LTE – S-Pen).

Disclaimer: Rooting your device involved custom methods. In case of a mishap, TechBeasts or Samsung may not be held responsible. Make sure that you’re doing everything at your own risk and with your full understanding.

How To Root Samsung Galaxy Tab A T550/T555 On Android Lollipop

  1. Download CF-Autoroot.tar file for SM-T550/555, SM-P550/555
  2. Do not extract the downloaded file, keep it as it is i.e .tar format.
  3. Now use this guide: How To Root Samsung Galaxy With CF-Auto-Root In Odin.
  4. Once you’re rooted, use Root Checker application to verify root access on your Galaxy Tab A 9.7

That’s all. Got any queries? Reach us out through the comment box below!

Credits: ashyx

Root Samsung Galaxy Tab A T350/355, P350/355 On Android Lollipop

13
Root Samsung Galaxy Tab A T350/355, P350/355 On Android Lollipop

Samsung’s Galaxy Tab A is Samsung’s new addition in its tablet line up. Galaxy Tab A is gaining popularity because of its justified price with its specifications. The Galaxy Tab A landed in two different variants i.e. 8.0 and 9.7. It looks like that Samsung won’t be focusing on the 5th iteration of the Galaxy Tab series and it will be adapting a different strategy for now by bringing devices like Galaxy Tab S and Galaxy  Tab A. Where the Galaxy Tab S sported a premium build, look and feel, the Galaxy Tab A is a bit opposite. For now our target device is the Galaxy Tab A 8.0, so we will be focusing on this variant only.

The Galaxy Tab A 8.0 sports a beautiful 8.0 inch display with 1024 x 768 pixels and 160 ppi. Samsung plotted a 2 MP secondary cam and 5 MP primary cam in this device. Under the hood there’s a Quad Core CPU clocked at 1.2 GHz accompanied by Adreno 306 GPU. A RAM of 1.5 GB, internal storage options are 16 and 32 GB with an expandable microSD card slot. A huge 4200 mAh battery is fixed inside this device. Galaxy Tab A runs on Android 5.0.2 Lollipop straight out of the box. Tab A sure has a bit low end specification, but the device got a lot of software perks that you’re going to love and you may not find on Galaxy Tab 4 or lower models This time around, Samsung played a bit different. The Galaxy Tab A 8.0 doesn’t come as a lone device with varying connectivity bands, but Samsung released a variant accompanied by an S-Pen having same specifications as that of the ordinary Tab A 8.0. Tab A 8.0 without S Pen comes as SM-T350 & T355, while with S-Pen it comes as SM-P350 and P355.

If you’re planning to get this device or if you’ve already got your hands on the Galaxy Tab A 8.0, you may want to do something out of the boundaries that are initially set by Samsung. The device doesn’t sport top-notch specification, but that’s not where its life ends. You can do more then a lot with your Galaxy Tab A once you gain root access on this device. Rooting your Galaxy Tab A has advantages more then the disadvantages that users may be afraid of. At first rooting your Galaxy Tab will help you to overclock or underclock the CPU of your device, which will result in enhancing or controlling the performance of your device. Having your Tab A rooted, you will be able to create the backup of each and every thing on your device including EFS, Nandroid, Apps Data, System Data etc. Root access also allows you to use apps like Greenify to enhance the battery life of your device and that’s not it, there’s a huge world of Android tweaks that is supported by rooted Android devices. To have the perks of root applications and root tweaks, you need to gain it on your device first of all. You must be wondering how you can achieve root on your Galaxy Tab A 8.0? Well, you’re not gonna need to worry at all.samsung-galaxy-tab-a

The purpose of the following guide is to help you to root your Galaxy Tab A 8.0 SM-T350(WiFi), T355(3G LTE) and SM-P350(WiFi), P355(3G LTE). This device can be easily rooted running Android 5.0.2 or Android 5.1.1 Lollipop using  the method listed below and the guides linked below. Just go ahead, grab the root files and root your Tab A 8.0 right away.

Disclaimer: Rooting your device involved custom methods. In case of a mishap, TechBeasts or Samsung may not be held responsible. Make sure that you’re doing everything at your own risk and with your full understanding.

How To Root Samsung Galaxy Tab A T350/355, P350/355 On Android Lollipop

That’s all. Got any queries? Reach us out through the comment box below!

Credits:  ashyx