Home Blog Page 360

Root Sprint, T Mobile Galaxy Note 5 & Install TWRP Recovery

Root Sprint, T Mobile Galaxy Note 5 & Install TWRP Recovery

Samsung unveiled the Galaxy Note 5 around 3 weeks back at its unpacked event which held in New York. The Galaxy Note 5 carries the top-notch specifications, a cool design, and a premium build. Galaxy Note 5 without a doubt is the best Note device as Samsung completely changed the device rather than going with its traditional design and traditional upgrades. Note 5 isn’t only about having a better hardware spec sheet, but the device has got some cool features that make it the best phablet of the present time.

Samsung used its own Exynos 7420 64 bit octa-core CPU to power this device up. Galaxy Note 5 carries a 4 GB RAM, and the internal storage begins from 32 GB, no external SD card slot though. Samsung used the same 16 MP shooter in Galaxy Note 5 as the one it used in the Galaxy S6 and Galaxy S6 Edge. On the front, we have a 5 MP selfie shooter fixed at the top of a 5.7 QHD display.

A battery of 3000 mAh is placed inside, this may be a thing to think about for some users, but Samsung’s battery optimizations won’t let you run out of battery on this new phablet. Note 5 runs on Android 5.1 out of the box.

Galaxy Note 5 is available from almost all major carriers. These include At&t, T-Mobile, Sprint, Verizon & others. If you’re planning to pocket a Galaxy Note 5 from T-Mobile or Sprint, you may get tired of seeing the bloatware on this phone. For those who do not have an idea about bloatware, bloatware is the inbuilt applications that are added by carriers or smartphone manufacturers.

Most of the users do not use these applications, so its a good idea to kick these applications off from the phone in order to cater to some extra storage space. Apart from that, you may also want to enhance the performance of your phone by means of some software tweaks. Power users may also want to enhance the battery life. All this is only possible if you’ve gained the root access on your phone. Without root access, you can’t make any system tweaks to your Note 5.

Luckily, Root for T-Mobile & Sprint Galaxy Note 5 is available now. After rooting, you can also install TWRP recovery which allows you to flash custom zip files, wipe cache, dalvik cache and create & restore Nandroid backup. There’s a lot more you can do with a custom recovery. All the credit for root and recovery goes to XDA senior member Manh_IT so, thanks to him. Let’s skip any further talk and head towards the method to root your T-Mobile or Sprint Galaxy Note 5 and then install TWRP recovery on it.

Early Preparations:

  • This guide is only for the Sprint Galaxy Note 5 SM-N920P and T-Mobile Galaxy Note 5 SM-N920T. Do not try this method on any other device. Otherwis,e you will result in bricking it. Check your device’s model number in settings > general > about device.
  • Backup your important contacts, call logs, sms messages and copy your media content to your PC in order to keep everything on a safe end.
  • Use your original data cable to establisha connection between your Galaxy Note 5 and your PC.
  • Disable Samsung Kies, Firewall or any Antivirus if enabled.
  • Follow this guide to the letter in order to avoid any mishap.

Disclaimer: Methods involved in rooting your Android phone are highly custom. Rooting your device voids its warranty. In Samsung’s case, rooting will also trip the Knox counter and you won’t be able to avail any free services from the warranty providers. While following this method, make sure that you’re doing everything at your own risk. In case of a mishap, TechBeasts or Samsung may not be held responsible.

Required downloads & installations

How To Root T-Mobile & Sprint Galaxy Note 5 Now

  1. First of all, you need to enable OEM unlocking on your Galaxy Note 5. Follow the steps listed below to do so.
  2. On your T-Mobile or Sprint Galaxy Note 5, go to settings > device > about device > tap the build number for 7 times. You will have the developer options enabled in the device section of settings.
  3. Now open the developer options and locate “OEM Unlocking” and check it.
  4. Now boot your Galaxy Note 5 in download mode. To do so, first of all, turn off your Galaxy Note 5 completely. Now turn on your Note 5 by pressing and holding Volume Down + Home + Power Key simultaneously. You will see a screen with a warning. Press Volume Up key to continue and you will enter the download mode displaying a message “Downloading”.
  5. Now connect your phone to your PC.
  6. Open Odin3.exe from the folder that you extracted in the required downloads and installations section.
  7. Odin will open up and show a blue light in the box above ID:COM, the blue light means your phone is connected properly. If the ID:COM box doesn’t turn blue, that means your phone isn’t connected.
  8. The only options ticked in Odin should be F.Reset Time and Auto-Reboot. Do not touch anything else, and leave all other options as they are.
  9. Now click on AP tab and select the extracted .tar.md5 Noble_kernal_Auto-Root file.
  10. Odin will take a second or two to load the file, once it has loaded the file click on the start button and sit back.
  11. Odin will now flash the Auto-Root kernel, once the kernel has been flashed your device will reboot and a “RESET” message will appear in the progress bar in Odin.
  12. Disconnect your phone and let it boot up.
  13. Once your phone boots up, open Google Play Store and locate SuperSu and install it.
  14. Now open SuperSu application from the app drawer, if it requires updating the SU binaries, update those.
  15. Now install Root Checker application and verify root access.
  16. Pheww! That’s all. You’re done rooting your Galaxy Note 5. Head over to the next portion to install TWRP recovery now.

How To Install TWRP Recovery on your T-Mobile or Sprint Galaxy Note 5

  1. Download Noble Kernel file with TWRP recovery:  TWRP-2.8.7.1-Alpha_N920T.tar.md5 (the same file will work for both variants)
  2. Now follow the steps 4-11 of the above method to install TWRP recovery. But this time you will select the TWRP recovery.tar.md5 file instead of the Noble Kernel Auto-Root file.
  3. Once you’ve flashed TWRP recovery, you can boot into the recovery by pressing and holding Volume Up + Power + Home Key.
  4. That’s all.

Stuck with something? Reach us out through the comment box below. We would love to help you out.

Watch Sony Xperia Z5, Z5 Compact & Z5 Premium Promo Videos

0
Watch Sony Xperia Z5, Z5 Compact & Z5 Premium Promo Videos

Sony unveiled its new flagship series today at IFA 2015, Berlin. The new devices include Sony Xperia Z5, Xperia Z5 Compact & Xperia Z5 Premium. Sony included a heavy spec sheet in these devices. We have a 5.2 inch full HD display on the Xperia Z5, a 4.6 inch 720p display on the Z5 Compact and a 4K display on the Xperia Z5 Premium. Display is the only main difference between all these three devices. Sony has equipped all these devices with Qualcomm’s Snapdragon 64 bit octa core CPU clocked at 2.0 GHz accompanied by Adreno 430 GPU. Internal storage begins from 32 GB, there’s a microSD card slot available on these devices as well.xperia-z5-premium-1

Sony’s all new 23 MP Exmor RS sensor debuted at the back of all these three devices. On the front Sony used a 5 MP selfie shooter. All these devices have a fingerprint scanner embedded in the power key. To give its fans a better idea, Sony came up with promo videos highlighting the important and eye-catching features of these devices. Let’s have a look on the promo videos and learn more about these devices.

Have a look at the Xperia Z5 Premium Official Camera Samples.


Xperia Z5 Premium Official Camera Samples

0
Xperia Z5 Premium Official Camera Samples

At the IFA 2015 event, which held in Berlin today, Sony brought the new Xperia Z5 line up in spotlight. The Xperia Z5, Z5 Compact and Z5 Premium are the members of the Xperia Z5 Trio. Sony has made these devices rich with top-notch hardware. Xperia Z5 family is powered up with Snapdragon 810 64 bit octa core CPU clocked at 2.0 GHz accompanied by Adreno 430 GPU. A RAM of DDR4 RAM of 3 GB is placed inside and 32 GB internal storage is there. All these devices sport same design and build, the only difference is when it comes to the display.

The Xperia Z5 has a 5.2 inch full HD display, the Z5 compact has a 4.6 inch display with a 720p resolution nd the Xperia Z5 Premium is the top gun of Sony for now. Z5 Premium flaunts a 5.5 inch 4K display with 806 ppi, which is the highest ppi and the display with highest resolution by any manufacturer so far.

Sony’s new 23 MP Exmor RS sensor has made a debut in the Xperia Z5 family. The new shooter carries a number of enhancements and features which are going to make these handsets probably the smartphones having best camera. The new shooter has the fastest autofocus capability. The phone has phase detection autofocus with 192 focuspoints. Sony promised 0.03s focusing times, which is three times faster then that of the Samsung Galaxy Note 5’s and Redmi Note 2’s camera. Xperia Z5 lineup’s rear camera offers 5x clear image zoom, ISO3200 for videos and ISO12800 for photos, enhanced steady shot feature, 4K video recording etc.

It looks like Sony has put all of its efforts in the rear camera of the Xperia Z5 Premium. You’re probably going to need to have a look on sample  shots taken by this camera in order to have a better idea of Sony’s all new 23 MP Exmor RS sensor. Here are the samples posted by Sony.

VivaVideo: Free Video Editor for PC [ Guide ]

0
VivaVideo: Free Video Editor for PC [ Guide ]

If you like to edit Videos on your Smartphone then you should try VivaVideo – a free Video editor, and today I’ll tell you how to install VivaVideo for PC, however, at the moment its not available for PC. But we still can install VivaVideo for PC using third party emulators. Following are the main features of VivaVideo Free Video Editor.

VivaVideo for PC

VivaVideo Features:

The easiest way to turn your photos into movie masterpiece and create video slideshow in several clicks.

Merge clips into one story with many awesome & fancy collage templates.

Enhance your videos with various texts, FX, stickers, music, filters, transitions and live dubbing.

Share your works to Facebook, YouTube, Instagram, WhatsApp, Facebook Messenger, Line, email and etc

200+ special effects including Animated Stickers/Themes/Filters/FX/Texts/Transitions.

for more Google Play.

How To Install VivaVideo For PC or MAC Using Blackstacks

Method 1:

  1. Install Bluestacks on your PC or MAC.
  2. Download VivaVideo Apk on your PC.
  3. Make sure that you have installed Bluestacks. Double click the downloaded VivaVideo Apk to install it.
  4. The APK will be installed through Bluestacks, once the notification pop ups determining the installation completion, open Bluestacks.
  5. Now click on My Apps and then click on VivaVideo .
  6. The application will open up. Now follow on-screen instructions to VivaVideo .

Method 2:

  1. Install Bluestacks on your PC or MAC.
  2. Open Bluestacks and setup your Google Play Store account.
  3. Now open Google Play Store and search for “VivaVideo “.
  4. Once found, install VivaVideo .
  5. Now click on My Apps and then click on VivaVideo .
  6. The app will open up. Now follow on-screen instructions to Play VivaVideo .

How To Install VivaVideo For PC or MAC Using Andy OS

  1. Download and install Andy OS on your Windows PC or MAC.
  2. Once downloaded, open Andy OS.
  3. Setup Google Play Account on it.
  4. Now open Apps > Google Play Store and search for “VivaVideo “.
  5. Install VivaVideo  and wait for it to finish installation.
  6. Once done, open “Uncategorized” portion in Andy and click on VivaVideo  to play it.
  7. That’s all.

Cymera Online Photo Editor for PC

0
Cymera Online Photo Editor for PC

There are many photo editors and collage maker Apps that are available in Google Play, but only few are the best. Today, I will tell you how to download Cymera Online Photo Editor for PCCymera is the best and perfect way to edit your selfie. In the following guide, I’ll explain you how to install Cymera for PC, its not available for PC yet but we can still install it on PC using third party emulators.

Cymera for PC

Cymera Features:

Take the best selfies by snapping your moments with free 100 live filters

Silent mode/anti-shake/timer/selfie/out-focusing options.

Brightness/contrast/mosaic/crop/rotate and more features just like Photoshop.

Funny stickers using the powerful face recognition feature (Comic masks, fancy frames).

One-tap beautify feature with automatic face recognition such as enlarge eyes/smile/slim.

For more Google Pay.

Cymera Online Photo Editor for PC [ Guide ]:

How To InstallCymera For PC or MAC Using Blackstacks

Method 1:

  1. Install Bluestacks on your PC or MAC.
  2. Download Cymera Apk on your PC.
  3. Make sure that you have installed Bluestacks. Double click the downloaded Cymera Apk to install it.
  4. The APK will be installed through Bluestacks, once the notification pop ups determining the installation completion, open Bluestacks.
  5. Now click on My Apps and then click on Cymera.
  6. The application will open up. Now follow on-screen instructions to Cymera.

Method 2:

  1. Install Bluestacks on your PC or MAC.
  2. Open Bluestacks and setup your Google Play Store account.
  3. Now open Google Play Store and search for “Cymera“.
  4. Once found, install Cymera.
  5. Now click on My Apps and then click on Cymera.
  6. The App will open up. Now follow on-screen instructions to Play Cymera.

How To Install Cymera For PC or MAC Using Andy OS

  1. Download and install Andy OS on your Windows PC or MAC.
  2. Once downloaded, open Andy OS.
  3. Setup Google Play Account on it.
  4. Now open Apps > Google Play Store and search for “Cymera“.
  5. Install Cymera and wait for it to finish installation.
  6. Once done, open “Uncategorized” portion in Andy and click on Cymera to play it.
  7. That’s all.

How to change country in Google Play Store [ Guide ]

How to change country in Google Play Store [ Guide ]

In the following guide given, are the instruction to change country in Google Play. Many of the apps in Google Play Store have country restriction over it, and in order to download these apps, you have to change country in Google Play.

604811b5036910c3b3b2c097610085fd_large (1)


How to change country in Google Play Store:

Following are the instruction provided by Google Play support:

If you’re having issues viewing your intended country’s Play Store and would like to change your default payment method or update an existing billing address in Google Wallet, please use the following steps:

1) Sign into your Google Wallet account to manage your payment methods (https://wallet.google.com/manage/paymentMethods)

2) Delete all of your payment methods from Google Wallet, and only add a card to one with a billing address located inside your desired country

3) Open the Play Store and navigate to any item available for download

4) Click to begin a download until you reach the “Accept and buy” screen (no need to complete the purchase)

5) Close the Play Store and clear data for the Google Play Store application (Settings > Apps > Google Play Store > Clear Data) or clear your browser cache

6) Re-open the Play Store. You should now see the Play Store that matches your default payment instrument’s billing country.

If you haven’t yet added a payment method to your account for the first time, please add a card directly from the Play Store with a billing address that matches your intended country location. Then, follow steps 3 through 6 to show your intended country’s Play Store.

After applying the given steps above and still there is no luck, then follow the instruction given below.

Step #1: Open wallet.google.com on your browser, go to settings and change the home address. After that goto Address book tab and remove the old address.

Step #2: After removing the old address you’ll be prompted to accept the new terms and condition for the new country.

Step #3: Now open Google Play Store on your device, go to settings> Apps > Google Play Store > Clear Data.

All Done! Please do tell me if this guide helped you or not, and don’t forget to share it with your friends.


How to remove Facebook birthdays from “My Calendars”?

0
How to remove Facebook birthdays from “My Calendars”?

To remove Facebook birthdays from “My Calendars” of your Android devices, just follow the given instructions below. Please follow all the steps as mentioned in order to remove Facebook Birthdays from your Android device calendars.

remove facebook birthdays from your Android calendar

How to remove Facebook birthdays from “My Calendars”?

Method #1:

  • Open Facebook and go to your Events page.
  • Now at the top the page you see settings click on Export Events.
  • You’ll get a popup windows with a Url, copy the Url.
  • Now go to your Google Calendar and at the bottom of the page, you’ll see other calendars and an Add button, click on Add Button.
  • Now paste the Url you have copied before and tap on ok. Now refresh the page and you’ll see only Facebook events.

Method #2:

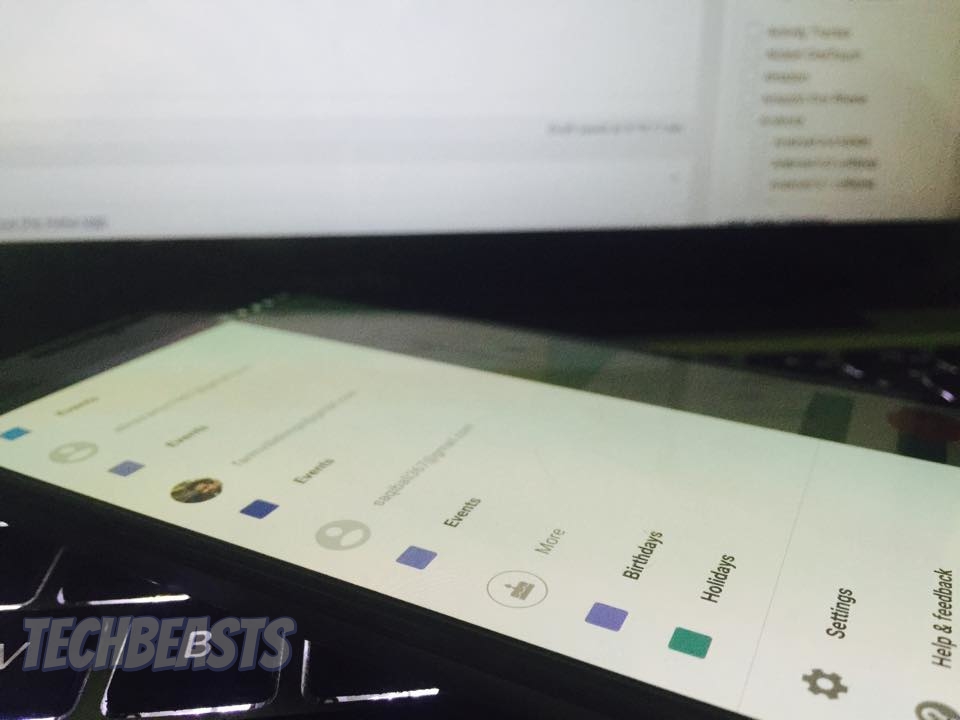
Open Calendar on your Android device, click on 3 line located on the top left corner. You’ll see your Gmail accounts, Events, Birthdays and Holidays. Tap on birthdays and then tap on the Facebook account, you’ll see a pop-up with three options Tap on “Do not Include birthdays”.

Method #3:

Go to your Android device settings Accounts Google >Tap on the email ID > Unsync the Calendar.

For HTC User’s try this:

Go into Accounts and sync in Settings and remove Facebook HTC Sense and your calendar will be back to normal.

Source

How to Undo a Sent Email in Gmail in 5 Steps [ Guide ]

0
How to Undo a Sent Email in Gmail in 5 Steps [ Guide ]

By following just a few number of steps, you can now learn how to Undo a Sent Email in Gmail – screenshots have also been added below. Just follow all the steps as mentioned, and if you face any issue regarding this guide please do tell me in comments.

Screen Shot 2015-08-27 at 16.51.08

How to Undo a Sent Email in Gmail in 5 Steps:

Step #1: Open mail.google.com in your browser. Login with your Gmail id and password.

Screen Shot 2015-08-27 at 17.02.53

Step #2: Once you are logged in, click on the gear icon located on top right corner of your screen.

Screen Shot 2015-08-27 at 17.03.18

Step #3: Now from the drop down menu click on settings.

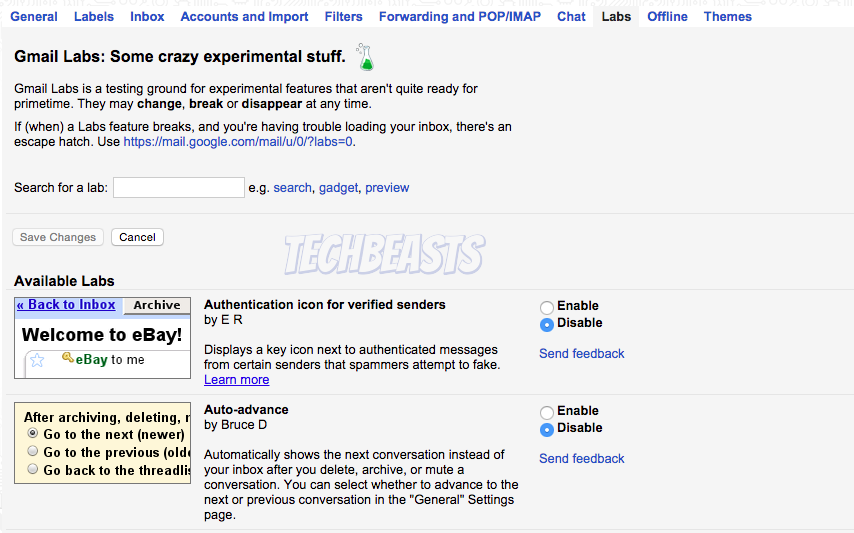
Step #4: In settings search for Labs and click on it, there you’ll see several features. Search for UNDO send feature and enable it.

Screen Shot 2015-08-27 at 17.03.54


Step #5: Now click on Save Changes.

Screen Shot 2015-08-27 at 17.04.24

All Done!

How to Fix your Oneplus One Mic Issue [ Guide ]

1
How to Fix your Oneplus One Mic Issue [ Guide ]

Following are the instructions for how to fix your OnePlus One Mic issue, all you have to do is to follow the steps as mentioned. Those who have updated their OnePlus One to the latest OS, their Mic issue will be fixed, and if not then follow the guide to Fix Oneplus One Mic Issue on Oxygen OS.

Fix your Oneplus One Mic Issue

How to Fix your Oneplus One Mic Issue [ Guide ]:

Let’s Start the guide:

Step #1: First go to your Phone Dialer and open settings. If you are using third party app then go to app drawer and open phone dialer from there.

Step #2: Now that dailer is opened tap on 3 dots > Settings.

Step #3: In settings menu tap on other settings > Open TTY Mode.

Step #4: Disable the Open TTY Mode by tapping on TTY Off.

All Done ! Now plugin your headset and Your Oneplus One MIC will work while talking.

How to Fix your Oneplus One Mic Issue [ OS Oxygen ]:

Step #1: Open Dialer and the tap on 3 dots, select Settings.

Step #2: Now select Call Settings for the list.

Step #3: Tap on TTY Mode.

Step #4: Tap on TTY OFF.

All Done! do share your thoughts regarding the given guide.

How to Turn on Screen Mirroring on Samsung Galaxy S6 Edge + and Connect With SmartTV

0
How to Turn on Screen Mirroring on Samsung Galaxy S6 Edge + and Connect With SmartTV

Following are the instruction on how to Turn on Screen Mirroring on Samsung Galaxy S6 Edge + and Connect With SmartTV, i’ll be using different methods to connect Samsung Galaxy S6 Edge + with SmartTV. You’ll be needing AllShare Cast Wireless Hub, HomeSync and HDMI CableAlso i will tell you how to use SideSync to connect your Samsung Galaxy S6 Edge + with PC or SmartTV.

fix s6 not registered on network

How To Enable screen mirroring on Samsung Galaxy S6 Edge +:

  • Goto quick setting.
  • Tap on Screen mirroring icon and enable it.

Now in the following steps you’ll find out how you can enable screen mirroring with AllShare Cast Wireless Hub, HomeSync, Miracast and HDMI Cable.

How To share the screen and data between your PC and mobile device:

  • First of all download SideSync on your Windows/Mac and mobile device. You can download SideSync from Google Play on your device.
  • Once SideSync is installed on your PC and mobile device, connect your device with PC using USB cable or WiFi.
  • If you have Samsung Smart TV then you can connect your device using WiFi, but if you don’t have Samsung SmatTV then you have buy a AllShare cast hub in order to connect with TV.

How to screen mirror from Samsung Galaxy S6 Edge + to a TV using AllShare Cast:

  • Turn on your television.
  • Power on your AllShare Cast though charger.
  • Connect your TV with AllShare Cast with HDMI Cable.
  • Kindly properly put HDMI Cable in the right port.
  • Now wait for the light to get blue from red on your AllShare Cast device.
  • Your TV is connected with AllShare Cast.
  • Now go to Samsung Galaxy S6 Edge + quick setting and tap on screen mirroring and first turn off then turn on it again.
  • After turning on Screen mirroring you will get a list of available devices. Select AllShare Cast’s dongle and enter the PIN as showed on TV.
  • Your Samsung Galaxy S6 Edge + is connected with your TV through AllShare Cast.

How to screen mirror from Samsung Galaxy S6 Edge + to a Samsung Smart TV:

  1. Press Input from your Samsung SmartTV remote.
  2. Select Screen Mirroring from your Smart Tv screen.
  3. Now go to your Galaxy S6 Edge + quick setting tap on Screen Mirroring.
  4. Your Phone will list all the available device available for Screen Mirroring.
  5. Select Samsung Smart TV. That’s all.

Wallpapers of the week: for iPhone, iPad and Desktop

0
Wallpapers of the week: for iPhone, iPad and Desktop

Not only, I love to collect but share Wallpapers for iPhone, Android devices and Desktops. And from now onward I’ll be posting free Wallpapers for iPhone, iPad and Desktops every week. Today, I’ve got beautiful Wallpapers for iOS devices and Mac.

Axinen_2015-Jul-25-1024x576

Special Thanks to @Axinen, who procured the following three wallpapers, directly from the Apple website.

Skate-Park-for-iPad-1024x1024

Camera: iPhone; iPad; desktop (2880 x 1800)

Mountain-for-iPad-1024x1024

Malware: iPhone; iPad; desktop (2880 x 1800

Apple-Pay-for-iPad-1024x1024

Apple Pay: iPhone; iPad; desktop (2880 x 1800).

Enjoy these beautiful Wallpapers for free, plus don’t forget to check our Wallpaper Gallery. 

How To quickly send up to 5GB of files online from PC/SmartPhone

0
How To quickly send up to 5GB of files online from PC/SmartPhone

Following are the instruction for how to quickly send up to 5GB of files online from your PC. We will be using “WeSendit” application to send files. Follow all the steps carefully in order to send big files online.

Screen Shot 2015-08-25 at 16.15.19


How To quickly send up to 5GB of files online from PC/SmartPhone:

Step #1: First open WeSendit homepage from here on your PC browser.

Step #2: Once you are on WeSendit homepage click on Add files button and select the file you want to send.

Screen Shot 2015-08-25 at 16.23.39


You can add any sort of files like image, document, archive, presentation, video, music, etc. When you add your first file you’ll see 3 icons on your right side of screen. These are the limits meter, your file sharing and uploading limits is 5GB, you can send maximum 200 files and only 15 receipt limits.

Step# 3: If you want to add more files just click on Add more files.

Step #4: Once all the files are added, now enter your email address and also the recipient email address. You can also add message if you want to.

Step #5: Now click on Send and wait for the confirmation message.

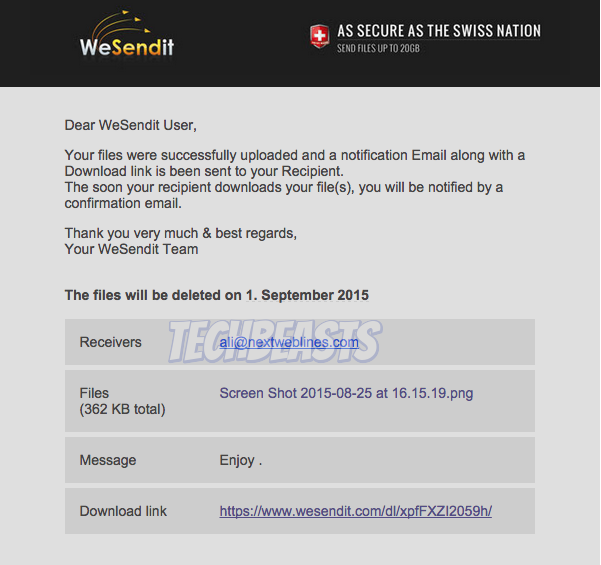
Step #6: Your recipient will receive a email with the download link in it.

Screen Shot 2015-08-25 at 16.35.59

All Done !! .