Home Blog Page 362

Download Fallout Shelter For Windows PC & Mac

0
Download Fallout Shelter For Windows PC & Mac

As promised by Bethesda Softworks LLC, the iOS hit Fallout Shelter is finally available for Android. Fallout Shelter gained quite a lot publicity because of its lucrative and unique game play. In the game you have to create arches under the bedrock, beneath 2000 feet to protect the dwellers. Basically, you’ve to run a community of dwellers, you’ve to build them vaults, you got to lead them to happiness, find jobs they love and help them to flourish. your task is also to make your dwellers look good by providing them unique outfits. You also got to provide them weapons and train them for the self defense. The dwellers are a complete force, or kind of community that you can use to explore the world above 2000 feet. Fallout Shelter gained popularity among iOS users within no time, Android users have been waiting for this game anxiously and it finally made its way to the Google Play Store for free.

Now that this game is available for Android, that means you can also play it on your PC with the help of Android Emulator. Those users who do not own and Android device, or those who do not want to keep their Fallout Shelter craze limited to the small screen of an Android smartphone or tablet, they can play this game on their PC using our guide. We are going to show you how you can install Fallout Shelter for PC on Windows XP/7/8/8.1/10 or a Mac OS X powered iMac or Macbook. We will be using BlueStacks or Andy OS to do so. Let’s go ahead and play Fallout Shelter for PC.Screenshot_6 Screenshot_7


How To Play Fallout Shelter For PC


BUILD THE PERFECT VAULT
Create a brighter future…underground! Select from a variety of modern-day rooms to turn an excavation beneath 2,000 feet of bedrock into the very picture of Vault Life.

OVERSEE A THRIVING COMMUNITY
Get to know your Dwellers and lead them to happiness. Find their ideal jobs and watch them flourish. Provide them with outfits, weapons, and training to improve their abilities.

PROSPER
A well-run Vault requires a variety of Dwellers with a mix of skills. Build a Radio Room to attract new Dwellers. Or, take an active role in their personal lives; play matchmaker and watch the sparks fly!

EXPLORE THE WASTELAND
Send Dwellers above ground to explore the blasted surface left behind and seek adventure, handy survival loot, or unspeakable death. Find new armor and weapons, gain experience, and earn Caps. But don’t let them die!

PROTECT YOUR VAULT
From time to time, idyllic Vault life may be disrupted by the dangers of post-nuclear life. Prepare your Dwellers to protect against threats from the outside…and within.

Vault-Tec has provided the tools, but the rest is up to you. What are you waiting for? Get started building your Vault today for FREE.

How To Fix Error 80240020 When Installing Windows 10 Free Upgrade

0
How To Fix Error 80240020 When Installing Windows 10 Free Upgrade

After downloading Windows 10 files people are facing Error 80240020, its because of overloaded Microsoft servers. In the following guide, I’ll tell you the method to fix Error 80240020 When Installing Windows 10 Free Upgrade. 

windows-10-download-iso-32-bit-64-bit-1024x575

How To Fix Error 80240020 When Installing Windows 10 Free Upgrade:

Step#1: First Navigate to C:\$Windows.~BT folder, but before going there you need to enable show hidden files.

Step#2: Once you are there you’ll see different folders. Now try to delete all the files and folder in it.

Step#3: Now goto C:\Windows\SoftwareDistribution\Download and here delete everything.

Step#4: Once everything is deleted, use this guide to install Windows 10 Free upgrade.

Step#5: Now all the files are downloaded again, now you can began with the installation process.

If you face Error 80240020 again, then you have to perform the steps mentioned above again form the scratch. If you face any issue regarding this guide please do tell me in comments.

Also See:

Deck Heroes Online For PC/Windows7/8/Mac

0
Deck Heroes Online For PC/Windows7/8/Mac

Cards games are now, all time favorite in both Android and iOS PlayStores, today I’ll tell you how to install Deck Heroes for PC using third party emulators. Deck Heroes is a role playing game in which you have to create a ultimate deck of amazing hoard of Heroes and magical Creatures. Before moving on to installation method, first let me tell you about the main features of Deck Heroes.

Deck Heroes Online For PC/Windows7/8/Mac

✔ FREE TO PLAY
✔ Non-Stop Gaming!
Innovative game play, endless battles, and countless tactics are guaranteed to have you hooked!
✔ Worlds at War
Align your army with the four factions – Human, Fae, Mortii, and Neander.
✔ Magnificent Artwork!
Elegant and exquisite designs paired with flamboyant, vibrant colors bring your Hero and Creature cards to life!
✔ Adventure Calls!
Intricately detailed maps, mazes, trials, and more, await those brave wanderers!
✔ Global Action!
Millions of gamers worldwide experience the suspense of a thrilling card adventure!
✔ Adrenaline Pumping Action!
Raids, competitions, and more; this is a player versus player haven!

Also See: Download BlueStacks Offline Installer for PC | Deck Heroes for AndroidDeck Heroes for PC

Stagefright Fix For Android Nexus 6, 5 And Other Devices

0
Stagefright Fix For Android Nexus 6, 5 And Other Devices

Google has released Stagefright fix LMY48I, factory images for seven Nexus devices  Google announced that the Stagefright vulnerability fix will start rolling out as an OTA today. It has also added new factory images for Nexus 6 USA-specific build on the Nexus developer pages. Clearly, this is a sign that all the Nexus phones and tablets bootloader unlocked can support the new build immediately.

StageFright-v2

As far as the new images are concerned, all of them go under the same build number that is LMY48I. Sprint listed the build number as the Stagefright fix for Nexus 5 and Nexus 6 this morning.  Factory images were released for seven Nexus devices. These devices include Nexus 4, Nexus 5, Nexus 6, Nexus 9 WiFi, Nexus 9 LTE, Nexus 7 WiFi and Nexus 10. To get the new build, just boot into the bootloader and run the batch file included.

Also See: how to protect Android from Stagefright MMS virus

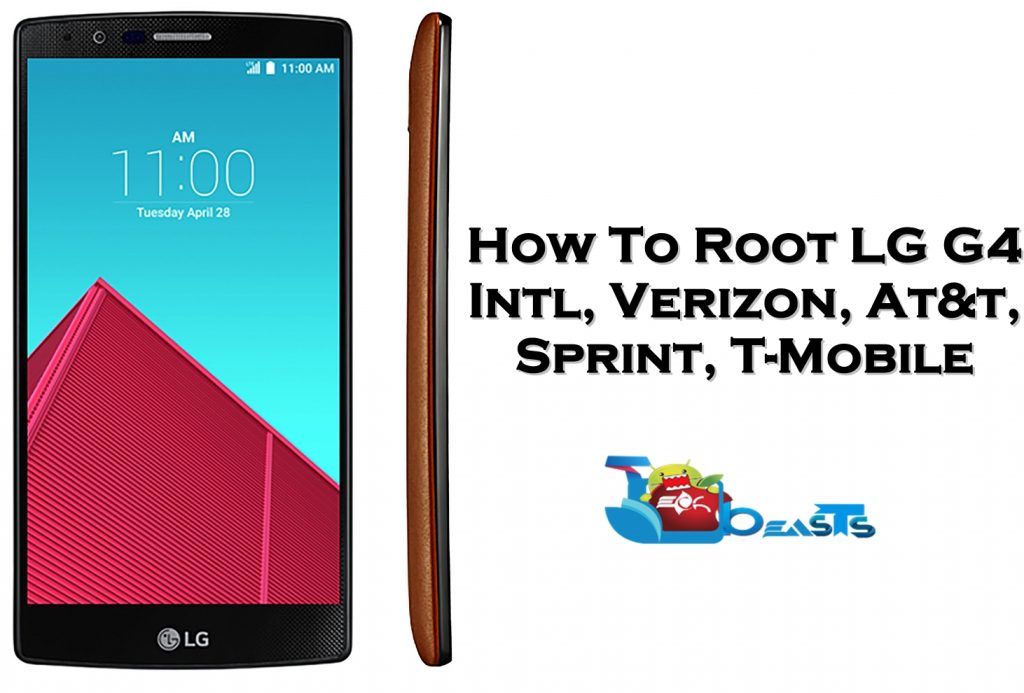
How To Root LG G4 [International, Verizon, At&t, T-Mobile, Sprint]

4
How To Root LG G4 [International, Verizon, At&t, T-Mobile, Sprint]

LG G4 is around for quite a while now. The device came under the umbrella of different carriers including At&t, Sprint, Verizon, T-Mobile and different variants for international markets. It took some time for the developers to find an exploit to root this device. Earlier, a root exploit was available only for the international variant. Carrier branded LG G4 seemed a hard nut to crack. At first, the system of this device was made too much secure by LG, and then Android Lollipop’s secure nature added to it as well. But now that the root exploit is out, you may root your LG G4 now.

Some of you might be very new to the term root. By rooting your smartphone, you will be able to wipe off all the restrictions set by device manufacturers. Rooting your LG G4 will give access to the core system of your device which is apparently locked by LG. You can make tweaks to the system of your phone and enhance its performance. There’s a number of applications in the Google Play store which require root access to work. These applications can intelligently boost the performance and battery life of your device. Some nice root specific applications include Flashify, Titanium Backup, System Tuner, Root Explorer. You can also remove bloatware from a rooted device with the help of applications available in the Play Store. If you have a reocvery.img file for your device, you can easily flash it on a rooted device with the help of an application like Flashify or Flash Gordon. Root access has quite many advantages, but at the same time it has some disadvantages as well. Rooting your device unchains it completely from device manufacturers and operating system providers. LG and Google both do not promote rooting an Android device, so doing it will void the warranty of your device and you won’t be able to claim any services for free.lg-g4-coupe-5529ef3604aec

Furthermore, Root access is not recommended for novice Android users. Before you root your device, you must have a good idea about what you’re doing with your device and how to handle a mishap if it occurs while performing the root process. If you have planned to LG G4, then you may have spotted the right place for help. We are going to teach you how you can root your At&t LG G4 running 10G firmware, Verizon LG G4 running 11A firmware, T-Mobile LG G4 running 10H firmware, Sprint LG G4 running ZV5 firmware and International LG G4 H815 running 10C firmware. The method initially seemed a bit complex, but we have made this comprehensive guide to make it easy for you. Let’s go ahead  root your LG G4 now.

Preparations

  • This guide is for LG G4, the variants listed above. Do not try this on any other device or else you may result in bricking it.
  • Charge your LG G4 up to 50% to avoid any power issues during the rooting process.
  • Backup your important contacts, call logs, sms messages and NVRAM/IMEI data.
  • Download and install Android ADB & Fastboot drivers: Full ADB & Fastboot Drivers | Minimal ADB & Fastboot drivers.
  • Download and Install LG USB Drivers: All LG USB Drivers | Verizon LG USB Drivers
  • Enable USB debugging mode on your LG G4. To do so, go to settings > about device > tap build number for 7 times. You will have developer options in settings now. Open developer options > enable USB debugging mode.

How To Root LG G4 [International, Verizon, At&t, T-Mobile]

Step#1: Download LG_Root.zip file and unzip the contents of this file on your computer’s desktop.

Step#2: Download Root file according to your variant

Step#3: Unzip the file for your variant. You will get a file named system.rooted.xxx.yyy.img.

Step#4: Having the USB debugging mode enabled, connect your LG G4 to your PC now and copy the unzipped system.rooted.xxx.yyy.img file to your phone’s internal storage.

Step#5: Now disconnect your phone from your PC as we need to connect it again in Fastboot mode. To do so, turn it off completely.

Step#6: Now press and hold Volume Up + Power Key and plug in the data cable to establish connection between your phone and your PC. Your phone will show the download/fastboot mode. As it shows, release the keys and put your phone aside.

Step#7: Get back the extracted LG_Root folder and double click the ports.bat file. A command window will open up showing you COM port numbers. Look for DIAG port number and write it down.

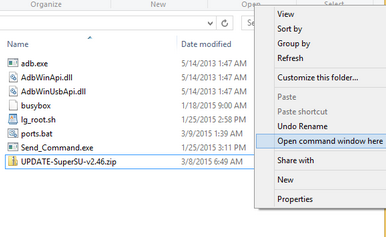
Step#8: Open the extracted LG_Root folder. Now within in the LG_Root extracted folder, press and hold shift key and then right click. Now from the open list click on “Open command window here”. This will open command prompt from LG_Root folder. You’re all set to push commands now and root your LG G4.Screenshot_1

Step#9: Now in the command prompt, enter the following command: Send-Command.exe \\. \COM4 (Replace the COM4 number with the DIAG port number that you noted above.)

Step#9: When this command is done running successfully, it will show you a “#” sign.

Step#10: Now get back to the opened command window again and type “id‘ and press enter. You will get something like “uid=(0)root gid=(0)root”.

Step#11: It’s the time to root your device now. Now issue one of the following commands according to your variant and press enter.

For At&t: dd if=/data/media/0/system.rooted.h81010g.img bs=8192 seek=65536 count=579584 of=/dev/block/mmcblk0

For Verizon:   dd if=/data/media/0/system.rooted.vs98611a.img bs=8192 seek=65536 count=548352 of=/dev/block/mmcblk0

For T-Mobile:   dd if=/data/media/0/system.rooted.H81110h.img bs=8192 seek=65536 count=548352 of=/dev/block/mmcblk0

For International G4:  dd if=/data/media/0/system.rooted.H81510c-EU.img bs=8192 seek=55296 count=529920 of=/dev/block/mmcblk0

For Sprint LG G4:   dd if=/data/media/0/system.rooted.LS991ZV5.img bs=8192 seek=65536 count=557312 of=/dev/block/mmcblk0

Step#12: Your LG G4 will be rooted in a few minutes. Wait for it to reboot. As it reboots, disconnect your device and find SuperSu in app drawer. Verify root access using Root Checker application.

That’s all. Stuck with something? Don’t worry! Reach us out through  the comment box below.

Credits: thecubed [XDA recognized developer]

Install TWRP Recovery & Root Moto G 2015 (3rd Gen)

Install TWRP Recovery & Root Moto G 2015 (3rd Gen)

motorola-moto-g-3rd-gen-11Few days ago Motorola unveiled the 3rd overhaul of its G series. Moto G 2015 came out of the curtains alongside Moto X Style and Moto X Play. Moto G is getting a lot of good reviews. Motorola has done quite a great job with the 3rd iteration of G series. Moto G has never been under much spotlight, Moto G wasn’t able to grab the spot of Motorola’s flagship device so far. But this time things seem different. Motorola has managed to make the Moto G stand in the line of its flagship devices. Under a very cheap price tag of only $180, the Moto G offers some eye-catching and worthy specifications.

Moto G 2015 flaunts a 5 inch screen with 720p resolution and 294 ppi. We have a Snapdragon 410 CPU clocked at 1.4 GHz accompanied by Adreno 306 GPU powering up this device. Moto G 2015 is available in either 8 GB internal storage and 1 GB RAM or 16 GB internal storage and 2 GB RAM. Moto G 2015 also offers a microSD card slot which supports up to 32 GB external memory. Moto G has a 13 MP powerful shooter at the back and a 5 MP shooter on the front. Out of the box you may find it running Android 5.1.1 Lollipop. Apart from these nice specifications, Moto G sports a very elegant design.

Motorola’s G series has been doing pretty good in the markets. A huge number of audience is going to get their hands on this device. Moto G will definitely enjoy a good amount of custom stuff as well. It’s just a matter of time when the developers get their hands and maximize this device’s limits. Moto G is actually a good device to load some custom stuff and checkout its potential. Moto G owners, who would like to unleash the real power of their device, they will need a custom recovery running on the device which will help them to install MODs, custom ROMs, create and restore Nandroid backup, wipe cache and dalvik cache and much more. They will also need root access on the device in order to install root specific applications to enhance the device’s performance. In case you’ve got your hands on this device and now you want to install custom recovery and root your device, you may have spotted the right place.

In the following post we will show you how you can install TWRP recovery on your Moto G 2015. After installing TWRP recovery, you will be able to flash SuperSu.zip file in order to root your Moto G 2015. Prior to the installation of TWRP, you will have to unlock the bootloader of your Moto G 2015. Let’s move ahead without any further ado and get all this done one by one.

Early preps:

  • This guide is only on for Moto G 2015 3rd Gen. Do not try this method on any other device, otherwise you might result in bricking it.
  • Backup your important contacts, call logs, media content and text messages as a safety measure.
  • Charge your phone up to 60% in order to avoid any power issues during the recovery installation and rooting process.
  • Enable USB debugging on your phone. To do so, go to settings > about device > tap build number for 7 times. You will have developer options in settings now. Open developer options > check USB debugging mode.
  • Use original data cable to establish connection between your device and your PC.
  • Follow this guide to the letter to avoid and mishap.

Disclaimer: Methods involved in flashing custom recoveries and rooting the device are highly custom. In case of a mishap, Techbeasts or Motorola may not be held responsible. Make sure that you’re doing everything at your own risk.

Required downloads & installations

  1. Unlock the bootloader of your Moto G 2015 3rd Gen.
  2. Download and install Motorola USB drivers.
  3. Download ADB & Fastboot packege with TWRP recovery.img file. Extract this ADB & Fastboot file on your desktop to access its contents.
  4. Download SuperSu.zip file and copy it to your phone’s internal storage.

How To Install TWRP Recovery on Moto G 2015

Step#1: Make sure that you’ve followed all the steps explained above.

Step#2: Now connect your Moto G to your PC. If it asks for some permission on the phone, check allow this PC and tap ok.

Step#3: Now open the extracted Minimal ADB & Fastboot folder.

Step#4: Now click on py_cmd.exe file in order to open the command prompt.

Step#5: Enter the following commands in command prompt one by one.

Step#6: adb devices

This command will list the connected adb devices. You can verify whether your device is connected properly or not.

Step#7: adb reboot-bootloader 

This command will reboot your Moto G 2015 in bootloader mode.

Step#8: fastboot flash recovery recovery.img

This will flash TWRP recovery on your Moto G 2015.

Step#9: As the recovery flashing is over, select recovery from Fastboot mode on your phone. You will now see the TWRP logo on the screen, that means you’ve successfully flashed TWRP recovery.

Step#10: Tap Reboot > System in TWRP recovery in order to reboot your Moto G 2015 now & let’s root it now.

How To Root Moto G 2015 3rd Gen

Step#1: Make sure that you’ve copied SuperSu.zip file to your phone. In case you haven’t, do it now.

Step#2: Now boot your phone in to TWRP recovery mode. To do so, turn it off completely first. Now turn it on by pressing and holding Volume Down + Power Key.

Step#3: As you see TWRP recovery, tap “Install > Locate the copied SuperSu.zip file (should be at bottom) > tap this file > Swipe the bar at the bottom of screen to confirm flash”.

Step#4: As soon as SuperSu.zip file is flashed, go back to main menu in TWRP and tap reboot > system.

Step#5: Your device will boot up now. Find SuperSu in app drawer. Install Root Checker app to verify root access.

Also See: How To Remove Unlocked Bootloader Warning From Moto G 2015, Moto X Style & Moto X Play


That’s all. Stuck with something? Don’t worry! Reach us out through the comment box below.

How To Install TWRP Recovery & Root Yu Yuphoria

0
How To Install TWRP Recovery & Root Yu Yuphoria

Less known manufacturers are bringing up great devices packing up top-notch specifications in a very affordable price these days. Yu Televentures (partly owned by Micromax) is one of those manufacturers. Recently Yu came up with its Yu Yuphoria smartphone which offers some worthy specifications. The device sports a 5.0 inch display with 720 x 1280 pixels and 294 ppi. At the back it has an 8 MP shooter and a 5 MP shooter on the front. Yu Yuphoria is powered up with Snapdragon 410 CPU clocked at 1.2 GHz and a RAM of 2 GB. Internal storage is 16 GB, you can also expand this storage with an external SD card. Yu Yuphoria runs on CyanogenMod Android 5.0.2 Lollipop out of the box.512201533340PM_635_yu_yuphoria_buffed_steel

Although this devices runs CyanogenMod, which has a greatly customisable nature, but you may want to enhance your device’ a little bit more. Methods to unlock the bootloader of Yu Yuphoria and also to root this device are available now. If you’re getting your hands on this device and you’re planning explore the real power of this device, you may want to follow this guide as it will teach you how you can unlock bootloader, install TWRP recovery and root your Yu Yuphoria.

Early preparations

  • This guide is for Yu Yuphoria only. Do not try this on any other device.
  • Charge your phone’s battery up to 50% to avoid any power issues during the rooting process.
  • Backup your important contacts, call logs, sms messages and media content as a safety measure.
  • Enable USB debugging mode on your device. To do so, go to settings > about device > tap build number for 7 times. You will have developer options in settings now. Open developer options and enable USB debugging mode.
  • Follow this guide to the letter to avoid any mishap.

Disclaimer: Rooting and flashing custom recovery void the warranty of an Android smartphone. In case of a mishap, Techbeasts or Yu may not be held responsible. Make sure that you’re doing everything at your own risk.

Required downloads and installations

How To Install Unlock Bootloader & Install TWRP Recovery On Yu Yuphoria

Step#1: Make sure that you’ve enabled USB debugging on your phone.

Step#2: Open developer options from settings and enabled Advanced Reboot.

Step#3: Now press and hold power key, tap reboot device > bootloader in order to reboot your phone in bootloader mode.

Step#4: Having your phone rebooted in bootloader mode, connect to your PC.

Step#5: Open the extracted ADB & Fastboot folder with recovery.img file.

Step#6: From the extracted folder, open “py_cmd.exe” file.

Step#7: Now enter the following commands in the command line.

Step#8: fastboot -i 0x2A96 oem devices

This command will verify your device’s connection with your PC.

Step#9: fastboot -i 0x2A96 oem unlock

This command will unlock your device’s bootloader.

Step#10: fastboot -i 0x2A96 oem flash recovery recovery.img

This command will flash TWRP recovery in your device.

Step#11: fastboot reboot

This command will reboot your device from fastboot mode.

That’s all. You’ve unlocked bootloader and installed TWRP recovery. Let’s root the device now.

How To Root Yu Yuphoria 

  1. Download SuperSu.zip file and copy it to your phone’s SD card.
  2. Now press and hold the power key of your device, tap reboot > recovery in order to boot into TWRP recovery mode.
  3. As your device boots up in TWRP recovery mode, tap Install > Locate SuperSu.zip file and select it. Swipe finger on the icon at the bottom of screen to flash SuperSu.zip.
  4. Once SuperSu.zip has been flashed, reboot your device.

Find SuperSu app in app drawer. Verify root access using Root Checker application.

That’s all. In case you’re stuck with something, reach us out through the comment box below.

Root & Install TWRP Recovery On HTC One M8 Eye

1
Root & Install TWRP Recovery On HTC One M8 Eye

HTC is trying its best to lift up its sinking boat with the help of different smartphones in the same line. HTC released a sibling of the HTC M8 named as HTC M8 Eye with very minor changes. M8 eye sported a 5 inch full HD display with a 5 MP shooter at the top. A 13 MP shooter is fixed at the back. Under the hood this device has a Snapdragon 801 CPU clocked at 2.3 GHz which is accompanied by an Adreno 330 GPU. Internal storage was 16 GB and RAM was 2 GB. HTC M8 Eye runs on Android 4.4.2 having HTC’s Sense UI atop of the OS.htc_one_m8_eye

If you’re an Android freak like me, HTC’s stock OS will never satisfy your requirements. At first, the Stock UI isn’t much cool, and then the limitations put by HTC will rip off your mood within no time. Thanks to Android’s open nature which makes any kind of tweaks and customisations and possible. With the help of custom stuff, you can make your HTC M8 Eye’s OS the way you want, you can load certain applications to enhance performance and battery life of your HTC M8 Eye. You can flash custom operating system and give your device a whole new look and feel. All this is possible with the help of root access and custom recovery. You will not be able to install custom operating systems only, but you will be able to wipe cache, dalvik cache, create & restore Nandroid backup, flash MODs and many other things which are not allowed in the stock recovery.

If you’re willing to modify your HTC M8 Eye, this may be the perfect chance for you. In the following post we are going to root our beloved HTC M8 Eye. We will also install TWRP recovery on the device. Let’s move forward and get the process done now.

Early preparations

  • This guide is intended for international HTC M8 Eye users. Do not try it on a carrier branded HTC M8 Eye or any other device.
  • Charge your device’s battery up to 50% to avoid any power issues during the recovery installation and rooting process.
  • Backup your important contacts, call logs, sms messages and media content as a safety measure.
  • Use original data cable to establish connection between your device and your PC.
  • Follow this guide to the letter to avoid any mishap.

Disclaimer: Methods involved in flashing custom recoveries and rooting the device are highly custom. In case of a mishap, Techbeasts or HTC may not be held responsible. Make sure that you’re doing everything with full understanding and at your own risk.

Required downloads and installations

How To Install TWRP Recovery on HTC M8 Eye

Step#1: Make sure that you’re done with required downloads and installations.

Step#2: Enable USB debugging mode on your HTC M8 Eye and connect it to your PC.

Step#3: Now open the extracted ADB & Fastboot drivers folder with recovery.img file.

Step#4: Now hold the shift key and right click on an empty area within the extracted ADB &  Fastboot folder. Click on “Open command window here”.

Step#5: Now issue the following commands one by one in the command prompt.

Step#6: adb devices

This command will verify your device’s connection with your PC. It will show you a code against your device.

Step#7: adb reboot-bootloader

This command will reboot your device in bootloader mode.

Step#8: Now on your device, use volume up and down keys to navigate and select fastboot mode. Your device should be in fastboot mode now.

Step#9: Now issue the following commands

Step#10: fastboot devices

This command will verify your device’s connection in fastboot mode.

Step#11: fastboot flash recovery recovery.img

This command will flash TWRP recovery in your device.

Step#12: As soon as this is done, disconnect your device and restart it.

How To Root HTC M8 Eye Now

Step#1: Make sure that you’ve copied the SuperSu.zip file in your phone. If you haven’t already copied, do it now.

Step#2: Now boot into TWRP recovery. To do so, turn it off completely. Now turn it on by pressing and holding Volume Down + Power Key. Using volume keys, navigate to recovery mode and enter recovery mode by pressing power key.

Step#3: Now you will be in TWRP recovery. Tap Install > Locate the copied SuperSu.zip file > Swipe finger to flash.

Step#4: Once done, reboot your device. Check out SuperSu in app drawer. Verify root access using Root Checker application.

That’s all. Stuck with something? Reach us out through the comment box below.


Install TWRP Recovery & Root Alcatel One Touch Idol 3

2
Install TWRP Recovery & Root Alcatel One Touch Idol 3

Gone are the days when you would get confused while selecting a nice smartphone in a tight budget. Manufacturers like One Plus, Lenovo, Alcatel and others have thrashed away this difference between low end, mid-range and high end devices. Now a days, you can easily get a smartphone with top-notch specifications in the budget of a low end smartphone. Alcatel Idol 3 5.5 is one of those devices. The device offers you a 5.5 inch full HD screen, Qualcomm Snapdragon 615 quad core CPU clocked at 1.5 GHz, 2 GB RAM, 16/32 GB internal storage with a microSD extension slot and a whopping 2910 mAh battery in a very reasonable price tag. Alcatel One Touch Idol 3 runs on Android 5.0 Lollipop, which is the latest Android version at the moment.

Alcatel One Touch Idol 3’s high end specifications make it a good device to load custom stuff and check out its limitations. Specially if you’re an Android freak, you won’t be able to the stock state of your device and you will definitely want to explore the hidden power of your Alcatel One Touch Idol 3. To pave a way for all the custom stuff, you need to remove the restrictions from the bootloader of your phone, to load applications to enhance the performance of your phone, you need to root it and to flash MODs, .zip files, backup Nandroid and wipe cache, you need to have a custom recovery like TWRP and CWM. If you’re reading this post while owning an Alcatel One Touch Idol 3, you may cheer up after knowing that method to unlock the bootloader, flash a TWRP recovery and also to root this device is available now.

As you move ahead, you will come across a method to unlock the bootloader of your Alcatel One Touch Idol 3 first of all. After that you will be able to flash TWRP recovery and in the you will be able to root your Alcatel One Touch Idol 3 5.5 with model number 6045. You can also root your device without installing a custom recovery. The method is listed below as well. Let’s go ahead without any further ado and get all this done now.alcatel one touch idol 3

Rooting / unlocking and flashing custom recoveries void the warranty of phone. In case of a mishap, Techbeasts or Alcatel may not be held responsible. Make sure that you’re doing everything at your own risk.


How To Unlock Alcatel One Touch Idol 3’s Bootloader

Step#1: Download and install Alcatel USB drivers.

Step#2: Download the following zip file and extract to a folder on your computer’s desktop.

Step#3: Enable USB debugging mode on your Alcatel One Touch Idol 3 and connect it with your PC.

Step#4: Allow your PC when it prompts for permission on your phone.

Step#5: Now go to the folder where you extracted the contents of downloaded zip file.

Step#6: Hold Shift key and Right click on empty area within that folder. Now click on “Open Command Prompt/Window Here”.

Step#7: Now in the command prompt, enter these commands

Step#8: adb reboot-bootlaoder

This command will reboot your device in bootloader mode.

Step#9: fastboot -i 0x1bbb devices

This command will verify your device’s connection in fastboot mode.

Step#10: fastboot -i 0x1bbb  oem device-info

This command will provide you your device’s bootloader info.

Step#11: fastboot -i 0x1bbb oem unlock

This command will unlock the bootloader of your device.

Step#12: fastboot -i 0x1bbb reboot

This command will reboot your device.

That’s all. You’ve unlocked the bootloader of your Alcatel One Touch Idol 3.

Installing TWRP recovery and rooting Alcatel One Touch Idol 3

Step#1: Download the TWRP recovery.img file and copy it to the folder where you extracted the contents of zip file you downloaded above.

Step#2: Download SuperSu.zip file and copy it to your phone’s internal storage.

Step#3: Enable USB debugging mode on your Alcatel One Touch Idol 3 and connect it to your PC. Allow your PC if it prompts on the phone.

Step#4: Now go to the folder where you extracted the contents of downloaded zip file and also copied the TWRP recovery.img file.

Step#5: Hold Shift key and Right click on empty area within that folder. Now click on “Open Command Prompt/Window Here”.

Step#6: Now in the command prompt, enter these commands

Step#7: adb reboot-bootloader

This will reboot your device in bootloader mode.

Step#8: fastboot -i 0x1bbb  flash recovery recovery.img

This will flash TWRP recovery on your Alcatel One Touch Idol 3.

Step#9: Reboot your device and you’re all done with flashing TWRP recovery. It’s time to root it now.

Step#10: Disconnect your device from your PC now.

Step#11: Now reboot your Alcatel One Touch Idol 3 in the newly installed TWRP recovery. To do so, turn off your device completely. Now turn it on by pressing either Volume Up + Power Key or Volume Up + Down + Power Key. One of these combinations will open TWRP recovery on your phone.

Step#12: Once you’re in TWRP recovery, tap “Install” and then locate the copied SuperSu.zip file. Select the file and swipe finger to flash it.

Step#13: As soon as TWRP is done flashing the file, reboot your phone and find SuperSu in app drawer. You can verify root access using Root Checker application.


Root Alcatel One Touch Idol 3 Without Install Custom Recovery

  1. Download this zip file and extract its content on some familiar location in your PC.
  2. Connect your Alcatel One Touch Idol 3 to your PC. Pull down notification bar on your phone and select “MTP” mode.
  3. Run Root.bat file from the extracted folder now.
  4. The device will reboot twice while rooting your phone. Just sit back and wait for it to root. Once done, checkout SuperSu in app drawer.
  5. That’s all.

That’s all. You’ve successfully unlocked bootloader, flashed TWRP recovery and rooted your Alcatel One Touch Idol 3. Facing any issues? Reach us out through the comment box below.

Credits: DallasCZ

Here’s How To Root Dell Venue 8 7840 Running Android Lollipop

2
Here’s How To Root Dell Venue 8 7840 Running Android Lollipop

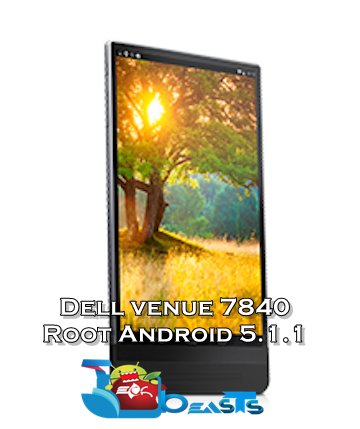
Dell didn’t want to stay behind in the Lollipop league. Recently it started updating its Venu 8 7840 to Android 5.1.1 Lollipop. The update brings goodies like new Material Design inspired UI, better performance, enhanced battery life and bug fixes. Users who are willing to update their Dell Venu 8 7840 to Android 5.1.1 Lollipop may want to root it after upgrading as updating process will wipe the root access from the device, or some users may want to root their device for the very first time. Rooting Dell Venu 8 on Android Lollipop is a little bit complex. If you’ve been wanting to root your Dell Venue 8 following an easy method, you may have spotted the right place to do so.

In the following post we are going to root Dell Venue 8 7840 running the all new Android 5.1.1 Lollipop. We will go through 3 different stages to gain the root access on the new firmware. As the method is complex, it’s tore down in comprehensive parts to avoid any confusion. Let’s go through some precautions and gain the root access on our beloved Dell Venue 8 7840 powered by Android Lollipop.Dell-updates-the-Venue-8-7840-tablet-to-Android-5.0-Lollipop

Early preparations & precautions

  • This guide is only for Dell Venue 8 7840 running Android 5.1.1 Lollipop. Do not try this on any other device.
  • Charge your phone up to at least 50% in order to avoid any power issues during the whole process.
  • Backup your important contacts, text messages, call logs and important media content just as a safety measure.
  • Follow this guide to the letter to avoid any mishap.

Downloads and installations

  1. Download and install Intel Phone Flash Tool Lite
  2. Download and install Intel USB drivers
  3. Download and extract Droidboots.zip file for Dell Venue 8 7840 to get firmware files.
  4. Download Temporary Recovery: IntelAndroid-FBRL-05-16-2015-PTR.7z – Unzip this file using 7zip.

Step 1: Downgrading With Droidboot

  1. Make sure that you’ve performed first three steps in downloads and installations.
  2. Now open the newly installed Intel Phone Flash Tool Lite
  3. Now in Intel Phone Flash Tool Lite, click on Flash File and select the “1-502_droidboot_and_firmware.xml” from the Droidboots.zip folder that you extracted above.
  4. Click start to flash the file, and let Intel Phone Flash Tool downgrade your device for a while.

Step 2: Using Temporary Recovery To Root the Device

  1. Download SuperSu.zip file and copy it to your phone’s internal storage.
  2. Now open the extracted IntelAndroid-FBRL-05-16-2015-PTR.7z folder and open “Launcher.bat’ file that you will find in it.
  3. A command window will now open with some options in it.
  4. Enable USB debugging on your phone and connect your phone with your PC now.
  5. Now the opened command window type Accept to access next menu.
  6. Now type “T4” to select the 4th option in the next menu. This will boot your phone in temporary recovery.
  7. As the temporary CWM recovery boots up on your Dell Venue, select “Install Zip > Choose Zip from SD card > SuperSu.zip > Yes” and flash it. Let CWM root your device. Once done, reboot your device
  8. As your device boots up, verify root access using Root Checker application and the proceed to the next step..

Flashing the new firmware now with root access

  1. Now once again, open Intel Flash Tool Lite.
  2. Connect your phone with your PC.
  3. Now click on Flash File and select “2-510_droidboot.xml‘ from the extracted droidboot folder.
  4. Once done, now again click on Flash File and this time select “3-510_firmware.xml“. Click start to flash it.
  5. Your device will reboot now, disconnect it and you will be rooted with Android 5.1.1 Lollipop on your Dell Venue 8 now.
  6. That’s all.

Stuck with something? Reach us out through the comment box below.

Credits: xBIGREDDx | Social-Design-Concept | VampireFo

Install CWM Recovery & Root Lenovo K3

2
Install CWM Recovery & Root Lenovo K3

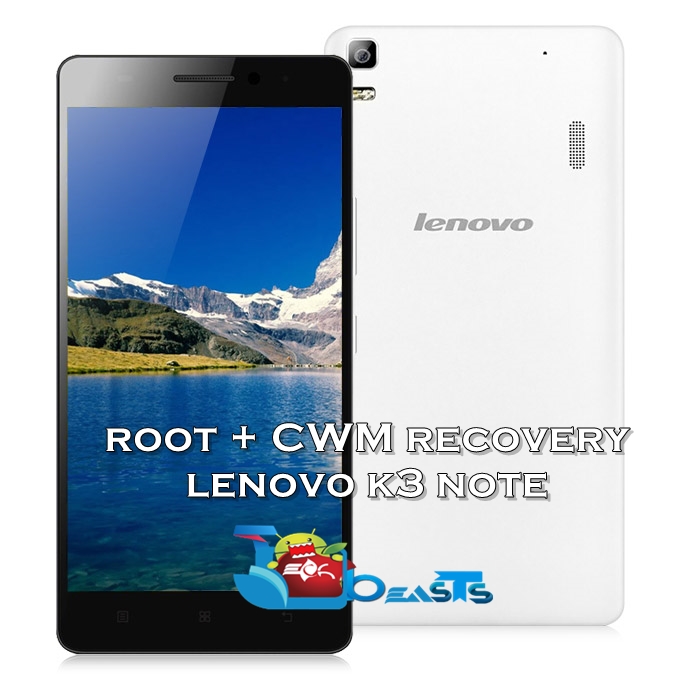
Lenovo’s K3 Note comes out as a result of real justice between money and the spec sheet. The K3 Note wipes of the lines of difference between high end, mid range and low end smartphones. The K3 Note offers a top-notch specifications in a below mid-range price. K3 Note has helped Lenovo to step ahead in the smartphone arena. K3 Note sports a 5.5. inch full HD display on the front with a 5 MP selfie shooter. At the back it got a 13 MP lying a flat, smooth design. Lenovo has powered K3 Note with 1.7 GHz octa-core MediaTek MT6752 processor
accompanied by Mali-T760 GPU. There’s a RAM of 2 GB, internal storage is 16 GB which is also expandable with the help of a microSD card slot. Lenovo K3 Note has a whopping 3000 mAh battery under the hood. You may find this device running on Android Lollipop out of the box. You may be surprised to know that K3 Note with these specifications is available under $200, which makes it one of the best and affordable smartphones. K3 Note shows Lenovo’s efforts to make its way among well-reputed smartphone manufacturers.

K3 Note is making its way to the markets at the moment. Many users have already got their hands on this device and shown their liking for this device. Just in case you’re going to own one, you may want to unleash the real potential of your K3 Note, which is possible by installing a custom recovery and rooting it. K3 Note is catching developers’ eyes, and we will be coming across enough custom stuff for this device. For now you can install a CWM recovery and root your K3 Note to enhance its performance. In the following post we are going to show you how you can install a CWM recovery using ADB & Fastboot method, and how you can root your K3 Note after installing the custom recovery.k3_lenovo

Precautions

  1. This guide is only for Lenovo K3 Note. Do not try this on any other device.
  2. Charge your phone up to 50% to avoid any power issues during the recovery installation and root process.
  3. Backup your important contacts, call logs, sms messages and media content as a safety measure.
  4. Enable USB debugging mode on your K3 Note. To do so, go to settings > about device > tap build number for 7 times. You will have developer options in settings now. Open developer options and enable USB debugging mode.
  5. Use original data cable to establish connection between your phone and your PC.
  6. Follow this guide to the letter.

Disclaimer: This is a custom process which will void the warranty of your phone. Make sure that you’re doing it at your own risk. In case of a mishap, Techbeasts or Lenovo may not be held responsible.

Required downloads and installations

How To Install CWM & Root Lenovo K3

Step#1: Open the Minimal ADB & Fastboot folder that you got after extracting the Minimal ADB & Fastboot drivers zip file.

Step#2:  From the Minimal ADB & Fastboot folder open “py_cmd.exe” file.

Step#3:  Now connect your Lenovo K3 Note with your PC. Make sure that you’ve enabled USB debugging mode before doing this. Upon connecting having USB debugging mode enabled, it will ask you on your phone to allow connection with your PC. Allow the connection and proceed.

Step#4:  In py_cmd.exe type “adb devices”. You will see the list of attached devices in command line, which will show some codes against your device as well. This means that your device is properly connected now.

Step#5:  Now enter following commands in the py_cmd.exe one by one.

Step#6:  adb reboot bootloader

Your device will now reboot in fastboot / bootloader mode.

Step#7:  fastboot devices

It will verify your device’s connection in fastboot mode.

Step#8:  fastboot flash recovery recovery.img

It will flash CWM recovery in your K3 Note.

Step#9:  fastboot reboot

It will reboot your device from fastboot mode.

Step#10: Now turn off your phone completely as we are going to boot in to recovery mode.

Step#11: After you’ve turned off your phone, turn it on by pressing and holding Volume Up + Volume Down + Power Key. As it boots up, it will ask you for language selection, select English and proceed.

Step#12: Now you will have access to the newly installed CWM recovery. In CWM recovery navigate using Volume Up & Down keys and use power key to make selection.

Step#13: Select “Install Zip > Choose from sdcard1 > select the SuperSu.zip file that you downloaded and copied in your phone”. Let it flash the SuperSu.zip file, once done, reboot your phone.

Step#14: Find SuperSu application in app drawer. You can verify root access using Root Checker application.

That’s all. Don’t forget to check out the 10 best root applications listed on our site. In case you’re stuck with anything, reach us out through the comment box below.