Home Blog Page 339

3 Easy Steps to Fix Stuck Buttons on Your Phone or Tablet

0
3 Easy Steps to Fix Stuck Buttons on Your Phone or Tablet
Image Credit:smartphones.wonderhowto.com

Here are 3 Easy Steps to Fix Stuck Buttons on Your Phone or Tablet. Nowadays we use smartphones & Tablets more then ever, it like we don’t computers or laptops. But what would you do if some of the most used keys no longer work the same way as they used to? The answer is quite simple, follow the instruction in our guide on how to Fix Stuck Buttons on Your Phone or Tablet.

An electronic device is not perfect and you cannot expect to work with all of your life. Same goes with all of your gadgets. One day, something will be messed up and then you need to fix it or get it fixed. If none works for you might need to get a new one. In this particular problem, we have buttons for smartphones which get stuck.

 However, instead of opting for exchanging or replacing the keys, you can opt for these  Easy Steps to Fix Stuck Buttons on Your Phone or Tablet. The reason why the buttons get stuck is because of external deposits of dust, oil and pollution from your hands or the environment so, there is nothing complicated in fixing the issue yourself.

3-easy-steps-fixing-stuck-buttons-your-phone-tablet.1280x600
Image Credit:smartphones.wonderhowto.com

3 Easy Steps to Fix Stuck Buttons on Your Phone or Tablet

To fix your Phone or Tablet stuck buttons, you will need Q-tips, canned air duster and isopropyl alcohol. So now let’s move on to the method.

Step 1:

The first thing that you need to do is to remove the deposits of dust from the sides of the button. To do so, make sure that you turn off the device first and remove the battery. Now, dip the Q-tip into isopropyl alcohol just enough to let the Q-tip absorb the alcohol but it should not be dripping.

Use this Q-tip to clean the sides of the buttons, which are bothering you, as deep as possible. Click the button a few times to let stuck deposits come to the surface.

Step 2:

After thoroughly cleaning the button itself, now you need to clean the frame of the buttons. Cleaning the walls that surround the button can be a little tricky. You can effectively clean the frame of the button if you press the button down and then do the cleaning, one side at a time. This will make the Q-tip rather accessible to the frame.

Step 3:

Finally, after you have done the cleaning, use the canned air duster to blow away the remaining deposits from the button and the frame. Hold the nozzle parallel to the button and then blow a few times. Make sure not to push any deposits down into the button frame.

That’s all. Now the stuck button should be free and you will find it more effortless to click it. You might require repeating the process a few times to completely clean the button.


Download Mimicker Alarm APK for Android

0
Download Mimicker Alarm APK for Android

Download Mimicker Alarm APK for Android: Getting out of the bed early morning is something more than hard. We all use alarms, but the ordinary alarms sometimes do not work and we fall asleep again. If there’s something interesting to do right when we wake up, then getting out of the bed can get much easier. Microsoft seems to have taken notice of this thing and came up with a new application.

Mimicker Alarm APK
Mimicker Alarm APK

About Mimicker Alarm:

Mimicker Alarm is a new Microsoft application that just came up a day ago. The application wakes you up by doing some sort of mimicry. It will either require you to speak something written on the screen,  capture a selfie or the application will simply ask you to leave your bed.

The mimicry game makes the best possible use of your surroundings to wake you p. It might give you some real-time task that you’ve to complete and that’s how you will get out of the bed. The given task has to be completed in a limited time span. If you fail to complete the task, the application will assume that you’ve fallen asleep once again and it will start ringing the alarm.

Here’s what Microsoft has explained about this application.

Features include:
First run experience to help you learn the app
Alarm customization for time, day, ringtone, snooze and Mimic
Multiple Mimics to wake up with: Match the expression, capture the color, complete the tongue twister, or shuffle between all three
Personalized images you can share with friends after each alarm

If you haven’t been able to get your hands on Mimicker Alarm application or if it hasn’t appeared in the Google Play Store at your end, you may want to grab the APK file of this application. We’ve pulled out the latest Mimicker Alarm APK and linked it right here. You can go ahead and download the Mimicker Alarm APK and install it as well using the instructions listed below.

Download Mimicker Alarm APK for Android

  1. Download Mimicker Alarm APK | Google Play Store link.
  2. Copy the Mimicker Alarm APK file to your phone.
  3. Now on your phone, go to settings > security > allow unknown sources > check it.
  4. Now using a file manager, locate Mimicker Alarm APK and tap to install it.
  5. Follow on-screen instructions to install the application.
  6. Once done, access the application from the app drawer and start using it.
  7. That’s all. Best of luck.

Update Galaxy S5 Mini G800F/M/Y to Android 6.0 Marshmallow via CyanogenMod 13

1

Succeeding guide will help you to flash Android 6.0 Marshmallow CyanogenMod 13 custom ROM on your Galaxy S5 Mini G800F, G800M and G800Y. Before proceeding with the flashing guide, we will learn about the Galaxy S5 Mini and its software.galaxy_S5_mini

Galaxy S5 Mini originated running Android KitKat on-board. The device no enjoys Android Lollipop, but the Lollipop time has already come to an end. Manufacturers are busy updating their flagship devices to Android Marshmallow which is the latest version of Android. We doubt if Samsung will update the Galaxy S5 Mini to any higher version of Android officially, but this sure is possible unofficially by means of a custom ROM. CyanogenMod 13 custom ROM has already made its way towards the Galaxy S5 Mini community, so if you’re willing to taste the Marshmallow sweetness, you may go ahead and give it a try now.

Most of the mainstream features like Camera, RIL, Bluetooth, WiFi etc are found working pretty fine in this ROM. Known issues include fingerprint scanner, Pulse sensor and Light sensor. If these features aren’t a big deal for you, you may go ahead and flash this ROM on your Galaxy S5 Mini without any hiccups here and there. This ROM is in its development stages, and it may not be kept as a daily driver. You may proceed if you’re an Android power user and you know how these custom ROMs work in an Android device. Newbie can be a little more careful and follow this guide to the letter to avoid any mishap.

Pre-installation instructions

  1. This guide is intended for Galaxy S5 Mini SM-G800F/M/Y users. Do not try this on any other device. Using the files linked here on a different device can result in bricking it. Verify your device model number in your phone’s settings > about device section.
  2. Your device must be running the latest possible available version of Android.
  3. Charge your phone up to 50% to avoid any power issues during the flashing process.
  4. Flash a custom recovery like TWRP on your Galaxy S5 Mini.
  5. Backup everything including contacts, call logs, sms messages and bookmarks. Also copy your media content to your computer.
  6. Create a Nandroid backup. This is highly recommend so that in case something goes wrong, you will be able to restore your system immediately by restoring Nandroid backup.
  7. Create an EFS backup of your device as well. Save the EFS backup to some safe place in your computer.
  8. Backup your important apps and apps data using Titanium backup if you want.
  9. Follow this guide carefully.

DISCLAIMER:THE METHODS INVOLVED IN FLASHING CUSTOM RECOVERIES, ROMS AND ROOTING YOUR PHONE ARE HIGHLY CUSTOM AND MAY RESULT IN BRICKING YOUR DEVICE, AND HAS NOTHING TO DO WITH GOOGLE OR THE DEVICE MANUFACTURER THAT IS SAMSUNG IN OUR CASE. ALSO ROOTING YOUR DEVICE WILL VOID ITS WARRANTY AND YOU WILL BE NO LONGER ELIGIBLE FOR ANY KIND OF FREE DEVICE SERVICES BY THE MANUFACTURERS/WARRANTY PROVIDERS. IN CASE OF ANY MISHAP WE MAY NOT BE HELD RESPONSIBLE.

Update Galaxy S5 Mini G800F/M/Y to Android 6.0.1 Marshmallow via CyanogenMod 13

  1. Download  latest cm-13.0-xxxxx.zip file.
  2. Download Gapps.zip (ARM 6.0.zip)file for CM 13.
  3. Connect your phone to your PC now.
  4. Copy the both the .zip files to the storage of your phone.
  5. Now disconnect your phone and turn it off complete.
  6. Boot into TWRP recovery now, in order to do so, turn it on by pressing and holding Volume Up + Home Button + Power Key. You should see the recovery mode in a while.
  7. Now in TWRP  recovery, wipe cache, factory data reset and advanced options > dalvik cache.
  8. After wiping all these three, select “Install” option.
  9. Now select “Install > Choose Zip from SD card > Select cm-13……xxxxx.zip file > Yes”.
  10. This will flash the ROM in your phone, once done get back to the main menu in recovery.
  11. Now once again select “Install > Choose Zip from SD card > Select Gapps.zip file > Yes”
  12. This will flash the Gapps in your phone.
  13. Reboot your device.
  14. You should see the Android 6.0 Marshmallow running on your device in a while.
  15. That’s all!

First boot may take up to 10 minutes, you may not worry if it’s taking that much long. In case it’s taking too long, you may boot into TWRP recovery and wipe cache and dalvik cache and reboot your device as it may fix the issue. In case your device is having issues, you may return to your old system using the Nandroid backup or follow our guide here to install stock firmware.

Got any queries? Reach us out through the comment box below.

Install Android 6.0 Marshmallow on Galaxy S4 VE I9515/L via CM 13

7
Install Android 6.0 Marshmallow on Galaxy S4 VE I9515/L via CM 13

Galaxy S4 Value edition, a little different variant of the original Galaxy S4 came out of the curtains carrying Android 4.4.2 KitKat on-board. Samsung updated this device to Android 5.0.1 Lollipop, and probably this is where the software life of this device will come to an end. Samsung won’t be updating the Galaxy S4 or any of its siblings to any further version of Android because of hardware limitations. Whenever a manufacturer puts the updates of a device to an end, custom ROMs help the devices to continue their journey and enjoy the higher Android version. Something similar has happened with the Galaxy S4 Value Edition as well. Marshmallow time is at its peak as Google has already released this new version of Android all around. If you’re a Galaxy S4 Value Edition owner and you’re also willing to get your hands on Google’s latest OS in your smartphone, it may be the right time for you to do so.S4 Value Edition

Android 6.0.1 Marshmallow is now available for the Galaxy S4 Value Edition GT-I9515 and GT-I9515L by means of CyanogenMod 13 custom ROM. CyanogenMod 13 is the most popular and widely used aftermarket Android firmware and has always given the devices which are forgotten by the manufacturers, a new life. The available CyanogenMod 13 custom ROM is an unofficial build. Most of the mainstream features like RIL, WiFi, Bluetooth, Camera are found to be working fine. The ROM seems good enough to flash, but we still recommend you to flash this ROM on your Galaxy S4 Value Edition if you’re an Android power user and you know how these custom ROMs work. For newbies, we recommend following this guide carefully to avoid any mishap. Let’s update our beloved Galaxy S4 Value Edition I9515 / I9515L to Android 6.0 Marshmallow via CM 13 custom ROM now.

Pre-installation instructions

  1. This guide is intended for Galaxy S4 Value Edition GT-I9515/I9515L users. Do not try this on any other device. Using the files linked here on a different device can result in bricking it. Verify your device model number in your phone’s settings > about device section.
  2. Your device must be running the latest possible available version of Android.
  3. Charge your phone up to 50% to avoid any power issues during the flashing process.
  4. Backup everything including contacts, call logs, sms messages and bookmarks. Also copy your media content to your computer.
  5. Create a Nandroid backup. This is highly recommend so that in case something goes wrong, you will be able to restore your system immediately by restoring Nandroid backup.
  6. Create an EFS backup of your device as well. Save the EFS backup to some safe place in your computer.
  7. Backup your important apps and apps data using Titanium backup if you want.
  8. Follow this guide carefully.

DISCLAIMER:THE METHODS INVOLVED IN FLASHING CUSTOM RECOVERIES, ROMS AND ROOTING YOUR PHONE ARE HIGHLY CUSTOM AND MAY RESULT IN BRICKING YOUR DEVICE, AND HAS NOTHING TO DO WITH GOOGLE OR THE DEVICE MANUFACTURER THAT IS SAMSUNG IN OUR CASE. ALSO ROOTING YOUR DEVICE WILL VOID ITS WARRANTY AND YOU WILL BE NO LONGER ELIGIBLE FOR ANY KIND OF FREE DEVICE SERVICES BY THE MANUFACTURERS/WARRANTY PROVIDERS. IN CASE OF ANY MISHAP WE MAY NOT BE HELD RESPONSIBLE.

Install TWRP Recovery on your Galaxy S4 Value Edition

  1. Download Odin3 V3.10.6.zip file and extract it on your desktop.
  2. Download and install Samsung USB drivers.
  3. Download TWRP Recovery.tar file and copy it to your desktop.
  4. Open Odin3 V3.10.6.exe that you extracted on your PC.
  5. Put your S4 Value Edition in download mode now. To do so, turn it off completely. Now turn it on by pressing and holding Volume Down + Home + Power Key. Once your phone boots up, press the Volume Up key to continue.
  6. Connect your phone to your PC now. The ID:COM box in the top-left corner of Odin3 should  turn blue. This indicates that your phone is connected properly.
  7. Now click the “AP” tab in Odin and select the TWRP recovery.tar file that you downloaded. It will take a second or two for Odin3 to load this file.
  8. Make sure that your Odin3 looks like this. The only option ticked should be F. Reset Time.

  9. Odin 3.10.6 Explained_Techbeasts
  10. Now you’re all set to flash the recovery. Just click the start button in Odin3 and sit back.
  11. Once the process box above ID:COM box shows green light and flashing process is finished, disconnect your device.
  12. Now turn off your device properly as we are going to boot into recovery mode.
  13. Now turn it on by pressing and holding Volume Up + Home + Power Key. This will boot your device in recovery mode. It should be TWRP recovery that you just installed.

Update Galaxy S4 Value Edition I9515/I9515L to Android 6.0.1 Marshmallow via CyanogenMod 13

  1. Make sure that you’ve installed TWRP recovery on your Galaxy S4 Value Edition.
  2. Download  latest cm-13.0-xxxxx.zip file.
  3. Download Gapps.zip (ARM 6.0.zip)file for CM 13.
  4. Download SuperSu.zip file.
  5. Connect your phone to your PC now.
  6. Copy the all the .zip files to the storage of your phone.
  7. Now disconnect your phone and turn it off complete.
  8. Boot into TWRP recovery now, in order to do so, turn it on by pressing and holding Volume Up + Home Button + Power Key. You should see the recovery mode in a while.
  9. Now in TWRP  recovery, wipe cache, factory data reset and advanced options > dalvik cache.
  10. After wiping all these three, select “Install” option.
  11. Now select “Install > Choose Zip from SD card > Select cm-13……xxxxx.zip file > Yes”.
  12. This will flash the ROM in your phone, once done get back to the main menu in recovery.
  13. Now once again select “Install > Choose Zip from SD card > Select Gapps.zip file > Yes”
  14. This will flash the Gapps in your phone.
  15. Now following the instructions listed in step 10, 11, flash SuperSu.zip file s well.
  16. Reboot your device.
  17. You should see the Android 6.0 Marshmallow running on your device in a while.
  18. That’s all!

First boot may take up to 10 minutes, you may not worry if it’s taking that much long. In case it’s taking too long, you may boot into TWRP recovery and wipe cache and dalvik cache and reboot your device as it may fix the issue. In case your device is having issues, you may return to your old system using the Nandroid backup or follow our guide here to install stock firmware.

Got any queries? Reach us out through the comment box below.

Update Galaxy S3 I9300 to Android 6.0.1 Marshmallow via CyanogenMod 13

0

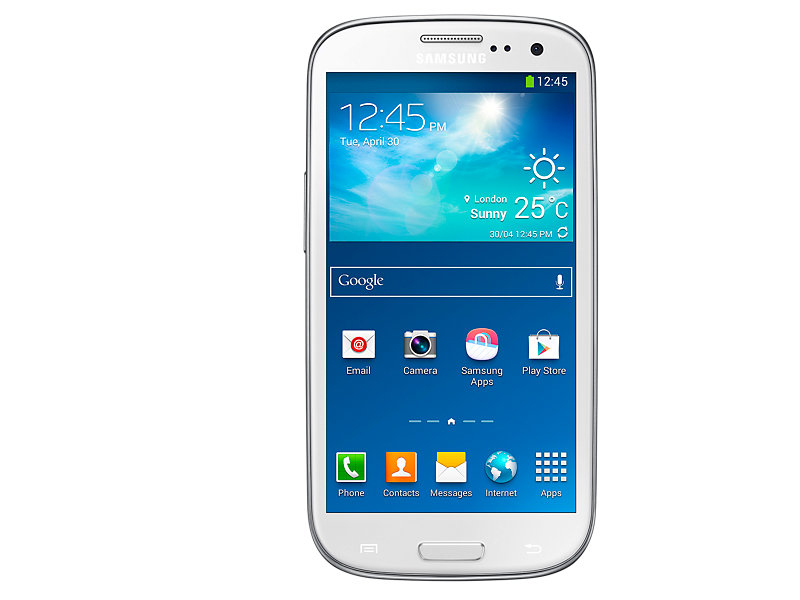
Android 6.0.1 Marshmallow CyanogenMod 13 custom ROM is finally available for our beloved Galaxy S3 I9300. You can follow the instructions in the on-going guide to flash this Android 6.0.1 Marshmallow on your international Galaxy S3 GT-I9300 using CyanogenMod 13 custom ROM.

Update Galaxy S3 I9300

Before heading towards the installation method, we will have a recap of the Galaxy S3 and its software life. Samsung’s famous flagship came up back in 2012. Galaxy S3 brought Samsung in the much needed spotlight, the device was a huge success for the company. Galaxy S3 originated carrying Android 4.0.4 Ice Cream Sandwich. Samsung made the device reach Android 4.3 Jelly Bean, and since then users haven’t come across any further version of Android. Since the discontinuity of official Android updates for the Galaxy S3, custom ROMs have been keeping this device alive. Google has already released the 6th iteration of Android named as Android 6.0 Marshmallow. Android Marshmallow packed inside custom ROMs is coming up for quite many legacy devices. If you’ve been finding a way to update your Galaxy S3 I9300 to Android 6.0 Marshmallow, then using a nice custom ROM may be the best choice for you. Since CyanogenMod is the most widely used and the most popular custom ROM and it has already made its way for our beloved Galaxy S3, we will go ahead now and flash this very custom ROM to give your device an entirely new life.

Be reminded that this is a custom ROM, and is in development stages. You will not find everything working perfectly fine and you will also come across quite many bugs. We only recommend you to flash this ROM if you’re an Android power user and you have a great idea about custom ROMs. If you’re a newbie, we recommend you to follow the instructions to the letter to avoid any mishap.

Pre-installation instructions

  1. This guide is intended for Galaxy S3 GT-I9300 users. Do not try this on any other device. Using the files linked here on a different device can result in bricking it. Verify your device model number in your phone’s settings > about device section.
  2. Your device must be running the latest possible available version of Android.
  3. Charge your phone up to 50% to avoid any power issues during the flashing process.
  4. Flash a custom recovery like TWRP on your Galaxy S3 I9300.
  5. Backup everything including contacts, call logs, sms messages and bookmarks. Also copy your media content to your computer.
  6. Create a Nandroid backup. This is highly recommend so that in case something goes wrong, you will be able to restore your system immediately by restoring Nandroid backup.
  7. Create an EFS backup of your device as well. Save the EFS backup to some safe place in your computer.
  8. Backup your important apps and apps data using Titanium backup if you want.
  9. Follow this guide carefully.

DISCLAIMER:THE METHODS INVOLVED IN FLASHING CUSTOM RECOVERIES, ROMS AND ROOTING YOUR PHONE ARE HIGHLY CUSTOM AND MAY RESULT IN BRICKING YOUR DEVICE, AND HAS NOTHING TO DO WITH GOOGLE OR THE DEVICE MANUFACTURER THAT IS Samsung IN OUR CASE. ALSO ROOTING YOUR DEVICE WILL VOID ITS WARRANTY AND YOU WILL BE NO LONGER ELIGIBLE FOR ANY KIND OF FREE DEVICE SERVICES BY THE MANUFACTURERS/WARRANTY PROVIDERS. IN CASE OF ANY MISHAP WE MAY NOT BE HELD RESPONSIBLE.

Update Galaxy S3 I9300 to Android 6.0.1 Marshmallow via CyanogenMod 13

  1. Download  latest cm-13.0-xxxxx.zip file.
  2. Download Gapps.zip (ARM 6.0.zip)file for CM 13.
  3. Connect your phone to your PC now.
  4. Copy the both the .zip files to the storage of your phone.
  5. Now disconnect your phone and turn it off complete.
  6. Boot into TWRP recovery now, in order to do so, turn it on by pressing and holding Volume Up + Home Button + Power Key. You should see the recovery mode in a while.
  7. Now in TWRP  recovery, wipe cache, factory data reset and advanced options > dalvik cache.
  8. After wiping all these three, select “Install” option.
  9. Now select “Install > Choose Zip from SD card > Select cm-13……xxxxx.zip file > Yes”.
  10. This will flash the ROM in your phone, once done get back to the main menu in recovery.
  11. Now once again select “Install > Choose Zip from SD card > Select Gapps.zip file > Yes”
  12. This will flash the Gapps in your phone.
  13. Reboot your device.
  14. You should see the Android 6.0 Marshmallow running on your device in a while.
  15. That’s all!

First boot may take up to 10 minutes, you may not worry if it’s taking that much long. In case it’s taking too long, you may boot into TWRP recovery and wipe cache and dalvik cache and reboot your device as it may fix the issue. In case your device is having issues, you may return to your old system using the Nandroid backup or follow our guide here to install stock firmware.

Got any queries? Reach us out through the comment box below.

The Ultimate Guide to Xposed Framework for Android

0
The Ultimate Guide to Xposed Framework for Android

Xposed Framework for Android: One of the greatest traits of owning an Android is its extensive customization capabilities which put other mobile operating systems to shame. Google has brought a lot of changes to Android over the years and we can customize widgets, keyboards, home launchers and many other components of the operating system. But unless you root your device, you’re pretty much just touching the top layer of the awesomeness. Rooting an Android device unleashes the hidden potential of the device and allows a hell lot of customizations.

Xposed Framework for Android

Xposed Framework for Android:

Many developers are taking the advantage of rooted devices and making cool apps which require root permissions on your device. With these apps, you can fiddle with the system files and services, so literally, you’re controlling the entire operating system at your will.

You can also find many device-specific mods and tweaks which improve the performance of the device and also makes your device unique with a lot of interface modifications. However, these things are a bit risky as it involves unlocking the bootloader, installing various mods which may brick your device occasionally.

Luckily, we have a powerful alternative which doesn’t require knowledge of custom Android development or editing system code.

About Xposed Framework:

Xposed Framework is a fabled Android development created by rovo89 which can change the behavior of the system and apps without touching the APKs or the code behind it. That’s great because it means that modules can work for different versions and even ROMs without any changes. Moreover, it’s pretty easy to undo the changes as all changes are done in the memory, you just need to deactivate the particular Xposed module and reboot to get your original system back. Xposed works with devices running Android 4.0.3 or later with root permissions enabled. So, let’s see how to install the Xposed framework and modules on your Android device.

How to Install Xposed Framework for Android:

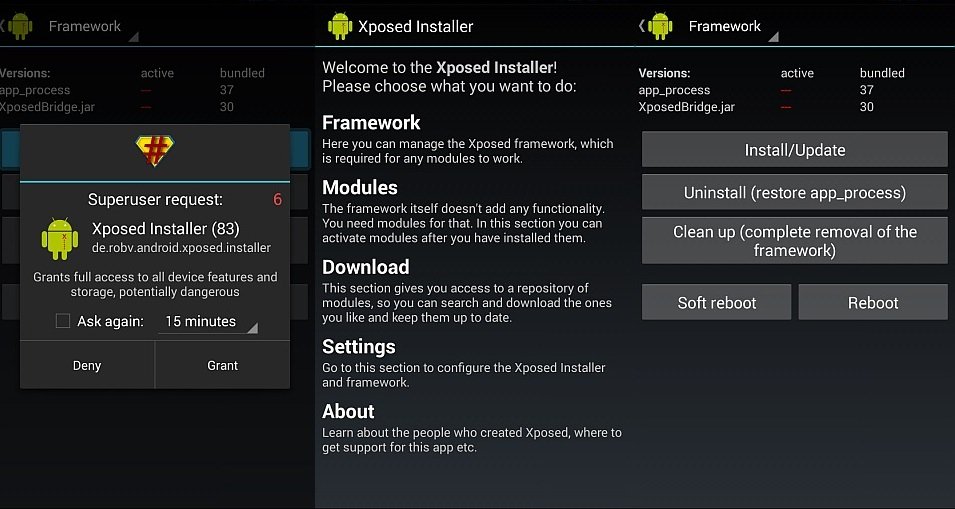
Download the latest Xposed framework installer app, and install it on your device. Launch the Xposed Installer app from your app drawer once it’s installed. Now tap on the Framework section, then tap the ‘Install/Update’ button.

xposed-framework

It will take some time for the framework to install, so don’t worry if the app stuck here for a while. Grant the SuperSU permission when prompted and you’re done with the framework installation. Now, you need to reboot the device for the changes to take place.

  • For Xposed Framework installation on Lollipop devices, follow this link.
  • For Xposed Framework installation on Marshmallow devices, follow this link.

So, now you have successfully installed the Xposed Framework but this doesn’t change anything in your device. You will need to install some Xposed modules to bring mods and changes to your device. Now, we will see how to install Xposed modules on your device and use them.

How to Install and Enable Xposed Modules

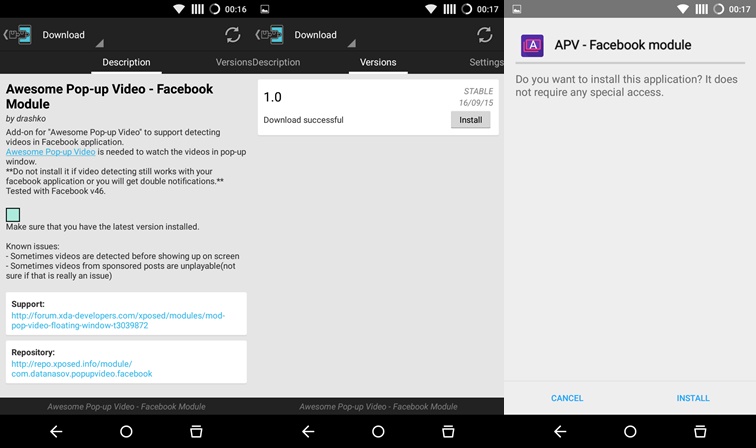
Xposed modules bring the functionality to your device with the help of the Xposed framework. You can download them right from the Xposed installer app or from other sources as well. To install the Xposed module from Xposed installer app, click on the download section and choose from numerous modules. Select the module and then click on the download button to download and install the app.

xposed-module-install

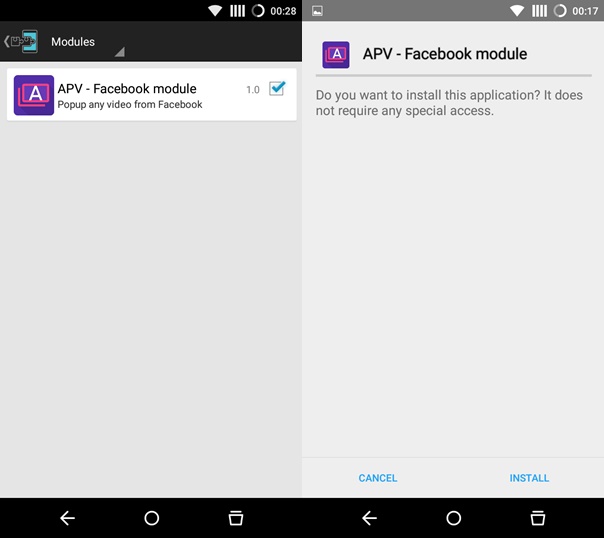
Now, you’ll need to enable the installed module. Once the module is installed, you’ll get a notification to enable the module. Just click on it to land in the Modules section of the Xposed installer, now check the module you want to enable and reboot the device to complete the process.

xposed-module-enable

Finally, after the reboot, just tap on the installed Xposed module to land in that particular module’s settings. Configure it as per your requirement and enjoy the power of Xposed Framework for Android.

That’s it, folks. Let us know if you need to know anything more about the Xposed Framework for Android.

How to Install Stock firmware on LG devices using KDZ Flash Tool

0
How to Install Stock firmware on LG devices using KDZ Flash Tool

Learn How to Install Stock firmware on LG devices using KDZ Flash Tool:

Android is known for its customization abilities and you might have already heard about rooting, custom recovery, custom ROMs, kernels and stuff. However, all these tech voodoo stuff is a bit dangerous at times and could possibly brick your device. If you’re lucky, you might have taken a nandroid backup to restore it later, else you have to search for other ways to unbrick your device.

Stock firmware on LG

Stock Firmware are one of the best ways to install the Android OS supplied by your manufacturer. Usually, devices get OS updates via OTA for user convenience but there are other methods to install the stock firmware. Manufacturers design PC software to install stock firmware which helps you recover the device in case of any mishap. LG has one such software called the Flash Tool which flashes the stock firmware on LG smartphones which is in the KDZ format.

The LG Flash tool can also be used to install the latest OS updates on your smartphone without waiting for the OTA update to reach your device. Installing stock firmware with KDZ flash tool erases everything on your device and loads a fresh copy of Android. Today, we will see how to install stock firmware on LG devices using KDZ Flash tool. So, let’s get on with the tutorial without any further ado.

Prerequisites:

  • Download the KDZ firmware for your LG device. Make sure to check the device model number before choosing a compatible firmware from a trusted source like XDA. Choosing a wrong firmware can potentially hard brick your device.
  • Download and install the LG Flash Tool 2014 (extract files if compressed) on your PC → Link
  • Make sure you have the latest LG drivers installed on your PC. If you didn’t install them yet, follow our exclusive USB drivers guide.
  • During the flashing process, disconnect from the internet and also make sure your Antivirus is turned off.

How to Install Stock firmware on LG devices

  1. Download the KDZ firmware for your LG smartphone and place it in an accessible directory on your PC. It’s better not to place it on the desktop as the spaces between Windows username (Ex: John Paul) could sometimes cause the firmware installation to fail.
  2. Put your LG device into Download Mode. To do this, power off your device, and connect it to the PC via USB while pressing both the volume keys of your device. Now, your device’s screen should show the Download Mode icon and device driver might get installed. If you didn’t enter the download mode, try the same process by just pressing the Volume Up button instead of both Volume buttons.
  3. Copy the KDZ file in the same folder where you have the Flash Tool files. Now, simply launch the LGFlashtool2014.exe file.
  4. In the LG Flash Tool, set the Select Type as CDMA, and load the KDZ file by clicking on the folder icon next to the Select KDZ file box.
    lg-flash-tool-2014
  5. Finally, choose CSE Flash option as we are installing a fresh copy of the stock firmware on your device. This will format all the app data as well as the internal storage of the device.
  6. In the next window, you’ll see some auto-populated data. Don’t bother about them, just click on Start to begin flashing.
    lg-flash-read-phone-information
  7. Now, select the Region and Language and clear phone Software update Registry in the following popup.
  8. Click on the OK button to begin flashing.
  9. You can see the firmware flashing progress in the Flash tool window. The process could take a while to complete, so sit back and relax until the flashing completes.
    flash-tool-progress
  10. The device will reboot automatically once the firmware flashing is complete. The first boot may take some time as the OS needs to build cache during the first boot.

That’s it. If you got any error while flashing the stock firmware, repeat the above process again and make sure the USB drivers are installed properly, Antivirus is turned off the PC is not connected to the Internet.

How to Root any Android Device without a PC

0
How to Root any Android Device without a PC

Rooting an Android device is the gateway to unleash the awesomeness and extreme power on your device. Android is a Linux-based OS, so with a little bit of tweaking, you can access the root privileges on your device. This process is called ‘Rooting’, which is basically an exploit to unlock all the barriers that are placed between you and the superuser (root user). Once you have the root privileges on your device, you can access and modify system files and code at your will. Of course, as you can imagine, it’s a time bomb if you don’t know how to handle it.

root-android-device-without-PC

Usually, rooting is a complex task to achieve and takes some hectic turns on the way. However, many developers have tried and brought One-Click root tools into play, that too without the use of a PC. We have many methods to root Android devices with PC, but there are quite a few options to Root any Android device without a PC. With these tools, you can root your device on-the-go. Today, we will see various root tools that can root your Android device without the need of a PC.

Prepare your Device

Before your begin with rooting your Android device, follow the below checklist to ensure a smooth process.

  1. Charge your phone battery to at least 50%
  2. Enable Unknown Sources from Settings » Security » Unknown Sources.
  3. Make sure to take proper backups of your device before proceeding with the rooting guide.

How to Root any Android Device without a PC/ Computer

We have picked several apps and tools that will root your Android devices without the need of a computer. Choose the method that fits you the best.

1. Framaroot

Framaroot is the best app which supports a wide range of Android devices running on various OS versions. Rooting with Framaroot is as easy as Open » Choose Exploit » Done. There is a huge success rate of rooting with this app and many Android users have reported it’s easy and safe.

framaroot

So, here’s how to root your device with Framaroot app.

  • Download Framaroot: Link
  • Using any File manager, install the APK file.
  • Launch the app drawer and open the framaroot app.
  • Now select Superuser or Super SU upon your choice.
  • Select the Exploit and the process will begin.
  • Once done, reboot your device.

You can also check out our complete Framaroot guide.

2. KingRoot

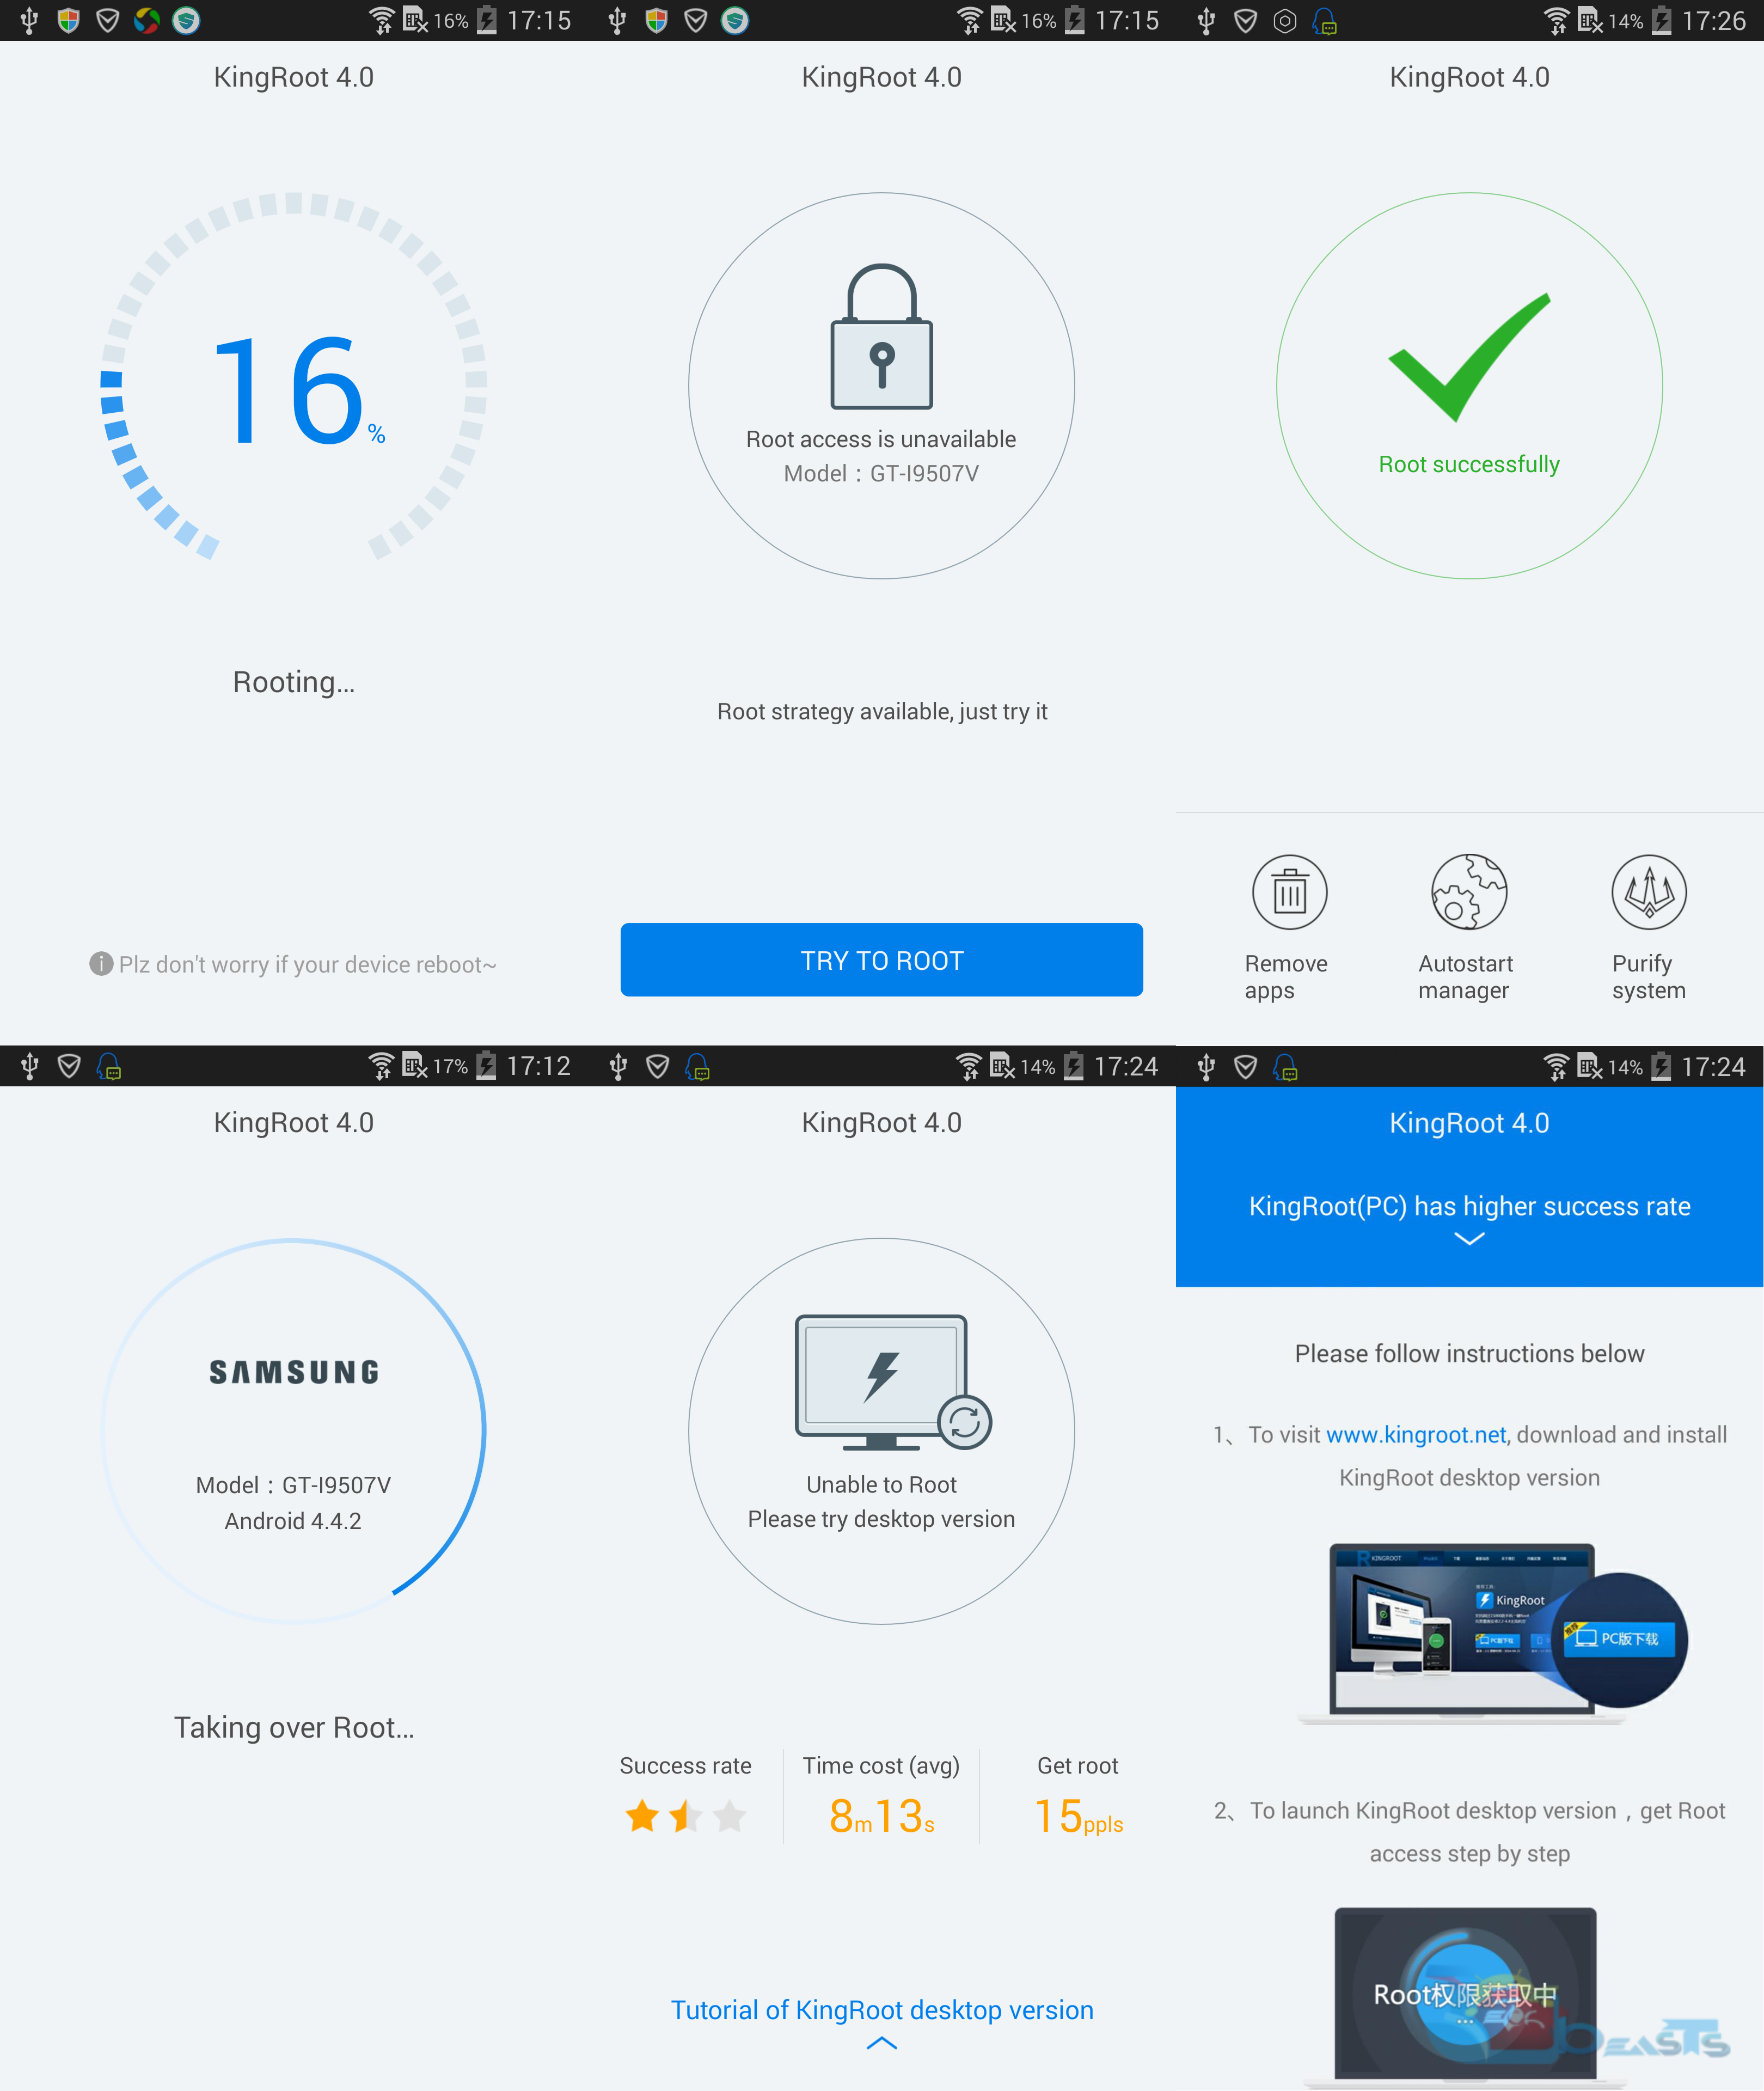
KingRoot tool is another One-Click Root tool that can possibly root your device without breaking a sweat. This tool is known to root a huge number of devices including the latest Galaxy S6 and other flagship devices. So, let’s see how to root your device with KingRoot app without using a PC.

  • Download the Kingroot mobile app: Link | Link
  • Open the File manager, and click on the downloaded APK file to install the app.
  • Launch the app drawer and open the Kingroot app.
  • The Kingroot app will do the rest and you just need to wait patiently until everything completes.

Here’s our extensive KingRoot guide.

3. iRoot App

iRoot is another one-click Android app which you can use for rooting your Android device without a PC. Similar to the above apps, the iRoot app also supports a good number of Android devices including Samsung, Sony etc… You can root and unroot your device with one-click using this app. So, follow the below procedure to root your device with the iRoot app.

  • Download the iRoot mobile app: Link
  • Open the File manager, extract the APK and install the app.
  • Launch the app drawer and open the iRoot app.
  • Click on the Root button and the app does the rest.

4. Towel Root

Towel Root is a universal root tool which mostly supports Samsung devices and can root your Samsung device without voiding Knox security flag. It’s also a simple one-click root tool and all you need to do is to download the APK from below, install it and click the make it ra1n button to root your device.

  • Download the latest Towelroot app from here by clicking the Lambda symbol.
  • Open the File manager, navigate to the downloaded app and install it.
  • Now launch Towelroot app and tap make it ra1n button to root your phone.
  • Your phone should reboot automatically.
  • Once the device is powered ON, download the latest SuperSU app from Google Play Store and install it.

Here’s our complete TowelRoot guide.

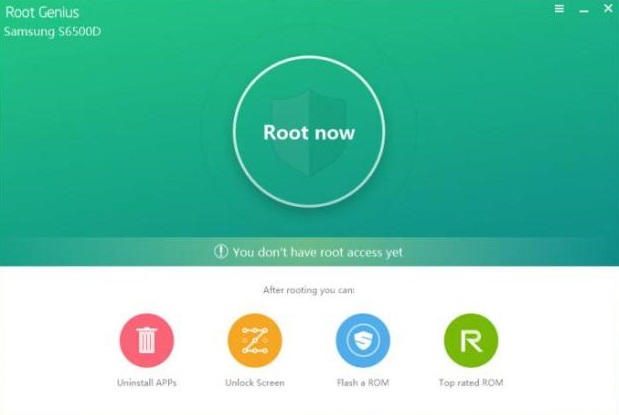
5. Genius Root

Genius Root is yet another rooting app that allows the users to root their device in one-click. It supports over 10,000 Android devices including the latest flagship devices and OS versions. All you need to do is to download the latest Genius root app, install it and follow the on-screen instructions to root your devices.

root-genius

  • Download the APK file directly to your phone or copy it to your phone from your PC.
  • Locate the APK file in your phone using a file manager and install it.
  • Now open the installed Root Genius from App Drawer.
  • Follow on-screen instructions to root your Android smartphone now.

Here’s our complete Genius Root guide.

So, that’s it. Let us know which method helped you to root your device in the comments section below.

Install Android 6.0.1 Marshmallow on your Xperia ZR via CyanogenMod 13

1
Install Android 6.0.1 Marshmallow on your Xperia ZR via CyanogenMod 13

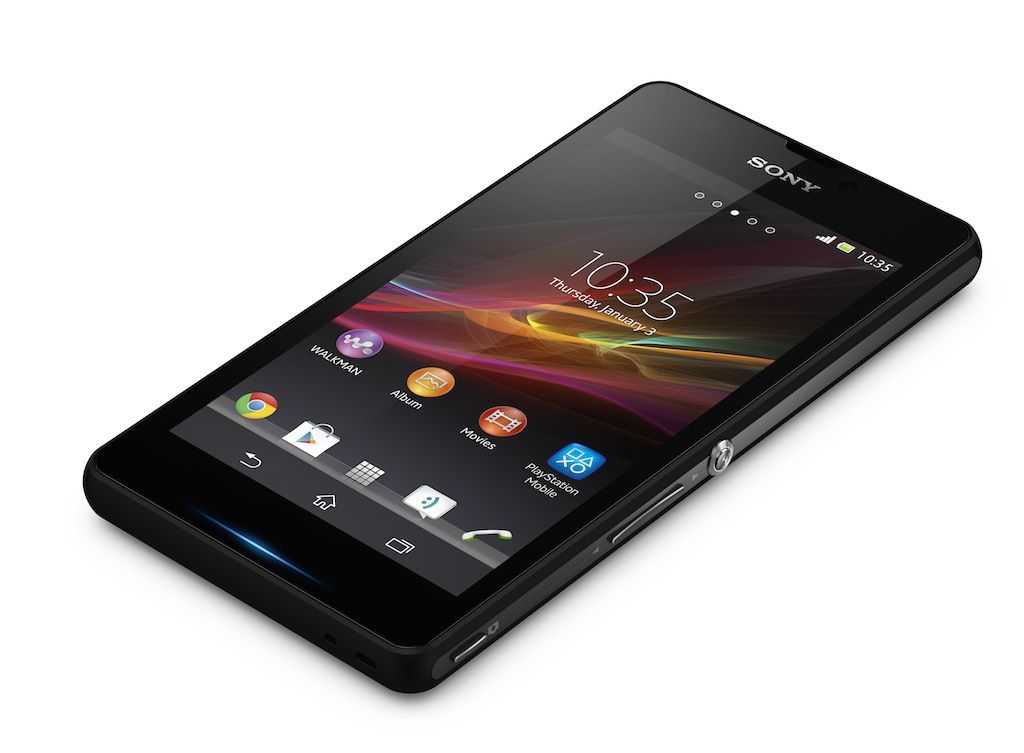
Xperia ZR won’t be getting any further version of Android. Xperia ZR’s software update life came to an end after getting updated to Android 5.1.1 Lollipop. Due to hardware limitations, Sony won’t be updating this device to Android Marshmallow or any higher version of Android to come in the future. Marshmallow sweetness has been spread everywhere in the Android world, so it may put the Xperia ZR owners in the Marshmallow appetite. To fulfil it, you will need the help of a custom ROM. Since the Android Marshmallow custom ROM has just begun, the best choice for you to go with maybe the CyanogenMod 13. The good news for Xperia ZR owners is, Android 6.0.1 Marshmallow based on CyanogenMod 13 is out for Xperia ZR now.5_Xperia_ZR_Side_Black

The ROM is the hard work of XDA senior member chipa_p. CyanogenMod 13 for Xperia ZR is in its alpha stage for now. There are bugs expected in this ROM so we only recommend Android power users to go ahead and flash this ROM. If you’re a newbie, you will want to make sure that you follow all the flashing instructions to the letter. We can move forward and begin with the flashing process in order to update our beloved Sony Xperia ZR to Android 6.0.1 Marshmallow via CyanogenMod 13 custom ROM.

Some precautions

  1. This guide is intended for Xperia ZR only. Do not try this on any other device.
  2. Charge your Xperia ZR up to 50% to avoid any power issues during the flashing process.
  3. Flash a custom recovery on your Xperia ZR.
  4. Backup everything including your contacts, call logs, sms messages and bookmarks. Also create a Nandroid backup.
  5. Follow this guide to the letter to avoid a mishap.

DISCLAIMER:THE METHODS INVOLVED IN FLASHING CUSTOM RECOVERIES, ROMS AND ROOTING YOUR PHONE ARE HIGHLY CUSTOM AND MAY RESULT IN BRICKING YOUR DEVICE, AND HAS NOTHING TO DO WITH GOOGLE OR THE DEVICE MANUFACTURER THAT IS SONY IN OUR CASE. ALSO ROOTING YOUR DEVICE WILL VOID ITS WARRANTY AND YOU WILL BE NO LONGER ELIGIBLE FOR ANY KIND OF FREE DEVICE SERVICES BY THE MANUFACTURERS/WARRANTY PROVIDERS. IN CASE OF ANY MISHAP WE MAY NOT BE HELD RESPONSIBLE.

How To Install Android 6.0.1 Marshmallow on your Xperia ZR via CyanogenMod 13

  1. Download Android 6.0.1 Marshmallow CM 13 ROM.zip file.
  2. Download Gapps.zip [pico package] file for Android 6.0.1 Marshmallow.
  3. Copy both the .zip files to your Xperia ZR’s internal or external SD card.
  4. Boot your Xperia ZR into custom recovery. If you’ve installed dual recovery using the guide linked above, you should use TWRP recovery.
  5. Now in TWRP recovery, perform a factory reset under wipe option.
  6. Now get back to the main menu in TWRP recovery and select “Install”.
  7. Under “Install”, scroll all the way down and choose ROM.zip file. Flash this file.
  8. Once done, get back to the TWRP recovery menu again and this time flash Gapps.zip file using the instructions as stated in the above step.
  9. Once you’ve flashed both files, wipe cache and dalvik cache under wipe option.
  10. Reboot your device into system now.
  11. That’s all. Your device should boot up in CM 13 Android 6.0.1 Marshmallow now.

In case something goes wrong, you may considering restoring the Nandroid backup. Another way to fix your device from the bricked state is to flash a stock ROM. Here’s our comprehensive guide on how to flash a stock firmware on your Sony Xperia

If you’ve got any queries, feel free to reach us out through the comment box below.

Install Android 6.0.1 Marshmallow on your Xperia Z via CyanogenMod 13

19
Install Android 6.0.1 Marshmallow on your Xperia Z via CyanogenMod 13

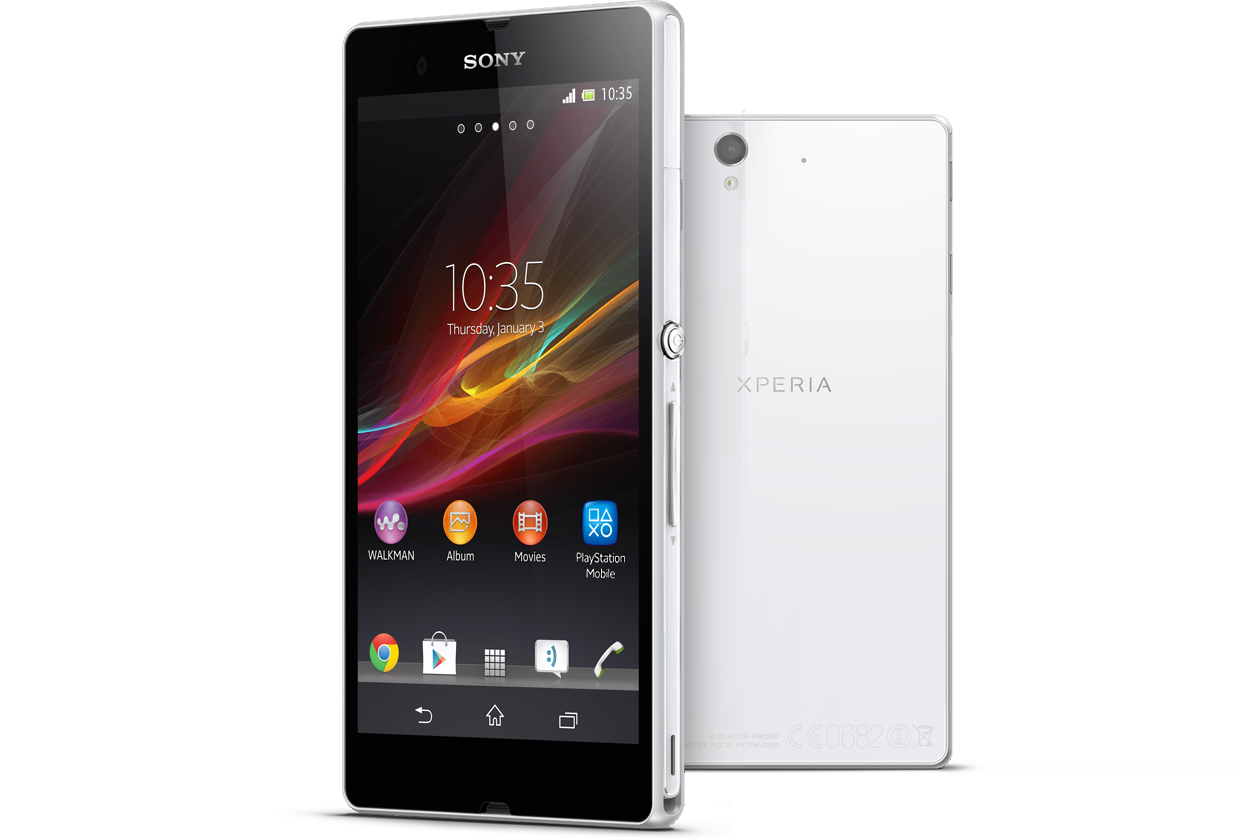
Time to update your Xperia Z to Android 6.0.1 Marshmallow now. This isn’t an official update, but an update that will happen via CyanogenMod 13. Sony has dropped the Xperia Z from the Android Marshmallow league. Xperia Z2 and the devices which came afterwards will be getting Android Marshmallow. The original Xperia Z and its fellows do not happen to be lucky enough. Sony did a great job by updating the device to Android 5.1.1 Lollipop, now we have to continue the journey with the help of custom ROMs. When it comes to custom ROMs, CyanogenMod is probably the best choice as it happens to be the most widely used aftermarket Android firmware.xperia-z-white

The ROM that landed in for Xperia Z is based on CyanogenMod 13 as mentioned above. The only thing that doesn’t work in this ROM at the moment is the camera, but I wonder if any third party application will make it work as well. Rest of the stuff like RIL and other features are found to be working pretty well. The ROM is in its alpha stages so there are great chances of bugs. We recommend Android power users to go ahead and flash this ROM or if you’re a newbie, you’ve to read the instructions being very careful. We will go through some precautions and then begin with the flashing process.

Time to jump up to the method in order to flash the Android 6.0.1 Marshmallow on your Sony Xperia Z via CyanogenMod 13 custom ROM.

Some precautions

  1. This guide is intended for Xperia Z only. Do not try this on any other device.
  2. Charge your Xperia Z up to 50% to avoid any power issues during the flashing process.
  3. Flash a custom recovery on your Xperia Z.
  4. Backup everything including your contacts, call logs, sms messages and bookmarks. Also create a Nandroid backup.
  5. Follow this guide to the letter to avoid a mishap.

Disclaimer:The methods involved in flashing custom recoveries, ROMs and rooting your phone are highly custom and may result in bricking your device, and has nothing to do with Google or the device manufacturer that is SONY in our case. Also rooting your device will void its warranty and you will be no longer eligible for any kind of free device services by the manufacturers/warranty providers. In case of any mishap we may not be held responsible.

How To Install Android 6.0.1 Marshmallow on your Xperia Z via CyanogenMod 13

  1. Download Android 6.0.1 Marshmallow CM 13 ROM.zip file.
  2. Download Gapps.zip [pico package] file for Android 6.0.1 Marshmallow.
  3. Copy both the .zip files to your Xperia Z’s internal or external SD card.
  4. Boot your Xperia Z into custom recovery. If you’ve installed dual recovery using the guide linked above, you should use TWRP recovery.
  5. Now in TWRP recovery, perform a factory reset under wipe option.
  6. Now get back to the main menu in TWRP recovery and select “Install”.
  7. Under “Install”, scroll all the way down and choose ROM.zip file. Flash this file.
  8. Once done, get back to the TWRP recovery menu again and this time flash Gapps.zip file using the instructions as stated in the above step.
  9. Once you’ve flashed both files, wipe cache and dalvik cache under wipe option.
  10. Reboot your device into system now.
  11. That’s all. Your device should boot up in CM 13 Android 6.0.1 Marshmallow now.

In case something goes wrong, you may considering restoring the Nandroid backup. Another way to fix your device from the bricked state is to flash a stock ROM. Here’s our comprehensive guide on how to flash a stock firmware on your Sony Xperia.

If you’ve got any queries, feel free to reach us out through the comment box below.

How To Fix Android Marshmallow MTP Issue using MTP Enabler

0
How To Fix Android Marshmallow MTP Issue using MTP Enabler

How To Fix Android Marshmallow MTP: If you’ve been trying to get rid of the MTP issue residing in your Android Marshmallow powered device. Then it’s the time to fix it now.

Android Marshmallow came up with tons of bug fixes and improvements. The only annoying thing Android Marshmallow users may come across is the selection of MTP mode. Every time they connect their phone to their PC. Although the users can select the MTP mode manually by tapping the on-screen option. But this process needed to be automated. XDA senior member bitstra seems to have done this job.

Android Marshmallow MTP

Bitstra’s application “MTP Enabler” intelligently changes the USB mode to MTP while you connect your phone to your PC. The application allows you to put a widget on your phone’s home screen.

You can simply tap the widget to activate the MTP enabler application. Once you’ve tapped this Widget and connected your device, the widget will change its background to Orange.  MTP enabler can also listen to the broadcast intent generated by USB connection but this is still in experimental mode, so going for the widget option is better as its stable.

Overview:

MTP enabler doesn’t tinker or tweak any system files of your Android OS. It doesn’t harm your device’s security or privacy in any way. The application is completely safe and secure to use. By default your connection type is set to “MTP” mode in the MTP Enabler application, but you can also change this option to “Ask me before”.

Upon enabling “Ask me before” option, it will ask you what type of connecting you want to go with upon connecting your phone with your PC.

For all the processes that the MTP enabler runs in the background, it doesn’t result in draining the battery of your Android. Go ahead and grab the MTP enable application and install it on your Android Marshmallow phone right away.

How To Fix Android Marshmallow MTP Issue

  1. Make sure that you’ve rooted your Android phone running Android Marshmallow. This application works with almost all Android Marshmallow ROMs.
  2. Download and install MTP Enabler application.
  3. Add MTP Enabler widget to your phone’s home screen to access it easily.
  4. You can setup MTP Enabler by accessing it through app drawer.

MTP Enabler

That’s all.

Switch between Applications on Android using Swiftly Switch

0
Switch between Applications on Android using Swiftly Switch

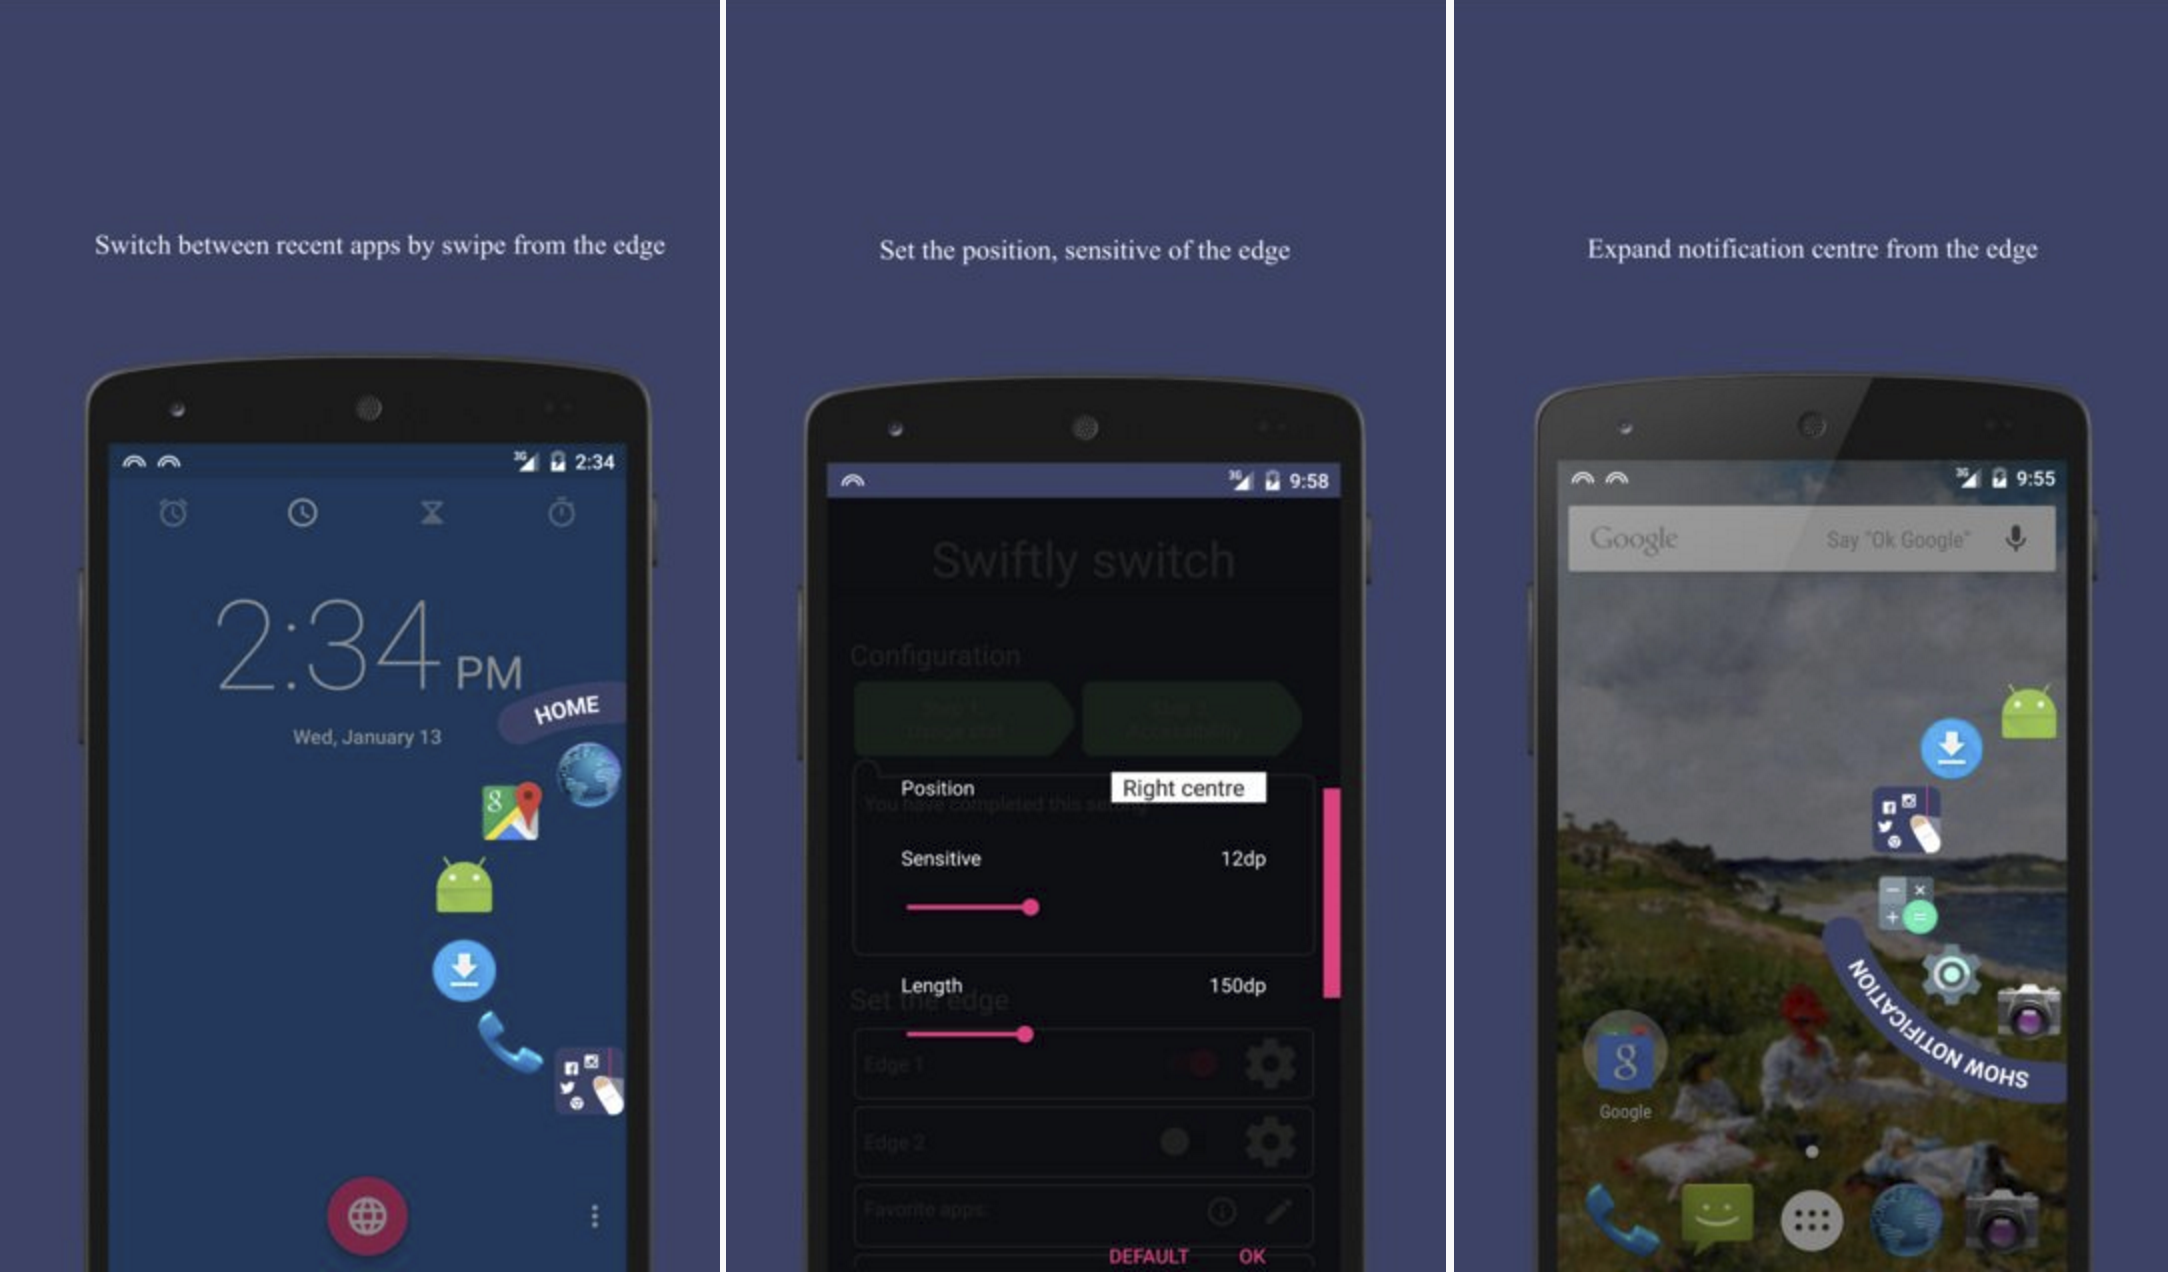
With the help of this guide, you can easily Switch between Applications on Android. Swiftly Switch is the easiest way to switch between your recently used applications. The application just came out of the curtains 3 days back.

Swiftly Switch actually redefines the way you switch between your favorite or your recent applications running on an Android device. With Swiftly Switch, you can switch from one application to another by only one single swipe on the screen.

Switch between Applications on Android

Overview:

Using Swiftly Switch, you cannot only switch between your recent applications, but you can also set your desired applications in the Swiftly Switch that you will want to switch between. You can also exclude some applications from appearing in the Swiftly Switch. By default, Swiftly Switch appears on the right Edge of your Android smartphone, but you can also enable it to appear on the left edge.

The cool thing about Swiftly is no requirement of root access. You do not need root access to activate this cool application on your Android smartphone. If you’re willing to get Swiftly Switch to work on your Android smartphone, then let’s go ahead and learn to switch easily between applications using Swiftly Switch.

How To Switch between Applications on Android:

  1. Download and install Swiftly Switch on your Android device.
  2. Open Swiftly Switch using app drawer.
  3. Enable Swiftly Switch using on-screen instructions. Also, enable Swiftly Switch in accessibility options as directed in the Swiftly Switch application.
  4. Once you’ve enabled Swiftly, swipe inwards from the middle of the right edge. The Swiftly Switch menu will appear.
  5. Drop the swipe on your desired application and it will open up.
  6. You can set your favorite applications to appear in the Swiftly Switch using the option available in the application.
  7. That’s all with using Swiftly Switch. Good Luck 🙂

Swiftly Switch

That’s all.