Home Blog Page 340

How to Use Torch on Android phone using Volume Buttons

0
How to Use Torch on Android phone using Volume Buttons

Learn how to Use Torch on Android using Volume Buttons. Controlling Torch that’s embedded in your Android smartphone’s flash using the Volume Keys has always been something more than convenient. Rather than tapping the Torch shortcut after unlocking your device, being able to control it directly using your Volume Keys is much easier and less time-consuming.

Use Torch on Android

Overview:

Users have been able to control the torch using Volume Keys on their Android smartphones, but until now that was possible only through a custom MOD or through a custom ROM. Not everyone is capable of flashing a MOD or flashing a custom ROM and nor everyone wants to root their device just for the sake of one such feature.

If there’s a more convenient solution available that allows you to turn on/off the torch using the volume keys, that’d be the cream on the cake. The good news is, now it’s possible to have complete control on your Android handheld’s LED flash as a torch by simply using the volume rocket place on the left or right side of the gadget, that too without root access.

More Details:

The application that will serve this purpose is named as Torchie. Once you’ve installed Torchie you an turn on/off the torch by holding volume up and down keys together. The application works when your phone’s screen is on when the screen is locked and even when the screen is off.

The application is pretty light, doesn’t carry any ads or spyware and it doesn’t even hurt your privacy. Torchie comes with a Material Design UI, but once you’ve installed and set up this application you won’t probably need to open this application. All the functionality will be controlled through the volume rockers.

Torchie is an absolutely free application. If you’ve been looking for such an application, this may be the time for you to go ahead and get it done right away.

Here’s a list of Torchie features:

  • Turn on/off torch just by holding volume buttons together
  • Works when the SCREEN is ON, in LOCK SCREEN, even while SCREEN is OFF
  • Control when Torchie functionality should work i.e while screening off, the screen on, lock screen
  • Can be used as a standalone torch/flashlight app too!
  • Easy to use Material Design UI
  • Lightweight (~1 MB)
  • Super fast and reliable functionality
  • Bright torch/flashlight/LED
  • Completely FREE and ever will be

How to Use Torch on Android phone using Volume Buttons:

  1. Download and install Torchie on your Android smartphone.
  2. Open Torchie application from the app drawer.
  3. Tap the enable button in Torchie.
  4. Torchie will ask you to enable the application in accessibility settings and take you to the accessibility options.
  5. Tap Torchie Quick and enable Torchie access.
  6. Now close Torchie and try pressing both the Volume Keys at the same time. The torch will lighten up. That’s all.

If you liked this application, we will recommend a donation to the developer for his hard work.

How To Save Battery on Android using WiFi Saver – The WiFi Manager

0
How To Save Battery on Android using WiFi Saver – The WiFi Manager

Learn how to Save Battery on Android using WiFi Saver app. The following guide will help you to manage WiFi connectivity on your Android device and save battery. This is for WiFi consumes for keeping your device connected to the internet unnecessarily. The application that we will use to manage WiFi on your Android device, in order to save battery is the all-new WiFi Saver.Save Battery on Android

Overview:

Are you one of the Android users who can’t turn off the WiFi and compromise losing internet connectivity on their device, but also want to save some battery? Well if so, then there may be a solution to this problem which allows you to use the WiFi and save the battery of your device at the same time.

The application to counter this problem is WiFi Saver, which just came up 2 weeks ago. WiFi Saver manages your WiFi connection efficiently and saves battery on your Android smartphone.

A Bit More Details:

The application keeps a watch on your device’s WiFi. It turns off WiFi if the signal strength is weak or if there’s no internet connectivity required. WiFi Saver automatically turns on the internet when network connectivity is required. This saves plenty of battery on your Android device.

The device doesn’t stay connected to the internet unnecessarily. Basically, when the signal strength is weak, the WiFi radios work actively to catch stronger signals and this results in draining the battery fast. So, if the signal strength is weak, having the WiFi turned off is the best choice, which this application will take care of for you.

Features:

There’s a handful of features available in this application that make it worth giving a try. There’s a basic saver which will save your battery by performing basic WiFi optimization operations. Then there’s low strength saver which will save battery when there’s low signal strength as mentioned above. There’s specific auto connect, which will specifically connect to the internet according to your liking. You can make the WiFi automatically connect and disconnect when your phone’s screen is unlocked or locked.

To sum it all up, we can say that WiFi Saver is a very simple application with no complexity involved at all. You can simply enable and disable your desired options and you’re done with the best possible WiFi optimizations to save some battery percentage. You can have a look on the list of the features attached below and then learn to use it.

WiFi Saver Features

  • Basic Saver.
  • Low Strength Saver.
  • Lock, to enable Mods in Locked Status.
  • Specific Auto Connect.
  • Random Auto Connect.
  • Enable WiFi When Unlocked.
  • Disable WiFi When Locked.
  • Basic Timer, to enable & disable WiFi in a specific time.
  • Specific Auto Connect Timer, enable & disable mod in specific time.
  • Random Auto Connect Timer, enable & disable mod in specific time.
  • Custom Service Delay, Set a custom delay for Saver Mods.
  • Custom Auto Connect Delay, Set a custom delay for Auto Connect Mods.
  • Show Network Details.
  • Dark Theme.
  • Ad-Free.

You sure have got a great idea about WiFi Saver application and also understood how important it is to manage your Android smartphone’s WiFi in order to save battery. We are all set to go ahead now and install WiFi Saver application on our target Android device. We will also learn how we can save battery on Android using this WiFi Saver WiFi manager application.

How To Save Battery on Android:

  1. Download WiFi Saver Application and install it on your Android phone. You must be running Android 4.0+ in order to be able to install WiFi Saver.
  2. Open the WiFi Saver Application from the app drawer.
  3. Enable the options according to your liking in order to start saving the battery.
  4. That’s all. Enjoy 🙂

WiFi_Saver3-side

In case you’ve got any queries, reach us out through the comment box below.

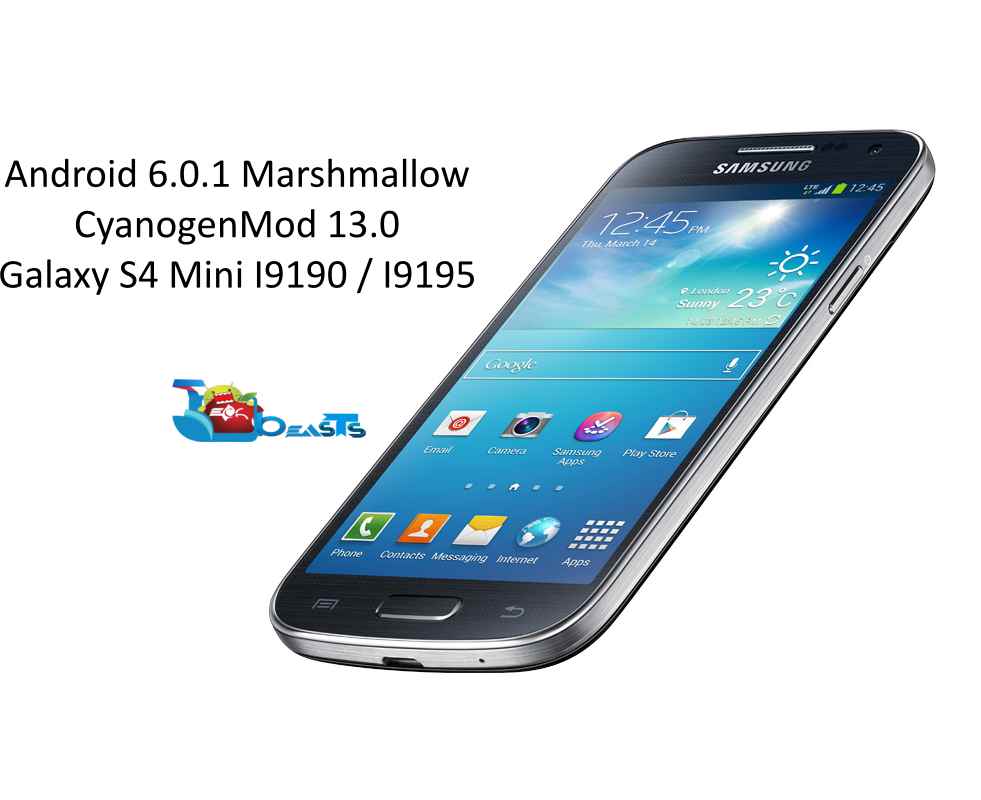
Install Android 6.0.1 Marshmallow on Galaxy S4 Mini I9190/I9195 via CyanogenMod 13

2
Install Android 6.0.1 Marshmallow on Galaxy S4 Mini I9190/I9195 via CyanogenMod 13

Galaxy S4 Mini’s software updates ended on Android KitKat. The device won’t be getting any further version of Android. Just in case you wish to update your device to a higher version of Android, the only way to do so might be the use of a nice custom ROM. Work on the custom ROMs based on Android Marshmallow just started off. Many of the users are keeping their eyes on the Android 6.0.1 Marshmallow based on CyanogenMod 13 for their devices. Galaxy S4 Mini happens to be one of the luckiest devices to join the league of CyanogenMod 13. We’ve already posted a guide on how to update your Galaxy S4 Mini to Android 5.1.1 Lollipop, now is the time for Android 6.0.1 Marshmallow.GT-I9195ZKABTU-407150-0

You will learn to install Android 6.0.1 Marshmallow CyanogenMod 13 on your Galaxy S4 Mini GT-I9190 and GT-I9195 in the succeeding guide. Before we head towards the installation instructions, it may be kept in mind that this is a custom ROM and it’s supposed to carry quite many bugs until it receives a stability build. Flashing custom ROMs is recommended for Android power users only. If you’re not confident enough to handle a mishap occurring after flashing a custom ROM, you may avoid flashing it. The ROM we are going to flash may not be good enough to use as a daily driver so make sure that you’re proceeding after embracing all the risks involved in the pre and post-flashing process.

Early preparations

  1. This guide is intended for Galaxy S4 Mini GT-I9190 and I9195 users only. Do not try flashing this ROM on any other device otherwise you may result in bricking it. Check your device’s model number in settings > about device.
  2. Charge your phone up to 50% to avoid any potential issues during the flashing process.
  3. Backup your important contacts, call logs, sms messages, bookmarks and other important data. Also copy your important media content to your computer. This is highly recommended as you may have to go through data wipes during the flashing process.
  4. Install a custom recovery like Philz Advanced CWM on your phone.
  5. Create a Nandroid backup and copy it to your PC. Don’t forget to create an EFS backup as well.
  6. Follow the instructions to the letter to avoid any mishap. Read the disclaimer carefully.

DISCLAIMER: IN CASE SOMETHING GOES WRONG, OR YOUR DEVICE MESSES UP, WE OR THE DEVICE MANUFACTURERS MAY NOT BE HELD RESPONSIBLE. CUSTOM PROCESS INVOLVE A HIGH RISK, SO MAKE SURE THAT WHAT EVERY YOU’RE DOING, YOU’RE TAKING FULL RESPONSIBILITY FOR THAT AND YOU’RE WELL AWARE OF THE PROCEDURES.

  1. Make sure that you’ve flashed the Philz Advanced Touch recovery linked above.
    1. Download CM 13.0 Custom ROM.zip file according to your device.
    2. cm-13.0-20160116-NIGHTLY-serrano3gxx.zip [I9190]
    3. cm-13.0-20160116-NIGHTLY-serranoltexx.zip [I9195]
  2. Download Google GApps for Android 6.0.1 for your device.
  3. Copy both the downloaded .zip files to the internal or external storage of your device.
  4. Now boot into recovery mode on your device. To  do so, turn it off completely. Now turn it on by pressing and holding Volume Up + Home + Power Key.
  5. Once your device boots up, leave the keys. You should be in the recovery mode now.
  6. Now in Philz Touch Recovery tap “Wipe & Format Options > Factory Reset > Yes”.
  7. Now go back to the main menu in Philz Touch and tap “Install Zip > Choose zip from /sdcard or storage depending on where you placed the file > select the ROM.zip file > Select Yes in next screen and wait for it to flash the ROM”.
  8. Now go back to the main menu again, once again tap “Install Zip > Choose zip > Select the GApps.zip file this time > Yes and wait for it to flash”.
  9. Once done, using the wipe options wipe cache and dalvik cache.
  10. Now reboot your device.
  11. You should be running Android 6.0.1 Lollipop on your Galaxy S4 Mini now. That’s all.

The first boot may take up to 10 minute so hold on while your device complete boots up. In case the newly installed OS doesn’t satisfy you, you can immediately flash the Nandroid backup to restore your previous firmware with all the data. In case you haven’t created a Nandroid backup, you may want to flash a stock firmware on your Samsung Galaxy S4 Mini.

Just in case you’re stuck with anything, feel free to reach us out through the comment or through our contact us page.

Backup & Restore on Android using Easy Backup & Restore [How to]

0
Backup & Restore on Android using Easy Backup & Restore [How to]

Here’s how you can Backup & Restore on Android. With the help of this guide, you will be able to back up everything on your Android device.

Have your contacts, call logs and text messages backed up from an Android device is one of the most essential things. It’s even more important if you happen to be a phone freak who loves to change a smartphone every other day. And if you’re one of the power users who can’t live without flashing a custom ROM every second hour, then having your important stuff backed up is going to keep you at a very secure end.

Backup & Restore on Android

Earlier, we posted the tutorials to backup Contacts, Call Logs, SMS Messages and other important data. The guides posted earlier were individual. The methods posted earlier were pretty helpful for the Android power users and other average Android users.

But our viewers wanted a more convenient method to backup each and everything in one go rather than using different methods for everything. While finding a more convenient method I came across Easy Backup & Restore application. The application does what its name suggests.

Overview:

Using Easy Backup & Restore, you can backup your important contacts, call logs, sms messages, mms, calendar entries, bookmarks, dictionary hits. To backup the aforementioned stuff, you do not need root access.

You can simply backup this primarily important data in just a few taps without any hiccups using this application. We’ve given this application a try and found, it works pretty well and for that reason.

We are going to take you through a comprehensive guide to help you backup and restore your important data. Let’s move ahead to backup & restore important call logs, contacts, sms messages and other data using Easy Backup & Restore.

Easy Backup & Restore also offers app backup, but for that, you need root access. We’ve talked about app backup in our Titanium Backup guide, so in the succeeding post we will talk about SMS, Contacts, Call Logs etc.

How To Backup everything using Easy Backup & Restore:

  1. Download and install Easy Backup & Restore application on your Android phone.
  2. Open Easy Backup & Restore application from the app drawer.
  3. Tap the Backup option, which is the very first button on the screen.
  4. Select what do you want to backup. The list will include SMS, MMS, Call Log, Calendar, Bookmarks, Dictionary and Contacts.
  5. You will probably want to backup SMS, Call Logs, Bookmarks & Contacts. Leave these options ticked and un-tick all other options.
  6. Tap “Ok” and select where do you want to save the backup. You can save the backup into your SD card, share it on mail or upload it on Dropbox, Google Drive etc.
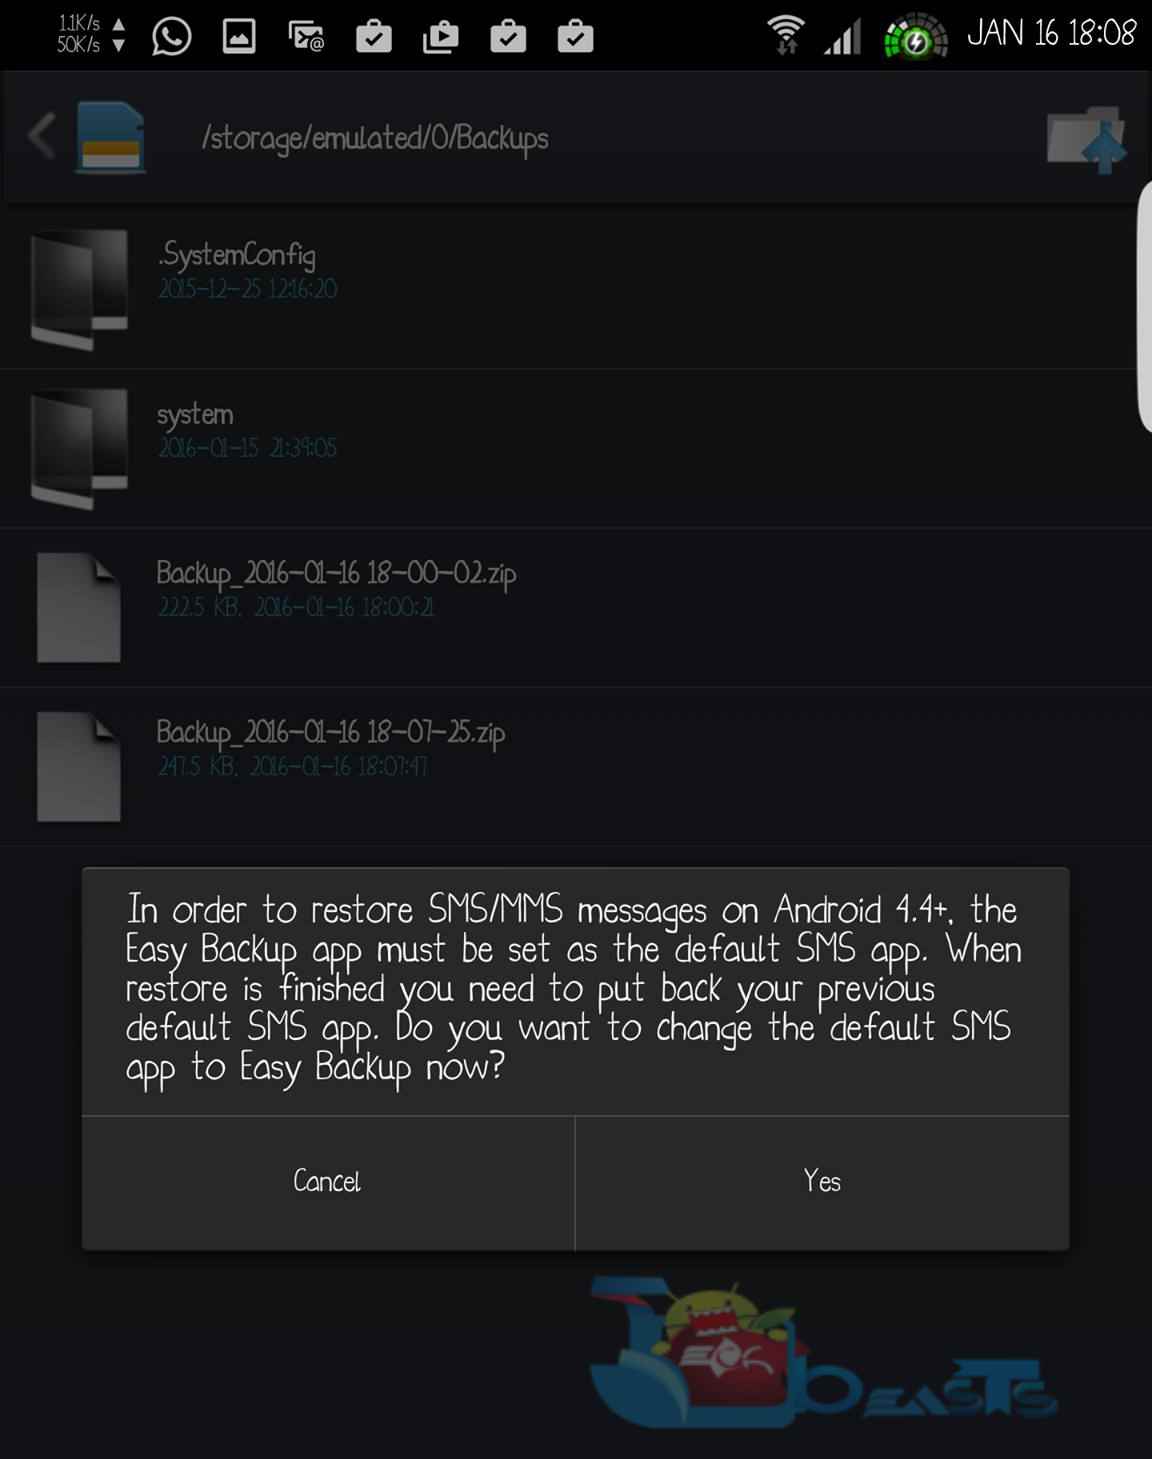
  7. The application will create a backup file and save it to your selected location. Once the backup process is done, you will be provided with a list of logs showing how many sMS, Call Logs and Contacts were backed up.
  8. Once you’re done, copy the backup file from your SD card to your computer or upload it to some cloud service so that you do not lose this data in case you decide to wipe your phone’s internal or external storage.
  9. That’s all.
    12545929_10207613227021398_116142156_o-side
    Backup & Restore on Android

How To Restore everything using Easy Backup & Restore

  1. Make sure that you’ve previously created a backup using Easy Backup & Restore application.
  2. Now simply open Easy Backup & Restore application from app drawer. If you haven’t already installed it, you may want to install it now.
  3. Once you’ve opened up this application, tap “Restore”.
  4. Now choose the location from where you want to restore your data.
  5. Select the backup file now.
  6. Let the restore process finish.
  7. That’s all. You will have your data restored now.
    12545789_10207613226181377_344220991_o
    Backup & Restore on Android

That’s all with using Easy Backup & Restore. We hope that you find this guide helpful. In case you got any queries, reach us out through the comment box below.

How To Enable EIS on LG Nexus 5X (Electronic Image Stabilization)

4
How To Enable EIS on LG Nexus 5X (Electronic Image Stabilization)

Learn how to How To Enable EIS on LG Nexus 5X (Electronic Image Stabilization).

This post is about enabling EIS on your Google Nexus 5X. You can easily enable Electronic Image Stabilization on your Nexus 5X by simply adding a line to your build.prop file.

Enable EIS on LG Nexus

Topic Overview:

Image stabilization systems in the cameras of Android smartphones have helped the Android freaks to take their photography to a whole new level. Recently Google released its Nexus 6P and Nexus 5X.

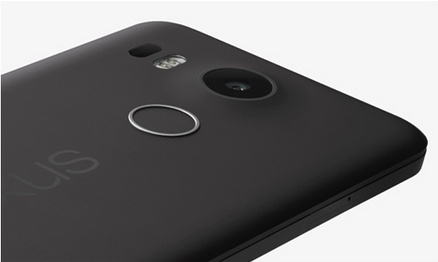
Both these smartphones are equipped with powerful 12.3 shooters at the back. Nexus 5X, which is the younger brother of Nexus 6P, carries almost all the features that Nexus 6P’s camera comes up with.

A new feature was recently discovered in the camera of Nexus 5X which will definitely enhance your photography experience. The discovered feature is EIS, which stands for Electronic Image Stabilisation. The term may be new to many of you, but it doesn’t anything different that of the OIS (Optical Image Stabilisation).

If your hand shakes while capturing pictures using your Nexus 5X, then having the EIS feature enabled is going to help you out by making the images stable once the images have been caught by the CCD of your camera.

In case you’re wondering about the science of EIS, let’s go through a brief over-view of this technology and then enable it on our beloved Nexus 5X. Before we move on to tell you how to Enable EIS on LG Nexus 5X, let’s tell you What’s EIS?

What is EIS?

EIS, electronic image stabilization manipulates the image electronically in order to stabilize it on your camera’s CCD. The CCD is a light-sensing chip of your camera. Once the chip has detected an image and the camera shakes while it detects the image, the EIS responds by moving the image to make sure that it doesn’t lose its place on the CCD.

EIS basically eliminates the shake from the images. For instance, you’re capturing an image and your hand shakes towards the left, the EIS will respond by moving the image towards the right to compensate it on the CCD. EIS is better than OIS as it puts a lot less burden on the camera’s sensor.

I guess that’s enough to have an idea about EIS. Let’s move ahead now and learn to Enable EIS on LG Nexus 5X.

How To Enable EIS on LG Nexus 5X (Electronic Image Stabilisation):

  1. Download and install ES File Explorer
  2. Open ES File Explorer on your phone now.
  3. Slide from left to right in order to open the menu.
  4. Scroll down and enable Root Explorer under tools. Grant the root rights now.
  5. Now once again slide from left to right or tap the menu key at top-left.
  6. Now under “Local” tap “/ Device”. This will open the root of the device.
  7. In device tap “System”.
  8. Now in System scroll down and locate build.prop. Tap the file to open it.
  9. A popup will ask you which application do you want to use, select ES Note Editor.
  10. In ES Note Editor, tap the small pencil on the top right to edit build.prop.
  11. Now you can make changes in the build. prop file. You’ve to add the following code in your build.prop file: persist.camera.eis.enable=1
  12. Once you’re done making changes, tap the back key on the top left.
  13. Save the file with changes.
  14. Reboot your device.
  15. You’re all done. You will have the changes implemented now.
  16. Now on your Nexus 5X go to camera settings > resolution & quality > enable video stabilization.
    7avuzuy
    Image credits: zurih

That’s all. In case you got any queries, reach us out through the comment box below.

How to Recover Deleted Spotify Playlists [ Tips ]

0
How to Recover Deleted Spotify Playlists [ Tips ]
Credit:wonderhowto.com

Here is how you can Recover Deleted Spotify Playlists. If you have taken a lot of time to create and form your Playlists, you might know the pain when you are unable to access them. While it is never easy to recover a playlist after accidentally deleting it, Spotify gives you the liberty to Recover Deleted Spotify Playlists. These are the Playlists that you go through on daily basis while driving to work, relaxing at home or at other events. And Spotify truly understands your concern if you have lost your favorite Playlist. Spotify comes with a recovery tool that can help you Recover Deleted Spotify Playlists.

Recover Deleted Spotify Playlists
Credit:wonderhowto.com

How to Recover Deleted Spotify Playlists:

In order to Recover Deleted Spotify Playlists, first of all sign into your Spotify account from either your Laptop or Mobile Device browser. You will not be able to Recover Deleted Spotify Playlists directly from the app.

Step1: Once you have signed into your Spotify account, go to ‘Account Overview’ and select ‘Recover Playlists’ from the drop down options.

Step2: A list of Playlist will appear. Select the Playlist that you want to recover and click on ‘Restore’.

Step3: To listen to the recovered playlist on your Spotify App, you will need to exit the app and log in again.

Step4: Now, the app will be refreshed and you will be able to see the recovered playlist at the bottom of the playlists.

That’s all. Now you have recovered Deleted Spotify Playlists and you can now enjoy listening to your favorite tracks again.

How to Install Remix OS Android on Your Computer

0
How to Install Remix OS Android on Your Computer

Here is the guide to Install Remix OS Android on Your Computer. Remix OS is an operating system based on Android and gives users a true Android experience. Desktop computers so not run Android OS and you may have used Android emulators in the past like Bluestacks or Youwave but, they fail to give the performance that you need. The better option that you are left with is to Install Remix OS Android on Your Computer. Remix OS is not only able to provide excellent performance but also comes with many unique features. Install Remix OS Android on Your Computer to use it for resizing the apps and multi-tasking. Also, the app is plug and play so once you insert a bootable pendrive on your computer, you will be able to run Android on it. The best thing about fails to run Windows properly, you can Install Remix OS Android on Your Computer instead. Remix OS is free to download and has been made available for the public to give you Android experience on your computer.

install-remix-os-android-your-computer.w654

Before you begin to Install Remix OS Android on Your Computer, make sure to check the requirements.

  • You will require an 8 GB+ FAT32 USB 3.0 flash drive with 20+ Mb/s write speed.
  • Make sure your computer supports booting from USB.
  • Lastly, disable the secure boot and the Legacy boot should be enabled.

Note: If you want to run Remix OS on Mac, you can use the bootable USB drive that you created on Windows as your Mac will not be able to create Remix OS bootable USB drive.

Install Remix OS Android on Your Computer:

If the requirements are complete, now you can proceed with the installation process.

Step 1: Firstly, go to the Remix OS download page and download Remix OS for computer.

Step 2: Once the file has been downloaded, extract the file contents from the ZIP.

Step 3: Once you have extracted the ZIP file contents, plug in the USB flash drive. Now, open/launch “remix-usb-tool.exe” file. The ‘Remix OS USB Tool’ window will be opened. From here, you need to select USB flash drive from the drop down menu. Once done, click on Browse. Now, head to the folder that contains content extracted from the ZIP file earlier. Select “Remix_OS_for_PC.iso” file.

Now, click OK to begin installation of the portable version of Remix OS. Keep the USB flash drive plugged in and wait for the installation process to complete.

Step 4: Once Remix OS for PC has been installed, you will be asked to reboot your computer. If you want the new Remix OS to run on your PC, click on ‘Reboot Now’.

Step 5: After the Reboot has started, hit F12. This will launch Boot menu. From here, check again if the Legacy boot is enabled and Secure boot is off. Now, select USB flash drive option from the list. Once, you select USB, you will be asked to choose your mode of preference for Remix OS from ‘Guest Mode’ and ‘Resident Mode’. If you select Guest Mode, none of your data will be saved. Resident Mode on the hand will save all your data including user accounts and your apps. Note that the Guest mode is more stable while you might face bug issues in Resident mode.

Note: If you want to boot Remix OS on Mac, skip step 5 and move on to step 6.

Step 6: Insert the bootable drive into your Mac and restart it. When the boot process starts, press and hold Option key, immediately.This will take you to the Startup Manager. From here, select the Remix OS option using mousepad or arrow keys.

Step 7: Let the Remix OS finish booting. Once the boot process has been completed, you will be able to see Android desktop on your computer. Remix OS is optimized for mouse and keyboard and supports multi-window as well. Now you can start enjoying the true Android experience on your desktop.

Download Pocket Mortys for Pc – Windows and Mac

0
Download Pocket Mortys for Pc – Windows and Mac

Following are the instruction on how to download and install Pocket Mortys for PC running Windows and Mac.Pocket Mortys is new top Simulation game, where you have to trian your Mortys to level them up and then lead them into battle with rival Ricks. Pocket Mortys is introduced for iOS and Android smartphones but thanks to third party emulators now we can install games like Pocket Mortys for PC.

Before moving on to the tutorial on Download Pocket Mortys for PC, let me tell you the main features of Pocket Mortys.

Pocket Mortys for Pc

Pocket Mortys Features:

– Discover dozens and dozens of bizarre Mortys across the multiverse of Rick and Morty
– Train and combine your Mortys to level them up and watch them grow
– Battle rival Ricks from across the multiverse
– Encounter your favorite characters like Bird Person, Mr. Meeseeks and more
– Craft items and engage in tedious side quests
– Win prizes at the space arcade Blips and Chitz
– Game Progress is Auto-Saved

How To Install Pocket Mortys For PC or MAC Using BlackStacks

Method 1:

  1. Install Bluestacks on your PC or MAC.
  2. Download Pocket Mortys Apk on your PC.
  3. Make sure that you have installed Bluestacks. Double-click the downloaded Pocket Mortys Apk to install it.
  4. The APK will be installed through Bluestacks, once the notification pop-ups determining the installation completion, open Bluestacks.
  5. Now click on My Apps and then click on Surfingers.
  6. The application will open up. Now follow on-screen instructions to Pocket Mortys.

Method 2:

  1. Install Bluestacks on your PC or MAC.
  2. Open Bluestacks and setup your Google Play Store account.
  3. Now open Google Play Store and search for “Pocket Mortys“.
  4. Once found, install Pocket Mortys.
  5. Now click on My Apps and then click on Pocket Mortys.
  6. The game will open up. Now follow on-screen instructions to Play Pocket Mortys.

How To Install Pocket Mortys For PC or MAC Using Andy OS

  1. Download and install Andy OS on your Windows PC or MAC.
  2. Once downloaded, open Andy OS.
  3. Setup Google Play Account on it.
  4. Now open Apps > Google Play Store and search for “Pocket Mortys“.
  5. Install Pocket Mortys and wait for it to finish the installation.
  6. Once done, open “Uncategorized” portion in Andy and click on Pocket Mortys to play it.
  7. That’s all.

How to Wirelessly Charge your SmartPhone

How to Wirelessly Charge your SmartPhone

This is how you can Wirelessly Charge your SmartPhone. But in order to charge your Phone Wirelessly, make sure your device supports wireless charging.

The whole idea of Wireless Charging lies in the living-in-the-future feel that carries with it. An idea that was fantasy a few years ago is slowly taking a commercial form and entering the global market with a lot of hype. Currently, we have many smartphones which support wireless charging technology and they’re showing a positive towards a great leap into future. So, you’re still rocking the old school wired-chargers? Do you wish to switch to the awesome wireless charging adapters? So, let’s see how this whole thing works and what all you need to make this happen.

Wirelessly Charge your SmartPhone

Topic Overview:

The wireless charging feature is incorporated in many smartphones and the most commonly used wireless charging standard is the Qi wireless standard. If you’re not sure if your device supports wireless charging, just head on to this page for a list of compatible devices. These smartphones have Qi-support built-in but if you don’t find your device in the above list, follow our article to add wireless charging to any Android device.

Here are the Benefits of Wireless Charging…

  • Well, as we have already quoted, wireless charging is all about the live-in-the-future experience. But don’t be mistaken that it’s just a marketing stunt, wireless charging is quite efficient now considering the physics behind it.
  • Many wireless chargers offer a minimal energy loss which I can live with considering I don’t have to deal with a bunch of twisted cables in my backpack.
  • With wireless charging, you don’t need to plug in your device, just drop it on your wireless charger and enjoy the convenience. Dock-style wireless chargers offer you a kick-stand type design which is convenient if you’re using your PC or laptop. You can just put your device in the charging dock so that you can simply pick it up when needed without the need to unplug it. You can also mat chargers or pad chargers for simplicity and more protection.
  • Wireless charging helps prevent wear and tear of your device, and you don’t have to worry about broken charging ports ever. Most importantly, no more swinging smartphones from the desk and bashing the walls (it happened a lot with me). Also, you don’t have to worry about the changing USB technologies, so don’t bother if your device doesn’t have USB Type-C as you won’t be using it much if you have a wireless charger.
  • The only downside is that the charging time will a bit higher compared to standard chargers but it isn’t much. You have to weigh in between convenience and consistency before opting for wireless charging technology.

So, Which Wireless Charger Should I purchase?

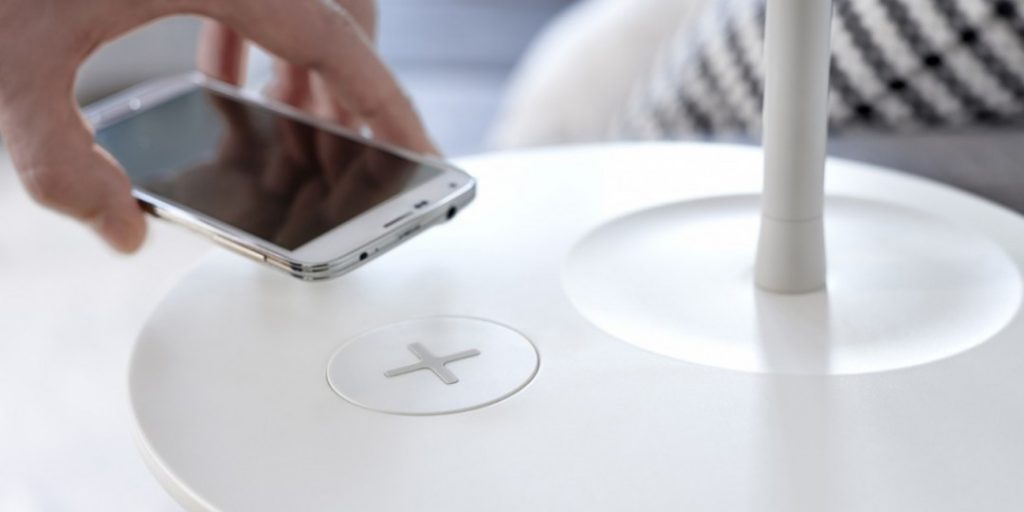
Wireless chargers come in a lot of varieties, shapes and sizes, be it a dock or a traditional mat, you have various options to choose from. First of all, you should know that wireless chargers are not so expensive after all, at least not now. The wireless chargers from elite manufacturers may cost a bit higher but you can always find many third-party chargers which cost not more than $10 – $20. You can also find fashionable docks that plug into a wall outlet or IKEA furniture with built-in wireless charging support.

ikea-wireless-charging

Most importantly, you should make sure that you purchase a wireless charger that is aptly compatible with your device. Make some time and browse through reviews and ratings on various e-commerce sites and make your choice. The Qi standard chargers work at the wavelengths of 100-205 KHz while the PMA (Power Matters Alliance) standard chargers work at around 277-357 KHz. So, dig a little deeper before you make a choice.

How do I Wirelessly Charging my phone?

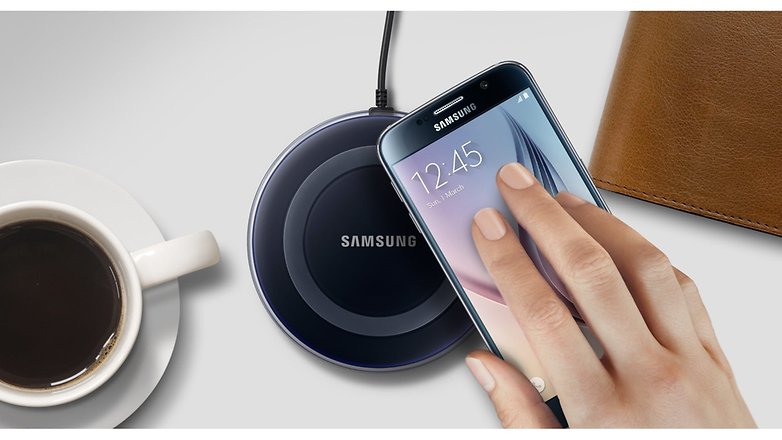
Once you have a wireless charger in your hand, just plug it into a power source and place your smartphone on it to start charging. Usually, there is no specific settings or configuration to be made to wirelessly charge your device unless your device maker thought otherwise. If everything’s good, you should see the wireless charging message on your smartphone.

It is expected that the charging is slower than standard wall chargers but you don’t need to fiddle with a bunch of wires here. However, don’t think it would be too bad, you could only expect a 20% loss. Although, you can see many Samsung devices which offer much more fast-charging wireless chargers. You could turn off the device while charging to improve the charging time and also make sure the wireless adapter is properly connected to the energy source.

So, don’t you want to buy yourself a wireless charger this year? Let us know if you like the wireless charging technology over standard messy cables.

Huawei Mate S Tips and Tricks

0
Huawei Mate S Tips and Tricks

huawei-mate-s

Launched at the IFA 2015 in Berlin, the Huawei Mate S is one of the coolest smartphones launched last year. The Chinese manufacturer has clearly aimed for the big guns with the Mate S, credit goes to the unparalleled looks of the device along with cutting-edge specs. The Huawei Mate S runs on the homebred EMUI software, a custom skin which runs on top the Android operating system. The EMUI interface is quite cool that you will immediately compare it with iOS.

Certain segments of the Mate S interface almost resembles the iOS layouts but the fact that it’s Android makes it more customizable. So, you get the awesome iOS interface along with the ultimate Android customizability at one go. The Settings menu is one of the main commanding aspects of the Mate S but we will make it more useful with some awesome tips and tricks.

Check out some of the cool Huawei Mate S tips and tricks to get the most of your device.

Let’s Start With the fingerprint sensor

One of the laudable features of the Mate S is its accurate fingerprint scanner which offers more than just unlocking the device. You can simply swipe your finger across it to take a quick peek at your notifications or just tap on it to jump back to home screen. So, do you just wanna sit idle or put the Mate S fingerprint scanner to some cool work.

huawei-mate-s-fingerprint-id
Source: Android Pit

I know you want to configure the fingerprint scanner and enjoy all its functions. So, head to Settings » Fingerprint ID to configure the fingerprint scanner on your Huawei Mate S.

Everyone Loves Motion controls, Right?

Motion controls and gestures have become one of the useful and cool parts of almost every smartphone interface. Huawei’s motion control section is packaged with a lot of resourceful gestures which will help you interact better with your device. For instance, the Pick up to reduce volume is a useful motion controlled function which will simply reduce the volume of calls or notifications as soon as you pick up the device.

Source: Android Pit
Source: Android Pit

Some other gesture-controlled function like Double touch, Shake to rearrange are also interesting. So, to use these cool gesture-based features, head to Settings » Motion control to enable these essential features.

Find your Mate S with Voice Wakeup

We’ve all passed that point where we have lost our precious smartphone somewhere in our own home or backyard and then vigorously search for it. Sometimes it’s even worsted if the device is in silent mode and we can’t give a ring to our number to find it.

Source: Android Pit
Source: Android Pit

Luckily, Mate S has Voice wakeup which is used to find your device faster if you lose it somehow. First, go to Settings » Voice wakeup and record some phrases into the device with your own voice. So, whenever you lose the phone, you can say these magic phrases to wake your Mate S when it’s nearby.

One-Hand UI – A Clever Solution

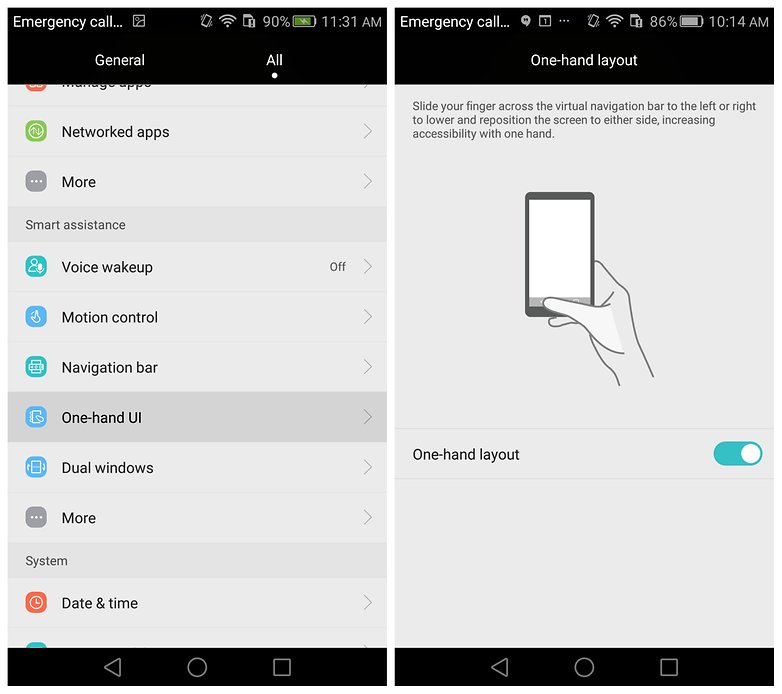
This is not a feature which you’re going to use all the time but it is really useful if you’re using the device with One-hand. We all know how difficult would it be to use the device with a single hand but sometimes we have to. The One-hand UI is a clever solution to this by reducing the size of the display to your convenience.

huawei-mate-s-one-hand-layout
Source: Android Pit

So, whenever you want to use this feature, go to Settings » One-hand UI to enable it. Then, just swipe your finger across the bottom buttons to decrease the size of the display.

Gloves Mode and Touch-Disable Mode

We all went through those irritating moments when your device automatically dials or texts someone when in your pocket or pouch. If you want to escape such things, simply enable the Touch-Disable mode from the Settings » More » Smart assistance.

Source: Android Pit
Source: Android Pit

When in there, you might also find the Gloves mode useful if you’re a regular biker. This option increases the touch sensitivity so you can interact with it even when wearing gloves or other hard textures.

How To Download Cortana On Android [ Guide ]

0
How To Download Cortana On Android [ Guide ]

Download Cortana On Android: The release of Cortana Android from Microsoft has caught the attention of all Android users. Those of you who have not heard about Cortana Android, it is an app that works like your personal assistant. This app is helpful when it comes to getting the important tasks done without doing anything.

Cortana is capable to work with your mobile device and PC work together. Moreover, it will sync calendar events, set reminders and easily find the data required. Cortana will notify reminders, send your scheduled email, open an app, track score, flights and the app can even talk to you. You can ask Cortana whatever you think of to get productive answers.

Microsoft Cortana app is available for download from Google Play store. However, there is another way to get this amazing productive app on your mobile device using APK ( if it is not yet available in your region ).  Note that the app will be able to run most of the features through this method. However, some of the features might be missing.

In the following guide, I will tell you how to download and install Cortana On Android smartphones and tablets.

Cortana On Android

 How To Download and Install Cortana On Android:

  • To begin with, firstly you will be required to allow unknown sources to install apk on your device. Go to device Settings> Security> Enable Unknown Sources.
  • Now you can proceed to download Cortana Android from here; Cortana apk.
  • Once the file has been downloaded, install it on your device.
  • Once the app has been installed, open the app and accept ‘Terms & Condition’ to proceed.
  • To start using the app, you will be required to log in through your Microsoft account and give the Name that will be used by Cortana to converse with you.

Now the app will be able to work together with your device’s operating system to provide various productive features of the app. Some of the features might not be available to use depending on your country/ region.

How to Fix Samsung Galaxy S5 App Freeze Problems

0
How to Fix Samsung Galaxy S5 App Freeze Problems

Smartphones running on Android platform have had many users who have made Android a part of their lives due to the millions of apps available for them to provide help in every part of their lives. You can download every kind of app from various categories simply through the Google Playstore into your mobile device. What if the apps you rely on stop working or crash? Well, this had been an issue reported by many Android users and here you will find a solution to the App freeze and App crash related issues faced on Samsung Galaxy S5.

Following are the instruction on how to fix Samsung Galaxy S5 App Freeze Problems. Follow all the steps carefully in order to fix app freezing issue.

Fix Samsung Galaxy S5 App Freeze Problems
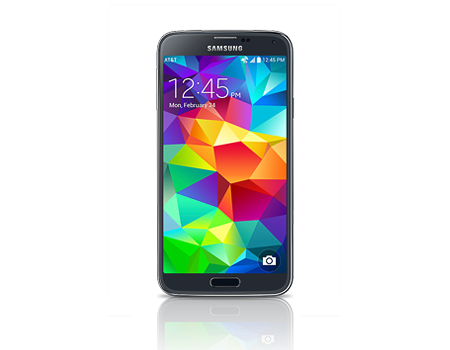
Source: www.att.com

How to Fix Samsung Galaxy S5 App Freeze Problems:

  • For those Samsung Galaxy S5 users who are facing App crash or App freeze related issues, one possible cause can be that you are using an older version of the app that is not compatible with your device. The solution to this is to update the app by going to Google Playstore>My Apps. Or you can remove and reinstall the app on your device. If you have updated the app and it still does not run properly, you can try other methods given here to solve the problem.
  • Some of the apps that you install through Google Play store require storing data on your device’s SD card. One problem that may cause the apps to not work properly is due to a broken, damaged or defective SD card that does not let the apps pull out stored data. If an app is not working as required due a defective SD card, you can try to replace the SD card with another one after uninstalling the app. Now reinstall the app on your device.
  • If your Samsung Galaxy S5 is running on Android Lollipop, it might not be able to support some of the apps from Google Play Store. These are the apps that are developed to run on another version of Android like Kitkat. If you find this to be a reason why your app freezes or crashes, you can ask the App developer to resolve the issue for you.
  • If none of the above-mentioned solutions work to fix the App crash or App freeze issue on your Samsung Galaxy S5, the last way to fix this can be to reset your device. To do a factory reset, first of all take a backup of all of your data. Now you can go ahead with the factory reset. Here is how to factory reset Samsung Galaxy S5.
  1. Now press power key, volume up and home key together. Keep holding the keys till your device vibrates and then release power key. Keep holding the other two buttons. When the Android recovery screen appears, release the other two keys as well.
  2. Now select the Factory Reset option or Wipe data using the volume down button. Press power key to select the option.
  3. You will be asked to confirm ‘delete user data’. Select yes using volume down key and then press power key. This will start the factory reset process on your device.
  4. Once the process has been completed, select the option to ‘reboot the device’.
  5. That’s it.