Home Blog Page 325

Install Official Android Marshmallow 23.5.A.0.570 On Xperia Z3 Compact D5803
0
Install Official Android Marshmallow 23.5.A.0.570 On Xperia Z3 Compact D5803

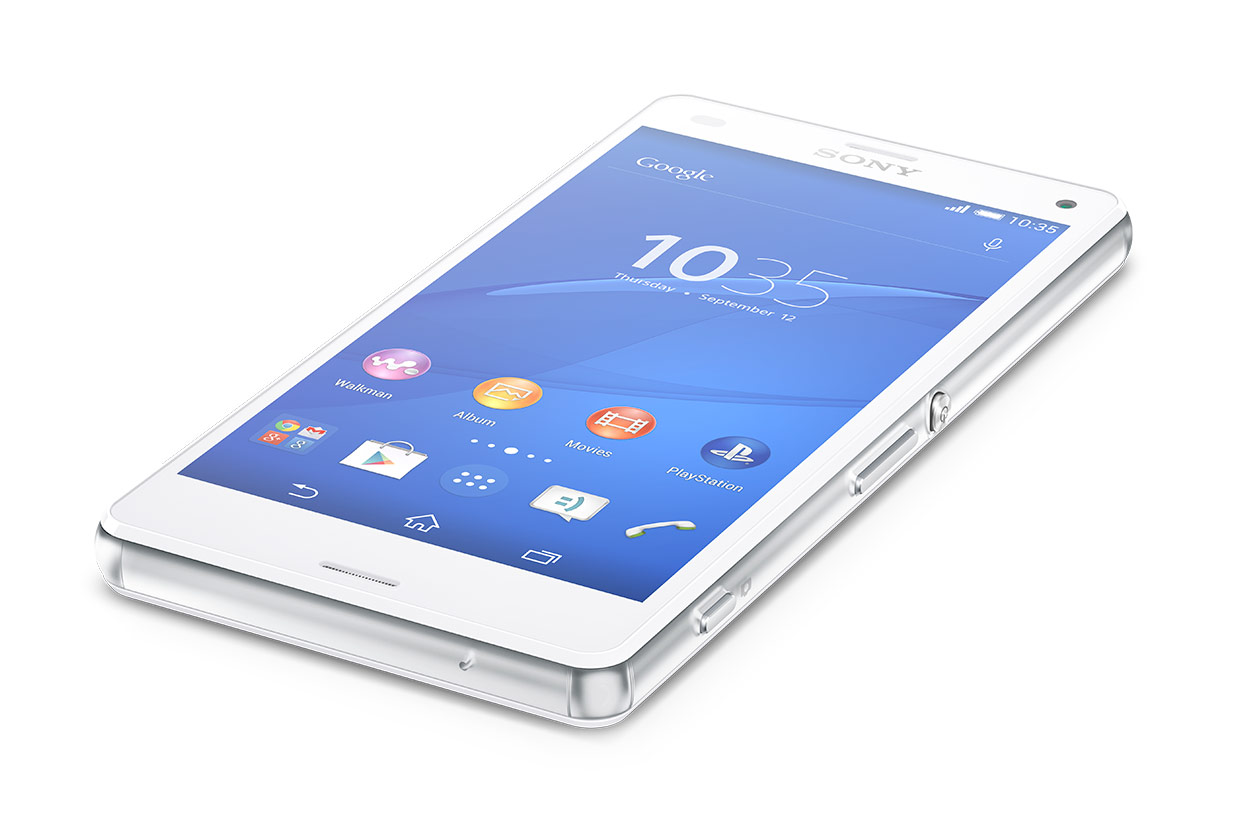
Xperia Z3 Compact users! The wait is over now. Sony rolled out the Android Marshmallow update for our beloved Xperia Z3 Compact today. Marshmallow update for Xperia Z3 Compact carries the new Camera 2.0.0 application with some UI changes and new features. The new doze mode is there to give your device some extra battery life. Performance stability and bug fixes are something notable in this update.xperia-z3-compact-gallery-04-1240x840-094c91770d9add70e8aee7cb743c8f05

Android Marshmallow update is currently hitting the D5803 variant of the Z3 Compact. It may be noted that this update has been made live for the devices which were a part of the Xperia Marshmallow beta program. At the moment, the update is reaching out select regions. Other variants of this device are expected to get this update anytime soon now.

As far as the version number is concerned, this update is Android 6.0.1 Marshmallow and it carries the build number 23.5.A.0.570. Those of you willing to update their Xperia Z3 Compact right now can check out the OTA update option or Sony PC Companion. If you happen to be lucky enough to get this update, you may obtain it right away. Just in case the aforementioned methods do not show any signs of Marshmallow for your device, you may consider going for it manually. You can flash the FTF file of 23.5.A.0.570 firmware on your device using Sony flashtool. Wondering how? Well, that’s what we are here for. Let’s go through some early preparation and then have a look on the guide to flash the latest official Android 6.0.1 Marshmallow 23.5.A.0.570 firmware on your Sony Xperia Z3 Compact D5803.

Early Preparations:

1. This is only for Sony Xperia Z3 Compact D5803. 

This ROM is only for the device mentioned above. Make sure that your model number matches the one listed above. To do so, go to Settings > About Device on your device and see your model number. Flashing this firmware on any other device will result in bricking it so make sure that you meet this requirement first of all.

2. Battery should be charged at least over 60%.

Make sure that your battery is charged enough to complete the flashing process. In case your battery is low and your device goes dead during the flashing process, you may end up soft bricking your device as it won’t complete the flashing process.

3. Backup everything!

Just to be on the safe side, you may consider backing up each and everything from your Android device. This is highly recommended so that in case anything goes wrong, you still have the access to all of your data and you can restore it immediately. You may backup everything as listed below.

4. Enable USB Debugging Mode on your device.

Enable USB debugging mode on your device. To do so, tap settings>developer options>USB debugging. If you can’t find developer options in settings, then tap settings > about device and tap “Build Number” for 7 times and you’ll get em’ activated under settings.

5. Install and setup Sony Flashtool.

You must have installed Sony Flashtool.  Find the full guide here. After installing Sony Flashtool, open the Flashtool folder from the drive where you installed it.Now open Flashtool>Drivers>Flashtool-drivers.exe and install the Flashtool, Fastboot & Xperia Z3 Compact drivers from the list. [Important]

6. Use OEM data cable to establish connection.

Make sure that you use the phone’s original data cable to establish connection between your phone and the PC. Using a different data cable might result in interrupting the firmware installation.

How To Update Sony Xperia Z3 Compact D5803. To 23.5.A.0.570 Android 6.0.1 Marshmallow Firmware

 Before moving forward, please make sure that you’ve read the pre requisites and ensure that you are set to go ahead.

  1. Download the latest firmware Android 6.0.1 Marshmallow 23.5.A.0.570 FTF file.
    1. For Xperia Z3 D5803 [Generic/Unbranded] Link 1  Create your own FTF using this guide
  2. Copy the file and paste in Flashtool>Firmwares folder.
  3. Open Flashtool.exe now.
  4. Hit the small lightening button on the top left corner and select Flashmode.
  5. Select the FTF firmware file that you placed in the Firmware folder.
  6. From the right side, select what do you want to wipe. Data, cache and apps log, all wipes are recommended, perhaps you may select if you don’t want.
  7. Click on OK, and it will start preparing the firmware for flashing. This may take a little while to load.
  8. As soon as the firmware is loaded, it will prompt you to attach the phone by turning it off and keeping the back key press.
  9. For Xperia Z2, Volume Down key will do the job of back key, just turn off your phone, keep the Volume Down key pressed and plug in the data cable.
  10. As soon as the phone is detected in Flashmode, the firmware will start flashing, Do not leave the Volume Down key until the process is complete.
  11. As soon as you see “Flashing ended or Finished Flashing” leave the Volume Down key, plug the cable out and reboot.
  12. That’s All! Congrats! You’ve installed latest Android 6.0.1 Marshmallow on your Xperia Z3 Compact. Enjoy

In case you got any queries or face any problems regarding this guide, please feel free to stop by the comment box below and let us know. We will get back to you as soon as possible. Thanks all!

Update Sony Xperia Z2 D6503 To Official Android Marshmallow 23.5.A.0.570 Firmware

1
Update Sony Xperia Z2 D6503 To Official Android Marshmallow 23.5.A.0.570 Firmware

Sony Xperia Z2 has started receiving the long-awaited Android Marshmallow update. Sony remained pretty good to its users regarding the software updates in the past. This time it took way long for Sony to push the Marshmallow update for the Xperia Z2. As expected, the Xperia Z2’s Marshmallow brings a number of notable changes. If you’ve remained a part of the Marshmallow beta program, you probably know what’s new in this update. However if you do not have an idea, you would like to know that new Marshmallow firmware brings the Camera 2.0.0 application with new UI and some additional features. Android Marshmallow’s Doze mode has also made its way to the Xperia Z2 with this update. Overall performance of Z2 has improved.Feature-6e2625a52307c37c1e620eac47092d85

Android Marshmallow for the Xperia Z2 has the version number 6.0.1 and carries the build number 23.5.A.0.570. The update is currently rolling out to the D6503 variant of the device and is hitting select regions only. You can check out the OTA update option or your Sony PC Companion if the update is available for you. Just in case this update isn’t available at your end at the moment, you may want to update your phone manually. It’s pretty easy to flash the Marshmallow firmware manually and it involves no risks at all. A guide below explains the method comprehensively. We will just go through some early preparations and then update our beloved Sony Xperia Z2 D6503 to official Android 6.0.1 Marshmallow 23.5.A.0.570 firmware.

Early Preparations:

1. This is only for Sony Xperia Z2 D6503

This ROM is only for the device mentioned above. Make sure that your model number matches the one listed above. To do so, go to Settings > About Device on your device and see your model number. Flashing this firmware on any other device will result in bricking it so make sure that you meet this requirement first of all.

2. Battery should be charged at least over 60%.

Make sure that your battery is charged enough to complete the flashing process. In case your battery is low and your device goes dead during the flashing process, you may end up soft bricking your device as it won’t complete the flashing process.

3. Backup everything!

Just to be on the safe side, you may consider backing up each and everything from your Android device. This is highly recommended so that in case anything goes wrong, you still have the access to all of your data and you can restore it immediately. You may backup everything as listed below.

4. Enable USB Debugging Mode on your device.

Enable USB debugging mode on your device. To do so, tap settings>developer options>USB debugging. If you can’t find developer options in settings, then tap settings > about device and tap “Build Number” for 7 times and you’ll get em’ activated under settings.

5. Install and setup Sony Flashtool.

You must have installed Sony Flashtool.  Find the full guide here. After installing Sony Flashtool, open the Flashtool folder from the drive where you installed it.Now open Flashtool>Drivers>Flashtool-drivers.exe and install the Flashtool, Fastboot & Xperia Z2 drivers from the list. [Important]

6. Use OEM data cable to establish connection.

Make sure that you use the phone’s original data cable to establish connection between your phone and the PC. Using a different data cable might result in interrupting the firmware installation.

How To Update Sony Xperia Z2 D6503 To 23.5.A.0.570 Android 6.0.1 Marshmallow Firmware

 Before moving forward, please make sure that you’ve read the pre requisites and ensure that you are set to go ahead.

  1. Download the latest firmware Android 6.0.1 Marshmallow 23.5.A.0.570 FTF file.
    1. For Xperia Z2 D6503 [Generic/Unbranded] Link 1  Create your own FTF using this guide
  2. Copy the file and paste in Flashtool>Firmwares folder.
  3. Open Flashtool.exe now.
  4. Hit the small lightening button on the top left corner and select Flashmode.
  5. Select the FTF firmware file that you placed in the Firmware folder.
  6. From the right side, select what do you want to wipe. Data, cache and apps log, all wipes are recommended, perhaps you may select if you don’t want.
  7. Click on OK, and it will start preparing the firmware for flashing. This may take a little while to load.
  8. As soon as the firmware is loaded, it will prompt you to attach the phone by turning it off and keeping the back key press.
  9. For Xperia Z2, Volume Down key will do the job of back key, just turn off your phone, keep the Volume Down key pressed and plug in the data cable.
  10. As soon as the phone is detected in Flashmode, the firmware will start flashing, Do not leave the Volume Down key until the process is complete.
  11. As soon as you see “Flashing ended or Finished Flashing” leave the Volume Down key, plug the cable out and reboot.
  12. That’s All! Congrats! You’ve installed latest Android 6.0.1 Marshmallow on your Xperia Z2. Enjoy

In case you got any queries or face any problems regarding this guide, please feel free to stop by the comment box below and let us know. We will get back to you as soon as possible. Thanks all!

Fix Unfortunately the process com.android.phone has stopped

0
Fix Unfortunately the process com.android.phone has stopped

Previously we’ve covered many Fix Unfortunately errors on Android smartphones and tablets. You can check all our guides here, today I’ve an other error which cause a lot of headache once it start popping-up ” process com.android.phone has stopped “. To Fix Unfortunately the process com.android.phone has stopped follow the instructions below. Keep that in mind once you started facing this issue you cannot use any app properly.

fix process com.android.phone

How To Fix Unfortunately the process com.android.phone has stopped:

Before going any further you must see our ultimate guide on how to Fix ‘Unfortunately app has stopped’ errors.

Step#1: Open Settings on your Android device.

Step#2: Now tap on More tab.

Step#3: Tap on Application Manager form the list.

Step#4: Now select All Application by swipe to left.

Step#5: There you’ll see all your installed apps, Tap on Phone.

Step#6: Now all you have to do tap on Clear Cache and Clear data.

Step#7: Now goto home screen and restart your device.

All Done ….

CLEAR CACHE AND DATA OF THE SIM TOOLKIT:

Step#1: Open Settings on your Android device.

Step#2: Now tap on More tab.

Step#3: Tap on Application Manager form the list.

Step#4: Now select All Application by swipe to left.

Step#5: There you’ll see all your installed apps, Tap on SIM TOOLKIT.

Step#6: Now all you have to do tap on Clear Cache and Clear data.

Step#7: Now goto home screen and restart your device.

Fix Unfortunately App Has Stopped [ Video Tutorial ]

Fix Samsung Galaxy S7 Edge freezes, lags, slows down and turns off unexpectedly

0
Fix Samsung Galaxy S7 Edge freezes, lags, slows down and turns off unexpectedly

Samsung Galaxy S7 Edge is a powerful device in many ways, but not every device is perfect. I’ve heard people complaining about that they are facing issues on Galaxy S7 Edge such as while using S7 Edge it freezes, my device turns off unexpectedly, slows down while multitasking and it lags while playing games or watching videos. First of all, I haven’t face anything like that, but we are here to help so let’s start the tutorial on how to Fix Samsung Galaxy S7 Edge freezes, lags, slows down and turns off unexpectedly.

See More: How to fix Samsung Galaxy S7 Battery draining too fast [ 5 Ways ]

Galaxy-S7-Edge-reboots-shutdown-slow-down

Fix Samsung Galaxy S7 Edge freezes, lags, slows down and turns off unexpectedly:

Following are the differents method which will help you to fix freezes, lags, slows down and turns off unexpectedly on Samsung Galaxy S7 Edge.

Find out if the problem is with your apps:

First thing you must do is find out what causing such issues, to do that follow the steps mentioned below.

  • Turn off your device.
  • Now press and hold power key.
  • When you see ‘Samsung Galaxy S7 EDGE’ release the power and hold the volume down key. Don’t let go until your device finishes rebooting.
  • Once your device boots up you’ll see ‘Safe mode’ in left corner.

Now that you are in safe mode and everything is perfectly working fine, that means some of the apps are causing this issue, to find out which app is the culprit one. I would suggest you start with the latest apps you downloaded. Once you find out, delete the app and boot your device normally.

Let’s Check the system cache:

This step is the most useful when it comes to fix Samsung Galaxy devices issues. Clearing the Cache on your device, if you don’t know how ? follow the instructions below.

Read more: fix Samsung Galaxy S7 Not Registered

Read more: how to Clear Cache, Cookies and History on Samsung Galaxy devices.

  • Turn off your Galaxy S7 Edge Plus.
  • Now press and hold Volume Up key, Home key, and Power key.
  • When your device vibrates, release the power button while continue to press/hold volume up and home key.
  • Once you see Android recovery screen, release both buttons.
  • You’ll see different option in the list, use volume down key to highlight ‘wipe cache partition.’ Use the power button to select it.
  • Once the process is completed, use volume key again to scroll and power button to select ‘Reboot system now’.
  • Your device will boot up.

Factory settings is the last solution:

If nothing is worked so far for you then the last resort is to perform a Factory reset. I’ll tell you two methods to perform factory reset on Samsung Galaxy S7 Edge.

  • Open Settings on your Galaxy S7 Edge.
  • Scroll down and tap on Backup and reset.
  • Tap on Factory data reset.

Using Recovery:

  • Turn off your Galaxy S7 Edge Plus.
  • Now press and hold Volume Up key, Home key, and Power key.
  • When your device vibrates, release the power button while continue to press/hold volume up and home key.
  • Once you see Android recovery screen, release both buttons.
  • You’ll see different option in the list, use volume down key to highlight ‘wipe data / factory reset.’ Use the power button to select it.
  • Once the process is completed, use volume key again to scroll and power button to select ‘Reboot system now’.
  • Your device will boot up in Factory state.

All Done !.

Install Official Android 6.0.1 Marshmallow XXU2DPCB on Galaxy Note 4 N910C

0
Install Official Android 6.0.1 Marshmallow XXU2DPCB on Galaxy Note 4 N910C

Samsung has brought the treat time for Galaxy Note 4 owners. Android 6.0.1 Marshmallow update has just started reaching out the Exynos Galaxy Note 4 SM-N910C. Android 6.0.1 Marshmallow update for the Galaxy Note 4 carries the build number XXU2DPCB and brings all the Marshmallow goodies to this device. This update also brings some features of the Galaxy Note 4 to the Galaxy Note 4. The off-screen-memo feature has likely made its way to the Note 4 now. Other features include the new toggle menu, some new icons, better battery life and stable performance. The update has been made live through OTA and Samsung Kies.uk_SM-N910FZKEBTU_000258012_Front_black (1)

In order to update your Galaxy Note 4 N910C to Android 6.0.1 Marshmallow, you can check out the OTA update option in settings > about device > software update or by connecting your phone to your PC and checking the update via Samsung Smart Switch or Samsung Kies. If you happen to be unlucky to get update through the aforementioned methods, you will likely want to flash the update manually. You can easily flash this latest Android 6.0.1 Marshmallow XXU2DPCB update on your Galaxy Note 4 SM-N910C using Odin3. Let’s have a look on how it’s done.

Early Preparations

1. This guide is only for Samsung Galaxy Note 4 N910C

Make sure that your device is exactly as mentioned above. To check out what device you have, go to Settings > More/General > About Device or Settings > About Device and match the model number. Be careful about the device model number, flashing a file on a device not listed here might result in bricking it up. In that case, we may not be held responsible.

2. Battery should be charged at least 60%!

Your device’s battery should not be weak. In case your device goes dead during the flashing process, your device may get soft bricked and you might be in need of flashing stock firmware and that will ultimately result in wiping up your data as well. So, make sure that you charge your device before you start the flashing process.

3. Use the OEM data cable to establish connection!

Always use the original data cable to establish connection between your Android device and your computer / laptop. Using ordinary data cables might interrupt the flashing process, so to avoid any mishap, you need to meet this requirement as well.

4. Backup everything!

Just to be on the safe side, you may consider backing up each and everything from your Android device. This is highly recommended so that in case anything goes wrong, you still have the access to all of your data and you can restore it immediately. Also, clean install is always recommended, that means you will probably have to wipe your device to install the new firmware. So, you may backup everything as listed below.

Backup SMS Messages
Backup Call Logs
Backup Contacts
Backup Media – Copy your files manually to your PC or Laptop.
Backup EFS – If rooted, otherwise skip this step.

5. Install Samsung USB drivers

In order to be able to establish connection between your PC and your , you need to have the Samsung USB drivers installed on your PC. You can find all Android USB drivers here on our site.

6. Turn off Samsung Kies and other softwares while using Odin3!

Make sure that you turn off Samsung Kies while using Odin3 flashtool. Samsung Kies will interrupt Odin3 and will result in causing errors and may not let you flash your desired firwmrae. Also, make sure that you turn off any antivirus software you’ve installed and also disable firewall to avoid any connection and flashing issues.

Required Downloads & Installations

  1. Download and extract Odin3 v3.10.6.
  2. Download and extract firmware file to get the .tar.md5 file.

Firmware Details:

  • Model: SM-N910C
  • Country: Poland
  • Android Version: Android 6.0.1 Marshmallow
  • Changelist:7633655
  • PDA: N910CXXU2DPCB
  • CSC: N910COXA2DPCB
  • Build Date: March 28, 2016.

How To Flash Official Android 6.0.1 Marshmallow on Galaxy Note 4 N910C

  1. Make sure that you read the instructions listed above carefully and you’re all set to go ahead now.
  2. Wipe your device complete in order to attain a neat installation. You may boot into the recovery mode and perform a factory data reset.
  3. Open Odin3.exe.
  4. Put your Galaxy Note 4 in download mode. To do so, turn it off and wait for 10 seconds. Turn it on by pressing and holding Volume Down + Home Button + Power Key simultaneously, You should see a warning, press Volume Up to continue. In case this method doesn’t work for you, try one from this guide.
  5. Connect your device to your PC.
  6. As soon as Odin detects your phone, the ID:COM box should turn blue.  Make sure that you’ve installed Samsung USB drivers before connecting.
  7. For Odin 3.09 or 3.10.6 hit the AP tab. Select the firmware.tar.md5 or firmware.tar, that you downloaded and extracted above.
  8. If you’re using Odin 3.07, you will select “PDA” tab instead of the AP tab, rest of the options remain untouched.
  9. Make sure that the options selected in your Odin are exactly as shown in the pic.Odin 3.10.6 Explained_Techbeasts
  10. Hit start and wait till the firmware  flashing is complete, The flashing process box will turn green upon successful flashing.
  11. Once the flashing process has been completed successfully, disconnect your device and reboot it manually.
  12. Once the device boots up, checkout the new firmware now.
  13. Your device will be running on official Android 6.0.1 Marshmallow firmware.
  14. Once updated to stock, do not try to downgrade, or else you will result in messing up EFS partition of your device.
  15. That’s all!

Got any queries? Make sure that you drop em’ in the comment box below. Good Luck!

Download Disney Crossy Road for PC (Windows and Mac)

0
Download Disney Crossy Road for PC (Windows and Mac)

Crossy Road was among the most-viral games of Android and iOS platforms at the time it made its way to the mobile gaming world. Crossy Road was able to cater over a 100 million users. The game is still liked by millions of gaming freaks. Developers of Crossy Roads decided to take the Crossy Road fun to a next level and introduced a whole new franchise named as Disney Crossy Road. Now that you can notice the word Disney in the title of this game, it shouldn’t be a hard shot to guess that Disney Crossy Road has been brought up by the developers of Crossy Road in collaboration with Disney.Disney Crossy Road

Disney Crossy Road’s concept is pretty much similar to the original Crossy Road. The twist is in the elements, characters and aesthetics of this game. Disney Crossy Road brings you over a 100 funny characters from Pixar. These characters include Mickey, Buzz Lightyear, Rapunzel, Sadness, Mufasa and many of your favourite characters. You’ve to cross those furious obstacles in the 8-bit movie world i.e. Toy Story, The Lion King, Wreck-It-Ralph and many more. Disney Crossy Road also brings some themed challenges to add up spice to your game play. Disney Crossy Road has been made available for Android users now. To begin having fun, you can go ahead and download Disney Cross Road for free from the Google Play Store.

Although you can easily grab this game on your Android smartphone or tablet, but just in case you’re wishing to play this game on your computer, you’re gonna need to follow a little bit different method. You can play Disney Crossy Road for PC on your Windows XP/7/8/8.1/10 Desktop PC and Mac OS X Macbook, iMac. You will need to install an emulator like BlueStacks to play Disney Crossy Road for PC. Time for us to jump up to the method and start playing this game right away.

Download Disney Crossy Road for PC and Mac

  1. Download Disney Crossy Road APK
  2. Download and install Bluestacks: Bluestacks Offline Installer | Rooted Bluestacks | Bluestacks App Player | Rooted BlueStacks 2
  3. Once you’ve installed Bluestacks, double click the downloaded Disney Crossy Road APK.
  4. The APK will be installed using Bluestacks, once installed open Bluestacks and locate the recently installed Disney Crossy Road.
  5. Click the Disney Crossy Road icon to open it, follow the on-screen instructions to play it.

You can also use Andy OS or Remix OS to install Disney Crossy Road, here’s the tutorial:  How To Run Android Apps On Mac OS X With Andy | How to launch Remix OS for PC and install Apps for PC via Remix OS.

The Andy OS and Remix OS tutorial explains how to play a game on your Mac OS X, but the same guide will also work for a Windows PC.

That’s all. In case you’re stuck with anything, reach us out through the comment box below.

Download Disney Crossy Road APK for Android

0
Download Disney Crossy Road APK for Android

The long awaited version of Crossy Road by Disney has finally made its way to the Android gaming world. Disney Crossy Road has been developed by the developers of the original Crossy Road in collaboration with Disney. Disney Crossy Road presents you your favourite characters from movies like The Lion King, Tangled, Wreck-It-Ralph and others. There are new locations to play the game in. You can play Disney Crossy Road in the 8-bit movie world. Disney Crossy Road brings a lot of new challenges to spice up your gameplay. The game is absolutely free and is now available to download from the Google Play Store.

Just in case you are unable to access Disney Crossy Road in the Google Play Store at your end, or your Play Store isn’t working due to some annoying issues, you might be in need of the APK file of this game. You can now download the Disney Crossy Road APK and install it using the set of instructions given below. The Disney Crossy Road APK attached here is completely untouched and pure and involves no risks at all. Just go ahead and download it to start playing your favourite game right now.

Disney Crossy Road for PC

Disney Crossy Road Features

Why should the chicken get all the fun?

From Hipster Whale, the makers of the original Crossy Road™ with over 120,000,000 downloads, and Disney comes Disney Crossy Road—an all-new take on the 8-bit endless adventure to cross the road without splatting!

Tap and swipe your way to a record-setting number of steps with 100+ Disney and Pixar figurines while dodging crazy and unexpected obstacles in the 8-bit worlds of Toy Story, Zootopia, The Lion King, The Haunted Mansion, Tangled, Wreck-It Ralph, and more.

• COLLECT over 100+ Disney and Pixar figurines, including Mickey, Donald, Buzz Lightyear, Rapunzel, Mufasa, Sadness, Wreck-It Ralph, Madame Leota, and other favorites (many with fun surprises)!

• JOURNEY through 8-bit depictions of Al’s Toy Barn, the Pride Lands of Africa, the Haunted Mansion, San Fransokyo, and more while enjoying 8-bit versions of familiar tunes like “You’ve Got a Friend in Me” and “I Just Can’t Wait to be King!”

• MASTER special themed challenges unique to each of the worlds, such as weathering blizzards, collecting cherries to earn special power-ups, avoiding thundering stampedes of wildebeest, staying clear of falling barrels, and then some!

Download and install Disney Crossy Road APK

  1. Download Disney Crossy Road APK.
  2. Download the file to your phone straight away, or copy it to your phone from your PC.
  3. Now on your phone, go to settings > security > allow unknown sources > check this.
  4. Now using a file manager, locate the APK file that your just copied or downloaded.
  5. Tap the APK file and finish installation using the on-screen instructions.
  6. Once installed, access the newly installed game through app drawer.
  7. That’s all. Enjoy Disney Crossy Road!

You may also want to try Disney Crossy Road for PC.

How to enable WhatsApp end-to-end encryption

0
How to enable WhatsApp end-to-end encryption

WhatsApp end-to-end encryption has been made available for all WhatsApp users across the world. With end-to-end encryption, WhatsApp aims to secure the chats of billions of its users. Enabling WhatsApp end-to-end encryption is quite an easy process. Here’s a comprehensive and step-by-step guide on how to enable WhatsApp end-to-end encryption on your Android and iOS device.

We are living in a world where information leaks have become more than common. Everyday we see some new battle going on around us because of the private information being compromised. It’s actually more than annoying when you see your private chats, text messages, calls or photos getting compromised. This mostly happens when people usually use different platforms to communicate with their loved ones and they speak their heart out, share their personal data over the IMs. When it comes to choosing an IM to for your primary communication, you come across some popular names like WhatsApp, Viber, Line, WeChat and others. But which one to choose when it comes to security? Well, if you’re going to choose an IM today, then you definitely need to go with WhatsApp. WhatsApp has announced its end-to-end encryption and has taken a leap over all other instant messengers today.

WhatsApp Encryption 1 WhatsApp Encryption 2


WhatsApp’s end-to-end encryption makes sure that all of your calls, text messages, videos, photos and documents that you’re sharing over WhatsApp are safe and sound. The end-to-end encryption secures every bit of information exchanged over WhatsApp. WhatsApp end-to-end encryption allocates a secret key to every single message. Only the recipient has the key to decrypt this message. Not even WhatsApp or an employee of WhatsApp can look into what you’re doing on WhatsApp. This step by WhatsApp has been taken to build more trust among its users and also to make the most popular instant messenger more safe and secure.

How to enable WhatsApp end-to-end encryption

  1. Make sure that you’re using the latest version of WhatsApp on your Android or iOS device. You can grab the latest WhatsApp from the Appstore for iOS and from the Play Store for Android.
  2. Now open the latest WhatsApp installed on your Android or iOS device.
  3. Open any chat on your WhatsApp.
  4. As soon as you open the chat screen, you will find the option “Messages you to send to this chat and calls are now secured with end-to-end encryption. Tap for more info”.
  5. Tap the above-mentioned message in your WhatsApp chat screen. As soon as you tap it, it will ask you for verification.
  6. Now tap the Verify button, and it will show you a QR code that has to be scanned.
  7. You will either have to scan the QR code on your contact’s phone, or you will have to ask them to scan your code. You will have to do the same process on your recipient’s device to reach the QR code scanning stage i.e. step 1 – 6.
  8. Once you’re done scanning the code, you will find an end-to-end encryption indicator in the contact info or the group info in your WhatsApp Messenger.
  9. That’s all you had to do to enable end-to-end encryption on WhatsApp. Best of luck.

Download Miitomo for PC – Windows and Mac

4
Download Miitomo for PC – Windows and Mac

Miitomo is one of the highly anticipated Android application that just made its way to the Android world just a few days back. The reason for this application to get so much hype was the team of developers working on it. Miitomo Nintendo’s first ever Android application. We are talking about the same Nintendo who was behind the famous Super Mario title.

Miitomo is a social application. Miitomo’s concept is actually good to have a look at. It’s sort of a game. You’ve to create your character named as Mii. Mii should look like you and then you can communicate with your friends using Mii. Mii will talk to your friends on your behalf and convey all your messages. Your Mii will give your friends the fun details about you and it will also ask your friends the fun details about them. Mii will interact with the Miis’ of your friends. This Mii character comes from Nintendo’s Wii. Miitomo offers a number of customisations. You can play and tweak your Mii character the way you want. Miitomo has gone viral over the past few days. If you’re willing to give it a try, you can grab it for free from the Google Play Store. However if you do not own an Android device or for some reason you can’t play it on a phone, you may consider playing Miitomo on a computer. Wonder how is that possible? Well, here’s an answer to your question.Miitomo for PC

Miitomo for PC can be accessed on a Windows XP/7/8/8.1/10 Desktop PC / Laptop and also a Macbook Air, Macbook Pro, iMac powered up with Mac OS X. You can run Miitomo for PC via BlueStacks, Remix OS or Andy OS. Let’s have a look on the steps and start using Miitomo on a computer.

Download Miitomo for PC and Mac

  1. Download Miitomo APK
  2. Download and install Bluestacks: Bluestacks Offline Installer | Rooted Bluestacks | Bluestacks App Player | Rooted BlueStacks 2
  3. Once you’ve installed Bluestacks, double click the downloaded Miitomo APK.
  4. The APK will be installed using Bluestacks, once installed open Bluestacks and locate the recently installed Miitomo.
  5. Click the Miitomo icon to open it, follow the on-screen instructions to play it.

You can also use Andy OS or Remix OS to install Miitomo, here’s the tutorial:  How To Run Android Apps On Mac OS X With Andy | How to launch Remix OS for PC and install Apps for PC via Remix OS.

The Andy OS and Remix OS tutorial explains how to play a game on your Mac OS X, but the same guide will also work for a Windows PC.

That’s all. In case you’re stuck with anything, reach us out through the comment box below.

Download Angry Birds Action for PC and Mac

0
Download Angry Birds Action for PC and Mac

Angry Birds series has dominated the Android and iOS gaming world for quite a while in the past. Angry Birds was once the favourite game of almost everyone. The game is still liked by many and to maintain its liking, Rovio Entertainment Ltd has introduced the all-new Angry Birds Action. Angry Birds Action is an arcade game. The storyline of this game puts the red birds in trouble once again. The village has been torn apart once again and the fingers are getting pointed towards Red. Your task is to jump into the Bird Island and collect enough of evidence to get your friend out of trouble. You will only be able to prove Red’s innocence if you manage to dig out a solid evidence. You will simply have to pull the slingshot to throw Red and co. careening into the village. The game brings over 90 new levels. You will get to unlock quite many bonuses and features as you go ahead and complete the levels. Angry Birds Action is a free  game. Android users can grab it from the Google Play Store and iOS users can grab it from the iOS App Store. Users who are willing to play this game on a computer can follow this guide below.Angry Birds Action PC

Angry Birds Action for PC can be played on a Windows XP/7/8/8.1/10 Desktop PC / Laptop and also a Mac OS X Macbook Air, Macbook Pro, iMac. You will need an Android emulator like BlueStacks, BlueStacks 2, Remix OS or Andy OS in order to be able to play Angry Birds Action for PC. Let’s move on to the method and start playing Angry Birds Action for PC.

Download Angry Birds Action for PC and Mac

  1. Download Angry Birds Action APK
  2. Download and install Bluestacks: Bluestacks Offline Installer | Rooted Bluestacks | Bluestacks App Player | Rooted BlueStacks 2
  3. Once you’ve installed Bluestacks, double click the downloaded Angry Birds Action APK.
  4. The APK will be installed using Bluestacks, once installed open Bluestacks and locate the recently installed Angry Birds Action.
  5. Click the Angry Birds Action icon to open it, follow the on-screen instructions to play it.

You can also use Andy OS or Remix OS to install Angry Birds Action, here’s the tutorial:  How To Run Android Apps On Mac OS X With Andy | How to launch Remix OS for PC and install Apps for PC via Remix OS.

The Andy OS and Remix OS tutorial explains how to play a game on your Mac OS X, but the same guide will also work for a Windows PC.

That’s all. In case you’re stuck with anything, reach us out through the comment box below.

Download MU Origin for PC (Windows and Mac)

1
Download MU Origin for PC (Windows and Mac)

MU Origin is a new online role-playing multiplayer game by Webzen Inc. MU Origin promises to give the players a unique MMORPG experience. The game is said to be different from the ordinary MMORPGs. The aesthetics of this game might be new and different, but the concept is nothing new. All you have to do is to go on a journey to hunt down your enemies. Meet different people and make them your friends, jump into the parties. You’ve to devastate the evil and bring the peace back to the world.MU origin for pc

MU Origin is a highly customisable game. There are three different classes named as Dark Knight, Dark Wizard and Elf. You’ve to create your who will represent you in the battles. Equip your hero with the most powerful weapons, earn some skills to make it an outstanding warrior. As you move towards the higher levels, your hero will keep earning some mighty skills and become a beast. You can collect Zens, Star Essences and Diamonds in the PVP Areas and exchange them in the trading and auction system. MU Origin is absolutely free and waiting for you in the Google Play Store.

Although playing this game on an Android phone is much easy, but some of the gaming geeks might want to play it on their computers as  well. For such users, we have this guide here. The guide demonstrates how you can play MU Origin for PC on your Windows XP/7/8/8.1/10 Desktop PC / Laptop and a Mac OS X Macbook or iMac. MU Origin for PC can be played via BlueStacks, BlueStacks 2, Andy OS and Remix OS. Let’s see the method and get this working now.

MU Origin for PC (Windows and Mac)

  1. Download MU Origin APK
  2. Download and install Bluestacks: Bluestacks Offline Installer | Rooted Bluestacks | Bluestacks App Player | Rooted BlueStacks 2
  3. Once you’ve installed Bluestacks, double click the downloaded MU Origin APK.
  4. The APK will be installed using Bluestacks, once installed open Bluestacks and locate the recently installed MU Origin.
  5. Click the MU Origin icon to open it, follow the on-screen instructions to play it.

You can also use Andy OS or Remix OS to install MU Origin, here’s the tutorial:  How To Run Android Apps On Mac OS X With Andy | How to launch Remix OS for PC and install Apps for PC via Remix OS.

The Andy OS and Remix OS tutorial explains how to play a game on your Mac OS X, but the same guide will also work for a Windows PC.

That’s all. In case you’re stuck with anything, reach us out through the comment box below.