Home Blog Page 326

Turn on Screen Mirroring on Samsung Galaxy S7 and Connect With SmartTV

2
Turn on Screen Mirroring on Samsung Galaxy S7 and Connect With SmartTV

Samsung new flagship Galaxy S7 and S7 edge has shocked the world with his brilliant features. Last year when Samsung released Galaxy S6 people didn’t found this device as good as it was marketed, Samsung dropped some of the core features in Galaxy S6 but now they have listened to users and given them what they want. Enough of the chit chat, you can read everything on Samsung Galaxy S7 in our review. Let’s get back to the topic, following are the instructions on how to Turn on Screen Mirroring on Samsung Galaxy S7 and Connect With SmartTV.

how-to-connect-your-galaxy-s7-to-your-tv

How To share the screen and data between your PC and mobile device:

  • First of all download SideSync on your Windows/Mac and mobile device. You can download SideSync from Google Play on your device.
  • Once SideSync is installed on your PC and mobile device, connect your device with PC using USB cable or WiFi.
  • If you have Samsung Smart TV then you can connect your device using WiFi, but if you don’t have Samsung SmatTV then you have buy a AllShare cast hub in order to connect with TV.

How to screen mirror from Samsung Galaxy S7 to a TV using AllShare Cast:

  • Turn on your television.
  • Power on your AllShare Cast though charger.
  • Connect your TV with AllShare Cast with HDMI Cable.
  • Kindly properly put HDMI Cable in the right port.
  • Now wait for the light to get blue from red on your AllShare Cast device.
  • Your TV is connected with AllShare Cast.
  • Now go to Samsung Galaxy S7 quick setting and tap on screen mirroring and first turn off then turn on it again.
  • After turning on Screen mirroring you will get a list of available devices. Select AllShare Cast’s dongle and enter the PIN as showed on TV.
  • Your Samsung Galaxy S7 is connected with your TV through AllShare Cast.

How to screen mirror from Samsung Galaxy S7 to a Samsung Smart TV:

  1. Press Input from your Samsung SmartTV remote.
  2. Select Screen Mirroring from your Smart Tv screen.
  3. Now go to your Galaxy S7 quick setting tap on Screen Mirroring.
  4. Your Phone will list all the available device available for Screen Mirroring.
  5. Select Samsung Smart TV. That’s all.

Evilbane Rise of Ravens for PC (Windows and Mac)

0
Evilbane Rise of Ravens for PC (Windows and Mac)

Evilban Rise of Ravens comes from Netmarble games, the guys who are behind some famous titles like Seven Knights and others. This new action game puts the players in the battle arena against the enemies who are up to destroy the world. The game story sports an evil shadow which has returned to take the peace of Kingdom of Ceroth away and has challenged Heavenstone. The shadow will devastate the land just like it did 20 years back. In order to defeat the dark shadow, a Raven has been chosen and given the responsibility to save the entire kingdom of Ceroth. So, it’s pretty much understood that you’re going to play the role of Raven in this game. The game is a blend of action and rpg. You will be playing Raven’s role and showing off some stunning action.Evilbane Rise of Ravens PC image

Netmarble games have managed to pack this game inside console-quality 3D graphics making this game much more cool and fun. Just like other popular action and RPG games, the characters in this game are highly customisable as well. You can equip your character with some mighty weapons from a collection of over 1000 different weapons. You can team up with different allies to defeat the bosses. You’re going to come across some mesmerising and also some haunted sceneries in this game. The game awaits you to save the pride of the kingdom of Ceroth now. You can play this game by installing it for free from the Google Play Store on your Android smartphone or tablet. However if you’re willing to play this game on a computer, that is somehow possible too.

Evilbane Rise of Ravens for PC can be easily played on a Windows XP/7/8/8.1/10 Desktop PC / Laptop and also a Mac OS X powered Macbook Pro, iMac or Macbook Air. All you need to do is to get an Android emulator. The guide here demonstrate how you can play Evilbane Rise of Ravens for PC via BlueStacks, BlueStacks 2, Remix OS or Andy OS.

Let’s head towards the 2nd page and get this game running on a computer right now.

How to fix Samsung Galaxy S7 Battery draining too fast [ 5 Ways ]

0
How to fix Samsung Galaxy S7 Battery draining too fast [ 5 Ways ]

Samsung Galaxy S7 is the latest flagship and no doubt Samsung did an awesome job, so far Samsung Galaxy S7 is getting good response but there are few customers who are complaining that they are facing battery drain issue. We have covered many articles on how to fix battery drain issues on smartphones, today I’ll give you some tips that will help you fix Samsung Galaxy S7 Battery draining too fast. 

Read more: How to Root Samsung Galaxy S7 and S7 Edge with CF-Auto Root

fix galaxy s7 battery draining to fast

How to fix Samsung Galaxy S7 Battery draining too fast:

Read more: Turn on Screen Mirroring on Samsung Galaxy S7 Edge and Connect With SmartTV.

#1:

  • First Goto your settings and the tap on battery, now check which is consuming the most of it. At my end it was Google Play Services. It was waking up my device without any reason, so you have to change the settings.
  • Goto Settings -> Privacy -> Privacy Guard. Now Tap on 3 dot for menu.
  • You’ll see a popup, tap on show built-in apps.
  • Now long press the Google Play Services until you see its settings.
  • Change settings of Wake Up, Keep Awake, Auto-Start and select Denied for each.

#2:

  • Use your device with the low brightness, use Auto brightness to control your screen brightness.
  • Turn off Wifi and Bluetooth when not needed.
  • Turn off location services (GPS).
  • Disable All apps running in background.

#3:

  • Use original USB while charging your device, also try using the 2Amp dock charger. If it’s charging slow you can try other manufacturers chargers.
  • If its not charging with charger, use your PC/Laptop to charge your device.
  • Boot your device in recovery and then charge your One Plus One.

#4:

  • Use Black Wallpaper on your home screen.
  • Perform a factory reset using recovery menu.
  • Install the latest OS on your One Plus One.
  • You can use different type battery saver application they might came handy.

#5:

  • Please try to charge your device when its on 30%-40%.
  • Make sure you are using original accessories to charge your device and please check everything is connected properly.
  • After connecting with your charger if your device is not turning on, leave it like this for 20 minutes. After that try to turn on your device.
  • If you’re still facing problems, it might be time to return the phone.

How to bypass WhatsApp privacy settings [ Tutorial ]

1
How to bypass WhatsApp privacy settings [ Tutorial ]

Here you go, finally there is a Spy which can easily bypass WhatsApp privacy settings and good thing is that it’s working. There were many software’s and Apps which claims that they can bypass WhatsApp security but they never did, only WhatsDog was a good app which let you Spy on a single contact by telling you whenever that contact is using WhatsApp. Today I’ve a another tool created by Maikel Zweerink which allow you to do a lot of things such as, Track any privacy setting changes, Share profiles via unique tokens and much more. Now Let’s start the method to bypass WhatsApp privacy settings.

bypass WhatsApp privacy settings

What can WhatsSpy Public do

Profile your daily habits and smartphone usage throughout the day, if you like that or not.

It contains the following functions:

  • Track user status / status message and profile picture (history).
  • Track any privacy setting changes.
  • Be notified via various services if a user comes online/changed any of the above in WhatsApp.
  • Compare users statuses to draw conclusions.
  • Get a timeline view just like Facebook about the tracked users.
  • Group all tracked users and view statistics about them.
  • Share profiles via unique tokens.
  • Full language support for EN,DE,ES,NL

How to bypass WhatsApp privacy settings [ Tutorial ]:

To install WhatsApp Spy Public you need to get a grip on technical abilities because you need to do few complex technical stuff.

Learn how to install WhatsApp Spy Public on your Linux Machine / VPS (Linux) / Raspberry Pi: Click Here for the method

Download WhatsApp Spy Public:

How to Root Samsung Galaxy S7 and S7 Edge with CF-Auto Root

How to Root Samsung Galaxy S7 and S7 Edge with CF-Auto Root

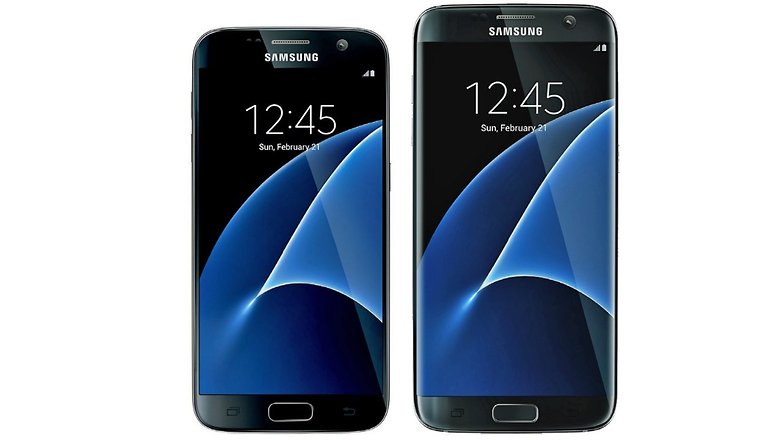
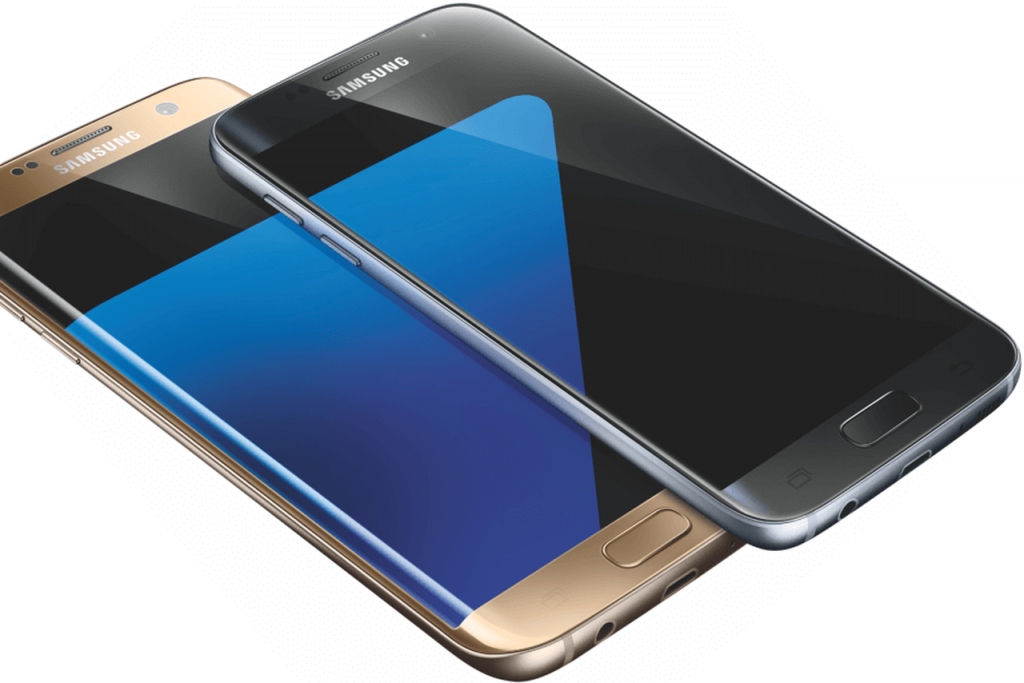
Samsung Galaxy S7 has been out for quite sometime and with the arrival of first Custom ROM for it, users must have been looking to root the device. The biggest risk in the rooting process is that you might Brick your device, although thanks to modern tools and applications of rooting, the chances of that is quite less, but if you have some important data, then always make a back-up before doing anything manually. Galaxy S7 and S7 Edge, both are amazing in terms or speed as well as performance and looks too. Now such a device must be used to its maximum potential and thanks to restrictions on the Stock ROMs, you can’t use and the amount of RAM and memory it takes, that is also a huge problem too.

The best and the easiest way to Root any Samsung device is via CF-Auto Root, what it does is that it installs a custom Recovery on your device, flashes the SU binaries through it and then reverts everything back to stock, except that your device is rooted.As you scroll down, you will find a step-by-step method to Root Samsung Galaxy S7 and S7 Edge with CF-Auto Root.
How to Root Samsung Galaxy S7 and S7 Edge with CF-Auto Root

In case you’re not finding yourself confident enough or convinced enough to root your Galaxy Core Prime, you may want to have a look on 10 reasons why you should root your Android. You may also want to go through some benefits of root access, so have a look on the 10 best applications for rooted phones to enhance the functionality of your phone after rooting it.

Here are some early preparations to make sure that nothing goes wrong

  1. This method only works with Samsung Galaxy S7 and S7 Edge. Your device must be running Android Lollipop or Marshmallow. Check your device’s model number and Android version in Settings > About device section.
  2. Enable USB debugging on your Galaxy A7. To do so, go to Settings > About device > tap the build number for 7 times. This will enable developer options in settings. Once enabled, open developer options and enable USB debugging.
  3. Enable OEM unlock on your Galaxy Core Prime if available. If OEM unlock doesn’t appear in developer options, skip this step.
  4. Backup your important contacts, call logs, sms messages and important media content.
  5. Charge your phone up to 50% to avoid and power issues during the flashing process.
  6. Turn off windows firewall, also disable or delete Samsung Kies while you’re using Odin3.
  7. Use your phone’s original data cable to establish connection between your phone and your desktop PC.
  8. Follow this guide to the letter to avoid any mishap.

DISCLAIMER: ROOTING PROCESS IS HIGHLY CUSTOM AND INVOLVES CERTAIN RISKS. ROOTING YOUR SAMSUNG GALAXY WILL VOID ITS WARRANTY. IF YOUR DEVICE HAS A KNOX COUNTER ON THE BOOTLOADER, ROOTING IT WILL TRIP THE COUNTER AND YOU WON’T BE ABLE TO RESET KNOX AFTER THAT. IN CASE OF ANY MISHAP, TECHBEATS, SAMSUNG OR CHAINFIRE MAY NOT BE HELD RESPONSIBLE. MAKE SURE THAT YOU’RE ROOTING YOUR PHONE AFTER UNDERSTANDING EACH AND EVERYTHING, AND YOU’RE DOING IT AT YOUR OWN RISK.

Required downloads:

  • Download and install Samsung USB drivers
  • Download and extract Odin. [Recommended Odin v3.09]
  • Open the following page: CF-Auto-Root
  • Once you’re on the CF Auto Root page, press Control + F or Command + F. After the search bar appears, type your phone’s model number to locate its Auto Root file. Download CF-Auto-Root file according to your device very carefully and extract it once only to get the .tar.md5 or .tar file.

How To Root Galaxy S7 and S7 Edge

  1. Open Odin.exe from the folder you extracted.
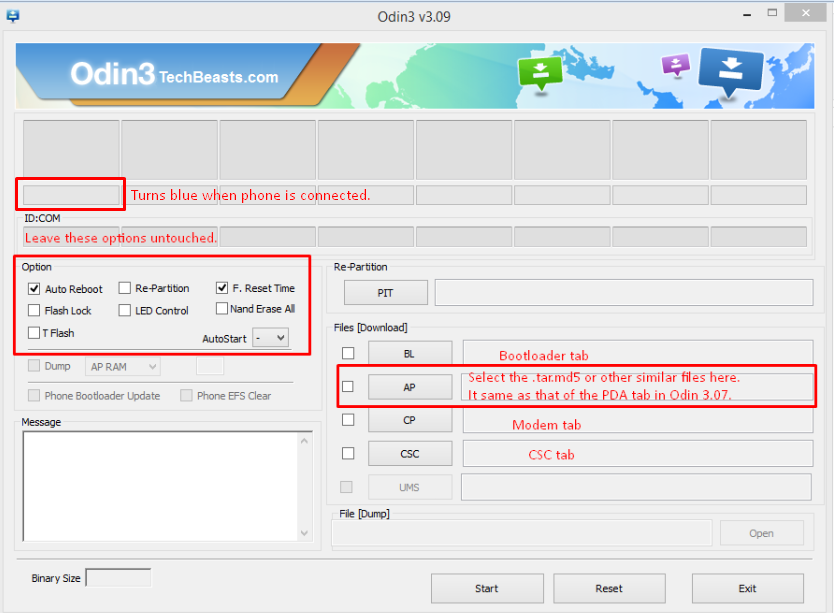
  2. Click on “PDA” / “AP” tab and select the unzipped CF-Autroot.tar file that you download and extracted in the third step in required downloads. If you’ve already downloaded the CF-Auto-Root file in .tar format, you do not need to extract it.
  3. Do not touch any other option in Odin. The only options ticked should be F.Reset Time and Auto-Reboot. Leave all other options as it is.
  4. Now put your Galaxy S7 or S7 Edge in download mode and connect it to your PC. To put it in download mode, turn it off completely. Now turn it on by press and holding Volume Down + Home + Power Key. It will boot up with a warning. Press Volume Up to continue. You should be in download mode now. If this combination doesn’t work, here’s How to Boot Samsung Galaxy Devices into Download & Recovery Mode
  5. Now connect it with your PC and let Odin detect it. As soon as Odin detects your phone, it will show you a blue or yellow indicator in the ID:COM box.Odin-3.09-explained.-2
  6.  As your device has been connected, click the “Start” button now.
  7.  Odin will now flash CF-Auto-Root. Once done, it will reboot your device.
  8. Disconnect your device, let it turn on completely and check SuperSu in app drawer once it boots up.
  9. You can verify root access by installing Root Checker application from Google Play Store.

Device booted up but not rooted? Here’s what to do

If your device isn’t rooted even after flashing CF-Auto-Root, you may try doing this.

  1. Follow the guide step and 2 from the guide above.
  2. Now in the third step, untick Auto-Reboot, the only ticked option should be F.Reset.Time.
  3. Follow the above guide from step 4 – 6.
  4. Once CF-Auto-Root has been flashed, reboot your device manually by either pulling out the battery or using the button combo.
  5. Verify root access as explained above.

How to Unroot your Galaxy S7 or S7 Edge?

You can unroot your device and revert back to the stock condition of your phone by flashing stock firmware. Here’s How To Flash Stock Firmware On Samsung Galaxy With Odin,

Got any issues? Reach us out through the comment box below.
Download Flail Rider for PC and Mac

0
Download Flail Rider for PC and Mac

Flail Rider comes from Bulkypix. If you’re one of the players who love to smash everything that comes on their way while driving a car in a game then Flail Rider is a pure source of entertainment for you. This mini game is going to be the reason for you to stick to your Android phone for hours.Flail Rider for PC image 1

The concept of this game is quite amazing and funny. A giant flail is attached through a heavy chain to the tail of your vehicle and you’re driving it in all the directions. It’s up to you now whether you want to drive smoothly, enjoy some drift and destroy everything around. The more damage you cause to the environment, the more score you’re going to put on the board and the more coins you’re going to collect. Flail Rider brings a variety of vehicles to choose from. These include a Tank, Monster Truck, Tuk-Tuk, Hotrod, Catmobile and many other vehicles. Large vehicles like Tank, Monster Trucks are equipped with a larger flail which will result in causing more damage to the environment. Flail Rider is based on voxel graphics. Flail Rider’s  Flail Rider just made its way to the gaming world of Android. Flail Rider is an absolutely free to play game. You can grab it for yourself from the Google Play Store.

If you’ve become a fan of Flail Rider and now you’re willing to play this game on a computer as well, that is possible too. You can easily get your hands on Flail Rider for PC. Flail Rider for PC runs pretty well on a Windows XP/7/8/8.1/10 Desktop PC / Laptop and also a Mac OS X powered Macbook Air, Macbook Pro, iMac. You will need an Android emulator like BlueStacks, BlueStacks 2, Andy OS or Remix OS to play Flail Rider for PC.

Let’s head towards the 2nd page now to learn how you can get Flail Rider running on your computer.

Download Tap Sports Baseball 2016 for PC and Mac

0
Download Tap Sports Baseball 2016 for PC and Mac

Tap Sports Baseball 2016 is the successor of Glu’s famous Tap Sports Baseball 2015. This Baseball series by Glu is liked by many gaming freaks all around the world. Tap Sports Baseball 2016 just adds some new features and improvements over its predecessor. Tap Sports Baseball 2016 brings a very easy to understand and a very enjoyable gameplay once again. The game is a piece of cake to master. It doesn’t require you to select your swing direction, the force of your bat to hit the ball. All you’ve to do is to touch the screen anywhere and your player will automatically hit the ball in that direction. Easy one-touch controls are one of the highlighted features which demonstrate a short gameplay session in this game.Tap Sports Baseball 2016 for PC 2

Furthermore, you can create your own Baseball team using some real players. You can play in leagues against other players in different regions. Tap Sports Baseball 2016 also allows players to pick up their favourite legendary players to recruit in the team. There are daily events and challenges to spice up your game. Tap Sports Baseball 2016 comes with decent graphics. Just like its predecessor, this game is also free to play. Android users can get Tap Sports Baseball 2016 for free from the Google Play Store.

However if you’re willing to play this game on a computer, that is possible as well. You can play Tap Sports Baseball 2016 for PC on a Windows XP/7/8/8.1/10 Desktop PC / Laptop and also a Macbook Air, Macbook Pro or iMac powered up with Mac OS X. All you will need to play Tap Sports Baseball 2016 for PC is an Android emulator like BlueStacks, BlueStacks 2, Remix OS or Andy OS.

Let’s move towards the 2nd page to get method and see how we can achieve our goal here.

Download Official HTC 10 Sense 8 QHD Wallpapers [Updated]

0
Download Official HTC 10 Sense 8 QHD Wallpapers [Updated]

HTC 10 is keeping the smartphone rumour mills active these days. HTC 10 could come out as soon as April 12, 2016. So far we’ve got hold of enough of information to speculate what the end product might turn out to be. HTC 10 will likely sport a 5.2-inch or 5.1-inch QHD display. The phone is expected to run Android 6 Marshmallow having HTC’s own Sense 8.0 atop of it. HTC is going to add a handful of wallpapers to add a little charm to this display. One of the HTC 10’s alleged wallpaper has been put up by a custom ROM developer @LlabTooFeR.

All official wallpapers of the HTC 10 have been leaked now. Luckily, we’ve grabbed the stock QHD HTC 10 wallpapers and attached right here. You can simply go ahead and download these by right clicking on it and then saving to your computer. You can use these wallpapers on your Android smartphone or tablet. The wallpapers iare in 2880 x 2560 pixels resolution.

HTC-10-Sense-80-wallpaper-01

As far as the power of the HTC 10 is concerned, it’s supposed to run on a Snapdragon 820 CPU accompanied by Adreno 530 GPU and a RAM of 4 GB. A battery of 3000 mAh is likely to be a part of this device. HTC 10 will have a fingerprint scanner as well. A world class camera is going to occupy some space in the HTC 10. Appearance of Boom Sound speakers is also expected. You can read all about the HTC 10 here.

Bypass iCloud Activation Lock iOS 8.1.3 / iOS 9.2.1 / 9.3 [ Working ]

0
Bypass iCloud Activation Lock iOS 8.1.3 / iOS 9.2.1 / 9.3 [ Working ]

We’ve provided a lot of methods to bypass Apple id and they worked but today I’ve found a real working method. This method is bit tricky and time taking, Let’s start the tutorial on how to Bypass iCloud Activation Lock iOS 8.1.3 / iOS 9.2.1 / 9.3. This method is applied on 4s, 5, 5C, 5S, 6, 6 Plus, 6S, 6S Plus running current iOS 9.3 / 9.2.1 / 9.2 / 9.1 / 9.0.2 / 9.0 / 8.4.1 / 8.4 / 8.1.3 firmware. 

Also See: How To Bypass iCloud Activation Lock & Remove iCloud Account [ Guide ]

Bypass-iOS-813-Activation

Also See: How To Use DoulCi To Bypass iCloud Activation [ Guide ]

How To Bypass iCloud Activation Lock iOS 8.1.3 / iOS 9.2.1 / 9.3 [ Working ]:

  • You have to change your DNS in your WiFi settings. [ 78.109.17.60 ].
  • Now head over to activation lock screen and tap on activation help. To make sure that DNS is working you have to wait till you see ritual site.
  • When you’ll be in next menu you’ll see options like playing games, watching videos, internet, etc.
  • Now move over to ‘Applications’ option and tap the ‘Crash Test 1’. The moment you tap on crash test 1 your device will reprising the stuff.
  • Tap on WiFi settings.
  • Tap on ‘i’ and pick ‘Manual’ option.
  • Add distinct emoji icons to the ‘Server’ and type ‘8888’ over the ‘Port’ zone.
  • When your device boots up, select the language. Keep doing this over and over again. It will take five minutes or more, as soon as it hits the required number of crashes you’ll promoted to your device home screen.
  • Once you’ll see you home screen, you can use only three apps Phone, Newsstand and Facetime.
  • You can now open Facetime or phone app to find the Apple id of previous owner and contact him.

How To Bypass iCloud Activation Lock iOS 8.1.3 / iOS 9.2.1 / 9.3 Video:

Delete photos in iOS when the trash can icon is grayed out

1
Delete photos in iOS when the trash can icon is grayed out

Following are the instruction on how to delete photos in iOS when the trash can icon is grayed out .

Yesterday I bought an iPhone 6s from a friend and as I was deleting all of his stuff, I don’t want to delete all the apps because then I have to re-install them and it take time. Now back to the topic as I was deleting photos I found out that the photos he transferred through iTunes can’t be deleted. Never faced such issue before, so I did a little workout and found a working method to delete photos in iOS when the trash can icon is grayed out .

Also See: Download iOS 9.3 Final IPSW File For iPhone And iPad [Direct Links]

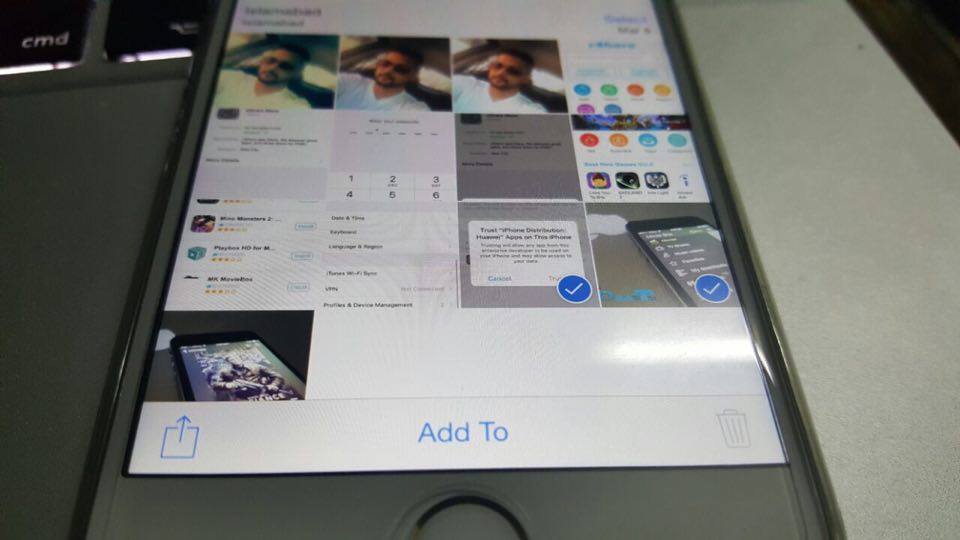
photos in iOS when the trash can icon is grayed out

How To Delete photos in iOS when the trash can icon is grayed out:

Before moving on let me tell you one thing,if you are seeing grayed out trash icon on your photos it’s because you have synced these photos using iTunes so in order to remove this photos or delete them you have to use iTunes again. Now let’s start the method to delete photos while trash icon is grayed out.

  • First connect your device to your PC or Mac.
  • Now if you see a popup asking to trust this device, Tap on trust.
  • Open iTunes and select your device, then Click on photos on the left side.
  • Now check on sync photos and click apply.
  • As soon as you click on apply, you’ll be promoted to replace the library on your mobile device. Click on Agree.

All Done.

Fix Unfortunately “com.samsung.faceservice has stopped” Error

3
Fix Unfortunately “com.samsung.faceservice has stopped” Error

Following are the instruction on how to fix Unfortunately “com.samsung.faceservice has stopped” Error Samsung Galaxy devices. I have seen many users of reporting that they are facing Unfortunately “com.samsung.faceservice has stopped” Error on their Galaxy S6 Edge Pus devices after updating to the Android 6.0.1. So without any further ado lets fix this error.

Also See: Fix Edge features still pops up after being disabled on Galaxy S6 Edge Plus.

Fix Unfortunately "com.samsung.faceservice has stopped” Error

How To Fix Unfortunately “com.samsung.faceservice has stopped” Error:

Also SeeHow To Fix “Unfortunately messaging has stopped” Error

Read MoreHow To Fix Unfortunately WhatsApp Has Stopped on Android

Before going any further you must see our ultimate guide on how to Fix ‘Unfortunately app has stopped’ errors.

Step#1: Open Settings on your Android device.

Step#2: Now tap on More tab.

Step#3: Tap on Application Manager form the list.

Step#4: Now select All Application by swipe to left.

Step#5: There you’ll see all your installed apps, Tap on Camera.

Step#6: Now all you have to do tap on Clear Cache and Clear data.

Step#7: Head back to All Application and select Gallery.

Step#8: Tap on Clear Cache and Clear data

Step#9: Now goto home screen and restart your device.

This will fix this issue and if not then you have to install an App named as ‘‘Package Disabler Pro “. Afte the application is installed, disable com.samsung.faceservice.

All Done.