Home Blog Page 302

Best HD Superman Wallpapers for iPhone

1
Best HD Superman Wallpapers for iPhone

Own an iPhone and also happen to be a Superman fan? You’re probably in for a treat as we have collected something awesome for iPhone users.  Being a Superman fan, you must apply some Superman makeover on your iPhone to show off your true love for this famous fictional superhero. Superman has been winning hearts of everyone since ages. There are numerous Superman plays out there to entertain Superman freaks. For iPhone users, we have collected some cool and stunning HD Superman Wallpapers.superman-wallpapers-for-iphone

The Superman wallpapers for iPhone are optimised according to the display of your phone. You can apply these Superman wallpapers on your iPhone 4, iPhone 4S, iPhone 5, iPhone 5C, iPhone 5S, iPhone 6, iPhone 6 Plus, iPhone 6s, iPhone 6s Plus, iPhone 7 and iPhone 7 Plus. The Superman wallpapers are from various series like Man of Steel, Superman vs Batman, Superman cartoons and also Superman comics. To save your favorite wallpaper, simply open the wallpaper by clicking on it and then right click > save it to your computer. You can also download these wallpapers directly to your iPhone. Go ahead now and download Best HD Superman wallpapers for iPhone.


We also have a collection of Best HD Batman Wallpapers for iPhone and Best HD Black and Jet Black iPhone 7 Wallpapers

Note: We do not own any of the wallpapers linked above. We have only collected the wallpapers and showing them here for iPhone users. All these wallpapers are the property of their rightful owners.

Titanfall Frontline for PC (Windows and Mac)

0
Titanfall Frontline for PC (Windows and Mac)

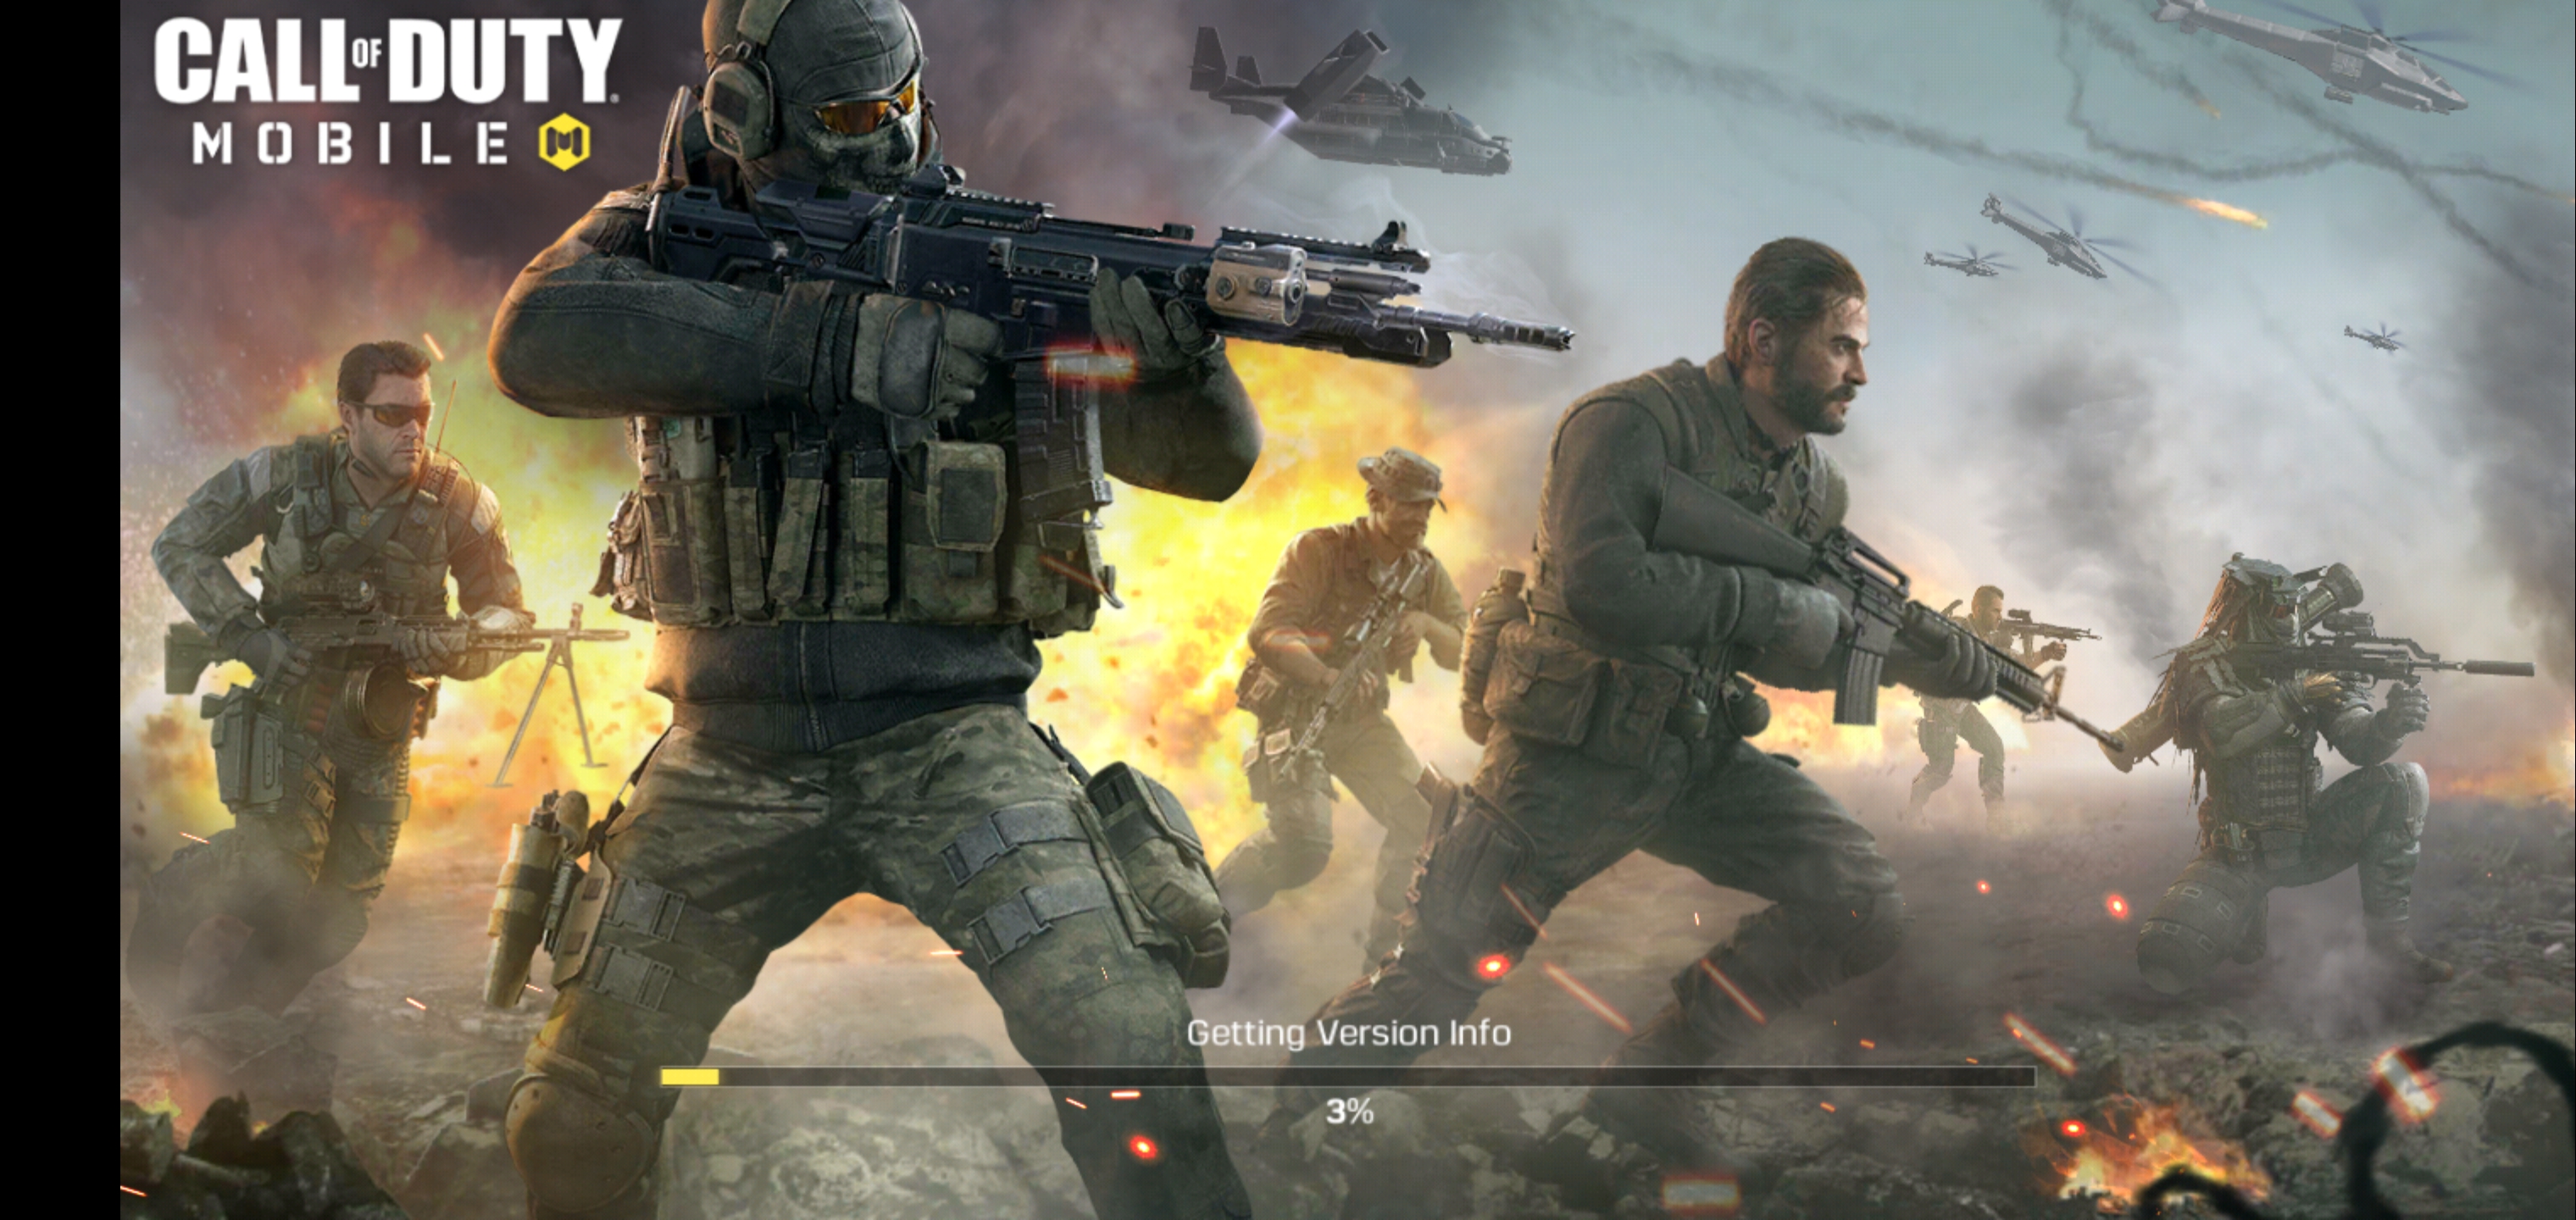
Titanfall Frontline has been making rounds in the news for a longtime. The game has finally made its way to select countries. Titanfall Frontline is comes under the umbrella of Nexon M. The mobile variation of Titanfall is a cards game. Play strategically to beat your opponents, lead your team to the victory. You are the commander in charge, do not devise a strategy that gets you killed in no time. Carefully deploy your Pilots and Titans for better results in head to head battles. Real time PvP battles are there for you to show off some real action. Expand your Army and keep performing various upgrades. Recruit as many Pilots and Titans as you can to win the battles and make your roots stronger. You can also form special squads for particular missions in this game. Give your troops and military the best training and advance them with the appropriate skills. You can use burn cards for a potential victory. That is what this game is all about. Titanfall Frontline is a free game, it can be downloaded via Google Play Store.titanfall-frontline-for-pc-and-laptop

Alongside the Android phones and tablets, Titanfall Frontline can also be played on a computer powered up with Windows or Mac OS X. You can easily play Titanfall Frontline for PC on your computer running Windows XP/7/8/8.1/10 and Mac OS X powered Macbook/iMac. To play Titanfall Frontline for PC, you need an Android emulator like the BlueStacks, BlueStacks 2, Andy OS or the new Remix OS Player. Have a look on the detailed tutorial and start playing Titanfall Frontline right away.

Titanfall Frontline for PC (Windows and Mac)

  1. Download Titanfall Frontline APK
  2. Download and install Bluestacks or Remix OS Player: Bluestacks Offline Installer | Rooted Bluestacks |Bluestacks App Player | Remix OS Player for PC
  3. Once you’ve installed Bluestacks, double click the APK that you just downloaded above.
  4. The APK will be installed using Bluestacks, once installed open Bluestacks and locate the recently installed Titanfall Frontline.
  5. Click the Titanfall Frontline icon to open it, follow the on-screen instructions to play it.

You can also use Andy OS  to install Titanfall Frontline for PC, here’s the tutorial: How To Run Android Apps On Mac OS X With Andy

Update Xiaomi Redmi Note 3 to Android 7.0 Nougat CM 14

0
Update Xiaomi Redmi Note 3 to Android 7.0 Nougat CM 14

Xiaomi Redmi Note 3 was launched officially in February, 2016. Xiaomi Redmi Note 3 was running on Android 5.1.1 Lollipop out of the box. That is the only firmware that this device had. Till date, Xiaomi hasn’t updated the Note 3 to any further version of Android. Redmi Note 3 users have been relying on custom ROMs to give a new life to their phone every time. Google is already done with the release of Android 7.0 Nougat, and now the Redmi Note 3 users definitely have their eyes on the Android 7.0 for their device instead of the Android 6.0 Marshmallow.xiaomi_redmi_note_3_pro

The good news for Xiaomi Redmi Note 3 users has already landed in. An unofficial build of CyanogenMod 14 custom ROM based on Android 7.0 Nougat has made its way to our beloved device. What’s cool about this ROM is that you will find most of the mainstream features working. CM 14 Android 7.0 Nougat for Redmi Note 3 boots up flawlessly. The ROM allows you to make calls, send sms messages and connect to mobile data which means RIL is working fine as well. The fingerprint on your device will also work in this ROM. Furthermore, WiFi, Bluetooth, Audo and Video Playback are also working. The camera is capable of capturing images, it may not shoot videos right now. Sensors, Flash and GPS are also working great. Since these are the features that are used in everyday routine, the features which are not working shouldn’t really bother you if you happen to be an Android geek.

To help Xiaomi Redmi Note 3 users with the installation of Android 7.0 Nougat CM 14, we have this comprehensive guide up here. You can now proceed towards the method to download and update Xiaomi Redmi Note 3 to Android 7.0 Nougat CM 14.

Update Xiaomi Redmi Note 3 to Android 7.0 Nougat CM 14

The ROM flashing process requires you to factory reset your device, so, make sure that you backup all of your important contacts, call logs, sms messages and media content. Flashing a custom ROM is not recommended by device manufacturers and the process is highly custom. In case a mishap occurs, TechBeasts, the ROM developer or the device manufacturer may not be held responsible. Make sure that you are doing everything at your own risk.

  1. Unlock the bootloader of your phone.
  2. Download TWRP Recovery.img and flash it using this guide: How to install TWRP 3.0.x Recovery on your Android device
  3. Download CM14-firmware-20160913.zip file and copy it to your phone’s internal or external storage.
  4. Download Google GApps.zip for Android 7.0 Nougat file and copy it to your phone as well.
  5. Boot into TWRP recovery on your Xiaomi Redmi Note 3.
  6. Perform a factory data reset using the Wipe option in TWRP.
  7. Now get back to the main menu in TWRP and tap Install > locate the ROM.zip file > flash it.
  8. After flashing the ROM, flash GApps.zip file similarly.
  9. Once done, reboot your device into system now.
  10. As your phone boots up, you should see Android 7.0 Nougat CM 14 ROM on the boot menu.
  11. That’s all. Happy flashing!

Source

Best HD Batman Wallpapers for iPhone

0
Best HD Batman Wallpapers for iPhone

Batman is probably the most popular fictional super hero. Batman die-hard fans love to give a Batman makeover to every thing that they have. Batman wallpapers are a great attraction for smartphone users as they love to apply Batman themed wallpapers, Batman themed phone cases and Batman theme stickers on their phones. When it comes to the user of phones, we have always witnessed the iPhone users showing off their phones at their best. iPhone users always want their phone to look stunning and if they also happen to be Batman fans, then a cool Batman wallpaper is what can make them blush.batman-wallpapers-for-iphone

Batman craze is something that will never come to an end. To entertain the iPhone users, we have compiled a list of some stunning Batman wallpapers. The wallpapers are cooked from almost all Batman appearances. You will also find some wallpapers from Batman villains. The wallpapers are optimized for the display of iPhone(s). Almost all these Batman wallpapers for iPhone are in black, which means they are good for the battery consumption of your iPhone as well. The wallpapers are in high quality resolution, so they are supposed to look crispy and cool on your iPhone’s screen You can use these Batman wallpapers on your iPhone 4, iPhone 4S, iPhone 5, iPhone 5C, iPhone 5S, iPhone 6, iPhone 6 Plus, iPhone 6S, iPhone 6S Plus, iPhone 7 and also the iPhone 7 Plus.

All you need to do now is to go ahead and grab your favorite wallpaper from our collection of Best HD Batman Wallpapers for iPhone. Open your favorite wallpaper and then save it to your computer and then transfer it to your iPhone or save it directly on your iPhone.

Note: We do not own of the wallpapers linked above. All these wallpapers are collected from random sources and are a property of their rightful owners.

Install Moto G Android 7.0 Nougat CyanogenMod 14

0
Install Moto G Android 7.0 Nougat CyanogenMod 14

Moto G 2nd gen from the year 2014 has got an unofficial build of CM 14 custom ROM based on Android 7.0 Nougat. Moto G 2014 initially ran on Android 4.4.4 KitKat out of the box. Motorola updated this device to Android Lollipop as well. Since then, there has been no further version of Android available for this device. Since Moto G runs on Android, this gives this device an opportunity to be updated to latest versions of Android through custom ROMs and that’s exactly why we love Android. Moto E and Moto G have no become the very first Motorola smartphones to have the unofficial CM 14 Android 7.0 Nougat builds.motorola-moto-g-2nd-generation-specifications-features-deals-photos-2__07906_zoom

CM 14 for Moto G has most of its features working. The ROM has got the RIL working on it which means you can make calls, send text messages and also connect to the mobile data. WiFi, Bluetooth, Camera, Audio, Video playback, Sensors, Flash and LED are also found working on this ROM. The only thing that’s not working at the moment is the video recording using the stock camera application. Even video recording will working using a third party camera application. These features are good enough to make this ROM a daily driver. If you are willing to taste the Android 7.0 Nougat on your Moto G, this may be the very right moment for you.

As you go ahead in this post, you will find a step by step guide to flash and Install Moto G 2nd gen Android 7.0 Nougat CyanogenMod 14 (unoffiical). Let’s have a look on the method and get done with it.

Install Moto G 2nd gen Android 7.0 Nougat CyanogenMod 14

The ROM flashing process requires you to factory reset your device, so, make sure that you backup all of your important contacts, call logs, sms messages and media content. Flashing a custom ROM is not recommended by device manufacturers and the process is highly custom. In case a mishap occurs, TechBeasts, the ROM developer or the device manufacturer may not be held responsible. Make sure that you are doing everything at your own risk.

  1. Unlock the bootloader of your phone.
  2. Download TWRP Recovery.img and flash it using this guide: How to install TWRP 3.0.x Recovery on your Android device
  3. Download cm-14.0-20160919-UNOFFICIAL-titan.zip file and copy it to your phone’s internal or external storage.
  4. Download Google GApps.zip for Android 7.0 Nougat file and copy it to your phone as well.
  5. Boot into TWRP recovery on your Moto G.
  6. Perform a factory data reset using the Wipe option in TWRP.
  7. Now get back to the main menu in TWRP and tap Install > locate the ROM.zip file > flash it.
  8. After flashing the ROM, flash GApps.zip file similarly.
  9. Once done, reboot your device into system now.
  10. As your phone boots up, you should see Android 7.0 Nougat CM 14 ROM on the boot menu.
  11. That’s all. Happy flashing!

Source

Update Moto E to Android 7.0 Nougat CyanogenMod 14

0
Update Moto E to Android 7.0 Nougat CyanogenMod 14

Moto E, a device from the year 2014 has been updated to Android 7.0 Nougat. Can’t believe it? That’s perfectly fine, we couldn’t believe it either at first, but it’s true. It’s obviously not possible officially, the phone has got an unofficial build of CyanogenMod 14.

Motorola has been pulling out some very nice mid-range and low-end smartphones lately. In 2014, Motorola released the very first generation Moto E, which did well and brought some respect to Motorola. The Moto E equipped a 4.5-inch display with 540 x 960 pixels resolution at 245 ppi. Snapdragon 200 CPU accompanied by Adreno 302 GPU powered this phone up with a RAM of 1 GB and internal storage starting from 4 GB. The phone also supported external SD card slot up to 32 GB. It has a 1980 mAh battery under the hood. 5 MP shooter is fixed at the back and there is no shooter on the front. Moto E was found running Android 4.4.4 KitKat out of the box. Motorola did have plans to upgrade this device to Android Lollipop as well.5132014122216pm_635_motorola_moto_e

Moto E is among the lucky most devices in the low-end category which has been blessed by Android 7.0 Nougat via CyanogenMod 14 custom ROM. Although an unofficial CyanogenMod 14 custom ROM, but it shouldn’t really matter to you if you are an Android power user and as long as this ROM works fine.

The ROM boots up, it plays the Audio, the Wifi works and allows you to browse internet. You can also make calls and send SMS messages which means RIL is working perfectly well. Camera is also working for shooting photos and you can also watch videos on this ROM. What more would you need? Have a look on the installation method now and learn to Update Moto E to Android 7.0 Nougat CyanogenMod 14.

The ROM flashing process requires you to factory reset your device, so, make sure that you backup all of your important contacts, call logs, sms messages and media content. Flashing a custom ROM is not recommended by device manufacturers and the process is highly custom. In case a mishap occurs, TechBeasts, the ROM developer or the device manufacturer may not be held responsible. Make sure that you are doing everything at your own risk.

Update Moto E to Android 7.0 Nougat CyanogenMod 14

  1. Unlock the bootloader of your phone.
  2. Download TWRP Recovery.img and flash it using this guide: How to install TWRP 3.0.x Recovery on your Android device
  3. Download cm-14.0-20160914-UNOFFICIAL-condor.zip file and copy it to your phone’s internal or external storage.
  4. Download Google GApps.zip for Android 7.0 Nougat file and copy it to your phone as well.
  5. Boot into TWRP recovery on your Moto E.
  6. Perform a factory data reset using the Wipe option in TWRP.
  7. Now get back to the main menu in TWRP and tap Install > locate the ROM.zip file > flash it.
  8. After flashing the ROM, flash GApps.zip file similarly.
  9. Once done, reboot your device into system now.
  10. As your phone boots up, you should see Android 7.0 Nougat CM 14 ROM on the boot menu.
  11. That’s all. Happy flashing!

Source

Install Android 7.0 Nougat AOSP on Galaxy Tab S2 T810/T815

0
Install Android 7.0 Nougat AOSP on Galaxy Tab S2 T810/T815

Galaxy Tab S2 9.7 from the year 2016 has become one of the luckiest devices to taste the all new Android 7.0 Nougat via an AOSP custom ROM. Galaxy Tab S2 9.7 is currently running on Android 6.0.1 Marshmallow. Samsung hasn’t announced any plans to update this device to any further version of Android. It’s unclear whether this device will even get a chance to get another upgrade or Android 6.0.1 Marshmallow is the final official update for this device. Keeping that apart, if you are an Android user, it really shouldn’t matter to you as you should always be able to update your device by flashing various custom ROMs.galaxy-tab-s2_white_5-1080x675

Android Open Source Project aka AOSP custom ROMs are the aftermarket distribution of official Android OS. The AOSP ROM available for the Tab S2 is based on Android 7.0 Nougat. The ROM is in its early stages, so expect a few things to crash. The ROM will surely get improved with time, but for now the only thing that matters is the Android 7.0 Nougat running on your device when there’s no sign of this firmware for many other Android smartphones.

AOSP ROM for the Galaxy Tab S2 has been put forward by XDA recognised developer RaymanFX, so thanks to him. The ROM is available for Galaxy Tab S2 9.7 SM-T810 and T815. You will need a custom recovery installed on your Tab prior to the installation of this ROM. The ROM isn’t pre-rooted either. You will have to flash SuperSU.zip file in the end to gain root access on it. Let’s have a look on the method and install this ROM right away.

The ROM flashing process requires you to factory reset your device, so, make sure that you backup all of your important contacts, call logs, sms messages and media content. Flashing a custom ROM is not recommended by device manufacturers and the process is highly custom. In case a mishap occurs, TechBeasts, the ROM developer or the device manufacturer may not be held responsible. Make sure that you are doing everything at your own risk.

Install Android 7.0 Nougat AOSP on Galaxy Tab S2 T810/T815

  1. Your phone must have a TWRP recovery installed on it.
  2. Download the ROM according to your device and copy to the internal or external storage. ROM.zip for SM-T815 | ROM.zip for SM-T810
  3. Download Google GApps.zip file for Android Nougat and copy it to your phone’s internal or external storage as well.
  4. Download SuperSU.zip file and copy it to your Tab S2’s storage as well.
  5. Boot into TWRP recovery on your Tab S2 9.7. To do so, first turn off your phone and then turn it on by pressing and holding Power + Volume Down > navigate to recovery mode and then boot into it.
  6. In TWRP recovery, tap Wipe > perform a factory data reset prior to the flashing of ROM.
  7. Now in TWRP recovery tap Install > Locate the ROM.zip file from where you placed > select the file > Swipe to confirm flash > flash it.
  8. Once the ROM flashes, get back to the TWRP recovery main menu and flash GApps.zip file in the same way as you flashed the ROM. After flashing GApps.zip, flash SuperSU.zip file as well.
  9. Now in TWRP home-screen tap Reboot > System.
  10. Your Tab S2 9.7 will now boot up into newly installed AOSP Android 7.0 Nougat and that’s all.

How to fix Remix OS Player Google Play Store not working [Error 936]

1
How to fix Remix OS Player Google Play Store not working [Error 936]

Jide has its all-new Remix OS Player out now which is much cooler than the traditional Android emulators. Remix OS Player enables users to play Android games on their Windows PC just like the true Windows supported games. The Remix OS Player looks stunning, has efficient performance and seems to be working with a lot of Android games which are not supported by emulators like BlueStacks, Andy OS and others.

Remix OS Player comes with Google Play Store pre-installed on it. You can instantly grab all your favorite Android games and apps from the Play Store. It doesn’t require you to go through the stuff you are not familiar with. If you own an Android device previously then using Remix OS Player is going to be piece of cake for you.

Google Play Store does not work in the first release of Remix OS Player

Unfortunately, in the first release of the player, Google Play Store isn’t working. Whenever you install or update an application via Google Play Store, the status bar of installation runs and then starts all over again. This works like a loop, the application doesn’t get installed and the progress bar keeps progressing, coming to an end and starting all over again and then it finally results in giving you Error 936.

Jide has fixed this error in an update, but there is a huge number of users sticking to the very first release of Remix OS Player. To avoid the process of installing the latest version of Remix OS Player from scratch, you would want to be able to fix this error in simple steps. Fortunately, a very simple and easy workout has surfaced which fixes this error and makes the Google Play Store work perfectly well once again.

Let’s go ahead now and learn How to fix Remix OS Player Google Play Store not working or the fix the Google Play Store error 936 on Remix OS Player.

How to fix Remix OS Player Google Play Store not working [Error 936]

  1. Open the Remix OS Player installation folder on your computer.
  2. Inside the Remix OS Player folder, press and hold shift key + right click on an empty area on the screen > Open command window here.
  3. Once you have the command window opened in front of you, issue the following commands one by one and hit enter.

remixemu\tools\bin\tune2fs.exe -O extents,uninit_bg remixemu\avd\Remix_OS.avd\userdata-qemu.img

remixemu\tools\bin\e2fsck.exe -y remixemu\avd\Remix_OS.avd\userdata-qemu.img

Start your Remix OS Player after running these commands. Run the Google Play Store and try installing apps now, it should work perfectly fine now. That’s all.

Don’t forget to stop by:

Install TWRP Recovery and Root Galaxy Tab S2 T810/T815

Install TWRP Recovery and Root Galaxy Tab S2 T810/T815

Samsung Galaxy Tab S2 was launched back in July 2015. Just like the original Galaxy Tab S, the successor of Tab S also came in two different variants. We have an 8.0-inch Galaxy Tab S2 and a 9.7-inch Galaxy Tab S2. The one that we are going to do some work on in the succeeding post is the 9.7-inch Galaxy Tab S2 which comes under the model numbers SM-T810 and SM-T815. Galaxy Tab S2’s bigger variants are equipped with a 9.7-inch display having a resolution of 1536 x 2048 pixels.

Samsung equipped the Galaxy Tab S2 with a 1.9 GHz and 1.3 GHz Octa Core CPU accompanied by a RAM of 3 GB. We can find an 8 MP shooter fitted at the back, and a 2.1 MP shooter fitted at the top of its front. Galaxy Tab S2 9.3 was found running on Android 5.0.2 Lollipop out of the box, the device was later updated to Android Marshmallow.

Galaxy Tab S2 TWRP Recovery

Those of you planning to get your hands on Galaxy Tab S2 9.7, or those of you who have already got one, they may be willing to bring some extra functionality and unleash the real power of their Galaxy Tab S2 9.7 now. Since anything out of the boundaries is strictly forbidden by Samsung, you won’t be able to check out the potential of your device staying on the stock state of your Android system. To equip your Galaxy Tab S2 with some new features, performance enhancements and load some new stuff, you will need root access and a custom recovery installed on your device.

Luckily, TWRP recovery, which is a famous custom recovery out of the only two available custom recoveries, is now available for the Galaxy Tab S2 9.7. Before you start wondering how you can get it running on your tablet, we would like to calm you down as we have already put together a comprehensive method to install TWRP recovery and root your 9.7 inch Tab S2 in this post. Before jumping towards the guide, we will give you a brief idea of a custom recovery and root access.

What can you do with root on your Tab S2?

Once you’ve got your Galaxy Tab S2 9.7 rooted, you will be able to install root-specific applications like Greenify, Root Explorer, System Tuner, Ad blockers etc. By installing such applications, you can enhance the performance and battery life of your device. You can also get into the root directory of your system by using Root Explorers, which is a great deal. As far as a custom recovery is concerned, it will allow you to flash MODs to bring new features, it will also allow you to enjoy some custom ROMs.

You can also backup Nandroid, EFS and Modem etc using the backup option in the TWRP recovery. Other things that you can do using a custom recovery include wiping cache, Dalvik cache and a lot more. Let’s put this conversation to an end and go through the detailed method to root and install TWRP recovery on our beloved Galaxy Tab S2 9.7 SM-T810 and SM-T815.

Install TWRP Recovery and Root Galaxy Tab S2 T810/T815

Preparations

  • This guide is only for Galaxy Tab S2 SM-T810 and SM-T815. Do not try this on any other device.
  • Charge your device up to 50%.
  • Use original data cable to establish a connection between your PC and your phone.
  • Backup your important data as a safety measure. Use the backup guides linked below.
  • Follow this guide to the letter to avoid any mishap.

DISCLAIMER: FLASHING CUSTOM RECOVERY AND ROOTING THE DEVICE VOID ITS WARRANTY. IN CASE OF A MISHAP, TECHBEASTS OR SAMSUNG MAY NOT BE HELD RESPONSIBLE. MAKE SURE THAT YOU’RE DOING EVERYTHING AT YOUR OWN RISK AND WITH YOUR FULL UNDERSTANDING.

Required Downloads:

Install TWRP Recovery and Root Galaxy Tab S2 T710/T715 on Android Lollipop/Marshmallow

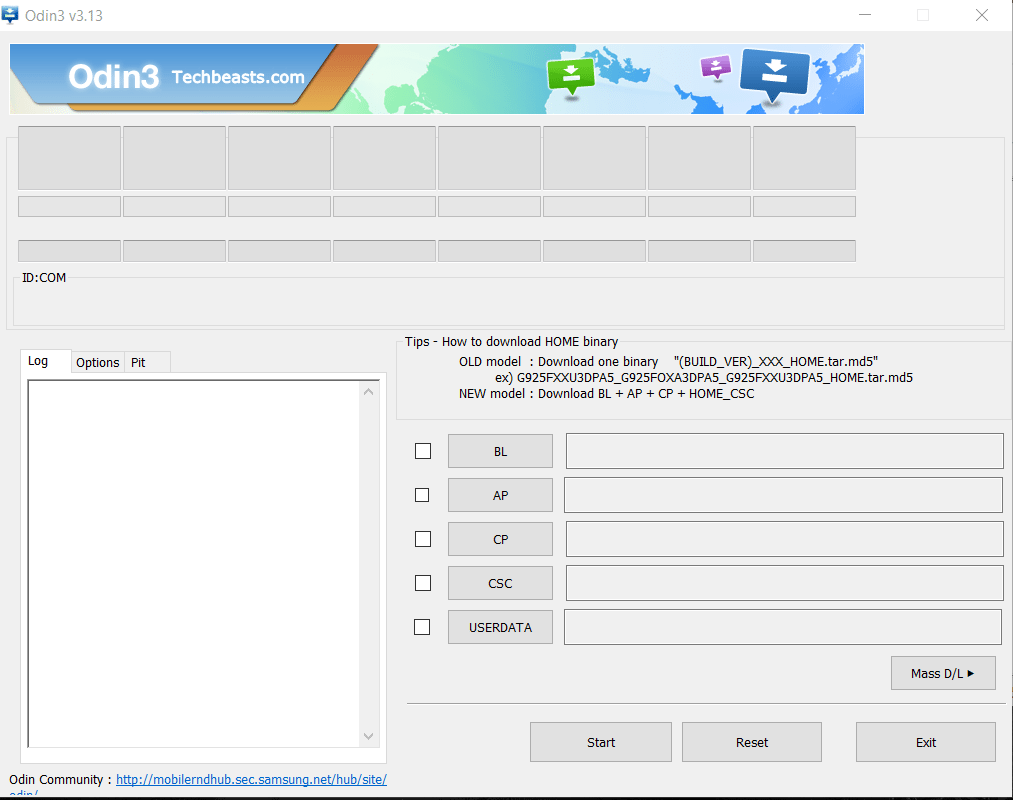
  1. Open Odin3 V3.10.6.exe that you extracted on your PC.
  2. Enable OEM Unlock on your Tab S2. To do so on your phone, go to settings > about device > tap the build number for 7 times to enable developer options. Get back to the settings and open developer options. Under developer, options turn on “OEM unlock.
  3. Put your Tab S2 in download mode now. To do so, turn it off completely. Now turn it on by pressing and holding Volume Down + Home + Power Key. Once your phone boots up, press the Volume Up key to continue.
  4. Connect your phone to your PC now. The ID:COM box in the top-left corner of Odin3 should turn blue. This indicates that your phone is connected properly.
  5. Now click the “AP” tab in Odin and select the TWRP recovery.tar file that you downloaded. It will take a second or two for Odin3 to load this file.
  6. Make sure that your Odin3 looks like this. The only option ticked should be F. Reset Time.

  7. Odin 3.10.6 Explained_Techbeasts
  8. Now you’re all set to flash the recovery. Just click the start button in Odin3 and sit back.
  9. Once the process box above ID:COM box shows a green light and flashing process is finished, disconnect your device.
  10. Without rebooting the device, we have to boot into TWRP recovery now. To do this, press and hold Volume Down + Home + Power key on your device, as soon as the screen goes black, immediately switch the key from Volume Down to Volume Up while having the Power + Home Key pressed. This will take you to the TWRP recovery.
  11. In TWRP Recovery, Swipe to allow modifications and then tap “Install > Locate the SuperSU.zip file > Select this file > Swipe to confirm flash > flash it”.
  12. Once SuperSU.zip file flashing ends, reboot your device into the system.
  13. As it boots up, check out the SuperSu in the application drawer. Also, install BusyBox from Play Store.
  14. Verify root access using Root Checker.
  15. That’s all. You’re now set to unleash the open source nature of Android.

Don’t forget to backup Nandroid now.

Stuck with anything? Reach us out through the comment box below!

Best HD Black and Jet Black iPhone 7 Wallpapers

0
Best HD Black and Jet Black iPhone 7 Wallpapers

iPhone 7 and iPhone 7 Plus came out at Apple’s exclusive event a few days back. Both the iPhone(s) came out in two new colors; Black and Jet Black. Apple launched the iPhone(s) in these colors for the very first time and the iPhone(s) look absolutely stunning. The black iPhone 7 has a smoky/dull finish while the Jet Black iPhone has a shiny and dark black finish. Apple also loaded the new iPhone 7 with some new features. Both new iPhone 7 variants have a new A10 Quad Core CPU, and a new improved display which produces more brightness. The iPhone 7 Plus carries a 12 MP dual shooter at the back and the iPhone 7 carries only a single 12 MP shooter at the back which is the same as the iPhone 6S.iphone-7-and-iphone-7-plus-images

The Black and Jet Black colors on the new iPhone 7 and 7 Plus caught the attention that Apple wanted. The first units of new iPhone are already sold out. If you’re planning to get your hands on the Black / Jet Black iPhone 7 or 7 Plus, you may add some extra beauty to your iPhone by applying some wallpapers of the same finish. We have managed to collect some stupendous Black and Jet Black wallpapers for iPhone 7 and 7 Plus. Some of the wallpapers are smoky, some are black and some are pure jet black. These black wallpapers do not only make your iPhone look dope, but these wallpapers also put less stress on the display of your phone resulting in consuming as less battery as possible. Another advantage of black wallpapers is the clarity of elements on the screen of your phone in light. Using a bright wallpaper makes the elements less visible when there is light around you.

Go ahead and download the Best HD Black and Jet Black iPhone 7 Wallpapers. These wallpapers are in high resolution and optimized for the display of iPhone. They will fit perfectly on your iPhone’s screen. Simply click on your desired wallpaper and save it to your PC and then transfer it to your iPhone or save it directly to your iPhone 7.

Note: All these wallpapers are collected from random sources and we do not own any of the images linked above. These images belong to their rightful owners.

Don’t forget to checkout:

Use voicemail transcripts in iOS 10 on iPhone

0
Use voicemail transcripts in iOS 10 on iPhone

Now that iOS 10 is finally here and Apple has added many new features, We’ll post different articles on how to use all the new iOS 10 features. Today I’ll tell you how to use voicemail transcripts in iOS 10 on iPhone if you don’t want to hear all your voice message then voicemail transcripts is a very handy feature for you.

voicemail-transcripts-in-ios-10

How to view transcript of voicemails in iOS 10 on iPhone and iPad:

Step1: On your iPhone home screen, Tap on Phone icon.

Step2: Now Tap on Voicemail located at the bottom right corner.

Step3: Tap a voicemail message.

Once you select a voicemail message, it will automatically start the audio playback when you tap on it to see a transcript. But next time when you select a voicemail you have selected before, audio playback will not start this time.

If you want to share a transcript of a voicemail on iOS 10, follow the steps below.

How to share transcripts of voicemails in iOS 10 on iPhone:

Step1: On your iPhone home screen, Tap on Phone icon.

Step2: Now Tap on Voicemail located at the bottom right corner.

Step3: Tap a voicemail message.

Step4: Now tap and hold transcript until an option menu appears.

Step5: Once the options menu appears, select the text you want to share.

Step6: Tap Share.

Step7: Now select the app through you want to share transcript. 

Photo Credit: iMore

Install AOSP Android 7.0 Nougat on Nexus 5

0
Install AOSP Android 7.0 Nougat on Nexus 5

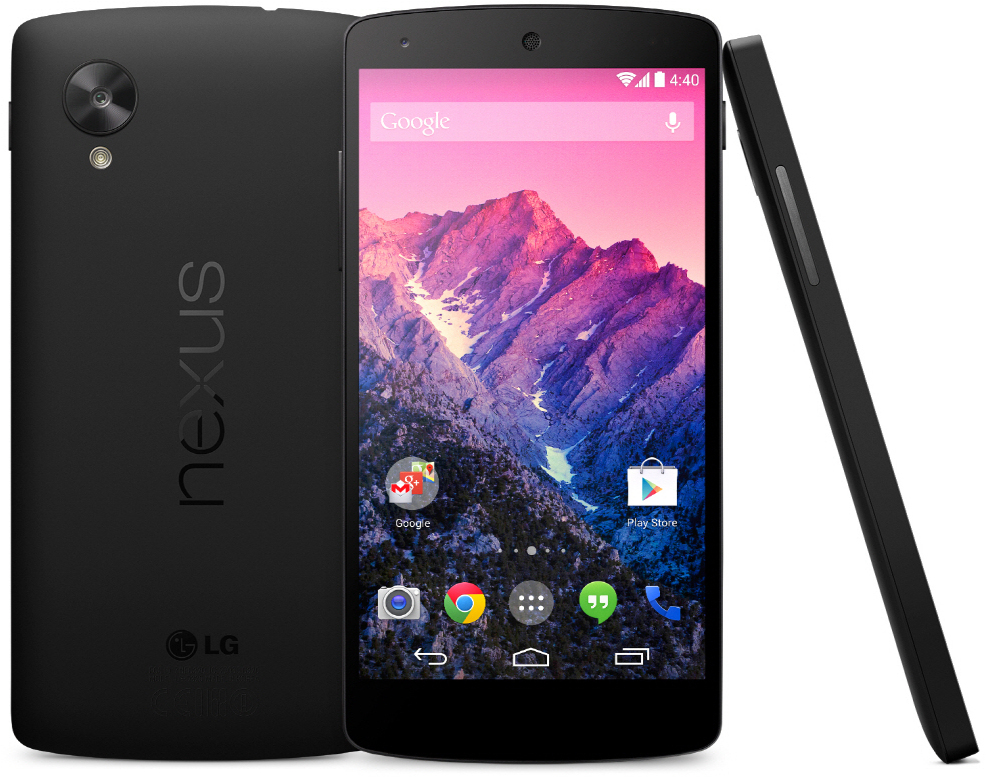
After the official release of Android 7.0 Nougat, Google announced its plans for updating the smartphones to Android 7.0. After coming across the Nexus devices which were set to get the Android Nougat update, users were disappointed with the findings of Nexus 5 getting dropped out from the list. Android Nougat will make its way to Nexus 6+ devices, the previous devices won’t be having the Nougat officially.

Manufacturers may disappoint the users with software updates for their Android handheld devices, but custom ROM developers are always there to cheer them up. XDA Santhosh M was fast enough to cook up an AOSP build of Android 7.0 Nougat for the LG Nexus 5 and put it up for users. The ROM turned out to be stable and smooth, and it also turned out to be a daily driver for users. Usually custom ROMs coming out this early have a lot of bugs in and out, but it was quite surprising to see that Android 7.0 Nougat stable ROM found its way towards Nexus 5 users in almost no time.nexus_5_1

WiFi, Bluetooth, RIL, Camera and other mainstream features of the device are working in this ROM. Although the ROM is stable, you may still come across a few bugs and you can report those bugs immediately to the developer. Keeping in view what’s working in this ROM, it may urge many users to flash it right away. You can flash the all new AOSP Android 7.0 Nougat on Nexus 5 by following the guide here. Let’s go through the steps and get it done.

The ROM flashing process requires you to factory reset your device, so, make sure that you backup all of your important contacts, call logs, sms messages and media content. Flashing a custom ROM is not recommended by device manufacturers and the process is highly custom. In case a mishap occurs, TechBeasts, the ROM developer or the device manufacturer may not be held responsible. Make sure that you are doing everything at your own risk.

How to Install AOSP Android 7.0 Nougat on Nexus 5

  1. Make sure that your phone’s bootloader is unlocked and it must have a TWRP recovery installed on it.
  2. Download the aosp_hammerhead-nougat-20160916.zip and copy it to your phone’s internal or external storage.
  3. Boot into TWRP recovery on your Nexus 5. To do so, first turn off your phone and then turn it on by pressing and holding Power + Volume Down > navigate to recovery mode and then boot into it.
  4. In TWRP recovery, tap Wipe > perform a factory data reset prior to the flashing of ROM.
  5. Now in TWRP recovery tap Install > Locate the ROM.zip file from where you placed > select the file > Swipe to confirm flash > flash it.
  6. Once the ROM flashes, get back to the TWRP recovery main menu and tap > Wipe > Advanced Wipe > select cache and dalvik cache > wipe both these.
  7. Now in TWRP home-screen tap Reboot > System.
  8. Your Nexus 5 will now boot up into newly installed AOSP Android 7.0 Nougat and that’s all.