Home Blog Page 303

How to copy files from your PC to Remix OS Player

1
How to copy files from your PC to Remix OS Player

Remix OS Player is out now and you may get your hands on it to play some Android games and apps for PC. If you are looking for a way to copy files from your PC to your Remix OS Player, you may not find an option in the Remix OS Player just like BlueStacks or BlueStacks 2 app player does. There is a nifty trick that allows you to copy files straight from your PC to your Remix OS Player, we tried it and it worked out perfectly well.

You can easily copy files from your PC to Remix OS Player by simply dragging and dropping the files. Let’s have a look on the method to see how it works and where do your files go after you drop them in the Remix OS Player.

How to copy files from your PC to Remix OS Player

  1. Download and install Remix OS Player on your PC.
  2. Open Remix OS Player.
  3. Have your files around that you want to copy to your Remix OS Player.
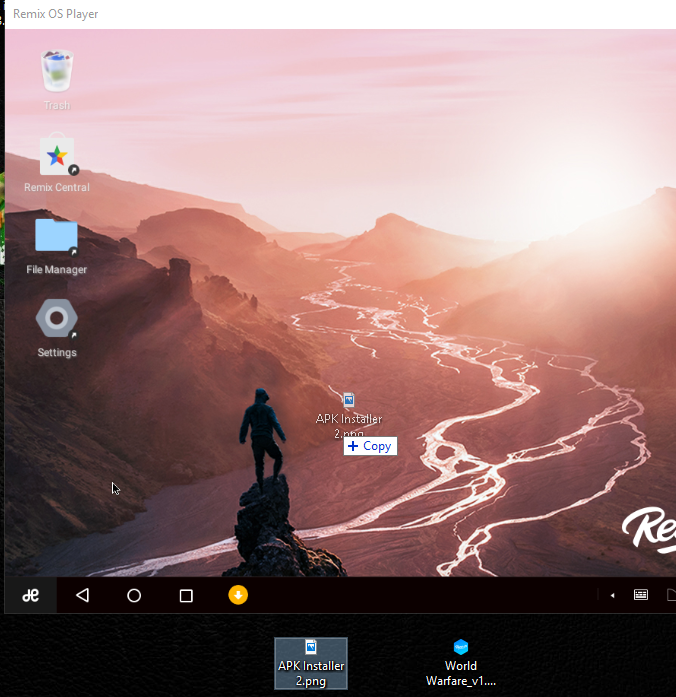
  4. Drag the files to be copied and drop them on the home-screen of Remix OS Player.copy-files-pc-to-remix
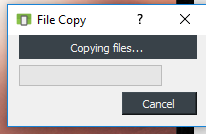
  5. Let the copy process finish.files-copying
  6. Click on the app drawer on the lower left corner in Remix OS Player.
  7. Now open the File Manager from the app drawer.
  8. In File Manager, click on Downloads.
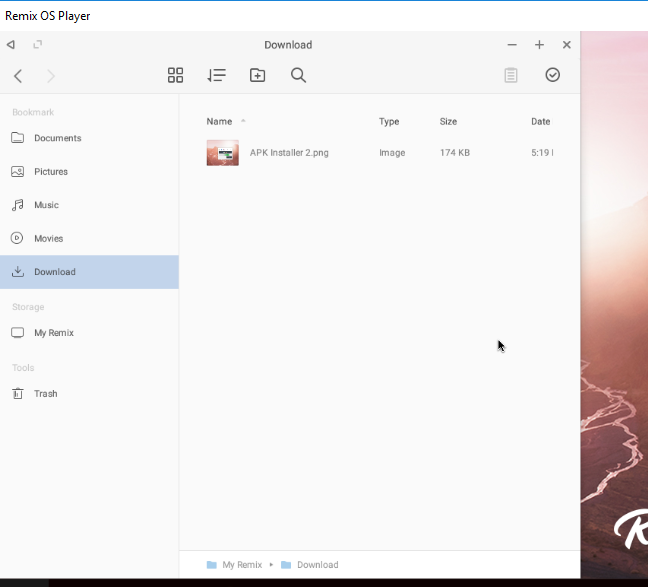
  9. You should find the recently copied files in the download folder now.remix-os-player-copied-files
  10. That’s all.

Also have a look at:

How to install APK on Remix OS Player from PC

7
How to install APK on Remix OS Player from PC

Jide has released an Android emulator based on its newly famed Remix OS. The emulator has been named as Remix OS Player and it emulates Android 6.0.1 Marshmallow on a Windows PC. Remix OS Player is based on Android x86 project. Remix OS Player is useful for those who do not want to go through hard and fast rules of installing the Remix OS through a USB stick or through a VM Ware. The Remix OS Player has made it way easy for users to get a glimpse of this emulator and run their desired Android games and apps for PC.

Remix OS Player brings the Google Play Store pre-installed. Unfortunately, the Play Store installations are not working in the very first release of the Remix OS Player. Jide seems to have this issue fixed in the alpha release of the Remix OS Player but there still are users wondering how to install APK files on the Remix OS Player since it doesn’t come with an APK installer just like BlueStacks or BlueStacks 2 does. Installing APK file is not only helpful when the Google Play Store isn’t working for you, but it also useful when you have an APK placed somewhere in your PC and you don’t want to go through the process of downloading it again on in your Remix OS Player. Remix OS Player allows APK installation if you have an APK file inside the emulator just like you do on your Android smartphone, but just in case you want to install an APK file from your PC, what are you going to do in that case?

Well, that is what we have sorted out. It is incredibly easy to install APK files on Remix OS Player from a PC. It involves going through a nifty trick. All you have to do is to download an APK file to your PC.

How to install APK on Remix OS Player from PC

  1. Download and install Remix OS Player on your PC.
  2. Open the Remix OS Player on your PC.
  3. Have the APK file downloaded somewhere on your PC.
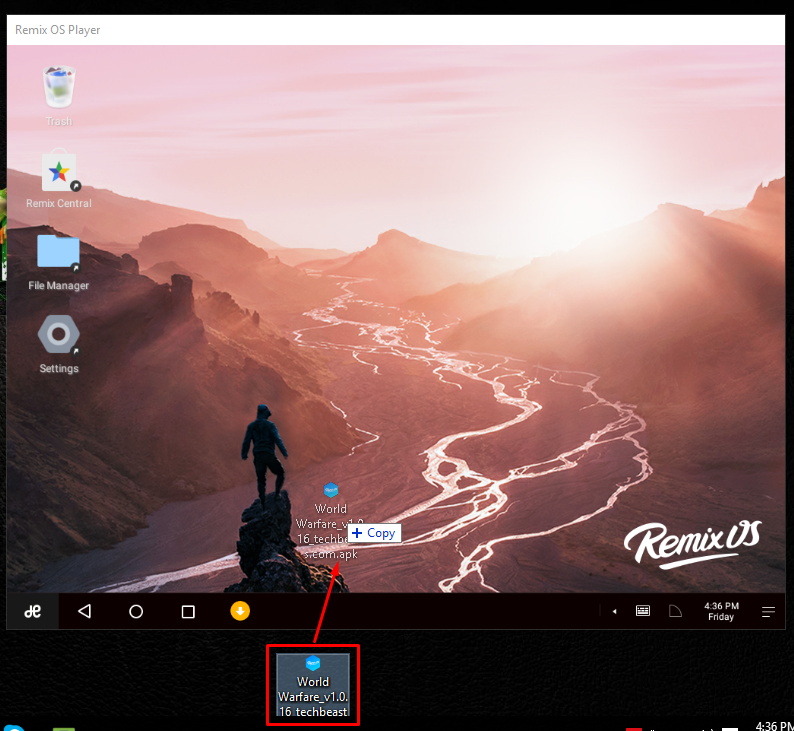
  4. Now drag and drop the APK file onto the Remix OS Player home-screen.apk-installation
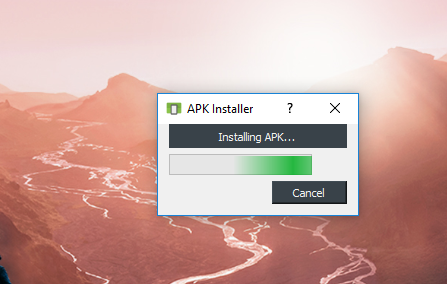
  5. Remix OS Player’s APK installer will pop up showing you “Installing APK” message.apk-installer-2
  6. Wait for a while and let it finish installing the APK.
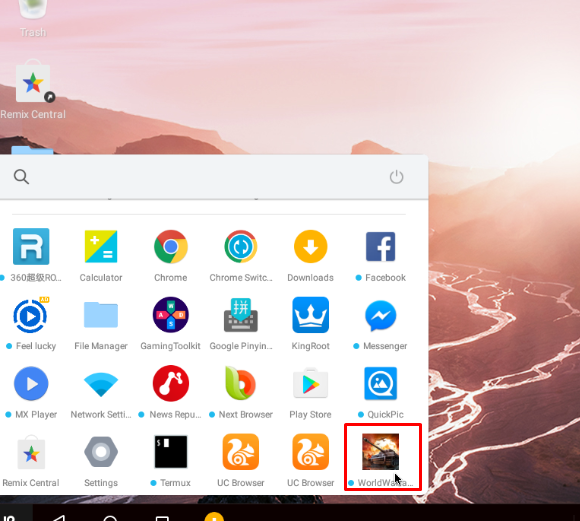
  7. Once the APK installer vanishes, open the app drawer on your Remix OS Player from the lower left corner.
  8. Scroll down and your newly installed application should appear at the end. That’s all.apk-installer-3


Download Oz Broken Kingdom APK

0
Download Oz Broken Kingdom APK

Oz Broken Kingdom has made its way to the Google Play Store. It’s the same game that Apple used to show off the iPhone 7 and 7 Plus graphics at its iPhone launch event so you can expect this game to have mind blowing graphics. Oz Broken Kingdom is another role playing game in which you have to lead a team of heroes and grab your heroine on your way towards a huge a battle against the darkness. Oz, the beautiful land has been conquered by darkness and peace has vanished from the world. The future of Oz is in danger and you have to save it. You have to play the role of a brave leader to take Oz out of darkness. Earn as many skills as you can and take your abilities to a next level. Upgrade your heroes and equip them with new skills for better performance in the battles. Have a look at Oz Broken Kingdom features and description by the developers of this game.oz-broken-kingdom-game

Battle the Great Darkness that has cast its shadow across the peaceful Land of Oz. Join the kingdom’s brave new heroine Ophelia Shen, along with the legendary heroes of Oz – Tin Man, Lion, and Scarecrow – as they embark on an epic quest to stop the rising evil, restore the balance of magic, and return the kingdom to its rightful glory.

• COMMAND a cast of new and classic Oz heroes in breathtaking turn-based combat.
• EVOLVE your heroes to Legendary levels of power.
• SUMMON incredible abilities to crush fearsome enemies and rally the kingdom to your side.
• EXPLORE the dark corners of Oz, solve the thrilling mystery, and restore the balance between Good and Evil.
• DOMINATE other opponents in the Arenas of Oz to climb the leaderboards and advance through the leagues.

UNLEASH UNIMAGINABLE POWER
With the combined might of Tin Man, Lion, Scarecrow, and mysterious newcomer Ophelia at your call, face the growing evil that is corrupting the source of all magic in Oz. Evolve each hero into powerful new forms, upgrade their unique abilities to devastate your enemies, and harness powerful gemstones to become a force for Good the likes the Kingdom has never known!

FIGHT TO SAVE THE REALM
Battle hordes of fiendish foes, beastly bosses, and nightmarish minions terrorizing the once-peaceful Kingdom of Oz. Dare to journey through the sinister Munchkin countryside, the perilous halls of Glinda’s Castle, and the many shadowy lands beyond – to shine the light of Goodness before the Great Darkness engulfs the entire realm.

COLLECT MIGHTY ABILITIES
Collect unique and powerful abilities to summon the forces of strength, nature, and magic. Level up your heroes’ abilities to battle and cripple your enemies. Prepare to unleash your might!

DOMINATE OPPONENTS IN THE ARENAS OF OZ
Challenge other players in real-time PVP to see who has the mightiest hero, strongest abilities, most epic battle companions, and the best strategy! Join fellow players in guilds, collect and train mighty companions, and showcase your battle prowess against others. Climb the leaderboards, earn rewards, and advance to the greatest leagues.

Oz Broken Kingdom is a free to play game. You can grab it for your Android device from the Google Play Store. In case the game is not appearing at your end right now, you may want to grab its APK file. We have managed to pull out the APK file of Oz Broken Kingdom and linked it here along with the installation instructions. Go ahead and download Oz Broken Kingdom APK and install it right away.

Download Oz Broken Kingdom APK

  1. Download Oz Broken Kingdom APK
  2. Download the file to your phone straight away, or copy it to your phone from your PC.
  3. Now on your phone, go to settings > security > allow unknown sources > check this.
  4. Now using a file manager, locate the APK file that your just copied or downloaded.
  5. Tap the APK file and finish installation using the on-screen instructions.
  6. Once installed, access the newly installed game through app drawer.
  7. That’s all. Enjoy Oz Broken Kingdom!

Just in case you’re willing to play the new version of  OZ Broken Kingdom on your  PC then checkout Oz Broken Kingdom for PC!


Download iPhone 7 and 7 Plus HD Wallpapers

1
Download iPhone 7 and 7 Plus HD Wallpapers

iPhone 7 and 7 Plus are the latest flagships of Apple and finally they have made something different, although the features they have added are just a bit old. Well, I am not here to tell what is good and what is bad in iPhone 7 and 7 Plus, In this post, I’ve collected the HD Wallpapers for iPhone 7 and iPhone 7 Plus. If you are not a big fan of custom Wallpapers then you can check our iPhone 7 and iPhone 7 Plus Stock Wallpapers post.

iphone-7-wallpapers

Download iPhone 7 and 7 Plus HD Wallpapers:

Download iPhone 7 and 7 Plus Stock Wallpapers

0
Download iPhone 7 and 7 Plus Stock Wallpapers

Apple recently released the iPhone 7 and iPhone 7 Plus which had their fair share of criticism. The iPhone 7 looks identical to the iPhone 6S while the iPhone 7 Plus has got a few new features. Apple’s farewell to the 3.5 mm jack brought it under the scrutiny. The new headphones get connected using the lightning connector, which means you cannot charge your phone and listen to the music via headphones at the same time. Both new phones have a new processor named as A10 Fusion, which is now a Quad Core CPU. iPhone 7 has a single shooter at its back and the iPhone 7 Plus has a dual camera setup, which is quite an upgrade over the previous iPhone 6S Plus. Apple has also introduced a new Jet Black color which has already attracted masses. iPhone 7 and 7 Plus will be making their way in three storage options i.e. 32/128/256 GB.

Both new iPhone(s) run on iOS 10, which is Apple’s latest version of the iOS. iOS 10 brings a lot of new goodies for Apple fanboys. Apple has loaded the iOS 10 on the new iPhone(s) with a handful of new wallpapers. Both these new phones are expected to come out in the markets starting from September 16, 2016. It may be hard for the iPhone freaks to wait till then, but there’s a treat available for them. The new iPhone 7 and iPhone 7 Plus stock wallpapers have already surfaced on the web and you can get your hands on them.

The iOS 10 stock wallpapers pulled out from the iPhone 7 and 7 Plus are available for download in a resolution of 1080 x 1920, 1242 x 2208 and 2048 x 2048 pixels. All the wallpapers are displayed below. A zip file containing all wallpapers is also linked at the bottom. Go ahead and pick up your favorite wallpaper and use it either on your iPhone or Android smartphone. You can also download all the wallpapers from the all-in-one zip file.

Download all Apple iPhone 7 and 7 Plus stock wallpapers

World Warfare for PC (Windows and Mac)

0
World Warfare for PC (Windows and Mac)

You can play World Warfare for PC on your Windows XP/7/8/8.1/10 Desktop PC/Laptop and also Mac OS X Macbook/iMac. Playing World Warfare for PC has been made possible by using Android emulators like BlueStacks, Andy and Remix OS. Before going through the installation instructions, let’s learn a little bit about this new game.

Ever wanted to experience what it is like to be in a war zone? Well, if so, then the all new World Warfare all set to teach you that. The new strategy game tends the gaming geeks to build a a city, deploy real time units, attack the enemies, form alliances and conquer the world. The game brings World War II inspired battles. If you haven’t had a chance to study much about the World War II then play this game and see what happened back in those days. World Warfare brings real-time PvP combat mode. You can train your commandos on up to 32 different types of units of air, sea and land. Upgrade your weapons to make sure that enemies do not wipe you off from the ground with their weapons. Plan strategic attacks. Moving without proper planning and strategy will get you killed in no time. You are the one in charge, so give the proper commands and lead your troops to victory. World Warfare is a free to play game. It’s available in the Play Store for Android users.world-warfare

World Warfare can be played on a computer as well. The method to run this game on a computer is a little different from that of an Android device. If you are interested in running this game on your computer, you may want to have a look on the instructions coming your way.

Download World Warfare For Windows PC & Mac

  1. Download World Warfare APK
  2. Download and install Bluestacks: Bluestacks Offline Installer | Rooted Bluestacks |Bluestacks App Player
  3. Once you’ve installed Bluestacks, double click the APK that you just downloaded above.
  4. The APK will be installed using Bluestacks, once installed open Bluestacks and locate the recently installed World Warfare.
  5. Click the World Warfare icon to open it, follow the on-screen instructions to play it.

You can also use Andy OS  to install World Warfare for PC, here’s the tutorial: How To Run Android Apps On Mac OS X With Andy

Download Live.ly for PC (Windows and Mac)

1
Download Live.ly for PC (Windows and Mac)

Live.ly comes from the developers of Musical.ly. Just as the name suggests, Live.ly enables you to livestream your videos and communicate with the people watching you in real time. Live.ly was just released 2 days back and the application has gained massive success in the span of 3 days. With Live.ly, you can broadcast your special moments anytime from any part of the  wold.  There’s a whole community looking forward to your live sessions on Live.ly. You can attract a fan following on your channel on Live.ly and turn yourself into a true entertainer. If you have ever thought of becoming a vlogger, this may be the right time for you to start. While coming across something special, unique, awesome or stunning, turn on Live.ly and show it to the world. Show off your talent and make friends around. Live.ly is all about broadcasting your life among thousands of users of this application.live-ly-for-pc

Live.ly is a free application and is available for iOS and Android. You can get it on your Android phone or the iPhone from the relevant app stores, but just in case you want to get this application on your computer and broadcast yourself using the webcam of your desktop PC or laptop then that’s going to be a little different procedure.

Live.ly for PC works well on a computer running Windows XP/7/8/8.1/10 and Mac OS X devices. You can run Live.ly for PC using an Android emulator like BlueStacks, BlueStacks 2, Andy OS or Remix OS. The following post will take you through a step-by-step guide to download and install Live.ly for PC.

Download Live.ly For Windows PC & Mac

  1. Download Live.ly APK
  2. Download and install Bluestacks: Bluestacks Offline Installer | Rooted Bluestacks |Bluestacks App Player
  3. Once you’ve installed Bluestacks, double click the APK that you just downloaded above.
  4. The APK will be installed using Bluestacks, once installed open Bluestacks and locate the recently installed Live.ly.
  5. Click the Live.ly icon to open it, follow the on-screen instructions to play it.

You can also use Andy OS  to install Live.ly for PC, here’s the tutorialHow To Run Android Apps On Mac OS X With Andy

Download Google Pixel Launcher APK

0
Download Google Pixel Launcher APK

Google is gearing up to launch its new flagship smartphones. The phones previously called Nexus will be named as Pixel and with this re-branding, Google is also changing a few things on the software end. The Pixel smartphones are going to be result of Google’s collaboration with HTC. Pixel smartphones are set for an official launch in the first week of October, 2016. While all eyes are set on these devices, interesting leaks are pouring in adding more evidence to the existence of Google Pixels devices rather than the Google Nexus devices.

XDA Recognised Developer  LlabTooFeR, who’s known for his leaks hinting towards HTC devices, has got his hands on the launcher of upcoming Pixel devices. The launcher which was previously known as Google Home is going to be the Pixel Launcher. At-least that’s what the leakster suggests. The leakster posted a few screenshots of the new Pixel Launcher and to entertain the Android enthusiasts a bit more, he also pulled out the APK file of the Pixel Launcher.

New: Download Google Pixel Apps (Pixel Launcher, Wallpaper Picker and More)

In the pictures and in the installation process of Pixel Launcher APK, it can be clearly seen that the launcher has got a new name. It gives us more proof that Google is going to overhaul the Nexus series when its execs grab the stage on their event happening in the first week of October 2016.pixel-launcher-apk

The Pixel Launcher APK is up and available for download. To add some spice up to your wait, grab the Pixel Launcher APK and install it on your Android smartphone to get a glimpse of the UI of upcoming HTC-Google Pixel smartphones.

  1. Download Google Pixel Launcher APK
  2. Copy the downloaded APK file to your phone.
  3. Allow unknown sources in Settings > Security.
  4. Locate the APK file in file manager and tap to install it.
  5. Follow on-screen instructions and finish installation of Pixel Launcher.
  6. Launch the application from app drawer now or manually bring up your recently installed launcher.

Source

5 Best Galaxy S3 I9300 Android 6.0.1 Marshmallow Custom ROMS

0
5 Best Galaxy S3 I9300 Android 6.0.1 Marshmallow Custom ROMS

Back in 2012, when Samsung was too much eager for a breakthrough and uplift its cellphone sales, Galaxy S3 landed in an did all things right for the South Korean manufacturer. Samsung’s Galaxy S II was a great success, but the Galaxy S3 was the phone which brought all the spotlight that Samsung had been looking for in those days. Galaxy S3 sported a 4.7-inch 720p display with a 1.9 MP shooter atop of it. The phone was powered up with Exynos 4412 Quad Core CPU and a RAM of 1 GB. Galaxy S3 has an 8 MP shooter at its back while the battery under the hood is of 2100 mAh. Galaxy S3 ran on Android 4.0.4 Ice Cream Sandwich out of the box and Samsung updated it to Android 4.3 Jelly Bean later on.

Android Jelly Bean was the highest version of Android available for the Galaxy S3. After this firmware, Samsung never updated the Galaxy S3 and pushed to the league of legacy Android smartphones. Since then, the Galaxy S3 is alive only because of the custom ROM developers. We have been getting a chance to enjoy every new version of Android on the Galaxy S3 by several custom ROMs. The Android 6.0.1 Marshmallow, which is currently succeeded by the Android 7.0 Nougat is available for the Galaxy S3 in form of a number of custom ROMs like CyanogenMod, Resurrection Remix and others. You can pick up the custom ROM of your choice and flash it on your Galaxy S3 to give it a new life.

If the phone has been lying under your drawer, it’s the time to take it out and wipe off the dust to prepare it for flashing. We have compiled up a list of 5 best custom Android 6.0.1 Marshmallow ROMs for the Galaxy S3 I9300. The list has the custom ROMs ranked according the number of views and response these custom ROMs received. The list of the 5 best custom Marshmallow Custom ROMs follows the tutorial to install these ROMs as you go down on this page. Let’s have a look on the ROMs and study their features one by one.

5 Best Galaxy S3 I9300 Android 6.0.1 Marshmallow Custom ROMS

  • CyanogenMod 13 Android 6.0.1 Marshmallow

The best custom ROM available ever since Android’s custom ROM development came into being. CyanogenMod 13 is the pioneer in the AOSP ROM industry. CyanogenMod 13 is meant to be for better performance, stability and to provide you close to stock experience. CyanogenMod community is active enough to pull out the custom ROMs based on the latest versions of Android first of all. The CyanogenMod 13 is already available for a plethora of devices and Galaxy S3 I9300 is one of them. CyanogenMod is the base for most of the custom ROMs available today. If you want a vanilla Android experience, great performance, better battery life and no bloatware, then you should give CyanogenMod 13 a try.

  • Temasek’s Unofficial CyanogenMod 13 Android 6.0.1 Marshmallow

Temasek’s unofficial CyanogenMod 13 Android 6.0.1 Marshmallow for the Galaxy S3 I9300 has been compiled using Sabermod GCC 4.9 tool-chain. Unofficial builds of the CyanogenMod 13 are intended to give the users a hang of the CyanogenMod 13 custom ROMs with extra features, addons, MODs and tweaks. Temasek’s unofficial CyanogenMod 13 is a feature rich custom ROM which has already entered into stable stages. This ROM can be used as a daily driver. Android power users who do not mind extra features embedded inside the CM 13 ROM should go for this ROM.

Temasek’s unofficial CyanogenMod 13 ROM features

  • Resurrection Remix Android 6.0.1 Marshmallow

Another great ROM available for a number of devices out there. Resurrection Remix ROM based on Android 6.0.1 Marshmallow is available for the Galaxy S3 I9300 as well. Resurrection Remix ROM has been compiled sources from the CyanogenMod, Slim ROM, OmniROM and then its very own source. Resurrection Remix puts performance, customization, power and stability altogether. This is a feature rich ROM and should complete all needs of an Android power user. Checkout the Resurrection Remix ROM features here.

  • AICP Android 6.0.1 Marshmallow

Previously based on Android AOKP and now based on AICP which stands for Android Ice Cold Project, AICP ROM first of all made its way to the HTC Desire HD. The ROM caught some good reviews and turned out into a mature custom ROM finding its way to many other Android smartphones. AICP ROM based on Android 6.0.1 Marshmallow is also available for the Galaxy S3 I9300. This is another feature rich custom ROM with great performance, speed, stability and smoothness. Read up the AICP ROM features.

  • Beanstalk Android 6.0.1 Marshmallow

Beanstalk Android Marshmallow custom ROM’s roots lie in the CyanogenMod 13. Beanstalk incorporates features from various custom ROMs including Dirty Unicorns and others. The ROM promises to give you great battery life, stunning performance and timely updates. Beanstalk Android 6.0.1 Marshmallow for the S3 I9300 made its way a few months back. You can have a look on its features on the official page.

Download and install Android 6.0.1 Marshmallow custom ROM on Galaxy S3 I9300

Preparations

  1. This guide is intended for Galaxy S3 GT-I9300 users. Do not try this on any other device. Using the files linked here on a different device can result in bricking it. Verify your device model number in your phone’s settings > about device section.
  2. Your device must be running the latest possible available version of Android.
  3. Charge your phone up to 50% to avoid any power issues during the flashing process.
  4. Flash a custom recovery like TWRP on your Galaxy S3 I9300.
  5. Backup everything including contacts, call logs, sms messages and bookmarks. Also copy your media content to your computer.
  6. Create a Nandroid backup. This is highly recommend so that in case something goes wrong, you will be able to restore your system immediately by restoring Nandroid backup.
  7. Create an EFS backup of your device as well. Save the EFS backup to some safe place in your computer.
  8. Backup your important apps and apps data using Titanium backup if you want.
  9. Follow this guide carefully.

DISCLAIMER:THE METHODS INVOLVED IN FLASHING CUSTOM RECOVERIES, ROMS AND ROOTING YOUR PHONE ARE HIGHLY CUSTOM AND MAY RESULT IN BRICKING YOUR DEVICE, AND HAS NOTHING TO DO WITH GOOGLE OR THE DEVICE MANUFACTURER THAT IS Samsung IN OUR CASE. ALSO ROOTING YOUR DEVICE WILL VOID ITS WARRANTY AND YOU WILL BE NO LONGER ELIGIBLE FOR ANY KIND OF FREE DEVICE SERVICES BY THE MANUFACTURERS/WARRANTY PROVIDERS. IN CASE OF ANY MISHAP WE MAY NOT BE HELD RESPONSIBLE.

Installation

  1. Download  the custom ROM of your choice:
    1. cm-13.0-20160912-NIGHTLY-i9300.zip
    2. cm-13.0-20160906-UNOFFICIAL-temasek-i9300-V12.zip
    3. aicp_i9300_mm-11.0-NIGHTLY-20160910.zip
    4. BeanStalk-6.20-20160822-i9300.zip
    5. Resurreciton Remix ROM.zip
  2. Download Gapps.zip (ARM 6.0.zip) file.
  3. Connect your phone to your PC now.
  4. Copy the both the .zip files to the storage of your phone.
  5. Now disconnect your phone and turn it off complete.
  6. Boot into TWRP recovery now, in order to do so, turn it on by pressing and holding Volume Up + Home Button + Power Key. You should see the recovery mode in a while.
  7. Now in TWRP  recovery, wipe cache, factory data reset the device using the Wipe option.
  8. After wiping all these three, select “Install” option.
  9. Now after tapping install > Locate and select customrom……xxxxx.zip file > Swipe finger to confirm > flash the ROM”.
  10. This will flash the ROM in your phone, once done get back to the main menu in recovery.
  11. Now once again tap  “Install > Locate and Select Gapps.zip file > Swipe finger to flash > flash Gapps.zip”.
  12. This will flash the Gapps in your phone.
  13. Reboot your device to system now.
  14. You should see the Android 6.0 Marshmallow running on your device in a while.
  15. That’s all!

First boot may take up to 10 minutes, you may not worry if it’s taking that much long. In case it’s taking too long, you may boot into TWRP recovery and wipe cache and dalvik cache and reboot your device as it may fix the issue. In case your device is having issues, you may return to your old system using the Nandroid backup or follow our guide here to install stock firmware.

Got any queries? Reach us out through the comment box below.
Samsung Galaxy Note 7: Enable/Disable Wi-Fi Calling

0
Samsung Galaxy Note 7: Enable/Disable Wi-Fi Calling

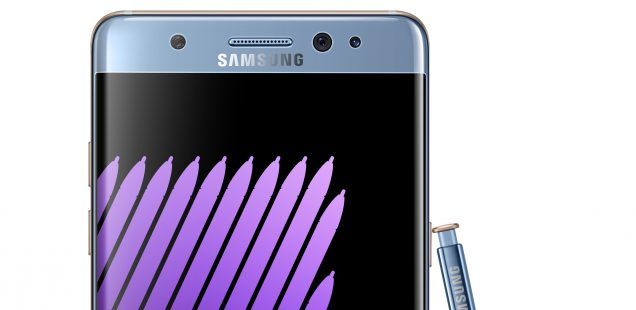
We are starting a series of Samsung Galaxy Note 7 How To’s. Today I’ll tell how you can Enable/Disable Wi-Fi Calling on Samsung Galaxy Note 7. Now all of you know that every Samsung device has WiFi calling feature, that means you can place a call over an available Wi-Fi connection but sometimes people find it annoying. Let’s start the method to Enable/Disable Wi-Fi Calling on Samsung Galaxy Note 7.

galaxy-note-7-wi-fi-calling

Samsung Galaxy Note 7: Enable/Disable Wi-Fi Calling:

There is no rocket science in it, all you have to do is follow all the steps below in order to Enable/Disable Wi-Fi Calling on Samsung Galaxy Note 7.

  • Open your home screen, select “Apps“, then choose “Settings“.
  • Now Select  “Advanced calling“.
  • You’ll few options, Select “Wi-Fi calling“.
  • In here all you have to do is, Slide the setting to “On” or “Off” as desired.

Well, one thing about Wi-Fi calling is that when you are on a call over Wi-Fi you’ll get a better sound quality and also all the calls will be free. One thing that I faced while Wi-Fi calling option was enabled on my device, it pop-ups every time I try to make the call that’s why I disabled it. It’s totally on you whether you want it or not.

Download and Install Galaxy S3 I9305 Android Marshmallow Custom ROM

0
Download and Install Galaxy S3 I9305 Android Marshmallow Custom ROM

The following post will take you through a comprehensive guide to update Galaxy S3 I9305 LTE to Android Marshmallow Custom ROMs including Resurrection Remix, CyanideL, CyanogenMod 13 and AICP ROM.

Galaxy S3 I9305 is the LTE variant of Samsung’s 2012 flagship device. Galaxy S3 was the device which gave Samsung the breakthrough that it needed to set its flagship lineup right. Samsung has been outdoing all other smartphone manufactures ever since it produced the Galaxy S3. Every single device that came after the Galaxy S3 was more successful than the S3. The S3 on the front had a 4.8-inch 720p display. It was powered up with Exynos 4412 Quad Core CPU and a RAM of 2 GB. The phone had 16 GB internal storage. 8 MP shooter at the back and a 2.1 MP shooter on the front. A 2100 mAh battery was packed inside and the phone ran on Android 4.1.1 Jelly Bean out of the box.0052

Galaxy S3’s official software support ended on Android 4.4.4 KitKat. Since then, Samsung never looked back and left the device all alone in the hands of custom ROM developers. Thankfully, the Galaxy S3 has been tasting all latest versions of Android which came out over the course of past 4 years. The new updates were made by means of custom ROMs. The recent iteration of Android, the Android 6.0.1 Marshmallow also made its way to the Galaxy S3 I9305 through various custom ROMs, and that’s what have for all of our beloved I9305 owners right here.

Before proceeding, we would like to let our users know that the ROMs we are going to cover are stable and are well tested by a huge number of users. These ROMs can be used as your daily driver. Having said that, since these are custom ROMs, we still can’t be sure of each and every single thing. Assuming that you are an Android power user(or going to be one if not right now) a few things crashing on your phone shouldn’t be a big deal. You can quickly revert back to your stock Android firmware if the custom ROMs do not fulfil your Android appetite.

Preparations

  1. This guide is intended for Galaxy S3 GT-I9305 users. Do not try this on any other device. Using the files linked here on a different device can result in bricking it. Verify your device model number in your phone’s settings > about device section.
  2. Your device must be running the latest possible available version of Android.
  3. Charge your phone up to 50% to avoid any power issues during the flashing process.
  4. Flash a custom recovery like TWRP on your Galaxy S3 I9305.
  5. Backup everything including contacts, call logs, sms messages and bookmarks. Also copy your media content to your computer.
  6. Create a Nandroid backup. This is highly recommend so that in case something goes wrong, you will be able to restore your system immediately by restoring Nandroid backup.
  7. Create an EFS backup of your device as well. Save the EFS backup to some safe place in your computer.
  8. Backup your important apps and apps data using Titanium backup if you want.
  9. Follow this guide carefully.

DISCLAIMER:THE METHODS INVOLVED IN FLASHING CUSTOM RECOVERIES, ROMS AND ROOTING YOUR PHONE ARE HIGHLY CUSTOM AND MAY RESULT IN BRICKING YOUR DEVICE, AND HAS NOTHING TO DO WITH GOOGLE OR THE DEVICE MANUFACTURER THAT IS Samsung IN OUR CASE. ALSO ROOTING YOUR DEVICE WILL VOID ITS WARRANTY AND YOU WILL BE NO LONGER ELIGIBLE FOR ANY KIND OF FREE DEVICE SERVICES BY THE MANUFACTURERS/WARRANTY PROVIDERS. IN CASE OF ANY MISHAP WE MAY NOT BE HELD RESPONSIBLE.

Update Galaxy S3 I9305 to Android 6.0.1 Marshmallow Custom ROM

  1. Download  the custom ROM of your choice:
    1. aicp_i9305_mm-11.0-rodman01-20160902.zip
    2. Resurrection Remix ROM.zip
    3. cm-13.0-20160901-UNOFFICIAL-temasek-i9305.zip
    4. Cyanide-v5.0-i9305-Detoxified-20160831.zip
  2. Download Gapps.zip (ARM 6.0.zip) file.
  3. Connect your phone to your PC now.
  4. Copy the both the .zip files to the storage of your phone.
  5. Now disconnect your phone and turn it off complete.
  6. Boot into TWRP recovery now, in order to do so, turn it on by pressing and holding Volume Up + Home Button + Power Key. You should see the recovery mode in a while.
  7. Now in TWRP  recovery, wipe cache, factory data reset the device using the Wipe option.
  8. After wiping all these three, select “Install” option.
  9. Now after tapping install > Locate and select customrom……xxxxx.zip file > Swipe finger to confirm > flash the ROM”.
  10. This will flash the ROM in your phone, once done get back to the main menu in recovery.
  11. Now once again tap  “Install > Locate and Select Gapps.zip file > Swipe finger to flash > flash Gapps.zip”.
  12. This will flash the Gapps in your phone.
  13. Reboot your device to system now.
  14. You should see the Android 6.0 Marshmallow running on your device in a while.
  15. That’s all!

First boot may take up to 10 minutes, you may not worry if it’s taking that much long. In case it’s taking too long, you may boot into TWRP recovery and wipe cache and dalvik cache and reboot your device as it may fix the issue. In case your device is having issues, you may return to your old system using the Nandroid backup or follow our guide here to install stock firmware.

Got any queries? Reach us out through the comment box below.
Source: AICP | CyanideL | Resurrection Remix | Unofficial CM 13

Install TWRP Custom Recovery On Samsung Galaxy S3 – All Variants

1
Install TWRP Custom Recovery On Samsung Galaxy S3 – All Variants

Out of the only two recoveries available for Android, Team Win definitely becomes the choice after seeing the number of features and the ease of use this recovery provides. The recovery is completely touch-based, with a very nice and cool UI, it has some additional features that make it the best choice to go with. Earlier, we posted the methods to install TWRP Custom Recovery on some of the Samsung flagship devices, but the recovery has been outdated now, and there also is a number of new firmwares available for the devices now that may require a latest and greatest version of the recovery.

Just in case you’re stuck with applying latest mods, ROMs and other tweaks to your Samsung Galaxy S3 because of an incompatible recovery with the firmware, you may stop worrying about it now as we have the solution right here for you. In the following post we are going to install TWRP Custom recovery on all the variants of Samsung’s past flagship Galaxy S3. All you need to do is, follow this guide carefully.1343224931_samsunggalaxys3img0044

Before we head towards the installation guide, let’s learn something about the custom recovery first, that is TWRP in our case.

Install TWRP Custom Recovery On Samsung Galaxy S3

A custom recovery allows you to install custom roms, mods etc. Along with these, you can make a Nandroid backup, this helps you a lot as you can move back to the previous working state of your phone at any time you want if you have backed up your current system. In some cases, to root the phone you need to flash SuperSu.zip file in the custom recovery, having installed the recovery may help you while in some cases to install the recovery easily,You can also wipe cache and dalvik cache of your phone using a custom recovery. There is a number of other options available in the custom recoveries that pave way for the device’s tweaking and deal with the problems efficiently.

Here are the pre-installation instructions:

  1. This guide is only for Samsung Galaxy S3 GT-I9300, I9305. Before installing this, make sure that your device is listed below. Check your device’s model number in Settings > More > About Device.
  2. Download the file carefully for your device.
  3. Make sure that your device’s battery is charged over at least 60%. Highly recommended in order to prevent any mishap during the recovery installation process.
  4. Make sure that you backup your important media content, ContactsCall Logs & Messages. This is highly recommended just in case something goes wrong and you need to reset your phone.
  5. It is recommended that you create a Nandroid Backup before proceeding, so that in case something goes wrong with the system, you can immediately restore it to the previous working state.
  6. Use only OEM data cable to establish connection between your phone and PC. Turn off your Anti Virus and Firewall to prevent any connection issues. Also enable USB debugging mode on your phone if you face connection issues.
  7. Recovery works well for Galaxy S3 running on all Android versions, no need to worry about the Android version.

Disclaimer: The methods involved in flashing custom roms and rooting your phone are highly custom and may result in bricking your device, and has nothing to do with Google or the device manufacturer that is SAMSUNG in our case. Also rooting your device will void its warranty and you will be no longer eligible for any kind of free device services by the manufacturers/warranty providers. If your device has knox counter on the bootloader, flashing recovery will trip the knox counter and you won’t be able to reset the counter. In case of any mishap we may not be held responsible. Follow these instructions to the letter to avoid any mishap or bricking. Make sure that whatever you do, you are doing it at your own responsibility.

Update: Latest TWRP 3.0.2.0 Links Added!

Pre – Requisites:

  • Download and Install Samsung USB drivers – Get Here.
  • Download and Extract Odin3 v3.09 – Get Here
  • Enough confidence to flash a recovery :-)!

Download the TWRP Recovery for Your Device:

How to Install TWRP custom Recovery on your Galaxy S3

  1. Download the file for your variant carefully.
  2. Open Odin3.exe.
  3. Put your phone in download mode, to do so, turn it off completely. Now turn it on by pressing and holding Volume Down + Home Button + Power Key, you should see a warning now, press Volume Up to continue.
  4. In case the download mode method doesn’t work for your device, try one of the methods from this guide.
  5. Connect your phone to your PC.
  6. The ID:COM box in Odin should turn blue now, that means your phone is connected properly in download mode.
  7. Click on the “AP” tab in Odin 3.09 and select the downloaded Recovery.tar file.
  8. In case you’re using Odin 3.07, click on the PDA tab in Odin and select the downloaded Recovery.tar file and let it load.
  9. Hit start now and sit back, it will take a few seconds to flash the recovery and your device will reboot.
  10. Press and hold Volume Up + Home Button + Power Key to access the TWRP 2.7 Recovery that you just installed.
  11. You can backup your current ROM and do a lot of other things using the options in TWRP Recovery.
  12. Make sure that you make an EFS backup and save it on your PC as well. Find the option in TWRP 3.0.2.x Recovery.
  13. That’s All.

How to Root:

  1. If you want to root your device now, you can download the SuperSu.zip file.
  2. Place the downloaded file on your phone’s sd card.
  3. Open TWRP 2.7 and select Install > SuperSu.zip and flash it.
  4. Reboot your device and find SuperSu in app drawer.
  5. Congrats! You’re now rooted as well.

That’s All! We hope that you found this guide of much help. In case you got any queries or face any difficulties regarding this guide, don’t hesitate to stop by the comment box below and leave us your message. We will try our best to help you out. Thanks All.