Home Blog Page 301

Fix Oops, we can’t reach Allo servers Error on Android

0
Fix Oops, we can’t reach Allo servers Error on Android

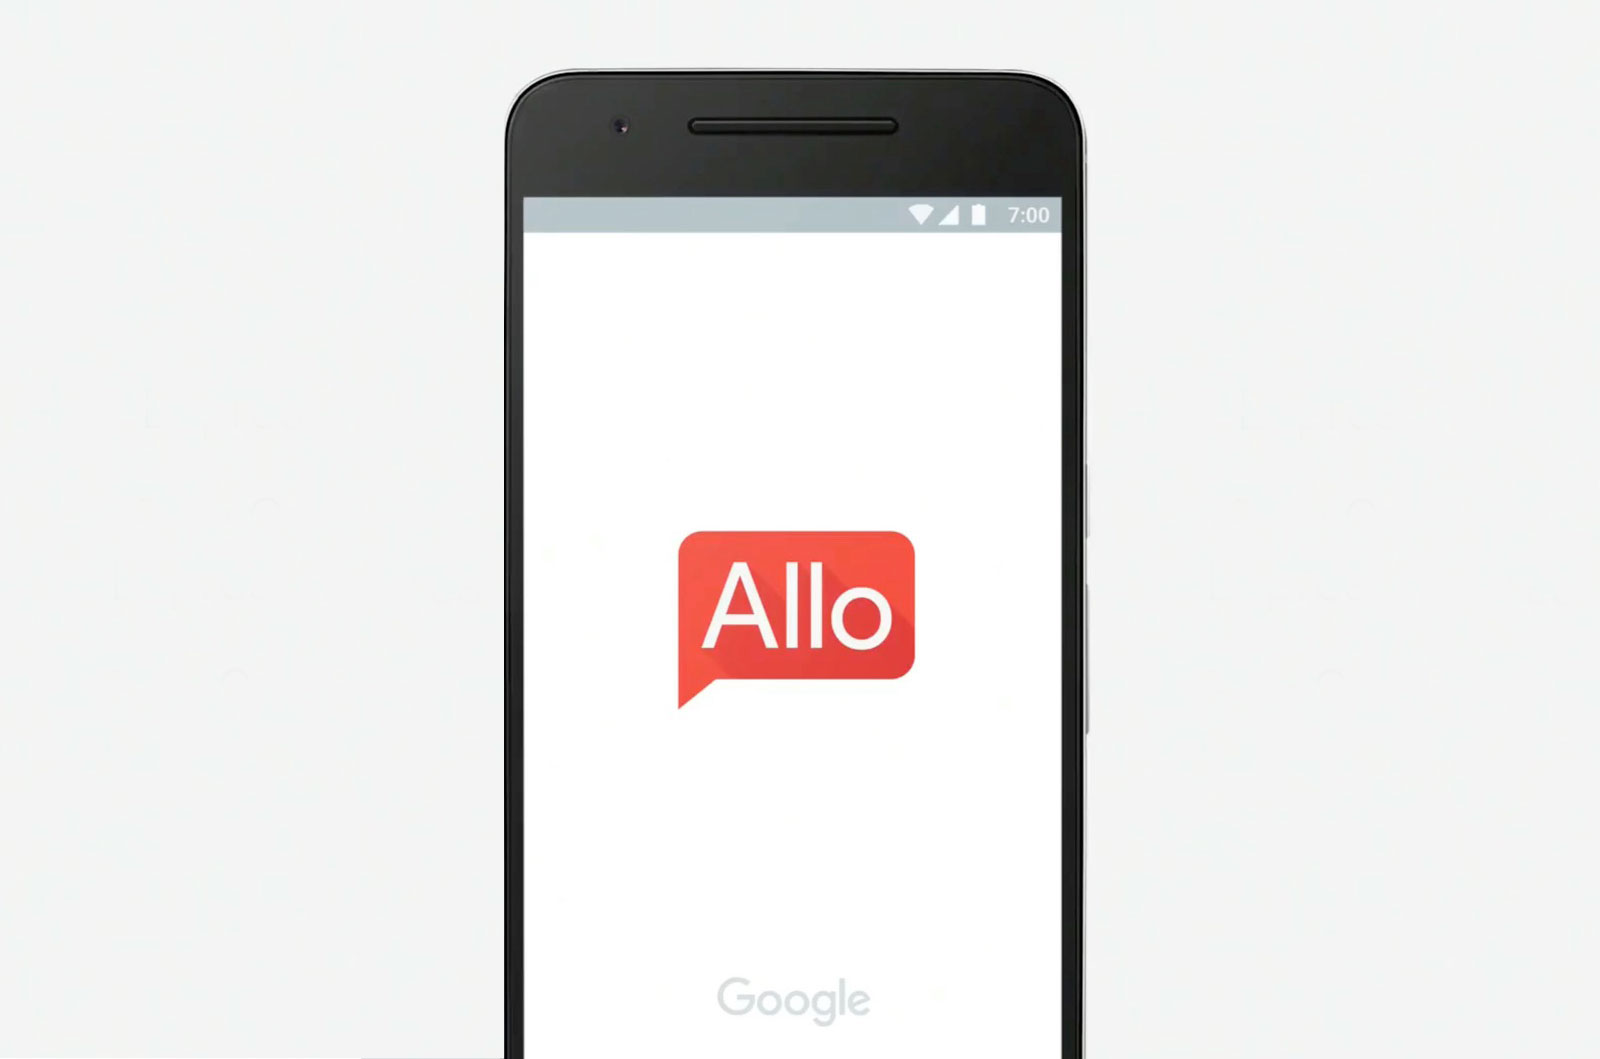
While configuring Google Allo many users have reported a common error ” Oops, we can’t reach Allo servers “, in this post, I’ll tell you how you can fix we can’t reach Allo servers error on Android. Now the first thought came in our mind is that this is the server end error but it’s not entirely true. Maybe the error is at our end because I’ve seen many users reported the same issue when they were trying to install Google Allo for Pc. IF the error is at Google Allo server end then all you can do is retry until your account is verified, other than that follow the steps below in order to fix Oops, we can’t reach Allo servers Error on Android.

fix Oops, we can’t reach Allo servers

Fix Oops, we can’t reach Allo servers Error on Android:

  • First, thing you should do is, check your internet connection. Make sure it working fine.
  • If your internet connection is working ok, try using 3G/4G Mobile data to see the error main reason.
  • Clear the App Data and Cache: Settings » Apps » Google Allo » and Clear Data and Cache.
  • Make sure you are running the latest Google Play Services. If you are running an old version try updating it to the latest version.
  • Once you are done with all the steps mentioned above, Reboot your device.
All Done.

How to Reset a Samsung Galaxy Note 7 Smartphone

0
How to Reset a Samsung Galaxy Note 7 Smartphone

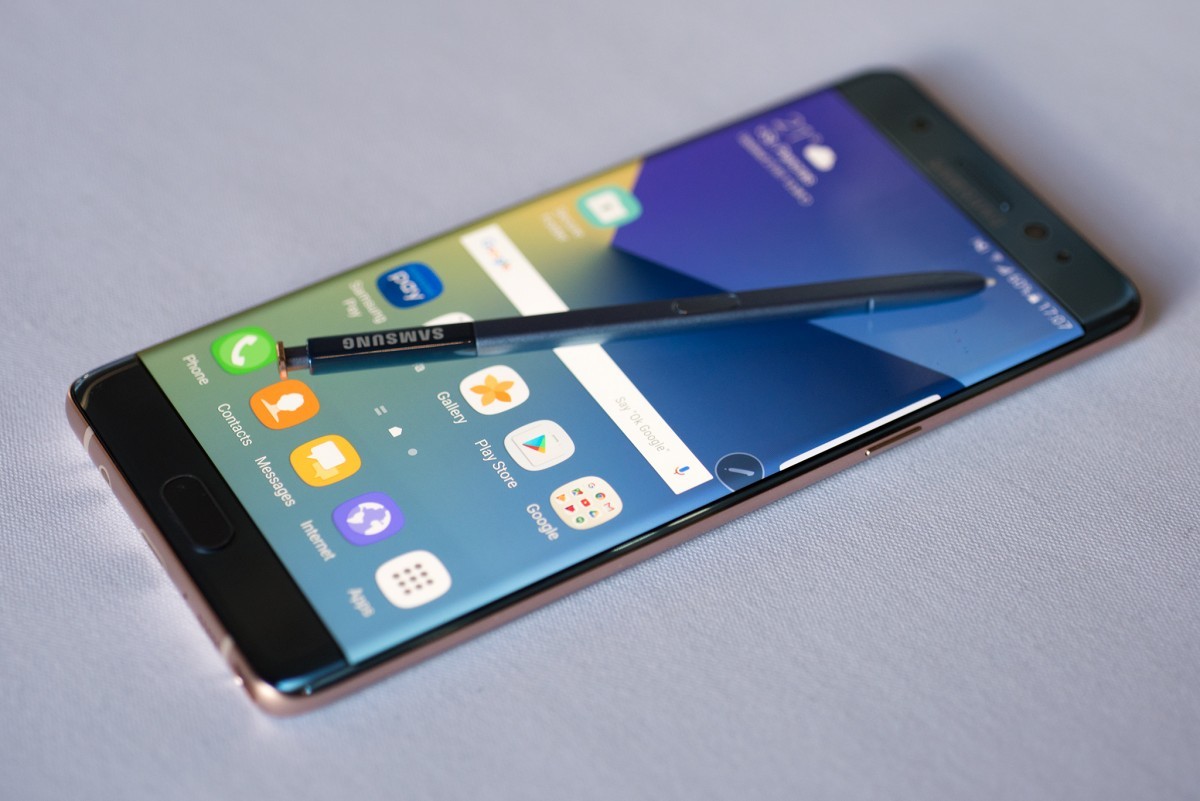
If you own a Samsung Galaxy Note 7 and while using the device you feel your device is lagging or getting slow then you need to reset your Galaxy Note 7. Sometimes Galaxy Note 7 hangs up, frozen, and it takes more time to open an app then usual time. The best solution for this condition is to reset Galaxy Note 7, following are different methods to reset Samsung Galaxy Note 7.

reset-galaxy-note-7

Reset Note 7 that is Frozen or Won’t Power On:

  • Connect your device with the power source, let it charge for few minutes.
  • Now press and hold “Volume Down” and “Power” same time.
  • Your device screen will blink once to twice, don’t turn off your device give it few minutes to boot up.

Reset Note 7 to Factory Defaults:

  • Turn off your device.
  • Now press and hold home+Power+Volume Up key.
  • Release the power button once you see Device logo, but keep holding home and Volume up keys.
  • Now when you see Android logo, let go both buttons.
  • Use the volume down button to navigate and highlight wipe data / factory reset.
  • Now use the power key to select the option.
  • You have to select ‘Yes‘ when you’ll be prompted to next menu.
  • Now wait for the process to be completed, once it’s done highlight ‘Reboot system now’ and press power button to select it.
  • All Done.

Method#2:

  • Goto Settings from your home screen.
  • Select “Personal“> “Back up and reset” > “Factory data reset“.
  • Tap on “Reset device“  when you see a warning message.

Done!

How to enable OEM Unlock on Android Nougat

4
How to enable OEM Unlock on Android Nougat

Android 7.0 Nougat is out in all its glory. The new Android 7.0 is more secure, stable and better when it comes to performance. Google has added tons of new features to make the Android 7.0 appealing. On this new OS, the smartphones have a better battery life. After the release of Android 7.0 Nougat, a lot of MODs, custom ROMs  and tweaks have also started pouring in. This means you can start customising the Android 7.0 Nougat installed on your smartphone.

To customise your phone, you need root access and a custom recovery installed at first. In most of the cases, before flashing a custom recovery and rooting your phone, you need an unlocked bootloader and unlocking your bootloader means taking complete responsibility of any damage happening to your phone and voiding the warranty. For this purpose, the Android system from Android Lollipop, Marshmallow onward comes with a permission in developer options which is known as OEM Unlock. Original Equipment Unlock basically restricts your device from flashing any third party files or unlocking the bootloader. In order to perform any custom operation on your phone, you must enable OEM Unlock and then proceed towards whatever you wish to.

If you own an Android Nougat device and you are planning to play around with it, you will need a guide on how to enable OEM Unlock. Let’s go ahead and have a look on how to enable OEM Unlock on Android Nougat.

How to enable OEM Unlocking on Android Nougat

  1. On your Android device, go to settings.
  2. Now in settings, scroll all the way down and go to About device.
  3. Now in About device locate the build number of your device. If build number is not there in About device section, it must be inside About device > Software. Tap the build number for 7 times to enable developer options.
  4. Once you’ve enabled developer options, develop options will appear in settings just above the About device option.
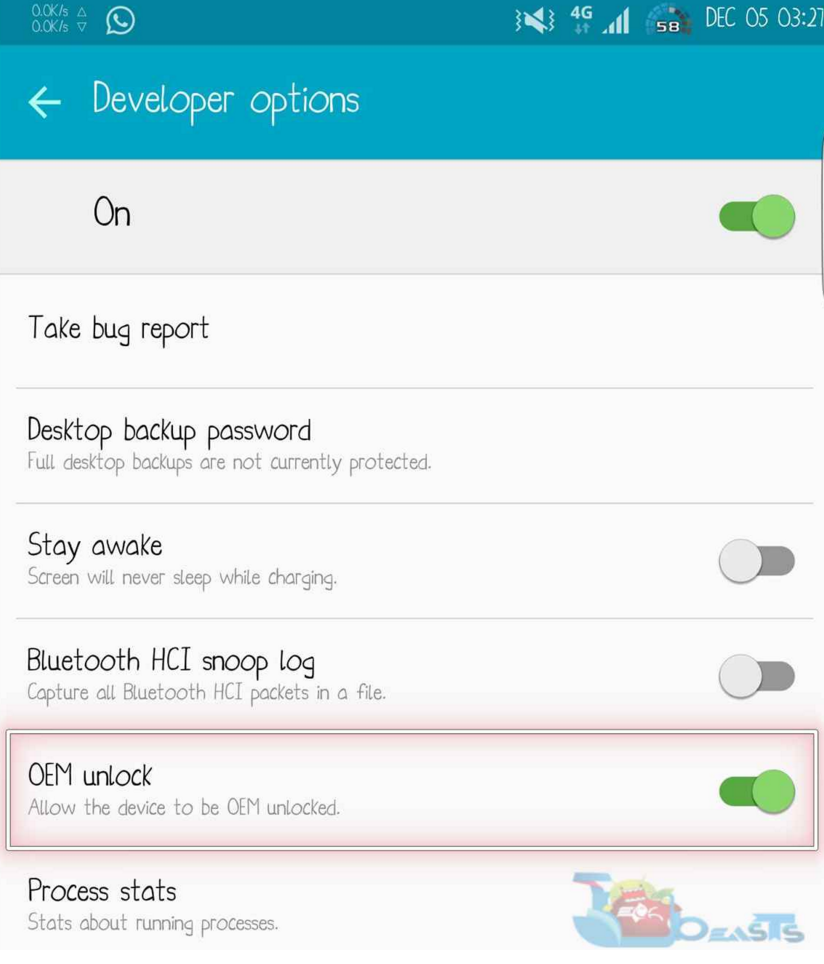
  5. Open developer options, the 4th or 5th option should be “OEM Unlock”. Turn on the small icon next to it and that’s all. You’ve enabled OEM Unlock.

Screenshot at Dec 29 16-06-52

Let us know if you’ve got any queries.

Starry Fantasy Online for PC (Windows and Mac)

0
Starry Fantasy Online for PC (Windows and Mac)

Another cool RPG game just made its way to Android devices and it is called Starry Fantasy Online. Starry Fantasy Online is similar to the traditional role playing games. You are the hero in this game and once again you are summoned to fight against the dark forces. The peace of a beautiful land has been devastated and now lies on your shoulders the responsibility of restoring that peace at priority one. 4 classes are being offered in this game which can further evolved into 2 classes. You can join hands with other players in the online multiplayer game. You can also chat with other players playing the same game and you can fight against demons with their help. The game has a lot more to offer packed inside stunning HD graphics. For that reason, we urge you to get your hands on it and see it for yourself. Starry Fantasy Online is currently available in the Google Play Store for free.starry-fantasy-online-for-pc

Willing to play this game on a computer? Well, that has been made possible as well. You can play Starry Fantasy Online for PC on your computer powered up with Windows XP/7/8/8.1/10 and Mac OS X, MacOS powered Macbook, iMac. The only thing you need is an Android emulator for this game. You can use BlueStacks, BlueStacks 2, Remix OS Player and Andy OS to play Starry Fantasy Online for PC. This post will take you through a comprehensive guide to install one of your desired Android emulator and then play the all new Starry Fantasy Online for PC right away. Let’s go ahead and have a look on a working method to start playing Starry Fantasy Online for PC.

Starry Fantasy Online for PC (Windows and Mac)

  1. Download Starry Fantasy Online APK
  2. Download and install Bluestacks or Remix OS Player: Bluestacks Offline Installer | Rooted Bluestacks |Bluestacks App Player | Remix OS Player for PC
  3. Once you’ve installed Bluestacks, double click the APK that you just downloaded above.
  4. The APK will be installed using Bluestacks, once installed open Bluestacks and locate the recently installed Starry Fantasy Online.
  5. Click the Starry Fantasy Online icon to open it, follow the on-screen instructions to use it.

You can also use Andy OS  to install Starry Fantasy Online for PC, here’s the tutorial: How To Run Android Apps On Mac OS X With Andy.

How To Fix Android App Widgets Not Appearing

0
How To Fix Android App Widgets Not Appearing

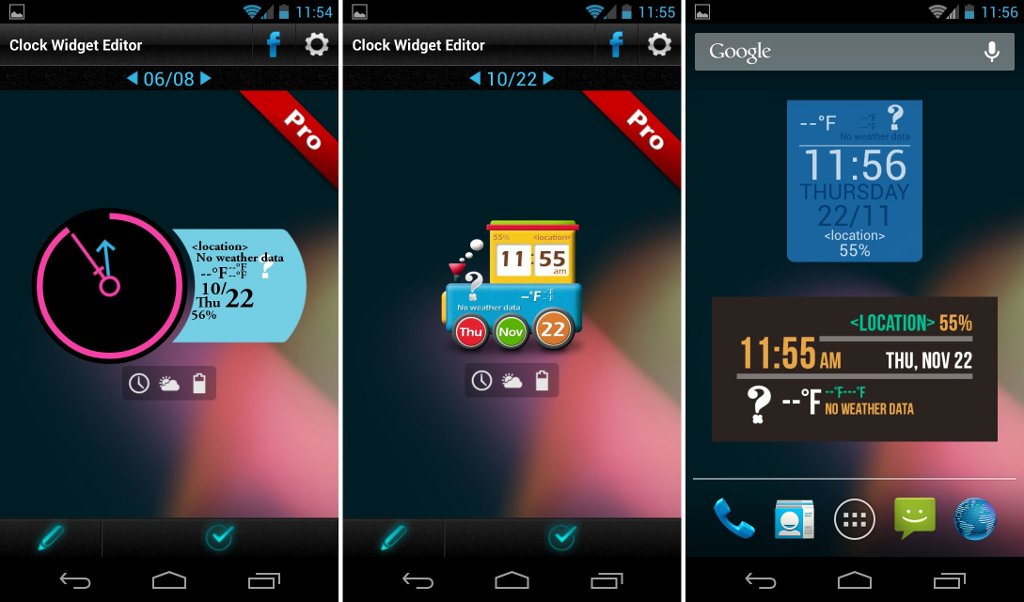
Yesterday I encountered an issue while using my Android device my app widgets were not showing up on my home screen. Apps like Facebook, Twitter, or any other apps. On the other hand, all the stocks apps widgets were showing up, So I worked a little bit and found the perfect solution for those who want to fix Android App Widgets Not Appearing. The thing is that the apps which are installed on the SD card are the one’s which are having widgets not appearing issue. There is a feature in Android which blocked all the which blocks widget for the app which is installed on SD card. Now let’s start the method to fix  Android App Widgets Not Appearing.

fix-android-app-widgets-not-appearing

How To Fix Android App Widgets Not Appearing:

  • Go to the Settings App.
  • From the list, Tap Apps.

” If you are using Samsung device->“Applications” > “Application manager“.

  • When you are Application manager choose the app which is not showing up in widgets.
  • Tap on Storage.
  • Tap on Change.
  • Now switch the selection from “SD card” to “Internal storage“.
  • Once done,restart your device.

When your device boots up check the app widgets section to see that the app is showing up or not. If still no luck for you the follow the method below.

  • Open Settings on your device.
  • Select Applications.
  • Tap on Application manager.
  • Tap on More icon and the choose Show System.

Every device has its respective name for home screens, for Samsung Devices “TouchWiz“, for Moto X, it’s called “Launcher“, Nexus 5X, it’s called “Nexus 5X Home screen“.

  • Tap on “Storage“.
  • Tap on “Clear Data“.

All Done.

Download Google Trips for PC (Windows and Mac)

0
Download Google Trips for PC (Windows and Mac)

Google now a days is busy in rolling out its exclusive Android applications in a full swing. We recently came across Google Duo and Google Allo, which are Google’s new video chat and texting platforms. In between Allo and Duo, Google has released another application called Google Trips which pretty much serves the purpose as its title suggests. Google Trips takes the Google Maps into account and provides you the nearest locations which are worth paying a visit. Suppose that you are visiting a beautiful country and you want to explore some stunning places around, you would want an application like Google Trips to pull out a list of some mesmerising places and make your memories there. And guess what? Google Trips works offline as well. You don’t need to worry about your internet connection, just dig the map and find out the places that suite your trip.google-trips-for-pc

That’s not it. Google Trips can do a lot more like automatically organising your trips, showing you your reservations and bookings for your flight, rental car, restaurant and hotel. Google Trips can manage your plans as well, it informs you about all the nearby attractions and the best thing about this application is that it can suggest you how to fill up your day with fun.

Google Trips has become a famous application in a short time-span. Android and iOS users can get it for their smartphones easily, but what if you want to get this application on your computer? Well, that has been made possible as well. In this post you will learn about installing Google Trips for PC on your Windows XP/7/8/8.1/10 Laptop/Desktop PC and Mac OS X powered Macbook/iMac. You can use an Android emulator like the BlueStacks, Andy OS or Remix OS Player to run Google Trips for PC. Let’s have a look on the method and start using Google Trips for PC right now.

Google Trips for PC (Windows and Mac)

  1. Download Google Trips APK
  2. Download and install Bluestacks or Remix OS Player: Bluestacks Offline Installer | Rooted Bluestacks |Bluestacks App Player | Remix OS Player for PC
  3. Once you’ve installed Bluestacks, double click the APK that you just downloaded above.
  4. The APK will be installed using Bluestacks, once installed open Bluestacks and locate the recently installed Google Trips.
  5. Click the Google Trips icon to open it, follow the on-screen instructions to use it.

You can also use Andy OS  to install Google Trips for PC, here’s the tutorial: How To Run Android Apps On Mac OS X With Andy


Block Someone’s Number on Google Allo [ How To ]

0
Block Someone’s Number on Google Allo [ How To ]

If you want to block someone’s number on Google Allo then you are at right place, In this post, I’ll tell how to Block Someone’s Number on Google Allo. As Google Allo is new and many of don’t know about basic features of this messenger, if you want to know how to Delete Messages, History, and Conversations on Google Allo check this link. Now let’s start the guide on how to block number on Google Allo.

block number on Google Allo

You can install Google Allo for PC using our guide [ Click here ].

Sometimes we don’t want an individual or individuals to be in contact with us so that’s why the blocking feature is must thing in any messenger. As we all know that Google Allo can access your contact list that means anyone who is in your contacts can contact you on Google Allo, so if you don’t want to be bothered by the ones you don’t want to talk follow the steps below.

Block Someone’s Number on Google Allo:

block-number-google-allo

Step#1: Launch Google Allo App.

Step#2: Now Touch & hold the contact you want to block.

Step#3: You’ll see a Pop-up with 3 options Delete, Turn off notifications, and Block.

Step#4: Tap on Block and this person will be no longer pain in your rear. 🙂

How to Unblock Number on Google Allo:

Step#1: Launch Google Allo App.

Step#2: Tap on menu button located on the top left corner.

Step#3: Tap on Blocked contacts.

Step#4: Here you’ll see the list of blocked contacts, against each contact you’ll see Unblock button, Tap on it to unblock the contact.

That’s It.

Delete Messages, History and Conversations on Google Allo

0
Delete Messages, History and Conversations on Google Allo

If you are using Google Allo and want to know how to delete Messages, History, and Conversations you are at the right place. As you, all of you know that Google Allo is the latest messenger from the Tech Gaint Google.Inc. Google Allo has pretty awesome features like Smart Reply, Ink, Stickers, Shout or Whisper and much more. Let’s start the method to Delete Messages, History and Conversations on Google Allo.

Delete Messages, History and Conversations on Google Allo

How to Delete a Message on Allo:

google-allo-delete-a-message

Step#1: Launch Google Allo on your phone.

Step#2: Tap on the conversation you want to delete.

Step#3: Now Touch & hold the message you want to delete.

Step#4: Once you have selected the message, tap the delete icon (dustbin) from top-right corner of screen.

Step#5: A pop-up dialogue will appear, Touch on DELETE.

How to Delete / Clear History on Allo:

google-allo-delete-history

Step#1: Launch Google Allo on your phone.

Step#2: Tap on the conversation you want to delete history for.

Step#3: Tap on profile photo of the contact or group to get menu options.

Step#4: Select Clear history and then select DELETE.

How to Remove a Conversation from Allo:

google-allo-delete-conversation

Step#1: Launch Google Allo on your phone.

Step#2: Touch & Hold conversation you want to delete.

Step#3: Select Delete from pop-up menu, then again select DELETE again.

This is all for now, I’ll be posting more Tips and Tricks for Google Allo. 

How to Fix Unfortunately Google Allo has Stopped Error on Android

0
How to Fix Unfortunately Google Allo has Stopped Error on Android

In this post, I’ll tell you how to fix Unfortunately Google Allo has Stopped Error on Android, Google Allo is the latest messenger from Google and it’s quite good. This is the most common error on any Android device, once you started seeing this error you cannot use the specific app properly. Before moving on to methods, You can download Google Allo Apk from here and also if you want to install Google Allo for PC try this link.

unfortunately-google-allo-has-stopped

How to Fix Unfortunately Google Allo has Stopped Error on Android:

Only for Samsung Devices:

  1. First of all, you need to boot your device in safe mode. To do so turn off your device completely.
  2. Now turn it on, while it boots up, keep the volume down key pressed.
  3. Leave the key as soon as your phone completely boots up. You will find “Safe Mode” notification on the bottom left.
  4. Now while you’re in the safe mode, tap the app drawer and navigate to the settings app.
  5. In settings open application manager > now open all applications > select Google Allo.
  6. You will have Google Allo settings now. Wipe Google Allo data and cache.
  7. Now reboot your device.
  8. Your issue should be resolved now.

Only for Xperia Devices:

  1. Touch and hold the Power key.
  2. Touch and hold Power off.
  3. Tap OK on the Safe Mode prompt. The device will restart in safe mode.
  4. From any Home screen, tap the Applications icon.
  5. Scroll to and tap Settings.
  6. Scroll to ‘DEVICE,’ and then tap Apps.
  7. Select the Google Allo.
  8. Wipe Google Allo data and cache.

Method#2:

  1. If the solution written above doesn’t help you, you may try wiping your device’s cache.
  2. To do so, simply turn off your phone.
  3. Now turn it on while pressing and holding Volume Up + Home + Power Key.
  4. Leave the keys as soon as your device boots up.
  5. Now using Volume Up & Down keys navigate to Wipe Cache Partition, select it using Power Key and wipe it.
  6. Once you’ve wiped it, reboot your device and check if your issue has been resolved or not.
  7. That’s all.

Method #3:

  • Turn off your device.
  • Now press and hold home+Power+Volume Up key.
  • Release the power button once you see Device logo, but keep holding home and Volume up keys.
  • Now when you see Android logo, let go both buttons.
  • Use the volume down button to navigate and highlight wipe data / factory reset.
  • Now use the power key to select the option.
  • You have to select ‘Yes‘ when you’ll be prompted to next menu.
  • Now wait for the process to be completed, once it’s done highlight ‘Reboot system now’ and press power button to select it.
  • All Done.

LeEco Le Pro 3 Launched with Snapdragon 821, 6GB RAM and 4070 mAh battery

1
LeEco Le Pro 3 Launched with Snapdragon 821, 6GB RAM and 4070 mAh battery

LeEco is another Chinese vendor making its mark slowly into the smartphone industry by pulling out smartphones boasting high-end specifications available in a very friendly budget. LeEco released its new smartphone, the Le Pro 3 today. The phone has made its way to the tech headlines because of its top of the line specifications and some amazing features.leeco-le-pro-3-announcement-1

LeEco Le Pro 3 sports a 5.5-inch full HD display at 403 ppi. It’s an IPS LCD display with 16M colors. LeEco Le Pro 3 joins the league of only a few smartphones to have the all new Qualcomm Snapdragon 821 under the hood. Adreno 530 GPU is there to entertain gaming geeks and graphic lovers. The phone has 2 different variants. It either offers a 32GB/64GB internal storage variant with 4GB RAM or a 64GB/128GB variant with a 6GB RAM. At the back, this device has got a 16 MP shooter with f/2.0 aperture and 1/2.8″ sensor size, 1.12 µm pixel size. On the front there is an 8 MP shooter f/2.2 aperture and 1.4 µm pixel size.leeco-le-pro-3-announcement-2

LeEco Pro 3 is a real moniker powered up with a 4070 mAh battery. The battery should be able to keep your phone powered on for all day long with some video playback and a few games on and off. LeEco was the very first Android OEM to ditch the 3.5mm headphone jack and Motorola did the same with its Moto Z afterwards. Motorola brought the headphone jack to its smartphones coming out after the Moto Z, but it looks like LeEco is in a different mood. You will not find any 3.5mm jack on the LeEco Pro 3. LeEco Pro 3 has a USB Type-C port and that’s where you will plug-in the headphones that will ship with this phone.leeco-le-pro-3-announcement-3

LeEco Pro 3 runs on Android 6.0.1 Marshmallow out of the box having LeEco’s eUI 5.8 on the top. The Pro 3 made the very first appearance in China for now. We hope this device to find some space on the shelves in store in other countries as well.leeco-le-pro-3-announcement-4

As far as the pricing is concerned, it is as follows.

  • LeEco Pro 3 4GB RAM and 32GB internal storage: $270
  • LeEco Pro 3 6GB RAM and 64GB internal storage: $299
  • LeEco Pro 3 4GB RAM and 64GB internal storage: $375
  • LeEco Pro 3 6GB RAM and 128GB internal storage: $450

Download and install OnePlus 3 Android 7.0 Nougat CyanogenMod 14

0
Download and install OnePlus 3 Android 7.0 Nougat CyanogenMod 14

Oneplus 3 owners, good news for all of you is out. You can now update your OnePlus 3 to Android 7.0 Nougat through an unofficial of build of CyanogenMod 14. Wondering what’s good in this so-early build of the CyanogenMod? Well, you will find most of your device’s mainstream features working flawlessly. Although the new CM 14 ROM for the OnePlus 3 is in testing stage, but it still has got features like Mobile Data, Calls, SMS Messages, Audio, GPS, Bluetooth and many others. Camera isn’t working right now, but we hope to get an update soon and get the Camera working as well. You can flash this ROM easily through a TWRP recovery for the sake of getting your hands on Android 7.0 Nougat way before OnePlus releases an official Nougat firmware.

OnePlus 3 outed in June, 2016. The device carried a 5.5-inch QHD display. OnePlus powered it up with a Qualcomm Snapdragon 820 CPU accompanied by Adreno 530 GPU. A RAM of 6 GB was found inside and the internal storage of this phone was 64 GB. OnePlus 3 also supports a microSD card. A 3000 mAh battery is packed inside. OnePlus was running on Android 6.0.1 Marshmallow out of the box. OnePlus has its own Oxygen OS themed Android for all of its devices. OnePlus 3 was under RAM issues for quite a while, but the company fixed issues later on by means of software updates.

So, that was all about the ROM and all about the device. It’s time for us to get back to what we are here for. In this post, we are going to flash and install the CM 14 custom ROM on the OnePlus 3 and update it to Android 7.0 Nougat. Flashing the ROM is an easy process, just make sure that you go through all the instructions carefully. Since its a custom ROM, and is in early stages, expect a few things to crash and being an Android user, you should be ready to face any circumstances that may occur afterwards.

Early preparations

  1. This guide is intended for OnePlus 3 [all variants]. Do not try this on any other phone or else you may result in bricking it.
  2. Charge your phone up to 50% to avoid power issues during ROM installation process.
  3. Backup your important contacts, call logs and sms messages. Also copy your media content to your computer.
  4. Unlock the bootloader of your OnePlus 3, install TWRP custom recovery and root it as well. Here’s the guide to do so.
  5. Create a Nandroid backup of your phone using a custom recovery.
  6. Follow this guide to the letter to avoid any mishap.

Disclaimer: Proceed at your own risk. These procedures of flashing custom ROMs are not recommended by OEMs. In case of a mishap, TechBeasts or the device manufacturer may not be held responsible.

Download and install OnePlus 3 Android 7.0 Nougat CyanogenMod 14

  1. Make sure that your phone has a TWRP recovery with bootloader unlocked at this point.
  2. Download latest cm-14.0-20160916-UNOFFICIAL-oneplus3.zip file and copy it to your phone’s internal storage.
  3. Download ARM 64 Gapps.zip file according to your choice. Copy this file to your phone’s internal storage as well.
  4. Now boot your phone into TWRP recovery. To boot into TWRP recovery, first turn off your phone completely. Now press and hold Volume Down + Power Key to turn on your OnePlus 3. As soon as your phone’s screen turns on, leave the Power Key and keep the Volume Down Key pressed. Your device will now boot into TWRP recovery mode.
  5. Once you’re in TWRP recovery, tap “Install > Locate the ROM.zip file > flash it”.
  6. After flashing the ROM, get back to the main menu in TWRP recovery and once again tap “Install > Locate and select the Gapps.zip file > flash it”.
  7. Now from the main menu in TWRP recovery, tap “Reboot > System”.
  8. Your phone will now reboot into CyanogenMod 14 custom ROM.

That’s all. I hope that this method worked right for you. In case you’ve got any issues while flashing the ROM, reach us out through the comment box below.

Source

Download Google Pixel and Pixel XL Stock Wallpapers

0
Download Google Pixel and Pixel XL Stock Wallpapers

Google Pixel and Pixel XL have been released. These are the very first smartphones which are built from the inside and outside by Google. Google’s manufacturer partner is HTC for these phones. Both phones have a Google logo at the back. Google has tried its best to put up premium phones, the phones are packed inside aluminum build and have a glass coating on the front and at the back on the upper part. Pixel phones are launched with Android 7.1 on the top. You can read more about these phones here: Google Pixel and Pixel XL are official now, here’s everything you need to know.

New: Download Google Pixel Apps (Pixel Launcher, Wallpaper Picker and More)

  • A plethora of Google Pixel and Pixel XL wallpapers leaked few days back when we were two weeks away from the official unveiling of these phones. The wallpapers come from a wallpaper applicaiton which is going to be a part of the Google Pixel launcher. The new wallpaper application in the upcoming smartphones will have several options like letting you choose your desired wallpaper from a handful of categories including Cityscape, Landscape, Textures, Life and Earth. The application will be suggesting you a daily wallpaper and a lot more. The new application will show you wallpapers from online sources. Upon selecting a wallpaper, you will be able to know more about who’s behind the picture and where, how that picture was actually captured.pixelteaser-walls-02-tile

Google Pixel’s wallpaper application will not work without the Pixel launcher. If you want this application to work on a non-pixel device, you will have to stick to the pixel launcher. To avoid that mess, we have got our hands on all the available wallpapers from all five categories of Google Pixel’s wallpaper application. The wallpapers available so far are absolutely stunning and crispy. The Google Pixel and Pixel XL stock wallpapers are in high definition resolution and are available for download here. You can grab your favorite wallpaper and apply on your Android smartphone or tablet right away.

Download Google Pixel Launcher APK

Right now, there are 43 wallpapers available in total. We are certain that the wallpaper collection will keep growing as Google releases the two smartphones. We will try our best to keep updating our page as we come across more new Pixel and Pixel XL stock wallpapers.

pixelteaser-walls-01 pixelteaser-walls-02 pixelteaser-walls-03 pixelteaser-walls-04 pixelteaser-walls-05 pixelteaser-walls-06 pixelteaser-walls-07 pixelteaser-walls-08 pixelteaser-walls-09 pixelteaser-walls-10 pixelteaser-walls-11 pixelteaser-walls-12 pixelteaser-walls-13 pixelteaser-walls-14 pixelteaser-walls-15 pixelteaser-walls-16 pixelteaser-walls-17 pixelteaser-walls-18 pixelteaser-walls-19 pixelteaser-walls-20 pixelteaser-walls-21 pixelteaser-walls-22 pixelteaser-walls-23 pixelteaser-walls-24 pixelteaser-walls-25 pixelteaser-walls-26 pixelteaser-walls-27 pixelteaser-walls-28 pixelteaser-walls-29 pixelteaser-walls-30 pixelteaser-walls-31 pixelteaser-walls-32 pixelteaser-walls-33 pixelteaser-walls-34 pixelteaser-walls-35 pixelteaser-walls-36 pixelteaser-walls-37 pixelteaser-walls-38 pixelteaser-walls-39 pixelteaser-walls-40 pixelteaser-walls-41 pixelteaser-walls-42 pixelteaser-walls-43