Home Blog Page 241

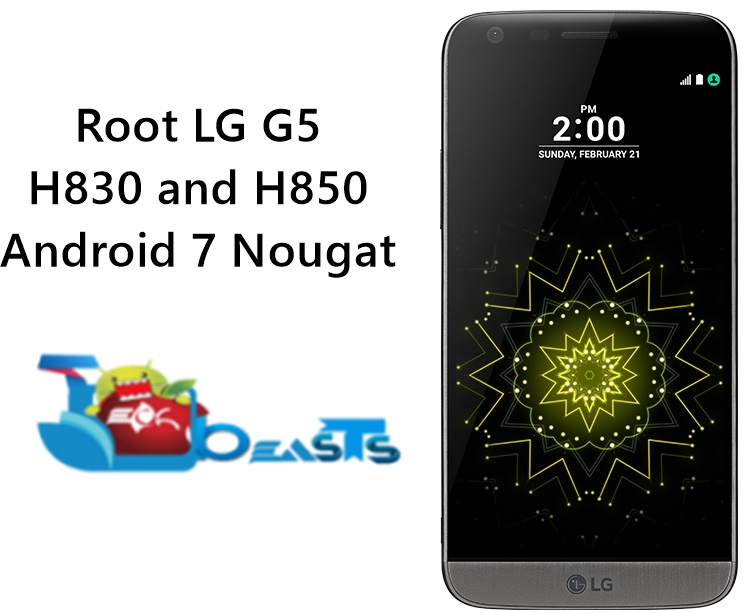
Install TWRP Recovery on LG G5 and Root it on Android Nougat
2
Install TWRP Recovery on LG G5 and Root it on Android Nougat

LG G5 was one of the very first Android smartphones updated to Android 7.0 Nougat. LG G5 has been enjoying all the Nougat goodies for a long while now. The device has seen a lot of improvements on the Nougat firmware. A plethora of MODs has also landed in for the LG G5 running on Android 7.0 Nougat.

LG G5 running stock Nougat in the hands of an Android power user is something that doesn’t sound good. G5 has got a lot of potential that you cannot unearth while you are using the untouched/stock firmware. To go beyond the boundaries and check out what your device is capable of, it is very important to root it and also to install a custom recovery like the TWRP recovery.

Rooting your LG G5 on Android Nougat is fairly easy. The method involves traditional steps of flashing a TWRP recovery using ADB and Fastboot and then flashing SuperSU to root the device. TWRP 3.1.0-0 is available for the LG G5. While root access will give you additional features by means of third party applications, the TWRP will let you backup your device and perform other important operations like wiping cache, dalvik cache and do a lot more.

For the method to work, your LG G5 must be running Android 7.0 Nougat. That’s the only main requirement for this procedure to work. The TWRP recovery is available for LG G5 H850 and the H830 variant at the moment. If you own one of these variants, you can jump up to the procedure to install TWRP recovery on LG G5 and root it on Android Nougat.

Install TWRP Recovery on LG G5 and Root it on Android Nougat

Preparations

  • This guide is intended for LG G5 H850 and H830 only. Do not try this on any other variant of the LG G5 or else you will result in bricking your device. Check your device’s model number in Settings > About device.
  • Charge your LG G5 up to 50% to ensure power backup during flashing process.
  • Backup your important contacts, sms messages, call logs and also copy your media content to your PC.
  • Enable OEM Unlocking on your LG G5. Also, enable USB debugging on your phone as well.
  • Use OEM data cable to establish connection between your PC and your phone.
  • Download and install Minimal ADB and Fastboot drivers.
  • Download and install LG USB drivers on your computer.
  • Unlock the bootloader of your LG G5 by following the instructions on LG’s official bootloader unlock page.

How to install TWRP Recovery and Root the LG G5 on Nougat now

  1. Make sure that you’ve unlocked the bootloader of your LG G5.
  2. Now download the TWRP Recovery.img [H850] or the TWRP Recovery.img [H830] file and rename it as twrp.img only.
  3. Copy the renamed twrp recovery.img file to the Minimal ADB and Fastboot folder that you’ve got in your Windows installation drive
  4. Download SuperSU.zip file and copy it to your LG G5’s external storage.
  5. Enable OEM unlocking and allow USB debugging on your phone.
  6. Now connect your LG G5 to your PC and open the Minimal ADB and Fastboot.exe from your desktop or open the command window using the instructions listed in the Minimal ADB and Fastboot guide.
  7. Now in the command window, enter the following commands one by one.
    1. adb reboot bootloader

    2. fastboot flash recovery twrp.img

  8. Now disconnect your phone from your PC and plug out the battery.
  9. Put the battery back in your phone and boot into recovery mode directly. To do so, Press and hold Volume down + Power button.
  10. As soon as you find the LG logo on you the screen, leave the power button and quickly press it again. Do not leave the Volume down button during this step.
  11. Keep holding the Volume Down and Power key unless you see the Factory Reset option on the screen.
  12. Follow on-screen instructions and perform a factory reset now.
  13. Once done, you’re all set to flash SuperSU.zip in TWRP. As you’ve copied SuperSU.zip into external SD card, you will first need to mount your external SD card by using mount option in TWRP. Once you’ve mounted external SD card, get back to the main menu in TWRP and tap “Install > Locate the SuperSU.zip file in external storage and flash it.
  14. Once SuperSU has been flashed, you can safely boot into the system now as TWRP will also stick here.

How to Root Android O Developer Preview

0
How to Root Android O Developer Preview

There are Android smartphone manufacturers who even updated their mainstream devices to Android Nougat and Google is already done with the Android O announcement. The new Android version will succeed Android Nougat. Google just made the first preview available for its eligible Pixel and Nexus devices. Android O is the next big iteration in the Android lineup, it will definitely bring a handful of changes that we have never seen in Android so far. Google will roll out several developer previews to make sure that everything goes intact in the final release of Android O. The name remains a mystery, Google will unveil the name of Android O at a latest stage this year. Speculations have been hinting towards Android Oreo, but you never know what name comes up as no one previously had an idea About Android N being Android Nougat.

With Android O Developer Preview running on your device, it will be nearly impossible to restrict yourself from unleashing the true power of your phone running this firmware. Unleashing the power starts right when you root your phone. Rooting Android on the Nexus/Pixel devices always happened quickly right when either the new device came out or a new firmware. The same happened in the case of Android O. The Android O Developer Preview has been rooted, and the method has been made available for users.

This has been done by none other then Chainfire. The root maestro has successfully found an exploit to root the O version and has updated his famous SuperSU to work on Google Nexus 5X and Nexus 6P. The root is not very much stable at the moment, it is pretty important to know the technical issues the root access is suffering at the moment. The developer has explained everything in his official thread here. Once you’ve read everything, you are good to go ahead and follow the method to root Android O Developer Preview.

Disclaimer: The root method currently available for Android O is more than risky. Make sure that you have read the instructions of developer carefully and you understand the risks involved in the procedure. In case something goes wrong, TechBeasts or any other party involved in laying out the instructions may not be held responsible. Make sure that you are doing it all at your own risk.

Useful guides: 

Root Android O Developer Preview

  1. Make sure your Google Nexus 5X or Nexus 6P has an unlocked bootloader.
  2. Also, your Nexus 5X and Nexus 6P must have a TWRP 3.1 recovery installed.
  3. Make a Nandroid Backup before rooting. This is a very important step.t
  4. Download the SuperSU-v2.79-SR4-20170323220017-ODP1-5X-6P.zip file and copy it to internal or external storage of your device.
  5. Now boot your device in TWRP recovery. To do so, turn it off first completely. Now press Volume Down + Power button to boot it into TWRP recovery mode.
  6. Once your phone is in TWRP recovery, tap Install > locate SuperSU file > select file > swipe finger to flash.
  7. After flashing it, reboot your device.
  8. Wait for a few seconds and it should boot up having the Android O rooted now.

Download Android O Launcher APK

0
Download Android O Launcher APK

Android O’s developer preview is out. Android O happens to be the next big update for Android. It will overtake Android Nougat. The developer preview rolled out for Google’s Pixel ad Nexus smartphones. The firmware doesn’t carry all of the features that Android O is expected to have. Developer preview is basically rolled out just to give a glimpse of the new version to the users and also to checkout what bugs and issues are lying around. Google will keep releasing developer previews, one after another, until it releases the final Android O build.

It’s just been a while since Android O was announced and the developer preview landed in, goodies from Android O have already started surfacing around the web. We saw Android O’s stock wallpaper coming out. With the days passing on, we will witness many other components leaking out of Android O and we will be able to grab them on our Android smartphones. That is what’s the greatest thing about Android OS. Applications, elements and other components of a device get ported within no time and all users can enjoy those.

From the Android O, the latest Google Pixel Launcher released as well. Some of you know this as Google Home, which Google renamed as Pixel Launcher later on. If you have already used this Launcher, you won’t be able to find much difference in the new build. The new Launcher allows users to swipe anywhere on the screen to bring up the application drawer whilst this was only possible by swiping from the  bottom.

The Launcher is available in the standalone APK form. Users can grab the APK and install it just as they install normal APKs. If you wish to integrate Google Now into the new Android O Launcher, you will have to install the Android O Launcher as a system application. Download Android O Launcher APK now and also go through the instructions to successfully install it.

Note: The Launcher works only on Android Marshmallow and Android Nougat powered phones.

Download Android O Launcher APK

  1. Download the Launcher of Android O: Launcher APK
  2. Copy the APK file to your phone.
  3. On your phone, go to settings > security > allow unknown sources.
  4. Get back to the file manager, locate the Launcher APK and install it.
  5. Press the home key so that it asks you what launcher you want to choose to get back to the system.
  6. Select Pixel Launcher and you are done.
  7. You can clear defaults for this application by going in to settings > applications/app manager > Google Now or Google Pixel Launcher > Set as Default > Set it or remove it from default according to your liking.
  8. That’s all.

Install Android O Launcher as system app to integrate Google Now

  1. Download and install Link2SD on your Android smartphone.
  2. Open the application on your phone and grant it SuperSU permissions.
  3. Use the search option and find out the Pixel Launcher in your phone.
  4. Long tap the Pixel Launcher application to bring up its related options.
  5. From the drop down menu coming up next, tap “Convert to system app”.
  6. Once the process ends, it will reboot your device or else reboot your device manually.
  7. That’s all. You will have Google Now integrated now.

To learn everything about the new Android O, checkout: What’s new with Android O?

Source


How to Update At&t Galaxy S6 to Nougat

0
How to Update At&t Galaxy S6 to Nougat

Samsung started updating its flagship devices to Android Nougat very recently. At first, it updated the S7 and S7 Edge to Android Nougat. Carriers like At&t, Verizon, T-Mobile and Sprint also followed Samsung’s footsteps and updated their branded S7/S7 Edge to Android Nougat. Samsung rolled out the Android Nougat update for the Galaxy S6 and S6 Edge right after after that. The update first of all came out for the global variants of the phones. It is now the turn of network carriers to start updating the phones to further version of Android.

At&t has taken the lead in this regard as it turns out to be the very first carrier to update its S6 to Nougat. The update brings all goodies you heard about for the previous devices. It updates the UI of the phone, brings a new UI for notification panel and toggles, new icons in the toggles, new icons for applications and also the new settings applications. Apart from the UI elements, the device gets a better battery life and also a higher performance in this new Android Nougat update.

At&t is currently sending out the update through OTA updates. You can check your device’s about device > software section to see if an update is available for your Galaxy S6 which falls under the umbrella of At&t. XDA member sand_bit has come forward to help the At&t S6 owners and posted out the OTA update files over the forum. Users can get their hands on these files and flash them manually to update the phone without waiting. The method is good for those users who have an At&t Galaxy S6  outside the region or those who are unable to capture this update.

Let’s go through the detailed process and update At&t Galaxy S6 to Nougat right away.

Update At&t Galaxy S6 to Nougat

Preparation

  1. The update is intended only for the At&t Galaxy S6 SM-G920A. Do not try this on any other phone.
  2. Backup everything including text messages, contacts, call logs and media content.
  3. Charge your phone up to 50%.
  4. Enable OEM Unlocking on your At&t Galaxy S6.
  5. Allow USB debugging mode on your phone.
  6. Download and install Samsung USB drivers on your computer.
  7. Turn of reactivation lock in settings > Lock screen and security > Find my mobile.
  8. Follow the instructions very, very carefully.

Important instructions

You can update your phone to Android 7.0 Nougat either from DPK5 firmware or the DQB3 firmware.

In order to install the firmware successfully, your phone must follow the path of files given below. You have two pathways to follow. If your Galaxy S6 G920A is currently running DPK5 firmware, you can skip the Andorid Marshmallow OTA.zip files given below and start flashing the files of Android Nougat in the following manner: DPK5 —> EQA8, EQA8 to EQB8, EQB8 to EQC9.

If your device is running on DQB3, you will flash the DQB3 —> EQB8 or the DQB3 to ECQ9.

If your Galaxy S6 is running on Android 6.0.1 Marshmallow DPJ1 firmware, you will have to flash the Android Marshmallow files as well in the following manner: DPJ1 to DPK1, DPK1 to DPK3, DPK3 to DPK5, DPK3 to DQB3 or DPK5 to DQB3.

If your Galaxy S6 is running on Android Lollipop, you will download the DPJ1 Odin files and flash them using this guide. The guide is for Galaxy S7, but you will follow the same procedure to flash the DPJ1 firmware on your At&t Galaxy S6.

Android 7.0 Nougat files

Android 6.0.1 Marshmallow files

How to install Android Nougat on your At&t Galaxy S6 now

Make sure that you have read all the instructions carefully.

  1. Now Install and setup Minimal Android ADB & Fastboot drivers.
  2. Now open your respective ADB & Fastboot drivers directory.Minimal ADB & Fastboot drivers, you will open your installation drive > program files > Minimal ADB & Fastboot folder.
  3. Now copy your desired update.zip files, for example SS-G920AUCS5DPK5-to-U5EQA8-UP and all other update files in the folder mentioned above.
  4. Now open the Minimal ADB and Fastboot folder and hold the shift key on your keyboard. While holding it, right click on an empty area and click on “Open command window here”.
  5. Put your Galaxy S6 in recovery mode using Volume Up + Power + Home Key simultaneously. Once it boots up in recovery, connect it to your computer.
  6. In the command window, issue the following command to verify connection: adb devices – This command will result in some code making sure your phone is connected properly in the adb mode.
  7. On your phone, use Volume buttons to navigate to apply update from adb and then press Power key to make a selection.
  8. Once this mode is selected, get back to the command window and enter the following commands one by one.
    1. adb sideload UPDATEFILENAME 

  9. Replace the UPDATEFILENAME with the name of the file you are flashing. E.g. adb sideload SS-G920AUCS5DPK5-to-U5EQA8-UP.
  10. Flash all the  files by copying in the ADB directory and replacing the name like this.
  11. Repeat the process unless you have flashed the EQB8 to EQC9 or the DQB3 to EQC9 files.
  12. Reboot your phone once you have successfully flashed all Android Nougat update files.
  13. That’s all.

Method#2

  1. Access your phone’s external SD card either on your phone or on your computer.
  2. Create a new folder named as “fota” in the root (main) directory of the external SD card.
  3. Copy the update.zip file that you got above in this “fota” folder.
  4. Turn off your phone now.
  5. Boot it into download mode. To do so, press the Volume Down + Power + Home Key. Upon getting a warning, press Volume Up to continue.
  6. In the download mode, make sure that the bootloader status is “Official” and not custom. If it says custom, then go back to the preparations and follow step# 4.
  7. Now boot into recovery mode. To do so, turn off your phone again. Now turn it on by pressing and holding Volume Up + Power + Home button. As the phone turns on, leave the keys.
  8. As your phone brings the recovery up, navigate using Volume Up/Down keys and press power key to select “apply update.zip from sd card”.
  9. Now in the apply update.zip from sd card menu, select the update.zip file that you copied to fota folder and press the power key once again.
  10. Press power key on the “Yes” option and it will quickly flash the Nougat OTA on your At&t Galaxy S6.
  11. That’s all.

Found this method working well? Don’t forget to reach us out if you have got any queries. That’s all.

Files credit


Install TWRP Recovery and Root Galaxy Tab S3 T820/T825

4
Install TWRP Recovery and Root Galaxy Tab S3 T820/T825

Samsung Galaxy Tab S3 just came out a while ago. Galaxy Tab S series is Samsung’s premium tablet series. These tablets equip top-notch specifications inside a very decent design and build. Just like the Galaxy Tab S and Tab S2, the Tab S3 also sports an elegant structure. Galaxy Tab S3’s 9.7-inch variant has a resolution of 1536 x 2048 pixels with 264 ppi. Samsung has powered up this Tab using Snapdragon 820 CPU, Adreno 530 GPU and a whopping 4 GB RAM. Tab S3 has 32 GB internal storage, it can expanded using a microSD card. Tab S3 has a 13 MP shooter at the back and a 5 MP shooter on the front. A huge 6000 mAh battery is placed inside.

Galaxy Tab S3 runs on Android 7.0 Nougat out of the box. The Tab S3 has just paved way towards new standards for the tablet devices. It’s about time that Galaxy Tab S3 starts hitting the hands of users and we start seeing the real power of this tablet getting unleashed. Just to give this thing a kickstart, XDA member Ashyx came up with the TWRP recovery and a procedure to root the Galaxy Tab S3. Ashyx has been coming up with recoveries and root for several devices in the past as well. Now is the turn for the Galaxy Tab S3.

Galaxy Tab S3 has been blessed by a TWRP 3.1.0-1 recovery. Using the latest version of SuperSU, the device can be easily rooted as well. Since it runs on Android 7.0 Nougat, things are little hard here for now. The Galaxy Tab S3 also requires disabling no-verity right after you root your device. All you need is to follow the instructions very carefully and it should go more than smooth.

Before flashing the recovery and root the tablet, it is very much important to know what y0u are up to, just in case you are a newbie. The custom recoveries like TWRP allow you to create the backup of every single partition from your phone, it also allows to wipe every partition, wipe cache, dalvik cache, data and system of the device. Flashing custom ROMs, MODs and other such related zip files is possible through custom recoveries like TWRP. In most of the cases, the device is rooted only with the help of a recovery. Whereas, the root access can do wonders. It can enhance the performance of your device by letting you install root specific applications. Users can also give a boost to their device’s battery life by using applications like Greenify and others.

Flashing TWRP recovery and rooting your Tab S3 will void its warranty. Be reminded that in case something goes wrong in the direction we don’t want it to, TechBeasts, the device manufacturer or the developer many not be held responsible. You are going to do everything at your own risk.

Assuming that Galaxy Tab S3 owners have a clear understanding of everything, it is time for us to download and install TWRP recovery and root Galaxy Tab S3 T820/T825.

Install TWRP Recovery and Root Galaxy Tab S3 T820/T825

Early preparations

  1. Charge your Galaxy Tab S3 up to 50% to avoid power issues during the flashing process. Check your device’s model number carefully under settings > more / general > about device.
  2. Enable OEM Unlocking and also enable USB debugging mode on your phone.
  3. Get an external microSD card or a USB OTG as you will need to copy SuperSU.zip file to that, otherwise you will have to use the MTP mode while you boot up into TWRP recovery to flash copy it.
  4. Backup your important contacts, call logs, sms messages and also copy your media content to your computer as you will have to wipe your phone on the way.
  5. Uninstall/disable Samsung Kies while using Odin. Samsung Kies can hinder the connection between your phone and Odin.
  6. Use OEM data cable to establish connection between your PC and your phone.
  7. Follow these instructions to the letter to avoid any mishap during flashing process.

Downloads and installations

  • Download and install Samsung USB drivers on your PC: Download Link with Guide
  • Download and extract Odin 3.10.7 on your PC: Download Link with Guide
  • Download the TWRP Recovery.tar file carefully according to your device.
  • Download SuperSU.zip file and copy it to your phone’s external SD card. If you haven’t got an external SD card, you will need to copy it to internal storage after installing TWRP recovery.
  • Download dm-verity.zip file and copy it to the external SD card as well. Alternatively, you can also copy both these.zip files to a USB OTG if you have got one.

How to Install TWRP Custom Recovery and Root Galaxy Tab S3 now

  1. Open Odin3.exe file from the extracted Odin files that you downloaded above.
  2. Put your Galaxy Tab S3 in download mode now. To do so, turn off your phone first. Now turn it on by pressing and holding Volume Down + Power + Home button. As soon as your device boots up showing a Downloading screen, leave the keys.
  3. Connect your phone to your PC now. Odin should show an “Added” message in the logs and also show the blue light in the ID:COM box. This will verify a successful connection between your phone and your PC.
  4. Now click on the “AP” tab in Odin and select the TWRP Recovery.img.tar file according to your device carefully.
  5. The options ticked in Odin should be only “F.Reset Time“. Make sure that the Auto-Reboot option is not checked, we do not want to reboot the phone after flashing TWRP recovery.
  6. After selecting the file and checking/unchecking the options carefully, hit the start button. Odin will now flash the TWRP and show you a PASS message in a few minutes.
  7. Once done, disconnect your device from your PC now. Do not reboot your device.
  8. Do not close Odin, follow the rest of the procedure below.

Now that we are done flashing TWRP recovery, next is the root access. There are 2 different things you can do. You can either root your phone and have it running alongside TWRP recovery or you can also disable forced encryption, mount your internal storage and disable dm-verity. We will cover both these aspects in two small methods below. Follow the one according to your liking.

How to disable forced encryption, mount internal storage, disable dm-verity and Root the Tab S3

  1. Download SR3-SuperSU-v2.79-SR3-20170114223742.zip and copy it to your external SD card or a USB OTG.
  2. Download no-verity-no-encrypt_ashyx and copy it to your external SD card or a USB OTG.
  3. Now you need to boot directly into TWRP Recovery. Turn off your phone completely and turn it on by pressing and holding Volume Up + Home + Power key now. Your phone should successfully boot into newly installed custom recovery.
  4. TWRP will ask you whether you want to allow modifications or not, you will need to swipe finger to the right to enable modifications. Swiping the finger to right will trigger dm-verity if you will need to disable it immediately. Leaving it enabled will not let you boot the phone, neither root it. This is an important stuff since we want to be able to modify the system.
  5. Now tap “Wipe > Format Data > type “yes” to format data. This is important to disable encryption. This step will factory reset your phone, so make sure that you’ve backed up the entire data at hand.
  6. Now go back to the main menu in TWRP Recovery and tap “Reboot > Recovery”. This will once again reboot your phone in TWRP.
  7. Now make sure that you’ve copied the SuperSU.zip and dm-verity.zip files in external SD Card or USB OTG, if not then transfer both these files to your external SD Card by using MTP mode in TWRP now. Once you’ve the files, tap “Install > locate the SuperSU.zip according to the location where you copied > flash it”.
  8. Now once again tap “Install > locate the dm-verity.zip file > flash it”.
  9. Once done flashing, reboot your phone to system.
  10. That’s all. You’re rooted and have a TWRP recovery installed. Best of luck.

That was it guys. Don’t forget to backup your EFS partition now and also create a Nandroid backup. Its’ time to unleash the true power of your Galaxy Tab S3. I hope that this guide proved to be fruitful for all of you. Let us know if you are stuck with something or something isn’t working right for you.

Credits: Ashyx

Download and install Bixby on Galaxy S6/S6 Edge/S6 Edge+/Note 5/S7/S7 Edge

6
Download and install Bixby on Galaxy S6/S6 Edge/S6 Edge+/Note 5/S7/S7 Edge

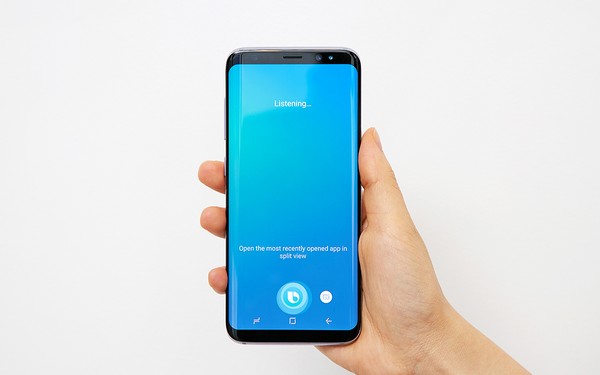
Samsung’s Bixby assistant is something cool added to the Galaxy S8 and S8 Plus. Bixby is basically Samsung’s take on Siri and Google Assistant. Just like the mentioned assistants, Bixby can do anything that you tell it to do so. Bixby is smart, it can do things beyond your imagination. For example, Bixby can quickly help you look up for information by simply snapping a picture of an object, it can bring up shopping links from Samsung’s partners with discounts for anything you want to purchase, it can text anyone, it can call anyone and all that simply by using the voice commands. Bixby has a dedicated button on the Galaxy S8 and S8 Plus.

We live in the world of Android with no limits. Tapping a little bit more into that open source world, an experiment has successfully implemented Bixby on other Galaxy smartphones of Samsung running Android 7.0 Nougat. These smartphones include Samsung Galaxy S6, Galaxy S6 Edge, Galaxy S6 Edge+, Galaxy Note 5, Galaxy S7 and the Galaxy S7 Edge. There is no major requirement regarding the hardware end. Users just need to have the Android 7.0 Nougat and they are all good to go. Bixby on these phones works as good as it works on the Galxay S8 and Galaxy S8 Plus.

Installation of Bixby on a Samsung Galaxy running Android Nougat is extremely easy. Before installing the Bixby assistant, you have to install the Galaxy S8 laucnher. S8 Launcher also works on all the phones mentioned above. If you just can’t wait more, then let’s learn to install Bixby on Galaxy S6/S6 Edge/S6 Edge+/Note 5/S7/S7 Edge now.

Before installing Bixby, do have a look at: What is Bixby? All you need to know about Samsung’s upcoming AI assistant

Install Bixby on Galaxy S6/S6 Edge/S6 Edge+/Note 5/S7/S7 Edge

Install Galaxy S8 Launcher on your Galaxy running Nougat

  1. Download Samsung Galaxy S8 launcher APK file.
  2. Copy the APK file to your phone.
  3. Go to settings > lock screen & security > allow unknown sources.
  4. Now locate the launcher APK file and install it.
  5. Press the home button now, and it should ask you which launcher you want to use. Select TouchWiz Home. If it doesn’t ask, it will automatically take you to the new launcher.
  6. If there is no apps button on the home-screen now, then long press the home-screen on an empty area, select “Home screen settings > Apps button > Show a button on the Home screen that opens the Apps screen > enable”.
  7. That’s all with the Galaxy S8 Launcher installation.

Install Bixby now

  1. Download Samsung Bixby APK file.
  2. Copy the APK file to your phone.
  3. Now locate the Bixby APK file and install it.
  4. Reboot your phone now.
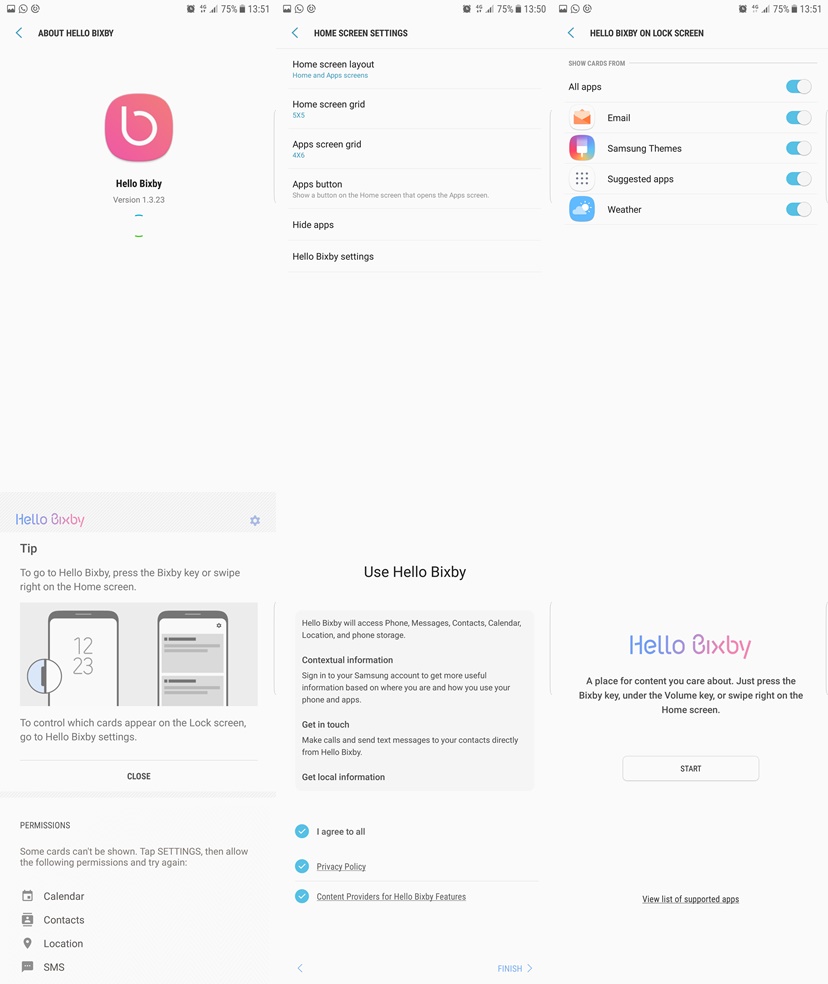
  5. Swipe left on the home-screen to launch Bixby and set it up to start using it.
  6. That’s all. Enjoy!

Any issues? Feel free to reach me out through the comments section below.

Source

[Fixed] Fix Samsung Galaxy S4 Won’t Turn On

0
[Fixed] Fix Samsung Galaxy S4 Won’t Turn On

Samsung Galaxy S4 was a game changer back in the days and now we have Samsung Galaxy S8, as the technology evolves so do we. People love to see new technology and in smartphones industry, Samsung is doing a good job. A few days back one of our users emailed me and told me that his Samsung Galaxy S4 won’t turn on. We have covered all issue regarding Galaxy S4 back in the days when Galaxy S4 was on fire. Well we love to help everyone this is what we do, Today I’ll tell you how to fix Samsung Galaxy S4 Won’t Turn On.

samsung galaxy s4 wont turn on
©Techbeasts: Fix Samsung galaxy s4 won’t turn on

Fix Samsung Galaxy S4 Won’t Turn On:

Following are the best possible solutions that we can provide to Fix Galaxy S4 won’t turn on. After trying all these methods you seem to have no luck then my friends you need to Samsung service center near you.

Perform Soft Reset On Galaxy S4:

The best solution in the book, when you hit the power button and your phone is doing nothing, remove the battery cover and pull the battery out. Now after that you need to Press and hold the button for 1 minute to drain off electricity. Put the battery back and turn on your Galaxy S4. The is the best and easiest method you can find in the hood.

Let Galaxy S4 Charge For 10 Minutes:

Before moving on or doing anything stupid read this, Sometimes our battery got drained and there no juice left in it to turn your device on. I would suggest you get the charger and put the connector in the charging port and let it charge for 10 minutes. I have tried this several times and it worked for me.

Boot Galaxy S4 In Safe Mode:

  • First, turn off your Galaxy S4.
  • Now press and hold the power key.
  • When you see Samsung Galaxy S4 logo, release the button and then press+hold the volume down button.
  • Don’t let go until your phone finishes the rebooting process.
  • When you see Safe Mode in the lower left corner of the screen let go the volume down button.

If your device bootups in Safe Mode that means you’re in luck, turn off your device and boot it normally and your device will be back as it was.

Boot Galaxy S4 In Recovery Mode:

  • Turn off your device.
  • Now press and hold home+Power+Volume Up key.
  • Release the power button once you see the logo, but keep holding home and Volume up keys.
  • Now when you see Android logo, let go both buttons.
  • Use the volume down button to navigate and highlight wipe cache partition.
  • Now use the power key to select the option.
  • You have to select ‘Yes‘ when you’ll be prompted to next menu.
  • Now wait for the process to be completed, once it’s done highlight ‘Reboot system now’ and press power button to select it.
  • All Done.

Now after trying that now try the following method.

  • Turn off your device.
  • Now press and hold home+Power+Volume Up key.
  • Release the power button once you see the logo, but keep holding home and Volume up keys.
  • Now when you see Android logo, let go both buttons.
  • Use the volume down button to navigate and highlight wipe data/factory reset.
  • Now use the power key to select the option.
  • You have to select ‘Yes‘ when you’ll be prompted to next menu.
  • Now wait for the process to be completed, once it’s done highlight ‘Reboot system now’ and press power button to select it.
  • All Done.

MLB Tap Sports Baseball 2017 for PC Windows/Mac

0
MLB Tap Sports Baseball 2017 for PC Windows/Mac

MLB Tap Sports Baseball 2017  for PC is now available and can be easily installed on a desktop PC/Laptop running Windows XP/7/8/8.1/10 and MacOS/OS X. Let’s learn a little bit about this all new app and then have a look on the installation method via BlueStacks or BlueStacks 2.

MLB Tap Sports Baseball 2017 for PC
MLB Tap Sports Baseball 2017 For PC Screen Shots

Download MLB Tap Sports Baseball 2017 for PC, Laptop Windows-Mac:

Following are the two methods from which you can download and install MLB Tap Sports Baseball 2017 for PC, Laptop Windows-Mac. Let’s start the method to download MLB Tap Sports Baseball 2017 for PC Windows.

MLB TAP SPORTS BASEBALL 2017
Price: To be announced

Download MLB Tap Sports Baseball 2017 for PC Windows using BlueStacks:

  • First, Download and install BlueSacks on your Windows or Mac.Bluestacks Offline Installer Rooted Bluestacks |Bluestacks App Player.
  • Once you’ve installed BlueStack, launch it from your desktop. You have to add your Google Account to use Google Play on BlueStack. Goto->Settings->Accounts-Gmail.
  • When BlueStacks screen loads up, Click on the Search icon.
NVSIP for PC Windows
©Techbeasts: BlueStacks Home Screen
  • Now you have to type in the app name. I am looking for MLB Tap Sports Baseball 2017 so, in the search bar, I’ll type MLB Tap Sports Baseball 2017 and hit enter.
  • On the next screen, you’ll see the list of all the apps containing MLB Tap Sports Baseball 2017 name, Click on the first one which is developed by Glu.
  • Now you’ll be at app page, here you have to click on install. It will start downloading the app and once the downloading is complete, MLB Tap Sports Baseball 2017 will be installed.
  • Before moving on you have to give permission to MLB Tap Sports Baseball 2017 in order to access your system information. Click on Accept when you’ll see the pop-up.
  • Now, wait for the installation process to be complete, once the MLB Tap Sports Baseball 2017 is download and installed, you’ll see a notification as you do on your Android devices. Goto BlueStacks homepage and there you’ll see the MLB Tap Sports Baseball 2017 logo in your apps. Click on the MLB Tap Sports Baseball 2017 logos to start using it.

DOWNLOAD MLB Tap Sports Baseball 2017 FOR PC ON WINDOWS 8.1/10/8/7/XP/VISTA & MAC LAPTOP:

Method:2

  1. Download MLB Tap Sports Baseball 2017 APK.
  2. Download and install BluestacksBluestacks Offline Installer | Rooted Bluestacks |Bluestacks App Player
  3. Once you’ve installed Bluestacks, double click the APK that you just downloaded above.
  4. The APK will be installed using Bluestacks, once installed open Bluestacks and locate the recently installed MLB Tap Sports Baseball 2017.
  5. Click the MLB Tap Sports Baseball 2017 icon to open it, follow the on-screen instructions to play it.

DOWNLOAD MLB Tap Sports Baseball 2017 FOR WINDOWS 10/8.1/8/7/XP & VISTA AND MAC COMPUTER:

You can also use Andy OS  to install MLB Tap Sports Baseball 2017 for PC, here’s the tutorial: How To Run Android Apps On Mac OS X With Andy.

You’ve successfully installed MLB Tap Sports Baseball 2017 for PC Windows/Mac, if you face any issue regarding this guide please do tell me in comments.

Ballz for PC Windows 10, 8, 7 – Mac Download Free

0
Ballz for PC Windows 10, 8, 7 – Mac Download Free

Ballz for PC is now available and can be easily installed on a desktop PC/Laptop running Windows XP/7/8/8.1/10 and MacOS/OS X. Let’s learn a little bit about this all new app and then have a look on the installation method via BlueStacks or BlueStacks 2.

©Techbeasts: Ballz in BlueStacks

Download Ballz for PC, Laptop Windows-Mac:

Following are the two methods from which you can download and install Ballz for PC, Laptop Windows-Mac. Let’s start the method to download Ballz for PC Windows.

Ballz
Price: Free

Download Ballz for PC Windows using BlueStacks:

  • First, Download and install BlueSacks on your Windows or Mac.Bluestacks Offline Installer Rooted Bluestacks |Bluestacks App Player.
  • Once you’ve installed BlueStack, launch it from your desktop. You have to add your Google Account to use Google Play on BlueStack. Goto->Settings->Accounts-Gmail.
  • When BlueStacks screen loads up, Click on the Search icon.
©Techbeasts: BlueStacks Home Screen
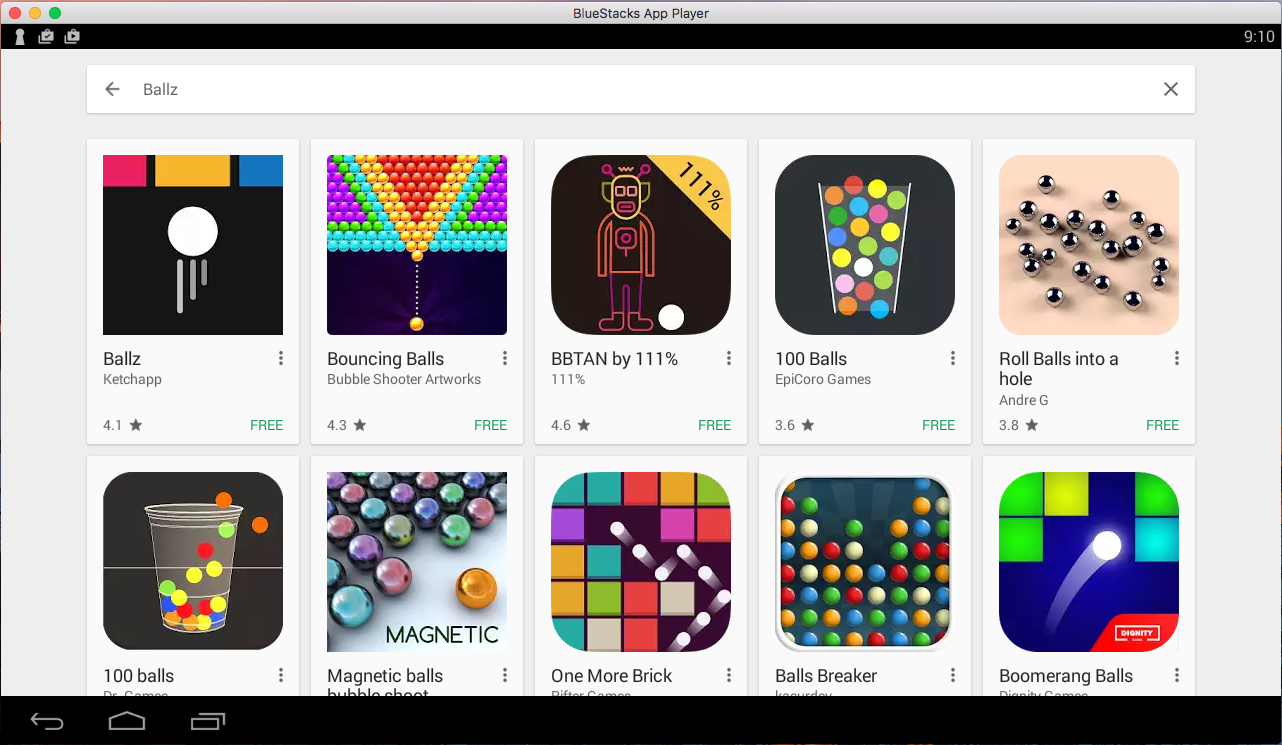
  • Now you have to type in the app name. I am looking for Ballz so, in the search bar, I’ll type Ballz and hit enter.
©Techbeasts: Type Ballz in BlueStacks Search Bar.
  • On the next screen, you’ll see the list of all the apps containing Ballz name, Click on the first one which is developed by Ketchup.
©Techbeasts: Click on Ballz icon developed by Ketchup.
  • Now you’ll be at app page, here you have to click on install. It will start downloading the app and once the downloading is complete, Ballz will be installed.
©Techbeasts: Click on install to start downloading process.
  • Before moving on you have to give permission to Ballz in order to access your system information. Click on Accept when you’ll see the pop-up.
©Techbeasts: In order to install Ballz for PC you need to give permission.
  • Now, wait for the installation process to be complete, once the Ballz is download and installed, you’ll see a notification as you do on your Android devices. Goto BlueStacks homepage and there you’ll see the Ballz logo in your apps. Click on the Ballz logos to start using it.
©Techbeasts: BlueStacks installing Ballz on PC.

DOWNLOAD Ballz FOR PC ON WINDOWS 8.1/10/8/7/XP/VISTA & MAC LAPTOP:

Method:2

  1. Download Ballz APK.
  2. Download and install BluestacksBluestacks Offline Installer | Rooted Bluestacks |Bluestacks App Player
  3. Once you’ve installed Bluestacks, double click the APK that you just downloaded above.
  4. The APK will be installed using Bluestacks, once installed open Bluestacks and locate the recently installed Ballz.
  5. Click the Ballz icon to open it, follow the on-screen instructions to play it.

DOWNLOAD Ballz FOR WINDOWS 10/8.1/8/7/XP & VISTA AND MAC COMPUTER:

You can also use Andy OS  to install Ballz for PC, here’s the tutorial: How To Run Android Apps On Mac OS X With Andy.

You’ve successfully installed Ballz for PC Windows/Mac, if you face any issue regarding this guide please do tell me in comments.

Chicken Scream for PC Windows 10, 8, 7 – Mac Download Free

0
Chicken Scream for PC Windows 10, 8, 7 – Mac Download Free

Chicken Scream for PC is now available and can be easily installed on a desktop PC/Laptop running Windows XP/7/8/8.1/10 and MacOS/OS X. Let’s learn a little bit about this all new app and then have a look on the installation method via BlueStacks or BlueStacks 2.

Chicken Scream for PC
©Techbeasts: Chicken Scream in BlueStacks

Download Chicken Scream for PC, Laptop Windows-Mac:

Following are the two methods from which you can download and install Chicken Scream for PC, Laptop Windows-Mac. Let’s start the method to download Chicken Scream for PC Windows.

Chicken Scream
Price: Free+

Download Chicken Scream for PC Windows using BlueStacks:

  • First, Download and install BlueSacks on your Windows or Mac.Bluestacks Offline Installer Rooted Bluestacks |Bluestacks App Player.
  • Once you’ve installed BlueStack, launch it from your desktop. You have to add your Google Account to use Google Play on BlueStack. Goto->Settings->Accounts-Gmail.
  • When BlueStacks screen loads up, Click on the Search icon.
Chicken Scream for PC
©Techbeasts: BlueStacks Home Screen
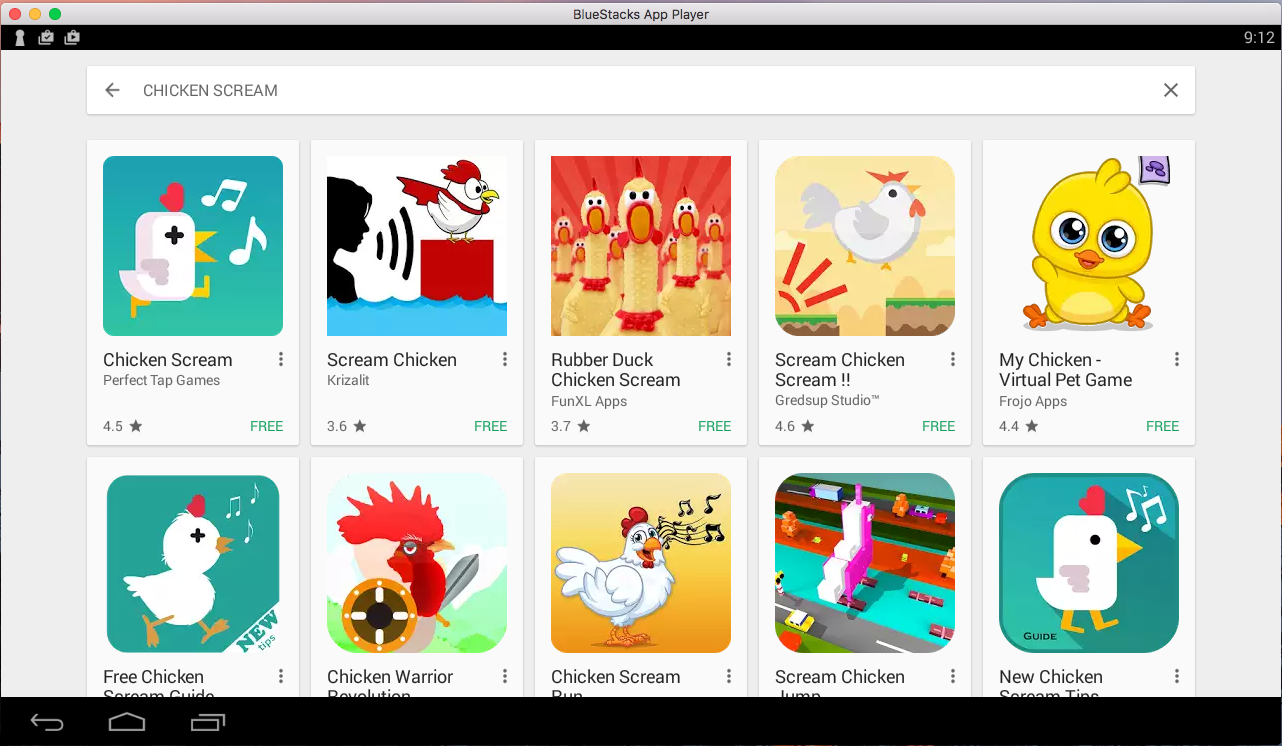
  • Now you have to type in the app name. I am looking for Chicken Scream so, in the search bar, I’ll type Chicken Scream and hit enter.
Chicken Scream for PC
©Techbeasts: Type Chicken Scream in BlueStacks Search
  • On the next screen, you’ll see the list of all the apps containing Chicken Scream name, Click on the first one which is developed by Perfect Tap Games.
Chicken Scream for PC
©Techbeasts: Click on Chicken Scream
  • Now you’ll be at app page, here you have to click on install. It will start downloading the app and once the downloading is complete, Chicken Scream will be installed.
Chicken Scream for PC
©Techbeasts: Click on Install.
  • Before moving on you have to give permission to Chicken Scream in order to access your system information. Click on Accept when you’ll see the pop-up.
Chicken Scream for PC
©Techbeasts: You have to accept when pop-up shows up.
  • Now, wait for the installation process to be complete, once the Chicken Scream is download and installed, you’ll see a notification as you do on your Android devices. Goto BlueStacks homepage and there you’ll see the Chicken Scream logo in your apps. Click on the Chicken Scream logos to start using it.
Chicken Scream for PC
©Techbeasts: Chicken Scream Installing on PC.

DOWNLOAD Chicken Scream FOR PC ON WINDOWS 8.1/10/8/7/XP/VISTA & MAC LAPTOP:

Method:2

  1. Download Chicken Scream APK.
  2. Download and install BluestacksBluestacks Offline Installer | Rooted Bluestacks |Bluestacks App Player
  3. Once you’ve installed Bluestacks, double click the APK that you just downloaded above.
  4. The APK will be installed using Bluestacks, once installed open Bluestacks and locate the recently installed Chicken Scream.
  5. Click the Chicken Scream icon to open it, follow the on-screen instructions to play it.

DOWNLOAD Chicken Scream FOR WINDOWS 10/8.1/8/7/XP & VISTA AND MAC COMPUTER:

You can also use Andy OS  to install Chicken Scream for PC, here’s the tutorial: How To Run Android Apps On Mac OS X With Andy.

You’ve successfully installed Chicken Scream for PC Windows/Mac, if you face any issue regarding this guide please do tell me in comments.

Download Samsung Galaxy S8/S8 Plus Stock Wallpapers

0
Download Samsung Galaxy S8/S8 Plus Stock Wallpapers

Galaxy S8 and S8 Plus are official now. It’s about time that all the goodies packed inside these smartphones start floating around the internet. The very first thing, that we all wait for every time a new smartphone comes out, are its wallpapers. Galaxy S8’s stock wallpapers are also out now and you can download them all. The wallpapers are available in two different resolutions, you can pick up the one according to your needs.

Go ahead and download Samsung Galaxy S8/S8 Plus stock wallpapers. You can apply these wallpapers on your Android or iOS powered smartphone. To download the wallpaper, simply open the image and then right click > save it to your computer or long tap the image to save it to your smartphone.

These wallpapers are in 1920 x 1080 pixels resolution

These wallpapers are in 2447 x 1246 pixels resolution

Update: March 31:

Samsung Galaxy S8/S8 Plus stock wallpapers:

Samsung Galaxy S8 Wallpapers

Samsung Galaxy S8 Wallpapers

Samsung Galaxy S8 Wallpapers

Samsung Galaxy S8 Wallpapers

Samsung Galaxy S8 Wallpapers

Samsung Galaxy S8 Wallpapers

Samsung Galaxy S8 Wallpapers

Samsung Galaxy S8 Wallpapers

Samsung Galaxy S8 Wallpapers

Samsung Galaxy S8 Wallpapers

Samsung Galaxy S8 Wallpapers

Samsung Galaxy S8 Wallpapers

Samsung Galaxy S8 Wallpapers

Samsung Galaxy S8 Wallpapers

Samsung Galaxy S8 Wallpapers

Samsung Galaxy S8 Wallpapers

Learn more about Samsung Galaxy S8 and S8 Plus: Samsung Galaxy S8 and S8 Plus announced: Here’s everything you need to know

Update Note 5 N920G to Android Nougat

1
Update Note 5 N920G to Android Nougat

Samsung just released the Android 7.0 Nougat for Galaxy Note 5 a week back. The firmware came out for the N920C variant of the device in Turkey first of all. The very next device expected to get Nougat after the N920C was N920G. Just as expected, Samsung rolled the firmware out for N920G variant of the Galaxy Note 5. Galaxy Note 5 N920G owners all across the world can update their phone to Android 7.0 Nougat now. The firmware is rolling out through OTA in select regions. You can go to your device’s about device section and check for OTA update under the software updates section. OTA update at the moment is available for the users in India, Bangladesh, Sri Lanka and Nepal. If you are unlucky to capture the OTA at the moment, don’t worry at all as you have the alternative method to update your phone. 

Samsung smartphones can be updated to latest Android version by means of Odin3. Using Odin3, you can flash the firmware manually on your Galaxy smartphone. You just need to keep a little patience while downloading the firmware as the files are big in size. The following tutorial is all set to guide you to update Note 5 N920G to Android Nougat manually.

Before flashing the firmware, please be reminded that it is in pure stock form. Updating your phone using the procedure listed below will not void the warranty of your device, nor it will harm the device in any way at all. The firmware will wipe root access if you have previously rooted your phone. It is recommended to factory reset your device to achieve better performance results upon flashing the new software.

Update Note 5 N920G to Android Nougat

Early Preparations

  • Make sure that your device is exactly as mentioned above. To check out what device you have, go to Settings > More/General > About Device or Settings > About Device and match the model number. Be careful about the device model number, flashing a file on a device not listed here might result in bricking it up. In that case, we may not be held responsible.
  • Your device’s battery should not be weak. In case your device goes dead during the flashing process, your device may get soft bricked and you might be in need of flashing stock firmware and that will ultimately result in wiping up your data as well.
  • Always use the original data cable to establish connection between your Android device and your computer / laptop. Using ordinary data cables might interrupt the flashing process, so to avoid any mishap, you need to meet this requirement as well.
  • Backup everything!

    Backup SMS Messages
    Backup Call Logs
    Backup Contacts
    Backup Media – Copy your files manually to your PC or Laptop.
    Backup EFS – If rooted, otherwise skip this step.

  • Make sure that you turn off Samsung Kies while using Odin3 flashtool. Samsung Kies will interrupt Odin3 and will result in causing errors and may not let you flash your desired firmware. Also, make sure that you turn off any antivirus software you’ve installed and also disable firewall to avoid any connection and flashing issues.

Required Downloads & Installations

  1. Download and install Samsung USB Drivers on your PC.
  2. Download and extract Odin3 v3.12.3
  3. Firmware for N920G: Download Android 7 Nougat for N920G
  4. Extract the downloaded firmware file to get the .tar.md5 files.
  5. Image only used for reference here.

How to Install Official Android 7.0 Nougat on Galaxy Note 5 N920G

  1. Make sure that you read the instructions listed above carefully and you’re all set to go ahead now.
  2. Wipe your device complete in order to attain a neat installation. You may boot into the recovery mode and perform a factory data reset.
  3. Open Odin3.exe.
  4. Put your Galaxy Note 5 in download mode. To do so, turn it off and wait for 10 seconds. Turn it on by pressing and holding Volume Down + Home Button + Power Key simultaneously, You should see a warning, press Volume Up to continue. In case this method doesn’t work for you, try one from this guide.
  5. Connect your device to your PC.
  6. As soon as Odin detects your phone, the ID:COM box should turn blue.
  7. Now in Odin, selects the files one by one as shown in the picture.
    1. Select BL tab and select the BL file in it.
    2. Select AP tab and select the PDA or AP file in it.
    3. Select CP tab and select the CP file in it.
    4. Select CSC tab and select HOME_CSC file in it.
  8. Make sure that the options selected in your Odin are exactly as shown in the pic.
  9. Hit start and wait till the firmware  flashing is complete, The flashing process box will turn green upon successful flashing.
  10. Once the flashing process has been completed successfully, disconnect your device and reboot it manually.
  11. Once the device boots up, checkout the new firmware now.
  12. Your device will be running on official Android 7.0 Nougat firmware.
  13. Once updated to stock, do not try to downgrade, or else you will result in messing up EFS partition of your device.
  14. That’s all!

These are some useful guides for Note N920G owners:

Got any queries? Make sure that you drop em’ in the comment box below. Good Luck!