Home Blog Page 515

Root the MOTO X – All Versions [Guide]

0
Root the MOTO X – All Versions [Guide]

Root the MOTO X: While the carriers like US Cellular, Sprint, AT&T and Verizon have decided to lock down the bootloaders of their MOTO X devices. This has paved a way for the developers to use their tricks and tactics on the device and gain the root access. Do you own any MOTO X device and willing to play with your device beyond the boundaries? The good news for all of the MOTO X users has arrived right from the Xda developers forum. Where one of the developers has achieved the root access on the MOTO X devices through his small app and that too without having the bootloader unlocked. The apk works for all versions of the MOTO X.

Root the MOTO X

How To Root MOTO X:

Follow the simple and easy instructions below to gain the root access on your MOTO X device.

Important Note:

Before we begin, make sure that you have the battery charged over 60 % and have backed up all your important ContactsCall Logs & Messages. It is highly recommended in case of any mishap or data loss to backup all your important data.

Method:

  1. Download the correct apk file from the Developer’s Post, according to your MOTO X’s version.
  2. Connect your Moto X to your PC & copy the downloaded apk file to the root of your device’s internal storage. Make sure that you don’t paste the file under any folder.
  3. Head to Settings > Personal > Security > Device Administration and Check Unknown Sources On.
  4. Download and install any file explorer from the Google Play Store. e.g ES File Explorer or Astro File Manager.
  5. Open the file explorer now, and navigate to the apk file that you posted on the root of your device’s internal storage.
  6. Tap the rooting apk file and install it, let the installation process finish.
  7. As soon as the installation is finished, wait for the device to reboot 2 – 3 times.
  8. As soon as the rebooting is done, open the Google Play Store and search for SuperSU and install it.
  9. That’s all you got to do in order to gain root access on your MOTO X device.
  10. Congrats you’ve rooted your device.

Disclaimer: While rooting your phone. Please keep it in mind that the Root Process isn’t official and has nothing to deal with Google Inc and the device manufacturer. Which is Motorola in our case. Follow the guide carefully to prevent any damages to the device as the method is completely custom.

Got any questions? Feel free to leave a comment below, we’ll try our best to help you out :D Good Luck

Install Clockwork Mod Recovery on Galaxy Y Duos.

1
Install Clockwork Mod Recovery on Galaxy Y Duos.

Samsung smartphones always arrived with a Stock recovery installed. But the problem with Stock recovery is that it only installs Signed zip files from Samsung, you can’t install any sort of Custom zip files using Stock recovery. Even if you think that you can do such a thing, the only thing you will get is an E:signature error when installing Custom zip files.

original

But there is one good thing about Stock recovery, that it allows you to install any other Custom recovery on your device. But in order to do that make sure that your device is rooted, if you want to install Custom firmware on it. You can search on Google how to root Galaxy Y duos, or does it even need root to install custom ROMs on it.

In this article, we will tell you how to Install Clockwork Mod Recovery on Galaxy Y Duos.

Disclaimer:

The methods involved in flashing custom roms and rooting your phone is highly custom and may result in bricking your device, and has nothing to do with Google or the device manufacturers which is Samsung in our case. In case of any mishap we may not be held responsible. Follow these instructions to the letter to avoid any mishap or bricking. Make sure that whatever you do, you are doing it at your own responsibility.

Before we begin, make sure:

  1. Your device battery level is at 75% or more.
  2. Your device should be rooted.
  3. Just in case, Backup all your important ContactsCall LogsMessages.

How To Install Clockwork Mod Recovery on Galaxy Y Duos.

  1.  Download CWM-6102.zip CWM Package for Galaxy Y Duos S6102 to your computer
  2. Connect your device to PC using an original data cable.
  3. Copy and paste the downloaded file to the root of your sd card.
  4. Disconnect the cable and turn off your phone.
  5. Now go into recovery, Press and hold Volume Up + Power + Home buttons together.
  6. In recovery select ‘apply update from sd card’ and select the ‘update zip from sd card’.
  7. Navigate to CWM-6102.zip and select it using the power button.
  8. Confirm the installation on the next screen and wait for it to complete.
  9. After the completion Select ‘go back’ and then select ‘reboot system now’.

How To Force-Close Apps in iOS 7

0
How To Force-Close Apps in iOS 7

Learn how to Force Close Apps in iOS 7. In the Past when you want to close an app in iOS, you press the home button twice and an app drawer pops-up. Then a long press on the app icon reveals the closing option. But in iOS 7, things are a bit different, whenever you press the home button twice, instead of app drawer you will see cards showing a thumbnail of the apps. Don’t worry, it’s not that difficult to force-close an app in iOS 7 but even easier than before.

How To Force-Close Apps in iOS 7:

Force-Close Apps in iOS 7

You will be able to swipe cards from left to right or either way. Swiping it all the way to the right will take you to the card of the home screen and all the way to the left will take you to the most recent app you opened. Tapping a card will launch the app and pressing the home button will not take you to the home screen again but it will open the app whose card will be in front of you.

iOS_7_Multitasking_Close_270x473

To force close an app because of freezing or troubleshooting or any other issue, open the multitasking by pressing the home button twice and swipe the card up, Not the icon but the card.

Root Huawei U8860 ICS Android 4.0 B923.

1
Root Huawei U8860 ICS Android 4.0 B923.

Here’s How you can Root Huawei U8860 ICS Android 4.0 B923. We’ve made a step by step tutorial.

Rooting your device gives you full access to your Android OS, allowing you to install Custom ROMs on your device. Installing many further apps that requires Root access.

For all those devices who end at the Update of ICS and wants to enjoy the features and speed of Android 4.1 and above, Rooting their device can help them installing Custom ROMs based on Android 4.1 and above.

After Rooting your device, eventually you can install Custom Recovery like Clockwork Mod recovery, that can help you install many Custom ROMs without any danger.

Root Huawei U8860 ICS Android 4.0 B923

Huawei U8860 had received the update of Android 4.0 ICS, but it won’t get any further than that. So, in order to update Huawei U8860 to Android 4.1 or further you need to Root it on Android 4.0 ICS. In this article, we will tell you how it is done.

Let’s head towards our guide and learn how to Root Huawei U8860 ICS Android 4.0 B923.

Disclaimer:

The methods involved in flashing custom roms and rooting your phone is highly custom and may result in bricking your device, and has nothing to do with Google or the device manufacturers which is Samsung in our case. In case of any mishap, we may not be held responsible. Follow these instructions to the letter to avoid any mishap or bricking. Make sure that whatever you do, you are doing it at your own responsibility.

Before we begin, make sure that you have the battery charged over 60 % and have backed up all your important ContactsCall LogsMessages. It is highly recommended in case of any mishap or data loss to backup all your important data.

How To Root Huawei U8860 ICS Android 4.0 B923.

  1. Download Huawei Root Tools (Android 4.0 ICS) For Huawei U8860 and extract it anywhere on your PC.
  2. Connect your Device to PC and make sure that ADB drivers are installed.
  3. Now Run root-me.cmd from the Extracted content and follow on-screen instructions.
  4. If everything went well, then your device must be rooted.
  5. To check, download Root Checker from Google Play store and run it.

How To Block Messages & Calls in iOS 7.

0
How To Block Messages & Calls in iOS 7.

With the help of this guide, you will learn how to Block Message & Calls in iOS 7. One of the most demanded features in any phone is an option of  Blocking calls and SMS. We don’t mostly get this feature by default. Most of the time, Users have to install 3rd party apps to Block Calls and Messages. But when it comes to third-party apps iOS users are not that lucky.  SO, for all the iOS 7 users there is good news. Apple has finally, given the option of Blocking unwanted calls, SMS and even Facetime calls from a number in iOS 7.

Block Messages & Calls in iOS 7

How To Block Messages & Calls in iOS 7:

This process is quite simple, In the Phone app or Facetime app click on Recent or Favourite tab. Touch the info ‘i’ button next to the number you want to block, this will take you to the Contact Card, Scroll down and select Block this caller. On the confirmation pop-up, touch the Block Contact option.

In the Phone or Facetime app:

  1. Touch the contact you want to block.
  2. While in Contact card, scroll down and Tap Block This Caller.
  3. On the confirmation pop-up Tap Block Contact.

In the Messaging app:

  1. Tap on the message individual you wish to block. Then Tap on contact, Top right corner.
  2. On the next page look for the “i” button.
  3. Again you will find yourself in the Contact Card, scroll down and choose Block This Caller.
  4. On the confirmation pop-up Tap Block Contact.

In Settings:

Goto Settings.

  • Phone > Blocked.
  • Messaging > Blocked.
  • Facetime > Blocked.
  1. Tap Add New.
  2. Tap on Contact you wish to block.
  3. Just add the contact number and if you want to unblock the number just repeat the but Choose Unblock instead of Block.

This is how you can easily Block SMS & Calls in iOS 7. Do tell us how did it go for you.

How To Make Text Larger in iOS 7. [ Tutorial ]

1
How To Make Text Larger in iOS 7. [ Tutorial ]

It is time for all new iOS 7 and Today we will tell you how to make text larger in iOS 7. It’s a common observation that every mobile comes with an option of increasing the text size. Well in case of an iPhone, it’s not just there for you. But in iOS 7, with many other things Apple has given the option of Dynamic Text which allows you to increase the Text size. It’s quite simple, you open Settings, goto Text size and increase it.

How To Make Text Larger in iOS 7:

Make Text Larger in iOS 7

  • But there is something else, you can increase the Text size even larger than normal extension. Beneath the Text size option lies the Accessibility.

Photo_Sep_20,_3_36_02_PM_270x405

  • Open it and Tap larger type.

Photo_Sep_20,_3_31_44_PM_270x405

  • At the Top of Screen, tap the Larger Dynamic Type and using the slider below you can increase the Text size as much as your device can handle.

Photo_Sep_20,_3_31_22_PM_270x405


Source

Turn-Off Background Apps Refresh in iOS 7.

0
Turn-Off Background Apps Refresh in iOS 7.

This is how you can Turn-Off Background Apps Refresh in iOS 7. Since from the release of iOS and iPhone, the only thing that is really irritating me, are the background apps. They do whatever they like carrying out whatever task they are requested. It’s kind of good thing, but when it comes to battery life, they are the main reason why we won’t get enough battery life. They keep running in the background and draining the battery without our notice.

In the Past, there was no option to stop these apps so you can increase the battery life, but in iOS 7 Apple had finally given the option of killing all those apps. In iOS 7 it is called Background Apps Refresh, which allows you to disable apps completely or with app-by-app basis with just a few steps. Very convenient app for all the developers to get full access of background running.

Turn-Off Background Apps Refresh in iOS 7:

Background Apps Refresh in iOS 7

To get started, Tap settings and goto General followed by Background Apps Refresh.

Here you will find a switch to disable all the Background apps altogether. With a list of apps that you can add in the list or they have Background Apps Refresh support built-in them. If your app requires Location data, you will see a location indicator along with it. The top switch will turn off all the apps, but you can disable the selected ones below. Reversing the decision is pretty simple too, just revisit the page and enable them again by pressing the switch.

BackGround-App-Refresh-iOS-7

Make sure not to disable Apple update option, but keep it on only Wi-Fi, not cellular data.

How to Update iPhone, iPad or iPod touch to iOS 7

0
How to Update iPhone, iPad or iPod touch to iOS 7

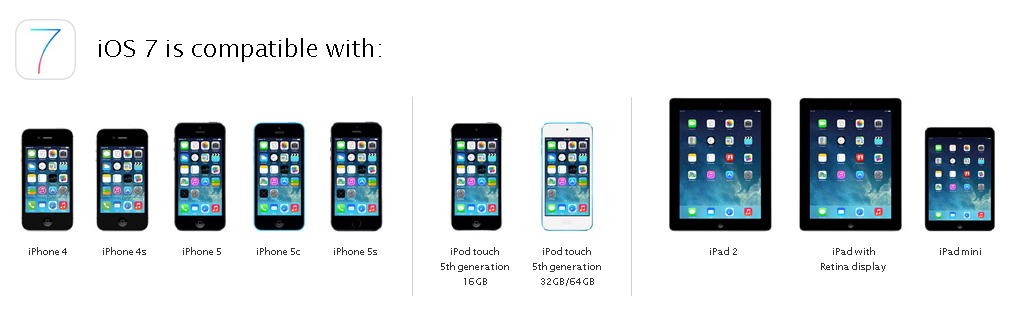
Update iPhone, iPad or iPod touch to iOS 7: Apple has finally rolled out the much awaited and the biggest update in the iOS history so far. The iOS 7 has started making it’s a way to the user’s devices over the air updates. The devices getting the iOS 7 update include Apple’s iPhone 4, iPhone 4S, iPad 2, iPad 3, iPad 4, iPad Mini and the 5th generation iPod touch as well. Sine the new iOS is completely revamped and includes a lot of new features, a new look and a lot of bugs fixed, who will not want to have the hands on this new version. Well, considering your need here’s our complete guide on how you can update your device to the latest iOS 7.

Update iPhone, iPad or iPod touch to iOS 7

Since this is a major update, here are some precautions we would like you to take before beginning the update process. First of all, make sure that you remove all the junk from your device, remove all the unwanted apps, contacts, messages and other media and nonmedia files which you don’t need or don’t use anymore.

Delete any previous backups taken with iCloud, head towards the Manage Storage option and sync only important apps with iCloud storage. Syncing the Camera Roll with iTunes is a better choice as it will not slow down the iCloud Storage service.

How To Make Backup:

In order to make sure that your iCloud backup is enabled head towards Settings > iCloud > Storage & Backup, and spot the slide the iCloud Backup slide on the Onside. To make a manual backup open Settings > iCloud < Storage & Backup and tap the Backup Now button at the bottom of the screen.

Since the update is quite big, we’d recommend you to back up your entire device using iTunes. Use the same software for updating your phone which you used to back up your phone. iTunes can manually backup and restore all of your settings, app settings, purchased apps, Messages, documents, Game settings, Camera Roll and other important data.

Methods:


Here’s how you can backup your Apple device using iTunes.

  1. Connect your device to your computer using the original data cable.
  2. Open iTunes

For iTunes 11:

  • In the iTunes Panel, Click the iOS device button on the right
  • In the Backup section, Click Back Up Now under ”Manually Backup & Restore”.

For iTunes 10.7:

  • Right click on your iOS device in the iTunes source list.
  • Choose Back Up from iTunes device shortcut menu.

Let the Back Up complete. You can monitor the Back-Up process in the iTunes status screen.

Little Things you need to know:

You don’t need to back up your purchased music, movies, apps, TV shows and books as these are all backed up automatically by iCloud and don’t count on your 5GB free cloud storage. These backups run automatically when your device is on, plugged in and locked and gets the Wi-Fi connectivity. So, you don’t need to worry about it and you can use the iCloud storage space for backing up your recent documents, messages or other media content which hasn’t been backed up yet or synced to your computer.

Please keep in mind that the iCloud will not back up any podcasts, audiobooks, movies, music and Tv shows or any photos that are synced to your computer and are not purchased from the iTunes store.

How to Update iPhone, iPad or iPod touch to iOS 7:

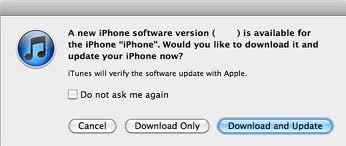
You can either update your device to iOS 7 using OTA (over the air) updates or stick to the old iTunes method. OTA update method is quite easy and safe as it is completely done by the device, you just need to make a few taps. The device automatically prompts a popup and tells you if there is a new update available, you can tap to install it. If you want to check the OTA update by yourself you can do so by hitting Settings > General > Software Update and you might get lucky enough to have an OTA update available.itunes-ios-update-prompt


For those who find the iTunes method easy, as soon as they connect their device to the computer they will get a popup notification just like the one on the right. Just click on the Download & Update button and within no time your device will be running on the latest iOS 7.

Give it a try:

Since the iOS 7 is a hot cake at the moment. Apple’s activation servers will be going through loads of update requests and these servers go down sometimes. We recommend you to keep a little patience and update your device a little later in order to prevent any mishap.

In case the servers go down while you are trying to update your device. You may be left with a device having no restoring in sight until the servers go live again. It is safer to update your device at evening or the next morning. Depending upon your country when the burden from the Apple’s server has taken off.

If you wish to downgrade your device to the previous iOS version you can do so by using the programs like TinyUmbrella or iFaith. 

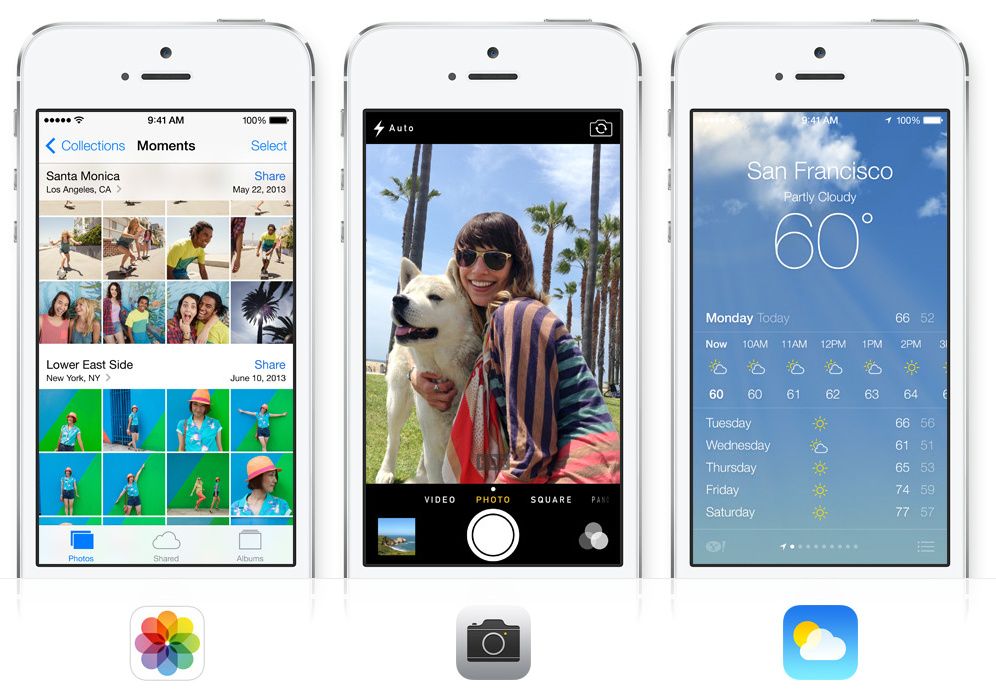
Let’s have a look at what’s new in the iOS 7:

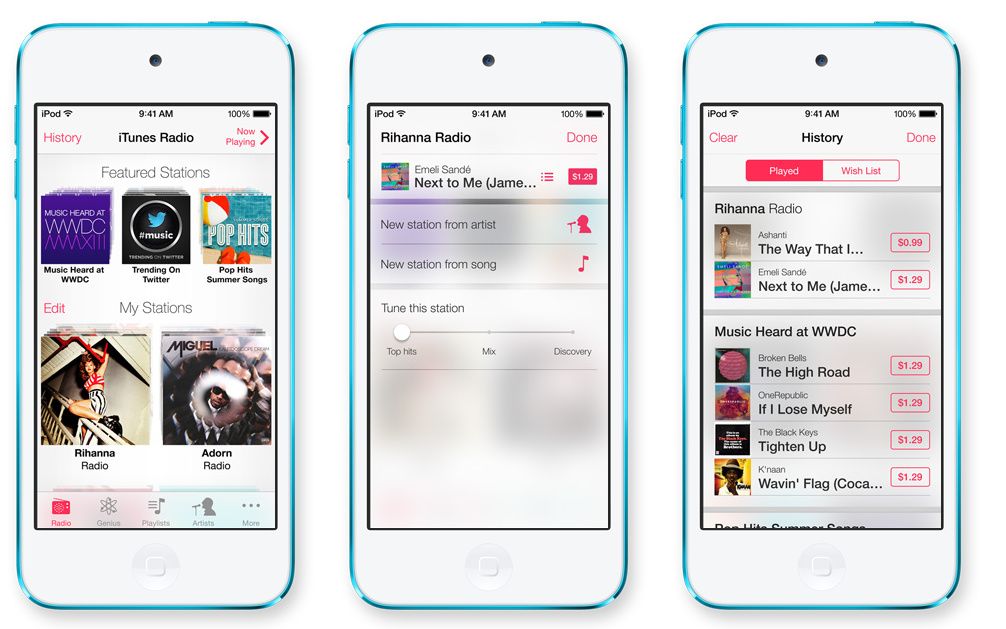
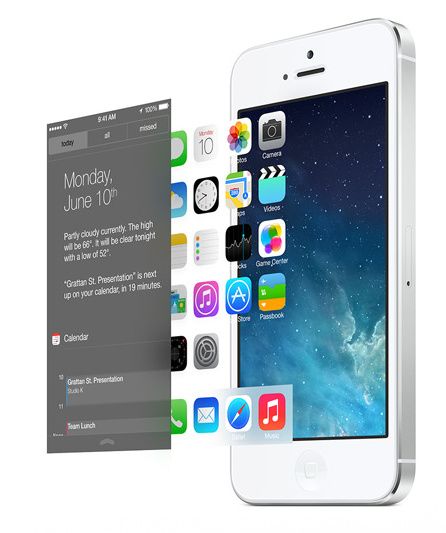
iOS 7 ScreenShots:

AirDrop-contact-less-sharing-nearby-via-Wi-Fi-and-Bluetooth


Calendar-with-no-leather


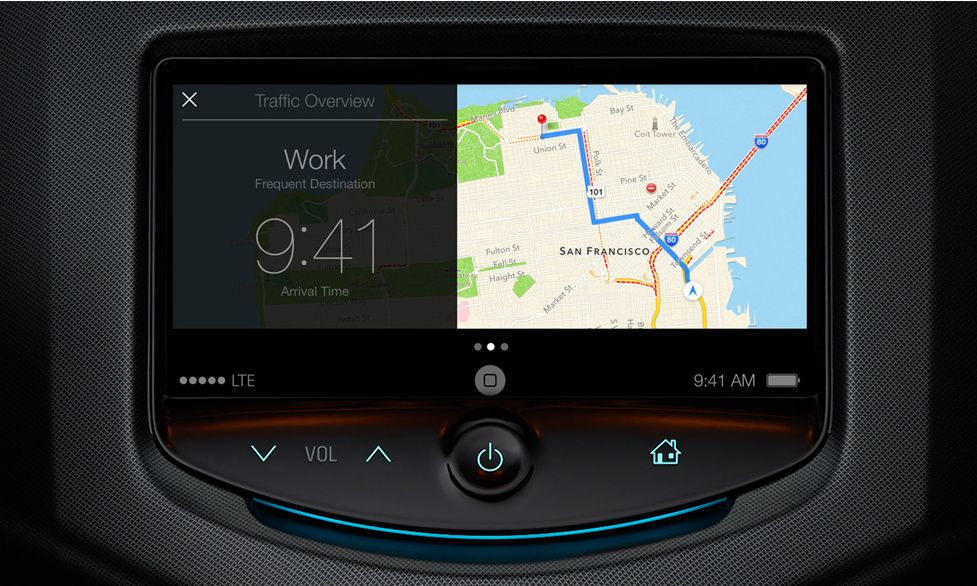
Camera-adds-square-Instagram-shots IMG-20130909-WA0004 It-will-connect-to-your-car Weather-app-with-gorgeous-animations New-notification-center-day-overview Overhauled-mobile-Safari-full-screen-smart-address-bar-swipe-tabs Siri-comes-with-a-more-humane-voice

 images source

How To Change Siri’s Voice in iOS 7.

1
How To Change Siri’s Voice in iOS 7.

I don’t know why Female voices are being put in digital personal assistant or any other recording. It feels kind of awkward hearing a female voice again and again, my personal opinion is that they should put voice of  or  in Siri. Well that is my opinion and if Apple would start listening to us that’d be great, for us that is. But that is none of our concern, the good news is that Apple has finally given the option of changing the Voice Gender of Siri in iOS 7.

siri-iphone-4s

Changing the gender of Siri’s voice is only a matter of few seconds and a real easy job to do.

  1. Open the Settings, Tap on General navigate to Siri.
  2. This is everything about Siri, here you can disable Siri, Change it’s default language, point Siri to your Personal information and much more.
  3. Changing it’s voice gender option will only Display Two points to Pick from- Male or Female.

Now you know how to change the Siri’s voice gender, you can come back again to change it again if you don’t like the Male voice. But changing Siri voice will not effect all the languages, so there is a possibility the your chosen language might not be supported by Siri’s voice. Best of Luck!


How To Search Files and Folders In Linux Using Find Command.

0
How To Search Files and Folders In Linux Using Find Command.

In Linux, Find Command can help you in finding many apps, folders, files in less time. This utility is capable to find almost everything in your OS including mount drives and removable storage. Mostly only a few commands are necessary to find things for users.

fx_find

The Format of Find Command is:

find [-H] [-L] [-P] [-D debugopts] [-Olevel] [path…] [expression]

  • The H, P and L options specify whether to follow commands.
  • debugopts provides debugging information.
  • And Olevel provides query optimization.

For your use of find, we will only need to specify the path and expression.

The Path:

The path specify where to look on the filesystem.All the subdirectories and the path will be searched by find. Specify ‘/’ for the path to search the entire filesystem.

Expression:

It consist of 3 parts: OPTIONS, TESTS and ACTIONS.

Now let’s discuss about the OPTIONS.

-help this will print out the short summary of find command usage.

find -help

-mount  this option tells find not to search other directories.

Now the TESTS.

This sections tells find what to look for.

-executable This tells find only to search for executable files.

name/-iname This gives string of the file or folder name you are searching for.

-regex This can be used instead of name to search for file and folder.

-type This can be used to specify what you are looking for.

Finally the ACTIONS.

This section is used to perform actions on the results of find command.

-exec Execute a command on each file found with file/directory name passed of the command.

How To Fix ‘no service’ issue in iPhone 4, 4S.

8
How To Fix ‘no service’ issue in iPhone 4, 4S.

A couple of days ago, my friend came to me for help about his iPhone 4, the problem was an error with Service. Whenever he inserted the SIM card a no service error appeared and he won’t able to send or receive messgaes.He told me that he had tried almost everything which he know in iPhone 4 to get back the service as usual but he always ended up with the message saying “No service” even when the SIM is inserted properly. What is the issue now? How can I resolve this in my iPhone 4?

iphone-4-gevey-sim_no_service

Also See: Download and Install Candy Crush Saga For PC.

I Googled it a bit and answers were quite simple. Here are the ways you can solve this problem.

First thing First, contact your service provider and tell them to Re-Activate your phone. It will work. As soon as you update it will work after a couple of minutes.

Otherwise, Reset the network settings from the General Settings and your phone will work fine.

But if you don’t want to follow the above methods, you should try this one.

  1. Open iTunes and connect your iPhone using original Data cable.
  2. Click on ‘Summary’ option.
  3. Click on ‘Restore’ option.
  4. After a successful restore, disconnect your iPhone.
  5. Restart the device for Restore to take effect.

I followed these steps and everything works fine foe me. Best of Luck to you.

Also See: FaceTime For PC – Download Here.

While on my way of Googling the Solution, i found many other things,  I am Sharing them with you:

Today my friend ask me to fix his iPhone 4S which showing no service message, I’ve tried many things but nothing worked so I inserted his sim card in mine iPhone 4 and mine sim card in his phone. Still no result, when I swap them back my phone was having same problem not only that I needed phone very badly so I inserted my sim card from iPhone 4 to my old iPhone 3GS ( i used an extension) and guess what it’s not working anymore. Is there any chance that some kind of virus is spreading using network and sim cards?

I,have been having no signal for days at a time and it’s driving me mad it happened again this morning I went and reset my network setting s and it fixed the problem first time happy days.

Source: discussions.apple.com

How to Active Multi-Window Concept in Chrome using Tab Rezsize

0
How to Active Multi-Window Concept in Chrome using Tab Rezsize

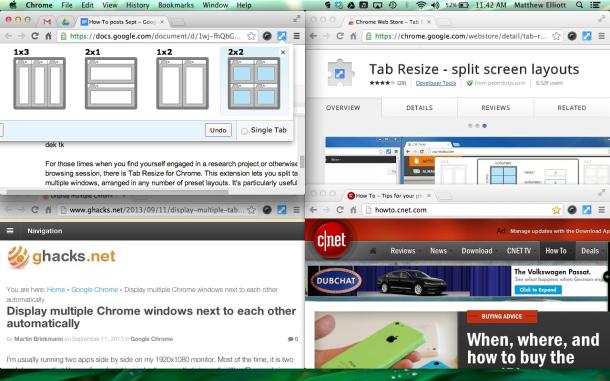
For all those out there, who wants to open a lot of Tabs in chrome but hate to do it because of the inconvenience, there is a solution for them. There is an extension for Google Chrome called Tab Resize, which allows you to split Tabs into multiple windows, arranged in a number of presets layouts, but particularly useful on large screens.

Screen_Shot_2013-09-13_at_11.42.38_AM_610x381

All you need to do is: Go to Chrome settings and click on extensions, click on “Get More extensions”. Then search for Tab Resize and click the fourth and click Free, wait for the installation to finish. After the installation is over, you will se an arrow at the top right side of Chrome Window, click on it an choose the layout and chrome Tabs will split according to your selection. And if you want to Undo everything, just click on the Tab resize button and select Undo.

Download Link: Tab Resize